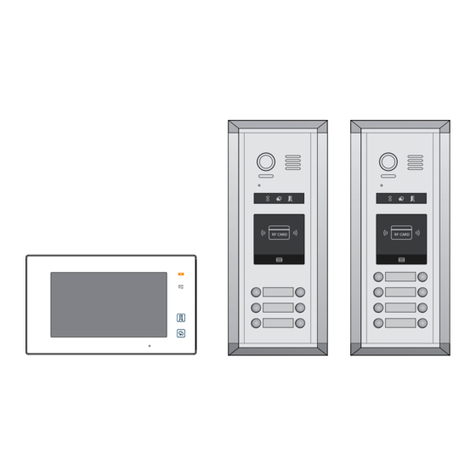
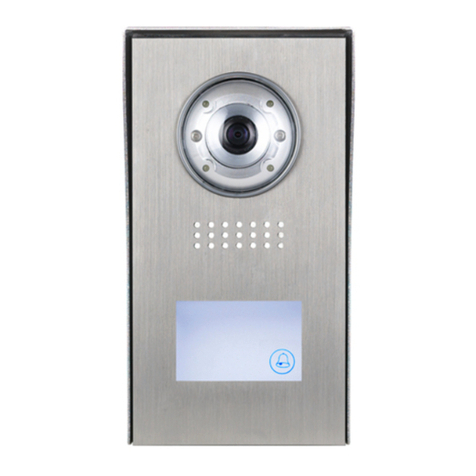
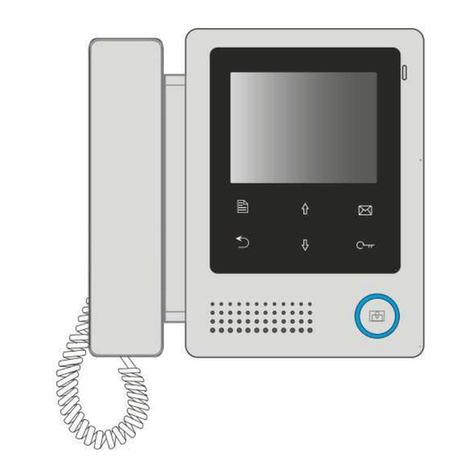
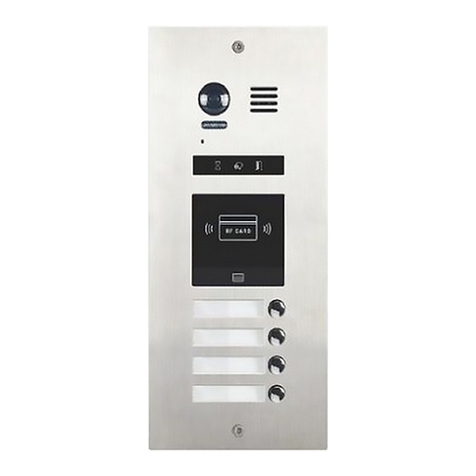
2easy DK1721 User manual

DK1711-22 KIT
2 WIRE INTERCOM SYSTEM
Please read this manual carefully before using the product you purchase, and keep it well for future use.We reserve the right to
modify the specication in this manual at any time without notice.
RF CARDRF CARD
Quick Guide


-1-
1. Product Lists Of Kits
Kit DK1711/ID consists of
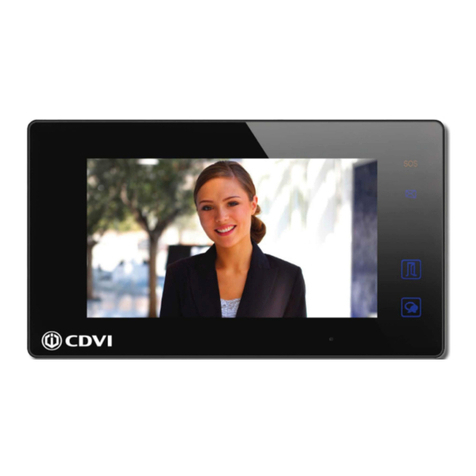
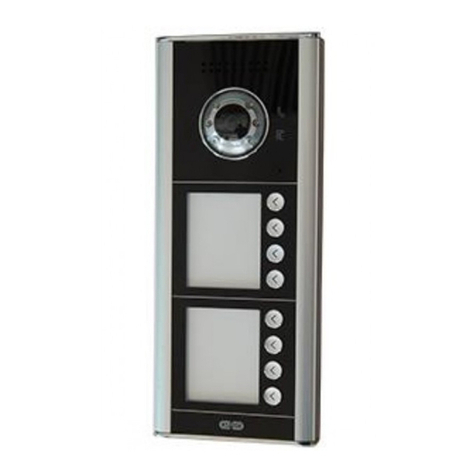
1* Outdoor Station- DT607C/ID-S1
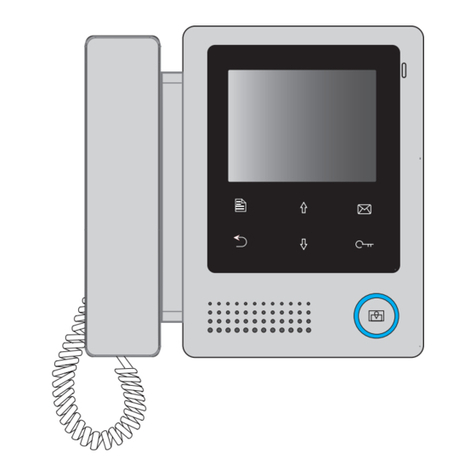
1* Indoor Unit- DT17S
1* Power Supply with UL approved- DR-30-24
1* Power Separator- DT-DPS-DR
1* DIN Rail
1* Relay- DS-ERL
1* AWG18 Power Cable
2* Management Cards- Add Card & Delete Card
5* Proximity Cards
Kit DK1721/ID consists of
1* Outdoor Station- DT607C/ID-S1
2* Indoor Unit- DT17S
1* Power Supply with UL approved- DR-30-24
1* Power Separator- DT-DPS-DR
1* DIN Rail
1* Relay- DS-ERL
1* AWG18 Power Cable
2* Management Cards- Add Card & Delete Card
5* Proximity Cards
Kit DK1722/ID consists of
1* Outdoor Station- DT607C/ID-S2
2* Indoor Unit- DT17S
1* Power Supply with UL approved- DR-30-24
1* Power Separator- DT-DPS-DR
1* DIN Rail
1* Relay- DS-ERL
1* AWG18 Power Cable
2* Management Cards- Add Card & Delete Card
5* Proximity Cards

-2-
2. System Connection
One Apartment Connection (IN-OUT wiring)
-
+
L1 L2 PL S+ S-
ID=0
Code=00, DIP6=off
+-
DPSDR-30-24
Code=01, DIP6=on
ON DIP
SW+
L2L1
SW-
RING
GND
12 3 4 5 6
ON DIP
SW+
L2L1
SW-
RING
GND
-
+
L1 L2 PL S+ S-
ID=0
Code=00, DIP6=on
+-
DPSDR-30-24
12 3 4 5 6
ON DIP
SW+
L2L1
SW-
RING
GND
12 3 4 5 6
Notes:
[1] DT607C/ID-S1 (One button).
The code address of indoor units start at 0-15 (switch all DOWN).
[2] DT607C/ID-S2 (Two buttons)
For the rst button (from bottom to top), the code address of indoor units start at 0-15 (switch
all DOWN).
For the second button, the code address of indoor units start at 16-31 (switch 5 ON).
[3] When use IN-OUT wiring without any distributor, Switch 6 ON for last monitor on the
line.
When use Star wiring with distributor (Home run), Switch 6 ON for every monitor.

-3-
Two Apartment Connection (IN-OUT wiring)
Connecting Multi Indoor Monitors (IN-OUT wiring)
-
+
L1 L2 PL S+ S-
ID=0
Code=00, DIP6=off
+-
DPSDR-30-24
Code=16, DIP6=on
SW+
L2L1
SW-
RING
GND
12 3 4 5 6
ON DIP
SW+
L2L1
SW-
RING
GND
12 3 4 5 6
ON DIP
-
+
L1 L2 PL S+ S-
ID=0
+-
DPSDR-30-24
Code=0, DIP6=offCode=1, DIP6=offCode=31, DIP6=on
SW+
L2L1
SW-
RING
GND
1 2 3 4 5 6
DIPON
SW+
L2L1
SW-
RING
GND
1 2 3 4 5 6
DIPONON DIP
SW+
L2L1
SW-
RING
GND
1 2 3 4 5 6
Code=30, DIP6=off
SW+
L2L1
SW-
RING
GND
1 2 3 4 5 6
DIPON

-4-
Connecting Multi Door Stations
ID=0
1st door station
ID=1
2nd door station
ID=2
3rd door station
ID=3
4th door station
L1 L2 PL S+ S- L1 L2 PL S+ S- L1 L2 PL S+ S- L1 L2 PL S+ S-
Monitors
OFF
ON
Impedance
switch
DBC4A1
A B C D
DPSDR-30-24
+-
Connecting Multi Indoor Monitors
Code=00, DIP6=on Code=01, DIP6=on Code=16, DIP6=on Code=17, DIP6=on
-
+
L1 L2 PL S+ S-
ID=0
+-
DPSDR-30-24
OFF
ON
DBC4A
A B C D Impedance
switch
SW+
L2L1
SW-
RING
GND
12 3 4 5 6
DIPON
SW+
L2L1
SW-
RING
GND
DIPON
12 3 4 5 6
SW+
L2L1
SW-
RING
GND
12 3 4 5 6
DIPON ON DIP
SW+
L2L1
SW-
RING
GND
12 3 4 5 6
It can be star wiring (home run with distributor). Please note the distributor DBC4A(1) is
not included in the kits.

-5-
3. Parts and Functions
LCD Screen
Microphone
Speaker
Talk/Mon Button
Unlock Button
Call Button/
Unlock 2nd Button
Setup Button
Down/Decrease Button
Up/Increase Button
1 2 3 4 5 6
ON DIP
SW+
L2L1
SW-
RING
GND
Connection Port
Mounting Hook
Mounting Hook
Key functions
Item Description
Microphone Receive voice from the user.
LCD screen Display the visitors' image.
Setup button Press to select the setting item you want.
Down/Decrease
button Press to decrease the value.
Up/Increase button Press to increase the value.
Speaker Send out vioce from the visitor.
Talk/Mon button Press to communicate hands free with visitor;
Press to view the outdoor condition in standby mode.
Unlock button Press to release the door
Call button/Unlock
2nd button
In standby mode, pick up handset, then press Call button to
activate the inner call;
During calling/talking state, press Unlock 2nd button to release
the second door.
Mounting hook Use to hang up the monitor.
Connection port Bus terminal.

-6-
[11]
[10]
[9]
[1]
[3]
[4]
[8]
[7]
[6]
[5]
[12]
[13]
[2]
[1] Microphone
[2] UNLOCK indicator
[3] CALL indicator
[4] Call button
[5] Nameplate
[6] Front panel
[7] Speaker
[8] Night view LED
[9] Camera lens
[10] Rainy cover
[11] Mounting hook
[12] Connection port
[13] Screw hole
1 2 3 4 5 6
ON DIP
SW+
L2L1
SW-
RING
GND
1 2 3 4 5 6
ON DIP
SW+
L2
L1
SW-
RING
GND
L1,L2: Bus line terminal.
SW+,SW-: Extra door bell call button
connection port.
RING,GND: Extra buzzer connection
port.
DIP switches: Total 6 bits can be
congured.
• Bit1~Bit5:UserCodesetting.
• Bit6: Set to ON if the monitor is at
the end of the line or works with
DBC4A1. Otherwise, set to OFF.
Terminal description
Front panel for outdoor station

-7-
4. Terminal Description For Outdoor Station
1 2 3
Lock Control Jumper
PIR Motion Detector
Connect Port
+12V
GND
PIR
L1 L2
PL
S+ S-
Main Connect Port
Lock Control Jumper: To select the lock type.
Motion Detector Connect Port: To connect
external PIR motion detector.
Main Connect Port: To connect the bus line
and the electronic locks.
• L1,L2: Connect to the bus line, no polarity.
• PL: External lock power input, connect to the
power positive(power +).
• S+: Lock power(+) output.
• S-: Lock power(-) output, connect to the power(-) input of locks(only when using the door
station to power the locks, if using the external power supply for the locks, the S- will not
be connected).
5. Functions Setting Up Of Outdoor Station
KEY_1
KEY_2
KEY_3
KEY_4
KEY_SET
LED_UNLOCK
LED_TALK
LED_NAME
RF CARD
This section explains the settings of each
function,please refer to the following table:
To perform the settings for the function you
want,you should move away the metal front
panel. Please refer to the sketch map.
Each operation is indicated by the lighting up
of the LED indicator on the unit, and by the
sounding of the buzzer.
Note: Must be less than 200mA, please always use DS-ERL with all outdoor station. See
page 14 for instruction.

-8-
Total 4 addresses can be congured. It can be modied either before or after installation.
0 is default, to change the setting, please follow the steps:
Factory default set at 0 1st station.
6. Settings Address Of Outdoor Station
UNLOCK Indicator:OFF
TALK Indicator:OFF Buzzer Beep+, Beep
UNLOCK Indicator:OFF
TALK Indicator:OFF
Buzzer Beep+
In standby mode, press
KEY_SET button once
Press KEY_1 button to set
the first door station.
Press KEY_2 button to set
the second door station.
Press KEY_3 button to set
the third door station.
Press KEY_4 button to set
the fourth door station.
UNLOCK Indicator:OFF
TALK Indicator:OFF
Buzzer Beep,Beep
UNLOCK Indicator:OFF
TALK Indicator:OFF
Buzzer Beep,Beep,Beep
UNLOCK Indicator:OFF
TALK Indicator:OFF
Buzzer Beep,Beep,Beep,Beep
ID=0,1st door station ID=1,2nd door station ID=2,3rd door station ID=3,4th door station
• If setting mode has not been exited, you can change the address of door station by pressing KEY1~4 freely.
• The LED_NAME indicator will always blink until exit out the setting mode.
• If without any operation in 10 seconds, it will exit out setting mode automatically.
• In this step,press KEY_SET button four times to exit out the setting mode manually.

-9-
7. Setting Unlock Mode For Outdoor Station
8. Setting Unlock Time For Outdoor Station
By default, the unlock time is 5 seconds, but it can be changed,the setting range is 1s~99s.
Follow the steps:
UNLOCK Indicator:ON
TALK Indicator:OFF
Buzzer Beep+, Beep
In standby mode, press
KEY_SET button three
times.
UNLOCK Indicator:ON
TALK Indicator:OFF
Buzzer Beep,Beep......
Press and hold on KEY_2
button. The time you holding
on is the new unlock time.
• When entering time delayed setting, the buzzer sound one time every second.
• The LED_NAME indicator will blink all the time until exit out the setting mode.
• If without any operation in 10 seconds, it will exit out setting mode automatically.
• In this step,press KEY_SET button twice to exit out the setting mode manually.
There are 2 unlock modes, Normally opened (Factory default) and Normally closed.
Normally opened is default, to change the setting, please follow the steps:
UNLOCK Indicator:ON
TALK Indicator:OFF
Buzzer Beep+, Beep
In standby mode, press
KEY_SET button three
times.
UNLOCK Indicator:ON
TALK Indicator:OFF
Buzzer Beep+
Press KEY_1 button to set
the unlock mode to
Normally opened.
UNLOCK Indicator:ON
TALK Indicator:OFF
Buzzer Beep, Beep
Press KEY_1 button again
to set the unlock mode to
Normally closed.
Press KEY_1
• If setting mode has not been exited, you can change the unlock mode by pressing KEY1 circularly.
• The LED_NAME indicator will blink all the time until exit out the setting mode.
• If without any operation in 10 seconds, it will exit out setting mode automatically.
• In this step,press KEY_SET button twice to exit out the setting mode manually.

-10-
9. Registering ID Card
• Upto320usercardscanberegisteredbythedoorstation.
• EasymanagementwithLEDstatusandsoundhints.
• There are two master cards, one MASTER CARD ADD card
and one MASTER CARD DELETEcard,Whenregisterednew
mastercards,theoldmastercardsareinvalidautomatically.
• Cardreadingdistanceislessthan3cm.
• Themastercardsarenecessarywhenyouaddordeleteuser
cards. Please keep it well for future use.
• EM card, 125kHz.
Authorizing master cards:
Bydefault,therearetwomaster cardsmarkedMASTER CARD ADD and MASTER CARD
DELETE,butyoushouldknowthatthemastercardcanbeauthorizedby usersatanytime.
Thatmeansanytwousercardscanbeauthorizedtomastercards,Whenregisterednewmaster
cards,theoldmastercardswillbeinvalidautomatically.
UNLOCK Indicator:Blink two times
TALK Indicator:OFF
Buzzer Beep,Beep
Show the first card to ID
card window, set the card
of MASTER CARD ADD.
UNLOCK Indicator:Blink three times
TALK Indicator:OFF
Buzzer Beep,Beep,Beep
Show the second card to ID
card window, set the card of
MASTER CARD DELETE.
UNLOCK Indicator:OFF
TALK Indicator:OFF
Buzzer Beep+, Beep
When power on in 10s,press
and hold on KEY_SET button
for 3s.
UNLOCK Indicator:Blink one time
TALK Indicator:OFF
Buzzer Beep+
Press KEY_2 button.
• The LED_NAMEindicatorwillalwaysblinkuntilexitoutthemastercardauthorizedmode.
• Ifwithoutanyoperationin10seconds,itwillexitoutsettingmodeautomatically.
• Itwillexitoutsettingmodeautomaticallyaftershowingthesetwocards,theUNLOCK&TALKindicatorwillbe
turned off.

-11-
Switching Access Control:
UNLOCK Indicator:OFF
TALK Indicator:ON
Buzzer Beep+, Beep
Show the master card of
MASTER CARD ADD to ID
card window in standby.
UNLOCK Indicator:ON
TALK Indicator:ON
Buzzer Beep+, Beep
Show the master card of
MASTER CARD DELETE
to ID card window.
UNLOCK Indicator:OFF
TALK Indicator:OFF
Buzzer Beep+
Show the master card of
MASTER CARD DELETE
again to switch as a door
station access control.
UNLOCK Indicator:OFF
TALK Indicator:OFF
Buzzer Beep+,Beep
Show the master card of
MASTER CARD DELETE
again to switch to DT-ACC
controlled.
TheaccesscanbecontrolledbydoorstationorDT-ACC,soit’savailabletoswitchtheaccess
function.
• Ifwithoutanyoperationin10seconds,itwillexitoutsettingmodeautomatically.
• Ifcurrentaccessiscontrolledbydoorstation,nextaccessswitchingsettingiscontrolledbyDT-ACC.
Adding User Cards:
UNLOCK Indicator:OFF
TALK Indicator:ON
Buzzer Beep+, Beep
Show the master card of
MASTER CARD ADD to ID
card window in standby.
UNLOCK Indicator:OFF
TALK Indicator:Blink one time
Buzzer Beep+
Show user cards to be
added in sequence.
UNLOCK Indicator:OFF
TALK Indicator:OFF
Buzzer Beep, Beep+
Show the master card of
MASTER CARD ADD again
to exit.
• Ifwithoutanyoperationin10seconds,itwillexitoutsettingmodeautomatically.
• Toaddusercard,theaccessmustbecontrolledbydoorstation.

-12-
Deleting User Cards:
Initializing Access (delete all user cards):
UNLOCK Indicator:ON
TALK Indicator:OFF
Buzzer Beep+, Beep
Show the master card of
MASTER CARD DELETE to
ID card window in standby.
UNLOCK Indicator:Blink one time
TALK Indicator:OFF
Buzzer Beep+
Show user cards to be
deleted in sequence.
UNLOCK Indicator:OFF
TALK Indicator:OFF
Buzzer Beep, Beep+
Show the master card of
MASTER CARD DELETE
again to exit.
UNLOCK Indicator:ON
TALK Indicator:OFF
Buzzer Beep+, Beep
Show the master card of
MASTER CARD DELETE to
ID card window in standby.
UNLOCK Indicator:ON
TALK Indicator:ON
Buzzer Beep+, Beep
UNLOCK Indicator:Blink for some time
TALK Indicator:Blink for some time
Buzzer Beep
Show the master card of
MASTER CARD ADD again,
format is activated.
Show the master card of
MASTER CARD ADD to ID
card window.
• .Ifwithoutanyoperationin10seconds,itwillexitoutsettingmodeautomatically.
• Toaddusercard,theaccessmustbecontrolledbydoorstation.
• Ifwithoutanyoperationin10seconds,itwillexitoutsettingmodeautomatically.
• Toaddusercard,theaccessmustbecontrolledbydoorstation.
• Atstep3,theUNLOCK&TALKindicatorwillblinkalltimeuntilformattingisnished.
• Whenformattingisnished,UNLOCK&TALKindicatorwillbeturnedoffandsound“Beep+”,andexitout
settingmodeautomatically.

-13-
10. Indoor Unit Parameter Setting
How to enter the installation setting page
When you want to set the monitor parameter, you must to know the setting code.
How to know the machine code
1.Press Setting
button in standby
mode.
2.Press Setting
button six times.
3.Press and hold
Unlock button
for 3s.
4.Use / button to increase
/ decrease the value; use
button to select next digital.
Six times
(1) (2) (3) (4)
[0000]
01.00
00.01.01
AUTO
1.Press Unlock(Help)
button in installation setting
page.
4.Use / button to search the
code you want.
[0000]
2419: Restore To Default
2424: RM Parameter Set
3006-3600: Monitor Time
8008-8009: Date Mode

-14-
DIP Switches Settings Of Indoor Unit
The DIP switches are used to set the user code for each monitor.Total 6 bits can be cong-
ured.
• Bit-1 to Bit-5 are used for user code setting. The value range is from 0 to 31, which have 32
different codes for 32 apartments.
• When multi monitors need to be installed in one apartment, these monitors should use the
same user code, and the master/slave mode should be set on the monitor.
• Bit-6 is bus line terminal switch, which should be set to “ON” if the monitor is at the end of
bus line, otherwise be set to “OFF”.
ON(1)
=
OFF(0)
=
ON
ON
ON DIP
123456
Bit state Setting Bit state Setting
1 2 3 4 5
6
ON DIP
1 2 3 4 5
6
ON DIP
When monitor is not
at the end of bus line.
When monitor is at
the end of bus line.
Bit-6 switch setting
ID0=ID32

-15-
12. Electric Lock Connection (NOT RECOMMENDED). See Page 14.
1) Door Lock Controlled with Internal Power
1.Electronic lock of Power-on-to-unlock type
should be used.
2.The door lock is limited to 12V, and holding
current must be less than 250mA.
3.The jumper should be placed on position 2 and
3 before connecting.
4.The door lock control is not timed from Exit
Button(EB).
5.The Unlock Mode must be set to 0 (by de-
fault).
Note: NOT RECOMMENDED unless the door lock is less than 250mA. Please see Part 13
on Page 14 for HOOKING UP A DOOR RELEASE.
EB
*
LOCK
Jumper position on 2&3
1 2 3
L1 L2 PL S+ S-
11. Answering a Call
00:30
01
When there is a call from a video door station.The call tone sounds, an image will be
displayed on the screen.
Press TALK/MON button on the panel, begin communicating hands free with the
visitor for 90 seconds.
While communicating with the visitor, unlock the door, adjust volume / brightness / contrast
are available. More details, please refer to the user manual of indoor monitor.
Note: If nobody answers the phone, the screen will be turned off automatically after 40 seconds.

-16-
13. Specication
2) Door Lock Controlled with External
Power
1.The external power supply must be used
according to the lock.
2.The inside relay contact is restricted to
230Vac 1A or 24Vdc 1A.
3.The jumper must be taken off before
connecting.
4.Setup the Unlock Mode according to
different lock types.
• Power-on-to-unlock type:Unlock
Mode=0(by default)
• Power-off-to-unlock type:Unlock
Mode=1
Take off the jumper
1 2 3
L1 L2 PL S+ S-
LOCK
POWER
SUPPLY
Power supply: 26Vdc
Power Consumption Of Outdoor Station: 0.85W in standby;
3.25W in working.
Power Consumption Of Indoor Unit: 0.17W in standby;
6.2W in working.
Camera lens: Color CMOS, 2.0 Mega pixel
1/2.7’’ sheye camera,1700 wide angle
Unlock Power output: 12Vdc,250mA
Unlock timing: 1~99s
Working temperature: - 20ºC ~ +55ºC
Wiring: 2 wire, non-polarity
Dimension: 5.51(H)×8.66(W)×0.69(D)inch(Indoor Unit)
6.93(H)×3.54(W)×1.06(D)inch(surface)
8.66(H)×4.68(W)×2.05(D)inch(ush)
* DT-RLC relay actuator is needed for 2nd lock connection.

-17-
14. Hooking Up a Door Release

The design and specications can be changed without notice to the user. Right to interpret and copyright of this
manual are preserved.
DK1711-22 KIT
FORTECHNICALSUPPORTCALL
1516-387-6606FROM9AMTILL4PM
MONDAYTHRUFRIDAY
OURWEBSITEWWW.NYWINT.COM
This manual suits for next models
2
Table of contents
Other 2easy Intercom System manuals

2easy
2easy DMR21 User manual

2easy
2easy DT43/D4 User manual

2easy
2easy 2-wire Series User manual
2easy
2easy DT692 User manual

2easy
2easy DMR11-D8 User manual

2easy
2easy DT-597 User manual

2easy
2easy CDV4791 User manual

2easy
2easy 2-wire Series User manual

2easy
2easy DT594 User manual

2easy
2easy DT 2-wire Quick start guide

2easy
2easy XT24 User manual

2easy
2easy DK4761 User manual

2easy
2easy 2-wire Series User manual

2easy
2easy DMR12/S8 User manual

2easy
2easy IRIS/DT39 User manual

2easy
2easy CDV17D User manual
2easy
2easy DMR21/D32/F1 User manual

2easy
2easy DT594 User manual

2easy
2easy DT 2-wire Quick start guide

2easy
2easy DT24 User manual