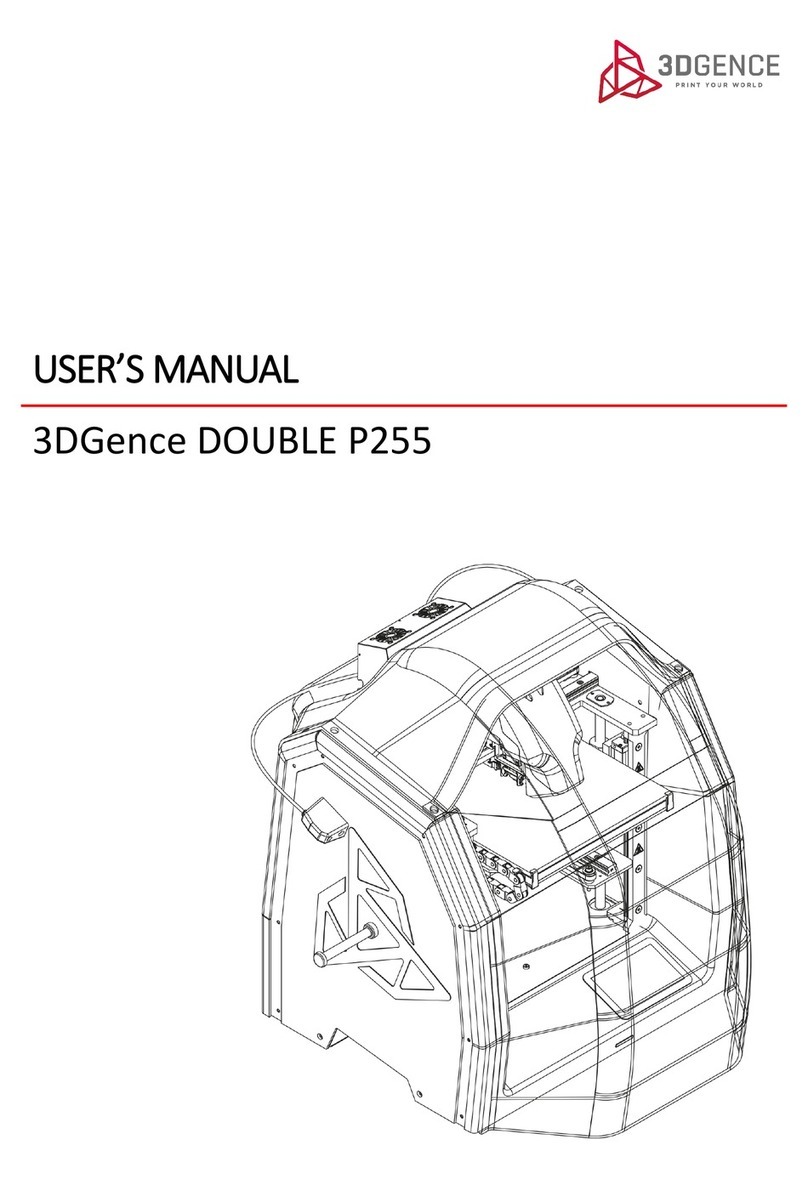
3DGence DOUBLE P255 Guide

3DGence DOUBLE P255 - maintenance activities | version 07.2021
3DGENCE DOUBLE P255
MAITENANCE ACTIVITIES

3DGence DOUBLE P255 - maintenance activities | version 07.2021
MAITENANCE ACTIVITIES
1. HOTENDS CLEANING .......................................................................................................................................................... 2
2. HEATBED CLEANING........................................................................................................................................................... 3
3. CALIBRATION OF HEATBED ................................................................................................................................................ 4
4. PRECISE AXES CALIBRATION............................................................................................................................................... 5
5. CALIBRATION OF OFFSETS ALONG X, Y AND Z AXES ........................................................................................................... 8
6. GEAR BELT TENSION MEASUREMENT............................................................................................................................... 12
7. LUBRICATION OF GUIDES AND TRAPEZOID BOLT ............................................................................................................. 15

3DGence DOUBLE P255 - maintenance activities | version 07.2021
1. HOTENDS CLEANING
Recommended frequency: each time printing is finished.
Each time after completed printing, clean the hotends by removing the remaining molten/burnt material that may
be on the outside of the nozzle
For this purpose:
Procedure for hotend cleaning.
1. Wear protective gloves.
2. In the TUNE menu, set the heating temperature for the given hotend using +/- keys. Choose Tool 0 temp.
option for T0 hotend and Tool 1 temp. option for T1 hotend.
3. Ensure good access to the hotend using the RISE HEATBED or LOWER HEATBED option in the MENU. Press
and hold the keys to move the heatbed smoothly up or down. Press the key once to move the heatbed at a
short distance.
4. Using a non-flammable material or tweezers, gently remove the remaining molten/burnt material.
5. After cleaning the hotend, switch the heating off (TUNE → Tool 0 temp. / Tool 1 temp. → RESET).
3DGence DOUBLE P255 printer can also clean the hotends automatically by extruding a section of material. This
function is particularly useful when the user has to change the material or remove the remains of old filament or if
the hotend has not been used for a long time and is slightly clogged. The automatic hotend cleaning assistant is
available during printing and in the idle mode.
Hotend cleaning assistant:
1. Choose MATERIALS and then CLEAN NOZZLES in the main menu.
2. Specify the hotend to be cleaned –MODEL MATERIAL for T0, SUPPORT MATERIAL for T1 or BOTH TOOLS for
both hotends. Confirm the choice with CONTINUE key.
3. The process will start automatically.
4. After completed process, remove the rest of the filament extruded from the hotend.

3DGence DOUBLE P255 - maintenance activities | version 07.2021
2. HEATBED CLEANING
Recommended frequency: each time printing is finished.
Dirty or greasy heatbed may seriously hinder or make printing impossible. It is recommended that the heatbed
should be cleaned before each new printout.
Clean the printer's heatbed by following the instructions below:
1. Set the printer's heatbed in a position that makes it possible to clean the heatbed easily (MENU → RISE
HEATBED / LOWER HEATBED).
2. Switch off all heating elements of the printer and wait until they are cooled down completely.
3. Switch the printer off using the main switch and disconnect the printer from the power source.
4. Put protective gloves on.
5. Remove any residual plastic from the heatbed surface using the spatula. Next, soak a cotton (non-synthetic)
cloth with a solvent:
• 10% spirit vinegar,
• acetone,
• nitro cleaner,
• extraction naphtha or clean the heatbed using a sponge soaked in detergent. When degreasing, pay special
attention not to expose the printer components made of plastic and painted components to action of a solvent as it
may damage them.
6. Wait for the solvent to evaporate completely.
ATTENTION: There are OHS instructions on the packaging of the solvents. The instructions must be strictly observed
–the solvent vapours may be harmful.

3DGence DOUBLE P255 - maintenance activities | version 07.2021
3. CALIBRATION OF HEATBED
Recommended frequency: when required, or once on a few hundred hours of printing.
The heatbed calibration procedure is always the same. There is no need to perform the calibration before each
printout. It is enough to perform it once every few dozen hours of printing or if there are problems with the
adhesion of the first layer of printout.
Calibrate the heatbed if any of the below symptoms occur:
• the printer is to be started for the first time,
• one or more corners or edges of the printout get unstuck or do not adhere to the heatbed,
• one or more corners or edges of the printout are pressed into the heatbed surface (the impression of
transparency),
• too thinly applied layer, eventually, skipping, clicking of the extruder motor, accumulation of excess material
between the hotend passages,
• the heatbed surface has been unintentionally lifted,
• large force has been applied, for example, when removing the printout, and there is a reasonable suspicion that it
has been relocated,
• the first layer seems to be unevenly distributed - one edge is correct while the opposite one is crushed or does not
adhere to the heatbed strongly enough.
3DGence DOUBLE P255 printer is equipped with an advanced, extremely sensitive system of automatic calibration of
the heatbed. This system facilitates the printer operation. The correct calibration procedure of the printer's heatbed
is described below. The printer has been calibrated prior to transport, but it may have become decalibrated during
transport. Therefore, the following actions should be performed in order to avoid problems with the first printout.
Heatbed calibration procedure.
For this purpose:
1. Check the power leads and the printer's leads for abrasion wear and defects. Check the cogged belts for defects
and abrasion wear. Confirm that the Z axis breaker (fig. 6) is not damaged, broken or bent and that it is aligned with
the Z axis endstop notch. To do this, use the "Rise heatbed" option in the menu and move the heatbed slowly up.
2. If there is a filament in the hotend, unload it (chapter III, point 4.1), and then cool both hotends down to a
temperature below 50oC (TUNE → Tool 0 temp. / Tool 1 temp. → RESET).
3. Gently remove all dirt and material residues from the nozzle of T0 hotend using tweezers and from the heatbed
using a spatula (this does not apply to the first start-up).
4. From the printer's MENU, choose the HOME ALL option.
ATTENTION: observe carefully the movement of all axes. When the Z axis breaker (fig. 37, violet colour) reaches the
level of the Z axis endstop (fig. 37, green colour) and stops, check the distance between T0 nozzle and the heatbed
using a feeler gauge. The distance should be about 0.8 - 1.5 mm. If the distance is larger, the heatbed scanning may
be aborted and the "Heatbed scan aborted" error message may be displayed.
If the distance between the heatbed and T0 nozzle tip is outside the range of 0.8 - 1.5 mm, adjust it manually:
a) Move the heatbed maximally backward along Y axis.
b) Loosen the clamp bolt (fig. 37, blue colour) locking the slide (fig. 37, yellow colour).
c) Adjust the distance by means of the thumbscrew (fig. 37, red colour). Tighten the thumbscrew to lower the slide
and increase the distance between the nozzle and the heatbed. Unscrew the thumbscrew to rise the slide and bring
the nozzle closer to the heatbed (fig. 37 red-yellow arrow).
d) Tighten the thumbscrew and check the position of the nozzle above the heatbed using a feeler gauge, after
selecting the "HOME ALL" command.
ATTENTION: During manual calibration of the heatbed, exercise particular care to prevent the heatbed from hitting
the hotend nozzle. Otherwise, the ceramic heatbed or hotend may get damaged. The guarantee provided by
3DGence does not cover such damage.

3DGence DOUBLE P255 - maintenance activities | version 07.2021
5. In the printer's menu, choose Menu → Advanced → Heatbed Scan. At this point, the process of heatbed scanning
starts.
6. Wait until the scanning is completed –it will take about 20 minutes. After completed scanning, "HEATBED SCAN
COMPLETED" message appears on the display. The printer's heatbed has been successfully calibrated and the printer
is ready for further work.
Fig. 37 Manual adjustment of the distance between the heatbed and T0 nozzle tip
4. PRECISE AXES CALIBRATION
Recommended frequency: each time the material type is changed to a different one.
3DGence DOUBLE P255 printer, like all 3DGence printers, is equipped with a unique system for precise dimensional
correction of the printed model. The printer is factory calibrated for Verbatim PLA material with the accuracy of 0.1
mm. During printing with the use of materials having various material shrinkage levels, the dimensional correction
may be necessary. In the case of most printers, such a correction can be very troublesome or even impossible.
Thanks to the innovative system, 3DGence DOUBLE P255 printer allows you to make a precise dimensional
correction in a simple and quick way. With just one calibration printout and simple measurements, this system
makes it possible to achieve the accuracy of 0.02 mm.
ATTENTION: each material from which the filament is made has its own unique thermal shrinkage. To ensure the
maximum precision of results, this calibration should be performed for the material from which the printout is to be
made.
To begin the precise calibration of the XY axes, the special printout has to be made (fig. 58).
Dimmension_Calibration.stl model is available at www.3dgence/support in the Your file tab (the tab is available after
creating an account and registering the device). The model should be prepared for printing in 3DGence Slicer
software for selected materials. The printout will take about 45 minutes.

3DGence DOUBLE P255 - maintenance activities | version 07.2021
Prepared models .stl and .gcode are also available at www.3dgence/support in the tab Your files
(the tab is available after creating an account and registering the device).
After printing, cooling down and removing the calibration cross carefully from the heatbed, measure the cross along
X and Y axes. They are marked on the model. Different tools can be used to make the measurement, but their
accuracy must be at least 0.05 mm:
• slide caliper,
• micrometer,
• coordinate measuring machine,
• optical tools.
The printout should be measured along X and Y axes. To increase the measurement certainty, follow the below
instructions:
• the measuring point should be in the middle of the model height above the step, both points at the height of the
same layer (fig. 59),
• measurements for X and Y axes should be made 5 times for each axis. Reject the highest and the lowest
measurement result from each group. Other measurements should be averaged for each axis (fig. 60).

3DGence DOUBLE P255 - maintenance activities | version 07.2021
Fig. 60 Table of measurements for X axis and Y axis
The result of such action will be the basis for further operations:
1. Go to MENU → ADVANCED → XY CALIB. (fig. 25).
2. Choose ORIGIN X and use –/+ keys to enter the value of the dimension given to the model in X axis. In the
case of Dimmension_Calibration.stl file downloaded from the website, this value is 100,00 mm.
3. Choose PRINT X and use –/+ keys to enter the value measured on the cross in X axis.
4. Choose ORIGIN Y and use –/+ keys to enter the value of the dimension given to the model in Y axis. In the
case of Dimmension_Calibration.stl file downloaded from the website, this value is 100,00 mm.
5. Choose PRINT Y and use –/+ keys to enter the value measured on the cross in Y axis.
6. Confirm the changes with the Save key. Additionally, in order to verify correct axis calibration, you can print
the Dimmension_Calibration.stl model downloaded from the website once again and measure it. Thanks to
this procedure, the next printout of the material for which calibration was performed will be printed with
compensation of material shrinkage along X and Y axes.

3DGence DOUBLE P255 - maintenance activities | version 07.2021
5. CALIBRATION OF OFFSETS ALONG X, Y AND Z AXES
Due to design characteristics of the dual hotend 3D printer, there are differences in the position of the hotends
along X, Y and Z axes. X/Y/Z Offset is the name of the parameter describing the position difference of T1 extruder
nozzle with respect to T0 extruder nozzle along X/Y/Z axes. Fig. 61 shows the visualization of the offsets along X axis
and Z axis. This difference can be compensated by the printer settings, using the touch panel.
Fig. 61 Visualization of the nozzle position difference (offsets)
ATTENTION: After each change of the hotend, the Z offset should be calibrated, and then the offsets along the X and
Y axis should be calibrated!
Calibration of Z axis offsets:
To calibrate the nozzle position difference along Z axis, use the Z MEASURE option available in MENU → ADVANCED
→ MODULE CALIB. The printer makes the tensometric measurement of the distance of both hotends (T0 and T1)
from the heatbed and recalculates these distances to the position difference of the T1 extruder nozzle with respect
to the T0 extruder nozzle.
The Z offset value can be also modified manually: MENU → ADVANCED → MODULE CALIB. → Z OFFSET and use the
+/- keys to enter a value.
Calibration of XY offsets:
In order to verify the offset along the X, Y axes, the calibration model should be printed in the printer memory
(procedure described below). The model is prepared for PLA and BVOH materials. The printout takes about 10
minutes. The model consists of two parts - part X (fig. 62) and part Y (fig. 63). Part X is used to set offset between
hotends along the X axis. Part Y is used to set offset between hotends along the Y axis. Each part consists of two
material layers - the bottom layer printed from support material (fig. 62, white) and the upper layer printed from
model material (fig. 62, red). Each part of the model is built of 11 lines. The middle line is point 0.00. The lines to the
right from point 0.00 increase with the plus sign every 0.05 mm in the range from 0.05 mm to 0.25 mm, and the lines
to the left from 0.00 point decrease with the minus sign every 0.05 mm in the range from -0.05 mm to - 0.25 mm
(fig. 62, 63). Printed symbols: "+" on the right side and "-" on the left side are helpful in determining the character
with which the read value will have to be entered into the printer (fig. 62, 63). With correctly calibrated offsets on
the middle line (point 0.00), the model material coincides with the support material both along the X axis and along
the Y axis.

3DGence DOUBLE P255 - maintenance activities | version 07.2021
Fig. 62 Calibration model of offset along X axis
Fig. 63 Calibration model of offset along Y axis
Figure 64 presents two calibration models –part X. The first one (at the top) has incorrect offset values along the X
axis, while the second one (at the bottom) has correctly calibrated offset values along the X axis (fig. 64). With
correctly calibrated offsets on the middle line (point 0.00), the model material coincides with the support material
both in the X axis and in the Y axis (Fig. 64, bottom model).

3DGence DOUBLE P255 - maintenance activities | version 07.2021
First of all, on the out of calibrated model find the line on which the model material (fig. 64, red) is best covered with
support material (fig. 64, white). On the top model (fig. 64), the materials overlap best on the third line to the left of
point 0.00. This line is distanced from point 0.00 at -0.15mm. This means that the X offset value is shifted by -0.15
mm and by this value the X offset value entered in the calibration menu must be corrected (the offset procedure in
the X and Y axis is described below).
Fig. 64 Comparison of correctly calibrated offset values with incorrectly calibrated ones

3DGence DOUBLE P255 - maintenance activities | version 07.2021
Calibration of XY offsets:
1. Load the model filament (PLA) and support filament (BVOH) by selecting from the printer menu: MATERIALS
→ LOAD MODEL MATERIAL / LOAD SUPPORT MATERIAL and follow the instructions on the display.
2. Print the calibration model in the printer memory by selecting from the printer menu: MENU → ADVANCED
→ MODULE CALIB. → AUTO XY CALIB.
3. After printing the model, select the line on the display on which the model material with the support
material in part X is best covered (fig. 65).
Fig. 65 Automatic offset calibration screen in the X axis
4. Select the CONTINUE button.
5. Select the line on the display on which the model material with the support material in part Y is best covered
(fig. 66).
Fig. 66 Automatic offset calibration screen in the Y axis
6. Select the CONTINUE button.
7. Confirm with the SAVE key.
8. Print the calibration model in the printer memory again by selecting from the printer menu: MENU →
ADVANCED → MODULE CALIB. → AUTO XY CALIB. and visually check the offset calibration level:
• if on the middle line the model material coincides with the support material both in the X axis and in the Y axis -
the XY offsets of the dual hotend module are calibrated correctly,
• if the model material does not coincide with the support material both on the X axis and in the Y axis on the middle
line - the XY offsets of the dual hotend module are not calibrated correctly. Calibrate the offsets again in accordance
with points 2 - 7.

3DGence DOUBLE P255 - maintenance activities | version 07.2021
6. GEAR BELT TENSION MEASUREMENT
Recommended frequency: every six months or every 2000 h
Once every six months or every 2000 hours it is recommended to review the technical condition of toothed belts
consisting in visual assessment of the degree of wear of the belts and checking their tension.
Before proceeding to check the tension of the toothed belts, you should obtain:
- Belt Tension Tester BTT Hz (Fig. 67).
Fig.67 Belt Tension Tester BTT HZ
Procedure of the measurement of the tension timing belts.
1. Run the belt tension tester (Fig.68).
Fig. 68 Start tester
2. Move the carriage of the module to the maximum left side.
Measurement of the tension timing belts on the axis X
•Start the tester.
•Place the microphone facing the toothed belt side at the third black mounting hole of the linear guide
counting from the right side of the printer.

3DGence DOUBLE P255 - maintenance activities | version 07.2021
Fig.69 Measurement toothed belt on the X axis
•Make the timing belt vibrate by vigorously jerking it like a guitar string.
•Check the voltage value on the tester and read the frequency value.
For a correctly tensioned Timing Belt on the X2 axis, the measured value should be between 71-75 Hz.
If the measured tension value is not within the specified ranges, please contact the 3DGence Technical Support for
assistance.
Measurement of the tension timing belts on the axis Y
3. Move the Y axis to the maximum back position.
4. Place the microphone facing the toothed belt side at the third black mounting hole of the linear guide
counting from the right side of the printer (Fig. 70).

3DGence DOUBLE P255 - maintenance activities | version 07.2021
Fig.70 Measurement toothed belt on the Y axis
•Make the timing belt vibrate by vigorously jerking it like a guitar string.
•Check the voltage value on the tester and read the frequency value.
For a correctly tensioned Timing Belt on the Y axis, the measured value should be between 71-75 Hz.
If the measured tension value for tension belts is not within the specified ranges, please contact the 3DGence
Technical Support for assistance.
3 2 1

3DGence DOUBLE P255 - maintenance activities | version 07.2021
7. LUBRICATION OF GUIDES AND TRAPEZOID BOLT
Recommended frequency: every four months.
1. Before you start to lubricate, please obtain:
- Grease SKF LGEP 2 (grease according to norm DIN 51825 or class K2K),
- a manual lubricator (Fig.71).
Fig.71 Manual lubricator
2. Choose the appropriate grease:
-for trapezoid that aren’t equipped with grease nipples and for linear guides:
•Grease SKF LGEP 2 (Fig.72)
Fig. 72 Grease SKF LGEP 2
3. Fill the lubricator with the appropriate grease according to the manufacturer’s instructions.

3DGence DOUBLE P255 - maintenance activities | version 07.2021
LUBRICATING THE TRAPEZOID BOLT
1. Set the heatbed to the lower position (Menu → Lower heatbed).
2. Move heatbed towards to you.
3. Lubricate trapezoid bolts and linear guides:
- Push grease into the grease nipple and around of the left linear carriage (Fig.73). It is located at the top of the
liner carriage. Push grease out by pressing the lubricator nozzle firmly against the grease nipple and pressing
smoothly the lubricator lever once.
Fig.73 Linear carriage grease nipple
4. Apply grease to the raceway of the trapezoid bolts (left and right) Fig.74
5. using a wooden stick (or other blunt tool).
-Apply the grease every 5 cm.
Fig.74 Trapezoid bolt raceway
6. Raise the heatbed (Menu-> Upper heatbed).
7. Lower the heatbed (Menu ->Lower heatbed).
8. Collect excess grease from linear carriages and trapezoid bolt nuts using a paper towel.
9. Apply grease to the raceway of the trapezoid bolts (left and right) using a wooden stick (or other blunt tool).

3DGence DOUBLE P255 - maintenance activities | version 07.2021
10. Raise the heatbed (Menu-> Upper heatbed).
11. Lower the heatbed (Menu ->Lower heatbed).
12. Collect excess grease from linear carriages and trapezoid bolt nuts using a paper towel.
LUBRICATING THE X AXIS
1. Move the module to the left until it stops to get access to the grease nipple on the X axis carriage.
2. Push grease into the grease nipple of the linear carriage of the X axis (Fig.75) by pressing the lubricator
nozzle firmly against the grease nipple and pressing smoothly the lubricator lever once.
Fig.75 Linear carriage of the X axis
3. Move the module to the right and left twice.
4. Remove excess grease from the linear carriages using a paper towel.

3DGence DOUBLE P255 - maintenance activities | version 07.2021
LUBRICATING THE Y AXIS
1. Move the heatbed to the front of the printer until it stops, to get access the Y axis linear carriage grease
nipple (Fig.76)
2. Push grease out by pressing the lubricator nozzle firmly against the grease nipple of the Y axis carriage and
pressing smoothly the lubricator lever once.
Fig.76 Linear carriage grease nipple Y axis
3. Move the heatbed back and forth twice.
4. Remove excess grease from the linear carriages using a paper towel.
5. Push grease out by pressing the lubricator nozzle firmly against the grease nipple of the Y axis carriage and
pressing smoothly the lubricator lever once.
6. Move the module back and forth twice.
7. Remove excess grease from the linear carriages using a paper towel.
Other manuals for DOUBLE P255
1
Table of contents
Other 3DGence 3D Printer manuals

3DGence
3DGence DOUBLE User manual

3DGence
3DGence ONE User manual

3DGence
3DGence ONE User manual

3DGence
3DGence DOUBLE P255 User manual

3DGence
3DGence ONE User manual

3DGence
3DGence DT3 User manual

3DGence
3DGence INDUSTRY F420 User manual

3DGence
3DGence ONE User manual

3DGence
3DGence INDUSTRY F340 User manual

3DGence
3DGence INDUSTRY F340 User manual