and then remove the wiring section of terminal block.
Please pay attention to the above operation sequence.
【E1 Port Connection】
The device provides 1 E1 port, interface type is BNC or RJ45,
interface impedance is 75 Ω unbalanced (BNC) and 120 Ω
balance (RJ45), supports interface 1500V electromagnetic
isolation protection. 120 Ω RJ45 pins are defined as follows:
Pin No. Function definition Signal
direction
1. NC (reserved) -
2. RX+ (positive received data) Input
3. RX- (received data negative) Input
4. GND (Ground) -
5. GND (Ground) -
6. TX+ (sending data positive ) Output
7. TX- (sending data negative) Output
8. NC (reserved) -
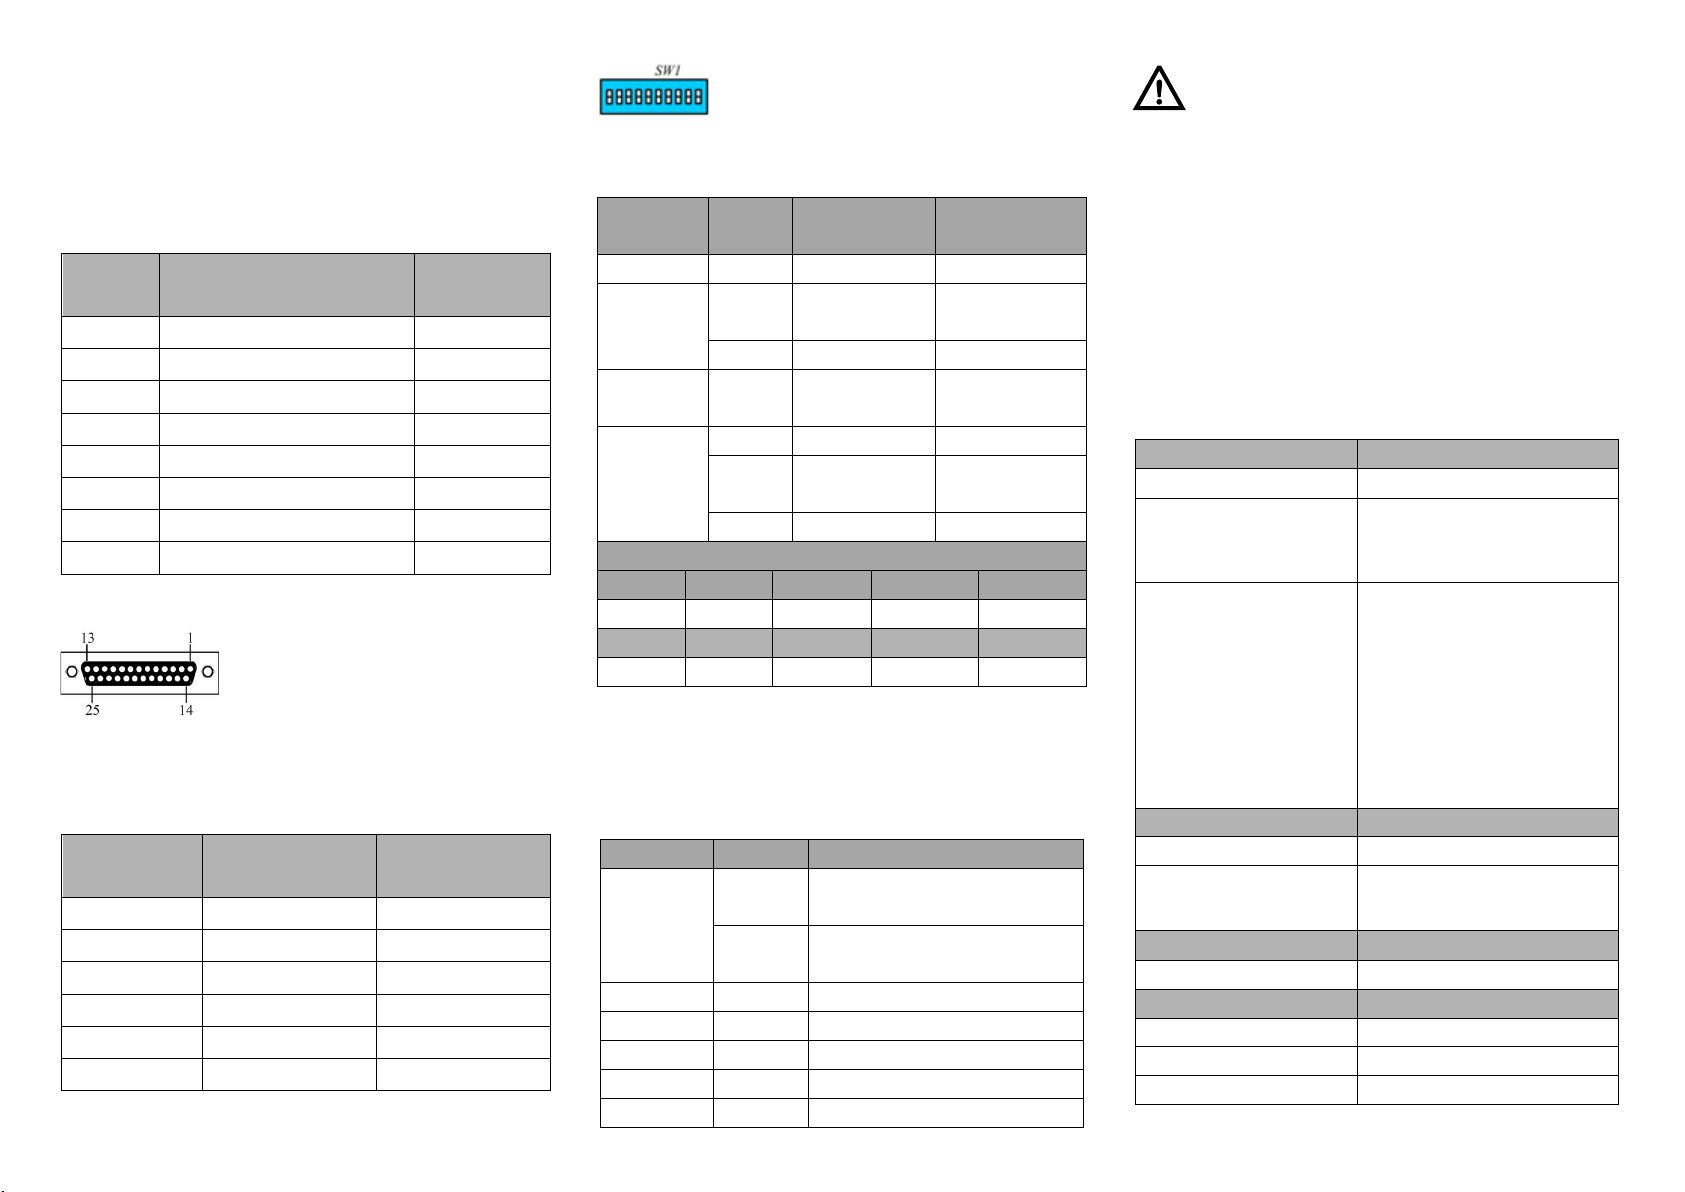
【RS-232 Connection】
The device provides 1 RS-232 interface
in the form of DB25 female head, which
can be connected to the RS-232 device
through the converter wire of DB25
male head to DB9 female head. The interface supports 600W
surge protection and 15KV static protection. The pin
definitions of RS-232 are shown as follows:
Pin No. Function
definition
Signal direction
2. TXD Input
3. RXD Output
5. CTS Output
6. DSR Output
7. GND -
8. DCD Output
【DIP Switch】
The device provides 1 set of DIP switch for
impedance, BNC grounding, clock, loopback
and factory setting. The functions are
defined as follows.
The settings of SW1 are as follows:
Category
DIP bit Set the DIP to
BNC
Grounding
Bit 2 No Grounding
Clock Bit 4 Internal Clock
Loopback
Bit 9 No loopback RS-232
Indicator
The device provides LED indicators to monitor the device
working status with a comprehensive simplified
troubleshooting; the function of each LED is described in the
table as below:
PWR
ON
The power supply is running
normally
OFF
Power supply is disconnected
or running abnormally
E1 interface receives no code
E1 interface receives full 1 code
Data received successfully
Notice:
Whether AIS alarm is caused by a line fault, depends on
the actual situation. For example, when E1 port uses
non-similar HDLC protocol, when data communication
is not conducted, the whole 1-code signal must appear
on the line, and the AIS indicator will alarm. Just as
when the device was just powered on, the line not
connected to the E1 port was full 0 codes, and the AIS
light was not on. If the E1 port was carried on the outer
loop, then the E1 port was full 1 code, and the E1 light
would be naturally on.
Specification
1 RS-232, DB25 female head
E1 Interface 1 E1, BNC or RJ45, 75 Ω
unbalanced (BNC) and 120 Ω
Indicator
Power indicator, losing
synchronization alarm
indicator, upstream E1 link full
1-code alarm indicator, E1 link
interrupt alarm indicator, data
receiving indicator from G.703
network, data sending
indicator to G.703 network
Terminal block AC power supply outlet with
℃
℃
~


