manuals.online logo
Brands
  1. Home
  2. •
  3. Brands
  4. •
  5. ABB
  6. •
  7. Control Unit
  8. •
  9. ABB SmissLine TP ZLS 260 User guide

ABB SmissLine TP ZLS 260 User guide

This manual suits for next models

2

Other ABB Control Unit manuals

ABB AC500 PLC User manual

ABB

ABB AC500 PLC User manual

ABB +P906 User manual

ABB

ABB +P906 User manual

ABB jokab safety Smile Tina Series User manual

ABB

ABB jokab safety Smile Tina Series User manual

ABB Relion 630 Series Quick start guide

ABB

ABB Relion 630 Series Quick start guide

ABB Relion 615 series Installation and operation manual

ABB

ABB Relion 615 series Installation and operation manual

ABB REC 523 Product manual

ABB

ABB REC 523 Product manual

ABB TA571-SIM User manual

ABB

ABB TA571-SIM User manual

ABB RELION 650 SERIES User manual

ABB

ABB RELION 650 SERIES User manual

ABB UCU-22 User manual

ABB

ABB UCU-22 User manual

ABB Relion 670 series User manual

ABB

ABB Relion 670 series User manual

ABB OHDI-01 User manual

ABB

ABB OHDI-01 User manual

ABB MotiFlex e100 OPT-MF-005 User manual

ABB

ABB MotiFlex e100 OPT-MF-005 User manual

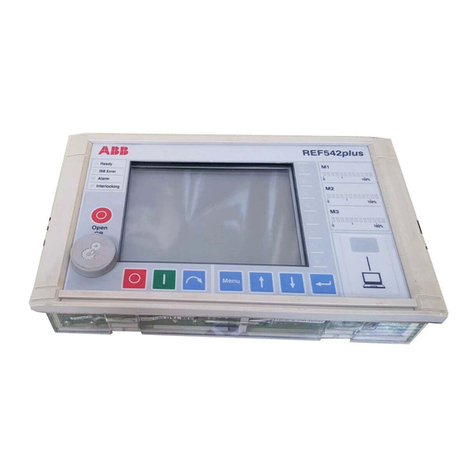
ABB REF542plus User manual

ABB

ABB REF542plus User manual

ABB Unitrol 1000-PM40 User manual

ABB

ABB Unitrol 1000-PM40 User manual

ABB REC650 ANSI User manual

ABB

ABB REC650 ANSI User manual

ABB Relion SAM600-IO User manual

ABB

ABB Relion SAM600-IO User manual

ABB ACH550 series User manual

ABB

ABB ACH550 series User manual

ABB ACS580-04 User manual

ABB

ABB ACS580-04 User manual

ABB RPBA-01 User manual

ABB

ABB RPBA-01 User manual

ABB ACS800-U4 User manual

ABB

ABB ACS800-U4 User manual

ABB COM600 series 5.0 Instruction Manual

ABB

ABB COM600 series 5.0 Instruction Manual

ABB OMD200 User guide

ABB

ABB OMD200 User guide

ABB ACSM1 Series User manual

ABB

ABB ACSM1 Series User manual

ABB Relion 630 Series Instructions for use

ABB

ABB Relion 630 Series Instructions for use

Popular Control Unit manuals by other brands

Seitz 14A80 user manual

Seitz

Seitz 14A80 user manual

Wilo RS485 Installation and operating instructions

Wilo

Wilo RS485 Installation and operating instructions

Becker CentralControl CC41 Commissioning Instruction

Becker

Becker CentralControl CC41 Commissioning Instruction

SICK CDB650 operating instructions

SICK

SICK CDB650 operating instructions

Panduit NetKey NKP5E88M Series installation instructions

Panduit

Panduit NetKey NKP5E88M Series installation instructions

MX Options Concentric Petite Fitting instructions

MX

MX Options Concentric Petite Fitting instructions

Clean Water Systems Fleck 2510 Installation & start?up guide

Clean Water Systems

Clean Water Systems Fleck 2510 Installation & start?up guide

Fairchild FSB44104A user guide

Fairchild

Fairchild FSB44104A user guide

LEGRAND Wattstopper LMIN-104 installation instructions

LEGRAND

LEGRAND Wattstopper LMIN-104 installation instructions

PMK ATT10BNCS instruction manual

PMK

PMK ATT10BNCS instruction manual

Tektronix TDS3FFT user manual

Tektronix

Tektronix TDS3FFT user manual

Woodward easYgen Technical manual

Woodward

Woodward easYgen Technical manual

Balluff BNI EIP-502-105-R015 user guide

Balluff

Balluff BNI EIP-502-105-R015 user guide

NXP Semiconductors TWR-LS1021A Getting started

NXP Semiconductors

NXP Semiconductors TWR-LS1021A Getting started

Advantech PCM-3117 Startup manual

Advantech

Advantech PCM-3117 Startup manual

Danfoss MCO 101 manual

Danfoss

Danfoss MCO 101 manual

Moons' Lin Engineering R701P user manual

Moons'

Moons' Lin Engineering R701P user manual

Aventics RV1 operating instructions

Aventics

Aventics RV1 operating instructions

manuals.online logo
manuals.online logoBrands
  • About & Mission
  • Contact us
  • Privacy Policy
  • Terms and Conditions

Copyright 2025 Manuals.Online. All Rights Reserved.

Montage Einspeiseblock
Fig. 1

Demontage Einspeiseblock
Fig. 2
Ausbrechen von Klemmenöffnung
Fig. 3
Einführen und befestigen des Kabels
Anzugsdrehmoment 2.8 Nm; Poz. II
Fig. 4
Durchschlaufen von Verbindungen
ZLS 260: L1 mit L1 und L3 mit L3
ZLS 261: L2 mit L2 und N mit N
ZLS 262: LA mit LA und LB mit LB
Fig. 5
Einspeisebeispiele
Fig. 6 Seiteneinspeisun L, N
Fig. 7 Mitteneinspeisung L, L
Fig. 8 Seiteneinspeisung LA, LB
Fig. 9 Mitteneinspeisung LA, LB
Montage sur les socles,
Bloc d’alimentation
F
Fig. 1
Démontage, Bloc d’alimentation
Fig. 2
Retirer le cache de la borne
Fig. 3
Insérer le fit et serrer
Couple de serrage 2.8 Nm; Poz. II
Fig. 4
Extension du câblage
ZLS 260: L1 avec L1 et L3 avec L3
ZLS 261: L2 avec L2 et N avec N
ZLS 262: LA avec LA et LB avec LB
Fig. 5
Exemples d’alimentation
Fig. 8 Alimentation latérale L, N
Fig. 9 Alimentation médiane L, L
Fig. 10 Alimentation latérale LA, LB
Fig. 11 Alimentation médiane LA, LB
Assembly to plug-in socket system,
Incoming Terminal Block
G
Fig. 1
Disconnection, Incoming Terminal Block
Fig. 2
Break out from the clamp hole
Fig. 3
To insert and to clamp the cable
with torque 2.8 Nm; Poz. II
Fig. 4
Loop of a connection
ZLS 260: L1 with L1 end L3 with L3
ZLS 261: L2 with L2 end N with N
ZLS 262: LA with LA end LB with LB
Fig. 5
Supply variants
Fig. 8 End feed L, N
Fig. 9 Centre feed L, L
Fig. 10 End feed LA, LB
Fig. 11 Centre feed LA, LB
Montaggio I
Fig.1
Smontaggio
Fig.2
Rottura della paretine in plastica dei
morsetti
Fig. 3
Inserimento e serraggio dei cavi
Forza torcente 2.8 Nm; Poz. II
Fig. 4
Collegamento connessioni
ZLS 260: L1 con L1 e L3 con L3
ZLS 261: L2 con L2 e N con N
ZLS 262: LA con LA e LB con LB
Fig. 5
Esempi di alimentazione
Fig. 8 Alimentazione laterale L, N
Fig. 9 Alimentazione centrale L, L
Fig. 10 Alimentazione laterale LA, LB
Fig. 11 Alimentazione centrale LA, LB
ABB Switzerland Ltd
Low Voltage Products
Fulachstrasse 150
CH-8201 Schaffhausen
Phone: +41 58 586 41 11
Fax: +41 58 586 42 22
E-mail: www.abb.com
ABB Ltd
Tower Court,
Coutaulds Way
Foleshill Enterprise Park,
Conventry
CV6 5NX
United Kingdom
L1L2 NL3
1
L1L2 NL3
1
2
> 30°
INmax. 6 A
1
2
L1L2 NL3
1
2
4
LA, LB
max. 63 A max. 63 A
INmax. 63 A
L1, L2, L3, NL1, L2, L3, N
LA
LB
LA
LB
∑ IN: max. 6 A
∑ IN: max. 63 A
LA, LB
max. 6 A max. 6 A
1 3
56 7
9
8
13 mm
0,52 in
Warnung 
Nichtbefolgung dieser Hinweise kann zu tödlichen Ver-
letzungen oder zu Sachschäden führen. Das Gerät darf
nur von einer elektrotechnisch unterwiesenen Person
installiert werden. Vor Beginn der Installation ist die
Netzspannungszufuhr abzuschalten.
Sicherheit
Es dürfen ausschliesslich die oberflächenveredelten
Sammelschienen von ABB verwendet werden. Am
Stecksockel-System dürfen keine Reparaturen vorge-
nommen werden.
Entsorgung
Defekte Geräte sind als Sondermüll an entsprechend
eingerichteten Sammelstellen zu entsorgen. Nationale
oder regionale Vorschriften über die Entsorgung von
Sondermüll sind zu befolgen.
Stromschienen
Es dürfen ausschliesslich die oberflächenveredelten
Sammelschienen von ABB verwendet werden. Am
Stecksockel-System dürfen keine Reparaturen vorge-
nommen werden.
Montageanleitung Einspeiseblock ZLS 260, ZLS 261, ZLS 262
Notice de montage Bloc d’alimentation ZLS 260, ZLS 261, ZLS 262
Mounting instruction Incoming Terminal Block ZLS 260, ZLS 261, ZLS 262
Introduzione Montaggio Blocco d’alimentazione ZLS 260, ZLS 261, ZLS 262
2CCC451038M0108 (8205399.I)
Sicurezza
Devono essere utilizzate esclusivamente le sbarre
collettrici della ABB con trattamento superficiale. Non
dev’essere eseguita alcuna riparazione al sistema di
zoccolo da innesto.
Smaltimento
Gli apparecchi difettosi devono essere smaltiti come
rifiuti speciali presso i centri di raccolta corrispondenti.
Ci si deve attenere alle normative nazionali e regionali in
materia di smaltimento dei rifiuti speciali.
Sbarre collettrici
Devono essere utilizzate esclusivamente le sbarre
collettrici della ABB con trattamento superficiale. Non
dev’essere eseguita alcuna riparazione sul sistema di
zoccolo da innesto.
Dati tecnici IEC:
Blocco d’alimentazione:
Tensione nominale max.: 690 V AC (L123, N)
230/400 V LALB
Corrente nominale max.: 63 A per L1, L2, L3, N
6 A per LA, LB
Morsetto principale: 2.5 a 25 mm2
per L1, L2, L3, N, LA, LB
06/2021 Index I
Avertissement F
Le non-respect des présentes instructions peut
entraîner la mort, des blessures corporelles ou des
dégâts matériels. L’appareil doit uniquement être ins-
tallé par une personne qualifiée. Coupez l’alimentation
électrique principale avant de commencer l’installation.
Sécurité
Utiliser exclusivement les barres collectrices à surface
améliorée de ABB. Ne procéder à aucune sorte de ré-
paration sur le système de socle d’enfichage.
Elimination
Les appareils défectueux sont à éliminer en tant que
déchets spéciaux sur les lieux de collecte prévus à cet
effet. Respecter les prescriptions nationales ou régio-
nales.
Barres conductrices
N’employer exclusivement que les barres collectrices à
surface améliorée de ABB. Ne procéder à aucune sorte
de réparation sur le système de socle d’enfichage.
Warning G
Failure to follow these instructions could result in death,
personal injury or property damage. The device should
be installed by a qualified person only. Turn off power
at the main power supply before beginning installation.
Safety
Only the surface-coated bus bars from ABB may be
used. Do not attempt to repair a damaged plug-in
socket system. Replace damaged components with
new components.
Disposal
Faulty products should be treated as hazardous waste
and disposed of in an appropriate manner. National or
regional regulations regarding the disposal of hazard-
ous waste should be adhered to.
Busbars
Only the surface-coated bus bars from ABB may be
used. Do not attempt to repair a damaged system.
Replace damaged components with new components.
Avvertimento I
La mancata osservanza delle presenti avvertenze può
essere causa di lesioni mortali o di danni materiali.
L’apparecchio dev’essere installato solamente da un
elettrotecnico qualificato. Prima dell’inizio dell’installa-
zione dev’essere disinserita la tensione di rete.
Warning! Installation by person with electrotechnical expertise only.
Warnung! Installation nur durch elektrotechnische Fachkraft.
Avvertenza! Fare installare solo da un elettricista qualificato.
Avertissement! Installation uniquement par des personnes qualifiées en électrotechnique.
¡Advertencia! La instalación deberá ser realizada únicamente por electricistas especializados.