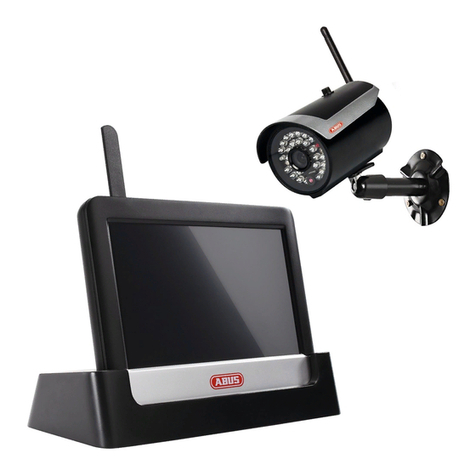
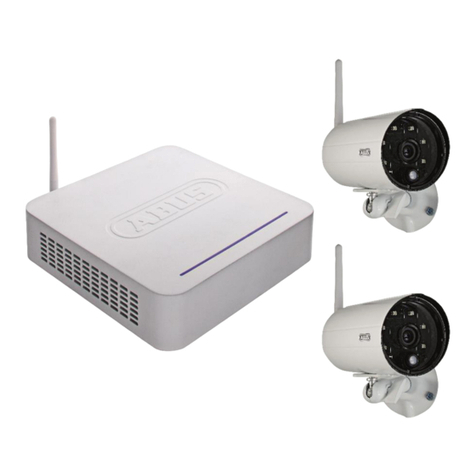
Abus TVAC15000C User manual

TVAC15000C
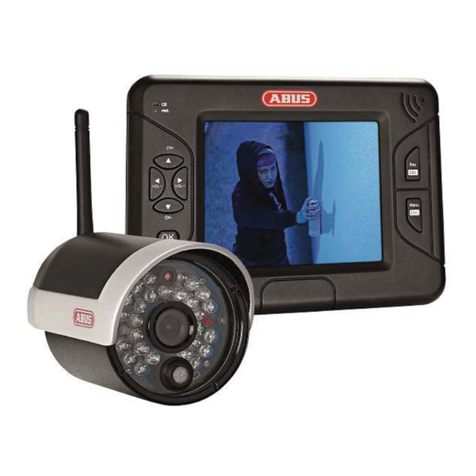
US User guide
FR Notice d’utilisation
PT Manual de instruções
ES Manual de instrucciones
You can find important information and FAQs about
this and other products on the website
www.abus.com/plug-and-play
Version 04/2014

This user manual contains important information for the installation and operation of
the TVAC15000C Home Surveillance System. Please take special care to store this
manual for future reference.
A list of contents with the corresponding page number can be found in the index on page 9.
Cette notice d’utilisation comporte des informations importantes pour l’installation et la
commande du système de surveillance du domicile TVAC15000C. Veuillez conserver ce
manuel pour une utilisation ultérieure.
Vous trouverez le récapitulatif des indications du contenu à la table des matières avec mention de la page
correspondante à la page 33.
O presente manual de instruções contém informação importante sobre a instalação e o
funcionamento do Sistema de Vigilância Doméstica TVAC15000C. Por favor, tenha o
cuidado de guardar este manual para consulta futura.
Uma lista de conteúdos com o respetivo número da página pode ser consultada no índice na
página 57.
Este manual de instrucciones contiene información importante para la instalación y el
uso de la cámara de vigilancia doméstica TVAC15000C. Asegúrese de guardar este
manual para futuras consultas.
En el índice de la página 81 encontrará un listado de los contenidos con las páginas donde podrá
consultarlos.
English
Français
Español
Português

TVAC15000C
3.5" Home Video Surveillance System
User manual
Version 04/2014
Original user guide in English.
Retain for future reference.

4
English
Introduction
Dear Customer,
Thank you for purchasing the ABUS TVAC1500C Home Surveillance System.
To ensure optimum performance and condition of this system is maintained, please read carefully the
enclosed operating manual.
This operating manual is meant to guide you through the process of operating the TVAC15000C Home
Surveillance System. This manual contains instructions for the system’s set up/installation, maintenance and
relevant safety information.
In the event you have questions regarding the system, installation or operating procedures please consult
your local authorized dealer or our customer service team.
ABUS USA, LLC surveillance products are not manufactured and/or sold with the intent to be used for illegal
purposes. ABUS USA, LLC expects consumer’s use of these products to be in compliance with local, state
and federal law. For further information on video and audio recording legal requirements, please consult your
local, state and federal law.
Thank you,
ABUS USA, LLC
Data storage is subject to national data privacy guidelines.
Disclaimer
This user guide has been produced with the greatest of care. Should you discover any missing information or
inaccuracies, please contact us under the address shown on the back of the manual.
ABUS USA, LLC does not accept any liability for technical and typographical errors, and reserves the right to
make changes to the product and user guide at any time and without prior warning.
ABUS USA, LLC is not liable or responsible for direct or indirect damage resulting from the equipment,
performance and use of this product. No forms of guarantee are accepted for the contents of this document.
ABUS USA LLC products are not manufactured and/or sold with the intent to be used for illegal purposes.
ABUS USA LLC. expects consumer’s use of these products to be in compliance with all local, state and
federal law. For further information on video surveillance and audio recording legal requirements, please
consult your local, state and federal law.
© 2014, All rights allowed by law are hereby reserved.

5
English
Icon explanation
A flash in the triangle is used if there is danger for the health, e.g. by an electric shock.
This triangular with the exclamation mark warning symbol indicates important notes in
the operating instructions which should be observed.
This symbol indicates special information bulletins and notes on the operation of the unit.
Important safety advice
All warranty claims are invalid in the event of damage caused by operating the system in
non-compliance with this user guide. ABUS USA LLC cannot be held liable for resulting
damages.
In the event of material or personal damage caused by improper operation or non-
compliance with the safety information, we cannot be held liable. All warranty claims are
voided in such cases.
The device has been manufactured in compliance with international safety standards. Please read these
safety advices carefully.
Safety advice
1. Power supply
110 V AC voltage, 60 Hz (using a power supply unit for 5 V DC)
Operate this product only from the type of power supply indicated on the marking label. If you are not sure
of the type of power supplied to your home, consult your local power company. Disconnect the product
from the mains before you start any maintenance or installation procedures. The power supplies are only
for indoor usage.
2. Overloading
Do not overload a wall outlet, extension cord or adapter as this may result in electric fire or shock.
3. Liquids
Protect the device from any kind of liquids entering.
4. Cleaning
Disconnect the product from the wall outlet before cleaning. Use a light damp cloth (no solvents) to dust
the product.
5. Accessories
Do not use any unsupported accessories as these may be hazardous or cause damage the product.
6. Location
This device can be used in inside as well as outside.
The product will be damaged even it falls from a low height.
During the installation of the camera please take care that direct sunlight cannot fall onto the
image sensor of the device. Please follow the installation instructions in the corresponding
chapter of this user manual.
Do not place the device near a radiator or heat register.
Only operate the device at locations where temperatures within the permitted ambient
temperature range of 14 °F to 122 °F prevail. Outside the predetermined temperature range
operation is possible, but can not be guaranteed.

6
English
7. Wireless transmission
The range of wireless transmission depends on various environmental factors. The local conditions at the
installation location can have a negative impact on the range. For this reason, if there is a clear line of
sight between the receiver and the transmitter, the range can be as much as 490 feet, but in buildings it
is significantly less.
The following environmental factors impair both the range and the frame rate:
Mobile phone towers, high-tension electricity pylons, power lines, ceiling and walls, devices with the
same or similar radio frequency.
Disclaimer
ABUS USA LLC. products are not manufactured and/or sold with the intent to be used for
illegal purposes. ABUS USA LLC. expects consumer’s use of these products to be in
compliance with all local, state and federal law. For further information on video
surveillance and audio recording legal requirements, please consult your local, state and
federal law. It is your responsibility to be aware of the local, state and federal regulations
regarding image storage and use.
Warnings
Follow all safety and operating advises before starting-up the device!
1. Follow these directions in order to avoid damage of the power cord or plug:
Do not modify or process the power cord or plug arbitrarily.
Make sure to disconnect the power cord holding the plug.
Keep heating appliances as far as possible from the power cord in order to prevent the cover
vinyl from melting.
The outdoor camera’s power supply unit must be protected against humidity and damp.
It is only for indoor usage.
2. Follow these directions. Failure to follow any of them may cause electrical shock:
Do not open the main body or the power supply.
Do not insert metal or inflammable objects inside the product.
In order to avoid any damage during lighting use a surge protection.
3. Do not use the product when it is out of order. If you continue to use the product when defective, serious
damage can be caused to it. Make sure to contact your local product distributor if the product is out of
order.
During the installation into an existing video surveillance system make sure that all devices are
disconnected from the low and supply voltage circuit.
If in doubt allow a professional electrician to mount, install and wire-up your device. Improper
electrical connection to the mains does not only represent at threat to you but also to other
persons.
Wire-up the entire system making sure that the mains and low voltage circuit remain separated
and cannot come into contact with each other in normal use or due to any malfunctioning.
Avoid using the device under the following unfavorable ambient conditions:
moisture or excessive air humidity
extreme cold or heat
direct sunlight
dust or combustible gases, vapors or solvents
strong vibration
strong magnetic fields, such as those found in the vicinity of machinery or loudspeakers
the camera must not be directed into the sun as this can destroy the sensor.
the camera may not be installed on unstable surfaces

7
English
Unpacking
While you are unpacking the device please handle it with utmost care.
If you notice any damage of the original packaging, please check at first the device.
If the device shows damages, please contact your local dealer.
FCC Compliance Information
Part 15 Compliance Statement
This device complies with Part 15 of the FCC Rules. Operation is subjected to the following two conditions:
(1) this device may not cause harmful interference, and (2) this device must accept any interference received,
including interference that may cause undesired operation.
This equipment has been tested and found to comply with limits for a Class B digital device, pursuant to
Part 15 of the FCC rules and ETSI (EN) 300328. These limits are designed to provide reasonable protection
against harmful interference in residential installations. This equipment generates, uses, and can radiate
radio frequency energy, and if not installed and used in accordance with the instructions, may cause harmful
interference to radio communications.
However, there is no guarantee that interference will not occur in a particular installation. If this equipment
does cause interference to radio or television equipment reception, which can be determined by turning
the equipment off and on, the user is encouraged to try to correct the interference by one or more of the
following measures:
Reorient or relocate the receiving antenna.
Move the equipment away from the receiver.
Plug the equipment into an outlet on a circuit different from that to which the receiver is connected.
Consult the dealer or an experienced radio/television technician for additional suggestions.
CAUTION! Any changes or modifications to this equipment not expressly approved by the party
responsible for compliance could void your authority to operate the equipment.
RF Exposure Information
The antenna used for this transmitter must be installed to provide a separation distance of at least 8” from all
persons and must not be collocated or operating in conjunction with any other antenna or
transmitter.
All declarations and certificates of conformity can be ordered from:
ABUS USA LLC
23910 N. 19th Ave.
Unit #56
Phoenix, AZ 85085-1850
Ph.: 1-623-516-9933
Mail: customers[email protected]
One-year Limited Warranty
Important: Evidence of original purchase is required for warranty service.
WARRANTOR:
ABUS USA LLC
ELEMENTS OF WARRANTY:
ABUS USA LLC warrants, for one year, to the original retail owner, this ABUS Product to be free from defects
in materials & craftsmanship with only the limitations or exclusions set out below.

8
English
WARRANTY DURATION:
This warranty to the original user shall terminate & be of no further effect 12 months after the date of original
retail sale. The warranty is invalid if the Product is (A) damaged or not maintained as reasonable or
necessary, (B) modified, altered, or used as part of any conversion kits, subassemblies, or any configurations
not sold by ABUS USA LLC, (C) improperly installed, (D) serviced or repaired by someone other than an
authorized ABUS service center for a defect or malfunction covered by this warranty, (E) used in any
conjunction with equipment or parts or as part of any system not manufactured by ABUS, or (F) installed or
programmed by anyone other than as detailed by the owner’s manual for this product.
STATEMENT OF REMEDY:
In the event that the product does not conform to this warranty at any time while this warranty is in effect,
warrantor will either, at its option, repair or replace the defective unit & return it to you without charge for parts,
service, or any other cost (except shipping & handling) incurred by warrantor or its representatives in
connection with the performance of this warranty. Warrantor, at its option, may replace the unit with a new or
refurbished unit. THE LIMITED WARRANTY SET FORTH ABOVE IS THE SOLE & ENTIRE WARRANTY
PERTAINING TO THE PRODUCT & IS IN LIEU OF & EXCLUDES ALL OTHER WARRANTIES OF ANY
NATURE WHATSOEVER, WHETHER EXPRESSED, IMPLIED OR ARISING BY OPERATION OF LAW,
INCLUDING, BUT NOT LIMITED TO ANY IMPLIED WARRANTIES OF MERCHANTABILITY OR FITNESS
FOR A PARTICULAR PURPOSE. THIS WARRANTY DOES NOT COVER OR PROVIDE FOR THE
REIMBURSEMENT OR PAYMENT OF INCIDENTAL OR CONSEQUENTIAL DAMAGES.
Some states do not allow this exclusion or limitation of incidental or consequential damages so the above
limitation or exclusion may not apply to you.
LEGAL REMEDIES:
This warranty gives you specific legal rights, and you may also have other rights which vary from state to
state. This warranty is void outside the United States of America & Canada.
PROCEDURE FOR OBTAINING PERFORMANCE OF WARRANTY:
If, after following the instructions in the owner’s manual you are certain that the Product is defective, pack the
Product carefully (preferably in its original packaging). Disconnect the battery from the Product & separately
secure the battery in its own separate packaging within the shipping carton. The Product should include all
parts & accessories originally packaged with the Product. Include evidence of original purchase & a note
describing the defect that has caused you to return it.
The Product should be shipped freight prepaid, by traceable means, to warrantor at:
ABUS USA LLC
23910 N. 19th Ave.
Unit #56
Phoenix, AZ 85085-1850
Ph.: 1-623-516-9933
Mail: customers[email protected]
Website: www.abus.com/us
(See www.abus.com for current hours of operation.)

9
English
Table of contents
1. Intended Use.........................................................................................................................................10
2. Scope of System Contents..................................................................................................................10
3. Features and functions........................................................................................................................10
4. Information and FAQs..........................................................................................................................10
5. Device description ...............................................................................................................................11
5.1 Front of the monitor......................................................................................................................11
5.2 Rear of the monitor.......................................................................................................................12
5.3 Monitor connections.....................................................................................................................12
5.4 Camera description......................................................................................................................13
5.5 Cable connections........................................................................................................................13
6. Installation.............................................................................................................................................14
6.1 Pairing the camera and monitor...................................................................................................14
6.2 Installing the camera....................................................................................................................14
6.3 Installing the monitor....................................................................................................................15
7. Operation...............................................................................................................................................16
7.1 Live view.......................................................................................................................................16
7.2 Main menu....................................................................................................................................17
7.3 Camera settings...........................................................................................................................18
7.4 Record settings ............................................................................................................................19
7.5 Event list.......................................................................................................................................20
7.6 System settings............................................................................................................................21
8. Maintenance and cleaning...................................................................................................................23
8.1 Maintenance.................................................................................................................................23
8.2 Cleaning .......................................................................................................................................23
9. Disposal and Lithium-Polymer Battery Warning...............................................................................24
9.1 Lithium-Polymer Battery Warning ................................................................................................24
9.2 Recycling and Disposal Information.............................................................................................24
10. Tips for troubleshooting......................................................................................................................25
11. Technical data.......................................................................................................................................26

10
English
1. Intended Use
You can use this 2.4 GHz wireless monitor and the IR wireless outdoor camera with PIR for easy wireless
transmission and displaying of video signals across middle to long distances.
Wireless signal transmission is an advantage in all locations where cables cannot be laid: the camera
transmits the video signal to the wireless monitor without the need for wires. Faults and interference can
be avoided due to the conversion into digital signals.
As soon as the camera’s PIR sensor detects movement, it starts recording to the SD card. You have the
option of connecting up to 4 cameras (TVAC15010C) to the monitor and showing then in a quadruple
display.
A detailed function description can be found in chapter 3 (“Description and functions”).
2. Scope of System Contents
1 x 3.5" TFT monitor
1 × IR wireless external 2.4 GHz camera,
including camera mount and
installation material
1 x 4 GB SD card
2 x power supply units
1 x Chinch-BNC adaptor
1 x AV cable
1 × Antenna
3. Features and functions
Complete set consists of 3.5" TFT monitor and IR wireless outdoor camera, 2.4 GHz
Compact IP66 outdoor camera with infrared night vision function and 400 TVL resolution
3.5" colour TFT with integrated loudspeaker
Digital encrypted audio and video transmission
User-friendly OSD (on-screen display)
4. Information and FAQs
You can find important information and FAQs about this and other products on the website
www.abus.com/plug-and-play. You will find information for troubleshooting under section 10 of these
instructions.

11
English
5. Device description
5.1 Front of the monitor
Battery display
Displays the current charge level
Red: Battery low
Green: Charging
Off: Battery completely charged
Power LED
Device status display
Blue: Device switched on
Off: Device switched off
▲
CH +
Live view: channel change
In the menu: switch between menu items
◄
Vol-
Live view: reduce volume
In the menu: switch between menu items
►
Vol+
Live view: increase volume
In the menu: switch between menu items
CH -
▼
Live view: channel change
In the menu: switch between menu items
OK key
Live view: open the events list
In the menu: confirm the settings and changes
Rec/Del
Live view: start/stop recording
In the menu: delete the recording
Only possible with SD card!
Menu/ESC
Live view: open/exit the menu
In the menu: exit submenu
The system automatically exits the menu after a wait time of
one minute.

12
English
5.2 Rear of the monitor
5.3 Monitor connections
Antenna
Stand
Power supply
5 V DC/1 A (DC, 14.5 × 4.8 mm)
AV output
Output for representing the on-screen display, use the AV
cable supplied
SD card slot
Slot for using an SD card of up to 32 GB
Power switch
Switch monitor on or off

13
English
5.4 Camera description
5.5 Cable connections
To connect the video RCA plug to a BNC input on a monitor or recorder, attach the BNC-RCA adapter to the
yellow RCA plug.
Antenna
Light sensor
Fixed lens
Power LED
LINK LED
IR LED
PIR sensor
Camera mount
Pairing button
Power supply connection
5 V DC/1 A
Yellow RCA plug (video)
Connection for transmitting the video signal
White RCA plug (audio)
Connection for transmitting the audio signal
Jack plug
Plug for connecting to the monitor

14
English
6. Installation
6.1 Pairing the camera and monitor
To connect a camera with the monitor, proceed as follows:
1. Connect the power supply to the cameras and monitor.
2. In the TFT monitor’s menu “Camera Setup -> Pairing” select the camera you require (1–4) and
confirm your choice with OK. The systems starts a 60 second countdown.
3. During the 60 seconds, press the PAIRING button on the camera cable until the green LINK LED on
the front of the camera starts to flash.
4. Upon successful connection of the camera the LINK LED is lit permanently.
6.2 Installing the camera
Select a suitable place for installing the camera using the camera mount. Mark the drill holes on the base
and pre-drill them. Insert the wall plugs provided and attach the mount with the screws.
You now have the option of swivelling the mount by 90° to position it where you want it. Loosen the screw
at the side and set the angle of view required. Then tighten the screw in the required position to fasten.
Warning:
Please note that connection can take up to 60 seconds.
Warning:
Before you start with the installation, make sure that the wireless transmission range reaches
your desired installation location.

15
English
Then screw the camera onto the mount and the power supply unit with the camera.
6.3 Installing the monitor
The installed battery gives you the option of using the TFT monitor flexibly.
When the battery LED lights up red, the battery needs charging Make sure that the battery is always
sufficiently charged in order to guarantee no loss of recording.
To do this, unfold the stand and position the monitor on the desired location.
Warning:
Only use the antenna provided for the installation.
Important:
Please note that if the monitor does NOT have an external power supply, it must be
charged for at least 8 hours prior to being used for the first time.
The battery life is about 3.5 hours.

16
English
To display the monitor display on another device, proceed as follows:
1. Connect the jack plug to the monitor’s AV OUT.
2. Connect the RCA plug to the monitor as shown in the drawing.
7. Operation
To switch the monitor ON/OFF, press and hold the power button for at least 2 seconds.
Each time it is started, the monitor switches to live view and it selects the last view that was set.
If the icon is displayed, the monitor has correctly identified the SD card and it is working normally.
7.1 Live view
01:12:45
2011 05 01
14:30:11
Signal display
Channel display
Recording display: flashes during recording
Motion detection recording activated

17
English
7.2 Main menu
Press MENU to open the main menu. You can use the arrow buttons to switch between menu items.
You can choose between the following
Camera-Setup:
Camera on/off = show/hide camera
Camera Brightness = brightness of camera
Pairing = add camera
Resolution = image resolution
Recorder Setup:
Alarm Period = length of alarm when motion is detected
Motion Detection = motion detection
SD Card Overwrite = SD card circular buffer
Motion detection alarm activated
No SD card inserted
Full SD
SD card full
Err SD
SD card was not identified
SD card locked
SD card is overwritten when it reaches capacity
SD card display
SD card capacity
Power supply display
Camera brightness display
01:12:45
Recording time
2011 05 01
14:30:11
Date/time display
Please note:
The icons disappear automatically after being displayed for ten seconds.

18
English
Event list:
The recordings are stored in sub-folders named after the
recording date.
The recordings are stored as individual files with the time of
recording as the file name.
System setup:
Quad Display = four-way display
Scan Period = dwell time for sequence display
Time setting = Date/time settings
SD Card Format = format SD card
Power Saving = energy-saving mode
TV-Format = TV output resolution
Set to factory Default = reset to factory defaults
System Version = software version of the monitor and
camera
7.3 Camera settings
Camera on/off = show/hide camera
Use the ◄► buttons to select a camera. Press
OK to switch between ON and OFF.
If you switch the camera OFF, it is no longer
shown.
Camera Brightness = brightness of camera
Use the ◄► buttons to select the desired
camera and confirm your choice with OK.
The relevant camera image is shown with a
selection bar with the options 0–9. You can use
the ◄► buttons to change the setting and
confirm with OK.

19
English
Pairing = add camera
Use the ◄► buttons to select the desired
camera and confirm your choice with OK. The
systems starts a 60 second countdown.
During the 60 seconds, press the PAIRING
button on the camera cable until the green LINK
LED on the front of the camera starts to flash.
Once the connection is successful, the LINK
LED on the camera lights up continuously
and the monitor switches to live view.
Resolution = image resolution
Use the ◄► buttons to select between the
resolutions
640 × 480 and 320 × 240. Confirm your input
with OK.
Note that the recording time changes for the
different resolutions.
7.4 Record settings
Alarm Period =
length of alarm when motion is detected
Use the ◄► buttons to select the desired alarm
duration.
You can choose between OFF/5 sec/10 sec/15
sec. Confirm your selection with OK.
The alarm duration is set to 5 seconds by
default.
Press any button to switch off the alarm when it
sounds.
Motion Detection =
recording duration for motion detection
Use the ◄► buttons to select the recording
duration for motion detection.
You can choose between OFF/5 sec/10 sec/15
sec.
Confirm your input with OK.
The recording duration is set to 5 seconds by
default.
Motion detection is deactivated for 5 seconds
after an alarm.

20
English
SD Card Overwrite = SD card circular buffer
Use the ◄► buttons to activate (ON) or
deactivate (OFF) the SD card circular buffer.
Confirm your selection with OK.
The circular buffer is activated by default.
Warning:
When the memory capacity is reached, the
monitor continues to record, deleting the
oldest recordings on the SD card.
The SD card capacity display flashes with 0.0
G in red.
7.5 Event list
Event List = event list
Use the arrow buttons to navigate between
folders. Press the OK button to select the
desired folder.
In the sub-folder, choose the relevant recording
file and play it by pressing OK.
Press ▲ or ▼ to fast-forward or rewind at the
speeds 2×/4×/8×/16×.
Note that the maximum recording time for a
manual recording is 10 minutes. Once this time
elapses, a new file is created.
Deleting files
Press DEL to enter deletion mode.
The current file or folder flashes. You can use
the ◄► buttons to select all or one file.
Press OK to confirm your choice.
Select to delete the selection.
To cancel the deletion, select .
Table of contents
Languages:
Other Abus Security System manuals

Abus
Abus SECVEST 868 User manual

Abus
Abus FU8110 User manual

Abus
Abus AZSG10005 Instruction Manual

Abus
Abus PPIC35520 User manual

Abus
Abus GWM100ME User manual

Abus
Abus Security-Center EcoLine TV7000 User manual

Abus
Abus Bordo 6000 Alarm User manual

Abus
Abus Terxon LX Instruction Manual

Abus
Abus Smartvest User manual

Abus
Abus WIRELESS ALARM SYSTEM User manual

Abus
Abus Terxon MX User manual
Abus
Abus SECVEST User guide
Abus
Abus Eyseo ECOLINE TV7026 User manual

Abus
Abus COWM300 User manual

Abus
Abus FU 8230 User manual

Abus
Abus GBM7300W User manual

Abus
Abus Secvest 2WAY User manual

Abus
Abus FUWM30000 User manual

Abus
Abus 56829 9 User manual

Abus
Abus FUEM30000 User manual