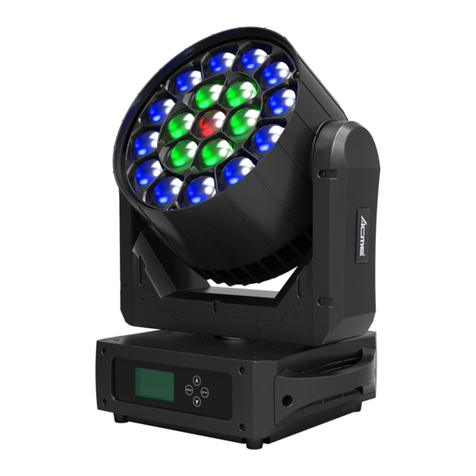
ACME CM-70Z User manual

CM‐70Z
UserManual
Pleasereadtheinstructioncarefullybeforeuse

1A
CONTENTS
1.SafetyInstructions....................................................................................................2
2.TechnicalSpecifications ............................................................................................3
3.HowToSetTheUnit .................................................................................................4
3.1ControlPanel ......................................................................................................4
3.2MainFunction ....................................................................................................5
3.3HomePositionAdjustment...............................................................................11
4.HowtoControltheUnit .........................................................................................12
4.1Master/SlaveBuiltInPreprogrammedFunction ..............................................12
4.2DMXController.................................................................................................12
4.3DMX512Configuration ....................................................................................13
5.DMX512Connection ..............................................................................................15
6.Troubleshooting......................................................................................................16
7.FixtureCleaning......................................................................................................17

2A
1.SafetyInstructions
WARNING
PleasekeepthisUserGuideforfutureconsultation.Ifyouselltheunittoanotheruser,besure
thattheyalsoreceivethisinstructionbooklet.
yPleaseunpackandcheckcarefullythereisnotransportationdamagebeforeusingtheunit.
yBeforeoperating,ensurethatthevoltageandfrequencyofpowersupplymatchthepower
requirementsoftheunit.
yIt’simportanttogroundtheyellow/greenconductortoearthinordertoavoidelectricshock.
yTheunitisforindooruseonly.Useonlyinadrylocation.
yTheunitmustbeinstalledinalocationwithadequateventilation,atleast50cmfromadjacent
surfaces.Besurethatnoventilationslotsareblocked.
yPleasedisconnectmainpowerbeforereplacementorservicing.
yPleasemakesuretherearenoflammablematerialsclosetotheunitwhileoperatingasitisfire
hazard.
yPleaseusesafetycablewhenfixesthisunit.DONOThandletheunitbytakingitsheadonly,but
alwaysbytakingitsbase.
yMaximumambienttemperatureisTa:40℃.DONOToperateitwherethetemperatureishigher
thanthis.
yUnitsurfacetemperaturemayreachupto75℃.DONOTtouchthehousingbare‐handduringits
operation.Turnoffthepowerandallowabout15minutesfortheunittocooldownbefore
replacingorserving.
yIntheeventofseriousoperatingproblem,stopusingtheunitimmediately.Nevertrytorepair
theunitbyyourself.Repairscarriedoutbyunskilledpeoplecanleadtodamageormalfunction.
Pleasecontactthenearestauthorizedtechnicalassistancecenter.Alwaysusethesametype
spareparts.
yDONOTtouchanycablesduringoperationashighvoltagemightbecausingelectricshock.
Pleasereadtheinstructioncarefullywhichincludesimportant
informationabouttheinstallation,usageandmaintenance.

3A
Warning:
yTopreventorreducetheriskofelectricalshockorfire,donotexposetheunittorainor
moisture.
yThehousing,thelenses,ortheultravioletfiltermustbereplacediftheyarevisiblydamaged.
Caution:
Therearenouserserviceablepartsinsidetheunit.DONOTopenthehousingorattemptany
repairsyourself.Intheunlikelyeventyourunitmayrequireservice,pleasecontactyournearest
dealer.
Installation:
TheunitshouldbemountedviaitsOmegaQuickReleaseClampbracket.Alwaysensurethatthe
unitisfirmlyfixedtoavoidvibrationandslippingwhileoperating.Makesurethatthestructure
towhichyouareattachingtheunitissecureandisabletosupportaweightof10timesofthe
fixturesweight.Alsoalwaysuseasafetycablethatcanhold12timesoftheweightoftheunit
wheninstallingthefixture.
Theequipmentmustbeinstalledbyprofessionals.Itmustbefixedinaplacewhereisoutofthe
reachofpeopleandnoonecanpassbyorunderit.
2.TechnicalSpecifications
Feathers:
◇Pan/Tilt:540°/220°
◇3operationmodes:DMX,Master/Slave,SoundActive
◇DMXchannel:14Channel
◇0~100%smoothdimming
◇Variablestrobeeffects
◇HighpowerLEDmovingwashwithzoom
◇LCDDisplayforeasynavigation

4A
Specification:
◇PowerVoltage:AC100‐240V,50/60HZ
◇PowerConsumption:105W
◇PowerCableDaisyChains:8FixturesMax.(230V,50Hz)
4FixturesMax.(120V,60Hz)
◇LightSource:7x10WOSRAMOSTARRGBWLED
◇Beamangle:10°~60°
◇Weight:6.2Kgs
◇Dimension:267x163x321mm
3.HowToSetTheUnit
3.1ControlPanel
1.FunctionDisplay:
Toshowthevariousmenusandtheselectedfunctions;

5A
2.LED:
DMXOnDMXinputpresent
MASTEROnMasterMode
SLAVEOnSlaveMode
SOUNDFlashingSoundactivation
3.Button:
MENUToselecttheprogrammingfunctions
DOWNTogobackwardintheselectedfunctions
UPTogoforwardintheselectedfunctions
ENTERToconfirmtheselectedfunctions
4.MAINSIN:PowerConconnectionfrommainpowersupply
5.MAINSOUT:PowerConloopconnectionformainpowersupplytothenextunit
6.Fuse(T6.3A):Protectstheunitfromover‐voltageorshortcircuit
7.ONLYFORREMOTECONTROL:ConnectswiththeoptionalCA‐8tocontroltheunit
8.DMXOUT:DMX512link,use3‐pinXLRcabletolinkthenextunitandoutputDMXsignal
9.DMXIN:DMX512link,use3‐pinXLRcabletolinktheunitandtheDMXcontroller
3.2MainFunction
Toselectanyofthegivenfunctions,presstheMENUbuttonuptotherequiredselectionasshown
onthedisplay.SelectthefunctionbytheENTERbuttonandthedisplaywillblink.Usethe
DOWN/UPbuttontochangethemode.Oncetherequiredmodehasbeenselected,pressthe
ENTERbuttontosetup,togobacktothefunctionswithoutanychangepresstheMENUbutton
again.PressandholdtheMENUbuttonforaboutonesecondorwaitforoneminutetoexitthe
menumode.
Themainfunctionsareshownbelow:

6A

7A
DMXAddress
ToselectDMXAddress,presstheENTERbuttontoshowtheDMXADDRESSonthedisplay.Use
theDOWN/UPbuttontoadjusttheaddressfrom001to512.Oncetheaddresshasbeenselected,
presstheENTERbuttontosetup,togobacktothefunctionswithoutanychangepresstheMENU
buttonagain.PressandholdtheMENUbuttonforaboutonesecondorwaitforoneminuteto
exitthemenumode.
ShowMode
ToselectShowMode,presstheENTERbuttontoshowtheSHOWMODEonthedisplay.Usethe
DOWN/UPbuttontoselecttheShow1,Show2,Show3orShow4mode.Oncethemodehas
beenselected,presstheENTERbuttontosetup,togobacktothefunctionswithoutanychange
presstheMENUbuttonagain.PressandholdtheMENUbuttonforaboutonesecondorwaitfor
oneminutetoexitthemenumode.
SlaveMode
ToselectSlaveMode,presstheENTERbuttontoshowtheSLAVEMODEonthedisplay.Usethe
DOWN/UPbuttontoselecttheSlave1orSlave2mode.Oncethemodehasbeenselected,press
theENTERbuttontosetup,togobacktothefunctionswithoutanychangepresstheMENU
buttonagain.PressandholdtheMENUbuttonforaboutonesecondorwaitforoneminuteto
exitthemenumode.
DimmerCurve
ToselectDimmerCurve,presstheENTERbuttontoshowtheDIMMERCURVEonthedisplay.Use
theDOWN/UPbuttontoselecttheMode1,Mode2,Mode3orMode4.Oncethedimmermode
hasbeenselected,presstheENTERbuttontosetup,togobacktothefunctionswithoutany
changepresstheMENUbuttonagain.PressandholdtheMENUbuttonforaboutonesecondor
waitforoneminutetoexitthemenumode.

8A
Mode1(OpticallyLinear):
TheincreaseinlightintensityappearstobelinearasDMXvalueisincreased.
Mode2(SquareLaw):
Lightintensitycontrolisfineratlowlevelsandcoarserathighlevels.
Mode3(InverseSquareLaw):
Lightintensitycontroliscoarseratlowlevelsandfingerathighlevels.
Mode4(S‐cure):
Lightintensitycontrolisfingeratlowlevelsandhighlevelsandcoarseratmediumlevels.
SoundState
ToselectSoundState,presstheENTERbuttontoshowtheSOUNDSTATEonthedisplay.Usethe
DOWN/UPbuttontoselecttheOn(turnontheSoundMode)orOff(SoundModeoff).Oncethe
modehasbeenselected,presstheENTERbuttontosetup,togobacktothefunctionswithoutany
changepresstheMENUbuttonagain.PressandholdtheMENUbuttonforaboutonesecondor
waitforoneminutetoexitthemenumode.
SoundSense
ToselectSoundSense,presstheENTERbuttontoshowtheSOUNDSENSEonthedisplay.Usethe
DOWN/UPbuttontoadjustthesensitivitylevel,thesensitivitylevelcanbeadjustedbetween0
(thelowest)and100(mostsensitive).PressandholdtheMENUbuttonforaboutonesecondor
waitforoneminutetoexitthemenumode.
BlackOut
ToselectBlackOut,presstheENTERbuttontoshowtheBLACKOUTonthedisplay.Usethe
DOWN/UPbuttontoselecttheYes(blackout)orNo(normal).Onceselected,presstheENTER
buttontosetup,togobacktothefunctionswithoutanychangepresstheMENUbuttonagain.

9A
PressandholdtheMENUbuttonforaboutonesecondorwaitforoneminutetoexitthemenu
mode.
BackLight
ToselectBackLight,presstheENTERbuttontoshowtheBACKLIGHTonthedisplay.Usethe
DOWN/UPbuttontoselecttheOn(LEDdisplayalwayson)orOff(LEDdisplayoffwhennotuse).
Onceselected,presstheENTERbuttontosetup,togobacktothefunctionswithoutanychange
presstheMENUbuttonagain.PressandholdtheMENUbuttonforaboutonesecondorwaitfor
oneminutetoexitthemenumode.
PanInverse
ToselectPanInverse,presstheENTERbuttontoshowthePANINVERSEonthedisplay.Usethe
DOWN/UPbuttontoselecttheYes(paninversion)orNo(normal)mode.Oncethemodehas
beenselected,presstheENTERbuttontosetup,togobacktothefunctionswithoutanychange
presstheMENUbuttonagain.PressandholdtheMENUbuttonforaboutonesecondorwaitfor
oneminutetoexitthemenumode.
TiltInverse
ToselectTiltInverse,presstheENTERbuttontoshowtheTILTINVERSEonthedisplay.Usethe
DOWN/UPbuttontoselecttheYes(tiltinversion)orNo(normal)mode.Oncethemodehasbeen
selected,presstheENTERbuttontosetup,togobacktothefunctionswithoutanychangepress
theMENUbuttonagain.PressandholdtheMENUbuttonforaboutonesecondorwaitforone
minutetoexitthemenumode.
FunctionDelay
ToselecttheFunctionDelay,presstheENTERbuttontoshowtheFUNCTIONDELAYonthedisplay.
UsetheDOWN/UPbuttontoselectthenoDelayor1SDelay,2SDelay,3SDelay(waitfor1/2/3
secondsbeforethesefunctionsof14CHareactivated/deactivated).Onceselected,pressthe
ENTERbuttontosetup,togobacktothefunctionswithoutanychangepresstheMENUbutton
again.PressandholdtheMENUbuttonforaboutonesecondorwaitforoneminutetoexitthe
menumode.

10A
WhiteBalance
ToselectWhiteBalance,presstheENTERbuttontoshowtheWHITEBALANCEonthedisplay.Use
theDOWN/UPbuttontoselecttheRedorGreen,Blue.Oncethemodehasbeenselected,press
theENTERbuttontosetup,usetheDOWN/UPbuttontoadjustthevalue(125~255).Once
selected,presstheENTERbuttontosetup,gobacktothefunctionswithoutanychangepressthe
MENUbuttonagain.PressandholdtheMENUbuttonforaboutonesecondorwaitforone
minutetoexitthemenumode.
ManualTest
ToselectManualTest,presstheENTERbuttontoshowtheMANUALTESTonthedisplay.Usethe
DOWN/UPbuttontoselectthePan/Tilt/Red/Green/Blue/White/Zoom/DimmerorStrobe.Once
youfindafunctionorcoloryouwishtotest,presstheENTERbuttonandusetheDOWN/UP
buttontoadjustthevalue(000~255).Oncethemodehasbeenselected,presstheENTERbutton
tosetup,gobacktothefunctionswithoutanychangepresstheMENUbuttonagain.Pressand
holdtheMENUbuttonforaboutonesecondorwaitforoneminutetoexitthemenumode.
AutoTest
ToselectAutoTest,presstheENTERbuttonandtheunitwillrunself‐testbybuilt‐inprogram.To
gobacktothefunctionspresstheMENUbuttonagain.PressandholdtheMENUbuttonabout
onesecondorwaitforoneminutetoexitthemenumode.
Temp.
ToselectTemp.,presstheENTERbuttonandthedisplaywillshowthecurrenttemperatureofthe
unit.Whenthetemperatureisunder60℃,thefixturewillworknormally;whenit’sbetween65
℃and75℃,thefixturewillreducethepoweroutput;whenitreach75℃orhigher,theLEDwill
beOFF.TogobacktothefunctionspresstheMENUbuttonagain.PressandholdtheMENU
buttonforaboutonesecondorwaitforoneminutetoexitthemenumode.
FixtureTime
ToselectFixtureTime,presstheENTERbuttonandthedisplaywillshowthenumberofworking
hoursoftheunit.TogobacktothefunctionspresstheMENUbuttonagain.Pressandholdthe

11A
MENUbuttonaboutonesecondorwaitforoneminutetoexitthemenumode.
FirmwareVersion
ToselectFirmwareVersion,presstheENTERbuttonandthedisplaywillshowtheversionof
softwareoftheunit.TogobacktothefunctionspresstheMENUbuttonagain.Pressandholdthe
MENUbuttonforaboutonesecondorwaitforoneminutetoexitthemenumode.
PROdefaults
ToselectPROdefaults,presstheENTERbuttontoshowthePRODEFAULTSonthedisplay.Usethe
DOWN/UPbuttontoselecttheYes(runbuilt‐inprogramtosetthefixturetoPRODefaults
settings)orNo.PresstheENTERbuttontosetup,togobacktothefunctionswithoutanychange
presstheMENUbuttonagain.PressandholdtheMENUbuttonforaboutonesecondorwaitfor
oneminutetoexitthemenumode.
Reset
ToselectReset,presstheENTERbuttontoshowtheRESETonthedisplayandallchannelsofthe
unitwillreturntotheirstandardposition.PressandholdtheMENUbuttonforaboutonesecond
orwaitforoneminutetoexitthemenumode.
3.3HomePositionAdjustment
Inthemainfunctions,holdtheENTERbuttonforatleast3secondstogointooffsetmode,usethe
DOWN/UPbuttonuptoselectthePanOffset,TiltOffsetorZoomOffset,andpressingtheENTER
buttontoconfirm.ThenusetheDOWN/UPbuttontoadjustthehomepositionofthePan,Tilt,
andZoom.Oncethepositionhasbeenselected,presstheENTERbuttontosetup,togobackto
thefunctionswithoutanychangepresstheMENUbuttonagain.PressandholdtheMENUbutton
foraboutonesecondorwaitforoneminutetoexitthemenumode.

12A
4.HowtoControltheUnit
Youcanoperatetheunitintwoways:
1.Master/slavebuilt‐inpreprogramfunction
2.UniversalDMXcontroller
YoudonotneedtoturntheunitoffwhenyouchangetheDMXaddress,thenewDMXaddress
settingwilltakeeffectimmediately.Everytimeyouturntheuniton,itwillshow“CM‐70Z”onthe
displayandmoveallthemotorstotheir‘home’positionandyoumayhearsomenoisesforabout
20seconds.AfterthattheunitwillbereadytoreceiveDMXsignalorrunthebuiltinprograms.
4.1Master/SlaveBuiltInPreprogrammedFunction
Bylinkingtheunitsinmaster/slaveconnection,thefirstunitwillcontroltheotherunitstogivean
automatic,soundactivated,synchronizedlightshow.Thisfunctionisgoodwhenyouwantan
instantshow.YouhavetosetthefirstunitinmastermodeShowModeandselectshow1orshow
2orshow3orshow4mode.ItsDMXinputjackwillhavenothingpluggedintoit,anditsmaster
LEDwillbeconstantlyonandsoundLEDwillflashtothemusic.Theotherunitswillhavetosetin
slavemodeandselectSlave1(normal)orSlave2(2lightshow)mode,TheirDMXcablesplugged
intotheDMXinputjacks(daisychain)andtheslaveledlightswillconstantlyon.
2‐lightshow
Inslavemode,Slave1meanstheunitworksnormallyandSlave2means2‐lightshow.Inorderto
createagreatlightshow,youcansetSlave2onthesecondunittogetcontrastmovementtoeach
other,evenifyouhavetwounitsonly.
4.2DMXController
ByusingauniversalDMXcontrollertocontroltheunits,youwillneedtosetDMXaddressfrom1
to512sothattheunitscanreceiveDMXsignal.
PresstheMENUbuttonuptowhentheDMXAddressisshowingonthedisplay.PresstheENTER
buttonandthedisplaywillblink.UsetheDOWN/UPbuttontochangetheDMX512address.Once
theaddresshasbeenselected,presstheENTERbuttontosetup,togobacktothefunctions
withoutanychangepresstheMENUbuttonagain.PressandholdtheMENUbuttonaboutone

13A
secondorwaitforoneminutetoexitthemenumode.
PleaserefertothefollowingdiagramtoaddressyourDMX512channelforthefirst4units:
ChannelmodeUnit1
Address
Unit2
Address
Unit3
Address
Unit4
Address
14channels1152943
4.3DMX512Configuration
14ChannelsMode:
CHANNELVALUEFUNCTION
1000‐255PAN
2000‐255PANFINE
3000‐255TILT
4000‐255TILTFINE
5
000‐255
PAN/TILTSPEED
fastslow
6
000‐009
010‐014
015‐255
SPECIALFUNCTIONS
Nofunction
Reset
Nofunction
7
000‐255
DIMMER
0%~100%
8
000‐019
020‐024
025‐064
065‐069
070‐084
085‐089
090‐104
105‐109
110‐124
125‐129
130‐144
145‐149
150‐164
165‐169
170‐184
185‐189
SHUTTER
Closed
Open
Strobe1(fastslow)
Open
Strobe2:openingpulse(fastslow)
Open
Strobe3:closingpulse(fastslow)
Open
Strobe4:randomstrobe(fastslow)
Open
Strobe5:randomopeningpulse(fastslow)
Open
Strobe6:randomclosingpulse(fastslow)
Open
Strobe7:burstpulse(fastslow)
Open

14A
190‐204
205‐209
210‐224
225‐229
230‐244
245‐255
Strobe8:randomburstpulse(fastslow)
Open
Strobe9:sinewave(fastslow)
Open
Strobe10:burst(fastslow)
Open
9000‐255RED(0%100%)
10000‐255GREEN(0%100%)
11000‐255BLUE(0%100%)
12000‐255WHITE(0%100%)
13
000‐009
010‐014
015‐019
020‐024
025‐029
030‐034
035‐039
040‐044
045‐049
050‐054
055‐059
060‐064
065‐069
070‐074
075‐079
080‐084
085‐089
090‐094
095‐099
100‐104
105‐109
110‐114
115‐119
120‐124
125‐129
130‐134
135‐139
140‐144
145‐149
150‐154
155‐159
160‐164
COLORMACRO
Open
LEE790–MoroccanPink
LEE157–Pink
LEE332–SpecialRosePink
LEE328–FolliesPink
LEE345–FuchsiaPink
LEE194–SurprisePink
LEE181–CongoBlue
LEE071–TokyoBlue
LEE120–DeepBlue
LEE079–JustBlue
LEE132–MediumBlue
LEE200–DoubleCTBlue
LEE161–StateBlue
LEE201–FullCTBlue
LEE202–HalfCTBlue
LEE117–SteelBlue
LEE353–LighterBlue
LEE118–LightBlue
LEE116–MediumBlueGreen
LEE124–DarkGreen
LEE139–PrimaryGreen
LEE089–MossGreen
LEE122–FernGreen
LEE738–JASGreen
LEE088–LimeGreen
LEE100–SpringYellow
LEE104–DeepAmber
LEE179–ChromeOrange
LEE105–Orange
LEE021–GoldAmber
LEE778–MillenniumGold

15A
165‐169
170‐174
175‐179
180‐201
202‐207
208‐229
230‐234
235‐239
240‐244
245‐249
250‐255
LEE135–DeepGoldAmber
LEE164–FlameRed
Open
Colorwheelrotationeffect
Clockwise,fastslow
Stop(thiswillstopwhereverthecolorisatthetime)
Counter‐clockwise,slowfast
Open
Randomcolor
Fast
Medium
Slow
Open
14
000‐255
ZOOM
widenarrow
5.DMX512Connection
TheDMX512iswidelyusedinintelligentlightingcontrol,withamaximumof512channels.

16A
1. Ifyouusingacontrollerwith5pinsDMXoutput,youneedtousea5to3pinadapter‐cable.
2. ThelastunitsDMXcablehastobeterminatedwitha120ohm1/4 W resistorbetweenpin
2(DMX‐)andpin3(DMX+)ofa3‐pinXLR‐plugandplugitintheDMX‐outputofthelastunit.
3. Connecttheunittogetherina`daisychain`byXLRplugfromtheoutputoftheunittothe
inputofthenextunit.Thecablecannotbranchedorsplittoa`Y`cable.DMX512isavery
high‐speedsignal.Inadequateordamagedcables,solderedjointsorcorrodedconnectorscan
easilydistortthesignalandshutdownthesystem.
4. TheDMXoutputandinputconnectorsarepass‐throughtomaintaintheDMXcircuit,when
oneoftheunits’powerisdisconnected.
5. Eachfixtureunitneedstohaveanaddresssettoreceivethedatasentbythecontroller.The
addressnumberisbetween0‐511(usually0&1areequalto1).
6. TheendoftheDMX512systemshouldbeterminatedtoreducesignalerrors.
7. 3pinXLRconnectorsaremorepopularthan5pinXLR.
3pinXLR:Pin1:GND,Pin2:Negativesignal(‐),Pin3:Positivesignal(+)
5pinXLR:Pin1:GND,Pin2:Negativesignal(‐),Pin3:Positivesignal(+),
Pin4/ P i n 5:Notused.
6.Troubleshooting
Followingareafewcommonproblemsthatmayoccurduringoperation.Herearesome
suggestionsforeasytroubleshooting:
A.Theunitdoesnotwork,nolightandthefandoesnotwork
1. Checktheconnectionofpowerandmainfuse.
2. Measurethemainsvoltageonthemainconnector.
3. CheckthepoweronLED.
B.NotrespondingtoDMXcontroller
1. DMXLEDshouldbeon.Ifnot,checkDMXconnectorsandcablestoseeiflinkproperly.
2. IftheDMXLEDisonandnoresponsetothechannel,checktheaddresssettingsand
DMXpolarity.

17A
3. IfyouhaveintermittentDMXsignalproblems,checkthepinsonconnectorsoronPCBofthe
unitorthepreviousone.
4. TrytouseanotherDMXcontroller.
5. CheckiftheDMXcablesrunnearorrunalongsidetohighvoltagecablesthatmaycause
damageorinterferencetoDMXinterfacecircuit.
C.Someunitsdon’trespondtotheeasycontroller
1. YoumayhaveabreakintheDMXcabling.ChecktheLEDfortheresponseofthemaster/
slavemodesignal.
2. WrongDMXaddressintheunit.Settheproperaddress.
D.Noresponsetothesound
1. MakesuretheunitdoesnotreceiveDMXsignal.
2. Checkmicrophonetoseeifitisgoodbytappingthemicrophone
3. MakesurethefixtureisnotsetintoBlackoutmode
E.Oneofthechannelsisnotworkingwell
1. ThesteppermotormightbedamagedorthecableconnectedtothePCBisbroken.
2. Themotor’sdriveIConthePCBmightbeoutofcondition.
7.FixtureCleaning
Thecleaningmustbecarriedoutperiodicallytooptimizelightoutput.Cleaningfrequency
dependsontheenvironmentinwhichthefixtureoperates:damp,smokyorparticularlydirty
surroundingcancausegreateraccumulationofdirtontheunit’soptics.
yCleanwithsoftclothusingnormalglasscleaningfluid.
yAlwaysdrythepartscarefully.
yCleantheexternalopticsatleastevery30days.

DeclarationofConformity
Wedeclarethatourproducts(lightingequipments)complywiththefollowing
specificationandbearsCEmarkinaccordancewiththeprovisionofthe
ElectromagneticCompatibility(EMC)Directive89/336/EEC.
EN55103‐1:2009;EN55103‐2:2009;EN62471:2008;
EN61000‐3‐2:2006+A1:2009+A2:2009;EN61000‐3‐3:2008.
&
HarmonizedStandard
EN60598‐1:2008+All:2009;EN60598‐2‐17:1989+A2:1991;EN62471:2008;
EN62493:2010
Safetyofhouseholdandsimilarelectricalappliances
Part1:Generalrequirements

Innovation,Quality,Performance
Table of contents
Other ACME Light Fixture manuals

ACME
ACME GLAMOUR 700Z RGBY User manual

ACME
ACME Xperior 5R BEAM F User manual

ACME
ACME MH-6616S User manual

ACME
ACME Xperior 5R BEAM F User manual

ACME
ACME Aeco 20 User manual

ACME
ACME Led Strobe 20 LED-ST20 User manual

ACME
ACME LPB-4P User manual

ACME
ACME XP-5000 SZ NF User manual

ACME
ACME LED BEAM 350 User manual

ACME
ACME COOLIE 545 User manual