manuals.online logo
Brands
  1. Home
  2. •
  3. Brands
  4. •
  5. ADTRAN
  6. •
  7. Gateway
  8. •
  9. ADTRAN 424RG ONT User manual

ADTRAN 424RG ONT User manual

quickStart
ABOUT THIS GUIDE
Once the 424RG ONT is installed and operational, you may want to make custom modifications to your network setup. This guide
provides step-by-step instructions on how to complete the following tasks.
■Logging in to the 424RG
■Setting or Changing Your 424RG’s Wireless Service
■Setting or Changing Your 424RG’s Wireless Security Options
■How to Connect to 2.4 or 5.0GHz Wireless Service Using WPS
■Enabling Guest SSIDs
NOTE: Before you can customize your 424RG, you will need to log in to the 424RG
Web Graphical User Interface (GUI).
BEFORE YOU BEGIN
Before you begin, make certain of the following:
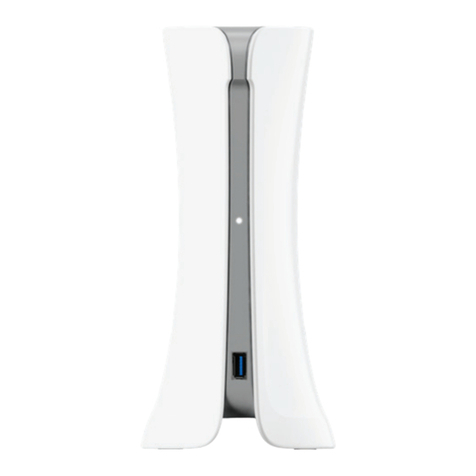
CAUTION: Never set the 424RG on its side while powered up. This may cause
overheating and damage the unit. Always use the stand that was provided during the
initial installation.
■The 424RG must be operational. It must be connected to your computer and the
power must be on.
■The 424RG must have access to the Internet.
■Data, Video, and Voice (optionally) must already be provisioned. The 424RG must
have been provisioned by the technician that installed the unit. This provisioning
enables you to receive data, voice, and video from the Internet, although voice is
optional and not required. These services are often referred to as “Triple Play”
service options by your service provider.
1
2
2.4
5.0
1
2
3
4
WPS
Customizing the
424 Residential Gateway ONT Issue Date: November 2015
Document P/N: 61287781F1-13A
261287781F1-13A
LOGGING IN TO THE 424RG
Before you can make any changes to your 424RG, you must log in using the 424RG Graphical User Interface (GUI). This interface is a
user-friendly way to make the desired changes.
NOTE: The Logout option on the side menu of the GUI will not log you out of the 424RG GUI. This option is intended for service techni-
cians only. To exit the 424RG GUI, select the “X” at the top, right of your Internet browser to close the Internet window entirely.
To log in to the 424RG, complete the following procedure:
1. Turn on your computer.
2. Access the Internet using the Internet Browser software on your computer.
3. The default IP address (192.168.1.254) works with all Internet WEB Browsers. This is an Internet address that is pre-set in the
424RG.
4. Type the IP address into the WEB Browser field; then, press the ENTER key. This displays the customer log on (Windows Security)
screen (Figure 1).
Figure 1. Windows Security Log In Screen
5. In the first field, enter user (this is the default User Name that was pre-set in the 424RG).
6. In the second field, enter user (this is the default Password that was pre-set in the 424RG).
7. Press OK. This displays the Device Info Screen (Figure 2 on page 3).
192.168.1.254
user
user
61287781F1-13A 3
The Device Info screen is the first screen that appears after you log in to the 424RG.This screen provides overall information for the
424RG and the WAN (Wide Area Network) connection status.
The upper box contains information that is stored on the 424RG. The lower box contains information retrieved from the DHCP server
when the IP address is assigned to the 424RG.
Figure 2. Device Info Screen
To continue provisioning the 424RG, select Wireless from the side menu. This displays Figure 3 on page 4.
Device Info
Advanced Setup
Wireless
Management
Logout
461287781F1-13A
SETTING OR CHANGING YOUR 424RG’SWIRELESS SERVICE
Your 424RG is factory-provisioned for both the 2.4GHZ service and the faster 5.0GHz service. Use the following procedures to reset or
customize your wireless service.
NOTE:
■The wireless setting of the 424RG must match the wireless setting of any wireless device that connects to the 424RG
■If you configure the 424RG from a wireless computer and you change the router SSID or security setting, you will lose your wireless
connection when you click Save. You must then change your computer’s wireless settings to match the 424RG’s new settings. To
avoid this situation, use a computer that is directly connected to the 424RG using an Ethernet cable.
Setting or Changing Your 2.4GHz Wireless Service
Follow the steps below to set up or change your 2.4GHz wireless service.
1. Select Wireless and 2.4GHz from the side menu; This displays the Wireless 2.4GHz - Basic menu (Figure 3).
2. By default, Wireless service is Enabled.
3. If you want to provision a new 2.4GHz SSID name, highlight the entry in the window next to SSID and enter a new SSID
designation. (Note: An SSID designation should not exceed 32 characters in length and is case-sensitive.)
4. Select Apply/Save.
Figure 3. Wireless 2.4GHz - Basic
ADTN2.4_Guest1
ADTN2.4_Guest3
ADTN2.4_Guest2
Wireless 2.4 GHz - Basic
This page allows you to congure basic features of the wireless interface. You can enable or disable the wireless LAN interface, hide the network
from active scans, set the wireless newtork name (also known as SSID) and restrict the channel set based on country requirements.
Click “Apply/Save”to congure the basic wireless options.
ADTN2.4G
ADTN2.4G_Guest1
ADTN2.4G_Guest2
ADTN2.4G_Guest3
Logout
61287781F1-13A 5
Setting or Changing Your 5.0GHz Wireless Service
Follow the steps below to set or customize your 5.0GHz wireless service.
1. From the side menu, select Wireless and 5.0GHz; This displays the Enable 5.0GHz Wireless Service menu (Figure 4).
2. By default, Wireless Service is Enabled.
3. If you want to provision a new 5.0GHz SSID name, highlight the entry in the window next to SSID and enter a new SSID
designation. (Note: The SSID designation should not exceed 32 characters in length and is case-sensitive.)
4. If you want to provision a new SSID for Video Service, simply highlight the entry in the SSID field and enter a new SSID
designation. The SSID designation should not exceed 32 characters in length and is case-sensitive.
5. Select Apply/Save.
Figure 4. Wireless 5.0GHz - Basic
This page allows you to congure basic features of the wireless LAN interface. You can enable or disable the wirless LAN interface,
set the wireless network name (also known as SSID) and restrict the channel set based on country requirements.
Click “Apply/Save”to congure the basic wireless options.
Logout
661287781F1-13A
SETTING OR CHANGING YOUR 424RG’SWIRELESS SECURITY OPTIONS
Use the following procedures to change or modify the security options of the wireless portion of your 424RG.
NOTE:
■The wireless setting of the 424RG must match the wireless setting of any wireless device that connects to the 424RG.
■For a wireless connection, the 424RG and each wireless computer or device must use the same SSID. This is often referred to as the
“network name”. The SSID is set to a pre-set factory default. This Default SSID is unique for each 424RG. The SSID can be found
with the information that accompanied the 424RG.
■If you configure the 424RG from a wireless computer and you change the router’s SSID, or security setting, you will lose your wireless
connection when you click Save. You must then change your computer’s wireless settings to match the 424RG’s new settings. To
avoid this situation, use a computer that is connected to the 424RG via an Ethernet cable.
Setting or Changing Security for Your 2.4GHz Wireless Service
To set or change the securities for your 2.4GHz Wireless Service, complete the following steps:
1. With Figure 4 on page 5 displayed, select 2.4GHz and then Security; Figure 5 will be displayed.
2. In the window adjacent to Enable WPS, select the check mark so Enable is displayed. The screen will change to include Add
Client provisioning. Do Not change anything under the “Add Client” option.
3. If you want to change the Network Authentication type for 2.4GHz, select a new value from the drop-down list.
4. In the window adjacent to WPA/WAPI passphrase, enter a password that will be used for this wireless service.
5. Select Apply/Save.
Figure 5. Wireless 2.4GHz - Security
WPA/WAPI passphrase
WPA Group Rekey Interval
WPA/WAPI Encryption
WEP Encryption
Wireless 2.4Ghz - - Security
This page allows you to congure security features of the wireless LAN Interface
You may setup conguration manually,
OR
through WiFi Protected Setup (WPS)
Note: When both STA PIN and authorized MAC are empty, PBC is used. If Hide Access Point enabled or MAC list is empty
with “allow”chosen, WPS2 will be disabled
WPS Setup
You can set the network authentication method, selecting data encryption
specify whether a network key is required to authenticate to this wireless network and specify the encryption strength.
Click “Apply/Save” when done.
Select SSID
Network Authentication
Logout
WPA/WAPI passphrase:
61287781F1-13A 7
Setting or Changing Security for Your 5.0GHz Wireless Service
To set or change the security for your 5.0GHz Wireless Service, complete the following steps
1. With Figure 4 on page 5 displayed, select 5.0GHz and then Security; Figure 6 will be displayed.
2. WPS should be Enabled (set as Factory Default). If it is not, in the window adjacent to Enable WPS, select the check mark so
Enable is displayed.
3. If you want to change the Network Authentication type for 5.0GHz, select a new value from the drop-down list.
4. In the window adjacent to WPA/WAPI passphrase, enter a password that will be used for this wireless service.
5. Select Apply/Save.
Figure 6. Wireless 5.0GHz - Security
Select SSID
Network Authentication
WPA/WAPI passphrase
Logout
861287781F1-13A
HOW TO CONNECT TO 2.4 OR 5.0GHZWIRELESS SERVICE USING WPS
Wi-Fi Protected Setup (WPS) is a standard means for creating a secure connection between your gateway and various wireless devices.
Is is designed to simplify the connection process between theses devices.
Once WPS has been Enabled, you can use the WPS button to set either 2.4 or 5.0GHz wireless service. To enable these services,
perform one of the following:
2.4GHz Service
If you have devices that support WPS, press and hold the WPS button for 5 or more seconds to automatically configure wireless security
for your network.
5.0GHz Service
If you have devices that support WPS, press and hold the WPS button for 1 or more seconds to automatically configure wireless security
for your network.
Figure 7. WPS Location
1
2
2.4
5.0
1
2
3
4
WPS
61287781F1-13A 9
ENABLING GUEST SSIDS
To allow a guest to have access to your network, the 424RG provides “guest” settings for the network/SSID. This enables your guest
access to the Internet while denying them access to your local network. To enable this setting, complete the following steps:
NOTE:
Guest SSIDs can only be enabled for the 2.4GHz Service.
Enabling a Guest SSID for Your 2.4GHz Wireless Service
To enable a guest SSID for your 2.4GHz Wireless Service, complete the following steps:
1. On the side menu, select the 2.4GHz option and Figure 8 will be displayed.
2. If you want to provision a new SSID name for a Guest SSID, select the Enabled check box adjacent to the first entry in the SSID
column in the “Wireless - Guest/Virtual Access” Points” table. For example, the Guest SSID would be ADTN2.4G_Guest1.
3. Select Apply/Save.
Figure 8. Wireless 2.4GHz - Basic
ADTN2.4_Guest1
ADTN2.4_Guest3
ADTN2.4_Guest2
Wireless 2.4 GHz - Basic
This page allows you to congure basic features of the wireless interface. You can enable or disable the wireless LAN interface, hide the network
from active scans, set the wireless newtork name (also known as SSID) and restrict the channel set based on country requirements.
Click “Apply/Save”to congure the basic wireless options.
ADTN2.4G
ADTN2.4G_Guest1
ADTN2.4G_Guest2
ADTN2.4G_Guest3
Logout
10 61287781F1-13A

Other ADTRAN Gateway manuals

ADTRAN 831-t5 User manual

ADTRAN

ADTRAN 831-t5 User manual

ADTRAN Type 400 User manual

ADTRAN

ADTRAN Type 400 User manual

ADTRAN jobAid 424RG3 User manual

ADTRAN

ADTRAN jobAid 424RG3 User manual

ADTRAN SDG-ST1 User manual

ADTRAN

ADTRAN SDG-ST1 User manual

ADTRAN jobAid+ Total Access 311 User manual

ADTRAN

ADTRAN jobAid+ Total Access 311 User manual

ADTRAN NetVanta 6310 User manual

ADTRAN

ADTRAN NetVanta 6310 User manual

ADTRAN 324RG User manual

ADTRAN

ADTRAN 324RG User manual

ADTRAN SMART/RG SR555ac User manual

ADTRAN

ADTRAN SMART/RG SR555ac User manual

ADTRAN SmartRG SR400ac User manual

ADTRAN

ADTRAN SmartRG SR400ac User manual

ADTRAN SmartRG SR400ac User manual

ADTRAN

ADTRAN SmartRG SR400ac User manual

ADTRAN 8612 User manual

ADTRAN

ADTRAN 8612 User manual

ADTRAN 7310-8 User manual

ADTRAN

ADTRAN 7310-8 User manual

ADTRAN NetVanta 644 Manual

ADTRAN

ADTRAN NetVanta 644 Manual

ADTRAN 7310-8 User manual

ADTRAN

ADTRAN 7310-8 User manual

ADTRAN 4242908L1 User manual

ADTRAN

ADTRAN 4242908L1 User manual

ADTRAN SMART/RG SR905ac User manual

ADTRAN

ADTRAN SMART/RG SR905ac User manual

ADTRAN NetVanta 1355 User manual

ADTRAN

ADTRAN NetVanta 1355 User manual

ADTRAN NetVanta 6360 Manual

ADTRAN

ADTRAN NetVanta 6360 Manual

ADTRAN 6304W User manual

ADTRAN

ADTRAN 6304W User manual

ADTRAN SDX810-RG User manual

ADTRAN

ADTRAN SDX810-RG User manual

ADTRAN BroadCloud User manual

ADTRAN

ADTRAN BroadCloud User manual

ADTRAN 7310-8 User manual

ADTRAN

ADTRAN 7310-8 User manual

ADTRAN Total Access 916 Manual

ADTRAN

ADTRAN Total Access 916 Manual

ADTRAN Total Access 912 User manual

ADTRAN

ADTRAN Total Access 912 User manual

Popular Gateway manuals by other brands

OpenVox VoxStack Series user manual

OpenVox

OpenVox VoxStack Series user manual

RTA 460ESBM-N34 Product user guide

RTA

RTA 460ESBM-N34 Product user guide

tilgin HG2300 series quick guide

tilgin

tilgin HG2300 series quick guide

ZyXEL Communications ZyXEL ZyWALL 10W user guide

ZyXEL Communications

ZyXEL Communications ZyXEL ZyWALL 10W user guide

RTA 460ECETC-NNA4 Product user guide

RTA

RTA 460ECETC-NNA4 Product user guide

Machfu i-ALERT Series installation manual

Machfu

Machfu i-ALERT Series installation manual

DBL Technology HTM series user manual

DBL Technology

DBL Technology HTM series user manual

ICP DAS USA DGW-521 quick start guide

ICP DAS USA

ICP DAS USA DGW-521 quick start guide

XAVi AR396 user manual

XAVi

XAVi AR396 user manual

2N Telekomunikace ATEUS EasyGate user guide

2N Telekomunikace

2N Telekomunikace ATEUS EasyGate user guide

Pepperl+Fuchs VBG-PN-K20-DMD-EV installation instructions

Pepperl+Fuchs

Pepperl+Fuchs VBG-PN-K20-DMD-EV installation instructions

Danfoss CS10 technical information

Danfoss

Danfoss CS10 technical information

Harman AMX DR-GW1000 quick start guide

Harman

Harman AMX DR-GW1000 quick start guide

Technicolor - Thomson SpeedTouch 530 Quick installation guide

Technicolor - Thomson

Technicolor - Thomson SpeedTouch 530 Quick installation guide

UfiSpace S9502-16SMT Hardware installation guide

UfiSpace

UfiSpace S9502-16SMT Hardware installation guide

Magnum Energy MagWeb GT owner's manual

Magnum Energy

Magnum Energy MagWeb GT owner's manual

Synway SMGREC user manual

Synway

Synway SMGREC user manual

H3C ICG2000 Quick Start Installation

H3C

H3C ICG2000 Quick Start Installation

manuals.online logo
manuals.online logoBrands
  • About & Mission
  • Contact us
  • Privacy Policy
  • Terms and Conditions

Copyright 2025 Manuals.Online. All Rights Reserved.