manuals.online logo
Brands
  1. Home
  2. •
  3. Brands
  4. •
  5. AGFA
  6. •
  7. Medical Equipment
  8. •
  9. AGFA DX-D 100 User manual

AGFA DX-D 100 User manual

Getting started with DX-D 100 - Performing a DR exposure
0186C EN 20161007
DISPLACEMENT AND
POSITIONING
Before using DX-D 100, check the battery
levels on the control panel. If the red indicator
is blinking, operation is not allowed. In that
case, it is necessary to charge the batteries.
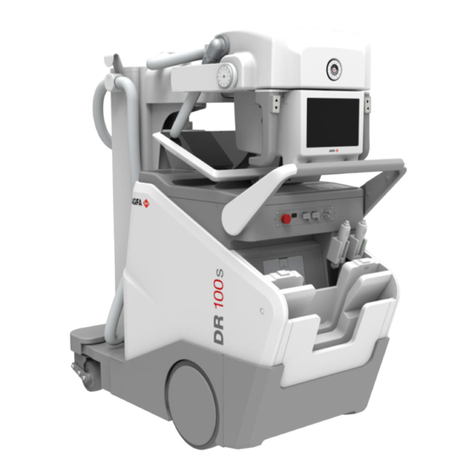
1 Drive the unit
Grip and hold the locking bar towards the handlebar.
Push the handlebar with both hands to drive forwards.
Release the locking bar to block motion.
2 Release the arm
Press the brake control at the tube-collimator handles
to release the arm from parking position.
Press and hold the brake control while using the
handles to rotate the column and move the arm
horizontally and vertically.
WARNING:
Monitor with special care the patient position
or anyone present, to avoid injury caused by
unit movements. Intravenous tubing,
catheters and other patient connected lines
should be routed away from moving
equipment.
3 Position the unit
Use the motion controls to adjust the position of the
unit with respect to the patient.
The four buttons on the tube-collimator handles control
the motion of each driving wheel (forwards/backwards).
1 2 3 4
1Backwards to the right
2Forwards to the right
3Forwards to the left
4Backwards to the left
4 Position the X-ray tube and
collimator
Use the tube-collimator handles to rotate the X-ray tube
on its transversal or horizontal axis. Use the collimator
handles to rotate the collimator on its vertical axis.
BASIC IMAGING
Note: If you use a wired network the network
cable must be plugged in to be able to query
the RIS or to send images.
5 Retrieve patient info
On the RIS, schedule the examinations.
In NX, query the RIS.
Define the patient info for the examination.
Start the exam.
6 Select the exposure
In NX, select the thumbnail for the exposure in the Image
Overview pane of the Examination window.
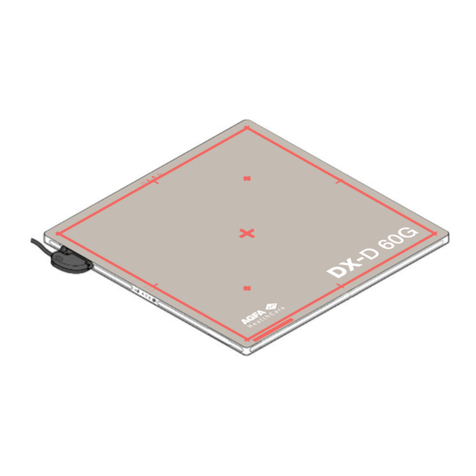
The DR Detector is activated. The DR Detector Switch
shows which DR Detector is active and shows its status.
The DX-D 100 software console is displayed and the
default X-ray exposure parameters for the selected
exposure are displayed.
Getting started with DX-D 100 - Performing a DR exposure
0186C EN 20161007
7 Prepare the exposure
Check the position of the X-ray unit and the patient.
WARNING:
Liquids ingressing the DR Detector may cause
malfunction and contamination.
If there is a chance that the detector comes in
contact with liquids (bodily fluids,
disinfectants,...), the DR Detector must be
wrapped in a protective plastic bag while
performing the examination.
Switch on the light localizer on the collimator.
If required, adapt collimation.
8 Check the exposure settings
On the NX application:
Check if the DR Detector Switch displays the name of
the DR Detector that is being used.
If a wrong DR Detector is displayed, select the right
DR Detector by clicking the drop down arrow on the DR
Detector Switch.
On a DR Detector that has a status indicator:
Check if the status of the DR Detector is ready for
exposure. If the status is not ready for exposure, the DR
Detector cannot be used for making an exposure.
On the software console:
Check if the exposure settings displayed on the
console are suitable for the exposure. If other exposure
values are required than those defined in the NX exam,
use the console to overwrite the default defined exposure
settings.
Check if the status of the DR Detector is ready for
exposure.
On the control panel:
Check if the led beacon light lights up green. This
indicates that the wireless DR Detector and the X-ray
generator are ready for making an exposure.
9 Execute the exposure
Take a safe distance from the X-ray tube.
CAUTION:
Excessive user or operator radiation exposure.
Always keep a distance of at least 2 meters
from the focal spot and X-ray beam, protect
body and do not expose hands, arms or other
parts of the body to the primary beam.
On the handswitch or on the remote control, press the
exposure button to execute the exposure.
The exposure is sent to NX.
WARNING:
The radiation indicator on the control console
lights up during exposure release.
CAUTION:
Do not select another thumbnail until the
preview image is visible in the active
thumbnail. The acquired image may be linked
to the wrong exposure.
In NX:
While the acquisition is ongoing, the X-ray on
indicator is displayed on the software console. The led
beacon light lights up yellow.
The image is acquired from the DR Detector and
displayed in the thumbnail.
The software console disappears.
If collimation is applied, the image is automatically
cropped at the collimation borders.
The actual X-ray exposure parameters are shown in
the Image Detail pane
10 Perform quality control
In NX:
Select the image on which quality control is to be
performed.
Prepare the image for diagnosis by using e.g. L/R
markers or annotations.
If the image is OK, send the image to a hardcopy
printer and/or PACS (Picture Archiving and
Communication System).
Other manuals for DX-D 100

2

Other AGFA Medical Equipment manuals

AGFA DR 100e User manual

AGFA

AGFA DR 100e User manual

AGFA CR MD1.0 GENERAL SET User manual

AGFA

AGFA CR MD1.0 GENERAL SET User manual

AGFA DR 800 User manual

AGFA

AGFA DR 800 User manual

AGFA DX-D 45C User manual

AGFA

AGFA DX-D 45C User manual

AGFA DR 100s User manual

AGFA

AGFA DR 100s User manual

AGFA DR 100e User manual

AGFA

AGFA DR 100e User manual

AGFA D2RS User manual

AGFA

AGFA D2RS User manual

AGFA DR 100e User manual

AGFA

AGFA DR 100e User manual

AGFA DR 100e User manual

AGFA

AGFA DR 100e User manual

AGFA DX-G User manual

AGFA

AGFA DX-G User manual

AGFA DRY 3.4 User manual

AGFA

AGFA DRY 3.4 User manual

AGFA DX-D 400 User manual

AGFA

AGFA DX-D 400 User manual

AGFA CR 30-X User manual

AGFA

AGFA CR 30-X User manual

AGFA CR 30-X User manual

AGFA

AGFA CR 30-X User manual

AGFA DX-D 300 User manual

AGFA

AGFA DX-D 300 User manual

AGFA WS-Motorized-T-001 User manual

AGFA

AGFA WS-Motorized-T-001 User manual

AGFA ADC Solo Guide

AGFA

AGFA ADC Solo Guide

AGFA CR 35-X User manual

AGFA

AGFA CR 35-X User manual

AGFA CRHD5.0 User manual

AGFA

AGFA CRHD5.0 User manual

AGFA 6005/100 6005/200 User manual

AGFA

AGFA 6005/100 6005/200 User manual

AGFA DX-D 400 User manual

AGFA

AGFA DX-D 400 User manual

AGFA CR User manual

AGFA

AGFA CR User manual

AGFA Drystar 4500 User manual

AGFA

AGFA Drystar 4500 User manual

AGFA DR 10s User manual

AGFA

AGFA DR 10s User manual

Popular Medical Equipment manuals by other brands

Esaote MyLabOmega Getting started

Esaote

Esaote MyLabOmega Getting started

TransMotion Medical TMM5-X Series Operation manual

TransMotion Medical

TransMotion Medical TMM5-X Series Operation manual

Cardinal Health NPWT PRO Quick reference guide

Cardinal Health

Cardinal Health NPWT PRO Quick reference guide

laerdal Resusci Junior Directions for use

laerdal

laerdal Resusci Junior Directions for use

Lightmed LightLink CXL Operator's manual

Lightmed

Lightmed LightLink CXL Operator's manual

Stryker InterPulse 0210 000 Series Instructions for use

Stryker

Stryker InterPulse 0210 000 Series Instructions for use

Planmeca PlanMill 60 S user manual

Planmeca

Planmeca PlanMill 60 S user manual

Boston Scientific LUX-Dx manual

Boston Scientific

Boston Scientific LUX-Dx manual

Stryker Power-PRO IT Cot 6516 Maintenance manual

Stryker

Stryker Power-PRO IT Cot 6516 Maintenance manual

Otto Bock 743L500 3D L.A.S.A.R. Posture Instructions for use

Otto Bock

Otto Bock 743L500 3D L.A.S.A.R. Posture Instructions for use

Tetcon 9OR0090145 product manual

Tetcon

Tetcon 9OR0090145 product manual

Bien-Air Dental 4VR 400 HOSES Instructions for use

Bien-Air Dental

Bien-Air Dental 4VR 400 HOSES Instructions for use

Veinlite LED+ manual

Veinlite

Veinlite LED+ manual

Smiths Medical CADD-Solis VIP Operator's manual

Smiths Medical

Smiths Medical CADD-Solis VIP Operator's manual

Beckman Coulter IM3632 manual

Beckman Coulter

Beckman Coulter IM3632 manual

Transmotion TMM Series troubleshooting guide

Transmotion

Transmotion TMM Series troubleshooting guide

Mindray Viewstation OR operating instructions

Mindray

Mindray Viewstation OR operating instructions

Aqua Phase AQ-2000 operating manual

Aqua Phase

Aqua Phase AQ-2000 operating manual

manuals.online logo
manuals.online logoBrands
  • About & Mission
  • Contact us
  • Privacy Policy
  • Terms and Conditions

Copyright 2025 Manuals.Online. All Rights Reserved.