
ENGLISH
Weleame
to
the
pbiwa
Steree
System
Congratulations
on
your
purchase
of
an
Aiwa
Stereo
System.
This
system's
CD
player
is
the
smailest
in
the
world
among
players
allowing
the
continuous
playing
of
five
discs.
Your
system
is
guaranteed
to
satisfy
your
needs
for
all
the
basic
audio
functions
you
had
expected
from
a
high
quality
Aiwa
system.
What's
more,
the
system
is
equipped
with
the
DOLBY
PRO
LOGIC
to
give
you
the
utmost
in
full-scale
Audio
&
Visual
entertainment.
With
these,
you
can
now
experience
the
same
listening
effects
found
in
a
movie
theater
or
concert
hall.
With
your
system,
sounds
will
take
on
a
“real-life”
presence
like
you
have
never
experienced
before.
Enjoy!
Check
your
system
and
accessories
CX-ZVM270
Compact
disc
stereo
cassette
receiver
SX-Z270
(L,
R)
Front
speakers
SX-C400
Center
SX-R230
Surround
speaker
speakers
FM
antenna
Operating
Instructions,
etc.
1
ENGLSH
TABLE
OF
CONTENTS
PREPARATIONS
PRECAUTIONS
..2cccc55cssces
cesectecceicetecctecccecindeattvadseneasiveansbanins
SETTING
UP
Qe
BEFORE
OPERATION
SETTING
THE
CLOCK
SOUND
SIMPLE
AUDIO
ADJUSTMENT
.........:ccsssssecsstecsersssssserentes
6
DSP
SURROUND
GRAPHIC
EQUALIZER
........ccsssssssesceocecssrereerestseesenstaenonses
7
RADIO
RECEPTION
MANUAL
TUNING
.......ccssssscesessorsesseceseorssoesstaseesessnnasonseese
8
PRESETTING
STATIONS
........cssssssssssssosensssensetseesneesensenses
8
TAPE
PLAYBACK
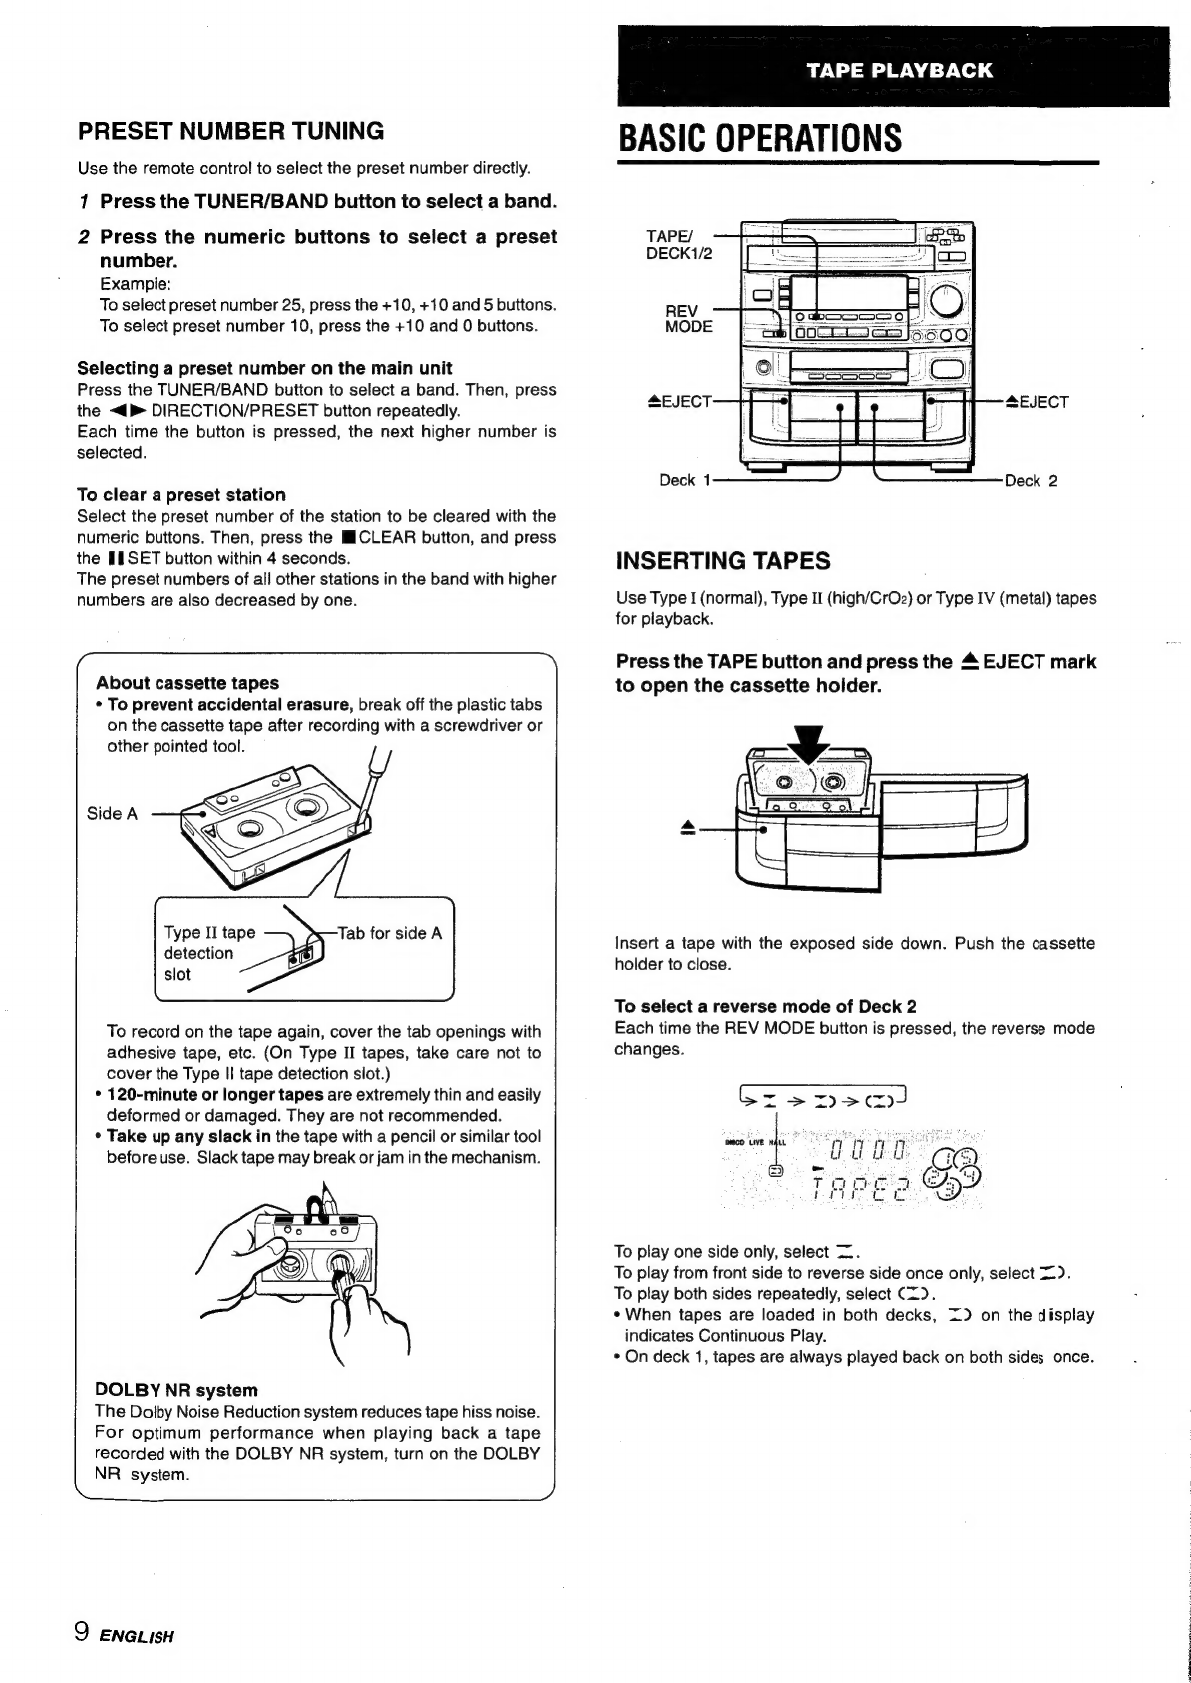
BASIC
OPERATIONS
............sscsecssssessesseserseseeseneesneasenntaces
9
CONTINUOUS
PLAY
0...
ccsscecsssctcesecessesesseseceoreacsseestanens
10
CD
PLAYING
BASIC
OPERATIONS
.........sssssssssssseetssesssesseccseencessasentaees
11
PROGRAMMED
PLAY
.........csssssscserseessssensenseeeessssa
sesesees
12
RECORDING
BASIC
RECORDING.
.......cccsssseeesserecenseesssereeseesnnsesianentanes
13
DUBBING
A
TAPE
MANUALLY
.........sccscscsssseeneenente
erences
14
DUBBING
THE
WHOLE
TAPE
........cssssssssssssesessssenie
enseaees
14
Al
EDIT
RECORDING
.........cccsssssecrsessoesseserorseeersetnontereens
15
PROGRAMMED
EDIT
RECORDING
..........:sssssersensoreses
16
DOLBY
PRO
LOGIC
ADJUSTING
SPEAKER
LEVEL
BALANCE
PLAY
WITH
DOLBY
PRO
LOGIC
..........esseesseeseeeneeteeee
KARAOKE
MICROPHONE
MIXING
uu...
cescssesssesevsssenetstteeneesene
eenseens
18
KARAOKE
PROGRAM
..........scecssseeesseesessesenseceneesie
weneneee
20
TIMER
SETTING
THE
TIMER...........cccseccsssessensssesnssessesersens
ersseene
SETTING
THE
SLEEP
TIMER
OTHER
CONNECTIONS
CONNECTING
OPTIONAL
EQUIPMENT
.........000.00cee
22
LISTENING
TO
EXTERNAL
SOURCEG...........00ceeee
23
GENERAL
CARE
AND
MAINTENANCE
......00......ceesssssseeeeetsseenee
centers
23
SPECIFICATIONS
PARTS
INDEX
siscciincescsassaisecsicccceerstvensedasesecessseneasses
raeaets
25


 User manual")


