Índice
Capitulo 1: Introducción
Capitulo 2: Versiones y referencias
Capitulo 3: Descripción del equipo
Capitulo 4: Instalación
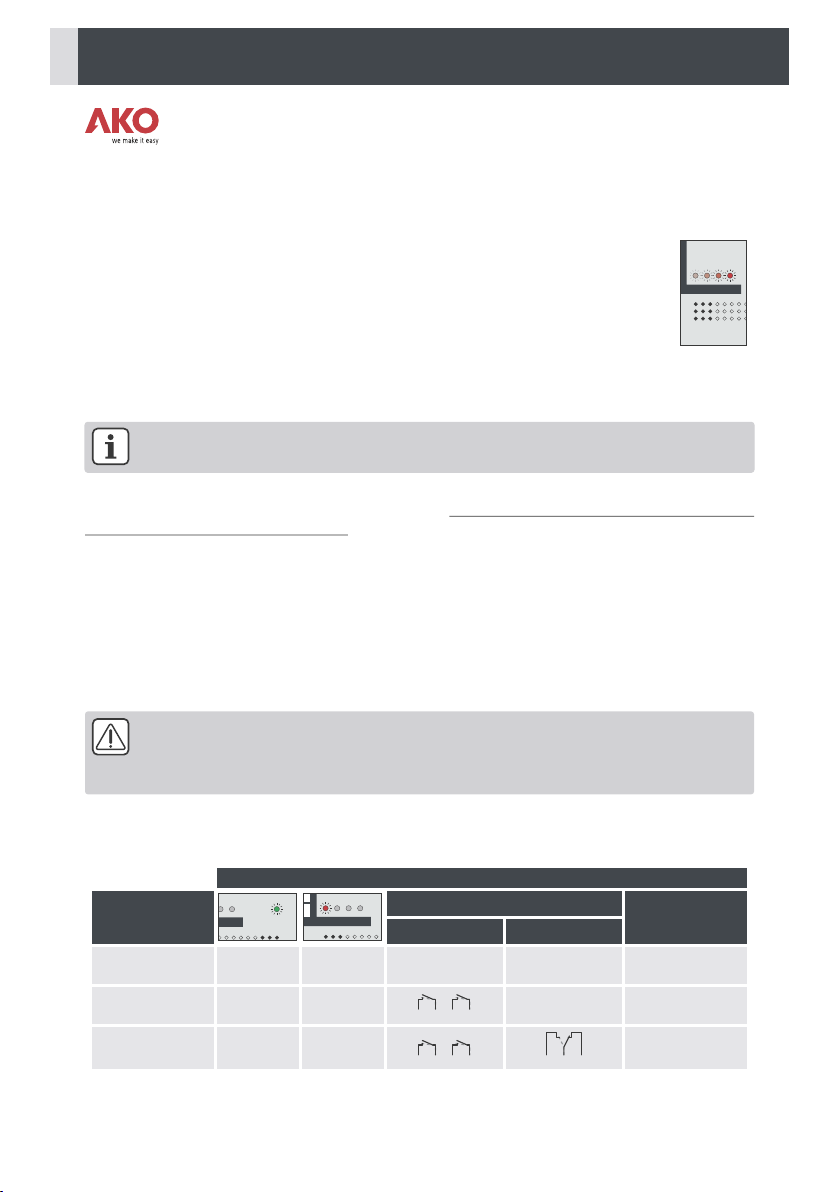
Capitulo 5: Funcionamiento
Capitulo 6: Mantenimiento
Capitulo 7: Datos técnicos
Central de alarma
Central de alarma
Montaje de la central
Montaje del detector
Configuración
Montaje del pulsador
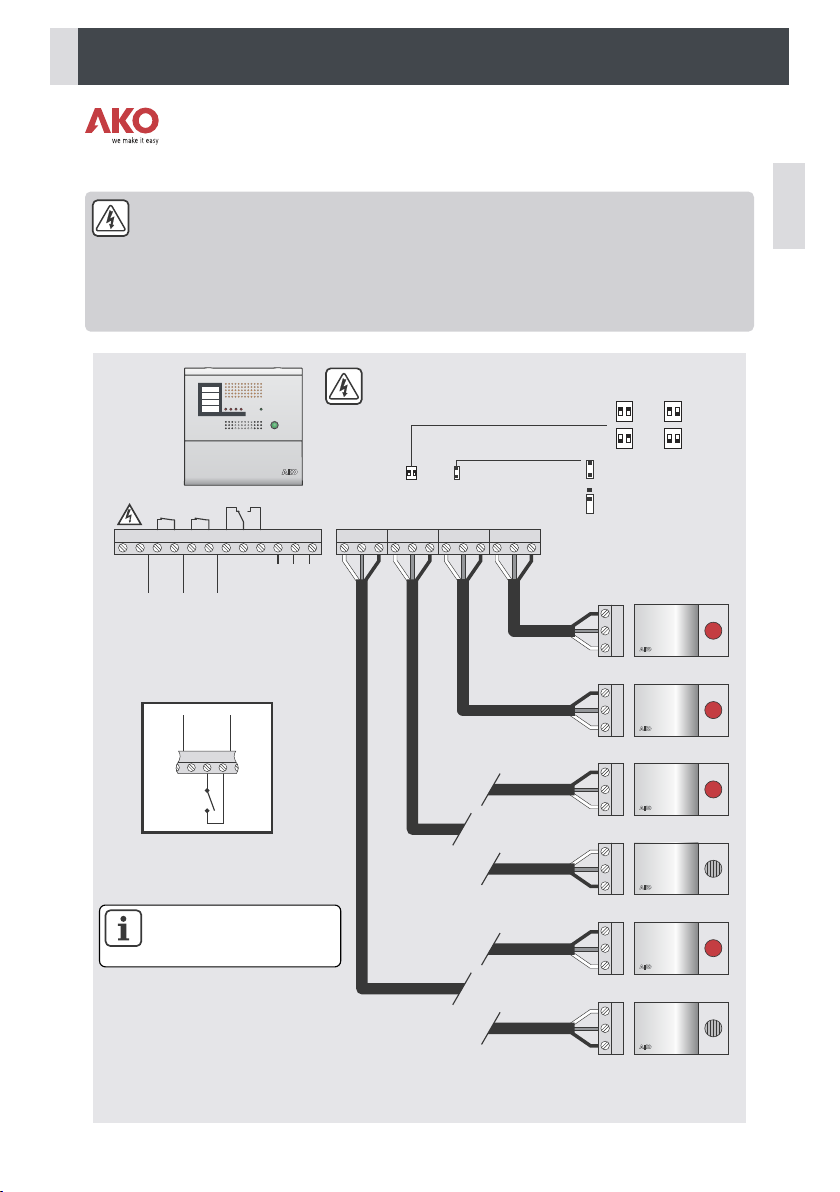
Conexionado
Pulsador luminoso
Pulsador luminoso
Detector de gas
Detector de gas
Pág. 3
P g. 3á
P g. 4á
P g. 5á
P g. 4á
P g. 5á
P g. 6á
P g. 8á
P g. 8á
P g. 10á
P g. 6á
P g. 7á
P g. 8á
P g. 9á
P g. 10á
P g. 11á
P g. 4á
P g. 4á
AKO Electromecànica, le agradece y felicita por la adquisición de nuestro producto, en cuyo desarrollo y fabricación se han utilizado las
tecnologías más innovadoras, así como unos rigurosos procesos de producción y control de calidad.
Nuestro compromiso por conseguir la satisfacción de nuestros clientes y el continuo esfuerzo por mejorar día a día lo constatan las diversas
certificaciones de calidad obtenidas.
Este es un producto de altas prestaciones y tecnológicamente avanzado. De su correcta planificación, instalación, configuración y puesta en
marcha, dependerá en gran medida su funcionamiento, así como las prestaciones finales alcanzadas. Lea detenidamente este manual antes
de proceder a instalarlo, y respete en todo momento las indicaciones del mismo.
Únicamente personal cualificado puede instalar o realizar la asistencia técnica del producto.
Este producto ha sido desarrollado para su utilización en las aplicaciones descritas en su manual, AKO Electromecànica no garantiza su
funcionamiento en cualquier utilización no prevista en dicho documento, así como no se responsabilizará en ningún caso de los daños de
cualquier tipo que pudiera ocasionar una utilización, configuración, instalación o puesta en marcha incorrectas.
Es responsabilidad del instalador y del cliente el cumplir y hacer cumplir las normativas aplicables a las instalaciones donde se destinarán
nuestros productos. AKO Electromecànica no se responsabilizará de los daños que puedan ocasionar el incumplimiento de las mismas. Siga
rigurosamente las indicaciones descritas en este manual.
De cara a alargar el máximo posible la vida de nuestros equipos, se deben cumplir las siguientes observaciones:
No exponga los equipos electrónicos al polvo, suciedad, agua, lluvia, humedad, temperaturas elevadas, agentes químicos, o
sustancias corrosivas de cualquier tipo.
No someta los equipos a golpes o vibraciones ni intente manipularlos de forma diferente a la indicada en el manual.
No supere en ningún caso las especificaciones y limitaciones indicadas en el manual.
Respete en todo momento las condiciones ambientales de trabajo y almacenaje indicadas.
Durante la instalación y al finalizarla, evite dejar cables sueltos, rotos, desprotegidos o en malas condiciones, pueden suponer
un riesgo para el equipo y para sus usuarios.
AKO Electromecànica se reserva el derecho a cualquier modificación tanto en la documentación como en el producto sin previo aviso.
2