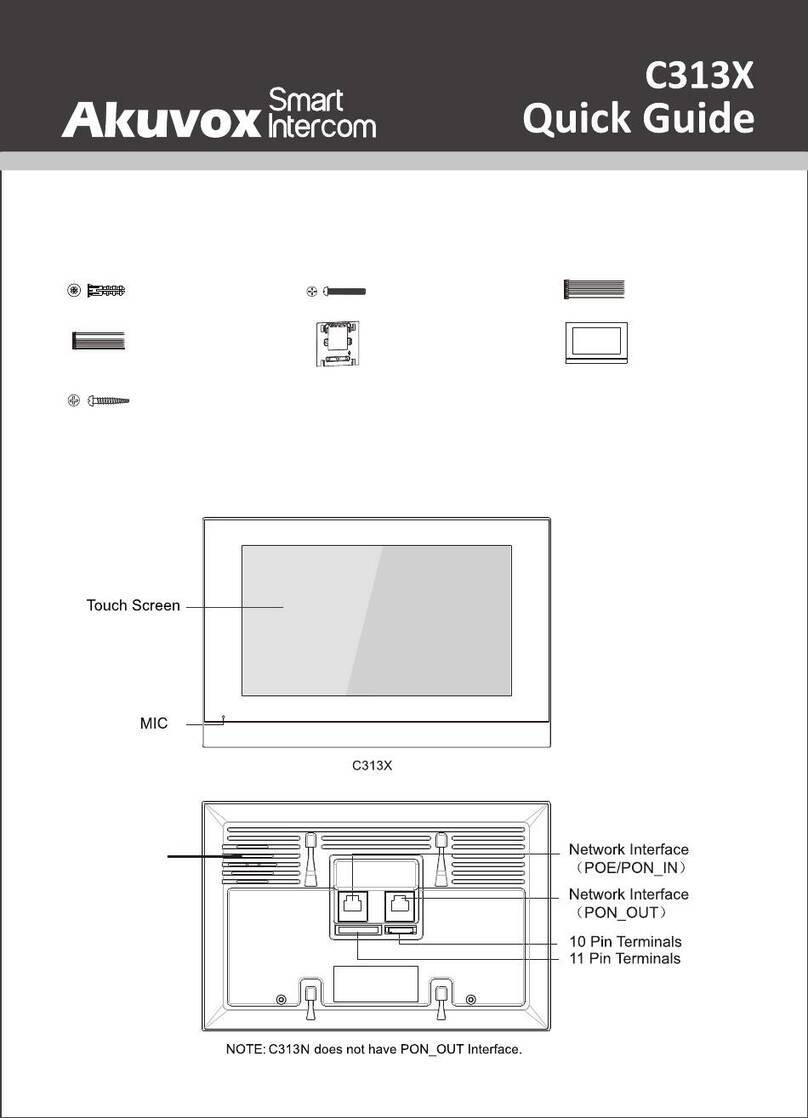
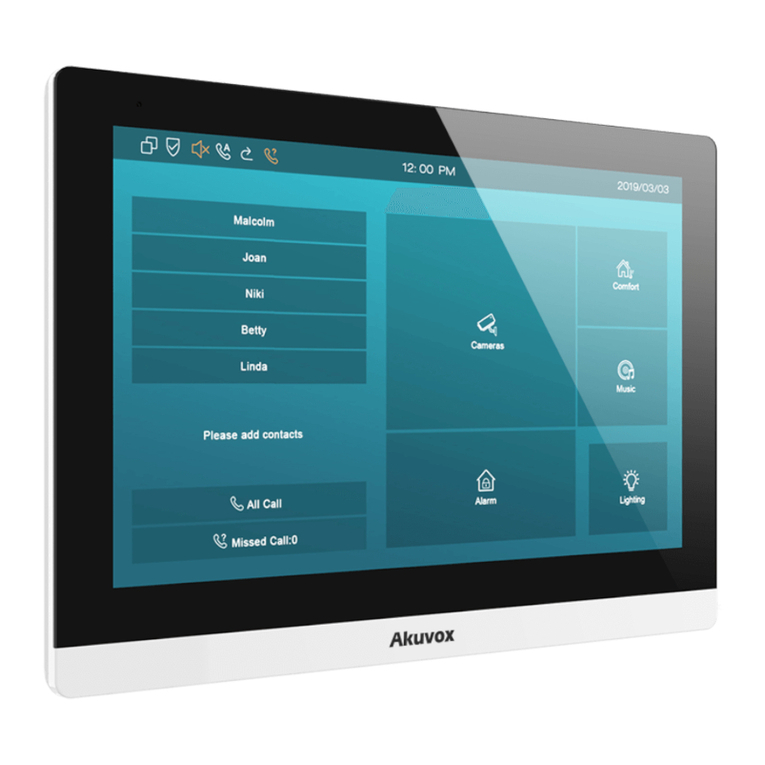
Akuvox C313 Series Service manual

AkuvoxC313IndoorMonitorAdministrator
Guide_V1.0 202105
Updated on 28 Feb 2022
3

Version: 1.0 | Date: Feb.2021
About This Manual
Thank you for choosing the Akuvox C313 series indoor monitor. This manual is
intended for the administrators who need to properly configure the indoor monitor.
This manual applies to the 113.30.6.49 version, and it provides all the configurations
for the functions and features of the C313 series indoor monitor. Please visit the
Akuvox website or consult technical support for any new information or the latest
firmware.
Introduction of Icons and Symbols
Warning:
Always abide by this information in order to prevent the
persons from injury.
Caution:
Always abide by this information in order to prevent the
damages to the device.
Note:
Informative information and advice from the efficient use of
the device.
3

Related Documentation
You are advised to refer to the related documents for more technical information via
the link below:
https://knowledge.akuvox.com/ (https://knowledge.akuvox.com/v1/en)
1.Product Overview
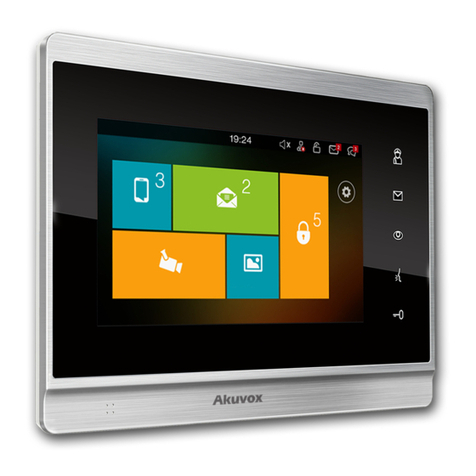
It can be connected with the Akuvox door phone for audio/video communication,
unlocking, and monitoring. Residents can communicate with visitors via audio/video
call, and it supports unlocking the door remotely. It is more convenient and safer for
residents to check the visitor’s identity through its video preview function. C313
series are often applied to scenarios such as villas, apartments, and buildings.
2.Change Log
The change log will be updated here along with the changes in the new software
version.
3.Model Difference
3

Model C313W C313S C313N
Feature
OS Linux
Display 7 inch (176 mm) diagonal
Resolution 800*480
Wi-Fi IEEE802.11
b/g/n,
@2.4GHz
X X
Ethernet 2xRJ45, 10/100Mbps
adaptive
1xRJ45,
10/100Mbps
adaptive
PowerSupply 12V DC connector 12V DC
connector
POE 802.3af Power-over-Ethernet
AlarmInput 8
RelayOutput 1
Installation Wallmounting
Operation
Temperature
0°C ~ +45°C
3

Operation
Humidity
10~90%
Dimensions
(WxHxD)
200*132*17.5mm
4.Introduction to Configuration Menu
Status: This section gives you basic information such as product information,
Network Information, and account information, etc.
Account: This section concerns SIP account, SIP server, proxy server, transport
protocol type, audio&video codec, DTMF, session timer, etc.
Network: This section mainly deals with DHCP&Static IP setting, RTP port setting,
and device deployment, etc.
Phone: This section includes Time&language, call feature, dial management, data
import&export, door log, web relay.
Contacts: This section allows the user to configure the local contact list store in the
device.
Upgrade: This section covers Firmware upgrade, device reset&reboot, configuration
file auto-provisioning, PCAP.
Security: This section is for password modification, account status & session time
out configuration, as well as service location switching.
Settings: This section is including the RTSPD & voice assistance setup.
Arming: This section covers the configuration including, arming zone setting, arming
mode, disarm code, and alarm action.
Mode selection:
Discovery mode: It is a plug and play configuration mode. Akuvox devices will
configure themselves automatically when users power on the devices and connect
them to the network. It is super time-saving mode and it will greatly bring users
3

convenience by reducing manual operations. This mode requires no prior
configurations previously by the administrator.
Cloud mode: Akuvox SmartPlus is an all-in-one management system. Akuvox Cloud
is the mobile service that allows audio, video, remote access control between
smartphones and Akuvox intercoms. All configurations in the device will be issued
automatically from the cloud. If users decide to use Akuvox SmartPlus, please
contact Akuvox technical support, and they will help you configure the related
settings before using them.
SDMC mode: SDMC (SIP Device Management Controller) is a simple and
comprehensive software for building management. It provides a topography for a
community while offering you a graphical configuration interface for the door access,
intercom, monitoring, alarm, etc. It is a convenient tool for property managers to
manage, operate, and maintain the community.
Tool selection
Akuvox has many configuration tools for you to set up devices more conveniently.
Here we list some common tools, please contact your administrator to get the tool if
you need them.
1. SDMC: SDMC is suitable for the management of Akuvox devices in large
communities, including access control, resident information, remote
device control, etc.
2. Akuvox Upgrade tool: upgrade Akuvox devices in batch on a LAN
(Local Area Network)
3. Akuvox PC Manager: distribute all configuration items in batch on a
LAN.
4. IP scanner: it is used to search Akuvox device IP addresses on a LAN.
5. FacePro: manage face data in batch for the door phone on a LAN.
5. Access the Device
3

Akuvox indoor monitor system settings can be either accessed on the device directly
or on the device web interface.
5.1. Device Start-up etwork Selection
Akuvox indoor monitor system settings can be either accessed on the device directly
or on the device's web interface. After the device boots up initially, you are required
to select the network connection for the device. You can either select ethernet or
wireless network connection according to your need.
5.2. Device Home Screen Type Selection
Akuvox indoor monitor supports two different home screen display mode- Call list
Mode, Nine Square Mode. To configure home page mode on the device web Phone-
>Key/Display, choose one suitable mode for your scenarios.
5.3. Accessing the Device Setting on the Device
5.3.1. Accessing Device Basic Setting.
Note:
Please refer to the chapter on Network Setting for the
configuration of the Ethernet and wireless network connection.
3

You can access the device's basic setting and advance setting where you can
configure different types of functions as needed. To access the device basic setting
by pressing More > Settings.
5.3.2. Accessing Device Advanced Setting
To access the advanced setting, press Setting then press Advance icon. Press
password 123456 (by default) to enter the advanced setting.
5.4. Access the Device Setting on the Web
Interface
You can also enter the device IP address on the web browser in order to log in the
device web interface by user name and password admin/admin where you can
configure and adjust parameter etc.
Note:
3

6. Language and Time Setting
6.1. Language Setting
When you first set up the device, you might need to set the language for your need
or you can do it later if needed. And the language can either be set up directly on the
device or on the device web interface according to your preference.
6.1.1. Language Setting on the Device
Language setting can be configured on the device and on the device web interface
that allows you to select or change the language for screen display to your
preference. To configure the language display on the device Setting > Language
screen.
You can also obtain the device IP address using the Akuvox IP
scanner to log in to the device web interface. Please refer to the URL
below for the IP scanner application instruction:
(https://knowledge.akuvox.com//v1/docs/akuvox-ip-
scanner)https://knowledge.akuvox.com/docs/how-to-obtain-ip-address-via-
ip-scanner-1 (https://knowledge.akuvox.com/docs/how-to-obtain-ip-address-via-
ip-scanner-1)
Google Chrome browser is strongly recommended.
The Initial user's name and password are “admin” and please be
case-sensitive to the user names and passwords entered.
3

6.1.2. Language Setting on the Web Interface.
To configure the language display on the device web Phone > Time/Lang interface.
You can either setup the device display language or device web interface language
on device web.
6.2. Time Setting
Time setting can be set up on the device and on the device web interface in terms of
time zone, date and time format, etc.
6.2.1. Time Setting on the Device
3

To set up time setting on the device More > Setting > Time screen.
Parameter Set-up:
NTP: NTP is switched on by default, which allows the date& time to be
automatically set up and synchronized with the default time zone and the
NTP server (Network Time Protocol). You can also set it up manually by
3

ticking the check box and then enter the time and date you want and
press the Save tab to save the setting.
Set Date: Enter the date when it is in manual mode.
Set Time: Enter the time when it is in manual mode.
NTP server1&2: enter the NTP server you obtained in the NTP server
field.
Time Zone: select the specific time zone depending on where the device
is used. The default time zone is GMT+0.00.
Date Format: select the date format as you like among the three format
options. The six formal options are Y-M-D, Y/M/D, D-M-Y, D/M/Y, M-
D-Y, M/D/Y.
Time Format: select 12 hour or 24-hour time format as you like.
6.2.2. Time Setting on the Device Web Interface
6.2.2.1. Time Setting on the Device Web Interface
Time setting on the web Phone > Time interface also allows you to set up the NTP
server address that you obtained to automatically synchronize your time and date.
And when your time zone is selected, the device will automatically notify the NTP
server of its time zone so that the NTP server can synchronize the time zone setting
in your device.
Note:
When the NTP toggle switch is toggled off then parameters related
to NTP server will become non-editable. And when the switch is
toggled on, then time and date will be denied editing.
3

6.2.2.2. Daylight Saving Time Setting
In addition to time settings, you can also configure daylight saving time on the same
interface. Modify the time parameters to achieve longer evening or day time,
especially in summer.
Parameter Set-up:
Active: To enable or disable the daylight-saving time. You can also
configure to make C313X to adjust the daylight-saving time
3

automatically.
Offset: To set the offset value, it is 60 minutes as default, setting the
clocks an hour ahead of the standard time.
By Date: To set the date schedule for daylight saving time.
By Week: To set the schedule for daylight saving time according to the
week and month.
7. Screen Display Configuration
C313 series indoor monitor allow you to enjoy a variety of screen displays to enrich
your visual and operational experience through the customized setting to your
preference.
7.1. Screen Display setting on the Device
You can configure a variety of features of the screen display in terms of brightness
and screen saver, etc. You can do this configuration on device More > Setting >
Display screen.
Parameter Set-up:
3

Brightness: press on the brightness setting and move the yellow dots to
adjust the screen brightness. The default brightness is “5”.
Screen Saver: tick the square box to enable the screen saver function.
Sleep: set the timing for the device screen to be turned off. You can
select the timing among nine options: 15 seconds,30 seconds, 1
minute, 2 minutes,5 minutes, 10 minutes, 30 minutes,1 hour. For
example, if you set it as 1 minute then the screen will be turned off if
there is no operation on the device for 1 minute. However, if you turn on
the function, then the device screen will not be turned off until screen
saver display reaches its configured time duration.
Screen Locker: tick the screen locker if you want to lock the screen
after the screen is turned off (turn to dark). You are required to enter
the system code to unlock the screen or you can unlock the screen by
facial recognition.
7.2. Screen Display Setting on the Web Interface
C313 series indoor monitor allows you to enjoy a variety of screen displays to enrich
your visual and operational experience through the customized setting to your
preference.
7.3. Screensaver Configuration
You can upload screen saver pictures to the device for a public purpose or for a
greater visual experience. Upload screen saver on device web interface Phone >
Album > Album.
Parameter Set-up:
Photo: Choose a photo to configure.
Upload: Choose a photo from the PC and upload this photo to the
monitor.
3

Screen Saver Options: select screen saver type among seven options:
SDMC, Local Album, SDMC+Local Album. Details for the screen saver
types are shown below:
NO. Screen Saver
Type Type Description
1SDMC
Pictures Display pictures from SDMC as the screen saver.
2Local Pictures Display picture uploaded to the indoor monitor as the
screen saver.
3SDMC+Local
Pictures
Display pictures from SDMC and the indoor monitor in
rotation as the screen saver.
7.4. Upload Device Booting Image
You can upload the booting image to be displayed during the device’s booting
process if needed on device web interface Phone > Album > Logo.
Note:
The previous pictures with a specific ID order will be overwritten
when repetitive designation of pictures to the same ID order
occurred.
The pictures uploaded should be in JPG format with 600k
maximum.
3

7.5. Upload Web interface logo
You can upload the logo image to be displayed on web interface if needed on device
web interface Phone > Album > Logo.
7.6. Icon Screen Display Configuration
C313 series indoor monitor allow you to customize icon display on the home screen
and More screen for the convenience of your operation on device web Phone >
Key/Display interface. This article helps you to set up the icon display properly on
the screens according to your preference.
Note:
The pictures uploaded should be in .png or .zip format.
Note:
The pictures uploaded should be in .png format with 50k maximum.
3

Parameter Set-up:
Type: click to select among sixteen icon options: "DND",
"Message", "Contact", "Call", "Display", "Status", "Setting",
"Sound", "Arming", " SOS", "Relay", "Lift", "Smart Living",
"Unlock", "N/A" is selected, the icon display in the corresponding
area will disappear.
Label: click to rename the icon if need, while DND icon cannot be
renamed.
Note:
You can configure 2 icons in area 1 and 2, or toggle whether to
display area 3, 4, 5 and 6.
Note:
You can configure 8 icons on the More screen.
3

8. Sound and Volume Configuration
Akuvox C313 series indoor monitors provide you with various types of ringtones and
volume configurations ranging from Mic volume, Ring volume, Talk volume, Tone
volume and Media volume. You can configure them on the device directly or on the
web interface.
8.1. Volume Configuration
8.1.1. Configure Volume on the Device
To set up the volumes on the device screen More > Setting > Sound.
Parameter Set-up:
Ring tones: select ringtone for incoming calls.
Door Unit Ring tones: To set ring tone when receiving calls from
Akuvox door units.
Ring Volume: adjust the incoming call ringtone volume.
Talk Volume: adjust the speaker volume during the call.
Mic Volume: adjust the volume of your voice to be heard.
3

Touch Sound: To enable sound when you press screen.
8.1.2. Configure Volume on the Web Interface
You can configure the tones and customize your doorbell sound by uploading the
audio file to your preference on device web interface Phone > Ringtones.
Parameter Set-up:
Upload: to choose the suitable sound file from the local folder.
Ringtones: to set ring tone for incoming calls.
Door Unit Ring Tones: To set ring tone when receiving calls from
Akuvox door units.
9. Phone Book Configuration
9.1. Phone Book Configuration on the Device
You can configure the contacts list in terms of adding and modifying contact groups
or contacts on the device More > Contacts directly.
9.1.1. Add Contacts
Note:
Doorbell sound files to be uploaded must be .WAV or MP3 format
with 250k maximum.
3
Other manuals for C313 Series
5
This manual suits for next models
3
Table of contents
Other Akuvox Intercom System manuals

Akuvox
Akuvox X915S User manual

Akuvox
Akuvox R26B Manual

Akuvox
Akuvox IT82 Series User manual

Akuvox
Akuvox R20A Manual

Akuvox
Akuvox R20K User manual

Akuvox
Akuvox R20A Manual

Akuvox
Akuvox C317 Series User manual

Akuvox
Akuvox R20A User manual

Akuvox
Akuvox SPD-R25 User manual

Akuvox
Akuvox X916S Assembly instructions

Akuvox
Akuvox SDP-R29 User manual

Akuvox
Akuvox R26 User manual

Akuvox
Akuvox E16 Series User manual

Akuvox
Akuvox R28 Series User manual

Akuvox
Akuvox C313 Series User manual

Akuvox
Akuvox E21A User manual

Akuvox
Akuvox E16 Series Service manual

Akuvox
Akuvox R27A User manual
Akuvox
Akuvox R20A User manual

Akuvox
Akuvox E12 User manual