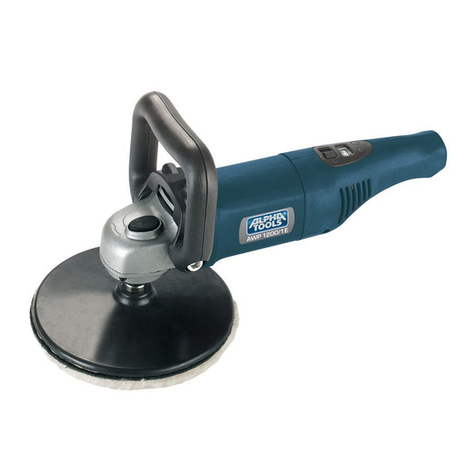
Alpha tools AWP 1200 E User manual

AWP 1200 E
Art.-Nr.: 20.932.20 I.-Nr.: 01029
kOriginalbetriebsanleitung
Polier- und Schleifmaschine
tOriginal operating instructions
Polishing and Sanding Machine
pMode d’emploi d’origine
de l'affûteuse et machine à polir
CIstruzioni per l’uso originali
Levigatrice e smerigliatrice
lOriginal betjeningsvejledning
polere- og slibemaskine
UOriginal-bruksanvisning
Polermaskin
BOriginalne upute za uporabu
Stroja za poliranje i brušenje
mManual de instrucciones original
Pulidora y lijadora
jOriginální návod k obsluze
Leštička a bruska
qAlkuperäiskäyttöohje
Kiilloitus- ja hiomakone
HOriģinālā lietošanas instrukcija
Pulēšanas un slīpēšanas mašīna
XOriginalna navodila za uporabo
polirnega in brusilnega stroja
AEredeti használati utasítás
polírozó- és csiszológéphez
ZOrijinal Kullanma Talimatı
Parlatma ve Z∂mparalama Makinesi
LOriginal-driftsveiledning
Polerings- og slipemaskin
EUpprunalegar notandaleiðbeiningar
Bón- og slípitæki
.Originaalkasutusjuhend
Poleer- ja lihvimismasina
GOriginali naudojimo instrukcija
Poliravimo ir šlifavimo mašina
Anleitung_AWP_1200_E_SPK7:_ 12.05.2010 13:59 Uhr Seite 1

2
1
1
2
3
7
5
4
6
2 3
3
4
8
Anleitung_AWP_1200_E_SPK7:_ 12.05.2010 13:59 Uhr Seite 2

3
4
7
5
6
8 9
Anleitung_AWP_1200_E_SPK7:_ 12.05.2010 13:59 Uhr Seite 3

4
D
“WARNUNG - Zur Verringerung des Verletzungsrisikos Bedienungsanleitung lesen”
Tragen Sie einen Gehörschutz.
Die Einwirkung von Lärm kann Gehörverlust bewirken.
Tragen Sie eine Schutzbrille.
Während der Arbeit entstehende Funken oder aus dem Gerät heraustretende Splitter, Späne
und Stäube können Sichtverlust bewirken.
Anleitung_AWP_1200_E_SPK7:_ 12.05.2010 13:59 Uhr Seite 4

Achtung!
Beim Benutzen von Geräten müssen einige
Sicherheitsvorkehrungen eingehalten werden, um
Verletzungen und Schäden zu verhindern. Lesen Sie
diese Bedienungsanleitung / Sicherheitshinweise
deshalb sorgfältig durch. Bewahren Sie diese gut
auf, damit Ihnen die Informationen jederzeit zur
Verfügung stehen. Falls Sie das Gerät an andere
Personen übergeben sollten, händigen Sie diese
Bedienungsanleitung / Sicherheitshinweise bitte mit
aus. Wir übernehmen keine Haftung für Unfälle oder
Schäden, die durch Nichtbeachten dieser Anleitung
und den Sicherheitshinweisen entstehen.
1. Sicherheitshinweise
Die entsprechenden Sicherheitshinweise finden Sie
im beiliegenden Heftchen!
WARNUNG
Lesen Sie alle Sicherheitshinweise und
Anweisungen. Versäumnisse bei der Einhaltung der
Sicherheitshinweise und Anweisungen können
elektrischen Schlag, Brand und/oder schwere
Verletzungen verursachen zur Folge haben.
Bewahren Sie alle Sicherheitshinweise und
Anweisungen für die Zukunft auf.
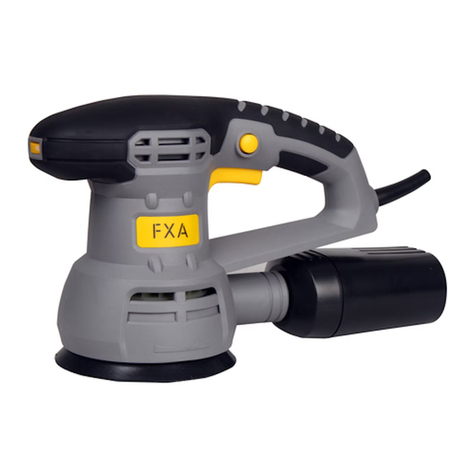
2. Gerätebeschreibung (Abb. 1/2)
1. Spindelarretierung
2. Vorderer Handgriff
3. Ein-/Ausschalter
4. Drehzahlregelung
5. Hinterer Handgriff
6. Netzkabel
7. Polier-/ Schleifteller
3. Bestimmungsgemäße Verwendung
Das Gerät ist zum Polieren von lackierten
Oberflächen sowie zum Schleifen von Holz, Eisen,
Kunststoff und ähnlichen Werkstoffen unter
Verwendung des entsprechenden Schleifpapiers
geeignet.
Das Gerät darf nur nach seiner Bestimmung
verwendet werden. Jede weitere darüber
hinausgehende Verwendung ist nicht
bestimmungsgemäß. Für daraus hervorgerufene
Schäden oder Verletzungen aller Art haftet der
Benutzer/Bediener und nicht der Hersteller.
Bitte beachten Sie, dass unsere Geräte
bestimmungsgemäß nicht für den gewerblichen,
handwerklichen oder industriellen Einsatz konstruiert
wurden. Wir übernehmen keine Gewährleistung,
wenn das Gerät in Gewerbe-, Handwerks- oder
Industriebetrieben sowie bei gleichzusetzenden
Tätigkeiten eingesetzt wird.
Restrisiken
Auch bei sachgemäßer Verwendung des Gerätes
bleibt immer ein gewisses Restrisiko, das nicht
ausgeschlossen werden kann. Aus der Art und
Konstruktion des Gerätes können die folgenden
potentiellen Gefährdungen abgeleitet werden:
Kontakt mit der ungeschützten Scheibe
(Schnittverletzung)
Hineingreifen in die noch drehende Scheibe
(Schnittverletzung)
Wegschleudern von Teilen der Scheibe (Schnitt-
oder stumpfe Verletzung)
Wegschleudern von Teilen des zu bearbeitenden
Materials (Schnitt- oder stumpfe Verletzung)
Feuergefahr durch Funkenflug
Schädigung des Gehöres, wenn kein vorge-
schriebener Gehörschutz getragen wird (Gehör-
verlust)
Einatmen von Schleifpartikeln von Material und
Scheibe
elektrischer Schlag bei Berühren von nicht
isolierten elektrischen Bauteilen.
Werden die in Ihrer Gebrauchsanweisung
enthaltenen Anweisungen nicht beachtet, können
aufgrund unsachgemäßer Benutzung andere
Restrisiken auftreten
4. Technische Daten
Netzspannung: 230V~ 50 Hz
Aufnahmeleistung: 1100 W
Drehzahl: 1000-3000 min-1
Polierteller: 180 mm
Anschlussgewinde: M14
Schutzisoliert II/ 쓑
Gewicht: 2,2 kg
5
D
Anleitung_AWP_1200_E_SPK7:_ 12.05.2010 13:59 Uhr Seite 5

Geräusch und Vibration
Die Geräusch- und Vibrationswerte wurden entspre-
chend EN 60745 ermittelt.
Schalldruckpegel LpA 84 dB(A)
Unsicherheit KpA 3 dB
Schallleistungspegel LWA 95 dB(A)
Unsicherheit KWA 3 dB
Tragen Sie einen Gehörschutz.
Die Einwirkung von Lärm kann Gehörverlust bewir-
ken.
Schwingungsgesamtwerte (Vektorsumme dreier
Richtungen) ermittelt entsprechend EN 60745.
Schwingungsemissionswert ah= 13,35 m/s2
Unsicherheit K = 1,5 m/s2
Achtung!
Der Schwingungswert wird sich aufgrund des Ein-
satzbereiches des Elektrowerkzeuges ändern und
kann in Ausnahmefällen über dem angegebenen
Wert liegen.
Beschränken Sie die Geräuschentwicklung und
Vibration auf ein Minimum!
Verwenden Sie nur einwandfreie Geräte.
Warten und reinigen Sie das Gerät regelmäßig.
Passen Sie Ihre Arbeitsweise dem Gerät an.
Überlasten Sie das Gerät nicht.
Lassen Sie das Gerät gegebenenfalls
überprüfen.
Schalten Sie das Gerät aus, wenn es nicht
benutzt wird.
Tragen Sie Handschuhe.
5. Vor Inbetriebnahme
Überzeugen Sie sich vor dem Anschließen, dass die
Daten auf dem Typenschild mit den Netzdaten über-
einstimmen.
5.1 Montage (Abb. 3-6)
Achtung! Ziehen Sie vor den Montagearbeiten den
Netzstecker
6. Bedienung
6.1 Verwendung als Poliermaschine
Beachten Sie bei Benutzung von Wachs- und
Poliermitteln die Anleitung des Herstellers!
ACHTUNG!
Um Beschädigungen an den zu polierenden
Werkstückflächen zu vermeiden, beachten Sie
unbedingt die folgenden Punkte:
Achten Sie darauf, dass der Polieraufsatz immer
exakt mittig auf dem Polier-/ Schleifteller befestigt
wird.
Überprüfen Sie vor dem Einschalten des Gerätes
den festen Sitz der Aufsätze.
Die zu bearbeitende Fläche nie mit dem seitlichen
Rand des Polier-/ Schleiftellers berühren.
Wählen Sie zum Polieren mit dem Drehzahlregler
(Abb. 2/ Pos. 4) maximal die nachfolgenden
Drehzahlen:
- Politur einarbeiten: ca. 1000min-1
- Hochglanzpolieren: ca. 1000-1100min-1
- Aufpolieren ca. 1400min-1
Bei Nichtbeachtung der vorstehenden Hinweise
übernimmt der Hersteller keinerlei Haftung.
Problemloses Wechseln der Polieraufsätze durch
Klettverschluss.
- Zum Auftragen des Poliermittels verwenden Sie den
Schaumstoffaufsatz (Abb.7).
Achten Sie darauf, dass dieser frei von
Verunreinigungen ist.
Verteilen Sie das Poliermittel gleichmäßig auf
dem Polierteller. (Das Poliermittel nicht direkt auf
die zu Polierende Fläche auftragen)
Schalten Sie die Poliermaschine nur ein- oder
aus, wenn das Gerät auf der zu Polierenden
Fläche aufliegt.
Legen Sie sich das Verlängerungskabel über Ihre
Schulter und bearbeiten Sie zunächst die ebenen
und großen Flächen wie z.B. Motorhaube,
Kofferraumdeckel und Dach.
Arbeiten Sie mit gleichmäßigen Bewegungen.
Wichtig! Die Poliermaschine auf der
Polierfläche aufliegen lassen, kein
Anpressdruck!
Anschließend gehen Sie zur Bearbeitung der
kleineren Flächen über (z.B. Türen).
- Zum Fertigpolieren verwenden Sie den
Fellaufsatz (Abb.8)
Achten Sie auch hier, dass dieser frei von
Verunreinigungen ist.
Entfernen Sie die Polierschicht in gleicher
Reihenfolge, wie Sie das Poliermittel aufgetragen
haben.
D
6
Anleitung_AWP_1200_E_SPK7:_ 12.05.2010 13:59 Uhr Seite 6

Achtung! Üben Sie keinen Druck auf die
Poliermaschine aus!
Pflege-Tipps
Für optimalen Lackschutz sollten Sie Ihren
Wagen 2- bis 3- mal im Jahr Polieren.
Waschen Sie Ihren Wagen mindestens alle 2
Wochen. Vermeiden Sie die Benutzung von
Haushaltswaschmitteln, da diese den Lack
beschädigen können und die Wachsschicht
ablösen.
Waschen Sie Ihren Wagen mit einem sauberen
Schwamm. Arbeiten sie von oben nach unten.
Insekten, Vogelkot und Teerflecken sollten täglich
von der Lackoberfläche entfernt werden.
Damit das Glasreinigungsmittel nicht die
Lackfläche benetzt, sollte es auf das Waschtuch
gesprüht werden, nicht direkt auf die
Fensterfläche.
6.2 Verwendung als Schleifmaschine
Zum Schleifen verwenden Sie die mitgelieferten
Schleifaufsätze (Abb. 9).
Problemloses Wechseln der Schleifaufsätze durch
Klettverschluss.
Schleifteller mit der ganzen Fläche aufsetzen.
Maschine einschalten und mit mäßigem Druck
über das Werkstück kreisende oder Quer- und
Längsbewegungen ausführen.
Zum Grobschliff wird eine grobe, für Feinschliff
eine feinere Körnung empfohlen. Durch
Schleifversuche kann die günstigste
Körnung ermittelt werden.
6.3 Drehzahlregelung (Abb.2)
Mit der Drehzahlregulierung können Sie die
gewünschte Arbeitsdrehzahl einstellen.
Durch drücken der Taste „+“ erhöht sich die
Drehzahl.
Durch drücken der Taste „-” verringert sich die
Drehzahl.
Die eingestellte Drehzahl können Sie dem Display (8)
entnehmen.
Eingestellte Drehzahl = Anzeige x 100
7. Austausch der Netzanschlussleitung
Wenn die Netzanschlussleitung dieses Gerätes
beschädigt wird, muss sie durch den Hersteller oder
seinen Kundendienst oder eine ähnlich qualifizierte
Person ersetzt werden, um Gefährdungen zu
vermeiden.
8. Reinigung, Wartung und Ersatzteil-
bestellung
Ziehen Sie vor allen Reinigungsarbeiten den
Netzstecker.
8.1 Reinigung
Halten Sie Schutzvorrichtungen, Luftschlitze und
Motorengehäuse so staub- und schmutzfrei wie
möglich. Reiben Sie das Gerät mit einem
sauberen Tuch ab oder blasen Sie es mit
Druckluft bei niedrigem Druck aus.
Wir empfehlen, dass Sie das Gerät direkt nach
jeder Benutzung reinigen.
Reinigen Sie das Gerät regelmäßig mit einem
feuchten Tuch und etwas Schmierseife.
Verwenden Sie keine Reinigungs- oder
Lösungsmittel; diese könnten die Kunststoffteile
des Gerätes angreifen. Achten Sie darauf, dass
kein Wasser in das Geräteinnere gelangen kann.
Die Polieraufsätze nur mit der Hand waschen und
Lufttrocknen lassen. Verwenden Sie dafür nur
milde Seife und einen feuchten Lappen.
8.2 Kohlebürsten
Bei übermäßiger Funkenbildung lassen Sie die
Kohlebürsten durch eine Elektrofachkraft überprüfen.
Achtung! Die Kohlebürsten dürfen nur von einer
Elektrofachkraft ausgewechselt werden.
8.3 Wartung
Im Geräteinneren befinden sich keine weiteren zu
wartenden Teile.
8.4 Ersatzteilbestellung:
Bei der Ersatzteilbestellung sollten folgende Angaben
gemacht werden:
Typ des Gerätes
Artikelnummer des Gerätes
Ident-Nummer des Gerätes
Ersatzteilnummer des erforderlichen Ersatzteils
Aktuelle Preise und Infos finden Sie unter
www.isc-gmbh.info
9. Entsorgung und Wiederverwertung
Das Gerät befindet sich in einer Verpackung um
Transportschäden zu verhindern. Diese Verpackung
ist Rohstoff und ist somit wieder verwendbar oder
kann dem Rohstoffkreislauf zurückgeführt werden.
Das Gerät und dessen Zubehör bestehen aus
verschiedenen Materialien, wie z.B. Metall und
Kunststoffe. Führen Sie defekte Bauteile der
Sondermüllentsorgung zu. Fragen Sie im
Fachgeschäft oder in der Gemeindeverwaltung nach!
D
7
Anleitung_AWP_1200_E_SPK7:_ 12.05.2010 13:59 Uhr Seite 7

8
GB
“Caution - Read the operating instructions to reduce the risk of inquiry”
Wear ear-muffs.
The impact of noise can cause damage to hearing.
Wear safety goggles.
Sparks generated during working or splinters, chips and dust emitted by the device can cause
loss of sight.
Anleitung_AWP_1200_E_SPK7:_ 12.05.2010 13:59 Uhr Seite 8

9
GB
Important!
When using equipment, a few safety precautions
must be observed to avoid injuries and damage.
Please read the complete operating manual with due
care. Keep this manual in a safe place, so that the
information is available at all times. If you give the
equipment to any other person, give them these
operating instructions as well.
We accept no liability for damage or accidents which
arise due to non-observance of these instructions
and the safety information.
1. Safety regulations
The corresponding safety information can be found
in the enclosed booklet.
CAUTION!
Read all safety regulations and instructions.
Any errors made in following the safety regulations
and instructions may result in an electric shock, fire
and/or serious injury.
Keep all safety regulations and instructions in a
safe place for future use.
2. Layout (Fig. 1/2)
1. Spindle lock
2. Front grip
3. ON/OFF switch
4. Speed control
5. Rear grip
6. Power cord
7. Polishing / sanding disk
3. Proper use
The machine is designed for polishing coated
surfaces and for sanding wood, iron, plastic and
similar materials using the appropriate abrasive
paper.
The machine is to be used only for its prescribed
purpose. Any other use is deemed to be a case of
misuse. The user / operator and not the
manufacturer will be liable for any damage or injuries
of any kind caused as a result of this.
Please note that our equipment has not been
designed for use in commercial, trade or industrial
applications. Our warranty will be voided if the
machine is used in commercial, trade or industrial
businesses or for equivalent purposes.
Residual risks
Even if you use this electric power tool in
accordance with instructions, certain residual
risks cannot be rules out. The following hazards
may arise in connection with the equipment’s
construction and layout:
Contact with the unguarded wheel (injuries
through cutting)
Reaching into the wheel while it is still rotating
(injuries through cutting)
Catapulting of parts of the wheel (injuries through
cutting or bruising)
Catapulting of parts of the material being
processed (injuries through cutting or bruising)
Risk of fire from flying sparks
Damage to hearing if the compulsory hearing
protection is not used (hearing loss)
Inhalation of abrasive particles from the material
and wheel
Electric shock upon contact with non-insulated
electrical parts
If the instructions listed in the operating instructions
are not adhered to, improper handling of the
equipment may result in other residual risks
4. Technical data
Voltage: 230V ~ 50 Hz
Power rating: 1100 W
Speed: 1000-3000 min-1
Polishing / sanding disk diameter: 180 mm
Connection thread: M14
Totally insulated II/ 쓑
Weight: 2.2 kg
Anleitung_AWP_1200_E_SPK7:_ 12.05.2010 13:59 Uhr Seite 9

10
GB
Sound and vibration
Sound and vibration values were measured in
accordance with EN 60745.
LpA sound pressure level 84 dB(A)
KpA uncertainty 3 dB
LWA sound power level 95 dB(A)
KWA uncertainty 3 dB
Wear ear-muffs.
The impact of noise can cause damage to hearing.
Total vibration values (vector sum of three directions)
determined in accordance with EN 60745.
Vibration emission value ah= 13,35 m/s2
K uncertainty = 1,5 m/s2
Important!
The vibration value changes according to the area of
application of the electric tool and may exceed the
specified value in exceptional circumstances.
Keep the noise emissions and vibrations to a
minimum.
Only use appliances which are in perfect working
order.
Service and clean the appliance regularly.
Adapt your working style to suit the appliance.
Do not overload the appliance.
Have the appliance serviced whenever
necessary.
Switch the appliance off when it is not in use.
Wear protective gloves.
5. Before starting the equipment
Before you connect the equipment to the mains
supply make sure that the data on the rating plate
are identical to the mains data.
5.1 Assembly (Fig. 3-6)
Important! Pull out the mains power plug before
starting the assembly work.
6. Starting up
6.1 Using as a polishing machine
When using waxing and polishing agents,
observe the instructions issued by their
manufacturer!
IMPORTANT!
To prevent damage to the surfaces of the workpieces
you wish to polish, make sure that you observe the
following instructions:
Make sure that the polishing attachment is always
mounted precisely in the center of the
sanding/grinding disk.
Before you start the equipment, check to ensure
that the attachments are securely installed.
Never touch the area you wish to polish with the
edge of the sanding/grinding disk.
Use the speed selector (Fig. 2/Item 4) to select the
following maximum speeds for polishing:
- Working in polish: approx. 1000 rpm
- Polishing to a high gloss: approx. 1000-1100 rpm
- Polishing up: approx. 1400 rpm
If you do not comply with these instructions, the
manufacturer cannot accept any liability.
The Velcro fastener enables easy changing of the
polishing attachment.
- Use the foamed plastic attachment to apply the
polishing agent (Fig. 7).
Make sure that the foamed plastic attachment is
free of any foreign bodies.
Spread the polishing paste evenly over the
polishing pad. Do not apply the polish directly to
the polishing surface.
Switch the polishing machine on and off only
when the polishing machine is resting on the
polishing surface.
Place the extension lead over your shoulder and
work first on the large, flat surfaces such as the
bonnet, boot lid and roof.
Keep your movements as regular as possible.
Important! Allow the polishing machine to glide
over the polishing surface. Do not exert pressure!
Work next on the smaller surfaces (doors, for
example)
Use the fleece attachment to finish off the
polishing (Fig. 8).
Make sure that the fleece attachment is free of all
foreign bodies.
Remove the layer of polish in the same order as it
was applied.
Important! Do not exert pressure on the
polishing machine!
Anleitung_AWP_1200_E_SPK7:_ 12.05.2010 13:59 Uhr Seite 10

11
GB
Care tips
For optimum paintwork protection, you should
polish your car 2 to 3 times a year.
Wash your car at least every 2 weeks. Avoid
using household detergents as these can damage
the paintwork and remove the layer of wax.
Wash your car with a clean sponge, working from
top to bottom.
Remove all insects, bird droppings and tar stains
from the paintwork daily.
If you use any window-cleaning agents, spray
them onto a cloth and not directly onto the
windows in order to prevent them wetting the
paintwork.
6.2 Using as a sanding machine
Use the supplied sanding attachments (Fig. 9) for
sanding purposes.
The Velcro fastener enables easy changing of the
sanding attachments.
Place the whole surface area of the sanding disk
on the material.
Switch on the machine and move it with gentle
pressure over the workpiece completely circular
movements or moving it to and fro and up and
down.
Use a coarse paper for coarse sanding and a
finer paper for finish sanding. You can find the
best paper for the job by means of testing.
6.3 Speed Control (Fig. 2)
Use the speed control to set the desired working
speed.
Press the “+” button to increase the speed.
Press the “-” button to decrease the speed.
Refer to the display (8) for the set speed.
Set speed = Display x 100
7. Replacing the power cable
If the power cable for this equipment is damaged, it
must be replaced by the manufacturer or its after-
sales service or similarly trained personnel to avoid
danger.
8. Cleaning, maintenance and ordering
of spare parts
Always pull out the mains power plug before starting
any cleaning work.
8.1 Cleaning
Keep all safety devices, air vents and the motor
housing free of dirt and dust as far as possible.
Wipe the equipment with a clean cloth or blow it
with compressed air at low pressure.
We recommend that you clean the device
immediately each time you have finished using it.
Clean the equipment regularly with a moist cloth
and some soft soap. Do not use cleaning agents
or solvents; these could attack the plastic parts of
the equipment. Ensure that no water can seep
into the device.
Wash the polishing attachments only by hand and
let them air-dry. Use only a mild soap and a damp
cloth.
8.2 Carbon brushes
In case of excessive sparking, have the carbon
brushes checked only by a qualified electrician.
Important! The carbon brushes should not be rep
laced by anyone but a qualified electrician.
8.3 Maintenance
There are no parts inside the equipment which
require additional maintenance.
8.4 Ordering replacement parts
Please provide the following information on all orders
for spare parts:
Model/type of machine
Article number of the machine
ID number of the machine
Replacement part number of the required spare
part
For our latest prices and information please go to
www.isc-gmbh.info
9. Disposal and recycling
The unit is supplied in packaging to prevent its being
damaged in transit. This packaging is raw material
and can therefore be reused or can be returned to
the raw material system.
The unit and its accessories are made of various
types of material, such as metal and plastic.
Defective components must be disposed of as
special waste. Ask your dealer or your local council.
Anleitung_AWP_1200_E_SPK7:_ 12.05.2010 13:59 Uhr Seite 11

12
F
« Avertissement – Lisez ce mode dʼemploi pour diminuer le risque de blessures »
Portez une protection de lʼouïe.
Lʼexposition au bruit peut entraîner une perte de lʼouïe.
Portez des lunettes de protection.
Les étincelles générées pendant travail ou les éclats, copeaux et la poussière sortant de
lʼappareil peuvent entraîner une perte de la vue.
Anleitung_AWP_1200_E_SPK7:_ 12.05.2010 13:59 Uhr Seite 12

13
F
Attention !
Lors de lʼutilisation dʼappareils, il faut respecter
certaines mesures de sécurité afin dʼéviter des
blessures et dommages. Veuillez donc lire
attentivement ce mode dʼemploi. Conservez-le bien
de façon à pouvoir disposer à tout moment de ces
informations. Si lʼappareil doit être remis à dʼautres
personnes, remettez-leur aussi ce mode dʼemploi.
Nous déclinons toute responsabilité pour les
accidents et dommages dus au non-respect de ce
mode dʼemploi et des consignes de sécurité.
1. Consignes de sécurité:
Vous trouverez les consignes de sécurité
correspondantes dans le cahier en annexe.
AVERTISSEMENT !
Veuillez lire toutes les consignes de sécurité et
instructions.
Tout non-respect des consignes de sécurité et
instructions peut provoquer une décharge électrique,
un incendie et/ou des blessures graves.
Conservez toutes les consignes de sécurité et
instructions pour une consultation ultérieure.
2. Description de lʼappareil (figure 1/2)
1. Blocage de broche
2. Poignée avant
3. Interrupteur Marche/Arrêt
4. Régulation de vitesse de rotation
5. Poignée arrière
6. Câble réseau
7. Plateau de polissage et de ponçage
3. Utilisation conforme à lʼaffectation
L'appareil sert au polissage de surfaces vernies et à
l'affûtage de bois, fer, matières plastiques et autres
matériaux du même genre en utilisant le papier-
émeri correspondant.
La machine doit exclusivement être employée
conformément à son affectation. Chaque utilisation
allant au-delà de cette affectation est considérée
comme non conforme. Pour les dommages en
résultant ou les blessures de tout genre, le
producteur décline toute responsabilité et
lʼopérateur/lʼexploitant est responsable.
Veillez au fait que nos appareils, conformément à
leur affectation, nʼont pas été construits, pour être
utilisés dans un environnement professionnel,
industriel ou artisanal. Nous déclinons toute
responsabilité si lʼappareil est utilisé
professionnellement, artisanalement ou dans des
sociétés industrielles, tout comme pour toute activité
équivalente.
Risques résiduels
Même en utilisant cet outil électrique
conformément aux prescriptions, il reste
toujours des risques résiduels. Les dangers
suivants peuvent apparaître en rapport avec la
construction et le modèle de cet outil électrique:
contact avec la meule sans protection (blessure
par coupure)
touche la meule en rotation (blessure par
coupure)
catapultage de pièces de la meule (blessure par
coupure ou lésion)
catapultage de morceaux du matériau à traiter
(blessure par coupure ou lésion)
risque d’incendie par la projection d’étincelles
lésion de l’ouïe lorsque l’on ne porte pas de
casque anti-bruit (perte de l’ouïe)
inhalation de particules de polissage du matériau
et de la meule
décharge électrique en effleurant des
composants électriques non isolés.
Si les instructions comprises dans votre mode
d’emploi ne sont pas respectées, d’autres risques
peuvent apparaître en raison de l’emploi non
conforme aux règles de l’art.
4. Données techniques
Tension du secteur : 230 V ~ 50 Hz
Puissance absorbée : 1100 W
Vitesse de rotation : 1000-3000 tr./min
Plateau de polissage et de ponçage Ø: 180 mm
Filet de raccordement : M14
Isolement de protection II/ 쓑
Poids : 2,2 kg
Bruit et vibration
Les valeurs de bruit et de vibration ont été
déterminées conformément à la norme EN 60745.
Anleitung_AWP_1200_E_SPK7:_ 12.05.2010 13:59 Uhr Seite 13

14
F
Niveau de pression acoustique LpA 84 dB(A)
Imprécision KpA 3 dB
Niveau de puissance acoustique LWA 95 dB(A)
Imprécision KWA 3 dB
Portez une protection acoustique.
Lʼexposition au bruit peut entraîner la perte de lʼouïe.
Les valeurs totales des vibrations (somme des
vecteurs de trois directions) ont été déterminées
conformément à EN 60745.
Valeur dʼémission des vibrations ah= 13,35 m/s2
Imprécision K = 1,5 m/s2
Attention !
La valeur de vibration est différente en fonction du
domaine dʼutilisation de lʼoutil électrique et peut,
dans des cas exceptionnels, être supérieure à la
valeur indiquée.
Limitez le niveau sonore et les vibrations à un
minimum !
Utilisez exclusivement des appareils en excellent
état.
Entretenez et nettoyez l’appareil régulièrement.
Adaptez votre façon de travailler à l’appareil.
Ne surchargez pas l’appareil.
Faites contrôler l’appareil le cas échéant.
Mettez l’appareil hors circuit lorsque vous ne
l’utilisez pas.
Portez des gants.
5. Avant la mise en service
Assurez-vous, avant de connecter la machine, que
les données se trouvant sur la plaque de
signalisation correspondent bien aux données du
réseau.
5.1 Montage (fig. 3-6)
Attention ! Retirez la fiche de contact avant les
travaux de montage
6. Mise en service
6.1 Utilisation en tant que polisseuse
Respectez les instructions du producteur en
utilisant de la cire ou dʼautres produits de
polissage !
ATTENTION !
Pour éviter d’endommager la surface de la pièce
devant être polie, veuillez absolument respecter les
points suivants :
Veillez à ce que le disque de polissage soit
toujours fixé exactement au centre du plateau de
polissage et de ponçage.
Contrôlez avant la mise en service de l’appareil si
les disques sont bien fixés.
Ne touchez jamais à la surface à traiter avec le
bord latéral du plateau de polissage et de ponçage.
Pour polir, sélectionnez au maximum les vitesses
de rotation suivantes avec le régulateur de vitesse
de rotation (fig. 2/ pos. 4) :
- Appliquer la pâte de polissage : env. 1000 tr/min
- Polissage brillant : env. 1000-1100 tr/min
- Repolir : env. 1400 tr/min
En cas de non respect des indications suivantes, le
producteur décline toute responsabilité.
Changement de brosses de polissage sans
problème grâce à la fermeture velcro.
- utilisez la mousse pour appliquer le produit de
polissage (fig. 7)
Veillez à ce quʼelle soit bien exempte dʼimpuretés.
Répartissez régulièrement le produit de polissage
sur le disque à polir. Ne pas appliquer
le produit directement sur la surfache à polir.
Ne mettez la machine en circuit ou hors circuit
que quand elle est posée sur la surface à polir.
Placez le câble de raccordement sur votre épaule
et travaillez dʼabord sur les grosses surfaces
plates comme p.ex. le capot du moteur, le cou
vercle du coffre et le toit.
Travaillez avec des gestes réguliers.
Attention! Poser la machine sur la surface à
polir sans faire pression.
Ensuite, procédez au polissage des plus petites
surfaces (p.ex. portières).
- employez la peau pour le polissage final (fig. 8)
Veillez ici aussi à ce quʼelle soit bien exempte
dʼimpuretés.
Polissez la surface dans le même ordre où vous
avez appliqué le produit de polissage.
Attention! Ne faites pas pression sur la machi
ne à polir
Conseils de soin
Afin de garantir une protection optimale de la
peinture, il est recommandable de polir votre
voiture 2 à 3 fois par an.
Lavez votre voiture au moins toutes les deux
semaines. Evitez dʼutiliser des détergents
domestiques puisquʼils peuvent endommager la
Anleitung_AWP_1200_E_SPK7:_ 12.05.2010 13:59 Uhr Seite 14

15
F
peinture et dissoudre la couche de cire.
Lavez votre voiture à lʼaide dʼune éponge propre.
Procédez du haut en bas.
Débarrasser tous les jours la surface de la
peinture des salissures dʼinsectes, dʼoiseaux et
de goudron.
Pour éviter des éclaboussures du produit à
nettoyer les vitres sur la peinture, il est conseillé
dʼen imbiber le chiffon et de ne pas asperger les
vitres.
6.2 Utilisation en tant qu´affûteuse
Pour l'affûtage, utilisez les embouts d'affûtage livrés
avec la fourniture (fig. 9).
Changement de brosses d'affûtage sans problème
grâce à la fermeture velcro.
Placez le plateau de ponçage de toute sa
surface.
Mettez la machine en circuit et effectuez une
pression modérée sur la pièce en effectuant des
mouvements en longueur et rotatifs.
Il est recommandé d'utiliser une granulation gros
sière pour le polissage de dégrossisseuse et
une fine pour la rectification. On peut déterminer
la granulation adéquate en effectuant des essais.
6.3 Régulation de vitesse de rotation (Fig. 2)
Vous pouvez régler la vitesse de travail désirée à
lʼaide du réglage de vitesse.
En appuyant sur la touche, « + » le nombre de tours
augmente.
En appuyant sur la touche, « - » le nombre de tours
diminue.
Vous verrez le nombre de tours réglé sur
lʼaffichage (8)
Nombre de tours réglé = affichage x 100
7. Remplacement de la ligne de
raccordement réseau
Si la ligne de raccordement réseau de cet appareil
est endommagée, il faut la faire remplacer par le
producteur ou son service après-vente ou par une
personne de qualification semblable afin dʼéviter tout
risque.
8. Nettoyage, maintenance et
commande de pièces de rechange
Retirez la fiche de contact avant tous travaux de
nettoyage.
8.1 Nettoyage
Maintenez les dispositifs de protection, les fentes
à air et le carter de moteur aussi propres (sans
poussière) que possible. Frottez lʼappareil avec
un chiffon propre ou soufflez dessus avec de lʼair
comprimé à basse pression.
Nous recommandons de nettoyer lʼappareil
directement après chaque utilisation.
Nettoyez lʼappareil régulièrement à lʼaide dʼun
chiffon humide et un peu de savon. Nʼutilisez
aucun produit de nettoyage ni détergeant ; ils
pourraient endommager les pièces en matières
plastiques de lʼappareil. Veillez à ce quʼaucune
eau nʼentre à lʼintérieur de lʼappareil.
Lavez les brosses de polissage uniquement à la
main et faites les sécher à lʼair. Nʼutilisez que du
savon doux et un chiffon humide.
8.2 Brosses à charbon
Si les brosses à charbon font trop dʼétincelles,
faites-les contrôler par des spécialistes en
électricité.
Attention ! Seul un(e) spécialiste électricien(ne) est
autorisé à remplacer les brosses à charbon.
8.3 Maintenance
Aucune pièce à lʼintérieur de lʼappareil nʼa besoin
de maintenance.
8.4 Commande de pièces de rechange :
Pour les commandes de pièces de rechange,
veuillez indiquer les références suivantes:
Type de lʼappareil
No. dʼarticle de lʼappareil
No. dʼidentification de lʼappareil
No. de pièce de rechange de la pièce requise
Vous trouverez les prix et informations actuelles à
lʼadresse www.isc-gmbh.info
9. Mise au rebut et recyclage
Lʼappareil se trouve dans un emballage permettant
dʼéviter les dommages dus au transport. Cet
emballage est une matière première et peut donc
être réutilisé ultérieurement ou être réintroduit dans
le circuit des matières premières. Lʼappareil et ses
accessoires sont en matériaux divers, comme par
ex. des métaux et matières plastiques. Eliminez les
composants défectueux dans les systèmes
dʼélimination des déchets spéciaux. Renseignez-
vous dans un commerce spécialisé ou auprès de
lʼadministration de votre commune !
Anleitung_AWP_1200_E_SPK7:_ 12.05.2010 13:59 Uhr Seite 15

16
I
“Avvertimento – Per ridurre il rischio di lesioni leggete le istruzioni per lʼuso”
Portate cuffie antirumore.
Lʼeffetto del rumore può causare la perdita dellʼudito.
Indossate gli occhiali protettivi.
Scintille createsi durante il lavoro o schegge, trucioli e polveri scaraventate fuori dallʼapparecchio
possono causare la perdita della vista.
Anleitung_AWP_1200_E_SPK7:_ 12.05.2010 13:59 Uhr Seite 16

17
I
Attenzione!
Nellʼusare gli apparecchi si devono rispettare diverse
avvertenze di sicurezza per evitare lesioni e danni.
Quindi leggete attentamente queste istruzioni per
lʼuso. Conservatele bene per avere a disposizione le
informazioni in qualsiasi momento. Se date
lʼapparecchio ad altre persone consegnate loro
queste istruzioni per lʼuso insieme allʼapparecchio!
Non ci assumiamo alcuna responsabilità per incidenti
o danni causati dal mancato rispetto di queste
istruzioni e delle avvertenze di sicurezza.
1. Avvertenze sulla sicurezza
Le relative avvertenze di sicurezza si trovano
nellʼopuscolo allegato.
AVVERTIMENTO!
Leggete tutte le avvertenze di sicurezza e le
istruzioni.
Dimenticanze nel rispetto delle avvertenze di
sicurezza e delle istruzioni possono causare scosse
elettriche, incendi e/o gravi lesioni.
Conservate tutte le avvertenze e le istruzioni per
eventuali necessità future.
2. Descrizione dellʼapparecchio
(Fig. 1/2)
1. Bloccaggio a mandrino
2. Impugnatura anteriore
3. Interruttore ON/OFF
4. Regolazione del numero dei giri
5. Impugnatura posteriore
6. Cavo di alimentazione
7. Platorello di levigatura / smerigliatura
3. Utilizzo proprio
L'apparecchio è adatto per levigare superfici
verniciate come anche per smerigliare legno, ferro,
plastica e materiali simili usando i rispettivi fogli
abrasivi..
Lʼapparecchio deve venire usato solamente per lo
scopo a cui è destinato. Ogni altro tipo di uso che
esuli da quello previsto non è un uso conforme.
Lʼutilizzatore/lʼoperatore, e non il costruttore, è
responsabile dei danni e delle lesioni di ogni tipo che
ne risultino.
Tenete presente che i nostri apparecchi non sono
stati costruiti per lʼimpiego professionale, artigianale
o industriale. Non ci assumiamo alcuna garanzia
quando lʼapparecchio viene usato in imprese
commerciali, artigianali o industriali, o in attività
equivalenti.
Rischi residui
Anche nel caso di utilizzo a regola d’arte
dell’apparecchio resta comunque un certo rischio
residuo che non può essere escluso. Visto il tipo e il
funzionamento dell’apparecchio ne possono risultare
i seguenti potenziali pericoli:
contatto con il disco non protetto (lesione da
taglio)
impigliamento nel disco ancora in rotazione
(lesione da taglio)
parti del disco scagliate all’intorno (lesione da
taglio o contusione)
parti del materiale da lavorare scagliate all’intorno
(lesione da taglio o contusione)
pericolo di incendio causato da scintille
danni all’udito se non si indossano le cuffie
antirumore prescritte (perdita dell’udito)
inalazione di particelle di materiale di asporto e
del disco prodotte durante il lavoro
scossa elettrica in caso di contatto con
componenti elettrici non isolati.
Il mancato rispetto delle disposizioni contenute nelle
istruzioni per l’uso può provocare altri rischi residui in
caso di uso improprio.
4. Caratteristiche tecniche
Tensione di rete: 230 V ~ 50 Hz
Potenza assorbita: 1100 W
Numero giri: 1000-3000 min-1
Platorello di levigatura / smerigliatura Ø: 180 mm
Filetto di collegamento: M14
Isolamento di protezione: II / 쓑
Peso: 2,2 kg
Rumore e vibrazioni
I valori del rumore e delle vibrazioni sono stati rilevati
secondo la norma EN 60745.
Anleitung_AWP_1200_E_SPK7:_ 12.05.2010 13:59 Uhr Seite 17

18
I
Livello di pressione acustica LpA 84 dB (A)
Incertezza KpA 3 dB
Livello di potenza acustica LWA 95 dB (A)
Incertezza KWA 3 dB
Portate cuffie antirumore.
Lʼeffetto del rumore può causare la perdita dellʼudito.
Valori complessivi delle vibrazioni (somma vettoriale
delle tre direzioni) rilevati secondo la norma EN
60745.
Valore emissione vibrazioni ah= 13,35 m/s2
Incertezza K = 1,5 m/s2
Attenzione!
Il valore di vibrazione cambierà a causa del settore di
impiego dellʼelettroutensile e in casi eccezionali può
essere superiore ai valori riportati.
Limitate al minimo lo sviluppo di rumore e le
vibrazioni!
Utilizzate soltanto apparecchi in perfetto stato.
Eseguite regolarmente la manutenzione e la
pulizia dell’apparecchio.
Adattate il vostro modo di lavorare
all’apparecchio.
Non sovraccaricate l’apparecchio.
Fate eventualmente controllare l’apparecchio.
Spegnete l’apparecchio se non lo utilizzate.
Indossate i guanti.
5. Prima della messa in esercizio
Prima di inserire la spina nella presa di corrente
assicuratevi che i dati sulla targhetta di
identificazione corrispondano a quelli di rete.
5.1 Montaggio (Fig. 3-6)
Attenzione! Prima delle operazioni di montaggio
staccate la spina dalla presa di corrente.
6. Messa in esercizio
6.1 Impiego come levigatrice
Quando usate cere e lucidanti, osservate le
istruzioni del produttore!
ATTENZIONE !
Per evitare di danneggiare la superficie da lucidare,
fate sempre attenzione ai seguenti punti:
Accertatevi sempre che gli accessori per la
lucidatura vengano fissati esattamente al centro
del disco di lucidatura/levigatura.
Prima dell’accensione dell’apparecchio controllate
che gli accessori siano fissati saldamente.
Fate in modo che le superfici da lavorare non
vengano mai in contatto con i bordi laterali del
disco di lucidatura/levigatura.
Per la lucidatura selezionate sul regolatore (Fig.
2/Pos. 4) al massimo i seguenti numeri di giri:
- Applicazione di pasta lucidante: ca. 1.000min-1
- Lucidatura a specchio: ca. 1.000-1.100min-1
- Lucidatura fine: ca. 1.400min-1
Qualora non vengano rispettate le suddette
avvertenze il produttore non si assume nessuna
responsabilità.
Facile sostituzione degli accessori per la lucidatura
grazie al fissaggio a velcro.
- Per applicare il lucidante usate il disco spugna
(Fig. 7).
Fate attenzione che questo sia completamente
privo di sporco.
Distribuire il preparato lucidante sul disco in
modo uniforme. Non applicare il preparato
lucidante direttamente sulla superficie dal
lucidare.
Accendere o spegnere la lucidatrice solo se
l´utensile è appoggiato sulla superficie da
lucidare.
Fare passare la prolunga sulla propria spalla e
lucidare prima le superfici più grandi e piane,
come per es. il cofano del motore, il coperchio del
vano bagagli ed il tetto.
Lavorare con movimenti uniformi.
Importante! Appoggiare solamente
l´apparecchio sulla superficie da lucidare e
non esercitare pressione!
Poi continuare con la lucidatura delle superfici più
piccole (per es. le porte).
- Per la lucidatura finale usate il disco in pelo
(Fig. 8).
Fate anche qui attenzione che questo sia
completamente privo di sporco.
Togliere ora la pellicola di lucidante rimasta
seguendo lo stesso ordine in cui essa è stata
applicata.
Attenzione! Nel lavorare non esercitare
pressione!
Consigli per la manutenzione
Per una protezione ottimale della vernice
dell´auto si consiglia di lucidarla da 2 a 3 volte
l´anno.
Lavare l´autovettura almeno ogni 2 settimane.
Anleitung_AWP_1200_E_SPK7:_ 12.05.2010 13:59 Uhr Seite 18

19
I
Evitare di usare comuni detersivi perchè questi
potrebbero rovinare la vernice e sciogliere lo stra
to di cera.
Lavare l´automobile con una spugna pulita
cominciando dal tetto e scendendo verso i
parafanghi.
Si consiglia di togliere ogni giorno gli insetti, lo
sterco degli uccelli e le macchie di catrame dalla
superficie verniciata.
Per evitare che il detergente per il vetro rovini la
superficie verniciata si consiglia di spruzzarlo
direttamente sullo straccio e non sui finestrini.
6.2 Impiego come smerigliatrice
Per levigare utilizzate gli acclusi dischi abrasivi
(Fig. 9).
Facile sostituzione degli accessori per la levigatura
grazie al fissaggio a velcro.
Appoggiare il platorello di levigatura con tutta la
superficie.
Accendete l'utensile e, esercitando una pressione
moderata sul pezzo da lavorare, eseguire dei
movimenti rotatori oppure in senso trasversale e
longitudinale.
Per una levigatura grossolana si consiglia una
grana grossa, per il finishing invece una grana
più fine. Eseguite delle prove per vedere qual è la
grana migliore.
6.3 Regolazione del numero dei giri (Fig. 2)
Con la regolazione del numero dei giri potete
impostare il numero dei giri desiderato per il lavoro.
Premendo il tasto „+“ si aumenta il numero dei giri.
Premendo il tasto „-„ si diminuisce il numero dei giri.
Il numero dei giri impostato potete leggerlo sul
display (8).
Numero dei giri impostato = indicatore x 100
7. Sostituzione del cavo di
alimentazione
Se il cavo di alimentazione di questo apparecchio
viene danneggiato deve essere sostituito dal
produttore, dal suo servizio di assistenza clienti o da
una persona al pari qualificata al fine di evitare
pericoli.
8. Pulizia, manutenzione e
ordinazione dei pezzi di ricambio
Prima di qualsiasi lavoro di pulizia staccate la spina
dalla presa di corrente.
8.1 Pulizia
Tenete il più possibile i dispositivi di protezione,
le fessure di aerazione e la carcassa del motore
liberi da polvere e sporco. Strofinate
lʼapparecchio con un panno pulito o soffiatelo con
lʼaria compressa a pressione bassa.
Consigliamo di pulire lʼapparecchio subito dopo
averlo usato.
Pulite lʼapparecchio regolarmente con un panno
asciutto ed un poʼ di sapone. Non usate
detergenti o solventi perché questi ultimi
potrebbero danneggiare le parti in plastica
dellʼapparecchio. Fate attenzione che non possa
penetrare dellʼacqua nellʼinterno dellʼapparecchio.
Lavate gli accessori per la lucidatura solo a mano
e fateli asciugare allʼaria. A tale scopo usate solo
detergente delicato ed un panno umido.
8.2 Spazzole al carbone
In caso di uno sviluppo eccessivo di scintille fate
controllare le spazzole al carbone da un elettricista.
Attenzione! Le spazzole al carbone devono essere
sostituite solo da un elettricista.
8.3 Manutenzione
Allʼinterno dellʼapparecchio non si trovano altre parti
sottoposte ad una manutenzione qualsiasi.
8.4 Ordinazione di pezzi di ricambio:
Volendo commissionare dei pezzi di ricambio, si
dovrebbe dichiarare quanto segue:
modello dellʼapparecchio
numero dellʼarticolo dellʼapparecchio
numero dʼident. dellʼapparecchio
numero del pezzo di ricambio del ricambio
necessitato.
Per i prezzi e le informazioni attuali si veda
www.isc-gmbh.info
9. Smaltimento e riciclaggio
Lʼapparecchio si trova in una confezione per evitare i
danni dovuti al trasporto. Questo imballaggio
rappresenta una materia prima e può perciò essere
utilizzato di nuovo o riciclato.
Lʼapparecchio e i suoi accessori sono fatti di
materiali diversi, per es. metallo e plastica.
Consegnate i pezzi difettosi allo smaltimento di rifiuti
speciali. Per informazioni rivolgetevi ad un negozio
specializzato o allʼamministrazione comunale!
Anleitung_AWP_1200_E_SPK7:_ 12.05.2010 13:59 Uhr Seite 19

20
DK
„Advarsel – Læs betjeningsvejledningen for at reducere risikoen for personskade“
Brug høreværn.
Støjudviklingen fra maskinen kan forårsage høretab.
Brug beskyttelsesbriller.
Gnister, som opstår under arbejdet, eller splinter, spån og støv, som står ud fra maskinen, kan
forårsage synstab.
Anleitung_AWP_1200_E_SPK7:_ 12.05.2010 13:59 Uhr Seite 20
Other manuals for AWP 1200 E
1
Table of contents
Languages:
Other Alpha tools Sander manuals

Alpha tools
Alpha tools AWP 1200/1 E User manual

Alpha tools
Alpha tools ADS 180/1 User manual

Alpha tools
Alpha tools AWP 1200 E User manual

Alpha tools
Alpha tools 44.192.51 User manual

Alpha tools
Alpha tools ADS 180/1 User manual

Alpha tools
Alpha tools DS 180 User manual

Alpha tools
Alpha tools SS 135 User manual

Alpha tools
Alpha tools ASS 280 User manual

Alpha tools
Alpha tools 44.605.22 User manual

Alpha tools
Alpha tools A-SS 135 K User manual