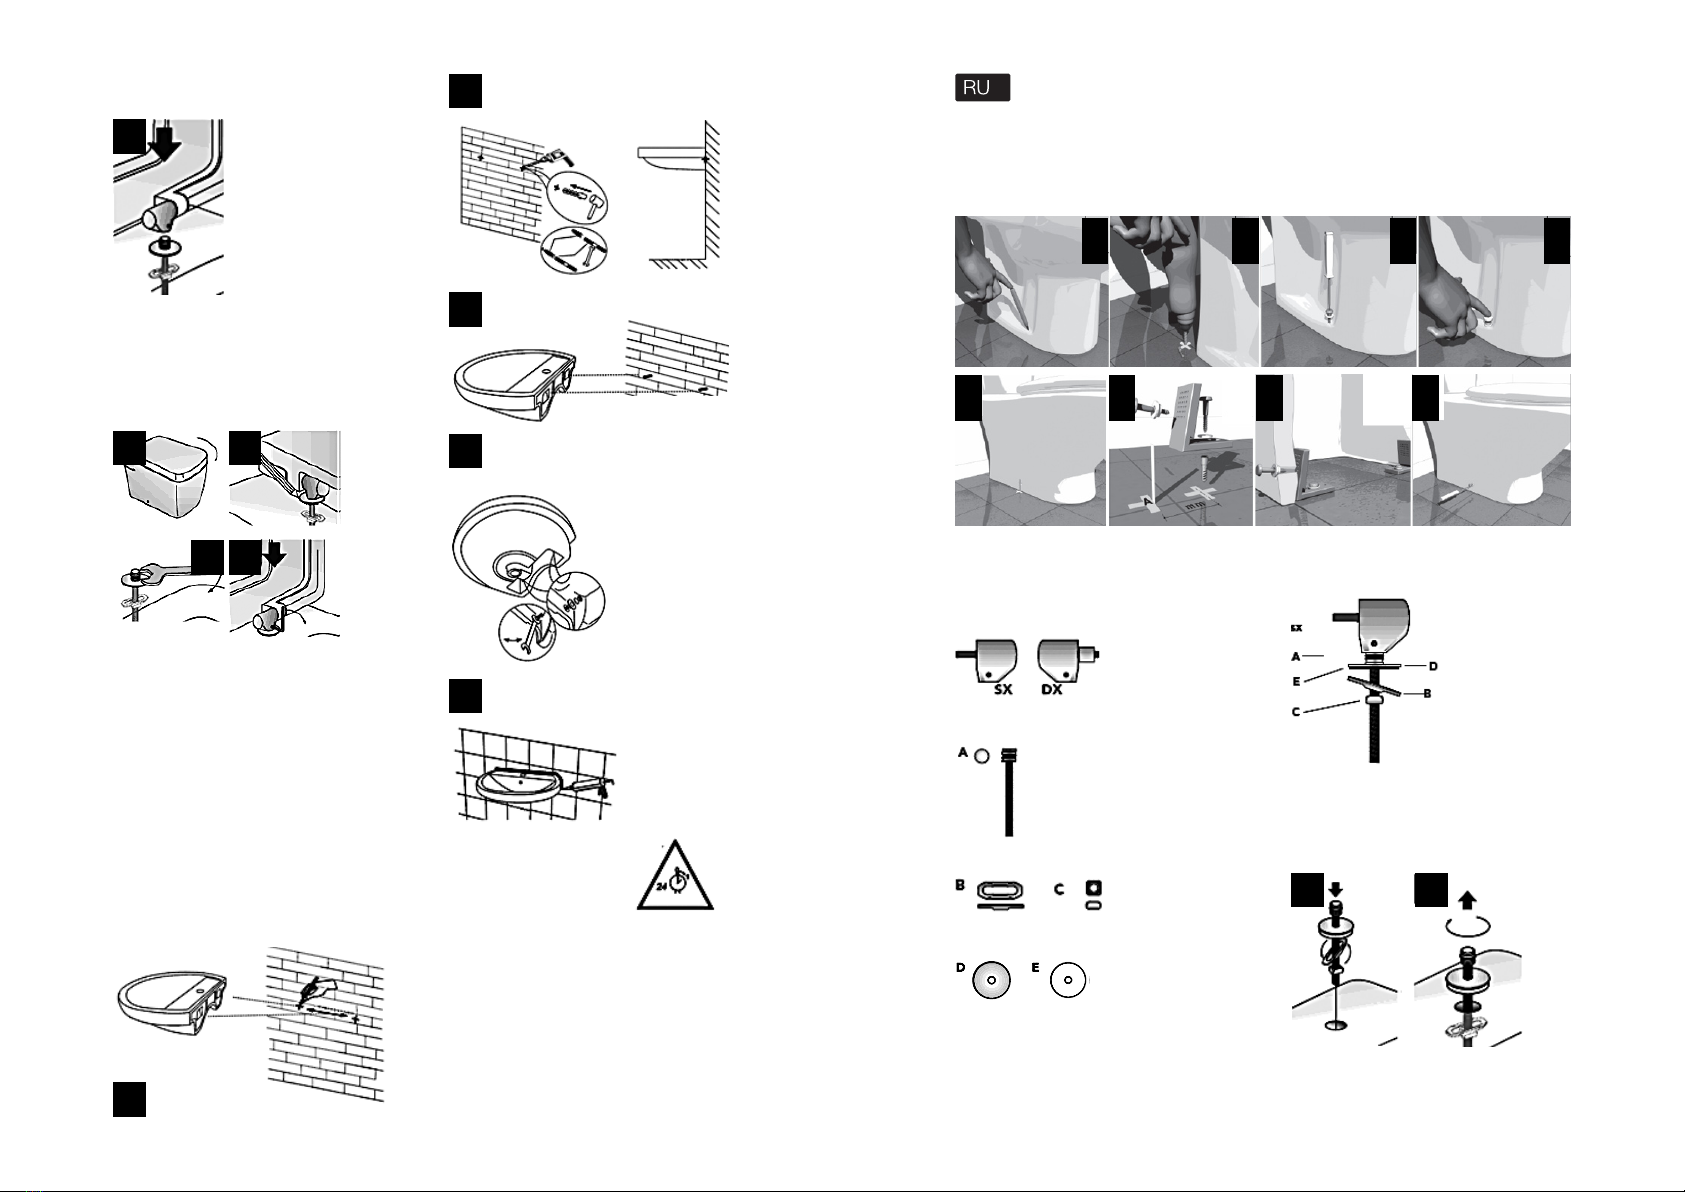
- встановить сидіння з кришкою, заздалегідь
забезпечене механізмами плавного опускання на
болти кріплення
- закрийте кришку і відцентруйте сидіння
відносно чаші унітазу. Відмітьте вірне положення
кріплення, після чого зніміть сидіння, затягніть
кріплення у відміченому положенні, після чого
надіньте сидіння, зафіксувавши механізми на
болтах кріплення.
Увага!
Щоб уникнути виходу з ладу механізму плавного
опускання (soft - close) сидіння, забороняється
докладати зусилля для примусового закриття
кришки/опускання сидіння.
Примітка:
При установці приставного унітазу виконайте
п. 1 і 2 цiєї інструкції. Встановлення бачка
прихованого монтажу здійснюйте, згідно
інструкції виробника, що додається до нього.
Монтаж підвісного унітазу на систему інсталяції
здійснюйте, згідно інструкції виробника, що
додається до неї. Встановлення сидіння з
кришкою виконайте згідно п.2 цiєї інструкції.
Встановлення раковины
Рекомендації по догляду за виробами.
Протирайте унітаз, бачок, сидіння і кришку
м'якою вологою тканиною. Не використовуйте
абразивні речовини і жорсткі тканини.
Рекомендується регулярне миття мильним
розчином, забороняється використання сильних
відбілювальних засобів. У разі попадання на
поверхню виробу рідин, що містять кислоту, їх
слід негайно видалити м'якою тканиною.
3
4
6
1
2
3
4
5
5
7
Instrukcja montażu i konserwacji
Muszla klozetowa
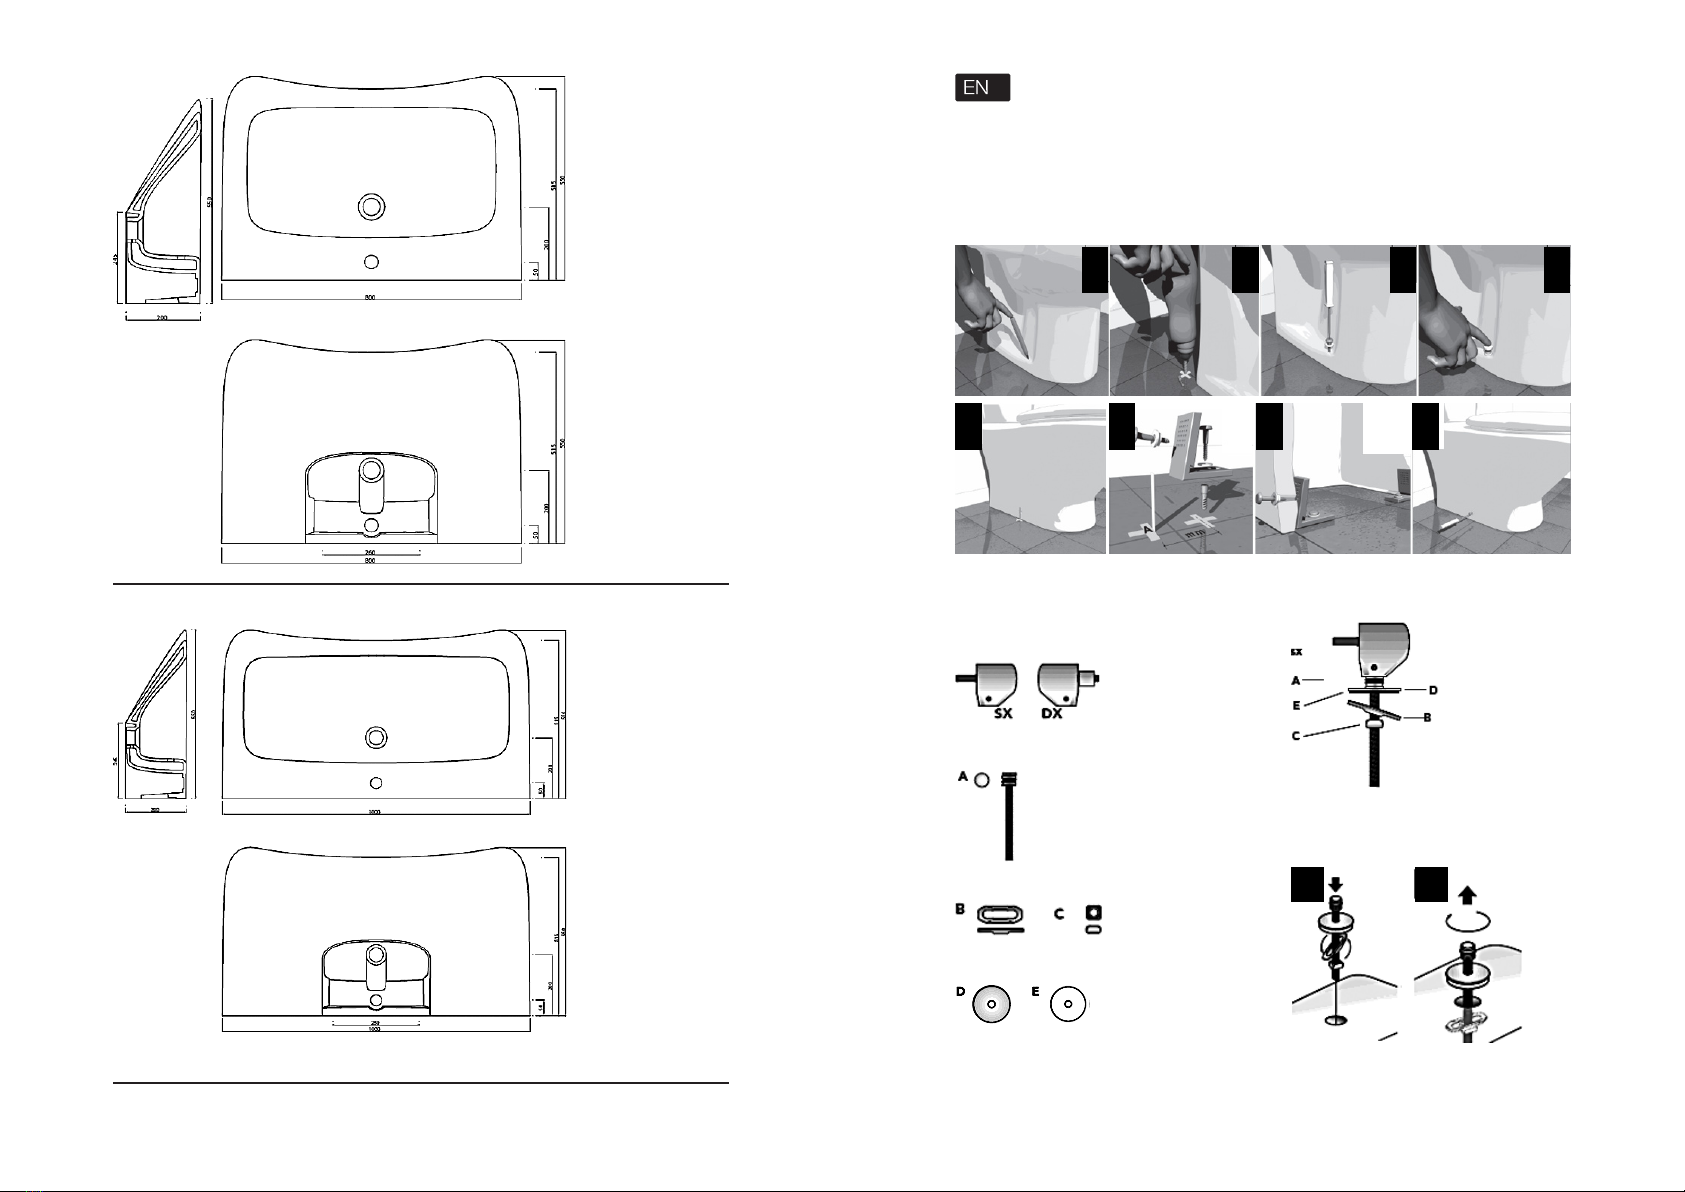
1. Mocowanie przystawianej muszli klozetowej / podłogowego bidetu do podłogi.
Przy montowaniu muszli klozetowej należy wybrać wariant, zgodnie z wchodzącym do kompletu wariantem
mocowania
2. Montaż i założenie siedzenia
W zestawie:
- siedzenie z pokrywą – 1 szt.
- mechanizm płynnego opuszczania (soft-close)- 1 szt.
- śruba mocowania - 2 szt.
- elementy mocujące – 2 komplety
- nakładka dekoracyjna (chromowana)- 2 szt.
- pierścień uszczelniający – 2 szt.
Rodzaj mocowania w komplecie:
- na śruby mocowania A należy nałożyć nakładki
dekoracyjne D, pierścienie uszczelniające E,
elementy mocujące B i C, w ten sposób, by element
B swobodnie przechodził przez otwór w muszli.
- Przekręcając B prostopadle do A, należy dokręcić
śruby A ręcznie do momentu ksacji
1
1
2
2
3
3
4
4
1 2