Amada MIH-200A User manual

AA09OM1158384-07
OPERATION MANUAL
AC INVERTER SEAM WELDING
POWER SUPPLY
MIH-200A

MIH-200A
Contents
1
Thank you for purchasing our AC Inverter Seam Welding Power Supply MIH-200A.
This operation manual describes its method of operation and precautions for use.
Read this operation manual carefully prior to use. Store appropriately for ready reference.
Contents
1. Special Notes
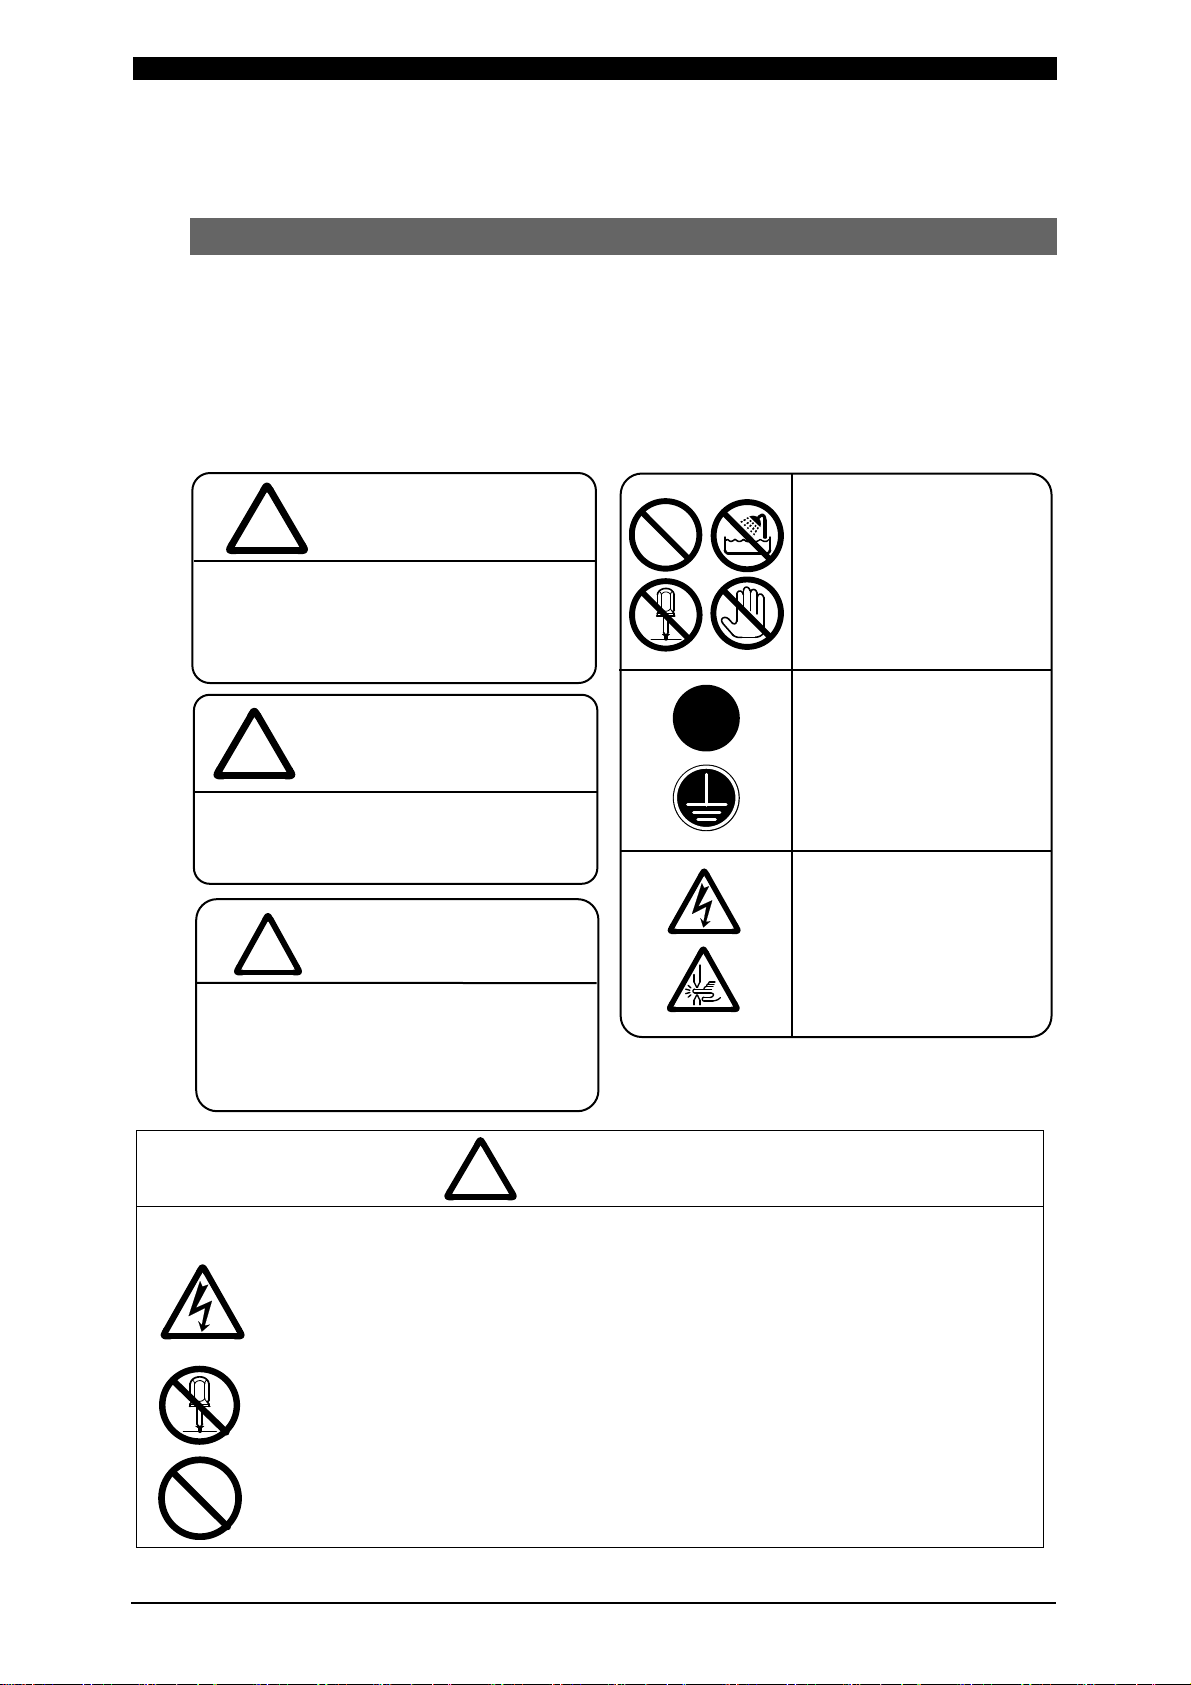
(1) Safety Precautions·································································1-1
(2) Precautions for Handling ·························································1-4
(3) On Disposal ·········································································1-4
(4) Warning Label for Safety ·························································1-5
(5) Operation of the OK Signal ······················································1-5
2. Features ··················································································2-1
3. Name and Functions of Each Section
(1) Front Panel ··········································································3-1
(2) Rear Panel···········································································3-3
(3) MA-627A (Sold Separately) ·····················································3-4
4. How to Operate Screens
(1) MENU Screen·······································································4-1
(2) POWER SUPPLY STATE Screen··············································4-1
(3) SCHEDULE Screen ·······························································4-3
(4) MONITOR1/MONITOR2 Screen ···············································4-6
(5) MONITOR SET Screen···························································4-8
(6) COPY SETUP DATA Screen ····················································4-9
(7) MODE SELECT Screen ··························································4-11
(8) MONITOR MODE Screen ·······················································4-15
(9) I/O CHECK Screen ································································4-16
(10) RESET TO DEFAULT Screen·················································4-17
(11) PROGRAM PROTECT MODE Screen ·····································4-17
(12) OVER WRITE / DOWN LOAD Screen······································4-19
5. Connection Procedures
(1) Basic Configurations ······························································5-1
(2) Connecting···········································································5-2
6. Interface
(1) Connection Diagram for External Input/Output Signals ··················6-1
(2) Description of External I/O Signals ············································6-3
(3) Connection of Input Signals ·····················································6-6
7. Basic Operation········································································7-1
8. Timing Chart ············································································8-1
9. Specifications
(1) Specifications ·······································································9-1
(2) Options (Sold Separately) ·······················································9-3
(3) Duty Cycle Graph ··································································9-4
(4) Schedule Data Table ······························································9-5
10. Outline Drawing ······································································10-1
11. Troubleshooting
(1) Fault Code List······································································11-1
(2) When a Welding Does not Start Even if the 2ND Signal is Input ······11-3

MIH-200A
1. Special Notes
1-1
1. Special Notes
(1) Safety Precautions
Before using, read "Safety Precautions" carefully to understand the correct method
of use.
These precautions are shown for safe use of our products and for prevention of
damage or injury to operators or others. Be sure to read each of them, since all
of them are important for safety.
The meaning of the words and symbols is as follows.
Do not touch the inside of the Power Supply except as instructed.
The interior of this Power Supply carries high voltage. It is very dangerous to
touch any parts except as instructed. Do not touch.
When inspecting the interior of the Power Supply, be sure to turn off the
power source of the Power Supply and wait for at least 5 minutes.
Never disassemble, attempt to repair, or modify the Power Supply.
These actions can cause electric shock and fire. Perform only the
maintenance described in the operation manual.
Never burn, destroy, cut, crush or chemically decompose the Power
Supply.
This product incorporates parts containing gallium arsenide (GaAs).
DANGER
!
Denotes operations and practices
that may imminently result in serious
injury or loss of life if not correctly
followed.
DANGER
!
Denotes operations and practices
that may result in serious injury or
loss of life if not correctly followed.
WARNING
!
Denotes operations and practices that
may result in personal injury or
damage to the equipment if not
correctl
y
followed.
CAUTION
!
!
These symbols denote
"prohibition". They are
warnings about actions
out of the scope of the
warranty of the product.
These symbols denote
actions which operators
must take.
Each symbol with a
triangle denotes that
the content gives
DANGER, WARNING
or CAUTION to the
operator.

MIH-200A
1. Special Notes
1-2
Do not insert your fingers or hands between the electrodes.
When welding, keep your fingers and hands away from the electrodes.
Do not touch any welded part or electrode during welding or just after
completion of welding.
The welded parts of a workpiece, electrodes, and the arm are very hot.
Do not touch them; burns may result.
Ground the equipment.
If the Power Supply is not grounded, you may receive an electric shock in
the event of malfunction or current leak.
!
Connect the specified cables securely.
Cables of insufficient current capacities and loose connections can cause
fire and electric shock.
Do not damage the power cable and connecting cables.
Do not tread on, twist, or apply force to any cable. Doing so may cause the
power cable and connecting cables to become broken, leading to electric
shock and fire.
Do not use any damaged power cable, connecting cable, or plug.
Failure to observe this precaution can lead to electric shock, short circuit, or
fire. If any part must be replaced or requires repair, consult us or your
distributor.
!
Stop the operation if any trouble occurs.
Continuous operation after occurrence of a trouble such as burning smell,
abnormal sound, abnormal heat, smoke, etc. can cause electric shock and
fire. If such a trouble occurs, immediately consult us or your distributor.
!
Persons with pacemakers must stay clear of the welding machine.
A person who uses a pacemaker must not approach the welding machine or
walk around the welding site while the welding machine is in operation,
without being permitted by his/her doctor. The welding machine generates a
magnetic field and has effects on the operation of the pacemaker while it is
turned on.
!
Protective gear must be worn.
Put on protective gear such as protective gloves, long-sleeve jacket, leather
apron, etc. Surface flash and expulsion can burn the skin if they touch the
skin.
!
Wear protective glasses.
If you look at the flash directly during welding, your eyes may be damaged.
If any surface flash and expulsion get in your eye, you may lose your
eyesight.
WARNING
!

MIH-200A
1. Special Notes
1-3
!
Apply the specified supply voltage.
Application of a voltage outside the specified range may result in fire or
electric shock.
Do not allow water to come in contact with the equipment.
Water on the electric parts can cause electric shock and short circuit.
!
Use proper tools (wire strippers, pressure wire connectors, etc.) for
terminal treatment of the connecting cables.
Do not cut the wire conductor; fire or electric shock may result.
!
Install the equipment on a firm and level surface.
Injury may result if the equipment falls or is dropped.
Do not sit on or place objects on the Power Supply.
Failure to observe this precaution may lead to malfunction.
!
Keep combustible matter away from the Power Supply.
Surface flash and expulsion may ignite combustible matter. If it is
impossible to remove all combustible matter, cover it with non-combustible
material.
Do not cover the Power Supply with a blanket, cloth, etc.
Do not cover the Power Supply with a blanket, cloth, etc. while it is in use.
The cover may be overheated and burned.
Do not use this Power Supply for purposes other than welding.
Use of this Power Supply in a manner other than specified can cause
electric shock and fire.
!
Use ear protectors.
Loud noises can damage hearing.
!
Keep a fire extinguisher nearby.
Keep a fire extinguisher in the welding shop in case of fire.
!
Maintain and inspect the Power Supply periodically.
Maintain and inspect the Power Supply periodically, and repair any damage
nearby before starting operation.
CAUTION
!

MIH-200A
1. Special Notes
1-4
(2) Precautions for Handling
Any work on this Power Supply must be performed only by the personnel with
sufficient knowledge and experience regarding an inverter-type welding power
supply.
Install this Power Supply on a firm and level surface. Operation on an incline
may result in malfunction.
For ventilation, provide 10-cm clearances at the intake and exhaust.
Transporting this Power Supply requires a minimum of two people. Be sure to
hold the underside when transporting. Holding a projection such as the
terminal cover may cause damage.
Do not install the Power Supply in the following locations:
Damp areas (where the humidity is higher than 90%),
areas where temperatures are above 40°C or below 5°C
areas near a high noise source,
areas where chemicals are handled,
areas where water may condense,
dusty areas, and
areas exposed to large amounts of vibration or shock.
Clean the exterior of the Power Supply using a soft, dry cloth or one slightly
dampened with water. If the Power Supply is very dirty, use diluted neutral
detergent or alcohol. Do not use paint thinner, benzine, etc., as they may
discolor or deform the Power Supply.
Do not insert a screw, coin, etc. into the Power Supply, as they may cause
malfunction.
Operate the Power Supply in accordance with the method described in this
operation manual.
Press switches/buttons carefully by hand. Handling them roughly (using a
screwdriver or the tip of pen) may result in a malfunction or failure.
Press switches/buttons one at a time. Pressing more than one switch/button at
a time may result in a malfunction or failure.
(3) On Disposal
This product incorporates parts containing gallium arsenide (GaAs). At the time of
disposal, separate it from general industrial waste or domestic waste and carry
out the disposal in accordance with applicable laws and regulations.

MIH-200A
1. Special Notes
1-5
(4) Warning Label for Safety
On the main body is warning label for safety. Its location and meaning are as
noted below.
Location: Output terminal cover.
Meaning: Shock hazard.
(5) Operation of the OK Signal
For products shipped in or after December 2014, the OK signal is not output at
WELD OFF. Other signals remain the same.
To check the product oepration at WELD OFF, use the END signal.
The OK/CAUTION signal is output at WELD ON as before.
For the output operation of the OK signal, see 4.(7)(f) OUT MODE (OK) and
Terminal 29 in 6.(2) Description of External I/O Signals.

MIH-200A
2. Features
2-1
2. Features
The MIH-200A is an inverter-controlled power supply for AC welding. In
combination with an AC transformer and a welding head, it can perform excellent
welding with less surface flash and expulsion and burns.
Function to monitor current, voltage, power and pulse width for judgment of weld
quality
Use of an inverter allows for high power factor and stable power conditions
Easy setting of a variety of items through the menu selection system
High thermal efficiency, reduced weld time and less thermal effect on the
surroundings are obtained because this power supply does not have
no-current-carrying time as in thyristor phase control.
Peltier effect (polarity effect) and uneven wear of electrodes, which are the problems
in DC welding, seldom occur, because this power supply performs AC welding.
Finer weld time setting in 0.2
ms and fine processing are possible, because the
control frequency is 5
kHz.
Stable welding current is always obtained, because this power supply is primary
constant-current controlled.
This power supply can be used for various purposes, because not only weld time but
also upslope and downslope can be set for the welding takt.

MIH-200A
3. Name and Functions of Each Section
3-1
3. Name and Functions of Each Section
(1) Front Panel
1) [WELD POWER] lamp (Green LED)
This lamp lights when the power is supplied to the Power Supply.
2) [READY] lamp (Green LED)
This lamp lights when the system is ready to start welding.
To turn on this lamp:
・[WELD ON/OFF] key
・WELD ON/OFF setting for program unit MA-627A and
・External WELD ON signal
must all be on.
POWER
ON
OFF
RESET
TROUBLE
WELD
POWER
WELD
ON/OFF
READY
START
WELD
TROUBLE
INDICATOR
PROGRAM
MONITOR
I/O
RS-232C/485
10)
9)
8)
1)
2)
3)
4)
5)
6)
7)
ON/O F F
WE LD
START
POW E R
READ Y
WE LD
WE LD
TROUB LE
TROUB LE
RESE T

MIH-200A
3. Name and Functions of Each Section
3-2
3) [START] lamp (Green LED)
This lamp remains lit while the 2ND signal is input.
4) [WELD] lamp (Green LED)
This lamp remains lit while the welding current is flowing.
5) [TROUBLE] lamp (Orange LED)
This lamp lights when an error is detected. At this time, the program unit emits a
beeping sound, and the Power Supply operation is interrupted.
6) [TROUBLE RESET] key
If this key is pressed while the [TROUBLE] lamp is lit, the lamp is turned off.
The [TROUBLE] lamp lights up again, however, as long as the error remains
uncorrected. Eliminate the cause of the error before pressing this [TROUBLE
RESET] key.
If the [TROUBLE] lamp lights up during operation, press the [TROUBLE
RESET] key, then input the 2ND signal again; operation will then resume.
7) [WELD ON/OFF] key
This key is one of those required to activate the [READY] lamp.
Pressing this key alternately lights and shuts off this lamp. When the key is
toggled on, the [READY] lamp lights, and when the key is toggled off, the lamp is
turned off. Hold down this key to toggle ON and OFF.
8) Welding Current Input Breaker Lever
Raise the lever to supply power and lower it to shut off power.
9) [RS-232C/485] connector
For external communication. This is not used on this Power supply.
10) [PROGRAM MONITOR I/O] connector
Connects to Program Unit MA-627A. Used for welding schedule setting and/or
reviewing monitor results.

MIH-200A
3. Name and Functions of Each Section
3-3
(2) Rear Panel
1) Connecting terminal block for external input/output signal
This terminal block is used to input the SCH signals and output the NG signals.
2) Terminal block for welding power input/output
This terminal block is used to connect to the input of the welding transformer and
the welding power supply (three-phase). The cable-mounting screw is for M5.
3) Welding Transformer [I/O] connector
This is not used on this Power supply. Do not connect anything.
50/60Hz
200V-240V ~
IN
POWER
OUTPUT
L1
L2
L3
U
V
I/OI/O
(With terminal covers mounted) (With terminal covers removed)
I/O
terminal
cover
I/O power supply cover 3)
2)
1)

MIH-200A
3. Name and Functions of Each Section
3-4
(3) MA-627A (Sold Separately)
1) [TROUBLE RESET] key
If this key is pressed while the [TROUBLE] lamp on the Power Supply is lit, the
lamp goes off. This key has the same function as the [TROUBLE RESET] key on
the Power Supply.
2) [CURSOR] keys
These keys are used to move the cursor (or ) to select an item.
3) [+ON/-OFF] keys
These keys are used to change the value of a selected item or to turn the item on
and off. When the [+ON] key is pressed, the selected value increases, and if the
[-OFF] key is pressed, the value decreases. The selected item is activated by
pressing the [+ON] key, and turned off by pressing the [-OFF] key.
4) [ENTER] key
This key is used to write the set or changed value and [ON/OFF] data to the
MA-627A. After any data is set or changed, be sure to press this [ENTER] key to
write the relevant data before moving the cursor.
If this [ENTER] key is not pressed, the MA-627A will not save the set data.
5) [MENU] key
This key is used to display the [MENU] screen. Press this key to return to the
[MENU] screen from any other screen.
ON
OFF
CURSOR
①②③
④⑤
⑥
TROUBLE
RESET ENTER
MENU
1)
6) 5)4)3)2)

MIH-200A
3. Name and Functions of Each Section
3-5
6) Connector
This connector is used to connect the circuit cable. Connect the other end of the
cable to the [PROGRAM MONITOR I/O] connector of the Power Supply.
CAUTION
No settings or changes may be made to any item from the receipt of the 2ND
signal through the end of the weld sequence and turning off the 2ND signal.
If setting is performed while the 2ND signal is input, the following screen
appears. Turn off the 2ND signal and press [TROUBLE RESET] key 1).
(Note) While the 2ND signal is input, 1) [TROUBLE RESET] key, [TROUBLE
RESET] key on the front panel (see (1) 6)) and the error reset input
terminal of the external I/O (see 6. Interface) do not work. Be sure to turn
off the 2ND signal before resetting an error.
MIH-200A IS BUSY OR NOT CONNECTED
Please RESET key in

MIH-200A
4. How to Operate Screens
4-1
4. How to Operate Screens
(1) MENU Screen
The MA-627A has various functions that are set from the respective screens. The
[MENU] screen displays these functions in menu form.
Move the cursor () to the desired item; press the [ENTER] key to move to the
selected screen (with the exception of the MODE SELECT screen).
The display of the [MENU] screen changes depending on the PROGRAM
PROTECT setting (See (11) PROGRAM PROTECT MODE Screen).
The numbers (1) to (10) indicate the paragraph No. within the chapter.
(1)
(2)
(3)
(4)
(5)
[MENU]
>POWER SUPPLY STATE COPY SETUP DATA
SCHEDULE MODE SELECT
MONITOR1 MONITOR MODE
MONITOR2
MONITOR SET
I/O CHECK
RESET TO DEFAULT
(6)
(7)
(8)
(9)
(10)
(2) POWER SUPPLY STATE Screen
This screen is used to display and set data for the Power Supply.
-POWER SUPPLY STATE
LCD CONTRAST(T:0 ---> 7:D) 2
CONTROL # 01
PROGRAMMED DATE 2000.01.01
POWER SOURCE FREQUENCY
MA-627A ROM VERSION # [ ]
MIH-200A ROM VERSION # [ ]
(a)
(b)
(c)
(d)
(e)
(f)
Appearance of characters used in the following explanation
Shaded characters (000) An item for which a value must be input, or which must
be set ON or OFF. Move the cursor ( ) to the number
(or to ON or OFF) to be selected or changed, and
press the [+ON/-OFF] key.
Outlined characters ( ) An item that is indicated on-screen but that cannot be
changed.

MIH-200A
4. How to Operate Screens
4-2
(a) LCD CONTRAST
Sets the screen contrast. The contrast can be set in a range from 0 to 7. The
larger the value, the darker the screen. Adjust the contrast if the screen is
difficult to view.
(b) CONTROL #
Input the identification No. of your Power Supply.
If you have two or more Power Supply units, input 01 for the first one, 02 for the
second one, 03 for the third one, and so on.
(c) PROGRAMMED DATE
Input the date on which a schedule is set as data. The date does not affect the
set schedule. When the Power Supply memory is initialized, the date is also
initialized to the date on which the ROM version is created.
(d) POWER SOURCE FREQUENCY
The frequency of the welding power is measured and indicated automatically.
(e) MA-627A ROM VERSION #
Indicates the ROM version No. of program unit MA-627A.
(f) MIH-200A ROM VERSION #
Indicates the ROM version No. of the Power Supply.
(Note) The Power Supply writes data into FLASH ROM on the control board when
a setting is changed or a schedule data is copied. The [READY] lamp on
the front panel and the external READY signal are turned off during writing.
Check that the [READY] lamp is turned on to start welding. It takes about 2
seconds at longest to write data into FLASH ROM.

MIH-200A
4. How to Operate Screens
4-3
(3) SCHEDULE Screen
Up to 255 welding schedules can be set on the Power Supply. These schedules
are indicated as SCHEDULE #1 to #255.
This screen is used to set the SCHEDULE No., length of weld time, welding current,
and so on. This data can be indicated using the 12 modes shown below, but the
indicated items are the same for all modes.
(a)
(c)
(d)
(j)
-SCHEDULE #255 WELD ON/OFF OFF
SQZ TIME CO TIME CNT HEAT
0000ms UP 00.0ms 000.0ms 999 (100)A
WELD1 00.0ms 000.0ms 999 100 A
HOLD WELD2 00.0ms 000.0ms 999 100 A
0000ms DOWN1 00.0ms 000.0ms 999 (100)A
DOWN2 00.0ms 000.0ms 999 (100)A
VALVE # 1 P/S RATIO 001.0
(b)
(e)
(f)
(g)
(h)
(i)
(k)
(a) SCHEDULE #
Select from #1 to #255 to set the SCHEDULE.
Normally select #1 first, then select additional schedules in sequential order.
(b) WELD ON/OFF
One of the settings required to turn ON the [READY] lamp of the Power Supply.
ON: WELD ON OFF: WELD OFF
(Note) Even if this switch is ON, the Power Supply cannot supply welding current
if the [WELD ON/OFF] key on the front panel or external WELD ON/OFF
signal is OFF. In order for the Power Supply to supply welding current, this
switch, the [WELD ON/OFF] key, and the external WELD ON signal must
all be ON.
(c) SQZ
Set the squeeze time during welding.
(d) HOLD
Set the hold time during welding.
(e) UP
Set the upslope time (to increase the welding current gradually), number of
counts and current value.
TIME Sets the weld time of half cycle. (a in the chart below)
CO TIME Sets the no-current-carrying time of half cycle. (b in the chart below)
CNT Sets the count of half cycle. (6 in the chart below)
(HEAT) Sets the start current value of upslope. (○
Ain the chart below)
(f) WELD1
Set the first weld time, number of counts and current value.
TIME Sets the weld time of half cycle. (c in the chart below)

MIH-200A
4. How to Operate Screens
4-4
CO TIME Sets the no-current-carrying time of half cycle. (d in the chart below)
CNT Sets the count of half cycle. (5 in the chart below)
HEAT Sets the current value of the first weld time (HEAT1). (○
Bin the
chart below)
(g) WELD2
Set the second weld time, number of counts and current value.
TIME Sets the weld time of half cycle. (e in the chart below)
CO TIME Sets the no-current-carrying time of half cycle. (f in the chart below)
CNT Sets the count of half cycle. (6 in the chart below)
HEAT Sets the current value of the second weld time (HEAT2). (○
Cin the
chart below)
(h) DOWN1
Set the first downslope time (to decrease the welding current gradually), number
of counts and current value.
TIME Sets the weld time of half cycle. (g in the chart below)
CO TIME Sets the no-current-carrying time of half cycle. (h in the chart below)
CNT Sets the count of half cycle. (5 in the chart below)
(HEAT) Sets the current value of the first downslope. (○
Din the chart below)
(i) DOWN2
Set the second downslope time (to decrease the welding current gradually),
number of counts and current value.
TIME Sets the weld time of half cycle. (i in the chart below)
CO TIME Sets the no-current-carrying time of half cycle. (j in the chart below)
CNT Sets the count of half cycle. (6 in the chart below)
(HEAT) Sets the current value of the second downslope. (○
Ein the chart
below)
Basic sequence
(Note) When OUT MODE(END) and OUT MODE(OK) are OFF
UP
HEAT1
WELD1
HEAT2
WELD2 DOWN1 DOWN2
SQZ
HOLD
SOL
BC
D
OK/CAUTION (Note)
END (Note)
Upslope
start current
end current
Downslope1
Aend current
Downslope2 E

MIH-200A
4. How to Operate Screens
4-5
Actual current waveform
(j) VALVE #
Two valves (welding heads) can be connected to the Power Supply. Use this
setting to select which of the two valves to use.
(k) P/S RATIO
Set the welding transformer turns ratio.
The turns ratio can be set in a range from 001.0 to 199.9.
(Example) When the tap voltage of the Welding Transformer MT-510AC is 3.5 V,
set 57.1 for P/S RATIO according to the formula 200 / 3.5 = 57.1.
1
2
3
4
5
6
A
B
1
2
3
4
5
WELD1
1
2
3
4
5
6
WELD2
C
13
24
5
1
2
3
4
5
6
DE
a
b
UP SLOPE
c
d
f
eg
h
DOWN SLOPE1 DOWN SLOPE2
j
i
No. of counts=5 No. of counts=6
No. of counts=6

MIH-200A
4. How to Operate Screens
4-6
(4) MONITOR1/MONITOR2 Screen
In this screen, you can confirm the operational conditions during welding.
Monitored data is displayed for each SCHEDULE.
(b) (c) (d)
(e)
-MONITOR1 SCHEDULE #225
CURR1 CURR2 VOLT1 VOLT2 POWER1 POWER2
AVE 000A 000A 0.00V 0.00V 0000W 0000W
MAX 000A 000A 0.00V 0.00V 0000W 0000W
MIN 000A 000A 0.00V 0.00V 0000W 0000W
TOTAL GOOD UPPER LOWER
COUNT1 000 000 000 000
COUNT2 000 000 000 000
(a)
(f)
(g)
(e)
-MONITOR2 SCHEDULE #225
TOTAL PULSE1 PULSE2
U 0000.0ms AVE 00.0% 00.0%
W1 0000.0ms W2 0000.0ms MAX 00.0% 00.0%
D1 0000.0ms D2 0000.0ms MIN 00.0% 00.0%
TOTAL GOOD UPPER LOWER
COUNT1 000 000 000 000
COUNT2 000 000 000 000
(a)
(a) SCHEDULE #
Set the No. of the SCHEDULE to monitor. The measured values (welding
current, voltage, etc.) for welding within that SCHEDULE are displayed.
The Power Supply stores the latest measured values of each SCHEDULE No.
The stored measurement values are not erased even when the power is turned
off, and thus can be checked for the next job.
(b) CURR1, CURR2
Displays the welding currents for WELD1 and WELD2.
Average value (AVE), maximum value (MAX) and minimum value (MIN) in the
set count value are displayed.
(c) VOLT1, VOLT2
Displays the measured voltages for WELD1 and WELD2 when the voltage
detecting cable is connected and the secondary voltage is input.
Average value (AVE), maximum value (MAX) and minimum value (MIN) in the
set count value are displayed.
(d) POWER1, POWER2
Displays the measured electric powers (measured current x measured voltage)
for WELD1 and WELD2 when the voltage detecting cable is connected and the
secondary voltage is input.
Average value (AVE), maximum value (MAX) and minimum value (MIN) in the

MIH-200A
4. How to Operate Screens
4-7
set count value are displayed.
(e) COUNT1, COUNT2
Displays the count values for WELD1 and WELD2. Judged by the item selected
in CAUTION ITEM on the MONITOR SET screen.
The number of total counts (TOTAL), values within range for judgment (GOOD),
values out of upper limit (UPPER) and values out of lower limit (LOWER) are
displayed.
(f) PULSE1, PULSE2
Displays the average pulse width of the primary current at half cycle as a
percentage of pulse width in full wave mode.
Average value (AVE), maximum value (MAX) and minimum value (MIN) in the
set count value are displayed.
(g) TOTAL
Displays the total weld time for each UP, WELD1, WELD2, DOWN1, and
DOWN2.
(Example) When TIME is 10.0 ms and CNT is 999, TOTAL is 9990.0 ms.
(Note) Monitored value
Only the last monitored value and the number of counts of each SCHEDULE
are kept for a period of 10 days after the power is turned off.
Table of contents
Other Amada Power Supply manuals

Amada
Amada 125DP User manual

Amada
Amada IP-400B User manual

Amada
Amada 125ADP User manual

Amada
Amada PULSETIG MAWA-050A User manual

Amada
Amada MD-A8000B-05 Series User manual

Amada
Amada CD-A Series User manual

Amada
Amada CL-P115A User manual

Amada
Amada HF2 User manual

Amada
Amada S-2200CA User manual

Amada
Amada IS-800CR User manual
Popular Power Supply manuals by other brands

3Com
3Com Powerware Uninterruptible Power System Prestige... Installation and operator's manual

Leonics
Leonics Ultimate-X 2000VA user guide

Crestron
Crestron C2N-SPWS300 Operation guide

Graymark
Graymark 803 manual

UTEPO
UTEPO USP600-2 Quick installation guide

Allen-Bradley
Allen-Bradley 1734-EP24DC installation instructions