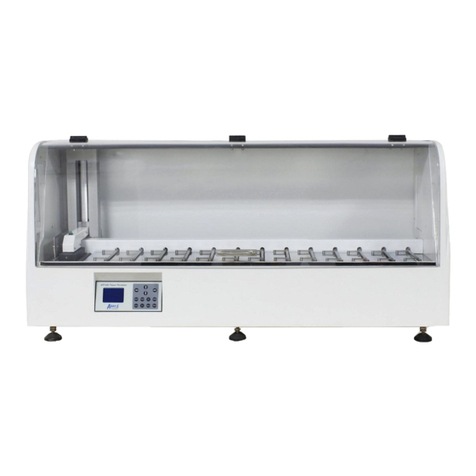
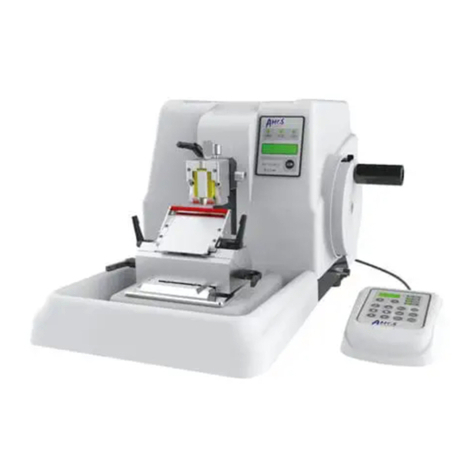
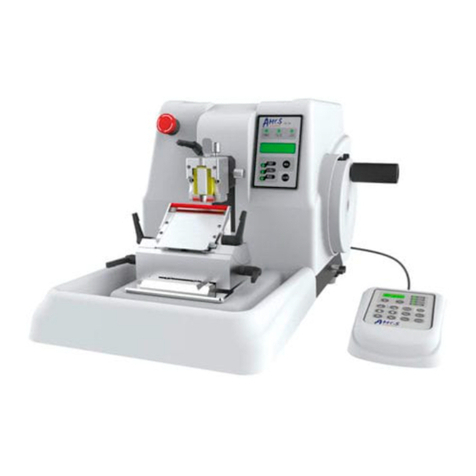
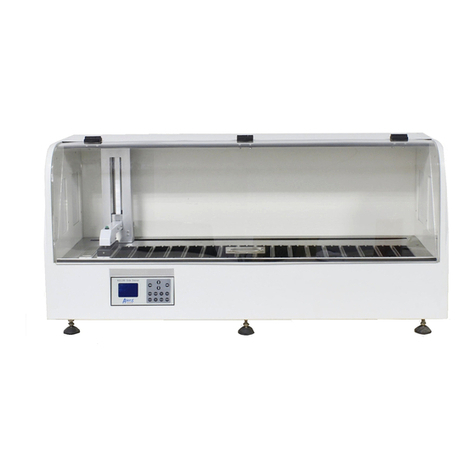
Amos AST 560 User manual

AST 560
Semi-automatic Cryostat Microtome
Operation Manual
www.amos-scientific.com
AMOS SCIENTIFIC PTY.LTD. ABN37 159 778 140


Presented in this Operation manual are the structure, functions
and using notice. Reading carefully prior to operating the
instrument.

Foreword
AST560 Cryostat Microtome is a
Semi- automatic microtome whose design
concept comes from customers all over the
world; it can meet different requirements
for tissue section.
To ensure the instrument works
properly, safely and perform durably, it is
necessary to read the operation manual
carefully.
Our companies are not only
responsible for the repair, but also train
distributors' ability of repairing. To
repair the product smoothly in time,
please contact your local distributor.
Notice: With the development of
technology and constantly updating of
products, this manual will make the
corresponding changes. Please forgive us
not to notify the improvement of technical
data and structure.

CONTENTS
1、SAFETY NOTES......................................................................................................................................1
1.1OVERVIEW .............................................................................................................................................................1
1.2 SAFETY WARNING ................................................................................................................................................1
1.3 SAFETY DEVICE ....................................................................................................................................................2
2、PERFORMANCE & PARAMETERS....................................................................................................3
2.1 PRODUCT DESCRIPTION &INTENDED USE.........................................................................................................3
2.2 OVERVIEW-INSTRUMENT COMPONENTS ...........................................................................................................3
2.3 PERFORMANCE INDEX .........................................................................................................................................4
2.4 TECHNICAL PARAMETER .....................................................................................................................................4
3、PREPARATION BEFORE OPERATING.............................................................................................5
3.1 INSTALLATION SITE REQUIREMENT ....................................................................................................................5
3.2 STANDARD DELIVERY...........................................................................................................................................5
3.3 INSTALLATION.......................................................................................................................................................6
3.4 ELECTRICAL CONNECTION ..................................................................................................................................7
4、OPERATION ...........................................................................................................................................8
4.1 OPERATION PANEL FUNCTION &CONTROL ......................................................................................................8
4.3 AUXILIARY FUNCTION....................................................................................................................................... 10
4.4 CRYO CHAMBER TEMPERATURE SETTING........................................................................................................ 11
4.5 SPECIMEN CLAMP TEMPERATURE SETTING .................................................................................................... 12
4.6 SECTION,TRIMMING AND RETRACTION SETTING.......................................................................................... 13
4.7 LOCK SCREEN KEY &AUXILIARY FUNCTION DISPLAY .................................................................................. 14
4.8 BLADE HOLDER INSTALLATION ....................................................................................................................... 14
4.9 CLAMPING THE SPECIMEN AND INSERTING THE BLADE................................................................................. 17
4.10 SECTION REFERENCE ..................................................................................................................................... 18
5、CLEANING & MAINTENANCE......................................................................................................... 18
5.1 CLEANING........................................................................................................................................................... 18
5.2 CLEANING THE WASTE TISSUE.......................................................................................................................... 19
5.3 MAINTENANCE .................................................................................................................................................. 21
6、TROUBLE SHOOTING....................................................................................................................... 21

AST 560 Semi-automatic Cryostat Microtome
201911119
---1---
1、Safety Notes
1.1Overview
The Operator Manual contains important safety instructions and information. In order to
operate the instrument safely, the operator must read carefully prior to starting up the instrument.
It is very important to ensure safety and avoid instrument damage. Please keep the manual close
to the instrument to read easily at any time.
▲Note: The safety marks and protective device on both instrument and accessories may
neither be removed nor modified , so as not to injure human body or instrument .
1.2 Safety Warning
Every principle person should read carefully and carry out strictly according to the following
safety notes relating to transport, installation, calibration, operation, maintenance, cleaning and
all aspects of the instrument.
1.2.1 Warning during transport and installation
●The instrument may only be transported or moved in an upright position and the tilt
angle should not exceed 45 °.
●Prior to removing the microtome , remove the blade holder .
●The input voltage has been preset at the factory , please check this setting complies with
your local power requirement before connecting to the main power
●Please use the power cord provided . If need to replace it, please use the power cord
with earth wire.
●Do not operate this instrument in the room with the danger of explosion .
●Don't remove or modify the protective device on both instrument and accessories , in
order to avoid injury to instrument or human body !
1.2.2 Warning of Operation
●Take care when handling microtome knives and disposable blades . The cutting edge is
extremely sharp and might cause serious injury.
●Remove the knife/blade before detaching the blade holder from the instrument , and put
the blade back into the blade box when not in use
●Never place the blade with the cutting edge facing upwards and never take out the blade
with your hands.
●Please clamp the specimen block before clamping the blade .
●Prior to replacing the specimen and blade , please lock the handwheel and cover the
blade guard on the cutting edge .
●Rotate the handwheel clockwise, otherwise it would affect section .
●Don't rotate the handwheel clockwise and counterclockwise frequently at top and
bottom , it might lead to deviation of section thickness .
●Ensure no liquid enters into interior of instrument during working .

AST 560 Semi-automatic Cryostat Microtome
201911119
---2---
1.2.3 Warning during cleaning and Maintenance
●Only authorized person may do the service and repair .
●Before cleaning and maintenance of each part, please cut off the power , unplug the
power plug , remove the blade holder and blade .
●Lock the handwheel before cleaning.
●Don't clean the instrument with corrosive liquid .
●Ensure no liquid enters into interior of instrument during clearing .
●After cleaning , don't turn on the instrument before it is completely dry .
●Turn the instrument off and unplug the power cord before changing the fuse . Please use
the fuse according to the requirement and specification in operation manual.
1.3 Safety Device
Handwheel locking mechanism
As showed in Fig1, it is the lock lever. Clockwise push the lever (1) until it locks the
handwheel at the upright position. To unlock the handwheel, rotate counterclockwise the lever
(1).
As showed in Fig1, the handwheel is locked. The "Lock" indicator light will be lit on display
panel as fig 2..
●Don't lock the handwheel when the handwheel is rotating , otherwise it will damage the
instrument
▲Attention: Before removing the instrument , changing specimen/blade or cleaning the
instrument ,the handwheel must be locked .
Fig 1 Fig 2
1
The lock indicator is highlighted,
indicating the handwheel is locked.

AST 560 Semi-automatic Cryostat Microtome
201911119
---3---
2、Performance & Parameters
2.1 Product description & intended use
Cryostat Microtome are usually composed of control systems , mechanical systems , drive
systems , blade holder , blade , housing etc , which is for the pathological analysis of tissue
samples .
2.2 Overview-Instrument Components
The main structure of cryostat microtome is shown in Figure 3 as below:
1
Touch Panel
7
Heating glass
2
Left control panel
8
Specimen Clamp
3
Freeze Shelf
9
Blade holder
4
Stationary heat extractor
10
Tool Shelf
5
Peltier on freeze shelf freezing area
11
Lock lever
6
Waste container
12
Handwheel
1
12
2
3
4
5
6
8
9
10
11
7
Fig 3

AST 560 Semi-automatic Cryostat Microtome
201911119
---4---
2.3 Performance Index
AST 560 is a Semi-automatic cryostat microtome whose specimen forward and backward
movement is controlled by motor. So it can get high quality section and easily operated. The
following is its performance:
⊙The whole instrument follows human engineering theory as well as artistic appearance,
made by numerical control machine.
⊙Artificial intelligence interface touch panel is easy to learn and operate.
⊙The retraction function can prevent the specimen from touching the blade sharp during lift.
⊙It equips counter which is able to show total quantity of slice.
⊙Adopt UV and O3disinfection to sterilize for 30 minutes every time.
⊙The specimen clamp semiconductor refrigerating function is enabled or disabled
⊙Defrosting at fixed time or manually
⊙Sterilization at fixed time or manually
⊙Sleep at fixed time or manually
⊙Large freezing shelf could load 17 samples simultaneously.
⊙Quickly feeding function.
⊙Waste section suction function.
⊙Alarm information query.
2.4 Technical Parameter
⊙Environment requirement:Temperature Range:+15℃~+30℃,
Air Humidity:≤60%
Working pressure:(86~106)kPa;
⊙Nominal Voltage:220~240V AC/100~120V AC
⊙Normal Frequency:50/60 Hz
⊙Power:≤1000VA
⊙Fuse:8A/20A
⊙Safe Classify:Classify I - Type B
⊙Lowest freeze chamber Temperature :-35±2℃
⊙Lowest freeze shelf Temperature:-45±5℃
⊙Lowest temperature of peltier unit on freeze shelf:-55±5℃
⊙Lowest temperature of peltier unit on specimen clamp:-50±5℃(Working time of
peltier :15 minutes)
⊙Electric coarse feed:Slow 300µm/s±30µm/s
Rapid 900µm/s±30µm/s
⊙Section thickness range:0 to 100µm
0 to 3µm,in 0.5µm increments
3 to 10µm, in 1µm increments
10 to 20µm, in 2µm increments
20 to 100µm,in 5µm increments

AST 560 Semi-automatic Cryostat Microtome
201911119
---5---
⊙Trimming thickness range: 0 to 600µm
0 to 50µm,in 5µm increments
50 to 100µm, in 10µm increments
100 to 600µm, in 50µm increments
⊙Retraction :0~80µm, in 5µm increments
⊙Specimen feed:24mm ±0.2mm
⊙Vertical stroke:54mm±1mm
⊙Specimen Max:35×35mm
⊙Repositioning of blade holder base(left-right) :50±1mm
⊙Motorize cutting speed : 75~230mm/s ±10% .
⊙Dimension: Width:715mm ,
Length:765mm ,
Height:1230mm ,
⊙Weight: About 130kgs
3、Preparation before operating
3.1 Installation site requirement
⊙The floor stand instrument fixed 4 wheels and 2 fixed support feet . The front only be
used during movement. Remove the package and move the instrument to the installation
site, then adjust the two fixed support feet and make the front wheels disabled.
⊙Start the instrument after let it rest for at least 2 hours .
⊙Ensure no other goods around the instrument . At least 300mm distance must be kept for
ventilation and heat dissipation.
⊙Ensure the working temperature and humidity must be in accord with the specification in
manual .
⊙Ensure leaving enough running space for rotating the handwheel .
▲Notice: Do not operate the instrument in the room with explosion hazard .
3.2 Standard Delivery
AST560 Cryostat Microtome
1set
7mm Wrench
1pc
Blade holder
1set
Disposable Blade
1box
Handwheel
1pc
Power Cord
1pc
Specimen clamp
18pcs
Fuse
2pcs
M5 Allen Key
1pc
Brush
1pc
M3Allen Key
1pc
Operation Manual
1pc
●Please check the supply carefully with the packing list after opening the carton . If you
have any doubt, contact the seller immediately .If you have any special requirement, please
illuminate it before the order.

AST 560 Semi-automatic Cryostat Microtome
201911119
---6---
1
2
3
4
5
6
8
7
9
10
11
12
3.3 Installation
3.3.1 Unpacking
As showed in the fig 4, the following is the instrument accessories:
Remove the cover (1) and
carton body (4), then take the
following things in order:
Upholder (2) , Corner Support
1 (3) , Corner Support 2(6) ,
Corner Support 3(7) , Corner
Support 4 (11) , Handwheel
(8) , Blade Holder (9), Cryostat
Microtome (12) ,
Glass Support (5).
Then take out other accessories
in the inner box package to
install the instrument.
Fig 4
1
Carton Cover
7
Corner Support 3
2
Upholder
8
Handwheel
3
Corner Support1
9
Blade Holder
4
Carton body
10
Carton Base
5
Glass Support
11
Corner Support 4
6
Corner Support 2
12
Cryostat Microtome

AST 560 Semi-automatic Cryostat Microtome
201911119
---7---
3.3.2 Handwheel Assembly
·Take out the handwheel accessories from
handwheel box .
·Tighten the handwheel lever (2) into handwheel (1)
with 7mm wrench .
·Insert bearing(3) , handwheel cover (4) ,bearing (3)
and handwheel washer (5) in order .
·Tighten them with M5×16 hexagon socket
screw(6) .
Fig 5
1
Handwheel
4
Handwheel Cover
2
Handwheel lever
5
Handweel washer
3
Bearing
6
M5×16 hexagon Socket Screw
3.4 Electrical Connection
●The voltage has been preset at the factory . Before connecting the instrument to the power,
please check that this setting complies with the local power requirements.
●Connect the instrument to a ground power socket to avoid accident .
●Please use the power cord provided . If need to replace it, please use the power cord with
earth wire.
●Insert the fuse(1) into the fuse socket (2)as it showed in the fig6 and insert the whole fuse
socket into the socket(3) as fig 6.
●Attention: Before changing the fuse , please cut off the power supply and pull the plug . Use
the fuse according to the specification in operation manual.
Fig6 Fig7
●As fig7 shows power switch . Turn off as the left fig and turn on as right fig.
●After turning on the power , display panel light and the specimen block will be back to the
original base position automatically with a beep .
3
2
1
1
2
3
4
5
6

AST 560 Semi-automatic Cryostat Microtome
201911119
---8---
4、Operation
4.1 Operation Panel Function & Control
All the parameters are set and displayed via Touch Panel. After power on, use the control
panel to operate the instrument as follows:
4.1.1 Touch Panel Main Interface
The touch panel main interface is as followed:
Fig 8
1.Timing Set
Click the icon, pop-up sub-interface, set timing parameters for each
function
2.Auxiliary Function
Click the icon ,pop up sub-interface , select the auxiliary function
3.Lamp
Click the icon ,turn on/off the lamp
4.Time display and set
Display current date and time .Click the icon ,set the date and time
5.Cryo chamber
temperature set and display
Display the actual cryo chamber temperature ; Click the icon , pop
up sub-interface , set the cryo chamber temperature
6.Freeze shelf temperature
Display the freeze shelf temperature
7.Specimen clamp
temperature
Display specimen clamp temperature ; Click the icon , pop up
sub-interface, set its temperature
8.Environment temperature
Display the environment temperature
12
1
2
4
3
5
6
7
8
9
10
11
13
14
15
16
17

AST 560 Semi-automatic Cryostat Microtome
201911119
---9---
9SECT/TRIM :alternative
select key
Click the icon, it switches between sections and trimming modes,
the current selected mode will turn to green. The corresponding item
shows the thickness value, and click this value, it pops up a numeric
keypad where can input the required value. The thickness range
refers to section 2.4-Technical parameters. For example, when the
thickness range is 0~3μm, the increment is 0.5μm. When you set
2.8μm, the default thickness is 3μm.
10Retra: Retraction key
Click the icon, “Retra”changes to green, the corresponding
thickness value shows on item 15. Click it, it pops up a numeric
keypad which is for modifying the retraction value. The value range
refers to Section 2.4
11 .Lock key
Click the icon to lock the screen or unlock the screen. The lamp key
is not controlled by this key
12.Value increasing arrow
Click this key to increase the value on item 15
13Section number sum
Section number sum , when exchange between slicing and
trimming, the value will return to zero automatically.
14.Progress display
Display the sample clamp progress
15.Section thickness set
According to the selection of item 9 , 10 and 11, it shows the setting
value of section, trimming and retraction. It can modify the value by
up and down arrow. Or click the value and it will pop up a keypad
where you could input the required value directly. The range refers
to the section 2.4.
16.Auxiliary function status
When the auxiliary function is activated , the corresponding icon is
highlighted
17.Value decreasing arrow
Click this key to decrease the value on item 15
4.1.2 Left control panel
The left control panel is used to control the specimen forward to
backward moving from blade holder as fig 9 :
Fast forward/fast backward (two arrows)
Adjust the specimen position rapidly; the speed could
reach900±30µm/s
Slow forward/slow backward (single arrow)
Adjust the specimen position slowly; the speed could
reach300±30µm/s
● Specimen feed distance is 24mm. Once exceeding this distance, the buzzer will beep and the
specimen movement stops.
Fig 9

AST 560 Semi-automatic Cryostat Microtome
201911119
---10---
4.2 Timing Set
Click the timing icon on the upper left corner of the main screen; it pops up a sub-interface
as shown below fig 10.
Fig 10
1 Left arrow
Use cooperatively with right arrow 3, select one date and set its working time
for each function. As fig10 , it shows each function’s working time on
Wednesday
2 Selected date
The selected date; Within setting of the function in this date, press the arrow
to select the next date to continue setting
3 Right arrow
Use cooperatively with left arrow 1 , select one date and set its working time
for each function
4 Automatic
defrosting time
Set the selected date and set the automatic defrosting time; Please note to
save the sample and remove the waste before defrosting
5 Automatic start
time
Set the selected date and set the automatic start time
6 Automatic
disinfection time
Set the selected date and set UV disinfection time. Please note it disinfects
only when the heating window closed
7Sleep time
Set the automatic sleep time
8Back
Press the key to return to the main interface after setting the parameters
4.3 Auxiliary Function
9
4
5
1
6
7
8
2
3

AST 560 Semi-automatic Cryostat Microtome
201911119
---11---
Click the auxiliary function setting icon on the left side of the main screen to pop up the
auxiliary function sub-interface as below fig 11.
Fig 11
1Real-time defrosting
Click this key to enter defrosting status immediately
2Real-time
disinfection
Click this key to enter disinfection status immediately. Please note it
disinfects only when the heating window closed
3Real-time sleep
Click this key to enter sleep status immediately
4Specimen clamp
peltier switch
When the specimen clamp temperature is lower than -8℃, click this icon to
activate this function. It will work for 15 minutes and stop.
5Pump waste sweeps
Prepare the related tools, click on this icon, the device automatically pump
cutting waste sweeps
6 Feed to memory
position
When the sample feeding, memory the current position and use
cooperatively with item 7.
7Automatic feeding
Click this icon, it feeds to memory position automatically.
8Alarm information
When the device alarms, click it to check the alarm information.
9 Back
After setting the parameters, click it back to the main interface.
Notice: Be sure to take out the samples and waste bags etc before entering into defrosting status.
The item 6 and 7 is only suitable for samples with similar thickness.
4.4 Cryo chamber temperature setting
1
2
3
4
6
5
7
8
9
10

AST 560 Semi-automatic Cryostat Microtome
201911119
---12---
Click the value beside the cryo chamber icon on main interface; it pops up sub-interface
temperature setting as below fig 12:
Fig 12
1Temperature
setting
It shows current set temperature. The value can be modified by item 2 and 3.
2Value
adjustment
Double arrows can be adjusted once 5 ℃, single arrow can be adjusted 1 ℃
3Quick value
selection
Select temperature value quickly.
4Back
After setting the parameters, click it back to the main interface.
4.5 Specimen clamp temperature setting
Click the value beside the specimen clamp icon on main interface. It pops up a sub-interface
temperature setting:
1 Temperature
setting
It shows current set temperature. The value can be modified by item 2 and 3.
1
2
3
4
1
2
3
4
Fig 13

AST 560 Semi-automatic Cryostat Microtome
201911119
---13---
2Value adjustment
Double arrows can be adjusted once 5 ℃, single arrow can be adjusted 1 ℃
3Quick value
selection
Select temperature value quickly.
4Back
After setting the parameters, click it back to the main interface.
4.6 Section, Trimming and Retraction setting
The section, trimming and traction options are located on the right side of the main interface
as below fig 14:
Fig 14
1.Section Option
When the current mode is trimming (TRIM is green), click SECT/TRIM icon
once, it turns to section mode, while SECT turns to green. When the current
mode is retraction (RETRA is green), click RETRA icon once, it turns to
white, while SECT turns to green which means the current mode is section.
2.Trimming
Option
When the current mode is section (SECT is green), click SECT/TRIM icon
once, it turns to retraction mode, while TRIM turns to green. When the current
mode is retraction ( RETRA is green) ,click RETRA icon once , it turns to
white ,while SECT turns to green which means the current mode is
section .And then click SECT/TRIM once to turn to trimming mode .
3.Retraction
Option
Click RETRA icon once, RETRA turns to green, it means the retraction mode
is selected.
4.Up arrow
Click the up arrow icon, increase the value for item 6. The increments refers
to section 2.4 –technical parameters.
5.Down arrow
Click the down arrow icon, decrease the value for item 6. The increments
refers to section 2.4 –technical parameters.
6.Thickness and
Setting
It shows corresponding item thickness value, and click this value, it pops up a
numeric keypad where can input the required value. The thickness range
refers to section 2.4-Technical parameters. For example, when the thickness
range is 0~3μm, the increment is 0.5μm. When you set 2.8μm, the default
thickness is 3μm.
4
2
3
6
5
1

AST 560 Semi-automatic Cryostat Microtome
201911119
---14---
4.7 Lock Screen Key &Auxiliary Function Display
The lock screen key and auxiliary function display is located in the bottom of the main
interface as below fig 15:
Fig15
1.Lock screen
key
The red icon indicates touch screen is locked .Click it to unlock the screen,
while the icon turns to blue. In the locked status, all the keys are useless
except lamp key.
2.Handwheel
lock
When the hand wheel is locked, the icon is highlighted, or the icon is dark.
The fig 17 shows the handwheel is locked.
3.Defrosting
When it is defrosting, the icon is highlighted, or it is dark.
4.Sleep
When it is in sleep status, the icon is highlighted, or it is dark.
5.Disinfection
When it is in disinfection status, the icon is highlighted, or it is dark.
6.Heating glass
opened
When the heating glass is open, the icon is highlighted, or it is dark.
7.Alarm
When the device has alarm information, the icon is highlighted, or it is dark.
8.Peltier status
When activate the specimen clamp peltier , the icon is highlighted , or it is
dark
4.8 Blade Holder Installation
As shown in fig 16 below, the blade holder is mainly consist of the following parts;
1
Longitudinal movable jaw
7
Fixed lever 2
2
Rotating movable jaw
8
Fixed lever 3
3
Movable blade clamp
9
Fixed lever 4
4
Fixed blade clamp
10
Anti-roll plate lock knob
5
Anti-roll plate
11
Anti-roll plate height adjusting knob
6
Fixed lever 1
⊙Fixed lever 1: It is used to fix the blade in the blade holder.
⊙Fixed lever 2: It is used to fix the blade holder into the cryo chamber.
⊙Fixed lever 3: Fixed blade clamp can be moved in the direction of arrow B, when it moves to
1
5
6
2
3
4
7
8
9

AST 560 Semi-automatic Cryostat Microtome
201911119
---15---
correct position and fix it by fixed lever 3.
⊙Fixed lever 4: Rotating movable jaw can be moved in the direction of arrow A on longitudinal
movable jaw to adjust the holder angle. When it reaches to correct angle, fix it by lever 4
⊙Anti-roll plate height adjusting knob: Turn the adjusting knob to adjust the relative distance
between the anti-roll plate and the blade, to adjust the anti-roll affection.
The blade holder has been already assembled when leaves factory, it only needs to be installed in
the equipment.
Fig 16
Installation of blade holder and base
As showed in fig 17, slide the blade holder along the track in cryo chamber, turn the fixed
lever 2 to horizon position to lock the blade holder. The blade is close to specimen clamp, please
do as the steps:
⊙If there is bladed installed, please take care to remove the blade and place it properly.
⊙Turn the fixed lever 2 (2) slowly until the locking block (3) at the bottom of the blade holder
moves to the farthest position away from the blade holder.
⊙Aligning the locking block (3) at the bottom with the circular hole (4) of the rail(1) ; Meanwhile ,
align the V-shaped groove (5) at the bottom of the blade holder with the V-shaped groove (6) on
rail (1) , and then place the blade holder on the rail (1) gently and push it forward a reasonable
3
4
5
6
7
8
10
9
11
2
1
10
A
B
Table of contents
Other Amos Laboratory Equipment manuals
Popular Laboratory Equipment manuals by other brands

CORNING
CORNING LSE 6703 instruction manual

Parr Instrument
Parr Instrument 4703 Operating instructions manual

Agilent Technologies
Agilent Technologies PSG Series Service guide

Radiometer Analytical
Radiometer Analytical TitraLab TIM840 user guide

Baracoda
Baracoda RoadRunners Laser Programming guide

Thermo Scientific
Thermo Scientific Dionex ICS-5000 Operator's manual

Witeg
Witeg WHM Series operating manual

Biosan
Biosan FTA-1 User instructions

Thermo Scientific
Thermo Scientific Safe 2020 operating instructions

H.E. Anderson
H.E. Anderson Feeder J Plus Installation Guidelines and Operation

Biotage
Biotage TurboVap 96 Dual Installation and safety

Xylem
Xylem SI Analytics TITRONIC 500 operating manual