For full warranty information, refer to the AMX AutoPatch Instruction Manual(s) associated with your Product(s).
4/07
©2007 AMX. All rights reserved. AMX and the AMX logo are registered trademarks of AMX.
AMX reserves the right to alter specifications without notice at any time.
3000 RESEARCH DRIVE, RICHARDSON, TX 75082 • 800.222.0193 • fax 469.624.7153 • technical support 800.932.6993 • www.amx.com
93-900-864 REV: A0
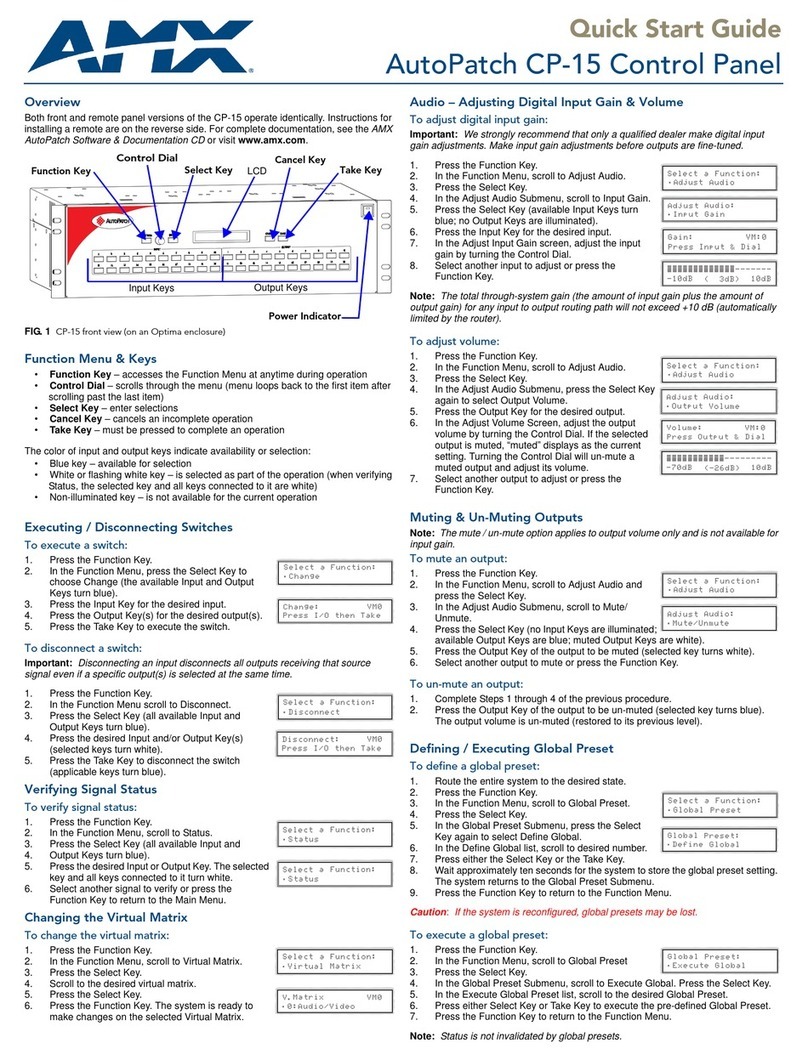
Caution: If the system is reconfigured, global presets may be lost.
To execute a global preset:
1. Press Function Key until the Global command is visible (bottom of screen).
2. Choose the Global command.
3. In the Execute Global Preset screen, locate desired (predefined) Global
Preset.
4. Press the Select Key.
5. Press the Take Key to execute the global preset.
System Error Codes / Troubleshooting
If error codes appear in the LCD (e.g., E01000A), a common troubleshooting
strategy is resending the command to see if the error was simply a timeout error.
Other things to check: link connections, power cables, and power source. If the
system still displays an error code, refer to the instruction manual on the CD or at
www.amx.com.
Checking the Software Version
To check the software version:
1. At the Main Menu screen, press Function Key until Setup command is visible.
2. Choose the Setup command; in the Setup screen, choose the Version
command.
The Setup Version screen appears (see following):
• Host – software version of initial operating system (IOS) for control panel
• Driver – control panel’s firmware version
• XNet ID – control panel’s XNNet device number
• Bridge – version of communication link from control panel to enclosure’s CPU
CP-20A Remote
General Specifications
Rear View
Caution: Do not use the Service connector as a point of control.
Installing a CP-20A Remote Panel
ESD Warning: Avoid ESD (Electrostatic Discharge) damage to
sensitive components; be sure you and the control panel(s) are
properly grounded before touching any internal materials.
Communication Cable Requirements
• Two-conductor, 20 AWG, 7/28 strand cable with a drain wire or shield,
such as Alpha 2412C (customer supplied)
• Max. length of cable: 1,000 ft. (304.8 m) total, including linked panels.
Installing the Panel
To Install a CP-20A Remote Panel:
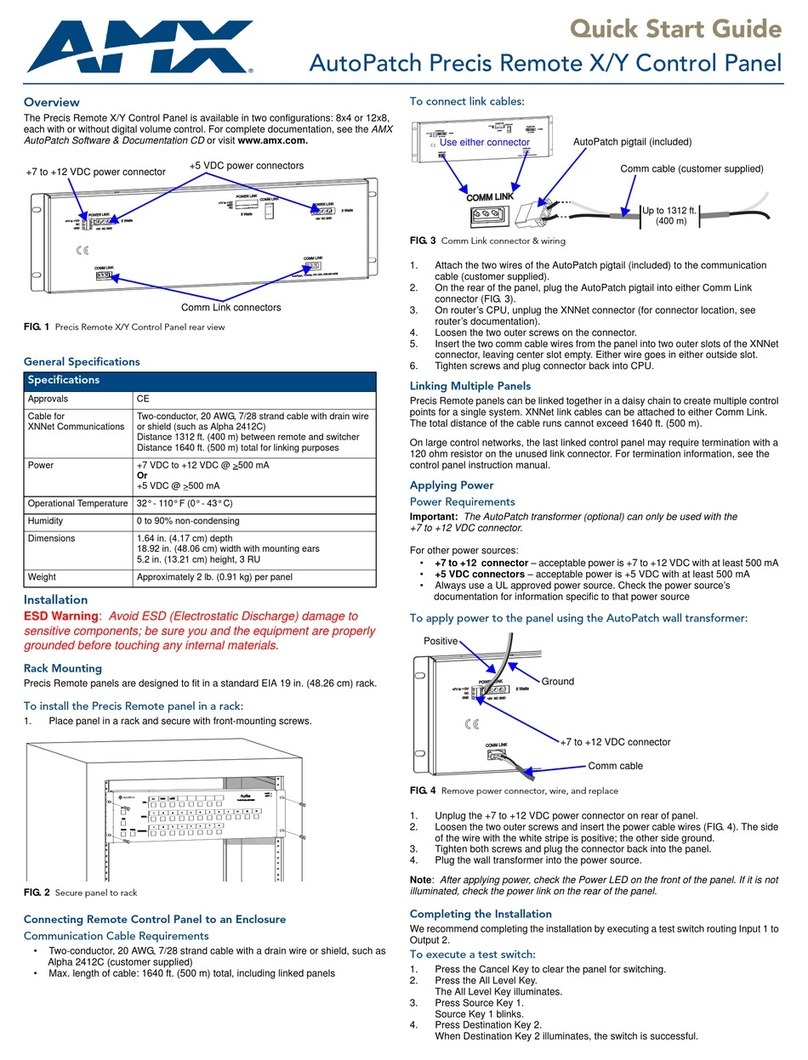
1. Unplug one of the Comm Link connectors (see FIG. 1)
2. Loosen the two outer screws on the connector.
3. Insert XNNet link cable wires; either wire goes in either outside slot (FIG. 2).
4. Tighten screws and plug the connector back into the Comm Link connector.
5. On router’s CPU, unplug XNNet connector (for connector location, see router
documentation).
6. Loosen the two outer screws on the connector.
7. Insert the two wires from the CP-20A into two outer slots of the CPU’s
connector, leaving center slot empty. Either wire goes in either outside slot.
8. Tighten screws and plug connector back into CPU.
Multiple Panels
CP-20A Remote Panels can be linked together in a daisy chain to create multiple
control points for a single system. XNNet link cablescan be attached to eitherComm
Link. The total distance of the cable runs cannot exceed 1,000 ft. (304.8 m).
On large control networks, termination may be required on the last linked control
panel (or device); for termination information, see the control panel instruction
manual (or device documentation).
Rack Installation
CP-20A Remote Panels are designed to fit in a standard EIA 19 in. (48.26 cm) rack.
Optimum viewing angle is at eye level.
To install the CP-20A Remote in a rack:
1. Wire the CP-20A to the enclosure and to a power source.
2. Insert the wired panel through the rear of the rack.
3. Attach panel with front mounting screws.
4. Apply power to the panel (see below).
5. After a brief wait, execute a test switch.
Applying Power
Important: Power requirements: +9 VDC @ 500mA. Always use a UL approved
power source. Check the power source’s documentation for information specific to
that power source.
On the (optional) AutoPatch wall transformer, the side of the wire with the white
stripe is positive and the other side is ground.
To apply power to the CP-20A Remote:
1. Unplug the power connector on the CP-20A Remote.
2. Loosen the two outer screws and insert the power cable wires (FIG. 3).
3. Tighten both screws and plug the connector back into the remote panel.
4. Place CP-20A Remote in rack or other permanent location before
applying power.
Completing the Installation
We recommend completing the installation by executing a test switch routing Input 1
to Output 2.
To execute a test switch:
1. Press the Function Key to view the Main Menu screen. In the Main Menu,
press the Change Key. (If Change Key is not visible, press Function Key until
Change Key appears).
2. At the Change Input screen, locate Input 1.
3. Press Select Key.
4. In Change Output screen locate Output 2. Press Select Key.
5. Press Take Key.
Important: If the CP-20A was not part of the original system, the current
configuration file must be uploaded to the remote. To upload the current file: in the
Main Menu, choose Setup, then Reload. For instructions on loading a new
configuration file, see the instruction manual on the CD or at www.amx.com.
Specifications
Cable for
XNNet Communications Two-conductor, 20 AWG, 7/28 strand cable with drain wire
or shield (such as Alpha 2412C)
Distance 1000 ft. (304.8 m) total, including linked panels
Power +7 to + 9 VDC @ 500 mA
Humidity 0 to 90% non-condensing
Dimensions 0.93 in. (2.36 cm) depth
19.0 in. (48.26 cm) width with mounting ears
5.2 in. (13.21 cm) height, 3 RU
Weight Approximately 2 lb. (0.91 kg) per panel
FIG. 1 CP-20A rear view
Comm connectors Power connector
Service connector
Do not use Service connector
unless directed to do so by Technical Support
FIG. 2 Insert wires into Comm Link connector
FIG. 3 Power connector
