3
■
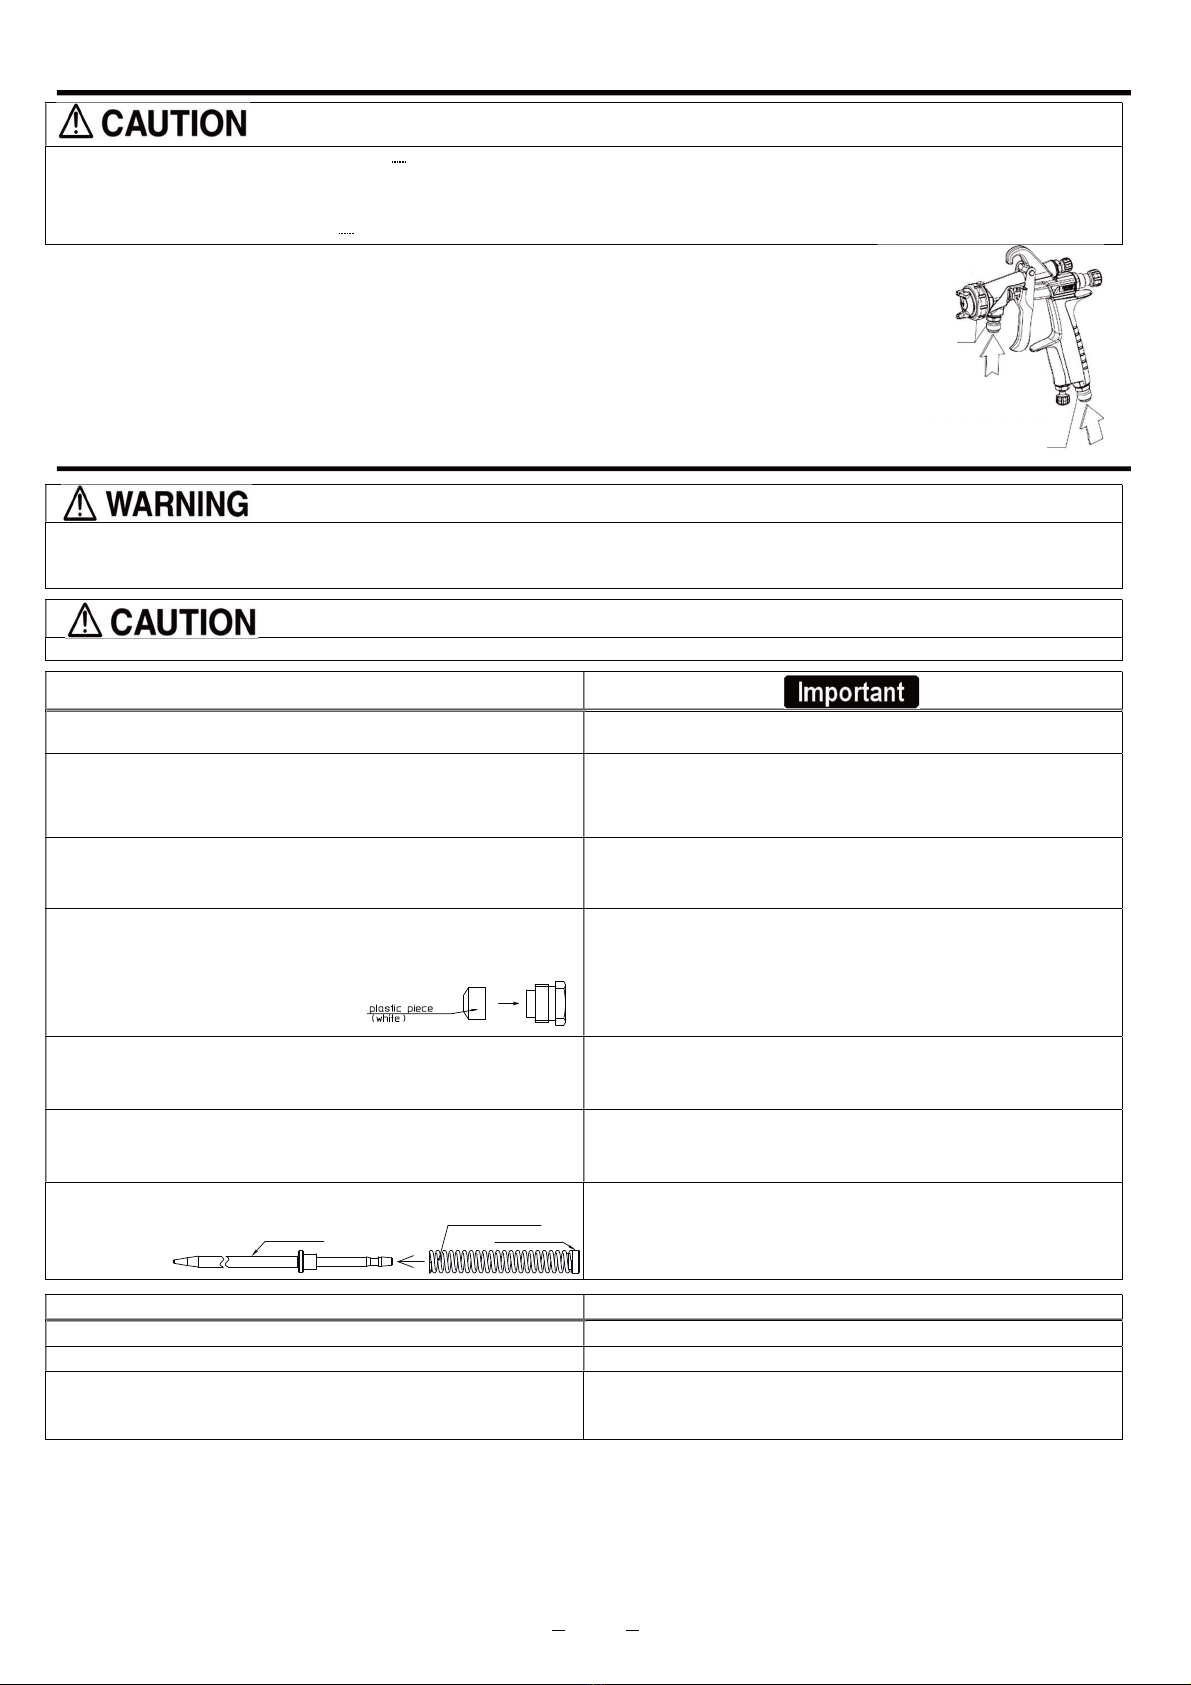
How to connect
・
Use clean air filtered through air dryer and air filter.
If not,dirty air can cause painting failure.
・
Before using the spray gun for the first time, clean fluid passages with thinner to remove rustpreventive oil.
If not cleaned, the rust preventive oil can cause paint failure, such as fisheyes.
・
Firmly connect hose or cup to spray gun.
If not, disconnection of hose or drop of cup can cause bodily injury
.
Step1. Connect an air hose to air nipple tightly.
Step2. Connect a fluid hose or a container to fluidnipple tightly.
Step3. Flush the spray gun fluidpassage with a compatible solvent.
Step4. Pour paint into container, test spray and adjust fluid output as wellas pattern width.
■
Maintenance and inspection
・
First release air and pressure fully according to item No.3 of “Improper use of equipment” of WARNING on page 2.
・
Only an experienced person who is fullyknowledgeable of the equipment should perform maintenance and inspection.
・
pH value shallbe 6 to 8, otherwise could cause corrosion.
・
IWATA parts forany maintenance or repairs.
Step-by-step procedure
to another container. Clean fluid passages and
Spray a small amount of thinner into fluid passages to clean them.
Incompletecleaning can result in
It is especially importantclean the gun fully and promptly after using two-component paint.
Clean each section with brush soaked with thinner and wipe out with waste cloth.
Soaking whole spray gun in solvent may cause spray gun malfunction.
cap assy. itself for extended period may cause adefective spray pattern.
When cleaning, never scratch the air cap assy., fluidnozzle, or fluid needle.
Avoid touching or damaging the tip of the fluid nozzle or needle.
3. Before disassembly, fully clean fluidpassages.
Remove fluid nozzle, using a ring spanner, box wrench or optional accessory spanner
(code 93538601)
3. During disassembly, avoid scratching the needle seating surface.
Either first remove the fluid needle or hold the trigger back whileremoving the fluid nozzle,
to protect the seating surface.
If you need to adjust fluid needle packing set, first tighten it by hand (with fluid needle in
place). Then tighten it further about 1/6turn (60-degree) by spanner.
When you remove needle packing set, do not leave the plastic tip of the packing in the
spray gun body.
If you tighten the fluid needle packing set too much, fluid needle will not m
resulting in paint leakage from tip of the fluid nozzle. Try to adjust it carefully while pulling
the trigger and confirming smoothmovement of the fluidneedle.
If you tighten it too much, first fully loosen it andthen retighten again carefully.
5. To assemble the airvalve, first assemble the air valve, air valve spring, andfluid adj. guide
assy. together. Next, insert fluid needle into fluid adj. guide assy., then fit it to spray gun
body and screw fluid adj.guide assy. in.
fit air valve spring and air valve to the spray gun body without the fluid
needle, the air valve may not be fitted correctly and the packing inside fluid adj. guide
assy. can be damaged.
6. Before assembling the pattern adj. assy. or air adj. assy. back on to the gun body, fully turn
the adjustment knobs counterclockwise to open. Once in the gun body the pattern adj.
knob and air adj. knob can be tightened.
6. If pattern adj. knob or air adj.knobis not fully opened when tightening into gun body, the tip
of it can contactand damage the seating surface.
7. When you assemble the needle spring on the fluid needle, the plastic tip should be on the
opposite side as the fluidneedletip.
7. If plastic tip is on the wrong side, it may not operate normally.Incorrect installation of the
needle spring may cause a heavytrigger pull.
Parts replacement standard
1. Each holepassage of air cap assy and fluid nozzle Replace if it is crushed or deformed.
2. Packing and O ring Replace if it is deformed or worn out.
3. Leakage from seating surface between fluid nozzle and fluid needle Replace them if leakage does not stop after fully cleaning the fluid nozzle and needle.
If you replace the fluid nozzle or fluid needle only, ensure they fully match and confirm that
there is noleakage.
Fluidneedle
Needlespringassy
Plastictip
Fluidnipple
(Suction /Pressure)
Air