Anker 5 Series User manual

Product Number: A83K2
51005004008 V02
@AnkerDeutschland
@AnkerJapan
@Anker
@AnkerOcial
@Anker_JP
@anker_ocial
@anker_jp
For tutorial videos, FAQs, manuals, and more
information, please visit:
Or scan the QR code below:
https://support.anker.com

USER MANUAL
Anker 553 USB-C Docking Station
(KVM Switch)
5
SERIES

01 English
06 Čeština
10 Dansk
14 Deutsch
18 ελληνικά
22 Español
26 Suomi
30 Français
34 Magyar
38 Italiano
42 Nederlands
46 Norsk
50 Język polski

54 Português
58 Pусский
62 Slovenský Jazyk
66 Slovenski Jezik
70 Svenska
74 Türkçe
78 日本語
81
84 简体中文
87 繁体中文
90
93

01 EN
At a Glance
1
9
13
10
10
2
3
4
5
6
7
8
11
12

EN 02
Controls and Ports Description
1Magnetic Remote
Selector
Press the remote selector to switch between two connected
computers.
• The blue LED indicates the current selection is PC 1.
• The yellow LED indicates the current selection is PC 2.
Rear View
2DC-IN Port Plug one end of the included 100W power adapter into the DC-IN
port and the other into a power outlet.
PC 1 Port 3USB-C Input Port
Connect your laptop to the PC 1 port
via the included USB-C cable.
Supports 65W power output to
charge your laptop.
PC 2 Port
4USB-C Data Input Port
Connect your desktop PC to the PC 2
port via the included USB-A to
USB-C cable.
5DisplayPort Input Port
Connect your desktop PC to the PC 2
port via the included DisplayPort
cable.
6HDMI Input Port Connect your desktop PC to the PC 2
port via the included HDMI cable.
7DisplayPort Output
Port
For 4K@60Hz resolution, connect your monitor to the KVM using
the DisplayPort output port.
Note that the DisplayPort output port only works with the
DisplayPort input port.
8HDMI Output Port
For 4K@60Hz resolution, connect your monitor to the KVM using
the HDMI output port.
Note that the HDMI output port only works with the HDMI input port.
Side View
9Audio In / Out Connect to earphones or other devices with a 3.5 mm AUX
connector.
Front View
10 USB-C 3.2 Gen 1
Port
Up to 5 Gbps data transfer.
Power output up to 20W.
11 USB-A 3.2 Gen 1
Data Port ×2 Up to 5 Gbps data transfer.

03 EN
12 USB-A 2.0 Port Data transfer speeds up to 480 Mbps and can be used to connect
USB devices such as keyboards, mice, or printers.
13 Power Button Turn the power supply on or o.
Specifications
Data Speed 5 Gbps Max
Supported Systems
macOS 12 or Later, Windows 10 or Later
HDMI 2.0 DisplayPort 1.4
Single Monitor
4K@60Hz /
/4K@60Hz
Dual Monitors
4K@60Hz (Windows OS) /
4K@30Hz (macOS)
4K@60Hz (Windows OS) /
4K@30Hz (macOS)
Note: If you are using macOS on your computer, the displayed content will be
mirrored. macOS only supports dual 4K@30Hz.
The table above shows the maximum supported resolutions. Actual resolution varies
based on the specifications of the host device.
Important Safety Instructions
1) Avoid dropping.
2) Do not disassemble.
3) Do not expose to liquids.
4) For the safest and fastest charge, use original or certified cables, power supplies,
attachments, and accessories.
5) This product is suitable for moderate climates only.
6) The ambient temperature when using this product should be 32 to 104°F (0 to
40°C).
7) Open flames, such as candles, must not be placed near this product.
8) Only use a dry cloth or brush to clean this product.
9) Keep this device out of the reach of children.
10) Do not put your fingers or hands into the product.
11) Avoid stepping on or squeezing the power supply or cord.
12) Unplug this device during lightning storms or when not used for an extended
period.

EN 04
Trademarks
The Adopted Trademarks HDMI, HDMI High-Definition Multimedia Interface, and
the HDMI Logo are trademarks or registered trademarks of HDMI Licensing
Administrator, Inc. in the United States and other countries.
This symbol indicates that this product shall not be treated as
household waste. Instead, it shall be handed over to the applicable
collection point for the recycling of electrical and electronic equipment.
This product is designed and manufactured with high-quality materials
and components, which can be recycled and reused.
Declaration of Conformity
Hereby, Anker Innovations Limited declares that this product is in compliance
with Directives 2014/30/EU & 2011/65/EU. The full text of the EU declaration of
conformity is available at the following internet address: https://www.anker.com.
Anker Innovations Limited
Room 1318-19, Hollywood Plaza, 610 Nathan Road, Mongkok, Kowloon, Hong Kong
The following importer is the responsible party contract for EU matters:
Anker Innovations Deutschland GmbH
Georg-Muche-Strasse 3, 80807 Munich, Germany
GB Declaration of Conformity
Hereby, Anker Innovations Limited declares that this product is in compliance with
the following Directives:
The Restriction of the Use of Certain Hazardous Substances in Electrical and
Electronic Equipment Regulations 2012 & Electromagnetic Compatibility Regulations
2016
The full text of the GB declaration of conformity is available at the following internet
address:
https://www.anker.com.

05 EN
The following importer is the responsible party contract for UK matters:
Anker Technology (UK) Ltd
GNR8, 49 Clarendon Road, Watford, Hertfordshire, WD17 1HP, United Kingdom
FCC Statement
This device complies with Part 15 of the FCC Rules. Operation is subject to the
following two conditions:
(1) This device may not cause harmful interference, and
(2) This device must accept any interference received, including interference that
may cause undesired operation.
Warning: Any changes or modifications not expressly approved by the party
responsible for compliance could void the user's authority to operate the equipment.
Note: This equipment has been tested and found to comply with the limits for
a Class B digital device, pursuant to Part 15 of the FCC Rules. These limits are
designed to provide reasonable protection against harmful interference in a
residential installation.
This equipment generates, uses, and can radiate radio frequency energy and, if
not installed and used in accordance with the instructions, may cause harmful
interference to radio communications. However, there is no guarantee that
interference will not occur in a particular installation. If this equipment does cause
harmful interference to radio or television reception, which can be determined
by turning the equipment off and on, the user is encouraged to try to correct the
interference by one or more of the following measures:
• Reorient or relocate the receiving antenna.
• Increase the separation between the equipment and the receiver.
• Connect the equipment to an outlet on a circuit different from that to which the
receiver is connected.
• Consult the dealer or an experienced radio/TV technician for help.
The following importer is the responsible party contract for FCC matters:
Company Name: Fantasia Trading LLC
Address: 5350 Ontario Mills Pkwy, Suite 100, Ontario, CA 91764
Telephone: +1-800-988-7973
IC Statement
This device complies with Industry Canada license-ICES-003. Operation is subject
to the following two conditions: (1) This device may not cause interference, and (2)
This device must accept any interference, including interference that may cause
undesired operation of the device.
Le présent appareil est conforme aux CNR d'Industrie Canada applicables aux
appareils radio exempts de licence. L'exploitation est autorisée aux deux conditions
suivantes : (1) l'appareil ne doit pas produire de brouillage, et (2) l'utilisateur de
l'appareil doit accepter tout brouillage radioélectrique subi, même si le brouillage
est susceptible d'en compromettre le fonctionnement.
This digital apparatus complies with CAN ICES-003(B)/NMB-003(B).

CS 06
Na první pohled
1
9
13
10
10
2
3
4
5
6
7
8
11
12

07 CS
Ovládací
prvky a porty Popis
1
Magnetický
dálkový
ovladač
Stisknutím dálkového ovladače můžete přepínat mezi dvěma
připojenými počítači.
• Modrá LED dioda značí, že aktuálním výběrem je PC 1.
• Žlutá LED dioda značí, že aktuální volba je PC 2.
Pohled zezadu
2Port DC-IN Jeden konec přiloženého 100W napájecího adaptéru zapojte do portu
DC-IN a druhý do elektrické zásuvky.
Port PC 1 3Vstupní port
USB-C
Připojí notebook k portu PC 1 pomocí dodaného
kabelu USB-C.
Podporuje 65W výstupní výkon pro nabíjení
notebooku.
Port PC 2
4Vstupní datový
port USB-C
Připojí stolní počítač k portu PC 2 pomocí
přiloženého kabelu USB-A na USB-C.
5Vstupní port
DisplayPort
Připojí stolní počítač k portu PC 2 pomocí dodaného
kabelu DisplayPort.
6Vstupní port
HDMI
Připojte stolní počítač k portu PC 2 pomocí dodaného
kabelu HDMI.
7
Výstupní
port
DisplayPort
Pro rozlišení 4K@60Hz připojte monitor ke KVM pomocí výstupního
portu DisplayPort.
Všimněte si, že výstupní port DisplayPort funguje pouze se vstupním
portem DisplayPort.
8Výstupní
port HDMI
Pro rozlišení 4K@60Hz připojte monitor ke KVM pomocí výstupního
portu HDMI.
Všimněte si, že výstupní port HDMI funguje pouze se vstupním portem
HDMI.
Pohled zboku
9
Zvukový
vstup/
výstup
Připojení ke sluchátkům nebo jiným zařízením s konektorem 3,5 mm
AUX.
Pohled zepředu
10 Port USB-C
3.2 Gen 1
Přenos dat až 5 Gb/s.
Výstupní výkon až 20 W.
11
2× datový
port USB-A
3.2 Gen 1
Přenos dat až 5 Gb/s.
12 Port USB-A
2.0
Přenos dat probíhá rychlostí až 480 Mb/s a lze jej použít k připojení
zařízení USB, jako jsou klávesnice, myši nebo tiskárny.
13 Vypínač Zapněte nebo vypněte napájení.

CS 08
Specifikace
Rychlost dat Max. 5 Gb/s
Podporované systémy
macOS 12 nebo novější, Windows 10 nebo novější
HDMI 2.0 DisplayPort 1.4
Jeden monitor
4K při 60 Hz /
/4K při 60 Hz
Dva monitory
4K při 60Hz (Windows OS) /
4K při 30Hz (macOS)
4K při 60Hz (Windows OS) /
4K při 30Hz (macOS)
Poznámka: Pokud v počítači používáte systém macOS, bude zobrazený obsah
zrcadlený. macOS podporuje pouze dvojici 4K@30Hz.
V tabulce výše jsou uvedena maximální podporovaná rozlišení. Skutečné rozlišení se
liší v závislosti na specifikacích hostitelského zařízení.
Důležité bezpečnostní pokyny
1) Se zařízením neházejte.
2) Zařízení nerozebírejte.
3) Nevystavujte ho působení kapalin.
4) Pro co nejbezpečnější a nejrychlejší nabíjení používejte originální nebo
certifikované kabely, napájecí zdroje, přídavná zařízení a příslušenství.
5) Tento výrobek je vhodný pouze pro mírné klima.
6) Okolní teplota při používání tohoto výrobku by měla být 32 až 104 °F (0 až 40 °C).
7) V blízkosti tohoto výrobku nesmí být umístěn otevřený oheň, například svíčky.
8) K čištění tohoto výrobku používejte pouze suchý hadřík nebo kartáč.
9) Uchovávejte tento přístroj mimo dosah dětí.
10) Nevkládejte do výrobku prsty ani ruce.
11) Nešlapejte na napájecí zdroj nebo kabel ani je nemačkejte.
12) Během bouřky nebo při delším nepoužívání odpojte toto zařízení ze sítě.
Tento spotřebič byste neměli vyhazovat společně s normálním
odpadem. Je nutné jej recyklovat. Tento symbol značí, že s tímto
výrobkem by nemělo být nakládáno jako s odpadem z domácnosti.
Místo toho je nutné jej zanést do příslušného sběrného místa pro
recyklaci elektrických a elektronických zařízení.

09 CS
Tento produkt je navržen a vyroben s použitím vysoce kvalitních
materiálů a součástí, které lze recyklovat a znovu použít.
Prohlášení o shodě
Společnost Anker Innovations Limited tímto prohlašuje, že výrobek je ve shodě se
směrnicí o rádiových zařízeních 2014/30/EU & 2011/65/EU. Úplné znění prohlášení
o shodě pro EU je k dispozici na internetové adrese:
https://www.anker.com.
Anker Innovations Limited
Room 1318-19, Hollywood Plaza, 610 Nathan Road, Mongkok, Kowloon, Hong Kong
Následující dovozce je odpovědnou stranou (smlouva pro záležitosti EU):
Anker Innovations Deutschland GmbH
Georg-Muche-Strasse 3, 80807 Munich, Germany

DA 10
Oversigt
1
9
13
10
10
2
3
4
5
6
7
8
11
12

11 DA
Betjeningsknapper
og porte Beskrivelse
1Magnetisk
fjernbetjening
Tryk på fjernknapperen, for at skifte mellem to forbundne
computere.
• Den blå lysindikator angiver, at PC 1 er valgt.
• Den gule lysindikator angiver, at PC 2 er valgt.
Set bagfra
2Jævnstrømsstik
(DC)
Sæt den ene ende af den medfølgende 100W strømadapter i
jævnstrømsstikket (DC), og sæt den anden ende i en stikkontakt.
PC 1-port 3USB-C-
indgangsport
Forbind din bærbare computer til PC 1-porten
med det medfølgende USB-C-kabel.
Bruger en udgangseekt på 65 W til
opladning af din bærbare computer.
PC 2-port
4USB-C-
dataindgangsport
Forbind din stationære computer til PC
2-porten med det medfølgende USB- USB-C-
kabel.
5DisplayPort-
indgangsport
Forbind din stationære computer til PC
2-porten med det medfølgende DisplayPort-
kabel.
6HDMI-
indgangsport
Forbind din stationære computer til PC
2-porten med det medfølgende HDMI-kabel.
7DisplayPort-
udgangsport
Ved brug af 4K på 60Hz, skal du forbinde din skærm til din KVM
med DisplayPort-udgangsporten.
Bemærk, at DisplayPort-udgangsporten kun virker med
DisplayPort-indgangsporten.
8HDMI-udgangsport
Ved brug af 4K på 60Hz, skal du forbinde din skærm til din KVM
med HDMI-udgangsporten.
Bemærk, at HDMI-udgangsporten kun virker med HDMI-
indgangsporten.
Set fra siden
9Lydind- og udgang Beregnet til tilslutning af hovedtelefoner eller andre enheder med
et 3,5 mm AUX-stik.
Set forfra
10 USB-C 3.2 Gen
1-port
Dataoverførselshastighed på op til 5 Gbps.
Strømforsyning op til 20 W.
11 USB-A 3.2 Gen 1
Data-port ×2 Dataoverførselshastighed på op til 5 Gbps.
12 USB-A 2.0-port Dataoverførselshastighed op til 480 Mbps. Er også beregnet til
tilslutning af USB-enheder såsom tastaturer, mus eller printere.
13 Tænd/sluk-knap Tænder og slukker enheden.

DA 12
Specifikationer
Datahastighed 5 Gbps maks
Understøttede systemer
macOS 12 eller nyere, Windows 10 eller nyere
HDMI 2.0 DisplayPort 1.4
Enkelt skærm
4K@60Hz /
/4K@60Hz
To skærme
4K@60Hz (Windows OS) /
4K@30Hz (macOS)
4K@60Hz (Windows OS) /
4K@30Hz (macOS)
Bemærk: Hvis du bruger macOS på din computer, vil det viste indhold blive afspejlet.
macOS understøtter kun dual 4K@30Hz.
Tabellen ovenfor angiver de maksimalt understøttede opløsninger. Den faktiske
opløsning varierer afhængigt af specifikationerne for værtsenheden.
Vigtige sikkerhedsinstruktioner
1) Tab ikke.
2) Skil ikke produktet ad.
3) Undgå, at væsker trænger ind.
4) For at opnå den sikreste og hurtigste opladning skal du bruge originale eller
certificerede kabler, strømforsyninger, udstyr og tilbehør.
5) Dette produkt er kun beregnet til moderate klimaer.
6) Den omgivende temperatur, når dette produkt anvendes, skal være 32 til 104 °F (0
til 40 °C).
7) Åben ild, såsom stearinlys, må ikke placeres i nærheden af dette produkt.
8) Brug kun en tør klud eller børste til at rengøre dette produkt.
9) Hold dette apparat uden for børns rækkevidde.
10) Sæt ikke fingre eller hænder i produktet.
11) Træd ikke på eller klem ikke på strømforsyningen eller ledningen.
12) Tag stikket ud af stikkontakten til dette produkt under tordenvejr eller når det
ikke bruges i længere tid.

13 DA
Apparatet må ikke bortskaffes sammen med almindeligt affald. Det
skal sendes til genbrug. Dette symbol indikerer, at dette produkt ikke
må behandles som husholdningsaffald. Det skal i stedet for afleveres
på genbrugsplads, der genindvinder elektrisk og elektronisk affald.
Dette produkt er designet og fremstillet med materialer og
komponenter af høj kvalitet, som kan genindvindes og genbruges.
Overensstemmelseserklæring
Anker Innovations Limited erklærer hermed, at dette produkt er i
overensstemmelse med direktiv 2014/30/EU & 2011/65/EU. Den fulde ordlyd af EU
overensstemmelseserklæringen kan findes på følgende internetadresse:
https://www.anker.com.
Anker Innovations Limited
Room 1318-19, Hollywood Plaza, 610 Nathan Road, Mongkok, Kowloon, Hongkong
Følgende importør er den ansvarlige part for EU-anliggender:
Anker Innovations Deutschland GmbH
Georg-Muche-Strasse 3, 80807 Munich, Germany

DE 14
Auf einen Blick
1
9
13
10
10
2
3
4
5
6
7
8
11
12

15 DE
Tasten und
Anschlüsse Beschreibung
1Magnetischer
Fernwahlschalter
Drücken Sie den Fernwahlschalter, um zwischen zwei
angeschlossenen Computern zu wechseln.
• Die blaue LED zeigt an, dass die aktuelle Auswahl PC 1 ist.
• Die gelbe LED zeigt an, dass die aktuelle Auswahl PC 2 ist.
Rückansicht
2DC-IN-Anschluss
Stecken Sie das eine Ende des mitgelieferten
100W-Netzadapters in den DC-IN-Anschluss und das andere
Ende in eine Steckdose.
PC 1-Anschluss 3USB-C-
Eingangsanschluss
Schließen Sie Ihren Laptop über das
mitgelieferte USB-C-Kabel an den PC
1-Anschluss an.
Unterstützt eine Ausgangsleistung
von 65 W zum Aufladen Ihres
Laptops.
PC 2-Anschluss
4USB-C-
Dateneingangsanschluss
Schließen Sie Ihren Desktop-PC über
das mitgelieferte USB-A-zu-USB-C-
Kabel an den PC 2-Anschluss an.
5DisplayPort-
Eingangsanschluss
Schließen Sie Ihren Desktop-PC über
das mitgelieferte DisplayPort-Kabel
an den PC 2-Anschluss an.
6HDMI-
Eingangsanschluss
Schließen Sie Ihren Desktop-PC über
das mitgelieferte HDMI-Kabel an den
PC 2-Anschluss an.
7DisplayPort-
Ausgangsanschluss
Für eine 4K@60Hz-Auflösung schließen Sie Ihren Monitor über
den DisplayPort-Ausgangsanschluss an den KVM-Switch an.
Beachten Sie, dass der DisplayPort-Ausgangsanschluss nur mit
dem DisplayPort-Eingangsanschluss funktioniert.
8HDMI-
Ausgangsanschluss
Für eine 4K@60Hz-Auflösung schließen Sie Ihren Monitor über
den HDMI-Ausgangsanschluss an den KVM-Switch an.
Beachten Sie, dass der HDMI-Ausgangsanschluss nur mit dem
HDMI-Eingangsanschluss funktioniert.
Seitenansicht
9Audioeingang/-
ausgang
Anschluss an Kopfhörer oder andere Geräte mit einem
3,5-mm-AUX-Anschluss.

DE 16
Ansicht von vorne
10 USB-C 3.2 Gen 1
Anschluss
Datenübertragung mit bis zu 5 Gbit/s.
Ausgangsleistung bis zu 20 W.
11 USB-A 3.2 Gen 1
Datenanschluss ×2 Datenübertragung mit bis zu 5 Gbit/s.
12 USB-A
2.0-Anschluss
Die Datenübertragungsgeschwindigkeit beträgt bis zu 480
Mbit/s und kann für den Anschluss von USB-Geräten wie
Tastaturen, Mäusen oder Druckern verwendet werden.
13 Einschalttaste Ein- oder Ausschalten der Stromversorgung.
Technische Daten
Datengeschwindigkeit 5 Gbps Max
Unterstützte Systeme
macOS 12 oder Folgeversion, Windows 10 oder
Folgeversion
HDMI 2.0 DisplayPort 1.4
Einzelner Monitor
4K@60Hz /
/4K@60Hz
Zwei Monitore
4K@60Hz (Windows OS) /
4K@30Hz (macOS)
4K@60Hz (Windows OS)
/
4K@30Hz (macOS)
Hinweis: Wenn Sie auf Ihrem Computer macOS verwenden, wird der angezeigte
Inhalt gespiegelt. macOS unterstützt nur Dual 4K@30Hz.
In der obigen Tabelle sind die maximal unterstützten Auflösungen angegeben. Die
tatsächliche Auflösung hängt von den Spezifikationen des Hostgeräts ab.
Wichtige Sicherheitshinweise
1) Vermeiden Sie Stürze.
2) Nicht demontieren.
3) Nicht mit Flüssigkeiten in Berührung bringen.
4) Verwenden Sie für die sicherste und schnellste Aufladung originale oder
zertifizierte Kabel, Netzteile, Zubehörteile und Accessoires.
5) Dieses Produkt ist nur für gemäßigte Klimazonen geeignet.
Other manuals for 5 Series
6
This manual suits for next models
1
Table of contents
Languages:
Other Anker Docking Station manuals

Anker
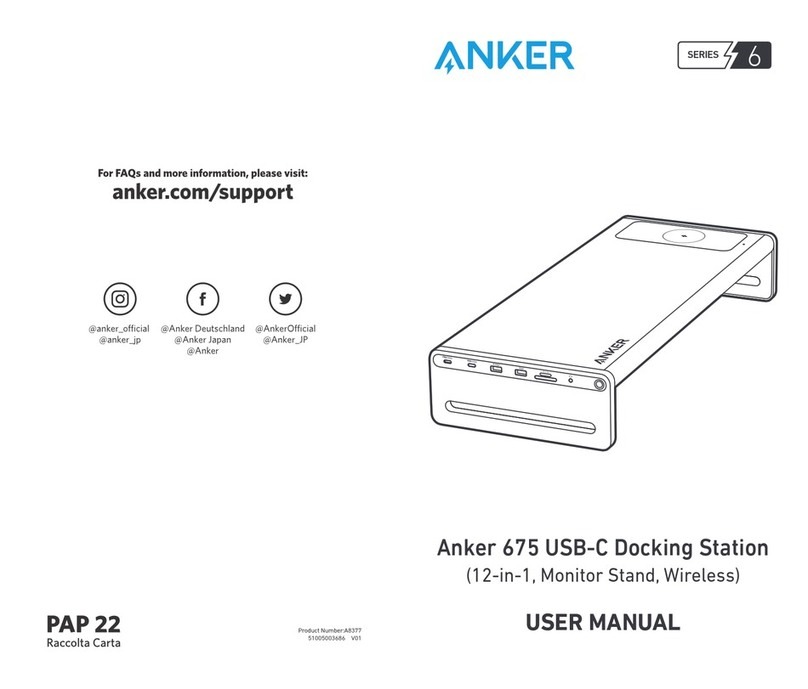
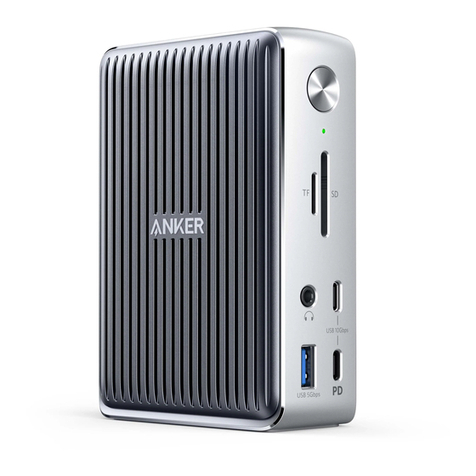
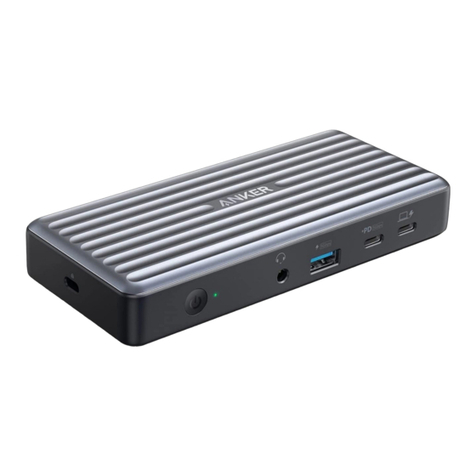
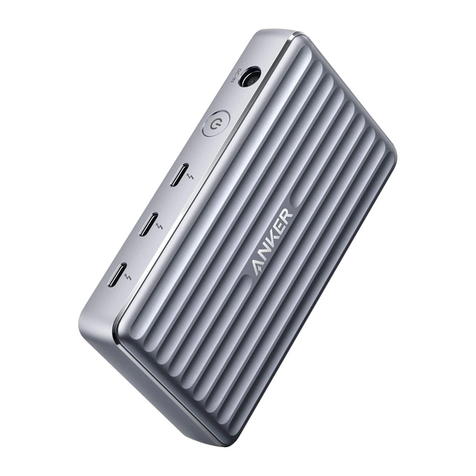
Anker 651 User manual

Anker
Anker 568 User manual

Anker
Anker 6 Series User manual

Anker
Anker Y1010 User manual

Anker
Anker PowerExpand User manual

Anker
Anker Power Expand Elite 12-in-1 Thunderbolt 4... User manual

Anker
Anker AK-68ANDOCKS-BA User manual

Anker
Anker 5 Series User manual

Anker
Anker 563 User manual

Anker
Anker 5 Series User manual