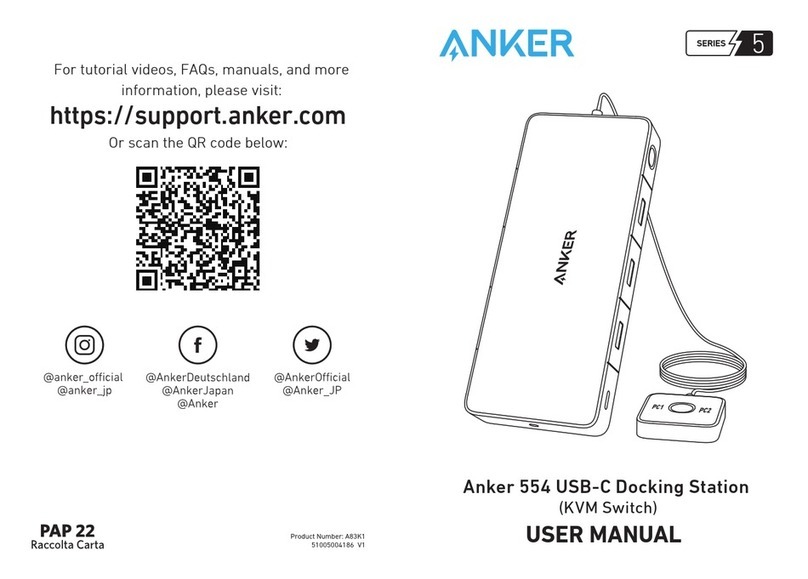
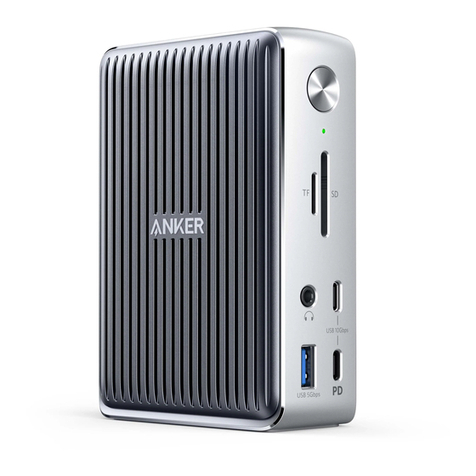
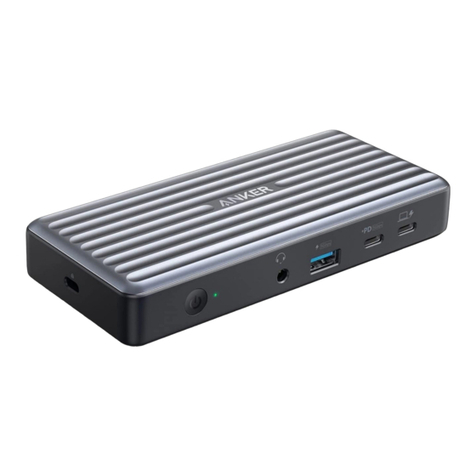
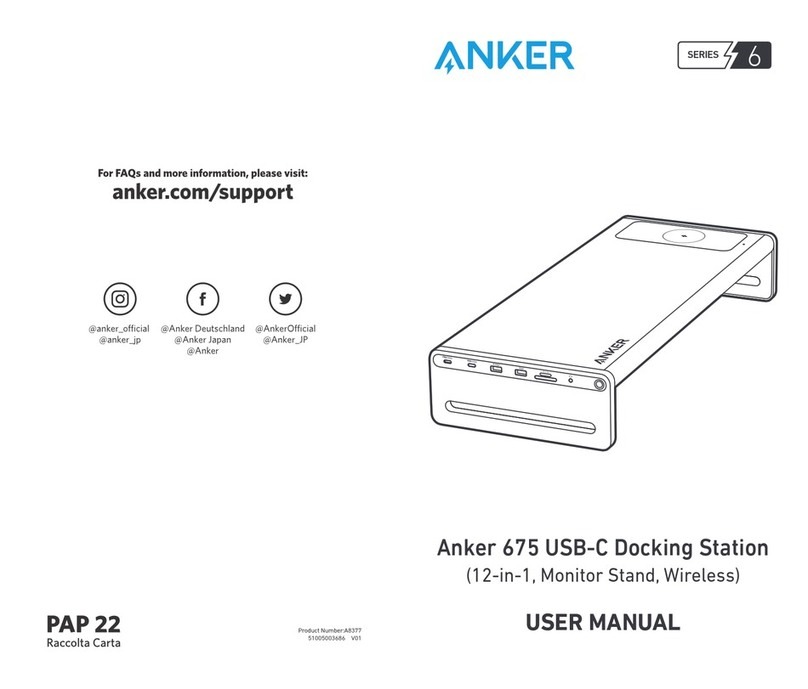
Anker 568 User manual

Product Number: A8399 51005003575 V01
For FAQs and more information, please visit:
anker.com/support
@Anker Deutschland
@Anker Japan
@Anker
@AnkerOcial
@Anker_JP
@anker_ocial
@anker_jp
USER MANUAL
Anker 568 USB-C Docking Station
(11-in-1, USB4)
5
SERIES

EN 01
01 English
07 Deutsch
11 Español
15 Français
19 Italiano
23 Português
27 Pусскийусский
31 Türkçe
35 日本語
38
42 简体中文
45 繁体中文
48
52
At a Glance
*The USB-C ports of host devices must support Power Delivery and
DisplayPort Alt Mode.
1
7
6
5
4
3
8
9
10
2

02 EN EN 03
1
USB-C Upstream Port
2HDMI 2.0 Port 3DisplayPort 1.4
4Ethernet Port 5USB-A 3.0 Port 6USB-A 2.0 Port
7DC-IN Port 8
USB-C 3.2 Gen 2 Port
9LED Indicator
10 Power Button
4Connect the dock to a router or modem at 10/100/1000 Mbps via
the Ethernet port.
8Connect USB-C compatible devices such as SSDs (Solid-State
Drive) to the USB-C 3.2 Gen 2 port (10 Gbps). You can also charge your
phone or tablet at a maximum of 30W via this port.
Important Safety Instructions
1) Avoid dropping.
2) Do not disassemble.
3) Do not expose to liquids.
4)
For the safest and fastest charge, use original or certified cables.
5) This product is suitable for moderate climates only.
6) The maximum ambient temperature when using this product
must not exceed 95°F / 35°C.
7) Open flame sources, such as candles, must not be placed near
this product.
8) Only use a dry cloth or brush to clean this product.
Using Your USB-C Docking Station
Power on Your Dock
1. Plug one end of the included power adapter into the DC-IN port and
the other into a power outlet.
2. Press the power button. The LED indicator will turn green.
Connect the Dock to Your Laptop
Connect your laptop to the dock's USB-C upstream port using the
provided cable. The LED indicator will turn blue, and your laptop will
begin charging at a maximum of 100W.
LED Indicator Guide
Solid green Powered on
Solid blue
Connected to a laptop
O
Not connected to a laptop
Video Ports
Item DisplayPort 1 DisplayPort 2 HDMI Port
Single
Monitor
8K@30Hz / /
/
8K@30Hz
/
/ /
4K@60Hz
Dual
Monitors
4K@60Hz
4K@60Hz
/
4K@60Hz /
4K@60Hz
/
4K@60Hz 4K@60Hz
Three
Monitors 4K@30Hz
4K@30Hz 4K@30Hz
The table above shows the maximum supported resolutions of this dock.
Actual display output will vary based upon the host device specifications.

04 EN EN 05
Trademarks
The Adopted Trademarks HDMI, HDMI High-Definition Multimedia
Interface, and the HDMI Logo are trademarks or registered trademarks
of HDMI Licensing Administrator, Inc. in the United States and other
countries.
FCC Statement
This device complies with Part 15 of the FCC Rules. Operation is
subject to the following two conditions: (1) This device may not cause
harmful interference, and (2) This device must accept any
interference received, including interference that may cause
undesired operation.
Warning: Changes or modifications not expressly approved by the
party responsible for compliance could void the user's authority to
operate the equipment.
Note: This equipment has been tested and found to comply with the
limits for a Class B digital device, pursuant to Part 15 of the FCC
Rules. These limits are designed to provide reasonable protection
against harmful interference in a residential installation.
This equipment generates, uses, and can radiate radio frequency
energy and, if not installed and used in accordance with the
instructions, may cause harmful interference to radio
communications. However, there is no guarantee that interference
will not occur in a particular installation. If this equipment does cause
harmful interference to radio or television reception, which can be
determined by turning the equipment o and on, the user is
encouraged to try to correct the interference by one or more of the
following measures:
• Reorient or relocate the receiving antenna.
• Increase the separation between the equipment and receiver.
• Consult the dealer or an experienced radio/TV technician for help.
The following importer is the responsible party:
Company Name: Fantasia Trading LLC
Address: 5350 Ontario Mills Pkwy, Suite 100, Ontario, CA 91764
Telephone: 1-800-988-7973
IC statement
This device complies with Industry Canada license‐ICES-003.
Operation is subject to the following two conditions: (1) This device
may not cause interference, and (2) This device must accept any
interference, including interference that may cause undesired
operation of the device.
Le présent appareil est conforme aux CNR d'Industrie Canada
applicables aux appareils radio exempts de licence. L'exploitation est
autorisée aux deux conditions suivantes : (1) l'appareil ne doit pas
produire de brouillage, et (2) l'utilisateur de l'appareil doit accepter
tout brouillage radioélectrique subi, même si le brouillage est
susceptible d'en compromettre le fonctionnement.
This digital apparatus complies with CAN ICES-003(B)/NMB-003(B).
Declaration of Conformity
Hereby, Anker Technology Co., Limited declares that this product is in
compliance with Directives 2014/30/EU & 2011/65/EU. The full text
of the EU declaration of conformity is available at the following
internet address: https://www.anker.com.
GB Declaration of Conformity
Hereby, Anker Innovations Limited declares that this product is in
compliance with the following Directives: The Restriction of the Use
of Certain Hazardous Substances in Electrical and Electronic
Equipment Regulations 2012 & Electromagnetic Compatibility
Regulations 2016. The full text of the GB declaration of conformity is
available at the following internet address: https://www.anker.com.
DE 0706 EN
Auf einen Blick
*Die USB-C-Ports von Host-Geräten müssen Power Delivery und
DisplayPort Alt Mode unterstützen.
1
7
6
5
4
3
8
9
10
2
Anker Innovations Limited
Room 1318-19, Hollywood Plaza, 610 Nathan Road, Mongkok,
Kowloon, Hong Kong
The following importer is the responsible party (for UK matters only):
Anker Technology (UK) Limited|GNR8, 49 Clarendon Road, Watford,
Hertfordshire, WD17 1HP, United Kingdom
The following importer is the responsible party (for EU matters only):
Anker Innovations Deutschland GmbH
Georg-Muche-Strasse 3, 80807 Munich, Germany
This symbol indicates that this product shall not be treated as
household waste. Instead it shall be handed over to the
applicable collection point for the recycling of electrical and
electronic equipment.

08 DE DE 09
1USB-C-Upstream-Port 2HDMI 2.0-Anschluss 3DisplayPort 1.4
4Ethernet-Anschlus 5USB-A 3.0-Anschluss 6
USB-A 2.0-Anschluss
7DC-IN-Anschluss 8USB-C 3.2 Gen
2-Anschluss
9LED-Anzeige
10 Ein-/Aus-Taste
4Verbinden Sie die Dockingstation über den Ethernet-Port mit
einem Router oder Modem mit 10/100/1000 Mbit/s.
8Verbinden Sie USB-C-kompatible Geräte wie SSDs (Solid-State
Drive) mit dem USB-C 3.2 Gen 2-Anschluss (10 Gbit/s). Über diesen
Anschluss können Sie auch Ihr Smartphone oder Tablet mit maximal
30 W aufladen.
Wichtige Sicherheitshinweise
1) Nicht fallen lassen.
2) Nicht auseinanderbauen.
3) Keinen Flüssigkeiten aussetzen.
4) Verwenden Sie für das sicherste und schnellste Aufladen
Original- oder zertifizierte Kabel.
5) Das Produkt ist nur zur Verwendung in gemäßigten
Klimazonen konzipiert.
6) Die maximale Umgebungstemperatur während der
Verwendung des Produkts darf 35 °C nicht übersteigen.
7) Oene Flammen wie z. B. Kerzen dürfen nicht in der Nähe des
Produkts stehen.
8) Reinigen Sie das Produkt nur mit einem trockenen Tuch oder
einem Pinsel.
Verwendung der USB-C Docking Station
Dockingstation einschalten
1. Stecken Sie ein Ende des mitgelieferten Netzteils am DC-IN-
Anschluss und das andere an einer Steckdose an.
2. Drücken Sie die Ein-/Aus-Taste. Die LED-Anzeige leuchtet grün.
Dockingstation mit Laptop verbinden
Schließen Sie Ihren Laptop mit dem mitgelieferten Kabel an den USB-
C-Upstream-Port der Dockingstation an. Die LED-Anzeige leuchtet blau
und der Laptop wird mit maximal 100 W aufgeladen.
Leitfaden für LED-Anzeigen
Leuchtet grün Eingeschaltet
Leuchtet blau
Mit einem Laptop verbunden
Aus
Nicht mit einem Laptop verbunden
Video-Anschlüsse
Element DisplayPort 1 DisplayPort 2 HDMI-Anschluss
Ein
Monitor
8K bei 30 Hz / /
/
8K bei 30 Hz
/
/ /
4K bei 60 Hz
Zwei
Monitore
4K bei 60 Hz
4K bei 60 Hz
/
4K bei 60 Hz /
4K bei 60 Hz
/
4K bei 60 Hz 4K bei 60 Hz
Drei
Monitore 4K bei 30 Hz
4K bei 30 Hz 4K bei 30 Hz
In der obigen Tabelle werden die maximal unterstützte Auflösungen
dieser Dockingstation angezeigt. Die tatsächliche Display-Ausgabe
variiert je nach den Spezifikationen der Host-Geräte.

ES 1110 DE
Konformitätserklärung
Anker Technology Co., Limited erklärt hiermit, dass dieses Produkt
die Richtlinien 2014/30/EU und 2011/65/EU erfüllt. Der vollständige
Text der EU-Konformitätserklärung ist unter der folgenden
Internetadresse verfügbar: https://www.anker.com.
Anker Innovations Limited
Room 1318-19, Hollywood Plaza, 610 Nathan Road, Mongkok,
Kowloon, Hongkong
Der folgende Importeur ist verantwortlich (nur für UK-Belange):
Anker Technology (UK) Limited,|GNR8, 49 Clarendon Road, Watford,
Hertfordshire, WD17 1HP, United Kingdom
Der folgende Importeur ist verantwortlich (nur für EU-Belange):
Anker Innovations Deutschland GmbH
Georg-Muche-Strasse 3, 80807 Munich, Germany
Dieses Symbol bedeutet, dass das Produkt nicht als Hausmüll
entsorgt werden darf. Stattdessen ist es an der jeweiligen
Sammelstelle für das Recycling von Elektro- und
Elektronikgeräten abzugeben.
Vista general
*Los puertos USB-C de los dispositivos receptores deben ser
compatibles con los protocolos Power Delivery y DisplayPort Alt Mode.
1
7
6
5
4
3
8
9
10
2

12 ES ES 13
1Puerto USB-C
ascendente
2Puerto HDMI 2.0 3DisplayPort 1.4
4Puerto Ethernet 5Puerto USB-A 3.0 6Puerto USB-A 2.0
7Puerto de entrada
de CC
8Puerto USB-C 3.2
de 2.ª generación
9Indicador LED
10 Botón de encendido
4Conecte la base a un router o módem de 10/100/1000 Mbps a
través del puerto Ethernet.
8Conecte dispositivos compatibles con USB-C, como SSD (unidad
de estado sólido), al puerto USB-C 3.2 de 2.ª generación (10 Gbps).
También puede cargar su teléfono o tableta a una potencia máxima
de 30 W a través de este puerto.
Instrucciones de seguridad importantes
1) Evite que el dispositivo sufra caídas..
2) No desmonte el dispositivo.
3) No exponga el dispositivo a líquidos.
4) Para que el proceso de carga sea el más rápido y seguro,
utilice cables originales o con certificación.
5) Este producto solo es adecuado para climas templados.
6) La temperatura ambiente máxima durante el uso del producto
no debe superar los 35°C.
7) No acercar el producto a llamas abiertas, como velas.
8) Limpie el producto únicamente con un paño seco o con un
cepillo.
Modo de uso de la base de carga USB-C
Conexión y encendido de la base
1. Enchufe un conector del adaptador de corriente incluido al puerto
de entrada de CC y el otro a una toma de corriente.
2. Pulse el botón de encendido. El indicador LED se iluminará de color verde.
Conexión de la base al portátil
Conecte su portátil al puerto USB-C ascendente de la base con el cable
incluido. El indicador LED se volverá azul y el portátil empezará a
cargarse a una potencia máxima de 100W.
Guía del indicador LED
Verde fijo Encendida
Azul fijo
Conectada al portátil
Apagada
No conectada al portátil
Puertos de vídeo
Componente DisplayPort 1 DisplayPort 2 Puerto HDMI
Un solo
monitor
8K a 30 Hz / /
/ 8K a 30 Hz /
/ / 4K a 60 Hz
Dos
monitores
4K a 60 Hz
4K a 60 Hz
/
4K a 60 Hz / /
/ 4K a 60 Hz 4K a 60 Hz
Tres
monitores 4K a 30 Hz
4K a 30 Hz 4K a 30 Hz
En la tabla anterior figuran las resoluciones máximas permitidas
de esta base. El formato de visualización variará en función de las
especificaciones del dispositivo receptor.
Declaración de conformidad
Por la presente, Anker Technology Co., Limited declara que este
producto cumple con las Directivas 2014/30 UE y 2011/65/UE. El
texto completo de la declaración de conformidad de la UE está
disponible en la siguiente dirección de Internet: https://www.anker.com.

FR 1514 ES
Anker Innovations Limited
Room 1318-19, Hollywood Plaza, 610 Nathan Road, Mongkok,
Kowloon, Hong Kong
La siguiente empresa importadora es la parte responsable (solo para
Reino Unido):
Anker Technology (UK) Limited,|GNR8, 49 Clarendon Road, Watford,
Hertfordshire, WD17 1HP, United Kingdom
La siguiente empresa importadora es la parte responsable (solo para
la UE):
Anker Innovations Deutschland GmbH
Georg-Muche-Strasse 3, 80807 Munich, Germany
Este símbolo indica que el producto no puede desecharse
junto con los residuos domésticos. En su lugar, debe llevarse
a un punto de recogida adecuado para el reciclaje de aparatos
eléctricos y electrónicos.
Récapitulatif
*Les ports USB-C des dispositifs hôtes doivent prendre en charge
Power Delivery et DisplayPort Alt Mode.
1
7
6
5
4
3
8
9
10
2

16 FR FR 17
1Port en amont
USB-C
2Port HDMI 2.0 3DisplayPort 1.4
4Port Ethernet 5Port USB-A 3.0 6Port USB-A 2.0
7Port DC-IN 8Port USB-C 3.2 Gen 2 9Voyant LED
10 Bouton d’alimentation
4Connectez la station d’accueil à un routeur ou un modem à
10/100/1000 Mbps via le port Ethernet.
8Connectez des périphériques compatibles USB-C tels que des
lecteurs SSD (Solid-State Drive) au port USB-C 3.2 Gen 2 (10 Gbit/s).
Vous pouvez également charger votre téléphone ou votre tablette à
une puissance maximale de 30 W via ce port.
Consignes de sécurité importantes
1) Ne pas faire tomber.
2) Ne pas démonter.
3) Ne pas exposer à des liquides.
4) Afin de garantir un chargement plus rapide et plus sûr, utiliser
les câbles d’origine ou des câbles certifiés.
5) Ce produit est adapté uniquement aux climats tempérés.
6) La température ambiante maximale pendant l’utilisation de ce
produit ne doit pas dépasser 35 °C / 95 °F.
7) Les sources de flamme nue, telles que les bougies, ne doivent
pas être placées à proximité de ce produit.
8) Nettoyer ce produit uniquement avec un chion sec ou une
brosse.
Utilisation de votre USB-C Docking Station
Mise sous tension de votre station d’accueil
1. Branchez une extrémité de l’adaptateur secteur inclus dans le port
DC-IN et l’autre dans une prise de courant.
2. Appuyez sur le bouton d’alimentation. Le voyant LED devient vert.
Connexion de la station d’accueil à votre ordinateur portable
Connectez votre ordinateur portable au port USB-C en amont de la
station d’accueil à l’aide du câble fourni. Le voyant LED devient bleu et
votre ordinateur portable commence à se recharger à une puissance
maximale de 100 W.
Guide des voyants LED
Vert fixe Sous tension
Bleu fixe
Connecté à un ordinateur portable
Éteint
Non connecté à un ordinateur
portable
Ports vidéo
Élément DisplayPort 1 DisplayPort 2 Port HDMI
Un seul
écran
8K@30 Hz / /
/
8K@30 Hz
/
/ /
4K@60 Hz
Deux
écrans
4K@60 Hz
4K@60 Hz
/
4K@60 Hz /
4K@60 Hz
/
4K@60 Hz 4K@60 Hz
Trois
écrans 4K@30 Hz
4K@30 Hz 4K@30 Hz
Le tableau ci-dessus indique les résolutions maximales prises en charge
par cette station d’accueil. L’achage réel variera en fonction des
spécifications du périphérique hôte.

IT 1918 FR
Déclaration de conformité
Par la présente, Anker Technology Co., Limited déclare que ce produit
est conforme aux Directives 2014/30/EU et 2011/65/EU. Le texte
intégral de la déclaration de conformité pour l’UE est disponible à
l’adresse suivante : https://www.anker.com.
Anker Innovations Limited
Room 1318-19, Hollywood Plaza, 610 Nathan Road, Mongkok,
Kowloon, Hong Kong
L’importateur suivant est la partie responsable (pour les questions
relatives au Royaume-Uni uniquement) :
Anker Technology (UK) Limited,|GNR8, 49 Clarendon Road, Watford,
Hertfordshire, WD17 1HP, United Kingdom
L’importateur suivant est la partie responsable (pour les questions
européennes uniquement) :
Anker Innovations Deutschland GmbH
Georg-Muche-Strasse 3, 80807 Munich, Germany
Ce symbole indique que ce produit ne doit pas être traité
comme un déchet ménager. Il doit plutôt être remis au point
de collecte approprié pour le recyclage des équipements
électriques et électroniques.
Descrizione del prodotto
*Le porte USB-C dei dispositivi host devono supportare Power
Delivery e DisplayPort Alt Mode.
1
7
6
5
4
3
8
9
10
2

20 IT IT 21
1Porta USB-C in
upstream
2Porta HDMI 2.0 3DisplayPort 1.4
4Porta Ethernet 5Porta USB-A 3.0 6Porta USB-A 2.0
7Porta DC-IN 8
Porta USB-C 3.2 Gen 2
9Indicatore LED
10 Pulsante di accensione
4Collega il dock a un router o modem a 10/100/1000 Mb/s tramite
la porta Ethernet.
8Collega dispositivi compatibili USB-C come ad esempio unità SSD
(unità a stato solido) alla porta USB-C 3.2 Gen 2 (10 Gbps). Con questa
porta è inoltre possibile caricare il telefono o il tablet a un massimo di
30 W.
Istruzioni importanti sulla sicurezza
1) Non lasciar cadere il prodotto.
2) Non smontare il prodotto.
3) Non esporre il prodotto a liquidi.
4) Per eettuare la ricarica in modo rapido e sicuro, utilizzare
cavi originali o certificati.
5) Il prodotto è adatto solo all’utilizzo in climi moderati.
6) Il prodotto deve essere utilizzato in ambienti a temperatura
non superiore a 35°C.
7) Non collocare sorgenti di fiamme libere, ad esempio candele
accese, vicino al prodotto.
8) Per pulire il prodotto, utilizzare esclusivamente un panno
asciutto o una spazzolina.
Utilizzo di USB-C Docking Station
Accendi il dock
1. Collega un'estremità dell'adattatore di alimentazione incluso alla
porta DC-IN e l'altra estremità a una presa di corrente.
2. Premi il pulsante di alimentazione. L'indicatore LED diventa verde.
Collega il dock a un laptopp
Collega il laptop alla porta USB-C in upstream del dock utilizzando
il cavo in dotazione. L'indicatore LED diventa blu e il laptop inizia a
caricarsi a un massimo di 100 W.
Guida agli indicatori LED
Verde fisso Acceso
Blu fisso
Collegato a un laptop
O
Non collegato a un laptop
Porte video
Elemento DisplayPort 1 DisplayPort 2 Porta HDMI
Monitor
singolo
8K a 30 Hz / /
/
8K a 30 Hz
/
/ /
4K a 60 Hz
Doppio
monitor
4K@60Hz
4K@60Hz
/
4K@60Hz /
4K@60Hz
/
4K a 60 Hz
4K a 60 Hz
Tre
monitor 4K a 30 Hz
4K a 30 Hz 4K a 30 Hz
La tabella precedente mostra la risoluzione massima supportata del
dock. L'uscita di visualizzazione eettiva varia in base alle specifiche del
dispositivo host.
Dichiarazione di conformità
Con la presente, Anker Technology Co., Limited dichiara che questo
prodotto è conforme alle Direttive 2014/30/EU e 2011/65/EU. Il testo
completo della dichiarazione di conformità UE è disponibile al
seguente indirizzo Internet: https://www.anker.com.

PT 2322 IT
Anker Innovations Limited
Room 1318-19, Hollywood Plaza, 610 Nathan Road, Mongkok,
Kowloon, Hong Kong
Il seguente importatore è la parte responsabile (contatto
esclusivamente per le questioni pertinenti al Regno Unito):
Anker Technology (UK) Limited,|GNR8, 49 Clarendon Road, Watford,
Hertfordshire, WD17 1HP, United Kingdom
Il seguente importatore è la parte responsabile (contatto
esclusivamente per le questioni pertinenti all'UE):
Anker Innovations Deutschland GmbH
Georg-Muche-Strasse 3, 80807 Munich, Germany
Questo simbolo indica che il presente prodotto non deve
essere trattato come rifiuto domestico. Deve invece essere
consegnato al punto di raccolta applicabile per il riciclaggio di
apparecchiature elettriche ed elettroniche.
Vista geral
*As portas USB-C dos dispositivos anfitrião devem suportar o modo
Power Delivery e DisplayPort Alt.
1
7
6
5
4
3
8
9
10
2

24 PT PT 25
1Porta USB-C a
montante
2Porta HDMI 2.0 3DisplayPort 1.4
4Porta Ethernet 5Porta USB-A 3.0 6Porta USB-A 2.0
7
Porta de entrada DC-IN
8
Porta USB-C 3.2 Gen 2
9Indicador LED
10 Botão para ligar/desligar
4Ligue a estação de ancoragem a um router ou modem a
10/100/1000 Mbps através da porta Ethernet.
8Ligue dispositivos compatíveis com USB-C, como SSDs (unidade
de estado sólido), à porta USB-C 3.2 Gen 1 (5 V/1,5 A, 5 Gbps).
Também pode carregar o telemóvel ou tablet com um máximo de 30
W através desta porta.
Instruções de segurança importantes
1) Evite deixar cair.
2) Não desmonte.
3) Não exponha ao contacto com líquidos.
4) Para beneficiar de um carregamento mais seguro e rápido,
utilize cabos originais ou certificados.
5) Este produto é adequado apenas para climas moderados.
6) A temperatura ambiente máxima durante a utilização deste
produto não deve exceder os 35 °C.
7) As fontes de chama abertas, tais como velas, não devem ser
utilizadas perto deste produto.
8) Utilize apenas um pano seco ou uma escova para limpar este
produto.
Utilizar a USB-C Docking Station
Ligar a estação de ancoragem à corrente
1. Ligue uma extremidade do transformador à porta de entrada DC-IN
e a outra extremidade a uma tomada elétrica.
2. Prima o botão para ligar/desligar. O indicador LED fica verde.
Ligar a estação de ancoragem ao portátil
Ligue o portátil à porta USB-C a montante da estação de ancoragem
com o cabo fornecido. O indicador LED fica azul e o portátil começa a
carregar a um máximo de 100 W.
Guia de indicadores LED
Verde sólido Ligado à corrente
Azul sólido
Ligado a um portátil
Desligado
Não ligado a um portátil
Portas de vídeo
Item DisplayPort 1 DisplayPort 2 Porta HDMI
Um
monitor
8K@30 Hz / /
/
8K@30 Hz
/
/ /
4K@60 Hz
Dois
monitores
4K@60 Hz
4K@60 Hz
/
4K@60 Hz /
4K@60 Hz
/
4K@60 Hz 4K@60 Hz
Três
monitores 4K@30 Hz
4K@30 Hz 4K@30 Hz
A tabela acima mostra as resoluções máximas suportadas nesta
estação de ancoragem. A saída de visualização real varia consoante as
especificações do dispositivo anfitrião.

RU 2726 PT
Declaração de Conformidade
Por este meio, a Anker Technology Co., Limited declara que este produto
está em conformidade com as Diretivas 2014/30/UE e 2011/65/UE. O
texto completo da declaração de conformidade da UE está disponível no
seguinte endereço da Internet: https://www.anker.com.
Anker Innovations Limited
Room 1318-19, Hollywood Plaza, 610 Nathan Road, Mongkok,
Kowloon, Hong Kong
O importador seguinte é a entidade responsável (contacte apenas
para questões no âmbito do Reino Unido):
Anker Technology (UK) Limited,|GNR8, 49 Clarendon Road, Watford,
Hertfordshire, WD17 1HP, United Kingdom
O importador seguinte é a entidade responsável (contacte apenas
para questões no âmbito da UE):
Anker Innovations Deutschland GmbH
Georg-Muche-Strasse 3, 80807 Munich, Germany
Este símbolo indica que este produto não deve ser tratado
como lixo doméstico. Em alternativa, deve ser entregue no
ponto de recolha aplicável para reciclagem de equipamento
elétrico e eletrónico.
Краткий обзор
*Порты USB-C хост-устройств должны поддерживать подачу
питания и альтернативный режим DisplayPort.
1
7
6
5
4
3
8
9
10
2

28 RU RU 29
1Восходящий порт
USB-C
2Порт HDMI 2.0 3Порт DisplayPort 1.4
4Порт Ethernet 5Порт USB-A 3.0 6Порт USB-A 2.0
7Гнездо питания
пост. тока (DC-IN)
8Порт USB-C 3.2
Gen 2
9Светодиодный
индикатор
10 Кнопка питания
4
Порт Ethernet позволяет подключить док-станцию к
маршрутизатору или модему с поддержкой скорости 10/100/1000
Мбит/с.
8
Порт USB-C 3.2 Gen 2 (10 Гбит/с) предназначен для подключения
устройств с поддержкой USB-C, например твердотельных накопителей
(SSD). Через этот порт можно также заряжать телефон или планшет при
максимальной мощности 30 Вт.
Важные инструкции по технике безопасности
1) Не допускайте падения изделия.
2) Не разбирайте изделие.
3) Не допускайте попадания жидкостей на изделие.
4) Для безопасной и наиболее быстрой зарядки используйте
оригинальные или сертифицированные кабели.
5) Это изделие предназначено для эксплуатации только в
условиях умеренного климата.
6) Температура воздуха при эксплуатации этого изделия не
должна превышать 35 °C.
7) Не размещайте рядом с изделием источники открытого огня,
например свечи.
8) Для очистки изделия используйте только сухую ткань или
щетку.
Использование док-станции USB-C Docking
Station
Включение док-станции
1. Подключите один конец прилагаемого адаптера питания к гнезду
питания пост. тока (DC-IN), а другой — к розетке электросети.
2. Нажмите кнопку питания. Светодиодный индикатор будет гореть
зеленым цветом.
Подключение док-станции к ноутбуку
Подключите ноутбук к восходящему порту USB-C док-станции с
помощью прилагаемого кабеля. Светодиодный индикатор будет
гореть синим цветом, и ноутбук начнет заряжаться при максимальной
мощности 100 Вт.
Справка по сигналам светодиодных
индикаторов
Непрерывный зеленый Устройство включено
Непрерывный синий
Устройство подключено к ноутбуку
Не горит
Устройство не подключено к
ноутбуку
Видеопорты
Элемент Порт DisplayPort 1 Порт DisplayPort 2 Порт HDMI
Один
монитор
8K при 30 Гц / /
/
8K при 30 Гц
/
/ /
4K при 60 Гц

TR 3130 RU
Два
монитора
4K при 60 Гц
4K при 60 Гц
/
4K при 60 Гц /
4K при 60 Гц
/
4K при 60 Гц 4K при 60 Гц
Три
монитора 4K при 30 Гц
4K при 30 Гц 4K при 30 Гц
В таблице выше указаны максимальные поддерживаемые разрешения
док-станции. Фактическое изображение на выходе будет зависеть от
технических характеристик хост-устройства.
Декларация о соответствии
Настоящим Anker Technology Co., Limited заявляет, что этот продукт
соответствует Директивам 2014/30/EU и 2011/65/EU. Полный текст
декларации о соответствии для ЕС можно найти на следующем
веб-сайте: https://www.anker.com.
Anker Innovations Limited
Room 1318-19, Hollywood Plaza, 610 Nathan Road, Mongkok, Kowloon,
Hong Kong
Следующий импортер является ответственной стороной (только для
Великобритании):
Anker Technology (UK) Limited,|GNR8, 49 Clarendon Road, Watford,
Hertfordshire, WD17 1HP, United Kingdom
Следующий импортер является ответственной стороной (только для
ЕС):
Anker Innovations Deutschland GmbH
Georg-Muche-Strasse 3, 80807 Munich, Germany
Genel Bakış
*Ana cihazların USB-C bağlantı noktaları, Power Delivery ve
DisplayPort Alternatif Modunu desteklemelidir.
1
7
6
5
4
3
8
9
10
2

32 TR TR 33
1USB-C Giriş Tarafı
Bağlantı Noktası
2HDMI 2.0 Bağlantı
Noktası
3DisplayPort 1.4
4Ethernet Bağlantı
Noktası
5USB-A 3.0
Bağlantı Noktası
6USB-A 2.0 Bağlantı
Noktası
7DC-IN Bağlantı
Noktası
8USB-C 3.2 Gen 2
Bağlantı Noktası
9LED Göstergesi
10 Güç Düğmesi
4
İstasyonun Ethernet bağlantı noktası aracılığıyla 10/100/1000 Mb/
sn. hızlarında bir yönlendiriciye veya modeme bağlayın.
8
SSD'ler (Katı Hal Sürücüsü) gibi USB-C uyumlu cihazları USB-C 3.2
Gen 1 bağlantı noktasına (10 Gb/sn.) bağlayın. Ayrıca bu bağlantı
noktası üzerinden telefonunuzu veya tabletinizi maksimum 30 W güçte
şarj edebilirsiniz.
Önemli Güvenlik Talimatları
1) Düşürmeyin.
2) Parçalara ayırmayın.
3) Sıvılara maruz bırakmayın.
4) En güvenli ve en hızlı şekilde şarj edebilmek için orijinal veya
onaylı kablolar kullanın.
5) Bu ürün yalnızca ılıman iklim koşullarında kullanım için
uygundur.
6) Bu ürün kullanılırken maksimum ortam sıcaklığı 35 °C'yi (95
°F) geçmemelidir.
7) Mum gibi açık alev kaynakları bu ürünün yakınına
yerleştirilmemelidir.
8) Bu ürünü temizlemek için yalnızca kuru bir bez veya fırça
kullanın.
İstasyonu Dizüstü Bilgisayarınıza Bağlaman
Birlikte gelen kabloyu kullanarak dizüstü bilgisayarınızı takma
biriminizin USB-C giriş tarafı bağlantı noktasına bağlayın. LED
göstergesi maviye döner ve dizüstü bilgisayarınız maksimum 100 W
ile şarj olmaya başlar.
LED Göstergesi Kılavuzu
Sabit yeşil Açık
Sabit mavi
Dizüstü bilgisayara bağlı
Kapalı
Dizüstü bilgisayara bağlı değil
Video Bağlantı Noktaları
Ürün DisplayPort 1 DisplayPort 2 HDMI Bağlantı
Noktası
Tek
Monitör
30 Hz'de 8K / /
/
30 Hz'de 8K
/
/ /
60 Hz'de 4K
İki Monitör
60 Hz'de 4K
60 Hz'de 4K
/
60 Hz'de 4K /
60 Hz'de 4K
/
60 Hz'de 4K 60 Hz'de 4K
Üç Monitör 30 Hz'de 4K
30 Hz'de 4K 30 Hz'de 4K
USB-C İstasyonunuzu Kullanma
İstasyonu açın
1. Birlikte verilen güç adaptörünün bir ucunu DC-IN bağlantı noktasına
ve diğer ucunu elektrik prizine takın.
2. Güç düğmesine basın. LED göstergesi yeşile döner.

JP 3534 TR
Yukarıdaki tablo, bu istasyonun desteklediği maksimum çözünürlüklerini
gösterir. Gerçek ekran çıkışı, ana cihaz özelliklerine bağlı olarak
değişiklik gösterir.
Uygunluk Beyanı
Anker Technology Co., Limited, işbu belge ile bu ürünün 2014/30/EU
ve 2011/65/EU Yönergelerine uygun olduğunu beyan eder. AB
uygunluk beyanının tam metni şu internet adresinde mevcuttur:
https://www.anker.com.
Anker Innovations Limited
Room 1318-19, Hollywood Plaza, 610 Nathan Road, Mongkok,
Kowloon, Hong Kong
Aşağıdaki ithalatçı sorumlu taraftır (yalnızca Birleşik Krallık ile ilgili
konularda):
Anker Technology (UK) Limited,|GNR8, 49 Clarendon Road, Watford,
Hertfordshire, WD17 1HP, United Kingdom
Aşağıdaki ithalatçı sorumlu taraftır (yalnızca AB ile ilgili konularda):
Anker Innovations Deutschland GmbH
Georg-Muche-Strasse 3, 80807 Munich, Germany
外観
* お使いの PC が USB Power Delivery および DisplayPort Alt モ
ードに対応している必要があります。
1
7
6
5
4
3
8
9
10
2

36 JP JP 37
1USB-Cポート (ア
ップストリーム)
2HDMI 2.0ポート 3Displayポート 1.4
4ギガビット・イ
ーサネット
(GbE) ポート
5USB-A 3.0ポート 6USB-A 2.0ポート
7DC入力ポート 8USB-C 3.2 Gen 2
ポート
9LEDインジケーター
10 電源ボタン
4 ギガビット・イーサネット (GbE) ポート (10/100/1000 Mbps) に
はルーターまたはモデムを接続します。
8 USB-C 3.2 Gen 2ポート (10 Gbps) にはSSDなどのUSB-C対応機
器を接続します。このポートを介して、スマートフォンやタブレ
ットを最大30Wで充電することもできます。
安全にご使用いただくために
1) 過度な衝撃を与えないでください。
2) 危険ですので分解しないでください。
3) 水などの液体で濡らさないようにしてください。
4) すばやく安全に充電するため、純正または認証されたケー
ブルをご使用ください。
5) 本製品は極端に暑いもしくは寒い場所での利用には適して
おりません。
6) 気温が35°Cを超える環境では、本製品を使用しないでくだ
さい。
7) 本製品を火気 (ろうそくなど) の近くで使用・保管しないで
ください。
8) 本製品のお手入れをする際は、乾いた布またはブラシのみ
を使用してください。
9) 同梱の電源コードは本製品のみにご使用ください。
本製品の使用方法
本製品の電源をオンにする
1. 付属の電源ケーブルとACアダプタを接続し、ACアダプタのコネ
クタをDC入力ポートに接続します。電源ケーブルのもう一方をコ
ンセントに接続します。
2. 電源ボタンを押すと、LEDインジケーターが緑色に点灯します。
本製品を機器に接続する
付属のケーブルを使用して、本製品のUSB-Cポート (アップストリ
ーム) にPCを接続します。LEDインジケーターが青色に点灯し、PC
は最大100Wで充電を開始します。
LED インジケーターの表示
緑色で点灯 電源がオン
青色で点灯
ノートPCに接続
消灯
ノートPCに未接続
ビデオポート
項目 Displayポート 1 Displayポート 2 HDMIポート
ディスプ
レイ1台
8K (30Hz) / /
/
8K (30Hz)
/
/ /
4K (60Hz)
ディスプ
レイ2台
4K (60Hz)
4K (60Hz)
/
4K (60Hz) /
4K (60Hz)
/
4K (60Hz) 4K (60Hz)
ディスプ
レイ3台 4K (30Hz)
4K (30Hz) 4K (30Hz)
上の表は、本製品が対応している最大解像度を示しています。 実際
のディスプレイ解像度は、お使いのPCの仕様によって異なります。
Table of contents
Languages:
Other Anker Docking Station manuals

Anker
Anker 651 User manual

Anker
Anker PowerExpand Elite 13-in-1 Thunderbolt 3 Dock User manual

Anker
Anker 564 User manual

Anker
Anker Power Expand Elite 12-in-1 Thunderbolt 4... User manual

Anker
Anker 563 User manual

Anker
Anker 778 User manual

Anker
Anker PowerExpand User manual

Anker
Anker AK-68ANDOCKS-BA User manual

Anker
Anker Y1010 User manual

Anker
Anker 5 Series User manual