manuals.online logo
Brands
  1. Home
  2. •
  3. Brands
  4. •
  5. arf
  6. •
  7. Toy
  8. •
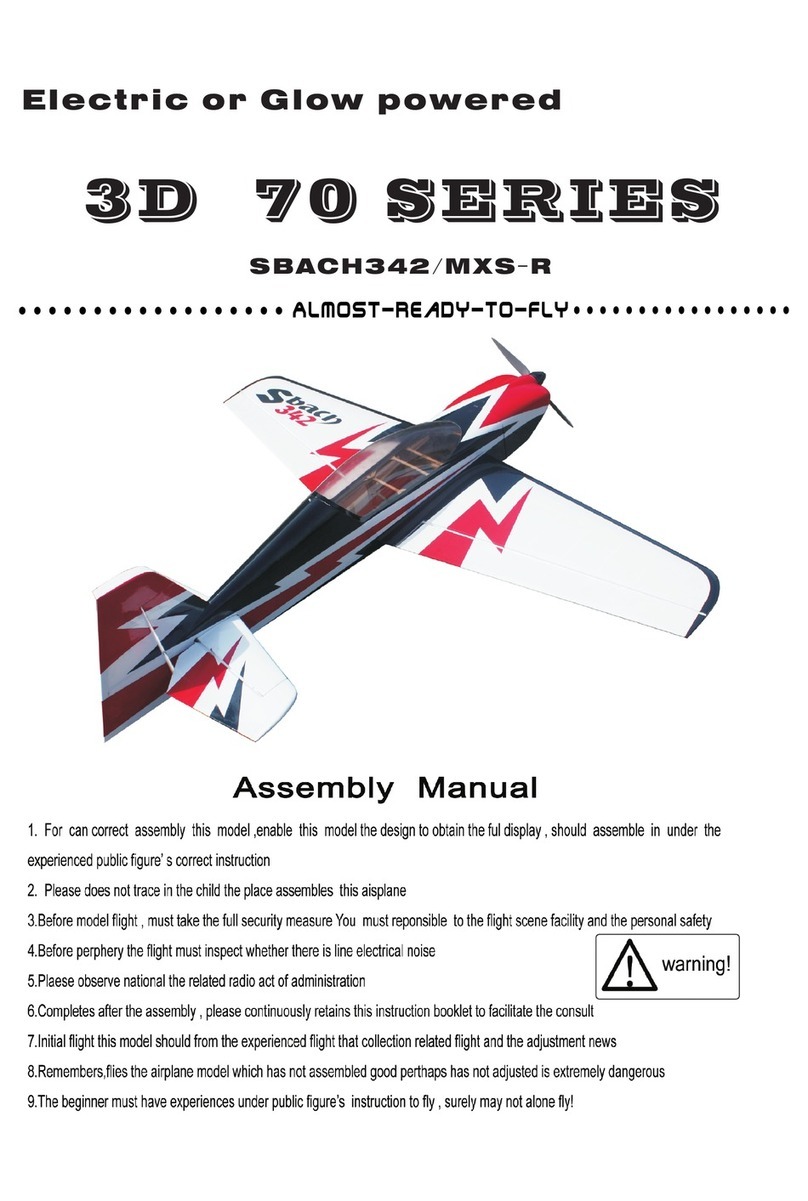
  9. arf Edge540K User manual

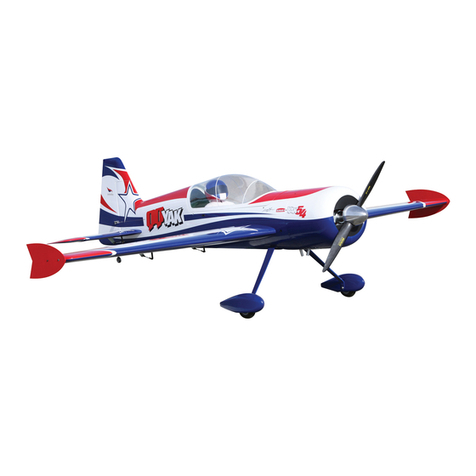
arf Edge540K User manual

GaspowerAircraft
30/ 30/ 30/
30/
50CC 50CC 50CC
50CC
Series Series Series
Series
Edge540K\Edge540\ Edge540K\Edge540\ Edge540K\Edge540\
Edge540K\Edge540\
Edge540T\ Edge540T\ Edge540T\
Edge540T\
Extra260\Extra330L\ Extra260\Extra330L\ Extra260\Extra330L\
Extra260\Extra330L\
Extra300SHP Extra300SHP Extra300SHP
Extra300SHP
Mxs-R\MXS\MX2 Mxs-R\MXS\MX2 Mxs-R\MXS\MX2
Mxs-R\MXS\MX2
Yak54\Yak55SP\ Y ak54\Yak55SP\ Yak54\Yak55SP\
Yak54\Yak55SP\
Yak55M\ Y ak55M\ Yak55M\
Yak55M\
Sbach342\Sbach300\Slick540\Slick360\ Sbach342\Sbach300\Slick540\Slick360\ Sbach342\Sbach300\Slick540\Slick360\
Sbach342\Sbach300\Slick540\Slick360\
………………………… ………………………… …………………………
…………………………
ALMOST-READY-TO-FLY ALMOST-READY-TO-FLY ALMOST-READY-TO-FLY
ALMOST-READY-TO-FLY
………………………… ………………………… …………………………
…………………………
CongratulationsonyourpurchasingofthisexcellentAlmost-Ready-to-FlyR/Cmodel!ThisARFadoptsthe
latest3Ddesignfeaturesandemphasizeshighperformance,lightweightandfun.Theplaneisdesignedby
professionalengineersandbuiltbyskilledcraftsmen.Manyofthepartsarealreadypre-installedforyou!
*Note:Thismanualdepictstheassemblyproceduresfortheseplanes.Plessereadthroughthemamualto
determinewhichstepsareappropriateforyouraircraft.
Cautions: Cautions: Cautions:
Cautions:
This This This
This
R/C R/C R/C
R/C
model model model
model
is is is
is
not not not
not
aaa
a
toy! toy! toy!
toy!
1.TheRCaircraftisnotatoy!Ifmisused,itcancauseseriousbodilyharmanddamagetoproperty.Flyitonlyin
openareaandfollowallinstructionsincludingyourRadioandEngine.
2.Asthisproductwasdesignedforhighperformance,incorrectinstallationwouldaffecttheflyingperformance.
Pleaseaskforassistanceformanexpericncedmodelerifyoudon’tunderstandthemethodsofassembly.
3.Becausethepackagecontainsmanysmallparts.Pleasekeepchildrenawayfromassemblyareawhile
assemblytheplane.
4.Forsafetyreasons,pleaseconsidereverypossibleaccidentwhenoperatingthismodelairplaneandfollow
yourclub/countryrules.
5.Thismodelwasdesignedfor30CCto60CCgasengineand1.20to2.40Nitroengine,pleaseusethe
recommendedenginesizeorequivalentelectricmotor.
6.Pleasereadthismanualcarefullybeforeassembly.Alwaysrefertoitduringassemblyanddonotdeviate
fromtheestablishedconstructionmethods.
Note:Thismanualdepictstheassemblyproceduresforboththeaircrafts.Pleasereadthroughthemanualto
determinewhichstepsareappropriateforyouraircraft.
Features: Features: Features:
Features:
Lateststructure
Lightweightconstructionandhighstructuralstrength
Superquality
Excellentaerobaticsand3Dperformance
Easyinstallation
Twopiecesremovablewingsandstabs
Completewithaccessories
Acrofoiltailwings
Lowwingloadingeasytoflying
Canopyandcowlingwithshockproofsiliconrubberblanket
Highperformancehardwareincluding:Balllinkagecontrolsystem
AdvancedPUwheels
C.F.
landinggear
Twopieceswingsfittedourproducednylonscrews
C.F.Wingtube
Longservoarmincluded
C.F .tubestomaketheplaneslightweight
Specification: Specification: Specification:
Specification:
50~60cc 50~60cc 50~60cc
50~60cc
class class class
class
30~40cc 30~40cc 30~40cc
30~40cc
class class class
class
Edge540T Edge540T Edge540T
Edge540T
Extra260 Extra260 Extra260
Extra260
Extra330L Extra330L Extra330L
Extra330L
MXS-R MXS-R MXS-R
MXS-R
Wing
Span:
88”(2234mm)87”(2210mm)88”(2234mm)89”(2260mm)
Length:81”(2057mm)80”(2040mm)80.5”2044mm)82”(2143mm)
Wing
Area:
1465sq.in(94.5sq.dm.
)
1426sqin(92sq.dm.)
1465sq.in(94.5sq.dm.
)
1426sqin(92sq.dm.)
Flying
Weinght:
15.5-171bs(7000-
7700g)
15.5-171bs(7000-
7700g)
15.5-171bs(7000-
7700g)
15.5-171bs(7000-
7700g)
Edge540 Edge540 Edge540
Edge540
Edge540K Edge540K Edge540K
Edge540K
Slick360 Slick360 Slick360
Slick360
Slick540 Slick540 Slick540
Slick540
Wing
Span:
87”(2202mm)87”(2202mm)87”(2208mm)87”(2208mm)
Length:82”(2098mm)82”(2098mm)83”(2100mm)83”(2100mm)
Wing
Area:
1240sq.in(80sq.dm.)1240sq.in(80sq.dm.)1426sqin(92sq.dm.)1426sqin(92sq.dm.)
Flying
Weinght:
15.5-171bs(7000-
7700g)
15.5-171bs(7000-
7700g)
15.5-171bs(7000-
7700g)
15.5-171bs(7000-
7700g)
RAVEN RAVEN RAVEN
RAVEN
Yak54 Yak54 Yak54
Yak54
Yak55SP Yak55SP Yak55SP
Yak55SP
SU26M SU26M SU26M
SU26M
Wing
Span:
87”(2210mm)85”(2160mm)87”(2210mm)87”(2210mm)
Length:81”(2060mm)80”(2035mm)80.5/8”(2048mm)80.5/8”(2048mm)
Wing
Area:
1449sq.in(93.5sq.dm.
)
1429sq.in(92.2sq.dm.
)
1451sq.in(93.6sq.dm.
)
1466sq.in(94.6sq.dm.
)
Flying
Weight:
16-17.51(7250-
7900g)
16-17.51bs(7250-
7900g)
16-17.51bs(7250-
7900g)
16-17.51bs(7250-
7900g)
Sbach342 Sbach342 Sbach342
Sbach342
SSS
S
bach300 bach300 bach300
bach300
Yak55M Yak55M Yak55M
Yak55M
Extra300SHP Extra300SHP Extra300SHP
Extra300SHP
Wing
Span:
87”(2210mm)87”(2210mm)88”(2234mm)88”(2240mm)
Length:84”(2150mm)84”(2150mm)80.5”2044mm)80.7”(2050mm)
Wing
Area:
1426sqin(92sq.dm.)1426sqin(92sq.dm.)
1465sq.in(94.5sq.dm.
)
1457sq.in(94sq.dm.)
Flying
Weinght:
15.5-171bs(7000-
7700g)
15.5-171bs(7000-
7700g)
15.5-171bs(7000-
7700g)
15.5-171bs(7000-
7700g)
Other Other Other
Other
Items Items Items
Items
Needed(not Needed(not Needed(not
Needed(not
included included included
included
in in in
in
the the the
the
kit kit kit
kit
)))
)
Slick360 Slick360 Slick360
Slick360
Slick540 Slick540 Slick540
Slick540
Extra330 Extra330 Extra330
Extra330
Egde540 Egde540 Egde540
Egde540
Wing
Span:
74”(1900mm)74”(1900mm)75”(1900mm)75”(1900mm)
Length:72”(1825mm)72”(1825mm)71”(1810mm)71”(1809mm)
Wing
Area:
868sq.in(56sq.dm.)868sq.in(56sq.dm.)868sq.in(56sq.dm.)868sq.in(56sq.dm.)
Flying
Weinght:
9.2-10.6lbs(4200-
4800g)
9.2-10.6lbs(4200-
4800g)
9.2-10.6lbs(4200-
4800g)
9.2-10.6lbs(4200-
4800g)
Edge540T Edge540T Edge540T
Edge540T
Extra260 Extra260 Extra260
Extra260
Extra330L Extra330L Extra330L
Extra330L
MXS-R MXS-R MXS-R
MXS-R
Wing
Span:
74”(1880mm)74”(1880mm)75”(1900mm)75”(1915mm)
Length:69.5”(1770mm)69.5”(1770mm)78”(1983mm)69”(1760mm)
Wing
Area:
837sq.in(54sq.dm.)837sq.in(54sq.dm.)837sq.in(54sq.dm.)888sq.in(57.3sq.dm.)
Flying
Weinght:
9.2-10.6lbs(4200-
4800g)
9.2-10.6lbs(4200-
4800g)
9.2-10.6lbs(4200-
4800g)
9.2-10.6lbs(4200-
4800g)
Sbach342 Sbach342 Sbach342
Sbach342
SSS
S
bach300 bach300 bach300
bach300
Yak55M Yak55M Yak55M
Yak55M
Extra300SHP Extra300SHP Extra300SHP
Extra300SHP
Wing
Span:
73”(1850mm)73”(1850mm)75”(1900mm)75”(1900mm)
Length:69.5”(1770mm)69.5”(1770mm)73”(1850mm)71”(1809mm)
Wing
Area:
837sq.in(54sq.dm.)837sq.in(54sq.dm.)837sq.in(54sq.dm.)837sq.in(54sq.dm.)
Flying
Weinght:
9.2-10.6lbs(4200-
4800g)
9.2-10.6lbs(4200-
4800g)
9.2-10.6lbs(4200-
4800g)
9.2-10.6lbs(4200-
4800g)
RAVEN RAVEN RAVEN
RAVEN
Yak54 Yak54 Yak54
Yak54
Yak55SP Yak55SP Yak55SP
Yak55SP
SU26M SU26M SU26M
SU26M
Wing
Span:
74”(1880mm)74”(1880mm)75”(1900mm)75”(1900mm)
Length:69.5”(1770mm)69.5”(1770mm)73”(1850mm)71”(1809mm)
Wing
Area:
837sq.in(54sq.dm.)837sq.in(54sq.dm.)837sq.in(54sq.dm.)837sq.in(54sq.dm.)
Flying
Weinght:
9.2-10.6lbs(4200-
4800g)
9.2-10.6lbs(4200-
4800g)
9.2-10.6lbs(4200-
4800g)
9.2-10.6lbs(4200-
4800g)
Propeller19*1023*8,30ccuse19*10~20*10,50ccuse22*10~23*10
Spinner(3”-4”)
18”or36”servoExtension
Additional Additional Additional
Additional
Requried Requried Requried
Requried
Equipment Equipment Equipment
Equipment
Radio Radio Radio
Radio
Equipment Equipment Equipment
Equipment
6-channelradiosystem
1standardservoforthrottle
5hi-torqueservos
Recommended Recommended Recommended
Recommended
JRsystemsFutabasystems
JR9XorJR9X11Futaba9CHPS
JRPCM10X12ZAP
JRPCM12X14MZA
Recommended Recommended Recommended
Recommended
engines engines engines
engines
Gasoline:30-60CC
2-Stroke:1.20-2.40
4-Stroke:2.40-6.00
Additional Additional Additional
Additional
Required Required Required
Required
tools tools tools
tools
and and and
and
adhesives adhesives adhesives
adhesives
Tools Tools Tools
Tools
Adjustablewrench(small)Hobbyknife
4-40TapMaskingtape
CanopyscissorsPhilipsscrewdriver(small)
Drill(drillpresspreferred)Razorsaw
Drillbit:1mm-6mmsetScissors
DrumsanderSquare
CutoffwheelSyringes
Flatbladescrewdriverw/shorthandle
Tap
handle
Foam:6mmT oothpicks
HexwrenchVelcrostraps
Adhesives Adhesives Adhesives
Adhesives
5-minuteepoxyMediumCAGlue
30-minuteepoxyThreadlock
Other Other Other
Other
Required Required Required
Required
Items Items Items
Items
EpoxybrushesPetroleumjelly
Felt–tippedpenorpencilRubbingalcohol
Measuringdevice(e.g.ruler,tapemeasure)Sandpaper(coarse)
MixingsticksforepoxyCoveringiron
PapertowelsDentalflossorstring
Before Before Before
Before
starting starting starting
starting
Assembly Assembly Assembly
Assembly
Beforebegintheassemblyofthesemodels,thoroughlyinspectthefuselage,wingpanels,
rudder,andstabilizer.Ifyoufindanypartdamagedormissing,pleasecontactthelocaldealer.
Ifyoufindanywrinklesinthecovering,pleaseuseaheatgunorcoveringirontosmooththem.
Assembly Assembly Assembly
Assembly
.Hinging .Hinging .Hinging
.Hinging
the the the
the
Control Control Control
Control
Surfaces Surfaces Surfaces
Surfaces
Beforestarthinging,youneedtoprepare:
Hinges
30-minuteepoxy
T oothpicks
Applyepoxyintotrailingedgehingeholesofthewing.
Applyepoxyononesideofthehinges.
Insertthemintotheholes.
Applyepoxyintothehingeholesof
theleadingedge.
Applyepoxytotheothersideofthehinges.
Installthecontrolsurfaces.
Movethesurfaceupanddownacoupleoftimestomakesure
all
thehingesarealignedcorrectlyandthe
desiredthrowisattained(Aileron:40degrees,others:45degrees)
Usesomemaskingtapetoholdthesurfacestogetheruntil
all
ofthesurfacesaresecureinplacewith
epoxy.
HingetheElevatorandRudderwiththesameway.
.Landing .Landing .Landing
.Landing
Gear Gear Gear
Gear
Installation Installation Installation
Installation
Main Main Main
Main
Landing Landing Landing
Landing
Gear Gear Gear
Gear
Insertthewheelaxlethroughthecenterholeofthewheel.
Installtwowheelcollars.ensurethatthewheelrollsfreely.
Whenthewheelandwheelpantareinstalledcompletely,youcanadjustthesetwowheelcollarstoletthe
wheelbeinthecenterofthewheelpant.
Note: Note: Note:
Note:
Use Use Use
Use
thread thread thread
thread
locking locking locking
locking
compound compound compound
compound
when when when
when
installing installing installing
installing
all all all
all
nuts nuts nuts
nuts
and and and
and
bolts bolts bolts
bolts
during during during
during
assembly. assembly. assembly.
assembly.
ThenInserttheaxlethroughtheholeinthelandinggear.Andattachtheaxleforthemainlandinggear
firmlywiththelocknut.
Installthewheelpantwithtwobolts.Makingsurethewheelisinthecenterofthewheelpant.
Installthemainlandinggearonthebottomofthefuselage.Considerusing“threadlock”onthescrewsto
keepthemfromvibratingduringflight.
Note:Use Note:Use Note:Use
Note:Use
thread thread thread
thread
locking locking locking
locking
compound compound compound
compound
when when when
when
attaching attaching attaching
attaching
all all all
all
nuts nuts nuts
nuts
to to to
to
bolts bolts bolts
bolts
during during during
during
assembly. assembly. assembly.
assembly.
Coverthemainlandinggearwiththehousing
by
attaching
it
withthescrewsprovided.Thisstepisonly
forYak55SP/Yak54/SU26M.
Tail Tail Tail
Tail
Wheel Wheel Wheel
Wheel
Instllation Instllation Instllation
Instllation
Centerthetailwheelbracketonthemountingblock.
Markthemountinglocationsforthelargewoodscrews.
Drillthreesmallpilotholesforthewoodscrews.
Usethreemetalserewstosecurethetailwheelbracketinplace.
Installthetailwheelparts.
Drillaholefortheconnectiveboltandinstall
it
withglue.
Letthecontrolwirethroughtheholesofconnectiveboltandlandinggearconnector.
Tightenthescrewtosecurethecontrolwire.
Installthewheelwithtwowheel
collars,ensuerthatthewheelrollsfreely.
...
.
Tail Tail Tail
Tail
surfaces surfaces surfaces
surfaces
Installation Installation Installation
Installation
Highperformanceaccessories-BallLinkageControlSystem.
Findouttheslotpre-openedforruddercontrolhorn,removethefilm.
Fitthecontrolhornintotheslot,meansurethecorrectlengthforit.
Cutthelongerpart,thenCAgluethehornsintotherudderofeachside.
Screwtheballlinkontothehorns.
Connectthepull-pullwireandcontrolhornwithballlink.
Threadthecableconnecterhalfwayintotheballlink.
Passthecableintothefuselagethroughtheslot.
Installtherudderservo.
Preparetherudderservoarm(weadviseyoutouselongservo
arm)attachingtwoballlinks
by
usingtheScrewsandlocknuts.
Centertherudderservoandplacetheservoarmontotheservo.’
Slideacrimpontothecable,connectthecableandcableconnecterlikeotherend,butdonotusecrimping
tool,letthecrimpcanremovefreely.
Repeatthesestepstoinstallthesecondruddercable.
Adjustthepositionoftheeonnecterendonthecable.
Useacrimpingtooltofixthecrimpandcable.
Rotatetheconnecterorballlinktotensionthecables.
Securetheservoarmtotherudderservo
by
usingthescrewthat
camewiththeservo.
Installa24”servoextensionontotheelevatorservo.Eithertietheservo
leadstogether,oruseaconnectortosecuretheextensiontoprevent
it
from
cominglooseduringflight.
Slick540/Y ak55SP/SU26M/Edge540T/Ectra330L:InstalltheservointheStabilizersectionofbothsides.
Yak54/Sbach342/Sbach300:Installtheservosinthefuselageinprecutlocationsonbothsides.
Installthehorizontalstabilizerassembliesatthistime.Insertthestab
tube.
Slideeachstabilizerhaltontothetube.Makesuretheantiroutation
pinsarefullyseated.
Installfourbolts(twoperside).Don’
t
forgettouse“threadlock”onthe
screwsbeforeinstalltokeepthemfromvibratingduringflight.
Followthesamewaytoinstalltheelevatorcontrolsystemlikeruddercontrolhorninstallation.
Connectthepushrodandcontrolhornasshown.
Putthecontrolhornintotheslotpre-opened,glue
it
tothestab,oneachside.
Installtheelevatorservoasshown
Connecttheservoandthepushrodasinthephoto
Measuretofindandmarkyourhornboltlocation.
Insertthecontrolhornbothleftsideandrightside.
Connectthecontrolhormandservoarmwithballlink.
.Engine .Engine .Engine
.Engine
Installation Installation Installation
Installation
Thereareonepieceofwoodentemplatessupplied,3W50ccgasolineengineandDA50\DLE55engine.
Selecttherighttemplateforyourengine(if
it
is3W50ccorDA50\DLE55)tomarkthelocationofmountingholes.
Markthecenterlineonthefirewallfortheengine.Note:thevertical
centerlineisoffsettotherightsideofcenterasviewedfromthefront
duetothebuilt-inright-thrust.Thesewillbenecessarynomatterwhat
engineyouchoosetoinstall.
Drilltheinstallationholesonthefirewall.Ifyouintendtoinstallnitro
engine,youneedtoinstalltheenginemountonthefirewallwithscrewsfirst.
Drillholesontheenginemountandfirmlyfastenthescrewsonthe
mount.
Measurethelengthofthecowling
anddecidewheretoinstalltheengine.Let
thepropellerdrivewashercomeout2mm
fromthecowlinginthefront.
Ifyouareinstallingagasolineengine,drillholesinthefirewallandthenfastenthesuppliedscrewsfrom
thebackofthefirewall.Makesuretheengineisfixedfirmlyandthenapply“threadlock”glueonthebolts.
Installthelgnition.
Throttle Throttle Throttle
Throttle
servo servo servo
servo
Installation Installation Installation
Installation
Installthethrottleservoontotheservomountandglue
it
intheplace
whereyouwanttomount.
Decidethelengthandthelocationofthethrottlelinkagerodaccording
tothepositionoftheservoarmandtheenginethrottlearm.Installthelinkage
rod.
Canister Canister Canister
Canister
Installation Installation Installation
Installation
Wesupporttwopieceswoods.Ifyounotusethecanister,youcanuseonepiecetoclosetheholeafterthe
engine.Ifyouusethecanister,youcanuseonepiecetoclosetheholeaftercanister.
.Fuel .Fuel .Fuel
.Fuel
Tank Tank Tank
Tank
Installtaion Installtaion Installtaion
Installtaion
RequiredParts:
●Clusk(fuelpickup)●Caps(2)
●FuelPickuptubing●Fueltank
●Rubberstopper●M3x30screw
2.Required
Tools
andAdhesives:
●HobbyknifeFoam:1/4”
●Philtipsscrewdriver(small)
Note: Note: Note:
Note:
The The The
The
stopper stopper stopper
stopper
provided provided provided
provided
with with with
with
the the the
the
Yak Yak Yak
Yak
has has has
has
three three three
three
holes holes holes
holes
.The .The .The
.The
holes holes holes
holes
are are are
are
the the the
the
fuel fuel fuel
fuel
pickup,fill pickup,fill pickup,fill
pickup,fill
and and and
and
vent vent vent
vent
lines.You lines.You lines.You
lines.You
can can can
can
use use use
use
two two two
two
holes: holes: holes:
holes:
One One One
One
for for for
for
the the the
the
fuel fuel fuel
fuel
pickup pickup pickup
pickup
and and and
and
one one one
one
for for for
for
the the the
the
fuel fuel fuel
fuel
vent vent vent
vent
...
.
Only Only Only
Only
open open open
open
the the the
the
third third third
third
hole hole hole
hole
if if if
if
you you you
you
are are are
are
going going going
going
to to to
to
use use use
use
aaa
a
separate separate separate
separate
fill fill fill
fill
line. line. line.
line.
Note Note Note
Note
for for for
for
gas gas gas
gas
engines: engines: engines:
engines:
While While While
While
the the the
the
stopper stopper stopper
stopper
is is is
is
OK OK OK
OK
for for for
for
both both both
both
gas gas gas
gas
and and and
and
glow,the glow,the glow,the
glow,the
inside inside inside
inside
fuel fuel fuel
fuel
tubing tubing tubing
tubing
supplied supplied supplied
supplied
is is is
is
for for for
for
gas gas gas
gas
and and and
and
glow. glow. glow.
glow.
If If If
If
aaa
a
gasoline gasoline gasoline
gasoline
engine engine engine
engine
is is is
is
used,Use used,Use used,Use
used,Use
tygon tygon tygon
tygon
tubing(not tubing(not tubing(not
tubing(not
included)for included)for included)for
included)for
all all all
all
lines lines lines
lines
outside outside outside
outside
the the the
the
fuel fuel fuel
fuel
tank. tank. tank.
tank.
3.Bendtwofueltubescarefullytoa45-degreeangleusingyourfingers.Thesewillbethefueltankfilland
venttubes.Usecarefullynottokinkthetubewhilebending.
4.Locatetherubberstopper.Insertthethreemetalfueltubesintotheholesinthestoppersothatanequal
amountoftubeexrendsfromeachsideofthestopper.Thestraighttubewillbethefueltankpickupthatprovides
fueltotheengine.
5.Slidethesmallercapoverthetubeonthesmallerendoftherubberstopper.Thisendwillbeinsertedinto
thefueltank.Thelargercapisplacedonthesideoftherubberstopperthatmakesthecap.
LooselyinstalltheM3x30screwsthroughthecenterofthestopper.
6.Locatetheclearpieceoftygonorsilieconefueltubingandthefueltankelunk.Cutthetubingtoappropriate
length.Installtheelunkontooneendofthetygonorsiliconetubing.Slidethetubing(endoppositethecluck)onto
thefueltankpickuptube(straighttube)inthestopper.
7.Slidethetubingontothemetaltubewhichhasbeenbent.
8.Carefullyinsertthestopperassemblyintothefueltank.Notethepositionoftheventtube:itmustbeupat
thetopportionofthefueltanktofunctionproperly.Also,itmaybenecessarytoshortentank.
You
shouldbe
abletoturnthetanktoanyattitude,andtheelunkwillfalltothelowestpoint(alldirectionsexceptforhaving
thestopperfacingdown).
9.TightentheM3x20screwcarefullydonotoverlytighten.Thisallowstherullerstoppertoformaseal
by
beingslightlycompressed,thussealingthefueltankopening.
Note Note Note
Note
the the the
the
position position position
position
of of of
of
the the the
the
fill fill fill
fill
tube:it tube:it tube:it
tube:it
must must must
must
be be be
be
down down down
down
at at at
at
the the the
the
bottom bottom bottom
bottom
portion portion portion
portion
of of of
of
the the the
the
fuel fuel fuel
fuel
tank,then tank,then tank,then
tank,then
you you you
you
can can can
can
pick pick pick
pick
up up up
up
fuel fuel fuel
fuel
when when when
when
you you you
you
end end end
end
your your your
your
flying. flying. flying.
flying.
AIR
Pumpingfuel
To
Engine
●Assembleandcheckthefueltanktoensuretherearenoleaks
beforeistallingit.Makesueryouconncetthethreeinlet/outlettubes(see
picture)correctlywhenconnectingthefuellines.
●Bindthefueltankwithnylonstrips.
.Cowling .Cowling .Cowling
.Cowling
Instalation Instalation Instalation
Instalation
●Cutoutthenecessaryholesinthecowltoaccommodateyourengine.Keepinmindthatyoumayneedto
relievethelowerportionofthecowlinordertoprovideadequateairflowfortheengine.
●Installasuitablepropellerandspinnerontheengineaccordingtothesuggestionsfromtheengine
manufacturer.Fitthecowlinganddrillholestoaccommodatethecowlingscrews.
.Wing .Wing .Wing
.Wing
Installation Installation Installation
Installation
●Installtheaileronservoswith18”
servoextensionintotheservotrays
locatedinthebottomofthewings.
●Ensureyouraileronservosarecentered.
Findouttheslotpre-openedforruddercontrolhorn,removethefilm.
Fitthecontrolhornintotheslot,gluethehornsintotheaileronofeachside.
Connecttheservoandballlinkwithpushrodasshown.
AssemblingtheWing
●Note:Tightenthescrewsonlybyhand.
.RadioInstallation
.CanopyandHatchAssemly
●Installthecontrolhorn.Adjustthehornandservoarm.Fixthehorninplacefirmly.Installtheballlinkand
pushrod.Makesureit
’
sfirmandflexible.
all 30cc size airplane, please follow the above method to install it.
(one piece control horn only)
●Usethewingtubetoattachthewinghalvestothefuselage.
●Installthenylonretainingserewsfromtheinsideofthefuselage.
●●●Note: Note: Note:Tighten Tighten Tightenthe the thescrews screws screwsonly only onlyby by byhand. hand. hand.
Ⅷ.Radio .Radio .RadioInstallation Installation Installation
●Wrapthereceiverbatteryand
receiverinfoam.Attachthereceiverand
batterytothebatterytray
by
usingVelcro
strapssoastosecurethereceiver.
●Mountthereceiverswitchina
convenientlocationinthesideofthefuselage.
Ⅸ.Canopy .Canopy .Canopyand and andHatch Hatch HatchAssemly Assemly Assemly

This manual suits for next models

17

Other arf Toy manuals

arf Composite QQ Yak 54 2.6 m User manual

arf

arf Composite QQ Yak 54 2.6 m User manual

arf Tornado Owner's manual

arf

arf Tornado Owner's manual

arf BH67 User manual

arf

arf BH67 User manual

arf AVENSIS Owner's manual

arf

arf AVENSIS Owner's manual

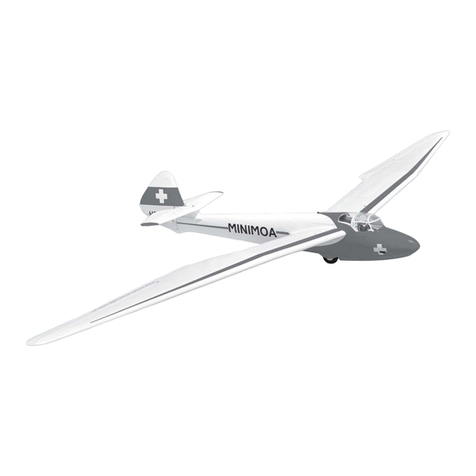
arf MINIMOA GLIDER User manual

arf

arf MINIMOA GLIDER User manual

arf YAK55M 60CC User manual

arf

arf YAK55M 60CC User manual

arf EXTRA300L User manual

arf

arf EXTRA300L User manual

arf 70 Series User manual

arf

arf 70 Series User manual

arf GILMORE Owner's manual

arf

arf GILMORE Owner's manual

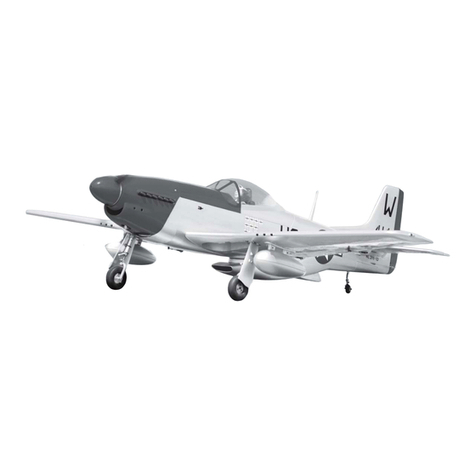
arf P-51 MUSTANG User manual

arf

arf P-51 MUSTANG User manual

arf CORSAR Owner's manual

arf

arf CORSAR Owner's manual

arf F4U Corsair .60 User manual

arf

arf F4U Corsair .60 User manual

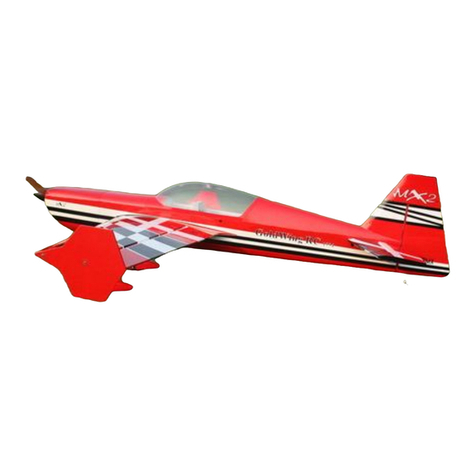
arf MX2 50CC V2 User manual

arf

arf MX2 50CC V2 User manual

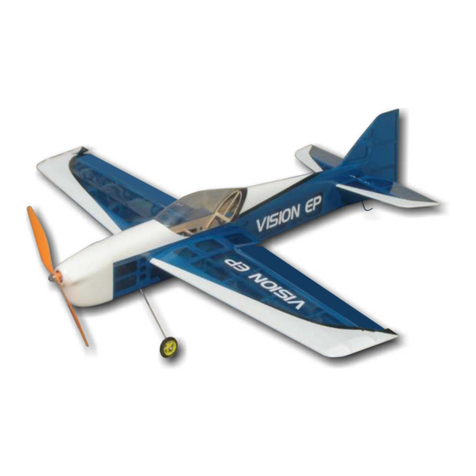
arf VISION EP User manual

arf

arf VISION EP User manual

arf PA-20 Pacer 10e User manual

arf

arf PA-20 Pacer 10e User manual

arf LITTLE TONI EP User manual

arf

arf LITTLE TONI EP User manual

arf HandyKing EP User manual

arf

arf HandyKing EP User manual

arf SBACH300 20CC V2 User manual

arf

arf SBACH300 20CC V2 User manual

arf Fan Star User manual

arf

arf Fan Star User manual

arf AeroPet 50 User manual

arf

arf AeroPet 50 User manual

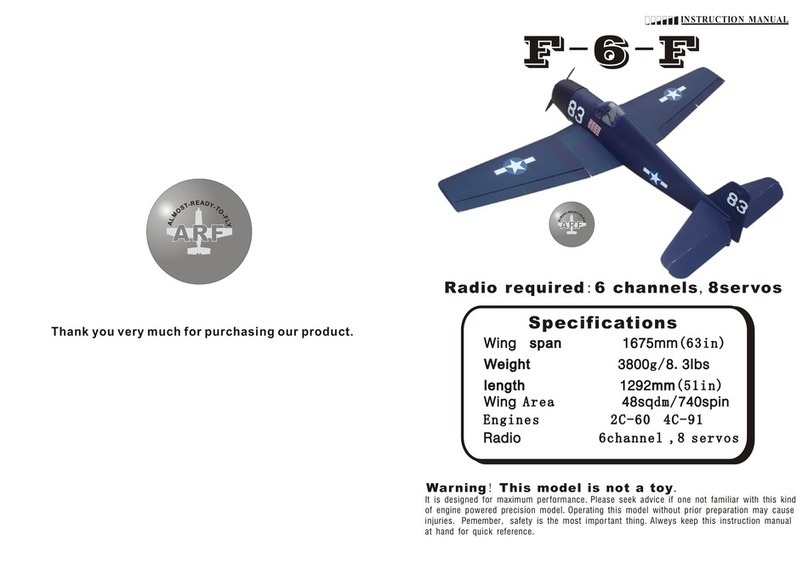
arf F-6-F User manual

arf

arf F-6-F User manual

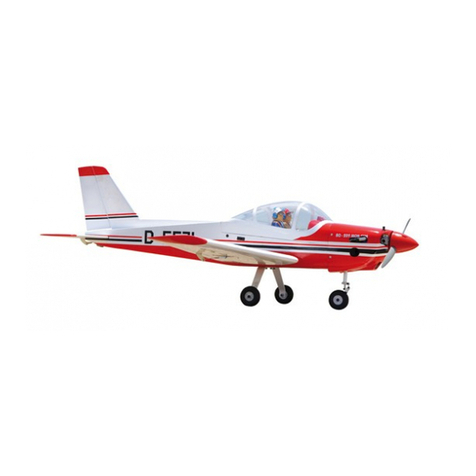
arf BO-209 MONSUN Owner's manual

arf

arf BO-209 MONSUN Owner's manual
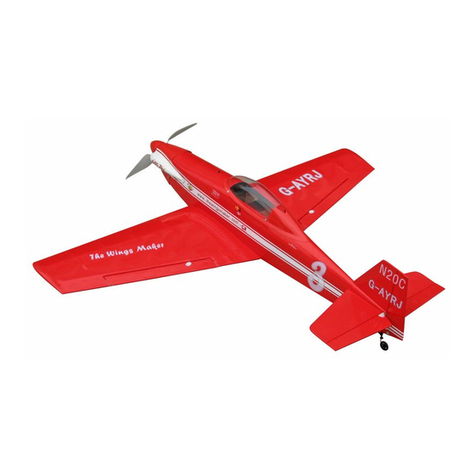
arf YAK 55M User manual

arf

arf YAK 55M User manual

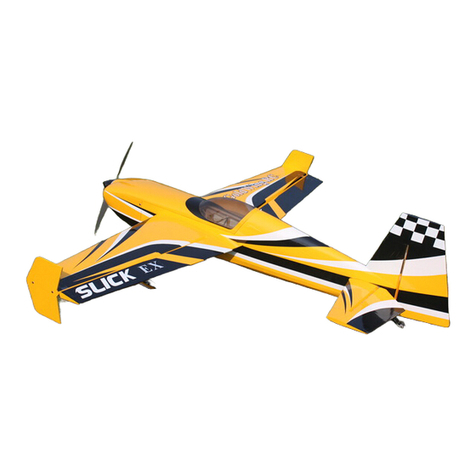
arf SLICK540 120E User manual

arf

arf SLICK540 120E User manual

Popular Toy manuals by other brands

Twister CPX Assembly & flight training guide

Twister

Twister CPX Assembly & flight training guide

REVELL Corsair F4U-4 Assembly manual

REVELL

REVELL Corsair F4U-4 Assembly manual

PARKZONE Extra 300 PNP/BNF instruction manual

PARKZONE

PARKZONE Extra 300 PNP/BNF instruction manual

LEGO 9747 Robotics Invention Systems 1.5 Building instructions

LEGO

LEGO 9747 Robotics Invention Systems 1.5 Building instructions

Magnum RC Flying Santa instruction manual

Magnum

Magnum RC Flying Santa instruction manual

Lite Brix Candy Shop instruction manual

Lite Brix

Lite Brix Candy Shop instruction manual

Little Tikes 652868M8 quick start guide

Little Tikes

Little Tikes 652868M8 quick start guide

Goodseed Tabernacle KiT instructions

Goodseed

Goodseed Tabernacle KiT instructions

Faller Sylter Backfischrutsche manual

Faller

Faller Sylter Backfischrutsche manual

Chad Valley CV Grand Piano Assembly & user instructions

Chad Valley

Chad Valley CV Grand Piano Assembly & user instructions

Hasbro Transformers Universe Autobot Roadbuster 83794... installation guide

Hasbro

Hasbro Transformers Universe Autobot Roadbuster 83794... installation guide

RC Lander F9F-2 Operational manual

RC Lander

RC Lander F9F-2 Operational manual

Pebaro 0351 manual

Pebaro

Pebaro 0351 manual

Fisher-Price Toots the Train instructions

Fisher-Price

Fisher-Price Toots the Train instructions

Fisher-Price VOICE TECH RESCUE HEROES Rescue Fire Truck instructions

Fisher-Price

Fisher-Price VOICE TECH RESCUE HEROES Rescue Fire Truck instructions

Fisher-Price R4747 instruction sheet

Fisher-Price

Fisher-Price R4747 instruction sheet

Viessmann 92889 Operation manual

Viessmann

Viessmann 92889 Operation manual

FMS 70MM AVANTI operating manual

FMS

FMS 70MM AVANTI operating manual

manuals.online logo
manuals.online logoBrands
  • About & Mission
  • Contact us
  • Privacy Policy
  • Terms and Conditions

Copyright 2025 Manuals.Online. All Rights Reserved.