manuals.online logo
Brands
  1. Home
  2. •
  3. Brands
  4. •
  5. Argos
  6. •
  7. Indoor Furnishing
  8. •
  9. Argos Mendoza 330/9430 User manual

Argos Mendoza 330/9430 User manual

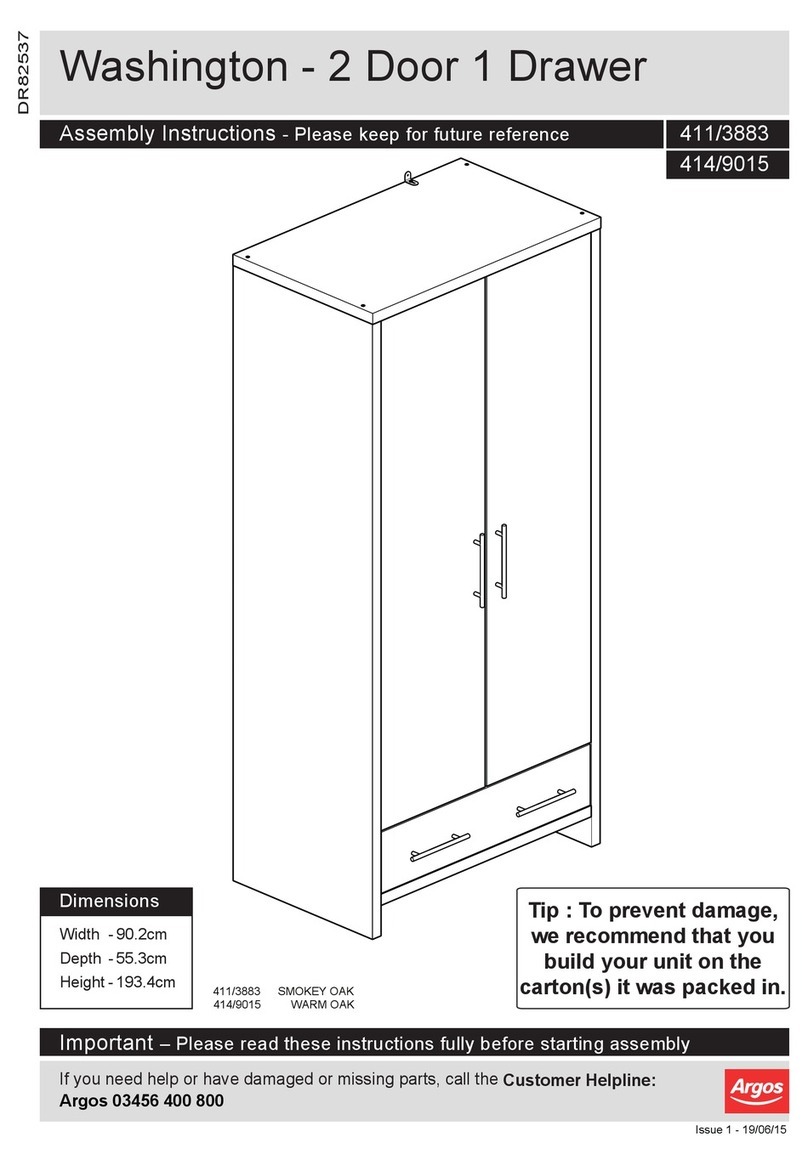
Mendoza - 2 Door 1 Drawer Robe
330/9430
Issue 1 - 12/09/12
Width - 90cm
Depth - 53cm
Height - 180cm
346/6744
355/4041
If you need help or have damage or missing parts, call the Customer Helpline: 03456 400 800
1Top panel (90 x 53cm) 2Base (82.3 x 49.1cm)
3Left side panel (177.5 x 49.6cm) 4Right side panel (177.5 x 49.6cm)
5Fixed shelf (82.3 x 48cm)
6Back panel x 2 (170.5 x 41.5cm)
7Side plinth x 2
(51.4 x 8.8cm)
9Hanging rail (81.5 x 3cm) 10 H profile
(28.8 x 2.8cm)
11 Left front frame (177.5 x 5cm) 12 Right front frame (177.5 x 5cm)
13 Bottom rail (76.2 x 5cm) 14 Top rail(76.2 x 5cm)
15 Left door (140.3 x 37.8cm) 16 Right door
17 Door knocker (139.3 x 31cm)
18 Blocks x 8 (6.4 x 1.9cm) 19 Large H profile
(114 x 2.8cm)
8Front plinth (88.8 x 9cm)
20 Drawer front
(75.5 x 21.7cm)
23 Drawer back
(70.5 x 18.7cm) Drawer bottom
24
(81.8 x 45.1cm)
21 Drawer left side
(45 x 19.2cm)
22 Drawer right side
25 Back rail (82.4 x 5cm)
26 Drawer runner x 2
(45 x 5cm)
27 Small H profile
(20.8 x 2.8cm)
(140.3 x 37.8cm)
(45 x 19.2cm)
F
30mm Screw x 46 Ø8x25mm Wooden dowel x 48 45mm Screw x 08
Nails x 50
Handle x 04
G
25mm Screw x 09
22mm Bolt x 08
H I
J
16mm Screw x 48
Hanging rail support x 2 Metal door knocker x 01
Right door hinge x 3
K L
Left door hinge x 3 Door clip x 02
M N O
P Q R
Straight metal door knocker x 01 Door clip x 02
If you have damaged or missing components,
call the Customer Helpline: 03456 400 800
Ø8x35mm Large wooden dowel x 02
S
50mm Screw x 6
5
2
B
B
B
B
B
B
B
B
B
B
B
B
14
B
B
B
13
B
3
B
B
BB
B
B
B
B
D
G
G
D
G
B
4
B
B
B
B
B
B
B
Fitting wooden dowels:
Insert dowels into
holes in the indicated
parts.
Fix hanging rail
support in the pre
marked holes on the left
side panel and right
side panel using
screws .
B
a:
b:
G
3
4
Attention pre marked holes
D
D
G
D
Attention pre marked holes
25
B
B
B
B
B
B
21
22
2X
BB
26
14
14
D
R
DD
Q
R
Q
Fixing door clip and
knocker:
Fix door clip in the
pre marked holes on
top rail using screws
as shown.
Fix straight door
knocker in the pre
marked holes on top
rail using screws
as shown.
R
Q
14
D
Attention
pre marked holes
a:
14
b:
D
4
A
A
A
A
A
3
A
A
A
Fixing front frames:
(Two people required
for an easier assembly)
Fix blocks in
pre marked holes on
right side panel and
left side panel using
screws as shown.
Important: Make
sure blocks are
flush to the edge on side
panels before fixing.
a: 18
3
4
A
b:
18
A
A
Step 3
Pre marked holes
a:
Attention!
18
18
6
4
12
A
A
A
A
Fixing front frames:
Fix right front frame to
the right side panel
through blocks using
screws as shown.
Attention: Note
correct position of
parts before fixing.
12
4
A
18
A
18
12
A
18
12
5mm.
48mm.
Attention correct
holes position. Attention correct
holes position.
11
3
A
A
A
A
11
18 A
48mm.
Attention correct
holes position.
Fixing front frames:
Fix left front frame to
the left side panel
through blocks using
screws as shown.
Attention: Note
correct position of
parts before fixing.
11
3
A
18
Step 6
Step 7
7
4
3
Assembling the cabinet:
(Two people required for
an easier assembly)
With help, fit base panel
, fixed shelf , top
rail , bottom rail and
back rail to the left side
panel and right side
panel .
Fix base panel and
fixed shelf using screws
.
Note correct
position of parts
before fixing.
3
4
14
5
2
13
A
2
5
Door clip to be
facing down.
A
A
A
A
A
14
Note: Make sure rounded edges
are facing up and holes are facing
down on bottom rail .
13
13
C
1
4
Fixing top panel:
Fix top panel to the
assembled cabinet using
screws as shown.
1
C
A
14
13
2
5
A
A
A
A
A
A
A
A
25
2
4
3
1
C
CC
C
C
C
C
C
5
25
Step 8
8
Step 9
E
E
E
E
E
E
Attention to the
parts alignment
Assembling the cabinet:
Fix side plinths to
the side panels using
screws .
Note: Make sure
side plinths are
aligned to the bottom and
front edges of the side
panels.
Fix front plinth to
the bottom frame using
screws .
Note: Make sure
front plihth is
aligned to the bottom edge
of the side panels and in
line to the side plinths.
E
8
7
a:
13
E
b:
8
7
8
8
7
Fixing drawer runners:
E
8
13
7
7
E
E
Fix drawer runners to
the sides using screws
as shown.
26
S
26
S
S
S
S
S
S
Step 10
9
Step 11
Fixing back panels:
Carefully turn the
product upright.
Important:
Cabinet MUST be
“square” when
back panels ate attached.
Attach the right back
panel first using nails
.
Position profile ,
large profile and small
profile to the attached
back panel.
Carefully slot the
second back panel into
profiles and fix it to the
cabinet using nails .
H
6
19
10
a:
b:
c:
6
H
H
H
H
H
H
6
6
a: b:
c:
66
10
b:
D
I
DD
I
Place hanging rail into
the supports within the
cabinet as shown.
Fix the door clip and
door knocker to the
pre marked holes on base
panel using screws as
shown.
9
I
R
D
R
R
9
10
9
19
27
27
Step 12
10
Preparing the doors:
Right door:
Attach right hinge
to the pre marked holes on
right door using screws
.
Note: Make sure
hinges are
positioned as shown in the
diagram.
Fix door clips to the
pre marked holes on right
door using screws
as shown.
J
D
L
16
D
a:
b:
16
Fix door knocker to
the pre marked holes on
the left door using
screws as shown.
Left door:
Attach left hinge
to the pre marked holes on
left door using screws
.
Note: Make sure
hinges are
positioned as shown in the
diagram.
15
D
17
a:
b: K
15
D
16
D
L
D
D
L
Attention
pre marked holes
K15
D
17
15
K
D
D
D
K
D
K
D
D
D
D
D
D
17
Attention
pre marked holes
JD
J
D
J
D
J
D
D
L
Attention
pre marked holes
Attention
pre marked holes
Step 13
Step 14
M
N
N
M
N
15
Carefully turn the
doors with their
front facing up.
Fix handles to the
doors using bolts .
M
NN
16
M
N
N
D
D
J
Fixing hinges:
Fix left door
hinges to the pre
marked holes on the left
front frame as shown.
Note correct
position of the
hinge prior to fixing.
Fix right door
hinges to the pre
marked holes on the
right front frame as shown.
Note correct
position of the
hinge prior to fixing.
Attention
pre marked holes
K
J
a:
b:
11
D
D
D
D
Attention
pre marked holes K
J
D
J
K
J
D
K
D
D
K
Step 15
Step 16
12
20
21
22
24
23
A
A
A
A
Assembling the
drawers:
Attach drawer sides
and to the drawer
front using screws .
Slide drawer bottom
into slots on drawer
sides.
Holding the drawer
back in place and flush
to the edge of drawer
side, fix them to the
drawer back using screws
.
Using bolt attach
the drawer handles to
the drawer front.
A
M
N
23
a:
b: c:
d:
a:
21 22
20 A
b:
24
c:
d:
M
M
N
N
NN
Fitting doors:
With help fit door hinges
together as shown in the
diagram.
16
15
Step 17
Fixing to wall.
Furniture must be fixed to
a wall. Fix wall strap to
top of furniture using
washer and screw .
With help, move furniture
into position.
O
PD
O
P
P
D
wall
Step 18
13
If you need help or have damage or missing parts, call the Customer Helpline: 03456 400 800
Insert drawer into unit.
With the back of the
drawers past the front
frames, use a hammer to
tap the dowels in flush
to the drawer sides.
This is a safety catch to
stop drawers falling out.
F
F F
F
F

This manual suits for next models

2

Other Argos Indoor Furnishing manuals

Argos Campbell Oak Effect Dining Table 280/7823 User manual

Argos

Argos Campbell Oak Effect Dining Table 280/7823 User manual

Argos Curve 377/3530 User manual

Argos

Argos Curve 377/3530 User manual

Argos 719/3594 User manual

Argos

Argos 719/3594 User manual

Argos 457/2156 Manual

Argos

Argos 457/2156 Manual

Argos Heart of House kent 3 door 3 drawer wardrobe... User manual

Argos

Argos Heart of House kent 3 door 3 drawer wardrobe... User manual

Argos 618/0144 User manual

Argos

Argos 618/0144 User manual

Argos Malibu 630/3165 User manual

Argos

Argos Malibu 630/3165 User manual
Argos Adult Malibu User manual

Argos

Argos Adult Malibu User manual

Argos 603/1822 User manual

Argos

Argos 603/1822 User manual

Argos Foley 358/8914 Datasheet

Argos

Argos Foley 358/8914 Datasheet

Argos Ottawa 194803 User manual

Argos

Argos Ottawa 194803 User manual

Argos Portabase User manual

Argos

Argos Portabase User manual

Argos Costello 0504/8036 User manual

Argos

Argos Costello 0504/8036 User manual

Argos Tolga 2drw Bedside User manual

Argos

Argos Tolga 2drw Bedside User manual

Argos Cheval 152/6435 User manual

Argos

Argos Cheval 152/6435 User manual

Argos Rattan User manual

Argos

Argos Rattan User manual

Argos Beech Effect TV Bench 609/0162 User manual

Argos

Argos Beech Effect TV Bench 609/0162 User manual

Argos Tolga 414/5758 User manual

Argos

Argos Tolga 414/5758 User manual

Argos Puerto Rico User manual

Argos

Argos Puerto Rico User manual

Argos Ellie 244/7472 User manual

Argos

Argos Ellie 244/7472 User manual

Argos Seychelles Table 801/8300 User manual

Argos

Argos Seychelles Table 801/8300 User manual

Argos Malibu User manual

Argos

Argos Malibu User manual

Argos Home 482/2844 User manual

Argos

Argos Home 482/2844 User manual

Argos Costa Swivel Chair 6893307 User manual

Argos

Argos Costa Swivel Chair 6893307 User manual

Popular Indoor Furnishing manuals by other brands

Regency LWMS3015 Assembly instructions

Regency

Regency LWMS3015 Assembly instructions

Furniture of America CM7751C Assembly instructions

Furniture of America

Furniture of America CM7751C Assembly instructions

Safavieh Furniture Estella CNS5731 manual

Safavieh Furniture

Safavieh Furniture Estella CNS5731 manual

PLACES OF STYLE Ovalfuss Assembly instruction

PLACES OF STYLE

PLACES OF STYLE Ovalfuss Assembly instruction

Trasman 1138 Bo1 Assembly manual

Trasman

Trasman 1138 Bo1 Assembly manual

Costway JV10856 manual

Costway

Costway JV10856 manual

moss DESIGN Caisson Credenza Assembly instructions

moss DESIGN

moss DESIGN Caisson Credenza Assembly instructions

Aquaglide FULL DECK 15.0 owner's manual

Aquaglide

Aquaglide FULL DECK 15.0 owner's manual

AREBOS AR-HE-SW30 user manual

AREBOS

AREBOS AR-HE-SW30 user manual

Till-Hilft Fulda 87005.330 Assembly instructions

Till-Hilft

Till-Hilft Fulda 87005.330 Assembly instructions

Twoey Outside 2010 quick start guide

Twoey Outside

Twoey Outside 2010 quick start guide

Hettich Easys 200 operating instructions

Hettich

Hettich Easys 200 operating instructions

The bedboss RELAX 404 Series owner's manual

The bedboss

The bedboss RELAX 404 Series owner's manual

Oeseder Möbelindustrie Bern 991 720 Assembly instructions

Oeseder Möbelindustrie

Oeseder Möbelindustrie Bern 991 720 Assembly instructions

Costway HW68469 user manual

Costway

Costway HW68469 user manual

Next ALIX A27743 Assembly instructions

Next

Next ALIX A27743 Assembly instructions

BROSA Hans Assembly guide

BROSA

BROSA Hans Assembly guide

Prodigg MINIKA PBA015T-FUR installation manual

Prodigg

Prodigg MINIKA PBA015T-FUR installation manual

manuals.online logo
manuals.online logoBrands
  • About & Mission
  • Contact us
  • Privacy Policy
  • Terms and Conditions

Copyright 2025 Manuals.Online. All Rights Reserved.