ARRI Hi-5 User manual

Hi-5 Hand Unit
U S E R M A N U A L
27th July 2021
Hi-5 Hand Unit
U S E R M A N U A L
27th July 2021

2
Imprint
Copyright © 2021 Arnold & Richter Cine Technik GmbH & Co.
Betriebs KG. All rights reserved. No parts of this document
may be reproduced without prior written consent of Arnold &
Richter Cine Technik GmbH & Co. Betriebs KG. Specifications
are subject to change without notice. Errors, omissions, and
modifications excepted.
ARRI, ALEXA, AMIRA, Master Grip, LDS and LENS DATA
SYSTEM are trademarks or registered trademarks of Arnold
& Richter Cine Technik GmbH & Co. Betriebs KG. All other
brands or products are trademarks or registered trademarks of
their respective holders and should be treated as such. Original
version.
For Further Assistance
ARRI Cine + Video Geräte Gesellschaft m.b.H.
Pottendorferstraße 23-25/3/1
A-1120 Vienna Austria
E-mail: [email protected]
Website: www.arri.com

3
Scope of this manual
This manual applies to the following product:
K2.0037280 Hi-5 Hand Unit
Revision History
Version ID Order # Release Date
01 10006313 K5.0039972 F07681 2021-07-27

4 Contents
1 Contents
1 Contents............................................................................. 4
2 How to Use this Manual................................................... 8
3 For Your Safety............................................................... 10
4 Audience and Intended Use...........................................12
5 Scope of Delivery and Warranty....................................13
6 Introduction to the Hi-5 Hand Unit................................ 14
6.1 Hand Unit Layout.................................................... 14
6.2 Control Elements.................................................... 19
6.2.1 Knob............................................................19
6.2.2 Slider...........................................................19
6.2.3 Force-Pad................................................... 19
6.3 Buttons.................................................................... 20
6.3.1 Power Button.............................................. 20
6.3.2 REC Button.................................................20
6.3.3 PAGE Button...............................................21
6.3.4 FUNC Button.............................................. 21
6.3.5 Screen Buttons........................................... 21
6.3.6 User Buttons............................................... 22
6.4 Touch Screen.......................................................... 22
6.5 Electrical Interfaces.................................................23
6.5.1 LBUS Interface........................................... 23
6.5.2 SERIAL Interface........................................ 23
6.5.3 USB-C Interface..........................................23
6.5.4 USB-A Interface..........................................23
6.5.5 Radio Module Interface.............................. 24
6.5.6 Smart Ring Interface...................................24
6.6 Screen Pages......................................................... 24
6.6.1 Lens Data Display (LDD)............................24
6.6.2 Camera Screen...........................................26
6.6.3 Menu Screen.............................................. 27
6.7 Radio Modules........................................................ 27
6.8 Batteries.................................................................. 29

Contents 5
7 Preparations.....................................................................31
7.1 Inserting the Battery Pack...................................... 31
7.2 Attaching a Smart Focus Ring................................31
7.3 Attaching a Radio Module...................................... 31
7.4 Setting the language...............................................32
7.5 Setting Time and Date............................................ 32
8 Controlling Lens and Camera........................................33
8.1 Connecting to Host Device..................................... 33
8.2 Controlling Lens Motors..........................................33
8.3 Getting Lens Data on LDD..................................... 34
8.4 Camera Control.......................................................36
8.4.1 ARRI Camera Control.................................37
8.4.2 RED Camera Control..................................37
8.4.3 Sony Camera Control................................. 38
9 Connecting to the ECS Sync App................................. 39
10 Lens Programming......................................................... 40
11 Lens File Management................................................... 41
12 Using Smart Focus Rings.............................................. 43
13 Override Mode................................................................. 44
14 Appendix.......................................................................... 45
14.1 Hi-5 Sets and Accessories..................................... 45
14.2 Dimensions and Weight..........................................48
14.3 Electrical Data.........................................................51
14.4 Environmental......................................................... 52
14.5 Service Mode.......................................................... 52
14.6 Service Contacts.....................................................53
14.7 Declarations of Conformity..................................... 56
14.7.1 International declarations............................56

6
Disclaimer
Before using the products described in this manual, be sure to
read and understand all the respective instructions.
The ARRI Hi-5 Hand Unit is/are only available to commercial
customers. By utilization, the customer agrees that the Hi-5
Hand Unit or other components of the system are deployed for
commercial use only. Otherwise the customer must contact ARRI
before utilization.
While ARRI endeavors to enhance the quality, reliability and
safety of their products, customers agree and acknowledge that
the possibility of defects thereof cannot be eliminated entirely.
To minimize the risk of damage to property or injury (including
death) to persons arising from defects in the products, customers
must incorporate sufficient safety measures in their work with the
system and heed the stated canonic use.
ARRI or its subsidiaries do not assume any responsibility for
losses incurred due to improper handling or configuration of the
Hi-5 Hand Unit or other system components.
ARRI assumes no responsibility for any errors that may appear
in this document. The information is subject to change without
notice.
For product specification changes after this manual was
published, refer to the latest published ARRI data sheets or
release notes, etc., for the most up-to-date specifications. Not
all products and/or types are available in every country. Please
check with an ARRI sales representative for availability and
additional information.
Neither ARRI nor its subsidiaries assume any liability for
infringement of patents, copyrights or other intellectual property
rights of third parties by or arising from the use of ARRI products
or any other liability arising from the use of such products. No
license, express, implied or otherwise, is granted under any
patents, copyrights or other intellectual property right of ARRI or
others.
ARRI or its subsidiaries expressly exclude any liability, warranty,
demand or other obligation for any claim, representation, cause,
action, or whatsoever, express or implied, whether in contract or
not, including negligence, or incorporated in terms and conditions,
whether by statue, law or otherwise. In no event shall ARRI

7
or its subsidiaries be liable for or have a remedy for recovery
of any special, direct, indirect, incidental, or consequential
damages, including, but not limited to lost profits, lost savings,
lost revenues or economic loss of any kind or for any claim by
a third party, downtime, good-will, damage to or replacement of
equipment or property, any cost or recovery of any material or
goods associated with the assembly or use of our products, or
any other damages or injury of the persons and so on or under
any other legal theory.
In the event that one or all of the foregoing clauses are not
allowed by applicable law, the fullest extent permissible clauses
by applicable law are validated.

8 How to Use this Manual
2 How to Use this Manual
This manual describes the necessary preparations to start using
the product.
For further details, refer to the
ARRI website at
http://arri.com/hi-5:
For Tech Tips, please visit the
ARRI Youtube Channel at
https://youtube.com/user/ar-
richannel:
All directions are given from a focus puller's point of view. For
example, Hi-5 right side refers to the right side of the Hi-5 when
holding it in two hands, with the focus knob on the right side and
looking at the display.
Connectors are written in all capital letters, for example LBUS.
Menu paths and screens are written in italic typeface, with menu
and LDD in capital letters, for example MENU > Backlight or LDD
> Lens.
Buttons are written in italic typeface capital letters, for example
REC button.
The appendix at the back of the manual contains useful reference
material including Hi-5 technical data, connector pin-out diagrams
and dimensional drawings.
Additional Information
For useful information in addition to this user manual please have
a look at the ARRI Learn & Help section on the ARRI website.

10 For Your Safety
3 For Your Safety
Before use, please ensure that all users read, understand and
follow the instructions in this document fully. 使用前,请确保所有
的用户都已经阅读、理解,并遵循本文档内的操作说明。
Risk levels and alert symbols
Safety warnings, safety alert symbols, and signal words in these
instructions indicate different risk levels:
DANGER
DANGER indicates an imminent hazardous situation which, if
not avoided, will result in death or serious injury.
WARNING
WARNING indicates a potentially hazardous situation which, if
not avoided, may result in death or serious injury.
CAUTION
CAUTION indicates a potentially hazardous situation which, if
not avoided, may result in minor or moderate injury.
ADVICE
NOTICE explains practices not related to physical injury. No
safety alert symbol appears with this signal word.
Note: Provides additional information to clarify or simplify a
procedure.

For Your Safety 11
Vital Precautions
WARNING
Risk of electric shock and fire!
Short-circuits may entail lethal damage!
Before use, read and follow all valid instructions.
Use solely and exclusively as described in the instructions.
Never open. Never insert objects.
For operation, always use a power source as indicated in the
instructions.
Always unplug the cable by gripping the plug, not the cable.
Never try to repair. All repair work should be done by a
qualified ARRI Service Center.
Never remove or deactivate any safety equipment (incl.
warning stickers or paint marked screws).
Always protect from moisture, cold, heat, dirt, vibration, shock,
or aggressive substances.
General precautions
Use only the tools, materials and procedures recommended in
this document. Unplug all cables during transport.
ADVICE
Do not store the Hi-5 Hand Unit in places where it/they may be
subject to temperature extremes, direct sunlight, high humidity,
severe vibration, or strong magnetic fields.

12 Audience and Intended Use
4 Audience and Intended Use
The Hi-5 Hand Unit is solely and exclusively for use on
professional camera setups.
ADVICE
The product is solely and exclusively available for commercial
costumers and shall be used by skilled personnel only. Every
user should be trained according to ARRI guidelines.
Use the product only for the purpose described in this
document. Always follow the valid instructions and system
requirements for all equipment involved.

Scope of Delivery and Warranty 13
5 Scope of Delivery and Warranty
Delivery
A complete delivery of the KK.0039973 Hi-5 Hand Unit Body Kit
includes:
•1x Hi-5 Hand Unit Body (K2.0037280)
•1x Bluetooth Dongle (K2.0039838)
•1x Smart Focus Ring Blank (K2.0037463)
•1x User manual
•1x Original packaging
ADVICE
On delivery, please check if package and content are intact.
Never accept a damaged/incomplete delivery.
ADVICE
Product and packaging contain recyclable materials. Always
store, ship and dispose according to local regulations.
ARRI is not liable for consequences from inadequate storage,
shipment or disposal.
ARRI offers an increasing variety of product bundles and
additional accessories. For details, please consult our website or
your local ARRI Service Partner.
Warranty
For scope of warranty, please ask your local ARRI Service
Partner. ARRI is not liable for consequences from inadequate
shipment, improper use or third-party products.

14 Introduction to the Hi-5 Hand Unit
6 Introduction to the Hi-5 Hand Unit
The ARRI Hi-5 hand unit provides reliable wireless camera and
multi-axis lens control in demanding situations on set. Robust and
weatherproof, it features unique, swappable radio modules for
different territories and shooting challenges, ensuring the best
possible radio link range for every setup.
•Hi-performance: strong radio signal over long distances
•Hi-versatility: swappable radio modules for different
locations
•Hi-speed: fast and efficient on-set ecosystem
•Hi-tech: future-proof hardware and software architecture
•Hi-reliability: robust, weatherproof, long battery life
6.1 Hand Unit Layout
Front Side

Introduction to the Hi-5 Hand Unit 15
Right Side
Left Side

16 Introduction to the Hi-5 Hand Unit
Back Side
Top Side

Introduction to the Hi-5 Hand Unit 17
Bottom Side
1 REC Button
2 REC Status LED
3 Ambient Light Sensor
4 PAGE Button
5 Upper Screen Buttons
6 Backlit Ring Area
7 Smart Ring Interface (Pogo Pins)
8 Registration Pin
9 Front Knob Index
10 Control Knob
11 Lower Screen Buttons
12 Power Button
13 FUNC Button

18 Introduction to the Hi-5 Hand Unit
14 Slider
15 Touch Screen
16 Force-Pad
17 Friction Adjustment
18 Snaphook Eyelet
19 Snaphook/Hand Strap Eyelet
20 Radio Release Button
21 Radio Module Interface
22 Hand Strap Eyelet
23 Back Knob Index
24 SERIAL Connector
25 LBUS Connector
26 User Buttons
27 Nato-Rail Security Pin
28 Nato-Rail
29 3/8" -16 UNC and 1/4" - 20 UNC Mounting Interfaces
30 USB-C Interface
31 USB-A Interface
32 Battery Compartment
33 M4 Mounting Interfaces

Introduction to the Hi-5 Hand Unit 19
6.2 Control Elements
6.2.1 Knob
The knob can control focus, iris and zoom motors and is set to
control the focus motor by default. It features a friction adjustment
mechanism and two Pogo pins to ARRI's Smart Focus Rings. The
integrated backlight lets the focus ring glow in white, red, green,
blue, yellow, magenta or cyan colors.
Turn the knob counterclockwise to focus towards infinity and turn
it clockwise to focus towards close focus in the default setting.
Press PAGE to enter the MENU, select Control Setup > Knob and
tick the Reverse checkbox to change the direction.
6.2.2 Slider
The slider can control focus, iris and zoom motors and is set to
control the iris motor by default.
Move the slider upwards to open the iris and move it clockwise
to close the iris. Press PAGE to enter the MENU, select Control
Setup > Slider and tick the Reverse checkbox to change the
direction.
6.2.3 Force-Pad
The Force-Pad can control focus, iris and zoom motors and is set
to control the zoom motor by default.
Push the Force-Pad upwards to zoom in and push it down to
zoom out in the default setting. Press PAGE to enter the MENU,
select Control Setup > Force-Pad and tick the Reverse checkbox
to change the direction.
In menu mode, the Force-Pad can be used to navigate through
the menu. It navigates in x- and y-directions, making it a good
alternative to the touch screen. Also, use User Button 3 to select
a menu item and use User Button 2 to go one level back.

20 Introduction to the Hi-5 Hand Unit
6.3 Buttons
6.3.1 Power Button
Press the Power button momentarily to switch the hand unit on.
Keep it pressed for two seconds to switch the hand unit off.
Pressing the Power button twice locks all control elements,
buttons and the touch screen. Press the Power button twice again
to unlock the hand unit.
6.3.2 REC Button
Press the REC button briefly to start recording. The REC Status
LED will change to red color (with cameras supporting tally
feedback).
Press the REC button again to stop recording.
Tail-Slate Mode
Hi-5 provides an tail-slate recording mode that prevents you from
stopping recording before the tail-slate is taken.
Use the tail-slate mode as follows:
1. Press the REC button for 1 second start recording. A red end-
slate icon will appear on the Lens Data Display, indicating that
tail-slate mode is active.
2. Capture the tail-slate at the end of the shot.
3. Press the REC button again for 1 second to stop recording.
Table of contents
Other ARRI Camera Accessories manuals

ARRI
ARRI 12xT1.3 User manual

ARRI
ARRI ALEXA User manual

ARRI
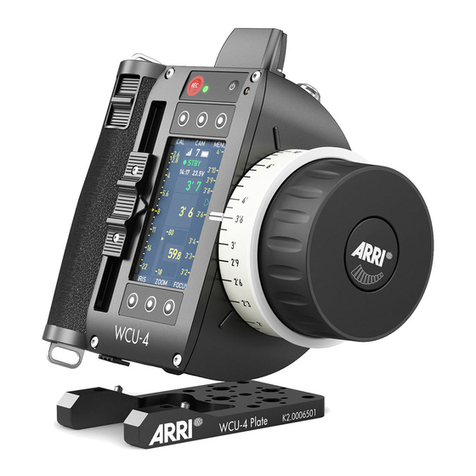
ARRI WCU-4 User manual

ARRI
ARRI ARRIMOTION User manual

ARRI
ARRI ARRIHEAD II User manual

ARRI
ARRI IVS 435 User manual
ARRI
ARRI K2.0013195 User manual
ARRI
ARRI SRH-360 SUP 3.0 User manual
ARRI
ARRI SRH-3 Operating instructions

ARRI
ARRI LMB-6 User manual