© 2021 Ascom. All rights reserved. TD 93301EN / March 2021 / Ver. C
ascom © 2021 Ascom. All rights reserved. TD 93301EN / March 2021 / Ver. C
ascom
In the All apps screen, tap the Messages app
icon . You can also open the app from
the Shortcut panel of the Home screen.
Tap the Start chat icon at the
bottom of the screen to write a new message
or tap the conversation to read and reply to
it.
Choose between manually dialing
the phone number, choosing the
contact from Favorites ,
Recent calls , or the Contacts .
In the All apps screen, tap the
Phone app icon . You can also
open the app from the Shortcut
panel of the Home screen.
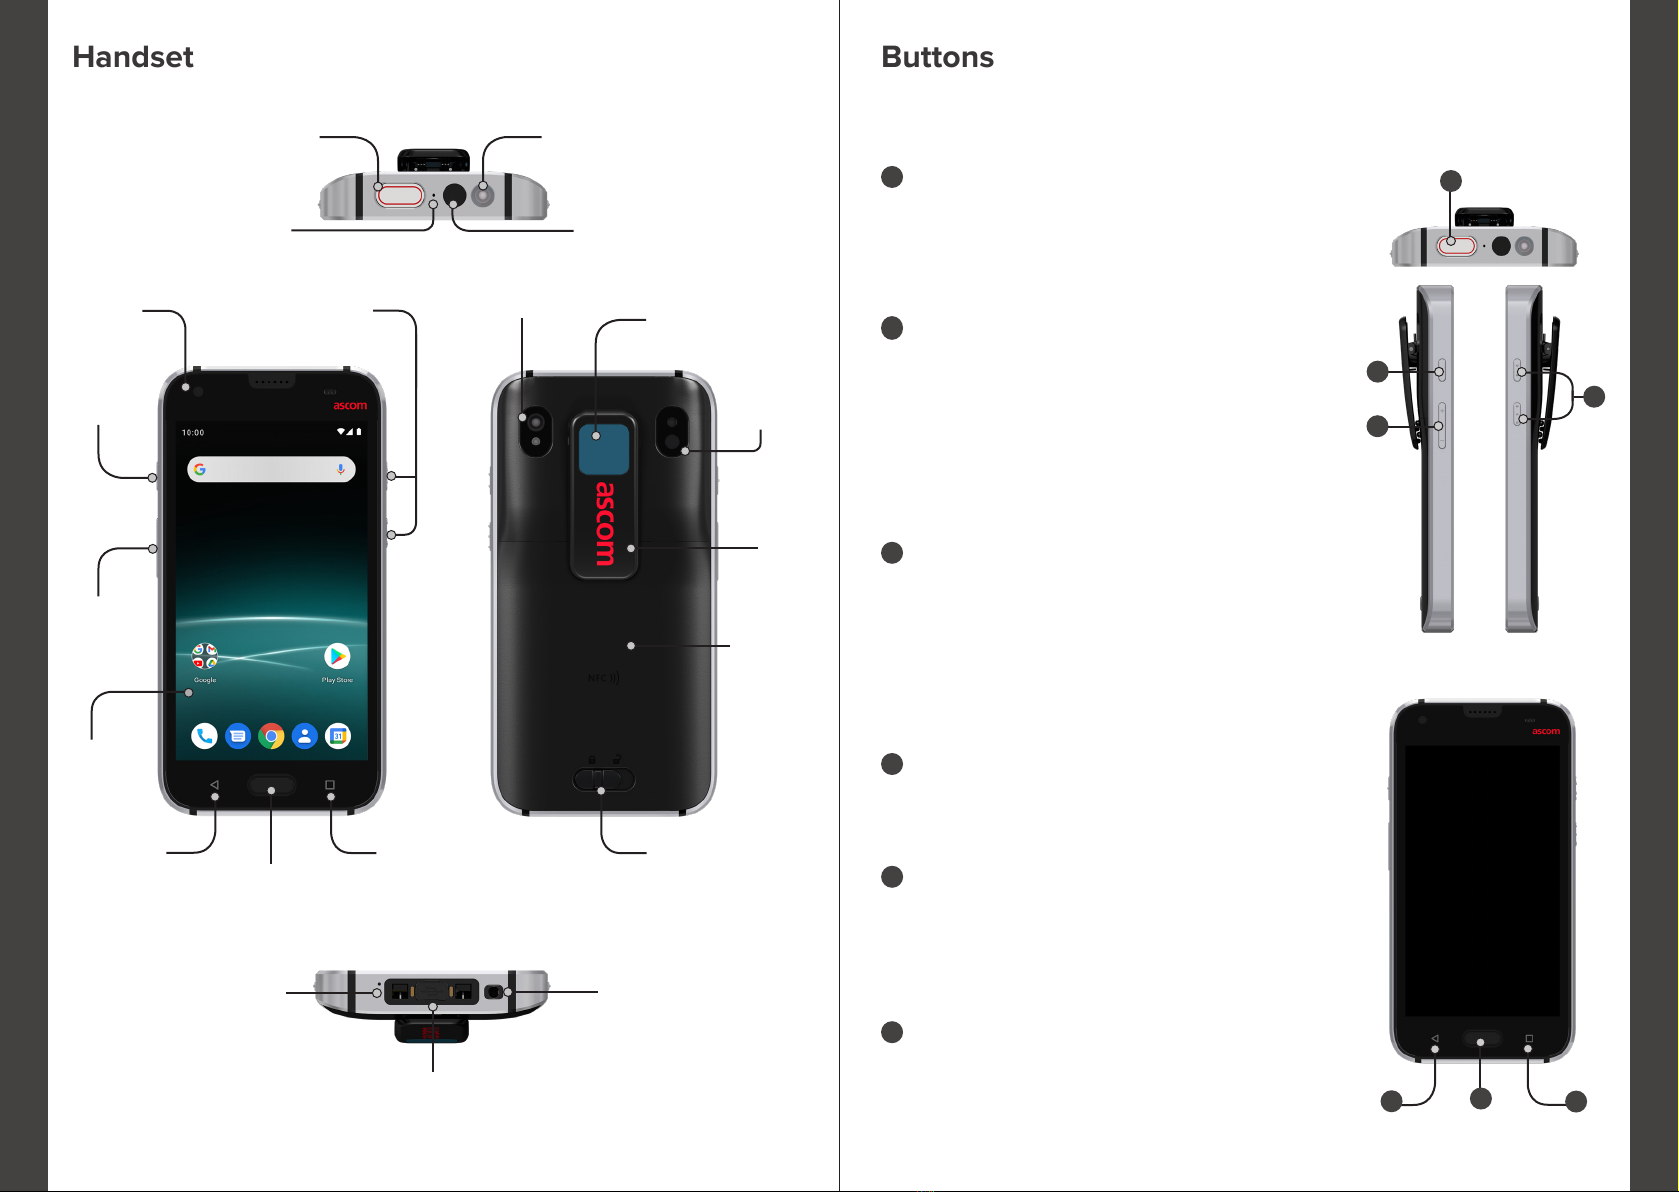
Handset Views
To get to the All apps screen, swipe up from the bottom of the Home screen.
To get back to the Home screen, swipe down in the All apps screen, or press the
Back or Home buttons.
Home screen
Navigate between Views
All apps screen
Back
button Home button
4
Communication
Calling
Messaging
1
1
2
Manual
dialing
2
NOTE:
Frequently used apps can be found in the shortcut panel of the Home screen.
If you can not nd the apps or want to change the shortcuts, contact your
system administrator for assistance.
Shortcut
panel
Views
3
The interface of the handset is divided into two separate views:
The Home screen is the main view of the handset, where you can use such
features as shortcuts to get a quick access to dierent apps and functions.
The All apps screen is the view where you can nd all the apps that are installed
on the handset.