ASCOM Myco User manual

User Manual
Ascom Myco Wi-Fi and Cellular Smartphone
TD 93066EN
26 April 2016 / Ver. D

TD 93066EN
26 April 2016 / Ver. D
User Manual
Ascom Myco Wi-Fi and Cellular Smartphone /Remove "Wi-Fi and
About this document
Safety precautions
It's important to read the safety precautions in Appendix A. Safety Precautions before using
the handset.
Save this manual. It includes important safety information and operating instructions. Save
all instructions for future reference.
Cross-references in the document
Throughout this document you will find cross-references in the text which indicate further
details that can be found in other sections of this document. The cross-references are
colored blue and linked to the relevant place in the document (example: see 20. Document
History User Manual on page 87). Click the blue link to read the relevant section.
To return to the original page after viewing a cross-referred page in Adobe Reader, press on
Alt + left arrow key.
Related documents
When referred to another document, for example, the Configuration Manual, the document
and its document number (TD XXXXX) is listed at the end of this document, 19. Related
Documents User Manual.
Trademarks
Android™ is a trademark of Google Inc.
Address
Ascom Wireless Solutions
Ascom (Sweden) AB
Grimbodalen 2
SE-417 49 Göteborg
Sweden

TD 93066EN
26 April 2016 / Ver. D
User Manual
Ascom Myco Wi-Fi and Cellular Smartphone
Contents
1. Introduction User Manual............................................................................................. 1
1.1 Abbreviations and Glossary User Manual .............................................................. 2
1.2 Features................................................................................................................... 2
2. Quick Installation Steps for Administrators ............................................................... 4
2.1 Insert SIM Card ........................................................................................................ 4
2.2 Install and Configure the Handset........................................................................... 4
3. Handset Description...................................................................................................... 7
3.1 Handset Overview ................................................................................................... 7
3.1.1 Home button................................................................................................... 8
3.1.2 Volume button, up and down......................................................................... 8
3.1.3 Power button.................................................................................................. 8
3.1.4 Proximity sensor............................................................................................. 8
3.1.5 Alarm or Multifunction button ....................................................................... 8
3.1.6 Top display...................................................................................................... 9
3.1.7 Color pad for clip............................................................................................. 9
3.2 Accessories .............................................................................................................. 9
4. Basics............................................................................................................................ 10
4.1 Switch the Handset On or Off................................................................................ 10
4.2 Wake and Unlock the Handset, or Lock and Put it to Sleep.................................. 11
4.3 Adjust the Volume................................................................................................. 11
4.4 Switch to Silent or Vibrator only mode................................................................. 11
4.5 Use the Touchscreen ............................................................................................. 12
4.6 Use the Keyboard .................................................................................................. 13
4.7 Navigate the User Interface .................................................................................. 14
4.7.1 Alert view...................................................................................................... 14
4.7.2 App view ....................................................................................................... 15
4.7.3 Conversation view ........................................................................................ 16
4.8 Use apps ................................................................................................................ 16
4.9 Battery level indication ......................................................................................... 17
4.10 Charge the Handset Battery ............................................................................... 17
4.10.1 Charge the handset in a Charging Rack ..................................................... 18
4.10.2 Charge the battery in a Battery Charging Rack ......................................... 18
4.10.3 Charge with a Micro USB cable ................................................................... 18
4.10.4 Charging indication .................................................................................... 19
4.11 Change Battery ................................................................................................... 20
4.12 Log in or Log out ................................................................................................. 21
4.12.1 Log in .......................................................................................................... 21
4.12.2 Log out ....................................................................................................... 22

TD 93066EN
26 April 2016 / Ver. D
User Manual
Ascom Myco Wi-Fi and Cellular Smartphone
4.12.3 Recent users list ......................................................................................... 23
4.13 Availability status ............................................................................................... 25
4.13.1 Availability status indication...................................................................... 25
4.13.2 Set the availability status .......................................................................... 25
5. Calling........................................................................................................................... 27
5.1 Answer or Reject a Call.......................................................................................... 27
5.2 Make a Call............................................................................................................. 28
5.2.1 Call using the keypad.................................................................................... 28
5.2.2 Call using the call list .................................................................................... 28
5.2.3 Call using the central phonebook ................................................................. 29
5.2.4 Call using the local phonebook..................................................................... 29
5.2.5 Advanced dialing .......................................................................................... 29
5.3 End a Call ............................................................................................................... 31
5.4 Functions During a Call.......................................................................................... 31
5.4.1 Enable loudspeaker and adjust volume........................................................ 32
5.4.2 Mute microphone.......................................................................................... 32
5.4.3 Show the keypad .......................................................................................... 32
5.4.4 Put call on hold ............................................................................................. 32
5.4.5 Add a second call .......................................................................................... 32
5.4.6 Receive a second call while in a call.............................................................. 32
5.4.7 Switch between calls .................................................................................... 32
5.4.8 Transfer call .................................................................................................. 32
5.4.9 Navigate the handset during a call .............................................................. 33
5.4.10 The phone bar............................................................................................. 33
5.5 Voicemail ............................................................................................................... 34
5.5.1 Indication of new voicemail messages......................................................... 34
5.5.2 Listen to voicemail messages....................................................................... 34
5.6 Push-to-talk Group Call ......................................................................................... 35
5.6.1 Join a PTT call session ................................................................................... 35
5.6.2 Use the PTT call screen ................................................................................. 36
5.6.3 Reject a PTT invitation.................................................................................. 37
5.6.4 Rejoin a PTT call session ............................................................................... 37
5.6.5 Initiate a PTT group call session ................................................................... 38
6. Phonebook ................................................................................................................... 39
6.1 Look up a Contact in the Central Phonebook........................................................ 39
6.2 Look up a Contact in the Local Phonebook ........................................................... 39
6.3 Add a New Local Contact....................................................................................... 40
7. Alerts ............................................................................................................................ 41
7.1 Alert View.............................................................................................................. 41
7.2 Alert Indication...................................................................................................... 42
TD 93066EN
26 April 2016 / Ver. D
User Manual
Ascom Myco Wi-Fi and Cellular Smartphone
7.2.1 Top display.................................................................................................... 42
7.2.2 Alert priority beacon..................................................................................... 42
7.2.3 Lock screen ................................................................................................... 42
7.2.4 Top priority bar............................................................................................. 42
7.2.5 Notification bars ........................................................................................... 43
7.3 Alert Classification................................................................................................. 43
7.3.1 Priority level and color.................................................................................. 43
7.3.2 Category color............................................................................................... 44
7.3.3 Alert type icons............................................................................................. 44
7.4 Alert Response Options......................................................................................... 45
7.5 View Alerts on a Locked Handset.......................................................................... 46
8. Messaging .................................................................................................................... 47
8.1 Write and Send Message....................................................................................... 47
8.2 Reply to Message .................................................................................................. 48
8.3 Search for Message ............................................................................................... 48
8.4 Copy, Delete and Forward Messages..................................................................... 48
8.5 Delete Conversations............................................................................................. 48
8.6 Call a Contact from Message ................................................................................. 48
9. Personal Alarm ............................................................................................................ 50
9.1 Top Button Alarm.................................................................................................. 50
9.2 Man-down and No-movement Alarm ................................................................... 50
9.2.1 Activate or deactivate the Man-down or No-movement alarms ................. 51
9.2.2 Man-down and No-movement indication .................................................... 51
9.2.3 Cancel a Man-down or No-movement alarm................................................ 52
9.3 Automatic Call after Alarm.................................................................................... 52
10. Notifications .............................................................................................................. 53
10.1 Sound and vibration............................................................................................ 53
10.2 Color-coded LED Signals...................................................................................... 53
10.3 Top Display Notification...................................................................................... 54
10.4 Lock Screen Notification...................................................................................... 54
10.5 Status Bar............................................................................................................ 55
10.6 Notification Bars.................................................................................................. 55
10.7 Notification Drawer............................................................................................. 57
10.8 Icons used for notification .................................................................................. 57
11. Apps ........................................................................................................................... 59
11.1 List of apps.......................................................................................................... 59
12. Camera and Gallery ................................................................................................... 61
12.1 Camera ................................................................................................................ 61
12.2 Gallery ................................................................................................................. 61

TD 93066EN
26 April 2016 / Ver. D
User Manual
Ascom Myco Wi-Fi and Cellular Smartphone
12.3 Take a Screenshot ............................................................................................... 61
13. Barcode Scanning...................................................................................................... 62
14. My Services ................................................................................................................ 63
14.1 Access the My Services app ................................................................................ 63
14.2 My Services functionality.................................................................................... 63
14.2.1 URI action shortcut..................................................................................... 63
14.2.2 Call action shortcut..................................................................................... 63
14.2.3 Data Send action shortcut.......................................................................... 63
15. Settings...................................................................................................................... 64
15.1 Display Settings .................................................................................................. 64
15.1.1 Change brightness...................................................................................... 64
15.1.2 Set font size................................................................................................ 64
15.1.3 Owner ID and name .................................................................................... 65
15.1.4 Sleep timeout ............................................................................................. 65
15.1.5 Rotate top display ...................................................................................... 65
15.2 Sound Settings.................................................................................................... 65
15.2.1 Volumes...................................................................................................... 65
15.2.2 Ringtones ................................................................................................... 65
15.2.3 Notification sound ...................................................................................... 66
15.2.4 Set tones..................................................................................................... 66
15.2.5 Hearing Aid Compatibility .......................................................................... 66
15.3 Languages Settings ............................................................................................ 66
15.4 Time and Date Settings....................................................................................... 66
15.5 Telephony Settings ............................................................................................. 66
15.5.1 Use the power button to end calls ............................................................. 66
15.6 Admin settings.................................................................................................... 67
15.7 About phone Settings......................................................................................... 67
16. Operation Notice ....................................................................................................... 68
16.1 Accessibility and Voice Quality ........................................................................... 68
17. Maintenance .............................................................................................................. 69
17.1 Cleaning the Handset.......................................................................................... 69
17.2 Battery Maintenance........................................................................................... 69
17.3 Replace the Color Pad for the Hinge-type Clip .................................................... 69
18. Troubleshooting User Manual.................................................................................. 70
18.1 Operational Problems ......................................................................................... 71
18.2 Error or Warning Messages................................................................................. 71
19. Related Documents User Manual............................................................................. 72
20. Document History User Manual............................................................................... 73

TD 93066EN
26 April 2016 / Ver. D
User Manual
Ascom Myco Wi-Fi and Cellular Smartphone
Appendix A. Safety Precautions .................................................................................... 76
A.1 Frequency Range................................................................................................... 76
A.2 Regulatory Information (EU and EFTA) ................................................................ 76
A.2.1 Exposure to Radio Frequency Signals .......................................................... 76
A.3 Regulatory Compliance Statements (USA and Canada only) .............................. 77
A.3.1 FCC and IC Compliance Statements .............................................................. 77
A.3.2 Exposure to Radio Frequency Signals........................................................... 77
A.4 Precautions and Environmental Requirements .................................................... 78
A.4.1 Handset ........................................................................................................ 78
A.4.2 Battery......................................................................................................... 78

TD 93066EN
26 April 2016 / Ver. D
User Manual
Ascom Myco Wi-Fi and Cellular Smartphone
1
1. Introduction User Manual
Ascom Myco is a durable, robust and to carry smart device handset for nurses, caregivers
and clinicians. Alerts from patient monitors, and communication from patients, or staff in
the healthcare team are available, wherever they are.
The Ascom Myco handset has a top display with a color coded LED priority beacon and
touchscreen, to prioritize the alerts, and the ability to quickly accept, reject or forward alerts.
The handset is available in two versions:
• Ascom Myco Wi-Fi
• Ascom Myco Wi-Fi and Cellular
Read Appendix A. Safety Precautions on page 76 before using the handset.
For a list of:
• Abbreviations and glossary used in the manual, see 1.1 Abbreviations and Glossary User
Manual on page 2.
• Handset features, see 1.2 Features on page 2.
Target group
This document is targeted at personnel responsible for handling the administration and
distribution of handsets at the end customer site.
It is also intended for the end user, or anyone interested in acquiring deeper knowledge
about the handset.
Prerequisites
Before the handset can be used, an administrator must do the following:
1 If the Cellular handset version is used, insert a micro-SIM card from a mobile network
operator into the handset, refer to 2.1 Insert SIM Card on page 4.
2 Register the handset in the PBX for voice, in the applicable Unite module(s) for
messaging, and the optional central management (Easy deployment) for setup and
configuration of handsets. Refer to the handset Configuration Manual.
3 Read the safety precautions in Appendix A. Safety Precautions on page 76.
How to use this document
This document describes the features and settings of the Ascom Myco Wi-Fi and Wi-Fi &
Cellular smart device. It is referred to as the "handset" in the manual, and especially marked
with "Wi-Fi only", or "Cellular only", whenever the functionality differs between the different
versions.
All assigned locations and alerts in this document are according to default programmed
versions, but additional functions, and factory settings are also included to cover additional
functionality.
The images can differ, depending on the software version.
For software download and parameter set up, refer to the handset Configuration Manual.
NOTE: Some functions are dependent on the PBX and protocol (SIP) versions, and your
system may not support all functions described in this document. For more
information about your system, please contact the person (or department)
responsible for the system in your organization, or contact your supplier.

TD 93066EN
26 April 2016 / Ver. D
User Manual
Ascom Myco Wi-Fi and Cellular Smartphone
2
1. Introduction User Manual
1.1 Abbreviations and Glossary User Manual
1.2 Features
Both handset versions (Wi-Fi, and Wi-Fi & Cellular) share the same features, apart from the
cellular functionality.
1G, 2G, 3G, 4G Common naming of the generations of mobile
communication evolution.
Cellular GSM/3G
Device Manager Application for management of portables, editing of
parameters and updating the portables with new software,
running on Unite CM.
GUI Graphical User Interface.
GSM Global System for Mobile Communication (often called 2G)
IP Internet Protocol is the principal communications protocol
in the Internet protocol suite.
LAN Local Area Network
MDM Mobile device management
micro-SIM A SIM card standard with smaller form factor compared to
a full-size SIM or mini-SIM card.
PBX Private Branch Exchange. A telephone system within an
enterprise that switches calls between local lines, and
allows all users to share a certain number of external lines.
HSPA High Speed Packet Access
SIM Subscriber Identity Module
SIP Session Initiation Protocol
SNMP Simple Network Management Protocol
UMTS Universal mobile telecommunications system - a third
generation mobile cellular system for networks based on
the GSM standard.
Unite CM Unite Connectivity Manager:
Unite module that enables messaging and alarm handling
in a WLAN system. It also includes the Device Manager.
VoIP Voice over IP
VoWiFi Voice over Wi-Fi:
is a wireless version of VoIP and refers to IEEE 802.11a,
802.11b or 802.11g network.
Wi-Fi The commonly understood name for wireless LAN
networks. Used generically when referring of any type of
802.11 network.
WLAN Wireless Local Area Network (LAN):
A type of LAN in which data is sent and received via high-
frequency radio waves rather than cables or wires.
Features
Professional Smartphone designed for mission critical communication
3G Cellular with HSPA data support (cellular handset version only)

TD 93066EN
26 April 2016 / Ver. D
User Manual
Ascom Myco Wi-Fi and Cellular Smartphone
3
1. Introduction User Manual
Wi-Fi 802.11a/b/g/n support
Seamless Wi-Fi roaming i.e. on-call handover between access points
Centralized management using Ascom Unite or 3rd party MDM tools
Supports Over-the-Air administration
Android OS 4.4 KitKat
3rd party App support
Supports integration to other systems using Ascom Unite middleware
Smart alert handling
Top display with color-coded LED priority beacon
Easily exchangeable battery
Durable, robust, and easy to carry
Optimized for single hand use, and regular disinfection
Multifunction/Alarm button (optional)
Hearing aid compatible (HAC)
IP54 rated
Professional barcode reader API, supporting 1D and 2D barcodes
(optional)
Easy deployment via QR-code
Man-down and No-movement alarms
Push-to-talk (PTT) group call
Location (AP, Ekahau RTLS, and Cisco MSE)
Features

TD 93066EN
26 April 2016 / Ver. D
User Manual
Ascom Myco Wi-Fi and Cellular Smartphone
4
2. Quick Installation Steps for Administrators
An administrator should perform the following steps to get the handset started:
NOTE: Remove the protective plastic sheet that is attached to the display at delivery before
using the touchscreen to ensure proper function.
1 Insert the micro-SIM card (Cellular handset versions only). Refer to 2.1 Insert SIM Card
on page 4.
NOTE: Only micro-SIM size cards can be used in the handset.
2 Close the battery cover, and lock it. Refer to 4.11 Change Battery on page 20.
TIP: The battery has an approximately 50% charge at delivery, and doesn't need to be
charged before use.
3 If desired, change the language. Refer to 15.3 Languages Settings on page 66.
4 Enter the handset ID (Easy deployment). Refer to 2.2 Install and Configure the
Handset on page 4.
NOTE: If not already done as prerequisite, perform Easy deployment. Refer to the handset
Configuration Manual.
5 If desired, configure parameter settings for the site or user. Refer to the handset
Configuration Manual for more information.
2.1 Insert SIM Card
NOTE: Cellular handset version only. Only micro-SIM size cards can be used in the handset.
1 If needed, unlock the battery cover, and remove it.
2 The SIM card slot is located under the clip. Press on the clip to open it fully, and insert
the micro-SIM in the SIM card slot, in the direction as shown on the label.
TIP: If needed, use a tweezer to hold it, then push it into the slot.
3 Close the battery cover, and lock it. The handset starts within seconds if the battery is
charged.
TIP: If the handset does not start, charge the battery, and then long press the Power
button to switch the handset On.
Remove SIM card
1 Open the battery cover lock. Press on the clip to open it fully, and remove the Battery
Pack.
2 Remove the micro-SIM card by using a 3-4 mm screwdriver, or similar tool, in the hole
above the SIM card slot, and pull outwards, until the micro-SIM card can be removed
(with fingers, or a tweezer).
CAUTION: Be careful not to damage the inside of the SIM card slot.
2.2 Install and Configure the Handset
The recommended method to install and configure a handset is through Easy Deployment,
using a pre-configured staging WLAN. If Easy Deployment isn't configured in the system, QR
code setup or manual installation methods can be used. Follow the instructions in the
applicable section below:

TD 93066EN
26 April 2016 / Ver. D
User Manual
Ascom Myco Wi-Fi and Cellular Smartphone
5
2. Quick Installation Steps for Administrators
Setup using Easy Deployment
A handset is automatically installed and configured, if the VoWiFi system is configured for
Easy Deployment. Refer to the handset Configuration Manual for information on how to
configure Easy Deployment in the VoWiFi system.
If the handset is successfully installed after the Easy Deployment process, but hasn't
received a messaging number automatically, do the following:
1 If the handset is switched On, switch it Off and then On again.
2 When the handset displays: "No messaging number configured for this device", tap
"Setup number".
3 When the handset displays: "enter messaging number", that is, the phone number of
the handset, enter the number.
4 Press "Done".
CAUTION: If a wrong number is entered, a factory reset must be done, and all handset
configuration parameter settings are restored to the default values. Refer to the
handset Configuration Manual.
If the unite system is configured for User log in, enter user log in and password supplied by
the system administrator.
Setup using QR codes
Quick installation and setup can be done by scanning a QR code, if Easy Deployment is
unavailable. The Setup QR code can be created by a system administrator and contains the
parameters necessary to install the handset in the system. Refer to the handset
Configuration Manual for instructions on how to create Setup QR codes.
To scan a Setup QR code, do the following:
1 Locate the "Setup" app, and tap to open it.

TD 93066EN
26 April 2016 / Ver. D
User Manual
Ascom Myco Wi-Fi and Cellular Smartphone
6
2. Quick Installation Steps for Administrators
2 Turn the handset horizontally and position the handset so that the QR code fits
within the scanning window in the center of the screen.
3 If the scan is successful the Setup app closes automatically and the text "Deployment
data applied successfully" appears on screen.
If needed, follow the steps in Setup using Easy Deployment on page 5 to add a messaging
number to the handset after installation.
Manual setup
If neither QR codes nor Easy Deployment is available, a manual installation method must be
used. Refer to the installation chapter of the handset Configuration Manual.

TD 93066EN
26 April 2016 / Ver. D
User Manual
Ascom Myco Wi-Fi and Cellular Smartphone
7
3. Handset Description
Both handset versions (Wi-Fi, and Wi-Fi & Cellular) share the same external characteristics.
• For an overview of the handset hardware, see 3.1 Handset Overview on page 7.
• For a list of available handset accessories, see 3.2 Accessories on page 9.
3.1 Handset Overview
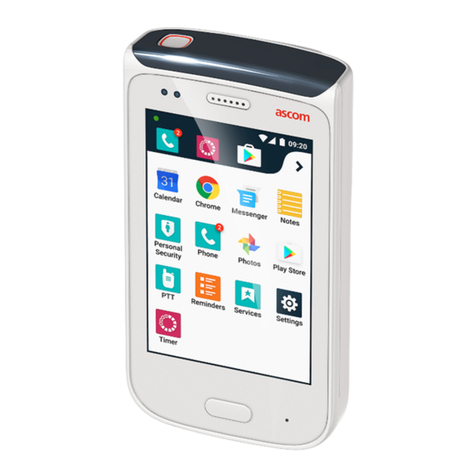
1Speaker.
2 Front microphone (main)
3 Charging connectors
4 Home button (3.1.1 Home button on page 8)
5 Main display with Touchscreen
6 Volume button (Up and Down) (3.1.2 Volume button, up and down on page 8)
7 Power button (3.1.3 Power button on page 8)
8Proximitysensor(3.1.4 Proximity sensor on page 8)
9 Alarm/Multifunctionabutton (3.1.5 Alarm or Multifunction button on page 8)
10 Top display (3.1.6 Top display on page 9)
11 Color-coded LED priority beacon (10.2 Color-coded LED Signals on page 53)
12 Loudspeaker

TD 93066EN
26 April 2016 / Ver. D
User Manual
Ascom Myco Wi-Fi and Cellular Smartphone
8
3. Handset Description
3.1.1 Home button
• Press to return to the Alert view (refer to 4.7.1 Alert view on page 14).
• Press to wake the display from sleep mode (refer to 4.2 Wake and Unlock the Handset,
or Lock and Put it to Sleep on page 11). The "Power" button can also be used for this
functionality.
• Long press to show running apps, with the possibility to close apps, or switch between
apps (refer to 4.8 Use apps on page 16).
3.1.2 Volume button, up and down
• Press up to increase or press down to decrease the speaker and loudspeaker volume
(refer to 4.3 Adjust the Volume on page 11).
• Press several times to mute the notification sounds or silence the ring signal for an
incoming call (refer to 4.4 Switch to Silent or Vibrator only mode on page 11).
To set the default volume, refer to 15.2.1 Volumes on page 65.
3.1.3 Power button
• Long press to switch the handset on (refer to 4.1 Switch the Handset On or Off on page
10).
• Press to wake the display from sleep mode (refer to 4.2 Wake and Unlock the Handset,
or Lock and Put it to Sleep on page 11). The “Home” button can also be used for this
functionality.
• Press to put it to sleep (refer to 4.2 Wake and Unlock the Handset, or Lock and Put it to
Sleep on page 11).
• Long press to switch off the handset (refer to 4.1 Switch the Handset On or Off on page
10).
3.1.4 Proximity sensor
Puts the screen automatically into sleep mode when holding the handset close to the head,
to avoid unintentional screen presses. When moving the handset away from the head the
screen turns back on automatically.
3.1.5 Alarm or Multifunction button
The button located on the top of the handset can be programmed for alarm functionality (9.
Personal Alarm on page 50), or other functionality such as placing a call or communicate in a
Push-to-talk group call (5.6 Push-to-talk Group Call on page 35). Some third-party apps can
also be configured to use the top button for input.
The button has two input modes, long press and multi-press mode:
13 Rear microphone
14 Camera (12. Camera and Gallery on page 61.)
15 GSM antenna
16 Battery cover lock
17 Battery Pack
18 Clip
19 WLAN antenna, and GPS antenna
20 Color pad for clip (3.1.7 Color pad for clip on page 9.)
a.This feature is system dependent.

TD 93066EN
26 April 2016 / Ver. D
User Manual
Ascom Myco Wi-Fi and Cellular Smartphone
9
3. Handset Description
•Longpressmode
- Press and hold the button for longer than a second.
• Multi-press mode
- Press the button multiple times under a short period of time.
The functionality for these two input modes is set by the system administrator.
3.1.6 Top display
The top display is used to quickly get information about incoming calls, messages or alerts,
without having to use the main display.
• Refer to 7.2.1 Top display on page 42 for details on how alerts are shown in the top
display.
• Refer to 10.2 Color-coded LED Signals on page 53 for details on how other notifications
are shown in the top display.
3.1.7 Color pad for clip
Used to differentiate the handsets between, for example, workgroups, shifts, or roles. The
blue color pad is attached by default, and it can be exchanged by one of the colors, red,
yellow, or green. See 17.3 Replace the Color Pad for the Hinge-type Clip on page 69.
3.2 Accessories
The following accessories are available for the handset:
Battery Pack A replacement Battery Pack may be replaced and charged
separately in the battery pack charger.
Spare clip The replacement hinge-type clip is especially designed to fit
one-layered fabric, like shirt pockets.
Safety cord The Safety Cord is attached around the clip to prevent from
dropping the handset.
Color pad kit for clip The color pad can be attached to the clip, and is used to easily
identify the handset belonging to, for example, a workgroup,
shift, or role.
CR5 Charging Rack The Charging Rack (CR5) charges up to six handsets at the
same time.
CR6 Battery Charging Rack The Battery Charging Rack(CR6) charges up to six spare
batteries at the same time.
Table adapters for
Charging Rack (CR5/CR6)
With the attachable feet the charging racks can be placed
standing on a table.
Micro USB cable Can be used to charge one handset at a time, for example at
own desk. Used with the USB Power supply.
USB Power supply The USB Power supply is used with the Micro USB cable.

TD 93066EN
26 April 2016 / Ver. D
User Manual
Ascom Myco Wi-Fi and Cellular Smartphone
10
4. Basics
4. Basics
The following chapter describes how to use the handset. Read it through before using the
handset for the first time.
This chapter explains how to do the following:
•4.1 Switch the Handset On or Off on page 10
•4.2 Wake and Unlock the Handset, or Lock and Put it to Sleep on page 11
•4.3 Adjust the Volume on page 11
•4.4 Switch to Silent or Vibrator only mode on page 11
•4.5 Use the Touchscreen on page 12
•4.6 Use the Keyboard on page 14
•4.7 Navigate the User Interface on page 14
•4.8 Use apps on page 16
•4.9 Battery level indication on page 17
•4.10 Charge the Handset Battery on page 17
•4.11 Change Battery on page 20
•4.12 Log in or Log out on page 21
•4.13 Availability status on page 25
4.1 Switch the Handset On or Off
Switch the handset on
NOTE: The handset is automatically switched on when a battery is inserted.
1 Long press the power button. Wait until the lock screen is shown.
2 Swipe the icon in any direction to unlock the screen.
Or, enter a PIN or password (set by the system administrator).
3 Wait for the handset to start.
Switch the handset off
1 Long press the power button.
2 Tap "Power off".

TD 93066EN
26 April 2016 / Ver. D
User Manual
Ascom Myco Wi-Fi and Cellular Smartphone
11
4. Basics
3 Tap OK.
4.2 Wake and Unlock the Handset, or Lock and Put it to Sleep
The handset automatically turns to sleep after 1 minute (default), to save battery time. This
setting can be configured in the handset, refer to 15.1.4 Sleep timeout on page 65. If the
screen lock functionality is enabled (default) the handset will be locked automatically when
entering sleep mode.
By default the lock screen shows the current time and date, but can also be set to show
alerts, warnings, messages, and missed calls if lock screen widgets are enabled. Refer to
10.4 Lock Screen Notification on page 54 for information on how to use lock screen
notifications.
NOTE: Incoming calls can be answered, and the personal alarm button can be pressed while
the handset is locked. An emergency call can also be made while the screen is locked,
depending on configuration. All alerts appear in the top display, even when the
handset is in sleep mode. Refer to 7. Alerts on page 41 or 5. Calling on page 27 for
details on how to handle alerts and calls.
Wake/unlock the handset
To wake the handset from sleep mode, do the following:
1 Press the power or home button.
2 If needed, swipe the icon in any direction to unlock the screen.
NOTE: If set by the system administrator, a PIN or password might be needed to unlock the
handset.
Put to sleep/lock the handset
• Press the power button, or wait until the handset automatically turns to sleep.
TIP: When not using the handset, put it to sleep mode. This avoids unintentional display taps
as it locks the screen.
4.3 Adjust the Volume
Adjust the volume by pressing the volume button (up or down), or by changing the volume
in the Settings app. Refer to 15.2.1 Volumes on page 65.
4.4 Switch to Silent or Vibrator only mode
Ringtones and notification signals can be switched off by setting the handset to either
Silent or Vibrator only mode. In Silent mode the vibrator is also switched off.
NOTE: The handset can be configured to not allow settings below a certain volume, refer to
the handset Configuration Manual for details.
To set the handset to Vibrator only/Silent mode, do one of the following:
• Make a long press on the volume down button. After the lowest volume level the
handset enters Vibrator only mode, then Silent mode.
• Long press the power button, and tap for Vibrator only, or for Silent mode.

TD 93066EN
26 April 2016 / Ver. D
User Manual
Ascom Myco Wi-Fi and Cellular Smartphone
12
4. Basics
• Decrease the volume in the Settings app, refer to 15.2.1 Volumes on page 65.
NOTE: Alerts and incoming messages are still indicated by the top display and colored LED
flashes, even if the handset is set to Silent mode.
4.5 Use the Touchscreen
The main handset display has a touchscreen with full support for standard Android
gestures, like tap, drag, swipe, and pinch/stretch.
NOTE: Third-party apps may use additional gestures.
Tap
Tap (touch) the display with a finger to:
• Open or select an item.
• Select, or clear a check box, or option.
• Place the cursor to enter text with the keyboard.
Tap and hold
Tap (touch) and hold the finger to the display to:
• Move an item.
• Show a menu.
• Enable selection mode, for example, to select several items from a list.
Double tap
Tap the display twice to:
• Zoom in and center on a block of content or an image. Double tap the display again to
zoom in further.
• Zoom out (if already zoomed in).

TD 93066EN
26 April 2016 / Ver. D
User Manual
Ascom Myco Wi-Fi and Cellular Smartphone
13
4. Basics
Drag
Some objects can be moved, for example apps, or unhandled alerts in the Alert view.
• Tap and hold, and drag the object to move it.
Swipe
Swipe to answer a call, unlock or change view.
• Tap the display and at the same time, move the finger in any direction.
Flick
• Flick the display to quickly to scroll up or down a list. Stop scrolling by tapping the
display.
Stretch and pinch
• Stretch the display to zoom in.
• Pinch the display to zoom out.
Other manuals for Myco
3
Table of contents
Other ASCOM Cell Phone manuals