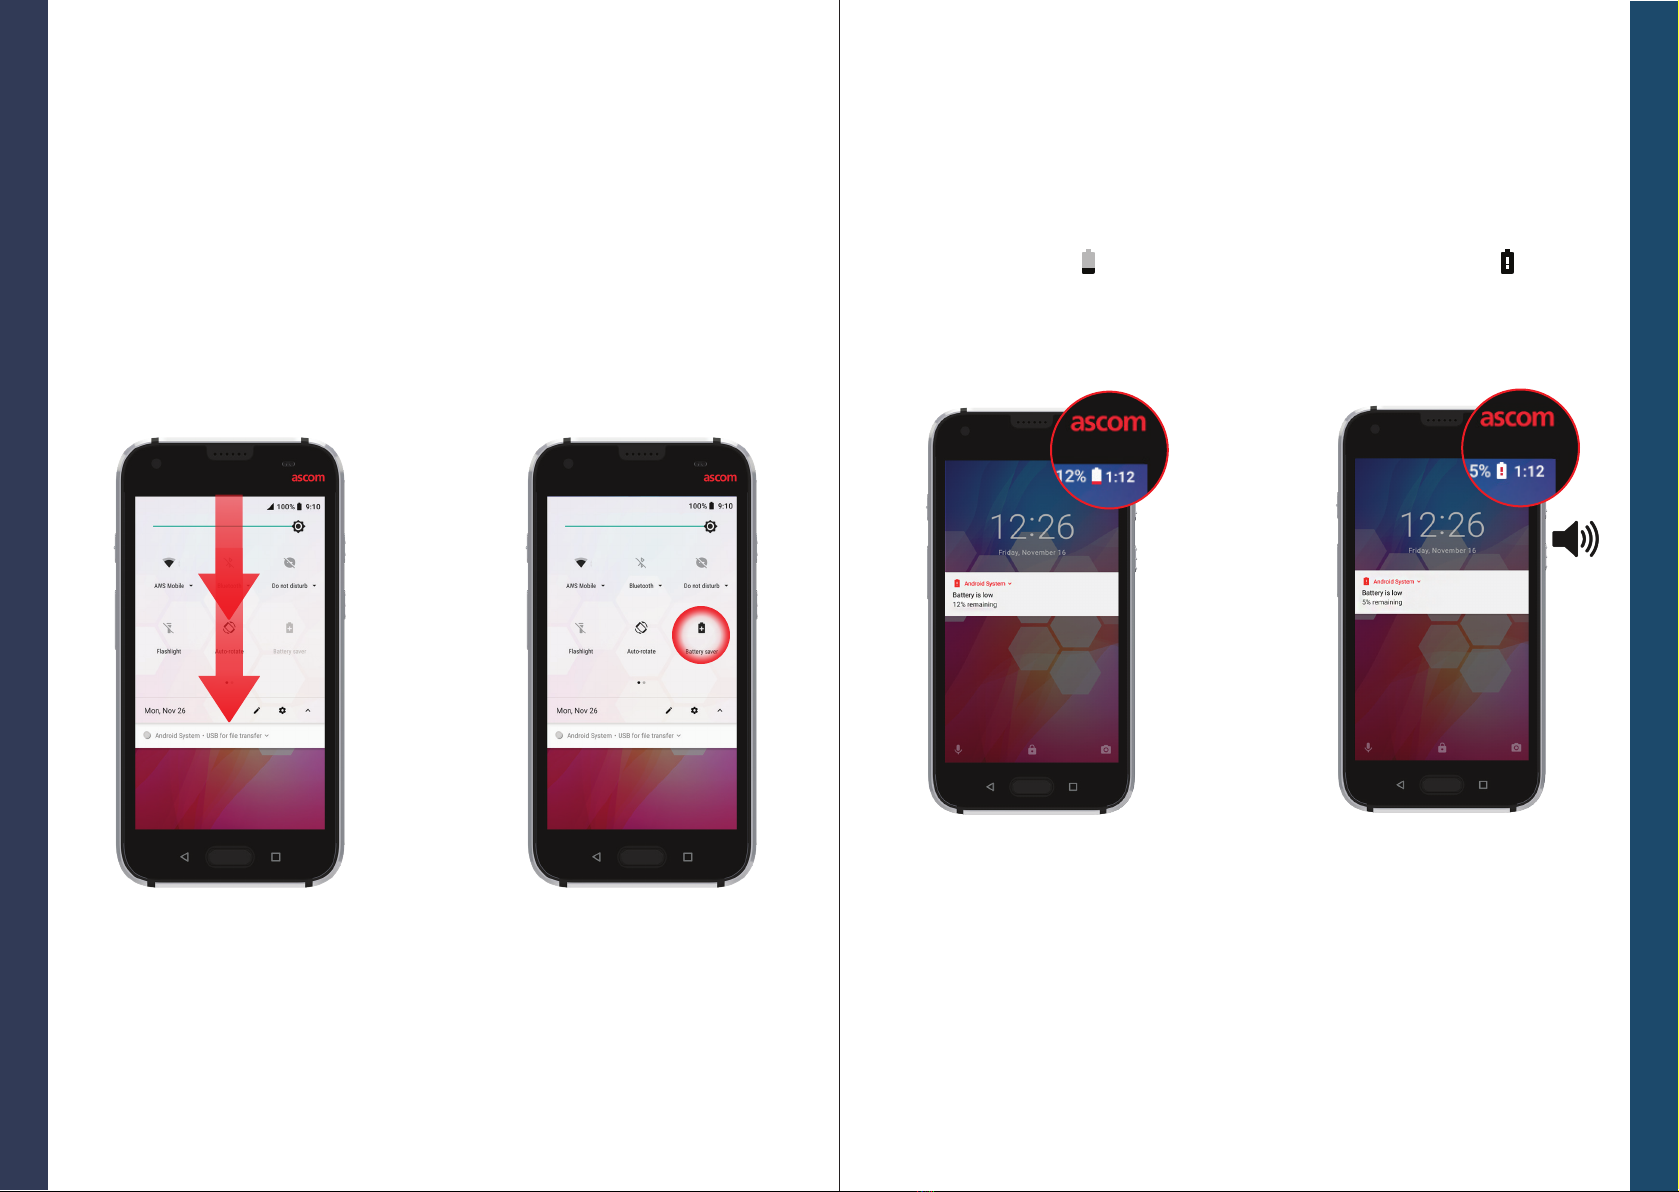
Low Battery
If the battery level is low, charge the battery or change the battery pack to a fully
charged as soon as possible.
-Low battery icon
-“Battery is low” notication
A battery level of 5 % or less is
indicated by:
-Battery alert icon
-“Battery is low” notication
-Sound signal from a handset
A battery level of 15 % or less is
indicated by:
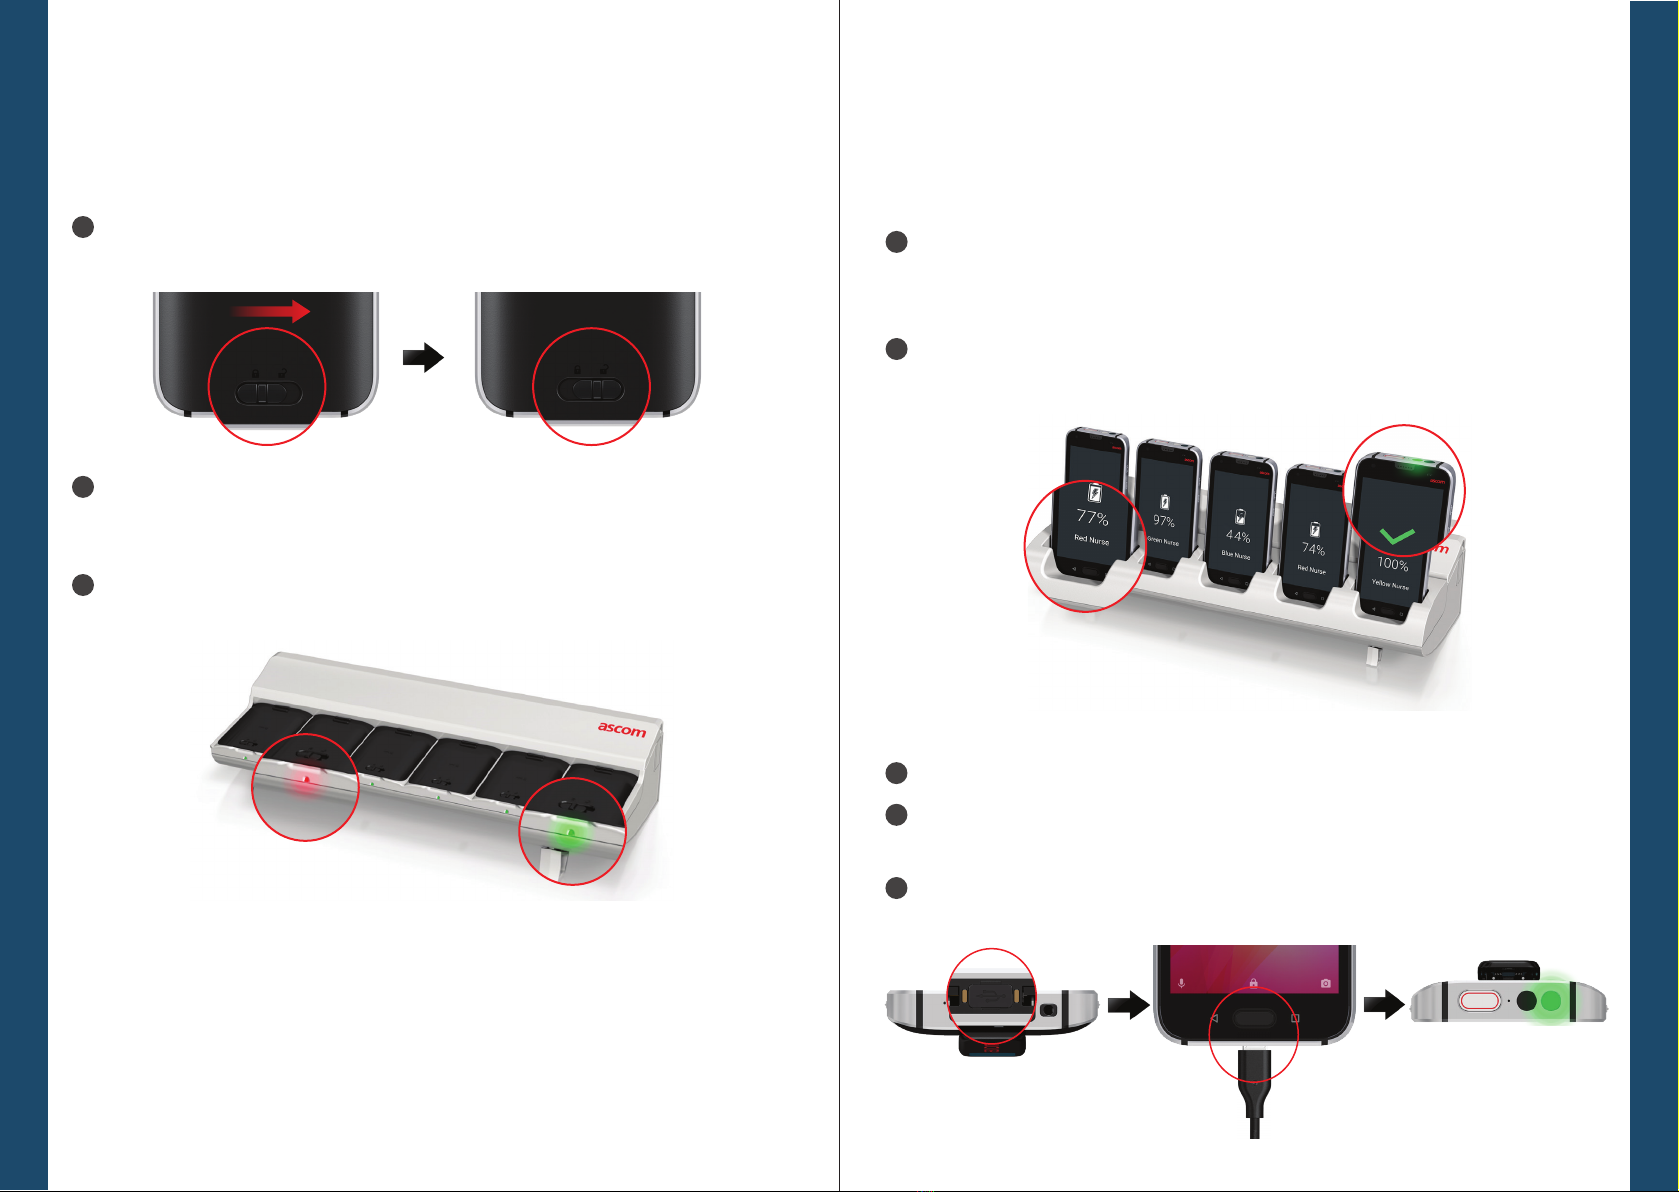
True Hot Swap
The handset has an easy replaceable battery that can be changed without
switching the handset o. With hot-swaping function you can continue using the
apps even when the battery is exchanged.
-When removing the battery pack, your handset works for 30 seconds.
-If the battery pack is not replaced in 30 seconds, the handset switches o.
Quick Settings
Settings
To see some settings, swipe down
from the top of the screen. To open
the whole Quick Settings panel,
swipe down again.
To turn the setting on / o , tap
the setting icon.
The Quick Settings panel can be used to make some fast changes in your handset,
such as change the brightness of the screen or put the handset in a battery save
mode.
You can open the Quick Settings panel both in unlocked mode and on the lock
screen.
Charging
78
ascom © 2018 Ascom (Sweden) AB. All rights reserved. TD93301 / 2018 / PA1 ascom
© 2018 Ascom (Sweden) AB. All rights reserved. TD93301 / 2018 / PA1