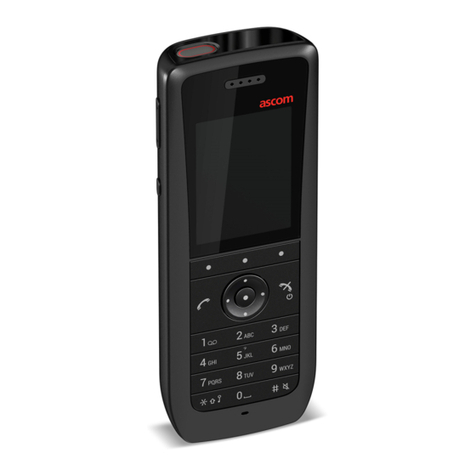
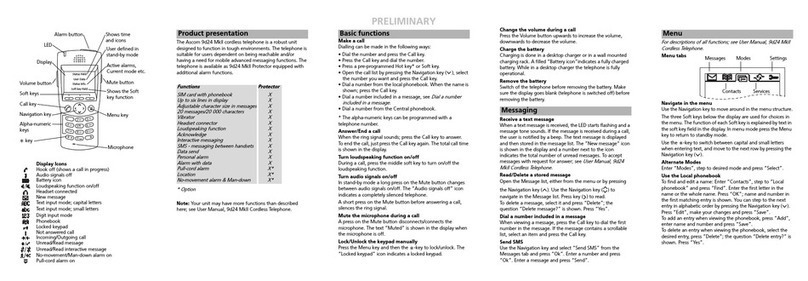
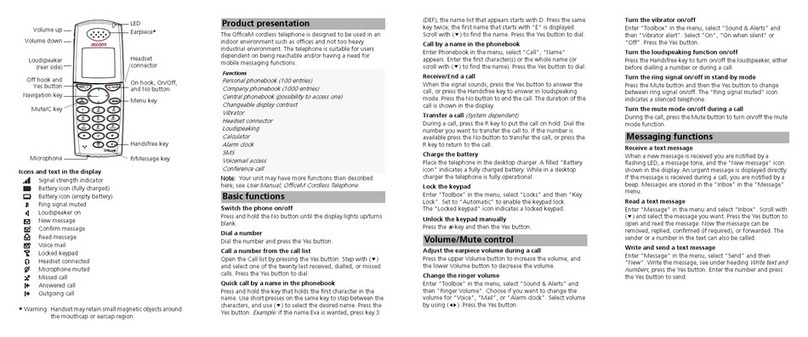
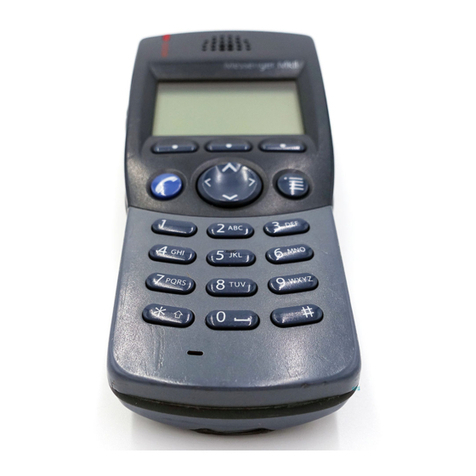
ASCOM 9D24 TALKER - User manual

TD 92333GB
2007-02-07/ Ver. D
User Manual
9d24 Mkll Cordless Telephone

TD 92333GB
2007-02-07/ Ver. D
User Manual
9d24 Mkll Cordless Telephone
Contents
1 Introduction............................................................................................................. 1
1.1 Abbreviations and Glossary ................................................................................ 1
1.2 System 9d .......................................................................................................... 1
1.3 Versions ............................................................................................................. 1
2 Descriptions............................................................................................................. 3
2.1 The 9d24 Mkll Cordless Telephone ..................................................................... 3
2.2 Battery ............................................................................................................... 4
2.3 EX-approved battery .......................................................................................... 5
2.4 Chargers ............................................................................................................ 5
2.4.1 Desktop Charger ........................................................................................ 5
2.4.2 Charging Rack ........................................................................................... 5
2.5 Icons and Text in the Display .............................................................................. 6
2.6 Keys and Buttons ............................................................................................... 8
2.6.1 Navigation Key ........................................................................................... 8
2.6.2 Menu key .................................................................................................. 8
2.6.3 Call Key ..................................................................................................... 9
2.6.4 Soft keys .................................................................................................... 9
2.6.5 Hot keys .................................................................................................... 9
2.6.6 Volume Button .......................................................................................... 9
2.6.7 Mute Button .............................................................................................. 9
2.6.8 Alarm Button ............................................................................................. 9
2.6.9 Alpha Numeric Keys ................................................................................. 10
2.7 Accessories ...................................................................................................... 10
2.7.1 Belt Clip, Swivel-type ............................................................................... 10
2.7.2 Leather Casing ......................................................................................... 10
2.7.3 Headset ................................................................................................... 11
2.7.4 Security String .......................................................................................... 11
3 Basic Operation ..................................................................................................... 11
3.1 Call List ............................................................................................................ 11
3.2 Make a Call ..................................................................................................... 11
3.3 Answer a Call .................................................................................................. 12
3.4 End a Call ........................................................................................................ 13
3.5 Decline an incoming call .................................................................................. 13
3.6 Transfer a Call .................................................................................................. 13
3.7 Turn Off Alert Signals at an incoming Call ........................................................ 13
3.8 Turn the Mute Mode during a Call Off/On ........................................................ 13
3.9 Loudspeaking Function .................................................................................... 13
3.10 Increase/Decrease the Speaker Volume during a Call ...................................... 14

TD 92333GB
2007-02-07/ Ver. D
User Manual
9d24 Mkll Cordless Telephone
3.11 Turn Audible Signals On/Off ........................................................................... 14
3.12 Lock/Unlock the Keypad ................................................................................. 14
3.13 Lock/Unlock the Handset ............................................................................... 14
3.14 Switch the Handset On .................................................................................. 14
3.15 Call menu ...................................................................................................... 14
3.15.1 Start a New Call during Conversation ..................................................... 15
3.15.2 Transfer call ........................................................................................... 15
3.15.3 “Blind” transfer ..................................................................................... 15
3.15.4 Switch between existing calls ................................................................. 15
3.15.5 Conference call ..................................................................................... 15
3.15.6 Call back ............................................................................................... 16
3.15.7 General purpose options ........................................................................ 16
3.15.8 Option shortcut ..................................................................................... 16
4 Messaging.............................................................................................................. 16
4.1 Message List .................................................................................................... 16
4.2 Receive a Text Message .................................................................................... 16
4.3 Message queuing and message priority ............................................................ 17
4.4 Prioritisation between Call Information and Messages ...................................... 18
4.5 Restriction when displaying a message. ............................................................ 19
4.6 Receive a Text Message during a Call ............................................................... 19
4.7 Close message ................................................................................................. 19
4.8 Read a Stored Text Message ............................................................................. 19
4.9 Delete a Stored Text Message ........................................................................... 19
4.10 Receive a Message with Request for Answer .................................................. 19
4.11 SMS (Short Message Service) .......................................................................... 20
4.11.1 Send an SMS ......................................................................................... 20
4.11.2 Send an SMS to a predefined Destination Address ................................. 20
4.11.3 Display and Scroll between SMS Messages ............................................. 20
4.12 Interactive Messaging .................................................................................... 20
4.13 Mobile Data ................................................................................................... 21
4.13.1 Send Mobile Data .................................................................................. 21
4.13.2 Send Mobile Data with a Prefix .............................................................. 21
4.14 Conference Call ............................................................................................. 21
4.15 Push-to-talk ................................................................................................... 21
5 Alarm Operation ................................................................................................... 22
5.1 Push-button Alarm ........................................................................................... 22
5.2 Test Alarm ........................................................................................................ 22
5.3 No-movement Alarm ....................................................................................... 22
5.4 Pull-cord Alarm ................................................................................................ 23
5.5 Man-down Alarm ............................................................................................ 24
TD 92333GB
2007-02-07/ Ver. D
User Manual
9d24 Mkll Cordless Telephone
5.6 Acoustic Localisation Signal .............................................................................. 24
5.7 Delay Time before Warning for No-movement and Man-down Alarms ............. 24
5.8 Alarm with Data .............................................................................................. 24
5.9 Automatic Call after an Alarm .......................................................................... 24
5.9.1 Connection method Speech Monitoring ................................................... 25
5.9.2 Connection method Loud ........................................................................ 25
5.9.3 Connection method Ordinary ................................................................... 25
5.10 Alarm Management with Automatic Calls ...................................................... 25
6 Navigate the Menu ............................................................................................... 26
6.1 Enter/Exit the Menu Mode ............................................................................... 26
7 Menu Tree.............................................................................................................. 27
7.1 Messages Tab ................................................................................................... 27
7.2 Contacts Tab .................................................................................................... 27
7.3 Modes Tab ...................................................................................................... 28
7.4 Services Tab ..................................................................................................... 28
7.5 Settings Tab ..................................................................................................... 29
7.6 Customizing the Menu Tree ............................................................................. 30
8 Menu Operation.................................................................................................... 31
8.1 Messages ......................................................................................................... 31
8.1.1 Message List ............................................................................................ 31
8.2 Contacts .......................................................................................................... 32
8.2.1 Find an Entry in the Local Phonebook ....................................................... 32
8.2.2 View an Entry in the Local Phonebook ..................................................... 32
8.2.3 Add an Entry to the Local Phonebook ...................................................... 32
8.2.4 Delete an Entry in the Local Phonebook ................................................... 33
8.2.5 Edit an Entry in the Local Phonebook ....................................................... 33
8.2.6 Find an Entry in the Central Phonebook ................................................... 33
8.2.7 Save a Number from the Call List to the Local Phonebook ........................ 33
8.2.8 Delete a Number in the Call List ............................................................... 34
8.2.9 Delete All Numbers in the Call List ........................................................... 34
8.3 Modes ............................................................................................................. 34
8.3.1 Change Modes ........................................................................................ 35
8.3.2 Change Mode Settings ............................................................................ 35
8.3.3 Set the Mode to Absent On/Off ............................................................... 35
8.3.4 Choose the Modes Answering method .................................................... 35
8.3.5 Switch the Handset Off ............................................................................ 36
8.3.6 Customizing the Modes Menu ................................................................. 36
8.4 Services ............................................................................................................ 36
8.4.1 Activate a Service ..................................................................................... 36
8.4.2 Create a new Service ............................................................................... 37

TD 92333GB
2007-02-07/ Ver. D
User Manual
9d24 Mkll Cordless Telephone
8.4.3 Edit a Service ........................................................................................... 37
8.4.4 Delete a Service ....................................................................................... 37
8.5 Settings ........................................................................................................... 37
8.5.1 Change the Volume ................................................................................. 38
8.5.2 Change the Ring Signal ............................................................................ 38
8.5.3 Key Beep On/Off ...................................................................................... 38
8.5.4 Vibrator On/Off ........................................................................................ 38
8.5.5 Deactivate/Activate No-movement alarm .................................................. 39
8.5.6 Deactivate/Activate Man-down alarm ....................................................... 39
8.5.7 Deactivate/Activate Pull-cord alarm .......................................................... 39
8.5.8 Edit a Soft key .......................................................................................... 39
8.5.9 Edit a Hot key .......................................................................................... 40
8.5.10 Select Language ..................................................................................... 40
8.5.11 Change Text Size .................................................................................... 40
8.5.12 Lock the Handset Manually .................................................................... 41
8.5.13 Change the Lock Code .......................................................................... 41
8.5.14 Clock Settings ........................................................................................ 41
8.5.15 Turn On/Off Automatic Keypad Lock ...................................................... 41
8.5.16 Enable/Disable Quick Answer ................................................................. 42
8.5.17 Set New Messages to be Displayed Upside down ................................... 42
8.5.18 Set Owner ID ......................................................................................... 42
8.5.19 Select PBX System .................................................................................. 42
8.6 Additional Information ..................................................................................... 42
9 Advanced Functions.............................................................................................. 43
9.1 System Handling .............................................................................................. 43
9.1.1 Register a New PBX System ...................................................................... 43
9.2 Adjustment of Audio Parameters ..................................................................... 44
9.3 DECT Location Feature ..................................................................................... 44
9.3.1 Location Test ............................................................................................ 44
9.4 Field Upgrade .................................................................................................. 45
9.4.1 Upgrade .................................................................................................. 45
9.5 Updating Software ........................................................................................... 47
9.5.1 Downloading Software ............................................................................ 48
9.5.2 Copying Software .................................................................................... 48
9.6 Changing SIM parameters ................................................................................ 49
10 Operation Notice................................................................................................. 50
10.1 Accessibility and Voice Quality ........................................................................ 50
10.2 Environmental Requirements .......................................................................... 50
11 Maintenance........................................................................................................ 50
11.1 EX Battery ...................................................................................................... 50

TD 92333GB
2007-02-07/ Ver. D
User Manual
9d24 Mkll Cordless Telephone
0
11.2 Charge the Battery ......................................................................................... 51
11.2.1 Charging Spare Batteries ........................................................................ 52
11.3 Remove the Battery ........................................................................................ 52
11.4 Fasten the battery .......................................................................................... 53
11.5 Change the SIM Card .................................................................................... 54
11.6 Change the Clip ............................................................................................. 54
11.7 Attach Pull-cord Protection Plug ..................................................................... 54
12 Trouble Shooting................................................................................................. 55
12.1 Error message ................................................................................................ 55
Document History ........................................................................................................ 56
Appendix A: 9d24 Mkll Functionality with a 9d23 SIM......................................... 57
Index ....................................................................................................................... 58

TD 92333GB
2007-02-07/ Ver. D
User Manual
9d24 Mkll Cordless Telephone
1
1 Introduction
This document describes the features and settings available for the 9d24 Mkll Cordless
Telephone. All procedures in this document are according to default programmed
versions, but additional functions and factory settings are also included as an attempt to
cover all functionality.
Note that your system may not supply all functions described in this document. For more
information about your system please contact the person (or department) responsible for
the system in your organization, or contact your supplier.
1.1 Abbreviations and Glossary
1.2 System 9d
The 9d24 Mkll Cordless Telephone is part of a system that integrates Messaging, Personal
alarm and Voice on a DECT platform. Hereby a system with digital voice quality, unique
messaging and alarm possibilities is created.
The System 9d consists of; a Radio Exchange, DECT base stations, software package for
message handling, software for configuration of the Radio Exchange and cordless
handsets. The System 9d integrates the On-site Paging- and Personal Security Systems.
1.3 Versions
The 9d24 Mkll Cordless Telephone is a robust, dust- and waterproof (IP64) handset
designed for people working in tough environments. It is suitable for users dependent of
being reachable and/or having a need for advanced mobile messaging functions.
CNIP Calling Name Identification Presentation

TD 92333GB
2007-02-07/ Ver. D
User Manual
9d24 Mkll Cordless Telephone
2
There are five versions of the Cordless Telephone, 9d24 Mkll Talker, 9d24 Mkll Messenger
with messaging functions, 9d24 Mkll Protector with additional alarm functions and two
intrinsically safe versions 9d24 MkII EX-Messenger and 9d24 MkII EX-Protector.
* System dependent feature
Figure1.
Functions
SIM card with local phonebook
Central phonebook
Vibrator
Microphone on/off during call
Headset connector
Messaging*
Acknowledge*
Interactive messaging*
SMS (Short Message Service)*
DataSend*
Datawith prefix*
Personal alarm*
Alarm with Data*
Location, base stations*
Location, DECT locators*
Man-down & No-movement alarm*
Pull-cord alarm*
Upgradable to Messenger
Upgradable to Protector
Accessories
Headset
with microphone on boom
with microphone on cable
with hearing protection
adapter for standard Peltor headset
EX-approved adapter for Peltor headset
Desktop charger
Charging Rack CR24
Belt Clip
hinge-type
swivel-type
Leather case
Security string
Spare battery
001
Messenger
EX-Messenger
Protector
EX-Protector
Talker
Messenger
EX-Messenger
Protector
EX-Protector
Talker
Yes
Yes
Yes
Yes
Yes
Yes
Yes
Yes
Yes
Yes
Yes
-
-
-
-
-
-
-
Yes
Yes
Yes
Yes
Yes
Yes
Yes
Yes
Yes
Yes
Yes
Yes
-
-
-
-
-
-
-
-
Yes
Yes
Yes
Yes
Yes
Yes
Yes
Yes
Yes
Yes
Yes
Yes
Yes
Yes
Option
Option
Option
-
-
Yes
Yes
Yes
Yes
Yes
Yes
Yes
Yes
Yes
Yes
Yes
Yes
Yes
Yes
Yes
-
-
-
-
Yes
Yes
Yes
Yes
-
Yes
Yes
Yes
Yes
Yes
Yes
Yes
Yes
Yes
Yes
Yes
-
Yes
Yes
Yes
Yes
Yes
Yes
Yes
-
-
-
Yes
Yes
Yes
Yes
Yes
Yes
-
Yes
Yes
-
-
-
Yes
Yes
Yes
Yes
Yes
Yes
-
Yes
Yes
Yes
Yes
Yes
Yes
-
Yes
Yes
Yes
Yes
Yes
Yes
Yes
Yes
Yes
Yes
Yes
Yes
-
-
-
-
-
-
-
-
-
-
-
-
Yes
Yes

TD 92333GB
2007-02-07/ Ver. D
User Manual
9d24 Mkll Cordless Telephone
3
2 Descriptions
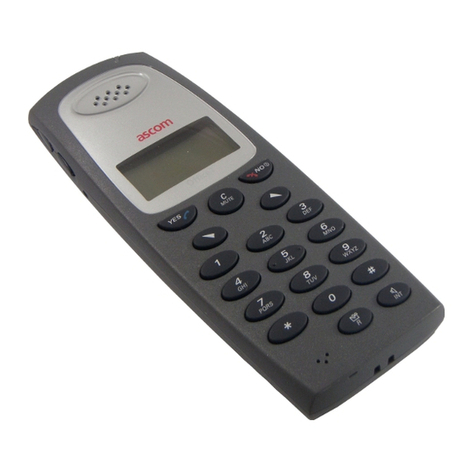
Figure 1. Description of the handset.
2.1 The 9d24 Mkll Cordless Telephone
Case
The case is made of durable PC/ABS plastic and is water, dust and soil protected. The joint
between the front and rear parts of the handset casing has a gasket made of elastic
plastic (thermoplastic polyester elastomer, TPE), as does the battery. Even the headset
connector has a tightening TPE gasket, preventing dust and water from getting inside
also when the headset is not connected.
The 9d24 Mkll Handset has the enclosure protection IP64 which means that dust (talcum
powder) and splashing water can not penetrate the handset. It also fulfils IEC 60068-2-32
procedure 1, witch means that it is tested to stand for 2 falls on each side, (totally 12 falls)
from the height of one meter onto painted concrete floor.
The alpha and numeric characters printed on the exterior of the 9d24 Mkll Handset have
been tested and found resistant to chipping, fading or wearing off when the handset is
treated with common cleaners and disinfectants or perspiration. The following chemicals
have shown no harmful effect:
3% Hydrochloric Acid
M-alcohol (70% Methylated Ethanol)
60% Chlorhexidin 0.5mg/ml
Antenna
The antennas are integrated inside the handset.
Figure 2.
Alpha numeric keys
Menu key
Mute button
LED
Display
Volume button
Navigation key
Call key
Soft keys
Alarm button
Microphone
Loudspeaker
002
1
3
6
5
4
7
8
9
0
2
D
E
F
M
N
O
J
K
L
G
H
I
P
Q
R
S
T
U
V
W
X
Y
Z
A
B
C

TD 92333GB
2007-02-07/ Ver. D
User Manual
9d24 Mkll Cordless Telephone
4
Display
The display is a illuminated 128 x 64 pixels LCD, covered by anti-reflex treated plastic
glass for maximum readability.
Keypad
The keypad is illuminated, which makes it possible to operate the handset in dark
environments. While not in use the keypad should be locked to prevent pressing a key
accidentally.
Clip, Hinge-type
The clip on the back of the handset helps you fasten the handset to a belt or similar.
It is also possible to change the clip to a swivel-type or if no clip is needed, to replace it
with a covering plate.
SIM Card
The SIM card contains all personal settings such as phonebook, identity, alert signal and
your defined functions of the Soft keys and Hot keys. This means that all personal settings
will be retained if the SIM card is moved to another handset.
2.2 Battery
The battery is a rechargeable Li-Ion battery placed on the back of the handset.
There are two similar handsets, 9d24 and 9d24 MkII. The battery for 9d24 does not fit
the 9d24 MkII and vice versa. If the wrong battery type is used, the handset will not work.
The handset or the battery will not be harmed in any way.
To make sure the correct battery is used for 9d24 MkII, check one or more of the
following:
• The article number should be 660087, 660088 (Medic) or 660121 (EX-version)
• The battery type should be Lithium Ion Battery
• The back plate of the battery should be black
• The label should be marked with "Only to be used in RAID2-XXXXX"
Figure 2. Make sure the correct battery is used.
Figure 3.
Only to be used in RAID2-XXXXX
> CAUTIONS <
- DO NOT DISASSEMBLE
- DISPOSE OF PROPERLY
- DO NOT EXPOSE TO HIGH TEMPERATURE
- USE ONLY SPECIFIED CHARGERS
- DO NOT SHORT-CIRCUIT
Lithium Ion Battery
3.7V 750mAh
YY-WW
660XXX. 660XXX
BKB 902 XX/X RXX
(140F/60C)
Manufactured by
Ascom (Sweden) AB
032

TD 92333GB
2007-02-07/ Ver. D
User Manual
9d24 Mkll Cordless Telephone
5
2.3 EX-approved battery
Note: The 9d24 MkII EX-Messenger and 9d24 MkII EX-Protector shall be used with special
EX-approved batteries (P/N 660121).
The EX-approved battery should be marked with the text: "Battery charging or
replacement is NOT permitted in hazardous area." The EX-approved battery can only be
opened with a special Battery Pack Opener. See
11.1 EX Battery
on page 51.
2.4 Chargers
2.4.1 Desktop Charger
The Desktop Charger is used for charging your handset, for example at your desk. The
tilted design facilitates the use of handsfree operation, e.g. in loudspeaking mode. The
charger is delivered with a plug-in power supply and is connected into a wall socket.
Desktop Charger shall only be connected to power adapters supplied by the
manufacture.
Available Power Adapter is:
P/N FW7650/05 Power Supply unit AC/5V DC/1A.
Note: When charging an EX-version the Desktop Charger must be marked with DC2.
2.4.2 Charging Rack
Figure 3. Wall mounted Charging Rack with power supply
The Charging Rack is used for charging your handset and/or spare batteries. When
charging spare batteries an adapter is needed. The wall mounted Charging Rack and its
power supply are a modular system which enables a number of installation
configurations. Each power supply can support several charging racks with four positions
Figure 4.
Figure 5.
1
3
6
5
4
7
8
9
0
2
D
E
F
M
N
O
J
K
L
G
H
I
P
Q
R
S
T
U
V
W
X
Y
Z
A
B
C
033
003

TD 92333GB
2007-02-07/ Ver. D
User Manual
9d24 Mkll Cordless Telephone
6
for handsets and/or batteries in each rack (see
Data Sheet Charging Rack TD 92382GB
).
Handsets with pull-cord alarm can be charged in the Charging Rack without removing
the pull-cord catch.
As the handset cannot distinguish between a Desktop Charger and Charging Rack, it is
recommended that the alert signal is silenced when placed in a rack. It can be set in the
“In charger” mode, see
8.3.2 Change Mode Settings
on page 35. There is also a SIM
parameter that can be set in the SIM Card Programmer by your system administrator.
Note: When charging an EX-version the Charging Rack must be marked with CR2.
2.5 Icons and Text in the Display
The icons and text in the display indicate functions and settings to which you have access.
The display normally shows the owner ID and the system ID, for example “System A”.
This indicates that the handset is in contact with System A. The owner ID is manually set
by the user.
Figure 4. Example of a display configuration in stand-by mode.
In stand-by mode the upper row is used for icons and the clock. Three rows are used for
information. First row for system information and second row for user information. The
user information in stand-by mode can be set by the user. The third information row is
used for showing the alarm icons and status of the handset. Examples of status
information are; muted, in charger etc. When there is no status to show the row is empty.
The bottom row (under the line) is the Soft key field. In stand-by mode it shows the user
defined names of the three Soft keys beneath the display. In menu mode where the Soft
keys are used for different choices, it gives you the function of each Soft key. Examples of
functions are; Back, Option, Save etc.
Figure 6.
“Hook off” icon indicates that your telephone is off hook.
“Audio signal off” icon is shown when all alert signals, including
ring signal, message tone, key beep etc. are turned off. High priority
messages will however override this setting.
“Battery” icon is always shown in the display in stand-by mode.
When the level is low it is time to charge the battery.
“Loudspeaking” icon is shown when the loudspeaker is activated
and the handset is in loudspeaking operation.
Shows time and icons
User information: User defined
in stand-by mode
Info Doctor Jobs Shows the Soft keys function:
User defined in stand-by mode
Alarm icons and
status information, i.e. current mode
13:22
System A
A Brown 4321
}
}
}
}
In charger
}
System information
004

TD 92333GB
2007-02-07/ Ver. D
User Manual
9d24 Mkll Cordless Telephone
7
The “New voice mail” icon appears when a new voice mail exists.
The symbol will remain until all voice mails has been listened to and/
or removed.
“New message” icon appears when a new message is received. The
number on the right side of the icon shows the total number of
unread messages. The symbol will remain until the message is
marked as read.
"New voice mail" icon and "New message" icon flashing appears
when there are both Voice mail and new messages.
(Flashing)
"Unread message" icon appears when reading one message and
there are unread messages in the message list.
“Not answered call” icon is added to not answered calls in the call
list. The number on the right side of the icon shows the total
number of missed calls.
“Key” icon indicates when your keypad is locked.
The “Padlock” icon indicates that the handset has been locked and
has to be unlocked with a code before it can be used.
“Headset” icon indicates that a headset is connected to the
handset.
“No-movement alarm on” icon indicates that the no-movement
alarm is activated.
“Man-down alarm on” icon indicates that the man-down alarm is
activated.
“Pull-cord alarm on” icon indicates that the pull-cord alarm is
activated.
ABC “ABC” indicates that you can type upper case letters and numbers
in text input mode.
abc “abc” indicates that you can type lower case letters and numbers in
text input mode.
123 “123” indicates that you can type numbers in text input mode.
“Incoming call” icon is added in front of incoming calls in the call
list.
“Outgoing call” icon is added in front of outgoing calls in the call
list.
“Unread message” icon is added in front of not read messages in
the message list.
3
5

TD 92333GB
2007-02-07/ Ver. D
User Manual
9d24 Mkll Cordless Telephone
8
2.6 Keys and Buttons
2.6.1 Navigation Key
The Navigation key controls the movement of the cursor in the display. In stand-by
mode, the Navigation key is used for entering the Call list, the Navigation key for
entering the Message list and pressing Navigation key will show the current date in the
display window. When navigating in the menu the key is used for moving up , down
, back (left), or next (right).
2.6.2 Menu key
The Menu key is used for entering the Menu.
“Read message” icon is added in front of read messages in the
message list.
“Interactive message” icon is added in front of not read interactive
messages in the message list.
“Read interactive message” icon is added in front of read interactive
messages in the message list.
“Add contact” icon appears on a Soft key when a phone number is
marked in the call list. It indicates that it is possible to add the
phone number to the local phonebook.
The “Contacts” icon is viewed when it is possible to get a phone
number from the local phonebook, for example to add it to a
function.
Menu Tabs: All tabs are displayed when you press the Menu button
Under the tab “Messages” in the menu mode, you can find the
message list. See 8.1 Messages on page 31.
Under the tab “Contacts” in the menu mode, you can find the local
and central phonebooks and the call list. See 8.2 Contacts on page
32.
Under the tab “Modes” in the menu mode, you can select between
modes and change and edit Modes. See 8.3 Modes on page 34.
Under the tab “Services” in the menu mode, you can select, add,
delete, or change a service function. See 8.4 Services on page 36.
Under the tab “Settings” in the menu mode, you do your handset
settings. See 8.5 Settings on page 37.

TD 92333GB
2007-02-07/ Ver. D
User Manual
9d24 Mkll Cordless Telephone
9
2.6.3 Call Key
The Call key is used for connecting and disconnecting calls.
2.6.4 Soft keys
Figure 5. Soft keys
The three Soft keys are located just beneath the display and the function of each Soft key
is indicated by text in the display just above the keys.
In stand-by mode the Soft keys can be used for specific functions defined by the user of
the handset. The function can be to dial a specific telephone number, sending mobile
data, a shortcut to the menu, or sending SMS.
When navigating in menu mode the Soft keys are used for different choices in the menu.
2.6.5 Hot keys
Any key “0” - “9” can be set to a Hot key. Any Hot key can be programmed to give
access to frequently used functions such as dialing a specific telephone number, sending
mobile data, a shortcut to the menu, or sending SMS. Note that the possibility to define a
Hot key can be locked by your system administrator.
2.6.6 Volume Button
The Volume button is used for increasing/decreasing the loudspeaker volume.
2.6.7 Mute Button
The Mute button is used for silencing the audible signals in stand-by mode, silencing the
ring signal at an incoming call and also to turn off/on the microphone during a call.
2.6.8 Alarm Button
The red Alarm button is used for sending alarms and for testing the alarm function (test
alarm).
Soft keys
Max. seven characters can be
used for naming a Soft key.
SMS Door Off
005

TD 92333GB
2007-02-07/ Ver. D
User Manual
9d24 Mkll Cordless Telephone
10
2.6.9 Alpha Numeric Keys
In some applications you have the possibility to write letters as well as numbers, which is
indicated by the “ABC” icon. Pressing the numerical keys will now give you access to the
alphabet plus some special characters according to the picture beneath.
Figure 6. Alpha Numeric Keys
In Stand-by Mode
In stand-by mode short presses on the keys enter the digits and the characters and #.
A long press on a key “0” - “9” activates the programmed Hot key function.
In Text input Mode
In text input mode a press on a key displays the first available character on that specific
key. Continue pressing the key to view the following characters. The marked character is
selected after a time out or when another key is pressed. Press the -key to switch
between upper case and lower case. A long press in text input mode will give the
number.
2.7 Accessories
2.7.1 Belt Clip, Swivel-type
The ordinary belt clip can be replaced with a special swivel-type belt clip adapted to firmly
place your handset onto your belt.
2.7.2 Leather Casing
The leather casing is especially designed for the handset. The casing comes with a swivel-
type belt clip and the handset is fully operational while placed in the casing. The leather
casing can easily be modified for use with handsets equipped with pull-cord alarm.
Note: The Leather Casing is not approved for use in EX-classified area.
Figure 7.
A B C Å Ä Æ À Á Â Ã Ç 2 D E F È É Ê Ë 3
G H I Ï Ì Î Í 4 J K L 5
M N O Ñ Ö Ø Ò Ó Ô Õ 6
P Q R S ß 7 T U V Ü Ù Ú Û 8
W XY Z Ý 9
Space + & @
/ $ % £ \ ± ½ 0
S
witch between upper
a
nd lower case
- ? ! , . : " ' ( )1
# * < = > ^ _ ° µ ¿ §
1
3
6
5
4
7
8
9
0
2
D
E
F
M
N
O
J
K
L
G
H
I
P
Q
R
S
T
U
V
W
X
Y
Z
A
B
C
006

TD 92333GB
2007-02-07/ Ver. D
User Manual
9d24 Mkll Cordless Telephone
11
2.7.3 Headset
A headset is recommended if you frequently use the phone and/or want to have both
hands free. The handset has a special headset connector that is waterproof. The headset
comes in three versions; with microphone integrated in the cable, with microphone on a
boom and with hearing protection (Peltor). An adapter, that makes it possible to connect
other standard types of Peltor headsets, is also available.
In order to achieve optimal audio quality with the different headset types it is
recommended that the SIM parameter called “Headset type” is altered to match the
headset type being used. The default setting for this parameter is microphone on a boom
i.e. the audio is optimized for using a headset with microphone on a boom.
Note: The handset must be equipped with the factory mounted headset connector.
EX classified Headset
The EX Headset with hearing protection from Peltor must be connected to an EX Headset
Adapter for Peltor Headset.
IMPORTANT: Headset used in combination with an EX classified 9d24 MkII EX-version
must have the same EX classification as the handset to fulfil the EX
directive.
EX classified headsets must be ordered directly from Peltor®, see the Peltor
homepage (www.peltor.se) for more information.
2.7.4 Security String
The security string is 800 mm long. Fasten one end to the hinge-type belt clip and the
other end to, for example, your pocket.
3 Basic Operation
3.1 Call List
The twenty last received/dialled telephone numbers are stored in a call list. Open the call
list by pressing the Navigation key , or from the menu, see
8.2 Contacts
on page 32. If
the clock and date function is set, you can on the same day the call was received/dialled,
see the time for the call. The time stamp is changed to a date stamp the following day.
3.2 Make a Call
Note: The headset answering button is only active during a call or when the telephone is
ringing and can thus not be used to get the line when making a call.
Pre-dial
Enter the number and press the Call key to get the line. The number is shown on the
display while dialling. If needed, you can press the Soft key “C” to erase and edit the
number. By using Navigation key or it is possible to step and add/delete a digit in the
middle of a number.

TD 92333GB
2007-02-07/ Ver. D
User Manual
9d24 Mkll Cordless Telephone
12
It is possible to turn on/off the tone sender in a predialled number by making a long press
on the -key. Tone sender on will be indicated with a “T” in the number and off with “-
”. If a pause is required in the number, it is added by making a long press on the #-key.
The pause is indicated with a “P” in the number.
Post-dial
Press the Call key to get the line and enter the number. The number will not be added
to the call list when post-dial is used.
Dial using a pre-programmed Hot key or Soft key
A Hot key or Soft key can be programmed with a telephone number. Press the pre-
programmed Hot key or Soft key. The call will automatically be connected.
Dial a number from the Call list
Enter the call list with Navigation key , or from the menu. Select a number and press
the Call key .
The number in the call list can be edited before the call is started. Press “Edit”, make the
changes and press the Call key .
Dial a number from a Message
You can dial a number included in a received message by pressing the Call key . The
first number in the message is dialled. If the message is stored in the message list, open
the list by pressing Navigation key . Select the message and press the Call key .
Dial a number from the Local Phonebook
1 Press the Menu key (the last used tab is opened).
2 Press Navigation key or and select the tab Contacts .
3 Press Navigation key and step to “Local Phonebook”.
4 Press Navigation key ; a name list is shown.
5 Step in the list by using Navigation key or . The selected entry is highlighted.
Press the Call key .
Start a New Call during Conversation
Press the right Soft key “R” during a call. Dial the number you want. Wait for answer.
Switch between the connected calls by using the Soft key “R”.
3.3 Answer a Call
The flashing LED, accompanied by a ring signal and/or a vibrating telephone, give you
notice of a call. Ring signal and vibrator can be disabled. If supported by your PBX, the
calling party’s phone number and/or name is shown. The name will also be shown if the
calling party’s phone number is stored in the Local phonebook. Press the Call key to
answer the call. When a headset is connected to the handset, the answering button on
the headset can be used to answer the call.
You can also set other answering methods in the modes settings. The answering methods
are Ordinary, Auto, Loud and Auto loud. See
8.3 Modes
on page 34 for more

TD 92333GB
2007-02-07/ Ver. D
User Manual
9d24 Mkll Cordless Telephone
13
information. In the settings menu , you can enable Quick Answer, see
8.5.16
Enable/Disable Quick Answer
on page 42.
3.4 End a Call
Press the Call key . When a headset is connected to the handset, the button on the
headset can be used to end the call. All connected calls are ended. The total call time is
shown in the display.
3.5 Decline an incoming call
Press the Soft key "Decline" to decline an incoming call.
3.6 Transfer a Call
Press the Soft key “R” during a call. Dial the number to the person you want to transfer
the call to. Wait for an answer and press the Call key .
In case the person you are trying to transfer the call to is not answering, you can take
back the call by pressing the Soft key “R” again.
This is the default setting. To make it easier for the user see
3.15 Call menu
on page 14.
3.7 Turn Off Alert Signals at an incoming Call
Press the Mute button before answering the call. All alert signals, including the vibrator,
will silence for that specific call.
3.8 Turn the Mute Mode during a Call Off/On
A press on the Mute button disconnects/connects the microphone. The text “Muted” is
shown in the display when the microphone is off during a call.
3.9 Loudspeaking Function
How you activate the loudspeaking function is dependent of the choice of answering
method. An incoming call can be connected with loudspeaking function active by
pressing Volume button (up) or middle Soft key. During a call, a press on the middle Soft
key activates the loudspeaking function. Press the middle Soft key again to turn it off.
You can also activate this function by selecting another answering method, see
8.3.4
Choose the Modes Answering method
on page 35. For the loudspeaking function you
have three choices in the menu:
• Ordinary. The loudspeaking function is turned on when the middle Soft key is pressed
• Loud. A call is connected with the loudspeaking function turned on when the Call key
is pressed.
• Auto loud. An incoming call is automatically connected after 2 signals with the
loudspeaking function turned on. Calls can be answered as usual before that.

TD 92333GB
2007-02-07/ Ver. D
User Manual
9d24 Mkll Cordless Telephone
14
3.10 Increase/Decrease the Speaker Volume during a Call
Press the upper part of the Volume button to increase the volume and press the lower
part to decrease the volume.
3.11 Turn Audible Signals On/Off
In stand-by mode a long press on the Mute button changes between audible signals on/
off and the icon appears/disappears. “Audio signal off” icon indicates a completely
silenced handset. Only highest priority messages will override this silent mode.
3.12 Lock/Unlock the Keypad
Press the Menu key and then the -key to lock/unlock the keypad. The “Locked
keypad” icon indicates a locked keypad. It is possible to lock the keypad during a call.
The keypad can also be locked automatically, see
8.5.15 Turn On/Off Automatic Keypad
Lock
on page 42 for more information.
3.13 Lock/Unlock the Handset
You can protect your handset from being used by others by locking it automatically when
placed in a charger or switched off. The handset can only be unlocked with a 1 to 4 digit
code. When the handset is locked, it is still possible to send all types of alarms.
This function requires a SIM card parameter setting. The function can only be enabled/
disabled in the SIM card, not from the handset. The code is set in the SIM card and can be
changed from the handset, see
8.5.13 Change the Lock Code
on page 41 for more
information.
The handset can also be locked manually, see
8.5.12 Lock the Handset Manually
on page
41 for more information.
3.14 Switch the Handset On
Press and hold the Call key until “Switch on?” is displayed. Press “Yes” while the
question is shown in the display window. The question is displayed for ten seconds.
How to switch the handset off is described in
8.3.5 Switch the Handset Off
on page 36.
3.15 Call menu
It is possible to program a Call menu via the SIM. The purpose of the Call menu is to
simplify exchange specific commands during a call. In the SIM card programmer the
different programmable options for the Call menu are described under the Settings\Call
menu folder.
During a call the Call menu is found on the left Soft key, "Options".
Only the programmed options will be visible in the menu. They will appear in an order
which can not be changed.
The following options are available in the Call menu (when programmed):
Other manuals for 9D24 TALKER -
5
Table of contents
Other ASCOM Cordless Telephone manuals

ASCOM
ASCOM OFFICE T User manual

ASCOM
ASCOM d83 User manual

ASCOM
ASCOM OFFICE T User manual

ASCOM
ASCOM 9D24 TALKER - User manual

ASCOM
ASCOM OfficeM User manual

ASCOM
ASCOM 9D24 TALKER - User manual

ASCOM
ASCOM d62 Talker Instruction sheet

ASCOM
ASCOM 9p23 User manual

ASCOM
ASCOM Avena 122 plus User manual

ASCOM
ASCOM 9D24 TALKER - User manual