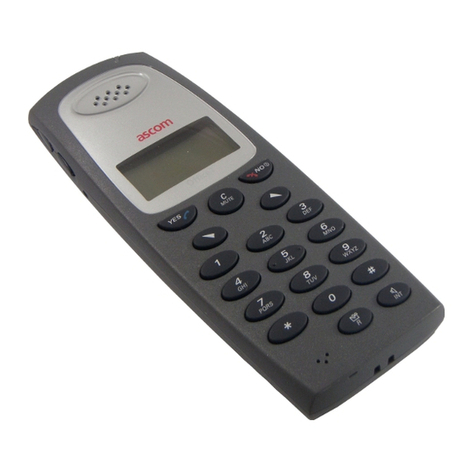
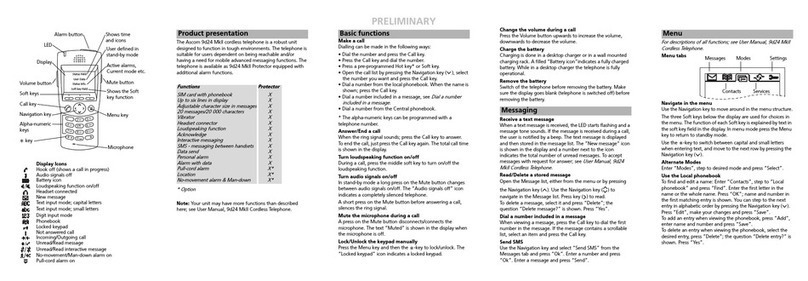
ASCOM Avena 122 plus User manual

a The world in your hands
Ascom Avena 122 and Ascom Avena 122 plus
User Guide
DECT Cordless telephone
THIS EQUIPMENT IS NOT
DESIGNED FOR MAKING
EMERGENCY TELEPHONY
CALLS WHEN THE POWER
FAILS. ALTERNATIVE
ARRANGEMENTS SHOULD
BE MADE FOR
ACCESS TO
EMERGENCY SERVICES.


Explanations
Please note that you can only use the answering machine functions if you have acquired
the set with integrated digital answering machine.
About the set
In choosing the Ascom Avena 122/Ascom Avena 122 plus you have acquired a cordless
telephone that combines the advantages of "untied telephoning" with the user comfort
of high-quality telephones. The set itself is designed using modern digital technology to
the European standard for cordless telephones (DECT). DECT technology offers a high
level of security against unauthorised interception in the radio area and good digital
quality of speech.
Besides the usual telephone features it also offers:
• the possibility of storing up to 20 abbreviated dialling numbers,
• adjustable handset volume and call charge metering,
• expansion option into a telephone system,
– operation of up to 6 handsets on one base station
– internal calls between 2 handsets
– operation of a handset on up to 4 base stations of the Ascom Avena 122/Ascom
Avena 122 plus family to expand the area in which you can make and receive
calls.
Safety notes
Warning! Only use approved nickel-cadmium (NiCd) batteries or nickel-metal
hybrid (NiMH) batteries:
NiCd AAA: • Panasonic: P-25 AAAR • Sanyo: N-4U
NiMH AAA: • Sanyo HR-4U • Panasonic HHR55AAA
• Varta: VH 551 AAA • Maxell: Ace HR-AAA
Using other battery cell types or non-rechargeable batteries/primary cells can be dangerous
and also lead to malfunctions of and/or damage to the set. Understandably, Ascom cannot
assume any liability in such cases.
– Make sure the battery cells are fitted correctly.
– Do not dip the battery cells in water; do not throw into the fire.
– Battery cells can become warm when being charged; this is a normal and harmless
process.
– Do not use third-party charging stations as they may damage the battery cells.
– Only use the enclosed SNG 4 af power supply unit for the base station and the
charging bracket.
–
Before using the Ascom Avena 122/Ascom Avena 122 plus, hearing-aid users
should be aware that radio signals interfere with hearing aids and can cause an
unpleasant humming noise if sufficiently loud.
A1
Y
R
LD
O

Programming key (P-key)
Explanations
Answering machine switched
on and/or handset in
answering machine mode.
Connection indicator
Call register: the entry has
been answered.
On-state: unanswered call has been
received. Call register: the entry has
not been answered.
Handset
Programming mode
Open listening
Receiver volume set to
"loud".
Microphone on the handset
is switched off.
Base station indicator.
Battery indicator
Receiver
Display
Redial key
Signal key
Internal key
Microphone
Keypad
0 – 9, *, #
Battery charge contacts
A2
ABCD
Display symbols
ABCD
8888.88888888.88
Connect key
Delete/Microphone
OFF key
One-touch dialling key

Explanations
Base station without answering machine
Rewind key
Record key
Forward key
Base station with answering machine
Please note that you can only use the answering machine functions if you have acquired
the appropriate set!
Internal key
Volume key "+"
Loudspeaker
LED red: lit when line is seized,
flashes when a handset is
logging on.
LED green: lit when batteries are
fully loaded up, flashes while
loading.
LED: lit when answering machine
is switched on. Flashes to indicate
new messages received.
A3
Volume key "–"
Delete key
Microphone for
intercom
ON/OFF/Stop key


1
20BA312004/A0_en
Explanations
Designation Function
‚– Initiates the secondary
functions or a programming
process
‚‚ – Code input prompt
r– Signal key function (Flash)
in connection with a
telephone system: forward-
ing to an external call
– Long click: insert a dialling
pause
‚r – Locks/unlocks the keypad
ˆ– Calls up the last numbers
‚ˆ – Retrieves the call register
Ù– Calls up the one-touch
memory
‚Ù – Stores a number in the
one-touch memory
During off-line call prepara-
tion:
– Deletes the character last
entered or press for longer
to delete the entire line
During programming:
– Deletes the command or
memory content last
entered
During a call:
– Mutes the microphone
Designation Function
‚ – Switches the handset off
Ë– Initiates an internal call
1– 6
‚Ë – Initiates the answering
machine mode
Ë8 – Initiates an intercom
connection with the base
station
Ë9 – General call
During a call
Ë0 – Access to public exchange
during inquiry
– Rejects call waiting from an
internal call
fl– Seizes and disconnects the
connection
– Switches the handset on
– Aborts a programming
procedure
1

2
20BA312004/A0_en
Explanations
Designation Function
1– Number 1
‚1 – Retrieves/checks the call
charges
2– Number 2
‚2 – Incoming/outgoing call via
base station A
3– Number 3
‚3 – Switches the loudspeaker
on the base station (open
listening) on or off
4– Number 4
‚4 – Adjusts the receiver volume
on the handset
5– Number 5
‚5 – Incoming/outgoing call via
base station B
6– Number 6
‚6 – Adjusts the ringing tone on
the base station
7– Number 7
‚7 – Direct call
(babyphone feature)
Designation Function
8– Number 8
‚8 – Incoming/outgoing call via
base station
C
9– Number 9
‚9 – Adjusts the ringing tone on
the handset
0– Number 0
‚0 – Incoming/outgoing call via
base station D
¯– Can be used for various
special functions
‚¯ – Temporary switchover to
DTMF function
·– Can be used for various
special functions
‚· – Initiates room monitoring

3
20BA312004/A0_en
Contents
Explanations ......................................... 1
Contents ................................................ 3
Setting up and putting into service ......
5
What’s included in the delivery package
and accessories ..................................... 5
Installation location/Range .................... 6
Connecting the base station ................. 7
Disconnecting the cords from the base
station/charging bracket........................ 7
Charging bracket .................................. 7
Inserting and charging the battery cells in
the handset .......................................... 8
Charging the battery cells ..................... 9
Battery indicator.................................... 9
Basic settings ...................................... 10
Handset: ON, OFF, Lock states ............. 10
Operate the dialing method ................ 11
Setting the ringing tone on the
handset/base station ........................... 12
Selecting the battery type .................... 13
Activating/deactivating the keyclick ..... 13
Range warning ................................... 14
Activating/deactivating the charge check
tone .................................................... 14
Offhook answering ............................. 15
System PIN (Personal Identification
Number) ............................................. 15
Handset PIN (Personal Identification
Number) ............................................. 16
Telephoning ........................................ 17
Answering a call ................................. 17
Ending a call ....................................... 17
Dialling out with the numeric keypad ....
17
Off-line call preparation ...................... 17
Last number redial .............................. 18
Storing abbreviated dialling numbers ....
18
Dialling abbreviated dialling
numbers directly ................................. 19
Dialling several abbreviated dialling
numbers in succession ........................ 19
Open listening at the base station ....... 20
Mute switch ........................................ 20
Adjusting the handset volume ............. 20
Temporary switchover to DTMF function ..
21
Unit/call charge metering .................. 22
Introduction ........................................ 22
Calling number identification ............ 23
Introduction ........................................ 23
Call register ......................................... 24
Suppressing the display (CLIR) ............. 25
Activating/deactivating CLIR ................ 25
Direct call (babyphone feature) ......... 26
Introduction ........................................ 26
Storing a direct call number ................ 26
Deleting a direct call number............... 26
Activating/deactivating direct call ........ 26
Initiating a direct call ........................... 26
Provider dialling ................................. 27
Introduction ........................................ 27
Entering/changing a provider
number ............................................... 27
Activating/deactivating provider
dialling ................................................ 27
Intercom .............................................. 28
Duplex calls between handset and
base station ........................................ 28
From handset to base station .............. 28
From base station to handset
(global call) ......................................... 28
Room monitoring ............................... 29
Disabling/enabling room monitoring ... 29
Initiating room monitoring .................. 29
Operation with several handsets ...... 30
Introduction ........................................ 30
Preparing the base station for
registration ......................................... 30
Registering a handset .......................... 30
Logging a handset onto a third-party base
station (GAP) ...................................... 31
Logging a third-party handset onto the
base station (GAP) .............................. 31
GAP uses ............................................ 32
De-registering a handset from the
base station ........................................ 32
Making calls between two handsets ......
32
Call waiting ........................................ 33
4
20BA312004/A0_en
Contents
Call handover/inquiry to another
handset .............................................. 33
Setting the ringing allocation for the
handsets ............................................. 34
Operation on several base stations ....
35
Introduction ........................................ 35
Application example ........................... 35
Specifying the configuration ............... 35
Selecting the base station ................... 35
Selecting the base station ................... 36
Setting the answering machine ........ 37
Introduction ........................................ 37
Setting the date and time ................... 37
Setting the number of rings ................ 38
Activating/deactivating the message
monitoring .......................................... 38
Setting the total recording time ........... 39
Operating modes ................................ 40
Setting the messages .......................... 40
Operating the answering machine
with the handset ................................ 41
Indication of new messages ................ 41
Initiating procedure for operation ........ 41
Recording the greeting message ......... 42
Deleting the greeting message ............ 42
Switching the answering machine
on/off ................................................. 43
Playing back recorded messages .......... 43
Deleting messages .............................. 44
Intercepting a call while the answering
machine is answering a call ................. 44
Monitoring incoming calls over the
handset .............................................. 45
Recording telephone calls.................... 45
Checking the recording time
remaining ........................................... 45
Operating the answering machine
from the base station ......................... 46
Recording your greeting message ........ 46
Deleting the greeting message ............ 46
Switching the answering machine
on/off ................................................. 47
Playing back messages ........................ 47
Deleting messages .............................. 48
Temporary monitoring ......................... 48
Operating the answering machine
by remote access ................................ 49
Introduction ........................................ 49
Remote access PIN .............................. 50
Remote access procedure .................... 50
Switching on the answering machine .. 51
Switching the answering machine
on/off ................................................. 51
Playing back recorded messages .......... 52
Deleting messages .............................. 52
Recording a greeting message ............. 52
Deleting the greeting message ............ 53
Carrying out room monitoring ............ 53
Ending room monitoring: .................... 53
PBX-related operation ........................ 54
Connection to a PBX ........................... 54
Setting the exchange identification
code (EIC) ........................................... 54
Deleting the exchange identification
code (EIC) ........................................... 55
Setting the dial pause ......................... 55
System settings .................................. 56
Setting a feature ................................. 56
List of system settings ......................... 56
Resetting the base station to the
default settings ................................... 58
Deleting all the one-touch memories ... 58
Deleting the exchange
identification code .............................. 58
Resetting the handset to the default
settings ............................................... 58
General information ........................... 59
Troubleshooting .................................. 59
Technical Data ..................................... 60
Write-on labels ................................... 61

5
20BA312004/A0_en
What’s included in the delivery
package and accessories
The delivery package contains the
following:
• Base station
• Handset
• 3 battery cells (AAA)
• 1 plug-in main unit
• Belt clip
• Connecting cord
• User Guide incl. Quick Reference
User Guide
Please note:
The plug-in main unit is located under the
fibre mould.
Accessories
You can purchase the following accesso-
ries from your Ascom dealer:
• Charging station for the handset
• Additional handsets
Setting up and putting into service

6
20BA312004/A0_en
Installation location/Range
Installation location
Do not position the base station on a me-
tallic surface or in the immediate vicinity of
other electronic appliances such as hifi
equipment, office equipment or microwave
ovens; this will prevent any mutual inter-
ference. Also avoid installing the base sta-
tion in the vicinity of heat sources, such as
radiators or in direct sunlight. For the best
possible range we recommend a central in-
stallation location at the centre of your ra-
dius of action. Avoid installation in niches,
small rooms and behind steel doors. To pre-
vent radio feedback in other telephones,
we recommend the largest possible dis-
tance (min. 1 m) between the base station
or handset and the other telephone.
Setting up your telephone
Your telephone is designed to be used un-
der normal operating conditions. Modern
furniture is treated with an endless variety
of lacquer and plastic coatings. Therefore,
it cannot be excluded that some of these
substances may contain agents which will
attack or deform the plastic feet of the base
station. If the equipment feet are chemi-
cally altered in this way, they may leave
unsightly marks on the surface of furniture.
Ascom cannot accept any liability for dam-
age of this kind. We recommend that you
use a non-slip underlay for your telephone,
especially on new furniture or furniture
treated with lacquer-based preservatives.
Range
The radio range is up to 300 m in the open.
Ambient conditions can affect the range,
as can room and building-related factors.
The effective range is lower inside build-
ings than outdoors. Silent zones can occur
due to the digital transmission in the fre-
quency range used – and also within the
range, depending on the structural envi-
ronment. In such cases the transmission
quality can be affected by repeated, short
call interruptions. Normal call quality can
be restored simply by moving slightly out
of the silent zone. If the range is exceeded,
the call will be disconnected shortly after-
wards (if necessary switch on range warn-
ing tone).
Listening protection
The Ascom Avena 122/Ascom Avena 122
plus transmits the voice data between base
station and handset in cryptologically en-
ciphered form (scrambling). As a result the
tapping of your calls by other cordless tel-
ephones, radio receivers, scanners, etc., is
excluded.
Important information
Whenever you make a telephone call, the
handset and base station are connected
with each other via a radio channel. The
base station uses this channel for switch-
ing between the telephone network and
the handset. To ensure that no-one else can
make telephone calls at your expense us-
ing other cordless telephones, an ID code
is constantly exchanged between base sta-
tion and handset. If the codes do not match
up, the call is disconnected or prevented
from being set up in the first place.
Setting up and putting into service

7
20BA312004/A0_en
Connecting the base station
Warning:
Make sure that you do not confuse the
plugs of the connecting cord and plug-in
mains unit cord on the base station. If you
do connect up the wrong plugs, the base
station will not work and may be damaged.
Connecting cord
The connecting cord (1) has two different
plugs. Insert the smaller one into the socket
(telephone symbol) underneath your tel-
ephone until it snaps firmly into place. Feed
the cord through the moulded cable duct
provided. Connect the TAE (telephone) plug
into your telephone socket.
Mains unit cable
Fit the plug from the mains unit cable (2) –
until it clicks into place – into the socket
identified with the mains unit symbol, then
feed the cable through the moulded cable
duct provided.
Note:
Your telephone will not function if the
mains unit is not plugged in or if the power
supply fails. The telephone may only be
used in conjunction with an SNG 4 mains
unit, tested in compliance with EN60950
Protection Class 2.
The mains unit should be easily accessible
and positioned as close as possible to the
base station.
Disconnecting the cords from the
base station/charging bracket
First unplug the mains unit from the mains
socket. To release the plugs on the con-
necting cord and mains unit cables, press
the snap-in clip towards the plug body (us-
ing a small screwdriver for instance) and,
at the same time, pull the plug out by the
cable.
Setting up and putting into service
(mains unit cable) 2 1 (connecting cord)
Base station
3 (mains unit cable)
Charging bracket

8
20BA312004/A0_en
Inserting and charging the battery
cells in the handset
Inserting the battery cells
To remove the battery compartment cover,
press it lightly and slide it downwards.
Insert the 3 battery cells into the battery
compartment (as shown): Make sure the
polarity is correct.
Slide the battery compartment cover back
over the battery cells until you hear it snap
into place.
Setting up and putting into service
Please note:
If the battery cells are inserted incorrectly,
the handset will not function.

9
20BA312004/A0_en
Note:
An audible acknowledgement tone at the
start of the battery charging process sig-
nals that the handset is correctly positioned
on the base station. When done so the
green LED starts to flash. If the battery cells
are completely empty, the audible acknowl-
edgement tone will be heard only once the
battery cells have received a minimum
charge.
When the battery cells are first inserted,
the battery status is unclear. A correct indi-
cation is obtained only after a complete
charging cycle.
Do not use batteries/primary cells,
only NiCd or NiMH battery cells.
Do not place the handset on the base sta-
tion if the battery cells have not been fitted.
Please observe the following to obtain
a long service life for your battery cells:
– Battery cells have to be charged
without interrupted for at least 6
hours for NiCd and 12 hours for NiMH
respectively prior to the initial commis-
sioning.
– Make sure the charging contacts do
not come into contact with metallic or
greasy parts.
– After long periods out of operation
with the power switched off (e.g.
during holidays), charge the handset
(the battery cells) before putting the
set back into operation.
– Please dispose of defective battery
cells in the correct way (not in
domestic waste).
– Only remove the battery cells from the
handset to replace them with new
ones.
– Do not charge the battery cells out of
the handset.
Charging the battery cells
The battery cells are not charged when
supplied. To charge the batteries, you need
to place the handset on to the base sta-
tion.
An audible acknowledgement signal
indicates that the handset is correctly fitted.
A set of NiCd battery cells (250 mAh) is
enough for approx. 80 hours "standby"
and approx. 6 hours "talk time".
The charging time takes approx. 6 hours.
A set of NiMH battery cells (550 mAh) is
enough for approx. 160 hours "standby"
and approx. 12 hours "talk time".
The charging time takes approx. 12 hours.
The "Basic Settings" section on page 14 de-
scribes how you can select the battery type.
Please note:
Make sure you select the correct battery
type so that the battery cells are not un-
der- or overcharged (see page 14).
The batteries may be damaged if the hand-
set is programmed to the wrong battery type.
Battery indicator
The battery indicator on the display shows
the approximate charging status of the
battery cells:
flashing : battery charging
steady : battery between 50%
and 100%
steady : battery between 30%
and 50%
steady : battery between 5%
and 30%
steady : battery under 5%
steady : battery status unclear
Setting up and putting into service

10
20BA312004/A0_en
Basic settings
Handset: ON, OFF, Lock states
Switching the handset to the OFF
state
Incoming calls are not signalled in the OFF
state.
Handset switched to ON
1. ‚
2.
Switching the handset to the ON
state
Incoming calls are signalled in the ON state.
Outgoing calls are also possible.
1. fl
Note:
In the ON state the handset’s internal call
number as well as the base station on which
the handset is operated are displayed on
the right-hand side of the display.
A
-1-
------
Switching the LOCK state on/off
(key lock):
Incoming calls are signalled in the lock state
and can be answered by pressing the Con-
nect key. To make an outgoing call you
need to switch the handset from the Lock
state to the ON state.
Switching on the Lock state.
1. ‚
2. r
Switching off the Lock state.
1. ‚
2. r
A
-1-

11
20BA312004/A0_en
Basic settings
Operate the dialing method
You can operate your telephone using two
different dialling methods:
– tone dialling
(dual tone multi-frequency dialling =
DTMF)
– pulse dialling
The default setting on your telephone is
tone dialling (DTMF). One of the advan-
tages of this setting is quick dialling so
check whether your socket works with tone
dialling.
Press the Connect key and then dial any
number (e.g. 2). If you can still hear the
same dial tone, you need to switch the
dialling method over to pulse dialling.
Handset switched to ON
1. ‚‚
To set pulse dialling
2. 033
or
To set DTMF with short flash signal
key
037
or
To set DTMF with long flash signal
key
038
3. ‚
You heard the audible acknow-
ledgement tone.
Notes:
If your telephone is connected to telephone
system, please take note of the relevant
operating instructions.

12
20BA312004/A0_en
Setting the ringing tone on the
handset/base station
Handset switched to ON
1. ‚
2. 9
The ringing tone on the handset rings as
previously set.
or
2. 6
The ringing tone on the base station rings
as previously set.
* The values currently set flash.
To adjust the volume, use the numeric keys:
0 = off to 4 = loud
To set the tone sequence, use the numeric
keys:
5 = slow to 7 = fast
To set the melody, use the numeric keys:
8, 9, the star or hash key
3. ‚
You hear the audible acknowledge-
ment tone.
Note:
If the procedure is terminated with the
Connect key, the old setting is retained.
Basic settings
A
01234 56789*o

13
20BA312004/A0_en
Basic settings
Selecting the battery type
The telephone is supplied with three re-
chargeable NiCd battery cells (250 mAh).
You can also equip your telephone with
NiMH battery cells (550 mAh), which have
a greater capacity and therefore a longer
standby time. Depending on the battery
type used, the handset has to be pro-
grammed as follows. Whenever you
change the battery type, the telephone
must be reprogrammed to the new type.
Battery type NiCd (250 mAh, supplied)
Handset switched to ON
1. ‚‚
2. 042
3. ‚
You hear the audible acknowledge-
ment tone.
The charging time and battery indicator are
now set to NiCd battery cells.
Battery type NiMH (550 mAh)
Handset switched to ON
1. ‚‚
2. 043
3. ‚
You hear the audible acknowledge-
ment tone.
The charging time and battery indicator are
now set to NiMH battery cells.
Please note:
The batteries may be damaged if the hand-
set is programmed to the wrong battery type.
Activating/deactivating the
keyclick
If you do not want every keypress con-
firmed by a click, you can deactivate this
function.
Deactivating the keyclick:
Handset switched to ON
1. ‚‚
2. 910
3. ‚
You hear the audible acknowledge-
ment tone.
Activating the keyclick:
Handset switched to ON
1. ‚‚
2. 911
3. ‚
You hear the audible acknowledgement
tone.

14
20BA312004/A0_en
Range warning
If you activate the range warning, a warn-
ing signal will sound if you leave the radio
range in the course of a call. This could be
due, for instance, to building-related fac-
tors acting at the limit of your base sta-
tion's transmission and reception range.
If this happens, move back towards the
base station or out of the radio shadow
until this warning signal stops. If you do
not return within the base station's trans-
mitting range, the radio and telephone link
is automatically disconnected.
Deactivating the range warning
signal (default setting):
Handset switched to ON.
1. ‚‚
2. 920
3. ‚
You hear the audible acknowledge-
ment tone.
Activating the range warning signal:
Handset switched to ON.
1. ‚‚
2. 921
3. ‚
You hear the audible acknowledge-
ment tone.
Note:
If the range is insufficient, shifting the base
station can bring about an improvement.
See page 6 for information about the opti-
mum location.
Activating/deactivating the
charge check tone
When the handset is replaced correctly on
the charging bracket an audible check tone
is heard.
Deactivating the charge check tone:
Handset switched to ON
1. ‚‚
2. 950
3. ‚
You hear the audible acknowledge-
ment tone.
Activating the charge check tone:
1. ‚‚
2. 951
3. ‚
You hear the audible acknowledge-
ment tone.
Basic settings
Table of contents
Other ASCOM Cordless Telephone manuals

ASCOM
ASCOM IP-DECT User manual

ASCOM
ASCOM d62 Talker User manual

ASCOM
ASCOM i63 User manual

ASCOM
ASCOM OFFICE T User manual

ASCOM
ASCOM 9D24 TALKER - User manual

ASCOM
ASCOM DT290 User manual

ASCOM
ASCOM 9D24 TALKER - User manual

ASCOM
ASCOM 9d24 MkllMessenger User manual

ASCOM
ASCOM d83 User manual

ASCOM
ASCOM EURIT 133 User manual
Popular Cordless Telephone manuals by other brands

Panasonic
Panasonic KX-TD7680 - Digital Wireless Telephone operating instructions

Gigaset
Gigaset Gigaset 2015 operating instructions

Siemens
Siemens Gigaset Powerline Adapter 200 User giude

Panasonic
Panasonic KX-TG7102HK quick guide

AT&T
AT&T EL51250 quick start guide

Sony
Sony SPP-900 - Cordless 900mhz Telephone operating instructions