Important safety information
CAUTION: To prevent risk of re or battery explosion, replace with the correct
battery type. Dispose of used batteries according to the instructions.
fDisconnect the telephone line from the equipment before open the battery door.
Do not use the battery in following conditions:
fHigh or low extreme temperature during use, storage or transportation.
fReplacement of a battery with an incorrect type that can defeat a safeguard.
fDisposal of a battery into fire or a hot oven, or mechanically crushing or
cutting of a battery, that can result in an explosion.
fLeaving a battery in an extremely high temperature surrounding
environment that can result in an explosion or the leakage of flammable
liquid or gas.
fA battery subjected toextremely low air pressure that can result in an
explosion or the leakage of flammable liquid or gas.
fU
se only the supplied rechargeable battery or replacement battery (model
BT162342/
BT262342).
To order, visit our website at
https://telephones.att.com,or call 1 (800) 222-3111. In
Canada, dial 1 (866) 288-4268.
fThe applied nameplate is located at the bottom or near of the product.
Especially about cordless telephones
fPrivacy: The same features that make a cordless telephone convenient create
some limitations. Telephone calls are transmitted between the telephone base
and the handset by radio waves, so there is a possibility that your cordless
telephone conversations could be intercepted by radio receiving equipment within
range of the cordless handset. For this reason, you should not think of cordless
telephone conversations as being as private as those on corded telephones.
fElectrical power: The telephone base of this cordless telephone must be
connected to a working electrical outlet which is not controlled by a wall switch.
Calls cannot be made from the handset if the telephone base is unplugged,
switched o or if the electrical power is interrupted.
fPotential TV interference: Some cordless telephones operate at frequencies
that may cause interference to TVs and VCRs. To minimize or prevent such
interference, do not place the telephone base of the cordless telephone near
or on top of a TV or VCR. If interference is experienced, moving the cordless
telephone farther away from the TV or VCR will oen reduce or eliminate the
interference.
fRechargeable batteries: This product contains nickel-metal hydride rechargeable
batteries. Exercise care in handling batteries in order not to create a short
circuit with conductive material such as rings, bracelets, and keys. The battery or
conductor may overheat and cause harm. Observe proper polarity between the
battery and the battery charger.
fNickel-metal hydride rechargeable batteries: Dispose of these batteries in a safe
manner. Do not burn or puncture. Like other batteries of this type, if burned or
punctured, they could release caustic material which could cause injury.
2
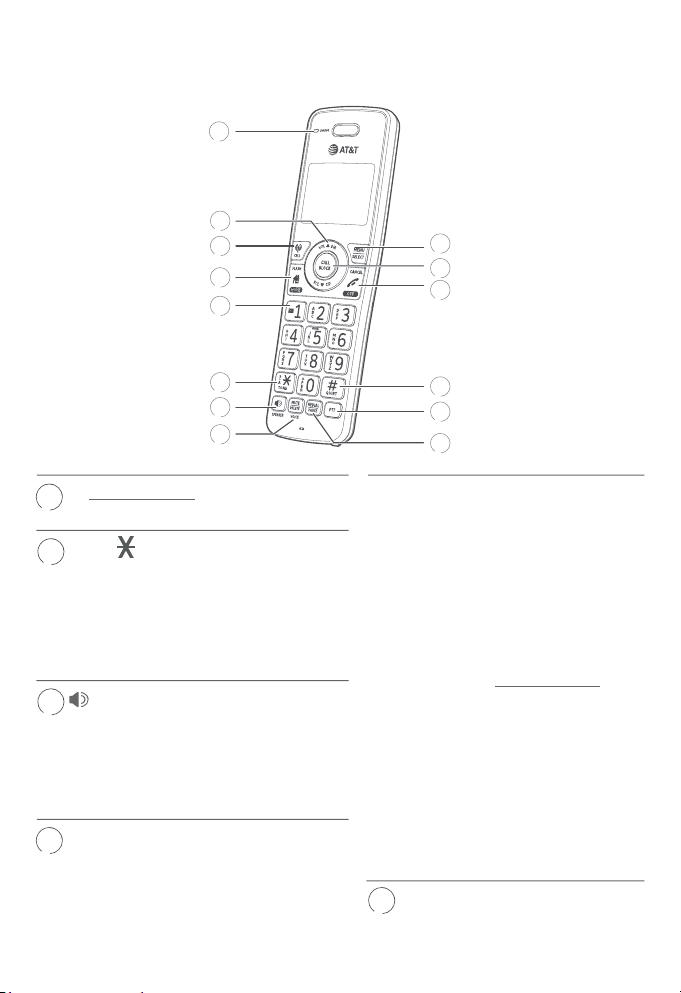
Getting started