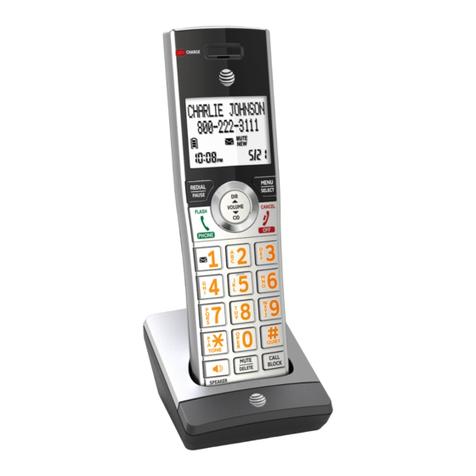
AT&T DEFINITY 8102 User manual

AT&T
DEFINITY®Communications
System Generic 2
and System 85
8102 and 8110 Telephone
User's Guide

NOTICE
While reasonable efforts were made to ensure that the information in this document
was complete and accurate at the time of printing, AT&T can assume no responsibility
for any errors. Changes or corrections to the information contained in this document
may be incorporated into future issues.
TO ORDER COPIES OF THIS DOCUMENT
Contact:
AT&T Customer Information Center
2855 North Franklin Road
P. O. Box 19901
Indianapolis, IN 46219
1-800-432-6600,
In Canada: 1-800-255-1242
Order:
Document No. 555-104-746
Issue 1, May 1991
For more information about AT&T documents, see Business Communications Systems
Publications Catalog
(555-00-010).
HEARING AID COMPATIBILITY
This equipment is compatible with the inductively coupled hearing aids prescribed by
the Federal Communication Commission (FCC).
Prepared by
AT&T Technical Publications Department
Denver, CO 80234
©1991 AT&T
All Rights Reserved
Printed in USA

Your 8102 and 8110 Telephones
The 8102 and 8110 telephones are similar in appearance; however, the 8110 telephone
has an added built-in speakerphone. (If you have an 8110 telephone, you may also be
able to use the Auto Answer feature.) Both telephones are designed to help you use
the many features the the AT&T DEFINITY® Communications System Generic 2 and
System 85.
Check which of these two telephones you are using. Then, familiarize yourself with
your telephone by looking carefully at either Figures 1 and 2, the 8102 telephone, or
Figures 3 and 4, the 8110 telephone, and reading the explanations of the telephones'
many features below the figures
Figure 1. 8102 Telephone, Top View
1

Figure 2. 8102 Telephone, Side and Bottom Views
Figure 3. 8110 Telephone, Top View
2

Figure 4. 8110 Telephone, Side and Bottom Views
Starting with the handset on the TOP VIEW and continuing clockwise
Handset For placing and answering calls. In most cases, you must lift
the handset (go off-hook) before you can use a feature. Also
known as the receiver.
Data jack
Adjunct (equipment)
jack (on the 8102 only)
Auxiliary power jack
(on the 8110 only)
Pause button
Programmable Dialing
buttons
Hold light
For connecting a device such as a modem to your telephone.
This jack is labeled DATA.
For connecting adjunct equipment such as a speakerphone or
headset to your telephone. This jack is labeled ADJUNCT.
For improving the performance of the built-in speakerphone
on long loops where there is limited power available from
the line. This jack is labeled DC IN 9V POWER.
For inserting a 5-second pause/delay into a telephone
number stored on a programmable dialing button or into a
dialing access code in the Auto Pause feature of Redial.
The 12 buttons on which you can program frequently dialed
telephone numbers, emergency numbers, or feature access
codes.
A red light that goes on to remind you that you have a call
on hold.
3

Hold button
Redial button
Auto Answer button
(on the 8110 only)
Mute button
(on the 8110 only)
Message light
Dial pad
Speaker button
(on the 8110 only)
Flash button
Program button
For putting a call on hold.
For redialing the last number you dialed.
For automatically activating the built-in speakerphone
whenever a call comes in.
For turning off the microphone associated with the handset or
the built-in speakerphone.
For indicating when a message has been left for you (slowly
flashing red light).
For dialing telephone numbers and accessing features (12-
button pad). The dial pad is also used with [ PROGRAM ] to
store numbers on the Programmable Dialing buttons or to
store dialing access codes in the Auto-Pause feature of Redial.
For accessing the built-in speakerphone and microphone
combination.
For using features such as Conference with business
communications systems, and for custom calling features if
you are using your telephone at home.
For storing telephone numbers on the programmable dialing
buttons on the front of your telephone and dialing access
codes in the Auto-Pause feature of Redial.
The SIDE VIEW shows the following features
Tone Selector (HI or
LO)
Tone Selector (FAST
or SLOW)
Ringer Volume control
Speaker volume
control
(on the 8110 only)
For selecting one of two tone ringer frequencies (high or low)
For selecting one of two tone ringer modulation rates (fast or
slow).
A 3-position switch to control the volume for the tone ringer.
Slide it up (away from you) for a louder ring, down (toward
you) for a quieter ring. The volume control is labeled
Ringer Vol.
For raising or lowering the volume of the built-in
speakerphone. The volume control is labeled
Speakerphone Vol.
The BOTTOM VIEW, for both types of telephones, includes the line jack and, on the
8102 telephone, the adjunct power jack.
Adjunct power jack
(for adjunct equipment
on the 8102 only)
Line jack
For connecting an auxiliary power source for using adjunct
equipment. This jack is labeled POWER.
For connecting a line cord to your telephone. This jack is
labeled LINE.
4

A Quick Look at the Features
The following lists voice features and briefly explains what each one does and how
you might want to use it.
The features in this guide have been divided into 2 categories:
●
●
Phone Features Those telephone features that you can use immediately no matter
which communications system your telephone is connected to. Note: You can use the
Speakerphone and Mute features only if you are using the 8110 telephone. You
may also be able to use the Auto Answer feature if it is assigned to your 8110
telephone.
Switch Features Those features that you can use only with a DEFINITY Generic 2
or System 85 switching system. Most of these features must be assigned by the
System Manager to your telephone. Check with your System Manager to see
which of these features you can use.
Phone Features
Auto Answer (for 8110 Users) Automatically turns on the built-in speakerphone when
a call comes in. Answer calls without lifting the handset and disconnects the call when
the calling party hangs up.
Hold Puts a call on hold until you can return to it. While a call is on hold, you can
leave your telephone to perform another task. Use when you have a call that you
don’t wish to drop, but which you have to interrupt briefly to do something else.
Redial (with Auto-Pause) Automatically redials the last number you dialed from the
dial pad, either an extension or an outside number. Use to save time in redialing a
busy or unanswered number.
Message Your Message light lets you know that a caller has left a message for you.
You can then follow your System Manager's local message retrieval procedures to get
your message.
Mute (for 8110 Users) Turns off the microphone of the built-in speakerphone or the
handset. Use when you want to confer with someone in the room with you, but you
do not want the other party on the call to hear your conversation.
Programmable Dialing Buttons The 12 programmable dialing buttons are provided
for one-touch dialing of frequently dialed telephone or account numbers. You can also
store emergency numbers, such as 911, or feature access codes on your programmable
dialing buttons. Note: If you want to store more than 12 programmable dialing
numbers, you can use the Switch Feature, "Abbreviated Dialing."
Speakerphone (for 8110 Users) Allows you to place and answer calls without lifting
the handset. Use any time you prefer hands-free communication, both speaking and
listening or for group conference situations.
5

Switch Features
Abbreviated Dialing (AD) Allows you to store selected telephone numbers as 3 or
fewer digits for quick and easy dialing. Each number can be a complete or partial
telephone number, an extension number, or a trunk or feature code. There are 3
possible type of lists — personal, group, and system — and you can have a total of 13
lists. Numbers on a personal list are programmable by you; numbers on group lists
are programmable by the controller of the list; system lists are programmable only by
the System Manager. Use this feature as a timesaver for dialing frequently called,
lengthy, or emergency numbers. Note: Check with your System Manager for the
types of lists you have and how many of each.
Automatic Callback Sends you a special 3-burst ring tone indicating that a
previously busy extension is now available. Use to avoid constant redialing when you
want to speak to someone who is frequently busy on the telephone. Note: You can
use this feature only for extensions, not outside numbers.
Call Forwarding — Busy/Don't Answer Temporarily forwards all your calls to
another extension or to the attendant if your telephone is busy or you do not answer
your calls within a preset number of rings. Use when you want your calls to be
forwarded to a telephone number of your choice.
Call Forwarding — Follow Me Temporarily forwards all your calls to another
extension or to an outside number, depending on your system. Use when you want
your calls to be automatically forwarded to a telephone number of your choice.
Call Park Puts a call on hold at your telephone, for retrieval at any extension. Use
when you need to go elsewhere to get information during a call, or whenever you
want to complete a call from a different location Also, if the call received is for
someone else, use it to hold the call until the called party can answer from the nearest
available telephone.
Call Pickup Lets you answer a call at your telephone for another extension in your
pickup group. Use when you want to handle a call for a group member who is absent
or otherwise unable to answer. Note: You can use this feature only if you and the
called party have been assigned to the same pickup group by your System Manager.
Call Waiting When you are busy on a call, sends a distinctive tone to notify you of
another incoming call waiting to be answered. This allows you to complete or hold
your present call and pick up the waiting call. It will save you from missing calls, and
your waiting caller from having to call back later.
Conference Allows you to add a third party to a call, so that you can conduct a
3-way conversation. (If you want to conference more than 3 parties, call your
attendant for assistance.) Use to set up time-saving conferences or to spontaneously
include a third party. Note: If you have both an active call and a call on hold, you
must terminate one of them before you can use Conference.
Hold (with Second Dial Tone) Puts a call in a holding state until you can return to
it. While a call is on hold, you can place another call, activate another feature, answer
a waiting call, or leave your telephone to do another task. Use when you have a call
that you don’t want to drop, but have to interrupt briefly to do something else.
6
Last Number Dialed Automatically redials the last number you dialed, either an
extension or an outside number. Available with DEFINITY® Generic 2 and System 85
R2V4 and some R3V3 systems. Check with your System Manager to see if the feature
is available in your system.
Leave Word Calling (LWC) Leaves a message for another extension to call you back.
The called party will be able to dial the message center, AUDIX, or a covering user to
retrieve a short, standard message that gives your name and extension, the date and
time you called, and the number of times you called. Use any time you want to have
someone call you back; it will help cut down on repeated call attempts.
Priority Calling Allows you to call another extension with a distinctive 3-burst ring
to indicate that your call requires immediate attention. Use when you have important
or timely information for someone.
Send All Calls Temporarily sends all your calls to the extension of a person
designated to answer them when you cannot (perhaps a secretary, receptionist, or
AUDIX). Use when you will be away from your desk for awhile, or when you do not
want to be interrupted by calls.
Transfer Transfers a call from your telephone to another extension or outside
number. Use when your caller needs to speak further with someone else. Note: Calls
from an outside number to your telephone can be transferred only to an extension, not
to another outside number.
7

How to Use the Features
Many features are available for use with your 8102 and 8110 telephones. The
procedures which follow give short, step-by-step instructions for using each feature.
For your convenience, features are listed alphabetically.
Special Instructions for General Use
As you operate the features assigned to your telephone, keep in mind the following
general rules.
●
●
●
●
Follow carefully all the steps listed in the procedure for the particular feature you
are using.
If you receive an intercept tone (high-pitched, alternating high and low tone) while
attempting to operate any feature, you have taken too much time to complete a
procedural step or have made a dialing error. Hang up, get dial tone, and begin
again at Step 1.
The tone that appears in brackets after a step, such as [dial tone], indicates what you
should hear from your handset after successfully performing that step. For a list of
tones and their meanings, see the sections titled Tones and Their Meanings.
For directions on filling out the Programmable Dialing Buttons Designation Card,
see the procedures for "Progmmmble Dialing Buttons" under Phone Features in
this section.
Quick-Reference Lists
At the end of this guide is a set of quick-reference lists. Use the lists to record your
feature and trunk codes, Abbreviated Dialing personal list items, and message and
attendant extensions. Once you have completed the lists, remove the page from the
booklet (tear along the perforation), and keep the lists near your telephone.
8

Phone Features
The following features can be used no matter which communications system your 8102
or 8110 telephone is connected to. Remember that you can use the Speakerphone and
Mute features only if you are using an 8110 telephone. Some 8110 users will also be
able to use the Auto Answer feature.
Answering and Placing a Call ✔
Note: If you are using the 8110 telephone, you can place and answer calls either by
going off-hook (by lifting the handset) or leaving the handset on-hook and by
pressing [ SPKR ]. Pressing [ SPKR ] simultaneously activates the built-in microphone so
that you can place and answer calls without lifting the handset.
If you are using the 8102 telephone, you can connect an external speakerphone to the
speakerphone/headset jack on the rear of your telephone. For procedures on
answering and placing calls with the adjunct speakerphone, refer to the instructions
that came with the equipment.
To answer a call 1
2
Pick up handset
Speak to other party
To answer a call using 1When you hear the telephone ring, press [ SPKR ]
the speakerphone (for
8110 users)
●Red light next to [ SPKR ] goes on
2Speak to other party
To place a call 1Pickup handset [dial tone]
2Dial desired number
To place a call using 1While on-hook, press [ SPKR ] [dial tone]
the speakerphone (for ●Red light next to [ SPKR ] goes on
8110 users) 2Dial desired number
To end a call 1Hang up handset
or
if you are using the speakerphone, press [ SPKR ]
●Red light next to [ SPKR ] goes off
9

Auto Answer (for 8110 Users)
To have your telephone
automatically answer a
call
Note: For this feature
to operate properly on
your switch, your line
must be administered
as "data restricted."
Also, for your
information, the Auto
Answer button is
removable and can be
replaced by a flat cap
(packed in the box with
8110 terminal). If the
button is removed, the
Auto Answer feature is
disabled.
1
2
3
4
While handset is on-hook, press [ AUTO ]
●Button released to the "up" position
●Colored area under button will remind you that the
Auto Answer feature is active
When a call comes in, the built-in speakerphone on
your telephone is automatically activated
●Both you and the other party hear a short ring and
then a burst of tone to indicate that the call has been
answered
●
Red light next to [
SPKR
] goes on
Speak to caller
When caller ends the call, 8110 telephone hangs up
automatically
or
You can press [ SPKR ] to end the call
●The 8110 telephone is now ready for next Auto
Answer call
To turn off the Auto 1Press [ AUTO ]
Answer feature ●Button reverts to "down" position (you can no longer
see the color around the button)
10

Hold✔
Note: If you want to place or answer another call or activate another feature while
you have a call on hold, you can use the Switch Feature, Hold (with Second Dial
Tone). For directions on using this feature, see "Hold (with Second Dial Tone)" under
the sections, Switch Features.
To put a call on hold 1Press [ HOLD ]
●Red light next to button goes on; call is on hold
To return to the held 1Press [ HOLD ]
call
or
If you have hung up the handset, pick up handset again
from the cradle
●Red light next to button goes off; you are reconnected
to other party
Message✔
To retrieve a message 1Dial the Message extension number
when your message
light is flashing or
11
Ask your System Manager for local retrieval methods

Mute (for 8110 Users)
To prevent the other 1Press [ MUTE ]
party from hearing you ●Red light next to [ MUTE ] goes on
(to mute microphone) ●Other party cannot hear you
To resume talking to 1Press [ MUTE ]
the other party (to turn ●Red light next to [ MUTE ] goes off
on speakerphone
microphone, or handset 2Resume conversation with the other party
again)
Programmable Dialing Buttons
The 12 programmable dialing buttons are provided for one-touch dialing of frequently
dialed telephone numbers. You can also store emergency numbers, such as 911, and
feature codes on these buttons.
Shipped with each telephone is a button designation card on which you can write the
names, numbers, or codes stored on each of the Programmable Dialing buttons. Use
the procdure directly below to remove the plastic cover on the front of your
telephone and place the designation card under it.
Note: You can program up to 20 digits and characters (such as a pause, "#", or "*") on
a programmable dialing button. If the number you want to store is longer than 20
digits and characters, you can do one of the following:
●
●
Store up to 20 digits and characters on one button; store the remainder of the digits
and characters on a second button. To place a call using these buttons, press the
first button; when all of the digits and characters have been dialed, press the second
button in the sequence.
Store up to 20 digits and characters on one button; dial the remainder of the digits
and characters manually.
12

To insert the button
designation card on 1
your telephone
2
3
4
5
If you are using a new telephone, remove the button
designation card from the box in which the telephone
was shipped
In the blank space next to the appropriate
Programmable Dialing button, write or type the name
or telephone number that you want to store there
Fold along the perforated edge(s) and detach the card(s)
from the sheet
Remove the plastic cover by placing your finger in the
finger slot on the right side of the telephone and lifting
up
Place the designation card on the telephone. Replace
the plastic cover over the designation card by fitting the
cover’s bottom tabs into the slots on the telephone and
pressing down, allowing the tabs on the top to snap
into place
To program any of the 1Press [ PROGRAM ] to enter programming mode
12 programmable ●
dialing buttons (while
on-hook)
You hear a low continuous tone while you are in
programming mode
2
3
4
5
Press programmable dialing button on which you want
to store the number
●Tone is briefly interrupted twice
Dial number you want to program on the button (up to
20 digits and characters, including [ PAUSE ] and [ FLASH ]
●The tone to remind you that you are in programming
mode is interrupted at each time you press a dial pad
key, [ PAUSE ], or [ FLASH ]
●You hear a rapid error tone if you try to enter more
than 20 digits and characters
You can use [ PAUSE ] to program a 5-second pause
between a dialing access number (for example, a 9) and
the telephone number, and for certain banking and
long-distance services. (For example, to put a pause
between a dialing access number and the telephone
number, press 9, then [ PAUSE ], then 12125551234.)
To program another programmable dialing button,
repeat steps 2 and 3
Press [ PROGRAM ] when you are ready to exit
programming mode
13

To dial a number with 1Pick up handset
a programmable or
dialing button if you are using an 8110 telephone, you can press
[ SPKR ]
2When you hear dial tone, press appropriate
programmable dialing button
●Number programmed on the button is automatically
dialed
To erase a number 1Press [ PROGRAM]
stored on a 2Press button to be cleared twice
programmable dialing
button 3Press [ PROGRAM]
Redial (With Auto-Pause)
To automatically redial 1Pick up handset
the last number you
or
dialed (from the-dial if you are using an 8110 telephone, you can press
pad) [ SPKR] [dial tone]
2Press [ REDIAL]
To program an
automatic pause for
redialed numbers
●Number is automatically redialed
Note: You will hear a rapid error tone if the dialed
number is longer than 20 elements.
1While the telephone is on-hook,
press [ PROGRAM] [programming tone]
2Press [ REDIAL]
3Press the appropriate access code and number of pauses
in order to insert a long enough waiting time to obtain
a second dial tone.
14

For example, if you need 2 pauses inserted between the
access code, such as "9," and the remainder of the
telephone number you are dialing, you would press
[ PAUSE] twice.
Note: You may store up to 3 different access
code/pause combinations.
4Press [ PROGRAM] again
EXAMPLE In the following example, there are 3 different access code/pause
combinations.
3
4
5
6
[programming tone]
Press [ REDIAL ]
Dial 9 and then press [ PAUSE ] 3 times ( [ PAUSE ] [ PAUSE ]
[ PAUSE ]). Since each depression of [ PAUSE ] adds 0.5
seconds, 3 depressions of [ PAUSE ] is 1.5 seconds.
Dial *9 (the second access code needed in the dialing
sequence in this example) and then press [ PAUSE ] 2
times ([ PAUSE ] [ PAUSE])
Dial *8 (the third access code needed in this sequence
and then press [ PAUSE ] 4 times ([ PAUSE ] [ PAUSE ]
[ PAUSE] [ PAUSE])
Press [ PROGRAM] again
●The access code sequence is stored for redialing at a
later time. Now, when you press [ REDIAL ] to redial a
call using one of the above access code/pause
combinations (for example, 91212555 1234), the
telephone will automatically insert the correct number
of pauses (3 in this example) to ensure waiting the
appropriate length of time to obtain a second dial
tone.
15

To erase all stored
access codes 1
2
3
Press [ PROGRAM]
Press [ REDIAL ] twice
Press [ PROGRAM] again
[programming tone]
Speakerphone (for 8110 Users)
To place/answer a call 1Press [ SPKR ]
without lifting the
handset, or to use ●Red light goes on next to button
speakerphone with any 2Place or answer call, or access selected feature
feature ●Adjust speakerphone volume with sliding arm on
right of set
3Press [ SPKR ] again to hang up
●Red light goes off
To prevent party from 1Press [ MUTE ]
hearing you (to mute
microphone) ●Red light next to [ MUTE ] goes on and other party
cannot hear you
16

To resume talking to 1Press [ MUTE ]
other party (to turn on ●Red light next to [ MUTE ] goes off
speakerphone
microphone, or handset 2Resume conversation with other party
again)
To change from
speakerphone to
handset
1Lift handset and talk
●Red light next to [ SPKR ] goes off
To change from
handset to
speakerphone
1During a call using handset, press [ SPKR ]
●Red light goes on next to [ SPKR ]
2Hang up handset
17

Switch Features
●
●
Since your 8102 or 8110 telephone is connected to a DEFINITY Generic 2 or System 85
communications system, you may be able to use any of the following features. Check
with your System Manager to see which of these features have been assigned to your
telephone.
Special InstructIons
The first time you use these procedures, you will need to customize them for yourself
by following the directions below. Your System Manager can supply the information
required.
To the right of each feature name is a box. For each feature that you have, mark a
[ ✔ ] in the blank box as a reminder. There is already a check in the box beside the
Conference, Hold, and Transfer features.
You can activate or cancel most of the features by dialing 2- or 3-digit code. In the
blanks provided within the procedures, write in the assigned feature code numbers.
Note: You can store these feature codes on Programmable Dialing buttons
(including [ FLASH ]).
Abbreviated Dialing (AD)
Note: Both the 8102 and the 8110 telephones have 12 Programmable Dialing buttons
on which you can store telephone numbers or access codes. In addition, DEFINITY
Generic 2 and System 85 allow you to store numbers in a maximum of 3 Abbreviated
Dialing lists.
To program or
reprogram an outside
number, extension, or
feature code into a
personal list
1
2
3
4
5
On a separate sheet of paper, jot down the outside
numbers, extensions, and feature codes you want to
program as items on your personal list (see example to
the left)
Note: Each telephone number or feature code is stored
as a separate list item.
Dial Abbreviated Dialing program code (while off-hook)
[confirmation tone]
Dial personal list code
Dial desired list item number (for example, 09, 01-95,
and so on, depending on list size) [dial tone]
Dial outside number, extension, or feature code you
want to store
18
Other manuals for DEFINITY 8102
1
This manual suits for next models
2
Table of contents
Other AT&T Telephone manuals

AT&T
AT&T SynJ SB67158 User manual

AT&T
AT&T CL4939 User manual

AT&T
AT&T E2912B User manual

AT&T
AT&T BELL 2563HB User manual

AT&T
AT&T Merlin Legend 10BS User manual

AT&T
AT&T 7407 User manual

AT&T
AT&T 500E User manual

AT&T
AT&T SynJ SB67118 User manual

AT&T
AT&T SB67030 User manual

AT&T
AT&T Merlin Legend MLX-10D User manual

AT&T
AT&T E5960C User manual

AT&T
AT&T 964 User manual

AT&T
AT&T 7401 Plus User manual

AT&T
AT&T SynJ SB67158 User manual

AT&T
AT&T 145 User manual

AT&T
AT&T Synapse SB67020 User manual

AT&T
AT&T 1855 - AT&T Corded Phone User manual

AT&T
AT&T E2555 User manual

AT&T
AT&T ML17939 User manual

AT&T
AT&T MDW 9000 User manual