CONTENTS
BEFORE YOU BEGIN ...............1
Choosing a Location
forYour Phone........................... 1
About Caller Identification
(Caller ID) ................................. 1
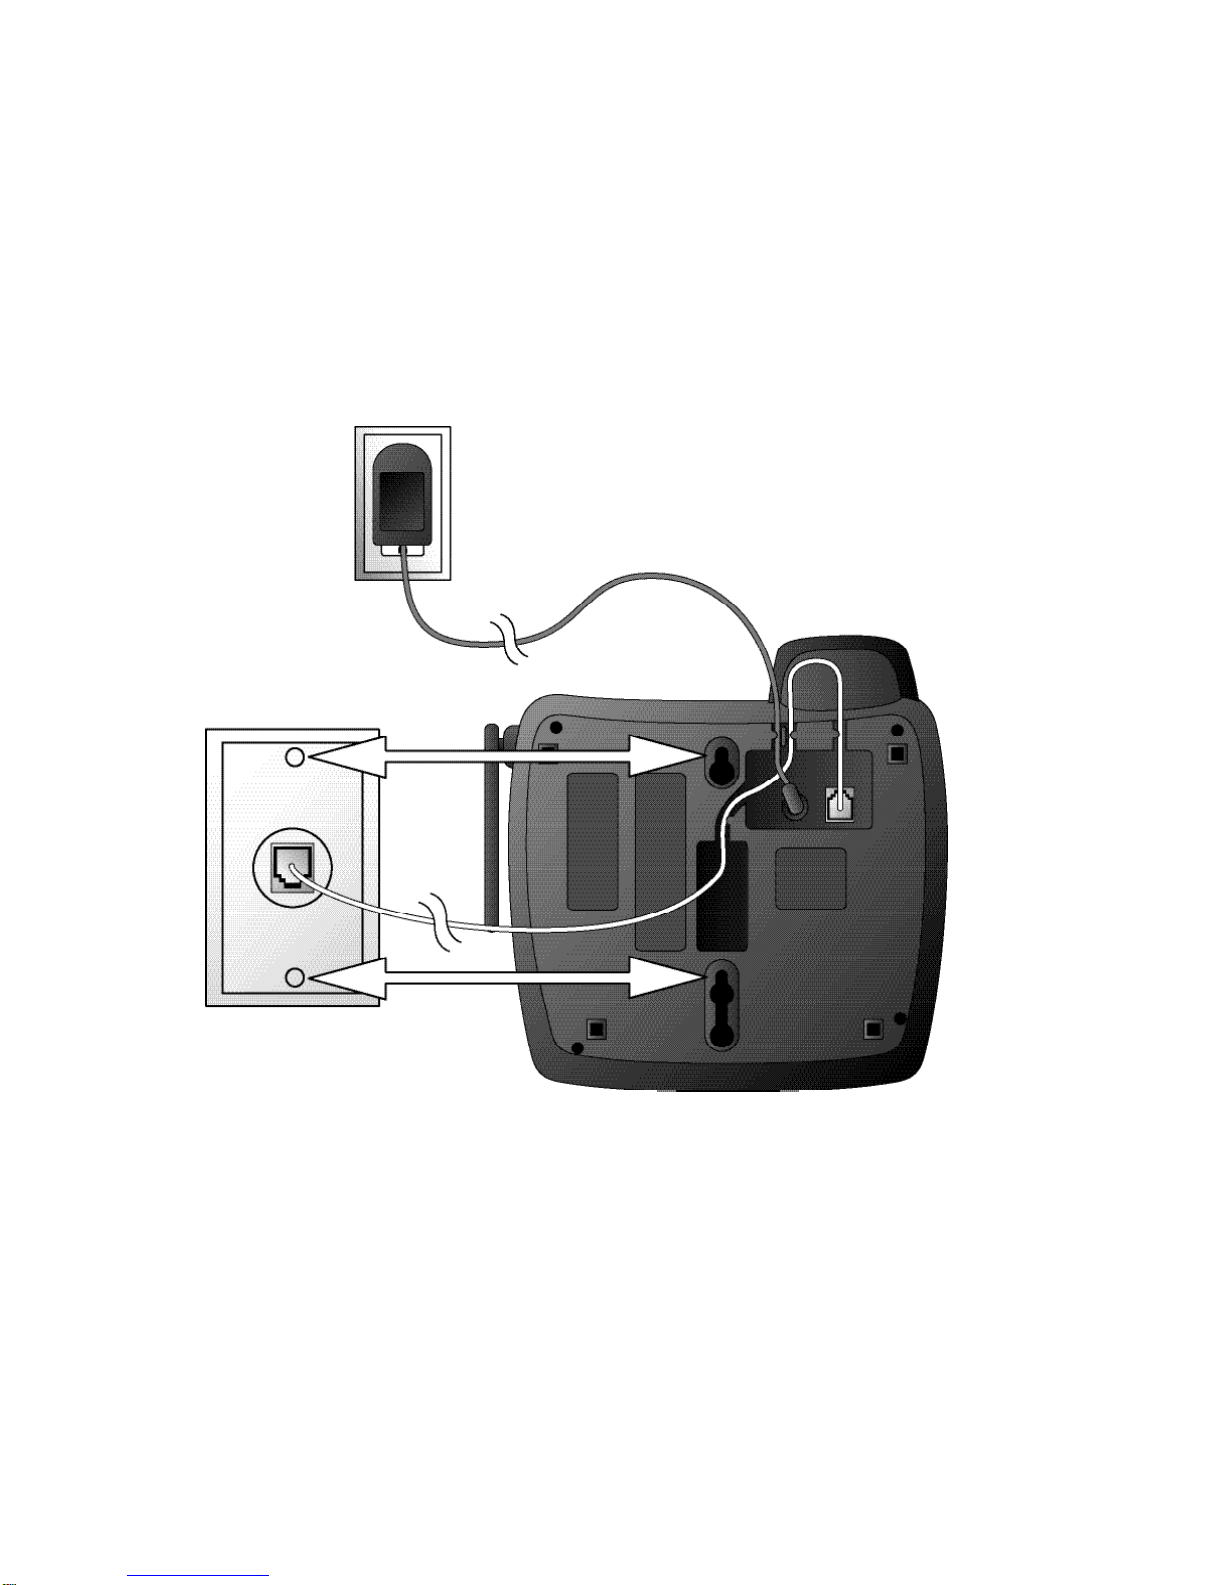
INSTALLATION .......................2
BeforeYou Install.......................... 2
Table/Desk Installation ................. 3
Wall Installation ............................ 5
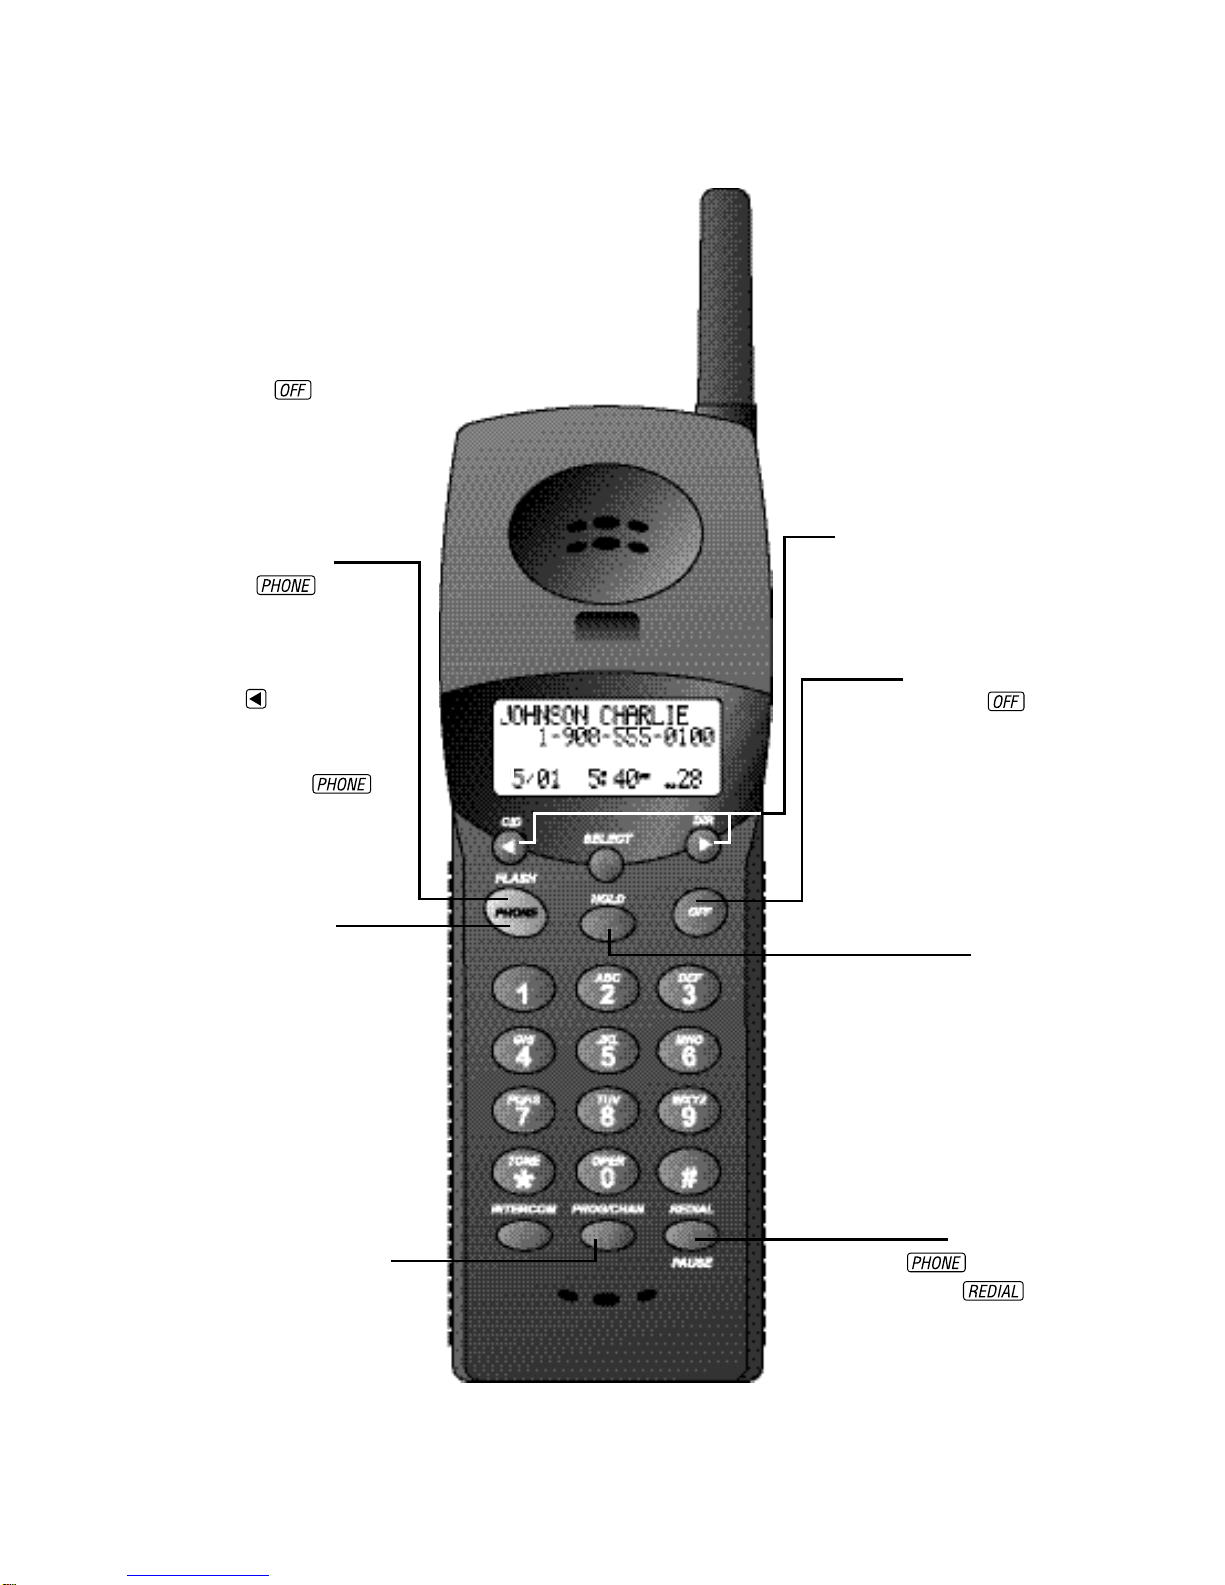
TELEPHONE OPERATION
AT THE HANDSET..........................6
Make a Call.................................... 6
Answer a Call................................ 6
End a Call...................................... 6
Change Channel............................ 6
Redial ............................................ 6
HandsetVolume............................ 6
Flash/CallWaiting.......................... 6
Hold .............................................. 6
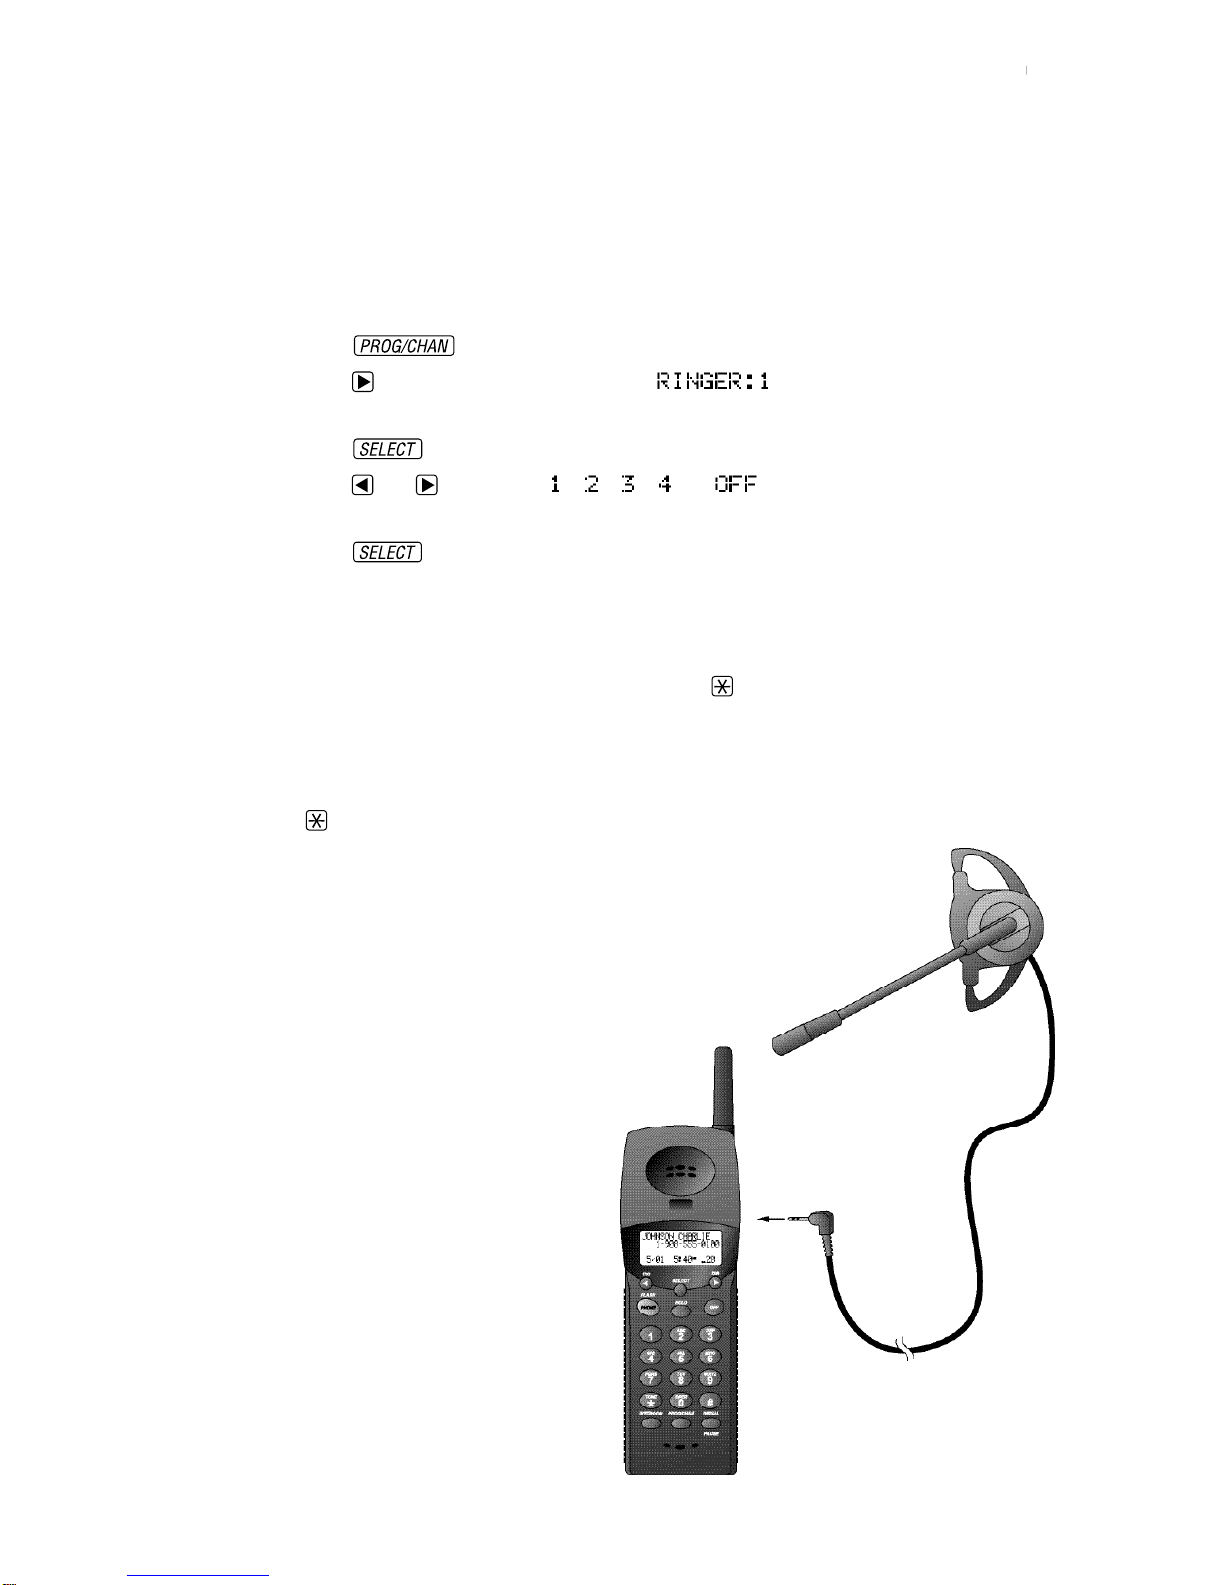
Handset Ringer Style/
Battery Save............................... 7
TemporaryTone Dialing................ 7
Headset Jack...................................7
Operating Range........................... 8
Display Screen Messages............... 8
TELEPHONE OPERATION
AT THE BASE ..............................9
Flash.............................................. 9
Hold .............................................. 9
Make,Answer or End a Call .......... 9
Mute.............................................. 9
Redial............................................ 9
SpeakerVolume............................. 9
Base RingerVolume Switch ........ 10
Intercom/Page ............................ 10
TELEPHONE MEMORY
AT THE BASE ............................11
Store a Number in
Base Memory........................... 11
Dial Number in Base Memory .... 11
TELEPHONE DIRECTORY ......12
Store a Number/Name in
the Directory........................... 12
Edit a Number/Name Stored
the Directory........................... 13
Delete a Number/Name Stored
the Directory........................... 14
Dial a Number from
the Directory........................... 14
CALLER ID OPERATION ........15
About Call History ...................... 15
Review Call History.................... 15
Delete Records from
Call History.............................. 16
Dial a Displayed Number............ 16
Store a Call History Record
in the Directory....................... 17
Display Screen Messages............. 17
Turn off the Base NEW CALL
Indicator.................................. 17
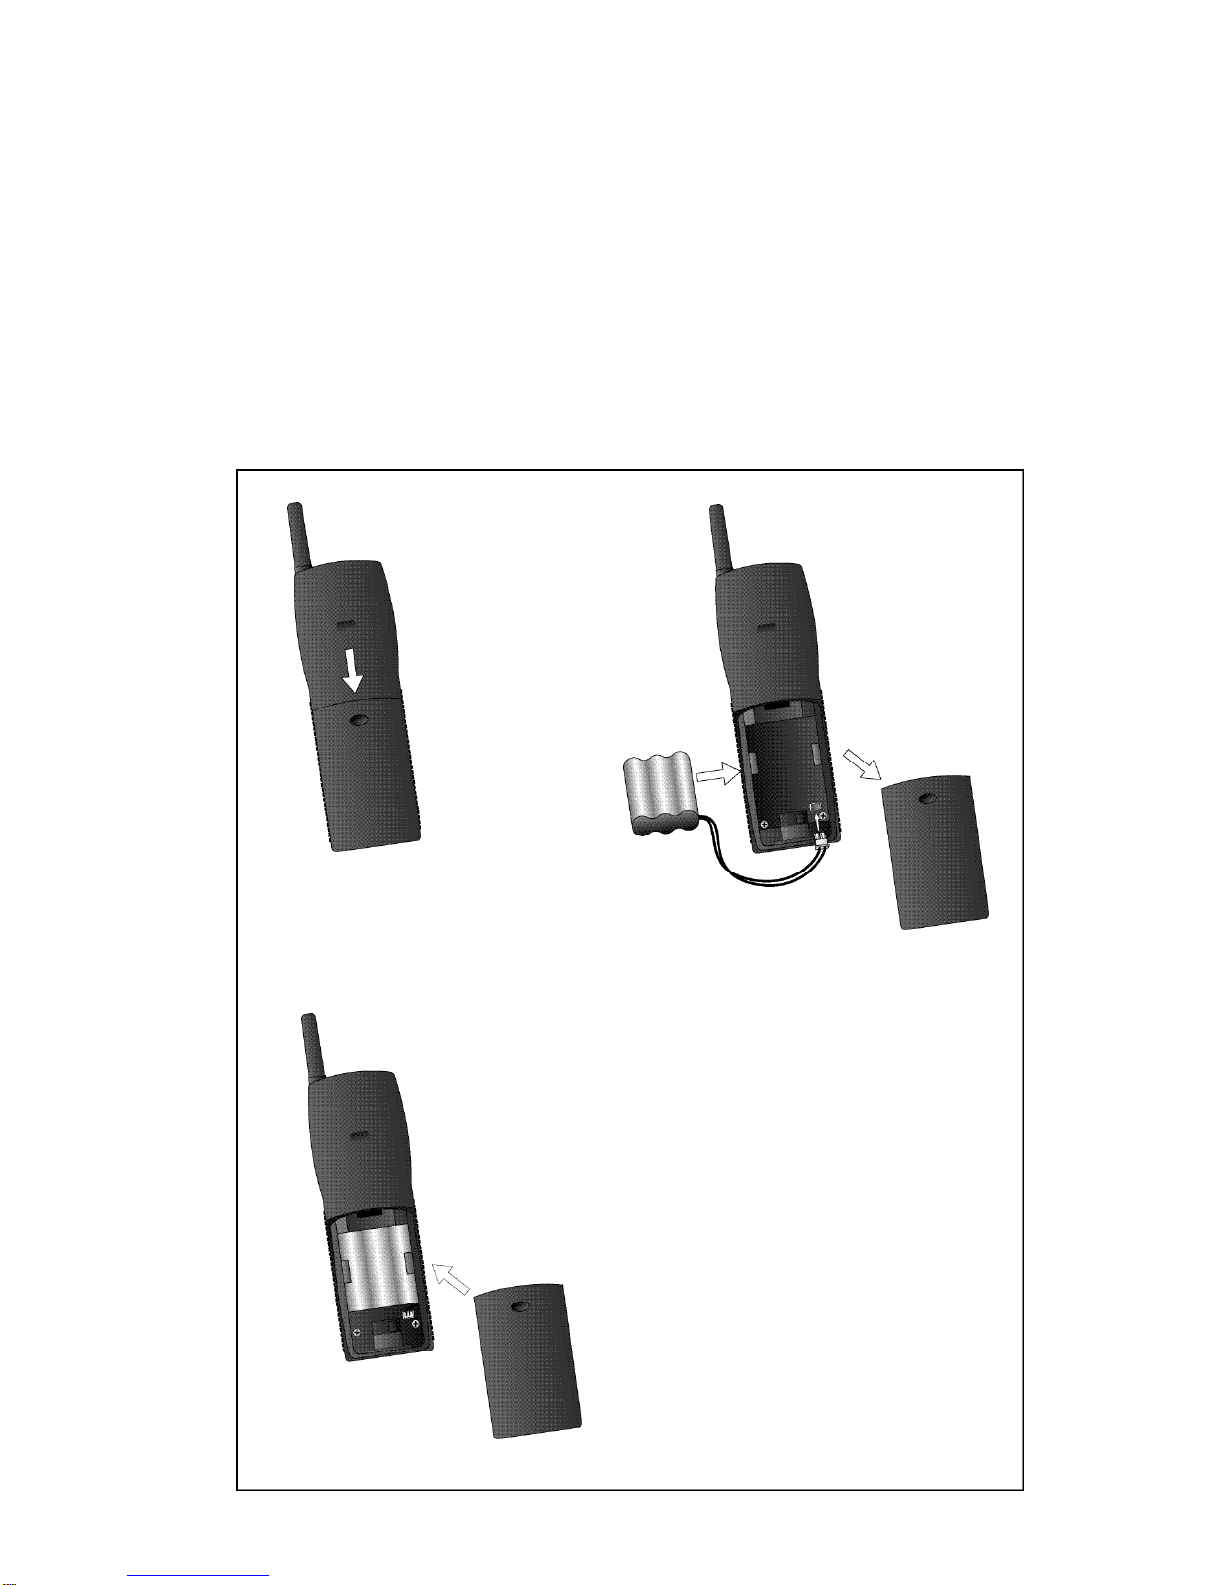
BATTERIES...........................18
Charge the Handset
Battery Pack............................. 18
Replacing the Handset
Battery Pack............................. 19
IN CASE OF DIFFICULTY ......20