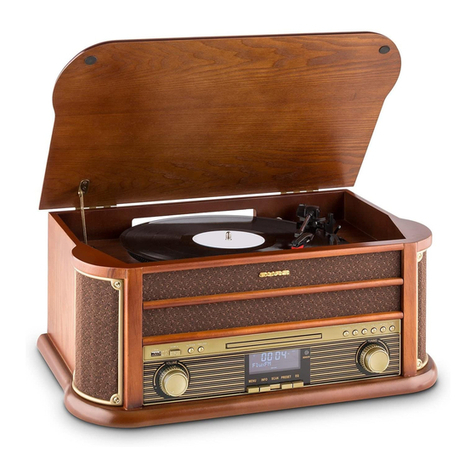
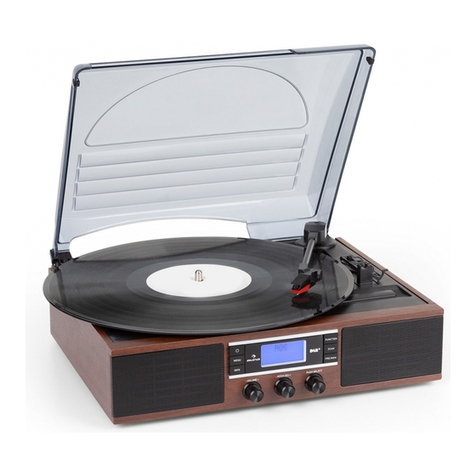
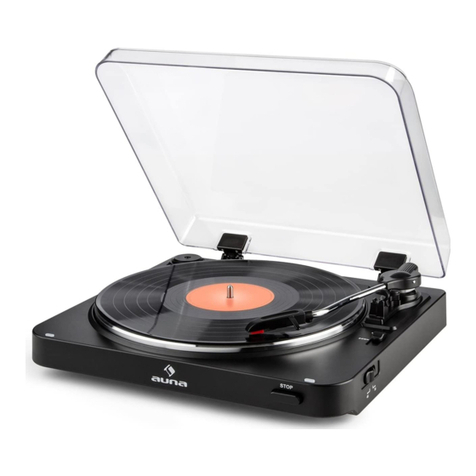
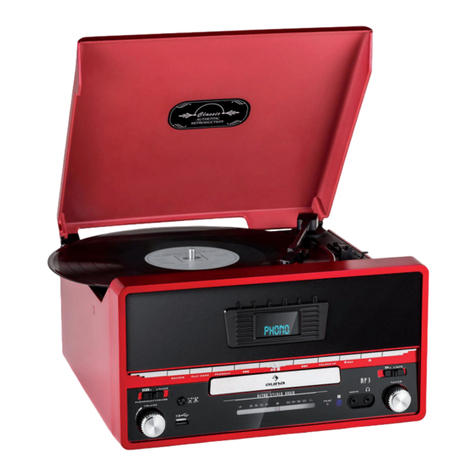
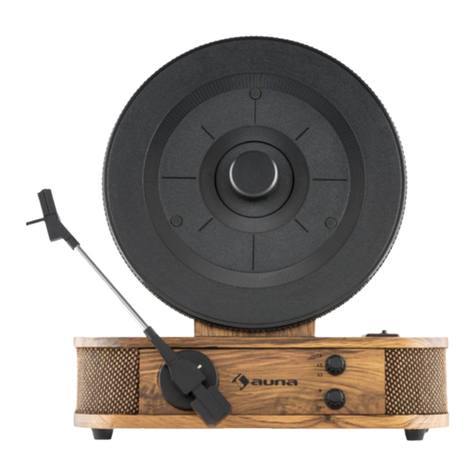
auna 10008991 User manual

www.auna-multimedia.com
Plattenspieler
Record Player
Lecteur de disque
10008991 10008992


3
DE
English 8
Français 13
Sehr geehrter Kunde,
wir gratulieren Ihnen zum Erwerb Ihres Gerätes. Lesen Sie die folgenden
Hinweise sorgfältig durch und befolgen Sie diese, um möglichen Schäden
vorzubeugen. Für Schäden, die durch Missachtung der Hinweise und
unsachgemäßen Gebrauch entstehen, übernehmen wir keine Haftung.
INHALTSVERZEICHNIS
Technische Daten 3
Konformitätserklärung 3
Sicherheitshinweise 4
Hinweise zur Entsorgung 4
Geräteübersicht 5
Vor dem ersten Betrieb 6
Radio wiedergeben 6
Schallplatte wiedergeben 7
Line-Ausgang 7
TECHNISCHE DATEN
Artikelnummer 10008991, 10008992
Stromversorgung 220-240 V ~ 50-60 Hz
KONFORMITÄTSERKLÄRUNG
Hersteller:
Chal-Tec GmbH, Wallstraße 16, 10179 Berlin,
Deutschland.
Dieses Produkt entspricht den folgenden
Europäischen Richtlinien:
2014/30/EU (EMV)
2014/35/EU (LVD)
2011/65/EU (RoHS)
2014/53/EU (RED)

4
DE
SICHERHEITSHINWEISE
1 Lesen Sie die Anleitung vor dem Gebrauch.
2 Bewahren Sie diese auf.
3 Beachten Sie sämtliche Sicherheitshinweise.
4 Das Gerät darf nicht in der Nähe von Wasser oder Feuchtigkeit
verwendet werden.
5 Es darf keine Flüssigkeit auf oder in das Gerät gelangen.
6 Bewegen Sie es vorsichtig; vermeiden Sie Schläge.
7 Decken Sie die. Belüftungsönungen nicht ab.
8 Stellen Sie es nicht in die Nähe von Hitzequellen (z.B. Heizung) auf.
Vermeiden Sie direktes Sonnenlicht.
9 Schließen Sie das Gerät wie hier beschrieben an.
10 Das Gerät verfügt über einen Überlastungsschutz.
11 Reinigen Sie das Gerät wie hier beschrieben.
12 Trennen Sie das Gerät b ei längerer Nichtbenutzung vom Stromnetz.
13 Das Gerät darf nur von einer Fachwerkstatt repariert werden wenn:
a. der Tonabnehmer oder das Netzkabel beschädigt sind,
b. ein Gegenstand darauf gefallen ist und Flüssigkeit darüber geschüttet
wurde,
c. es Regen ausgesetzt war,
d. es nicht funktioniert, obwohl sich nicht geändert hat.
e. es heruntergefallen und der Subwoofer beschädigt ist.
14 Der Benutzer soll das Gerät warten wie hier beschrieben.
HINWEISE ZUR ENTSORGUNG
Bendet sich die linke Abbildung (durchgestrichene
Mülltonne auf Rädern) auf dem Produkt, gilt die
Europäische Richtlinie 2012/19/EU. Diese Produkte
dürfen nicht mit dem normalen Hausmüll entsorgt
werden. Informieren Sie sich über die örtlichen
Regelungen zur getrennten Sammlung elektrischer
und elektronischer Gerätschaften. Richten Sie sich
nach den örtlichen Regelungen und entsorgen
Sie Altgeräte nicht über den Hausmüll. Durch die
regelkonforme Entsorgung der Altgeräte werden
Umwelt und die Gesundheit ihrer Mitmenschen
vor möglichen negativen Konsequenzen geschützt.
Materialrecycling hilft, den Verbrauch von Rohstoen
zu verringern.

5
DE
GERÄTEÜBERSICHT
1 Staubschutz 10 Band/FM LED Anzeige
2 Frequenzbandanzeige 11 Spindeladapter
3 Lautsprecher links 12 Plattenteller Geschwindigkeitsregler
4 Lautstärkeregler 13 Tonabnehmerhalter
5 Ein/aus-Schalter 14 FM Stereo Anzeige
6 Kopfhöreranschluss 3,5 mm 15 FM Antenne
7 Rechter Lautsprecher 16 Auto Stopp-Schalter
8 Frequenzregler 17 Netzkabel
9 Band/FM Stereo Wahlschalter

6
DE
VOR DEM ERSTEN BETRIEB
Aufbau
• Packen sie das Gerät aus und entfernen sämtliches Verpackungmaterial.
• Prüfen sie vor dem Anschluss ob die Netzspannung, der auf dem
Typenschild angegebenen entspricht.
• Decken sie keine Belüftungsönungen ab und lassen sie immer etwas
Raum zur Belüftung um das Gerät.
Anschluss
Verbunden sie den Netzstecker mit einer Steckdose. Stellen sie das Gerät
auf „ Radio“ und die LED-Anzeige leuchtet rot. Das bedeutet, dass das Gerät
betriebsbereit ist und Musik wiedergeben kann.
RADIO WIEDERGEBEN
Manuelle Frequenzeingabe
1 Drücken sie „FUNCTION/BAND” und wählen das gewünschte Band (AM,
FM oder FM Stereo).
2 Wechseln sie mittels Frequenzreglers zu einem Radiosender.
3 Stellen sie die Lautstärke nach ihrem Belieben ein.
FM und FM Stereo Empfang
• Stellen sie den Wahlschalter auf FM und die Sender werden in MONO
empfangen: in Manchen fällen ist so der empfang besser.
• Stellen sie den Bandwahlschalter auf FM Stereo und die Sender werden
in stereo empfangen. Die FM Stereo LED leuchtet.
Hinweise für einen besseren Empfang
• AM: die Stabantenne kann nur durch Bewegen den Gerätes bewegt und
umpositioiert werden.
• FM: das Ferät verfügt an der Rückseite des Gehäuses über eine
Wurfantenne. Diese muss für einen guten Empfang vollständig
abgerollt und ausgelegt sein.

7
DE
SCHALLPLATTE WIEDERGEBEN
1 Entfernen sie den Nadelschutz.
2 Prüfen sie, ob der Abnehmer vor der Verwendung vom Halter gelöst ist.
3 Wählen die die Funktion „PHONO”.
4 Wählen sie die Geschwindigkeit je nach abgespielter Schallplatte.
5 Legen sie eine Schallplatte auf den Plattenteller (verwenden sie den
Spindeladapter wenn nötig).
6 Heben sie den Tonarm von der Ablage und bewegen diesen vorsichtig
an den rand der Schallplatte. Der Plattenteller begingt sich zu drehen.
7 Setzen sie den Tonarm auf die gewünschte Position der Schallplatte.
8 Stellen sie die Lautstärke ein.
9 Am Ende der Schallplatte stoppt die Rotation automatisch. Heben Sie
den Tonarm an und legen diesen zurück auf die Ablage.
Tipp: Sie können das Gerät jederzeit manuell stoppen: heben sie den
Tonarm von der Schallplatte und Legen diesen zurück auf die ablage.
Hiweis: Stoppt die automatische Stopp-Funktion vor Ende der
Schallplatte, müssen sie die automtische Stopp-Funktion deaktivieren
(„o“). Der Tonarm läuft nun bis zum Ende der Platte durch, stoppt aber
nicht. Sie müssen die Wiedergabe dann manuell stoppen. Schalten sie
dazu das Gerät aus, stellen den die Stopp-Funktion wieder auf ein („on“)
und legen den Tonarm wieder auf den Halter.
LINE-AUSGANG
Sie können das Gerät über den Line-Ausgang (13) mit einer Stereoanalage
verbinden. Verbinden sie den Line-Ausgang mit dem AUX-Eingang der
Stereoanlage. Verwenden sie hierzu ein Cinch-Kabel (nicht im Lieferumfang
enthalten).
Hinweis: die Tonwiedergabe über die integrierten Lautsprecher wird
nicht unterbrochen, selbst dann ncht wenn das Gerät mit einer HIFI-
Anlage verbunden ist. Drehen sie die Lautstärke auf ein minimum, so
dass der Klang nur von die HIFI-Anlage kommt.

8
EN
Dear Customer,
Congratulations on purchasing this equipment. Please read this manual
carefully and take care of the following hints to avoid damages. Any failure
caused by ignoring the mentioned items and cautions mentioned in the
instruction manual are not covered by our warranty and any liability.
CONTENT
Technical Data 8
Declaration of Conformity 8
Safety Instructions 9
Hints on Disposal 9
Product Description 10
Before rst Use 11
Listening to Radio 11
Listening to Phono 12
Line Out Connection 12
TECHNICAL DATA
Item number 10008991, 10008992
Power supply 220-240 V ~ 50-60 Hz
DECLARATION OF CONFORMITY
Producer:
Chal-Tec GmbH, Wallstraße 16, 10179 Berlin, Germany.
This product is conform to the following European
Directives:
2014/30/EU (EMC)
2014/35/EU (LVD)
2011/65/EU (RoHS)
2014/53/EU (RED)

9
EN
SAFETY INSTRUCTIONS
1 Read the instructions. All uses guidelines must be read before start device.
2 Keep the instructions for future use.
3 Attention, use and security guidelines must be respected.
4 The device must not be used near water or be put in contact with
moisture.
5 Make sure has no liquid is spilled on device and device openings.
6 Move device carefully, avoid shocks.
7 Do not block the breakdown of the device outputs.
8 Do not place the device near from a heat source (e.g. radiator). Do not
expose it to the Sun.
9 Plug the device as indicate on this information form.
10 This device has a connection with overload protection (security device)
decision-making. If the replacement of decision-making is required,
please you send has an experienced or the device manufacturer
technician.
11 For cleaning the device, please follow the recommendations of the notice.
12 The sector cord should be unplugged a long period of use.
13 Device shall be repaired by a qualied person when:
a. the taken or the power cord is damaged,
b. objects have fallen into the apparatus or a liquid has been spilled into device,
c. device was exposes to the rain,
d. device does not work correctly without notable exterior change,
e. device fell and the subwoofer is broken.
14 The user shall not try to maintain device beyond.
HINTS ON DISPOSAL
According to the European waste regulation 2012/19/
EU this symbol on the product or on its packaging
indicates that this product may not be treated as
household waste. Instead it should be taken to the
appropriate collection point for the recycling of
electrical and electronic equipment. By ensuring this
product is disposed of correctly, you will help prevent
potential negative consequences for the environment
and human health, which could otherwise be caused
by inappropriate waste handling of this product. For
more detailled information about recycling of this
product, please contact your local council or your
household waste disposal service.

10
EN
PRODUCT DESCRIPTION
1 Dust cover 10 FM stereo led indicator
2 Dial pointer 11 Spindle adaptor
3 Left speaker 12 Turntable speed selector
4 Volume knob 13 Pick-up holder
5 Power o/function selector 14 Line out socket
6 Stereo headphone jack 3.5 mm 15 FM antenna
7 Right speaker 16 Auto stop switch
8 Tuning knob 17 AC cord
9 Band/FM stereo selector

11
EN
BEFORE FIRST USE
Installation
• Unpack all parts and remove protective material.
• Do not connect the unit to the mains before checking the mains voltage
and before all other connections have been made.
• Do not cover any vents and make sure that there is a space of several
centimeters around the unit for ventilation.
Connection
1 Connect the power cord to ac outlet
2 Switch the systme to “ radio “ function. If the power led indicator is on
with red Light, it’s mean the power supply is normal. Now your system
is ready to play the Music.
LISTENING TO RADIO
Manual tuning
1 Press “function/band” button and select the desired band (am or fm or
fm-stereo).
2 Tune to the required station by turning the tuning knob.
3 Adjust volume knob to the desired volume level.
FM and FM stereo reception
• Set the fm mode selector at “ fm ” position. Programs are received in
mono mode. In particular when stereo signals are weak. It is preferable
to receive the program in mono.
• Set the fm mode selector at “fm-st” position for receiving stereo
programs. The LED “ST” indicator will light up to show FM stereo
program is receiving.
Hints for best reception
• AM: the receiver has a built-in am bar antenna. If am rececption is weak,
slightly rotate or re-positioning of the unit will usually improve the am
reception.
• FM: the receiver has a build-in fm wire antenna hanging at the rear
cabinet. This Wire should be totally unraveled and extended for best
reception.

12
EN
LISTENING TO PHONO
1 Remove the stylus protector.
2 Be sure that the tone arm is being detached from the tone arm rest
before operating and re-secured again afterwards.
3 Select to “ phono ” function.
4 Set the speed selector to the proper position depending on the record
to be played.
5 Place the record on the platter (use the spindle adaptor if required).
6 Lift the tone arm from the rest and slowly move it to the record side.
The platter will start to rotate.
7 Place the tone arm to the desired position of the record.
8 Adjust the volume to the desired level.
9 At the end of record, the platter will automatically stop rotating. Lift the
tone arm from the record and return it to the rest.
Tip: To stop manually, lift the tone arm from the record and return it to the
rest.
As some kind of record the auto-stop area was out of the unit setting, so
it will stop before the last rack nish. In this case, select the auto-stop
switch to “ o “ position, then it will run to the end of the record but will
not stop automatically (turn o the unit by power button or switch back
the auto-stop switch to “ on “ position to stop the platter rotate). Then
put back the tone arm to the rest position.
LINE OUT CONNECTION
You can connect the system to your whole hi- system by connecting
the line out socket (13) to the auxiliary input socket with a rca cable (not
included).
Remark: the sound from the original build-in speaker will not be
terminated even after connecting to other hi- system via line out
socket. You can turn the volume of system to minimum level if you prefer
the sound coming from the hi- system only.

13
FR
Cher client,
Toutes nos félicitations pour l’acquisition de ce nouvel appareil. Veuillez
lire attentivement les instructions suivantes de branchement et d’utilisation
an d’éviter d’éventuels dommages. Le fabricant ne saurait être tenu pour
responsable des dommages dus au non-respect des consignes de sécurité
et à la mauvaise utilisation de l’appareil.
SOMMAIRE
Fiche technique 13
Déclaration de conformité 13
Consignes de sécurité 14
Conseils pour le recyclage 14
Aperçu de l‘appareil 15
Lecture de la radio 16
Sortie de ligne 17
FICHE TECHNIQUE
Numéro d'article 10008991, 10008992
Alimentation 220-240 V ~ 50-60 Hz
DÉCLARATION DE CONFORMITÉ
Fabricant :
Chal-Tec GmbH, Wallstraße 16, 10179 Berlin,
Allemagne.
Ce produit est conforme aux directives européennes
suivantes :
2014/30/UE (CEM)
2014/35/UE (LVD)
2011/65/UE (RoHS)

14
FR
CONSIGNES DE SÉCURITÉ
1 Lisez les indications avant d‘utiliser l‘appareil.
2 Conservez ce mode d‘emploi.
3 Respectez l‘ensemble des consignes de sécurité.
4 L‘appareil ne doit pas être utilisé à proximité de l‘eau ou de l‘humidité.
5 Aucun liquide ne doit pénétrer à l‘intérieur de l‘appareil.
6 Déplacez l‘appareil avec précaution ; évitez les chocs.
7 Ne couvrez pas les ouvertures d‘aération.
8 N‘installez pas l‘appareil à proximité de sources de chaleur (chauage
par exemple). Evitez l‘ensoleillement direct.
9 Branche l‘appareil tel qu‘il est décrit ici.
10 L‘appareil est équipé d‘une protection contre la surcharge.
11 Nettoyez l‘appareil tel qu‘il est décrit ici.
12 Lors des longues périodes de non-utilisation, débranchez l‘appareil du
secteur.
13 L‘appareil ne doit être réparé que par un spécialiste lorsque :
a. La lecteur de son ou le câble secteur est endommagé,
b. Un objet est tombé sur l‘appareil ou des liquides ont été renversés
dessus,
c. Il a été exposé à la pluie,
d. Il ne fonctionne pas bien que rien n‘ait été modié.
e. Il est tombé et le subwoofer est endommagé.
14 L‘utilisateur doit entretenir l‘appareil tel qu‘il est décrit ici.
CONSEILS POUR LE RECYCLAGE
Le pictogramme ci-contre apposé sur le produit
signie que la directive européenne 2012/19/UE
s‘applique (poubelle à roues barrée d’une croix). Ces
produits ne peuvent être jetés dans les poubelles
domestiques courantes. Renseignez-vous concernant
les règles appliquées pour la collecte d’appareils
électriques et électroniques. Conformez-vous aux
réglementations locales et ne jetez pas vos anciens
produits avec les ordures ménagères. Le respect
des règles de recyclage des vieux produits aide à
la protection de l’environnement et de la santé de
votre entourage contre les conséquences négatives
possibles. Le recyclage des matériaux aide à réduire
l’utilisation des matières premières.

15
FR
APERÇU DE L‘APPAREIL
1 Protection contre la poussière 10 Témoin LED de bande FM
2 Témoin de bande de fréquence 11 Centreur
3 Enceinte gauche 12 Réglage de la vitesse du plateau à
disques vinyles
4 Réglage du volume 13 Support de la lecteur de son
5 Bouton de marche/arrêt 14 Témoin FM Stéréo
6 Prise casque 3,5 mm 15 Antenne FM
7 Enceinte droite 16 Commutateur auto stop
8 Réglage de la fréquence 17 Câble secteur
9 Sélecteur de Bande/FM Stéréo

16
FR
AVANT LA PREMIÈRE UTILISATION
Installation
• Déballez l‘appareil et retirez tous les matériaux d‘emballage.
• Avant de brancher l‘appareil, vériez que la tension de votre secteur
correspond à celle qui est indiquée sur la plaque signalétique.
• Ne recouvrez aucune ouverture d‘aération et laissez toujours un peu
d‘espace autour de l‘appareil pour le ventiler.
Branchement
Banchez l‘adaptateur secteur dans une prise. Mettez l‘appareil sur „ Radio“,
le témoin LED s‘allume en rouge. Cela signie que l‘appareil est prêt à
fonctionner et que vous pouvez lire de la musique.
LECTURE DE LA RADIO
Choix manuel de la fréquence
1 Appuyez sur „FUNCTION/BAND” et choisissez la bande désirée (AM, FM
ou FM Stéréo).
2 Avec le bouton de réglage de la fréquence, choisissez une station de
radio.
3 Réglez le volume selon vos préférences.
Réception FM et FM Stéréo
• Réglez le sélecteur sur FM pour recevoir les stations en MONO : dans
certains cas la réception est meilleure ainsi.
• Réglez le sélecteur sur FM Stéréo pour recevoir les stations en stéréo.
Le témoin LED FM stéréo s‘allume.
Conseils pour une meilleure réception
• AM : vous pouvez modier la position de l‘antenne en déplaçant
l‘appareil.
• FM : l‘appareil dispose d‘une antenne laire à l‘arrière du boîtier. Pour
une bonne réception, celle-ci doit être entièrement déroulée et étendue.

17
FR
LECTURE DES DISQUES VINYLES
1 Retirez la protection de l‘aiguille.
2 Avant d‘utiliser l‘appareil, vériez que le lecteur de son est bien libéré
de son support.
3 Choisissez la fonction „PHONO”.
4 Choisissez la vitesse en fonction du disque lu.
5 Placez un disque sur le plateau vinyle (utilisez le centreur si besoin).
6 Soulevez le bras de lecture de son support et déplacez-le avec
précaution vers le bord du disque. La plateau vinyle se met à tourner.
7 Placez le bras de lecture à la position voulue sur le disque.
8 Réglez le volume.
9 A la n du disque, la rotation s‘arrête automatiquement. Soulevez le
bras de lecture et reposez-le sur son support.
Astuce : vous pouvez à tout moment arrêter l‘appareil manuellement :
soulevez le bras de lecture du disque et reposez-le sur son support.
Remarque : si la fonction auto stop arrête la lecture avant la n du
disque, vous devez désactiver la fonction auto stop („o“). Le bras de
lecture poursuit maintenant jusqu‘à la n du disque, mais ne s‘arrête plus
tout seul. Vous devez alors arrêter la lecture manuellement. Pour cela,
éteignez l‘appareil, remettez la fonction auto stop sur ON et reposez le
bras de lecture sur son support.
SORTIE DE LIGNE
Vous pouvez brancher l‘appareil sur une chaîne stéréo par la Sortie de ligne
(13). Branchez la Sortie de ligne sur l‘entrée AUX de la chaîne stéréo. Utilisez
pour cela un câble RCA (non fourni).
Remarque : la lecture de son via les enceintes intégrées ne s‘interrompt
pas, même lorsque l‘appareil est branché sur une chaîne HIFI. Réglez le
volume au minimum pour que le son ne vienne que de la chaîne HIFI.


This manual suits for next models
1
Table of contents
Languages:
Other auna Turntable manuals

auna
auna Verticalo S User manual

auna
auna Belle Epoque 1908 User manual

auna
auna TT-186 DAB User manual

auna
auna Retro Plattenspieler User manual

auna
auna Verticalo SE User manual

auna
auna Graceland TT User manual

auna
auna TT-10 BT User manual

auna
auna ClearTech Record Player User manual

auna
auna TT-Classic Light User manual

auna
auna TT Classic User manual

auna
auna TT-931 User manual

auna
auna Berklee TT Play User manual

auna
auna Verticalo User manual

auna
auna TT-Pure User manual

auna
auna TT-370 User manual

auna
auna Mary Ann User manual

auna
auna TT-186E User manual

auna
auna 10021685 User manual

auna
auna RTT 1922 User manual

auna
auna Belle Epoque 1905 User manual