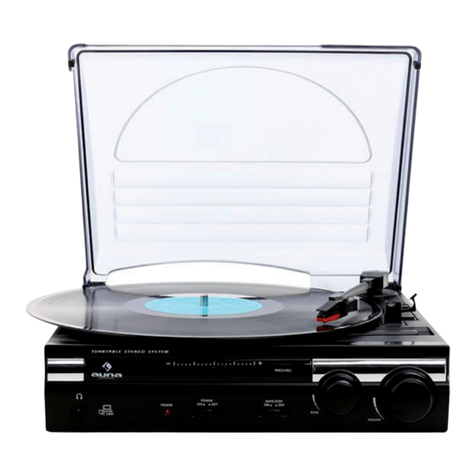
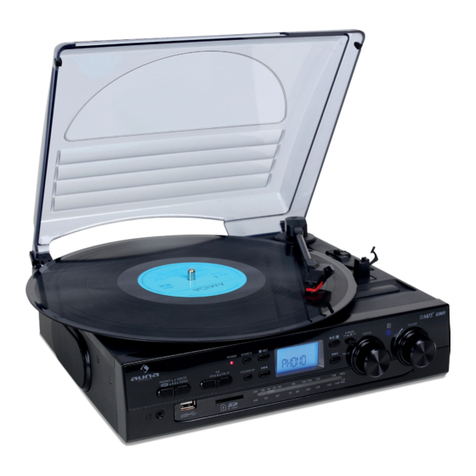
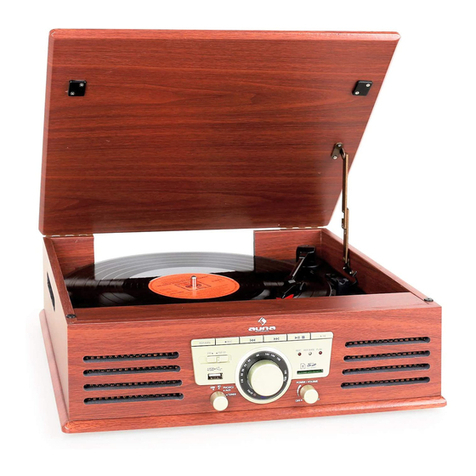
auna 10011073 User manual

http://www.auna-multimedia.com
Retro-Stereoanlage
10011073 10011075 10011078

2
Warnung
Gerät
Zur Reduzierung der Gefahr von Brand, elektrischem Schlag und Beschädigung:
• Setzen Sie dieses Gerät nicht dem Regen aus.
• Stellen Sie keine mit Flüssigkeiten gefüllten Gefäße, wie Vasen, auf dieses Gerät.
• Ausschließlich das empfohlene Zubehör verwenden.
• Reparieren Sie dieses Gerät nicht selbst. Wenden Sie sich zur Wartung an qualiziertes
Kundendienstpersonal.
• Lassen Sie keine Gegenstände aus Metall in dieses Gerät fallen.
• Stellen Sie keine schweren Gegenstände auf dieses Gerät.
Netzkabel/Netzteil
Zur Reduzierung der Gefahr von Brand, elektrischem Schlag und Beschädigung:
• Gewährleisten Sie, dass die Spannung der Stromversorgung dem auf diesem Gerät angegebenen
Wert entspricht.
• Stecken Sie den Netzstecker vollständig in die Steckdose ein.
• Ziehen Sie nicht am Kabel, knicken Sie es nicht und stellen Sie keine schweren Gegenstände darauf.
• Fassen Sie den Stecker nicht mit nassen Händen an.
• Fassen Sie den Stecker beim Herausziehen an seinem Korpus an.
• Verwenden Sie keinen beschädigten Netzstecker oder eine beschädigte Steckdose.
• Installieren Sie dieses Gerät so, dass das Netzkabel sofort aus der Steckdose gezogen werden
kann, wenn Störungen auftreten.
Kleine Objekte/Verpackungsteile
(Plastikbeutel, Karton, etc.)
• Bewahren Sie die kleine Objekte (z.B. Schrauben und anderes Montagematerial, Speicherkarten)
und Verpackungsteile außerhalb der Reichweite von Kindern auf, damit sie nicht von diesen
verschluckt werden kann. Lassen Sie kleine Kinder nicht mit Folie spielen. Es besteht
Erstickungsgefahr!
Achtung
• Gerät
StellenSiekeineQuellenoenerFlammen,z.B.brennendeKerzen,aufdasGerät.
Aufstellung
• StellenSiedasGerätaufeinetrockene,ebene,wasserfesteundhitzebeständigeOberäche.
• Die Steckdose muss leicht zugänglich sein, um im Notfall das Gerät schnell vom Stromkreis trennen
zu können.
• Installieren oder positionieren Sie dieses Gerät nicht in einem Bücherregal, Einbauschrank oder
einem sonstigen engen Raum. Stellen Sie eine gute Belüftung des Gerätes sicher.
• Stellen Sie das Gerät nicht auf Verstärker oder andere Geräte, die heiß werden können. Diese
Hitze könnte das Gerät beschädigen.
• Setzen Sie dieses Gerät keinem direkten Sonnenlicht, hohen Temperaturen, starker Feuchtigkeit
und übermäßigen Erschütterungen aus.

3
Netzadapter
• Der Netzadapter kann mit Wechselstrom von 220 - 240 V betrieben werden.
• Verwenden Sie aber einen geeigneten Steckeradapter, wenn der Stecker nicht in die Netzsteckdose
passt.
Bestimmungsgemäßer Gebrauch
Dieses Gerät dient der
• musikalischen Unterhaltung in Innenräumen
Es ist ausschließlich für diesen Zweck bestimmt und darf nur zu diesem Zweck verwendet werden. Es darf
nur in der Art und Weise benutzt werden, wie es in dieser Gebrauchsanleitung beschrieben ist.
Dieses Gerät ist nicht dafür bestimmt, durch Personen (einschließlich Kinder) mit eingeschränkten
physischen, sensorischen oder geistigen Fähigkeiten oder mangels Erfahrung und/oder mangels Wissen
benutzt zu werden, es sei denn,sie werden durch eine für ihre Sicherheit zuständige Person beaufsichtigt
oder erhielten von ihr Anweisungen, wie das Gerät zu benutzen ist. Kinder sollten beaufsichtigt werden,
um sicherzustellen, dass sie nicht mit dem Gerät spielen.
Transport des Gerätes
Bitte bewahren Sie die Originalverpackung auf. Um einen ausreichender Schutz beim Transport des Ge-
rätes zu erreichen, verpacken Sie das Gerät in der Originalverpackung.
Reinigung der äußeren Oberäche
Verwenden Sie keine üchtigen Flüssigkeiten, wie Insektensprays. Durch zu starken Druck beim
AbwischenkönnendieOberächenbeschädigtwerden.Gummi-oderPlastikteilesolltennichtübereinen
längeren Zeitraum mit dem Gerät in Kontakt sein.
Bedienelemente

4
1. Plattenspieler
2. 45 RPM Adapter
3. Tonarmhebel
4. Tonarm
5. Geschwindigkeitsregler
6. Tonarmhalter
7. Display
8. Lautsprecher
9. Sendersuche
10.Önen/Schließen-Knopf
11. “Mode“.Knopf
(Program, Repeat 1,
Repeat Album, Repeat All,
Random)
12. Titelsprung vorwärts
13. Frequenzbandwahlschalter
Fernbedienung
• Entfernen Sie die Plastiksicherung.
• Prüfen Sieg ggf. ob die mitgelieferte Batterie (Typ CR2025 (3V)) korrekt eingelegt ist
(Typ CR2025 (3V)).
• Wechseln Sie leergelaufene Batterien.
1. Play/Pause-Knopf
2. Aufnahme-Knopf
3. Stop-Knopf / Moduswahl
4. Titelsprung rückwärts
5. Titelsprung vorwärts
6. Önen/Schließen-Knopf
7. Prog-Knopf
8. “Mode“-Knopf (Program,
Repeat 1, Repeat Album,
Repeat All, Random)
9. “FOLDER up“-Knopf
10. “FOLDER down“-Knopf
11. Fernbedienungssensor
14. Bassboost
15. Titelsprung rückwärts
16. USB-Eingang
17. Stop-Knopf / Moduswahl
18. Kopfhörerausgang
19. Play/Pause-Knopf
20. Funktionswahlschalter
21. CD-Tür
22. Aufnahme-Knopf
23. Lautstärkeregler
24. Fernbedienungssensor
25. UKW-Antenne
26. Line-Ausgang
27. Auto-Stop-Wahlschalter
28. Stromkabel

5
Gerätenutzung
UKW-Radiotuner
1. Legen Sie den Funktionswahlschalter (20) auf die Position “Radio”.
2. Wählen Sie das gewünschte Frequenzband vermittels des Frequenzbandwahlschalter (13).
3. Stellen Si emit Hilfe der Sendersuche-Reglers einen Sender ein (9).
4. Stellen Sie mit Hilfe der Lautstärkereglers (23) die gewünschte Lautstärke ein.
5. UmdasRadioauszuschalte,legenSiedenFunktionswahlschalter (20) auf die Position„OFF“position.
Antenne
Richten Sie zunächst die Antenne und ggf. das Gesamtgerät aus, um einen optimalen Radioempfang
zu erzielen.
UKW-Stereo- und Mono-Empfang
Sie können den Frequenzbandwahlschalter (13) auf die Position “FM ST.“ legen, um Stereosound
zu erhalten. Empfängt das Gerät Stereosound, wir eine entsprechende Anzeige auf dem Display
eingeblendet.
Plattenspieler
1. Legen Sie den Funktionswahlschalter (20) auf die Position “Phono”.
2. Legen Sie eine Platte auf den Plattenteller. Nutzen Sie ggf. den mitgelieferten Single-Adapter (2).
3. Stellen Sie den Geschwindigkeitsregeler (5) auf 33, 45 oder 78 Umdrehungen pro Minute ein.
4. Entfernen Sie den Tonarmhalter und ziehen Sie den Schutz von der Plattennadel ab.
5. Heben Sie den Tonarm mit dem Tonarmhebel (3).
6. Bewegen Sie den Tonarm an die gewünschte Stelle der Platte.
7. Legen Sie die Nadel vorsichtig auf die gewünschte Steller der Platte.
8. Ist das Ende der Platte erreicht, wird der Plattenteller automatisch stoppen. Heben Sie den
Tonarm und platzieren
Sie diesen in dessen Ausgangsposition
9. Sie können dem Abspielvorgang automatisch stoppen, indem Sie den Tonarm während des
Abspiels heben.
10. Auto-Stop-Funktion (27):
a) In der Position “On” wird das Abspielen der Platte bei Erreichen ihres Endes automatisch
beendet.
b) In der Position “On” wird das Abspielen der Platte bei Erreichen ihres Endes nicht
automatisch beendet. Diese Einstellung bietet sich beim Abspielen einiger Singles an.
Aux-Ausgang (26)
Schließen Sie die Anlage über diesen Ausgang an externe Verstärker oder aktive Lautsprecher an.
Modusauswahl-Knopf (17)
Halten Sie diesen Knopf 3 Sekunden gedrückt, um zwischen dem CD- und dem USB-Modus zu wechseln
Kopfhörerausgang (18)
Schließen Sie hier ihre Kopfhörer an. Nutzen Sie ggf. einen Adapter.
CD/MP3-CD-Betrieb
1. Legen Sie den Funktionswahlschalter (20) auf die Position CD/MP3.
2. DrückendenÖnen/Schließen-Knopf(10),umdieCD-Ladezuönen.
3. Legen Sie eine CD-Ein.
4. DrückendenÖnen/Schließen-Knopf(10),umdieCD-Ladezuschließen.
5. Die CD wird automatisch anfangen zu spielen und das Display die Titelzahl anzeigen.
6. Drücken Sie den Play/Pause-Knopf (19), um mit dem Abspielen zu beginnen oder dieses zu
unterbrechen.
7. Durch Drücken des Stop-Knopfes (18) können Sie den Abspielvorgang beenden.
8. Drücken Sie die Knöpfe (12) bzw. (15) um zwischen Titeln zu springen. Halten Sie die Knöpfe
gedrückt, um innerhalb eines Titels zu spulen.

6
9. Bei einer MP-Disc haben Sie außerdem die Möglichkeit, zwischen Ordnern zu springen, indem Sie
die Tasten (9) bzw. (10) auf der Fernbedienung drücken.
Wiedergabe-Modi
Durch wiederholtes Drücken des Mode-Knopfes (11) können Sie zwischen Wiederholung eines Titels,
Wiederholung eines Albums, Wiederholung des gesamten Datenträgers und Zufallswiedergabe wählen.
Bei der Zufallswiedergabe können Sie durch Drücken der Knöpfe (12) und (15) die Zufallsauswahl
initiieren. Alle Wiedergabemodi werden durch Drücken der „Stop“-Taste annulliert.
Titelprogrammierung
1. Drücken Sie den Stop-Knopf (15)
2. Drücken Sie den Prog-Knopf (11).
3. Wählen Sie mit Hilfe der Knöpfe (12) und (15) einen Song aus, den Sie programmieren wollen.
4. Drücken Sied n Prog-Knopf (11), um ihre Auswahl zu bestätigen.
5. Wiederholen Sie die Schritte 3 und 4 für weitere Titel.
6. Drücken Sie den Play/Pause-Knopf (19), um mit dem Abspielen zu beginnen.
USB-Betrieb
1. Stecken Sie einen USB-Datenträger in den Eingang (16).
2. Drücken Sie ggf. den Modusauswahlschalter (17).
3. Der USB-Datenträger wird automatisch ausgelesen und die Gesamtanzahl der Titel auf dem
Display angezeigt.
4. Das Abspielhandling ist analog zum CD-Betrieb.
Aufnahmefunktion von CD auf USB / MP3-Digitalisierung
1. Legen Sie den Funktionswahlschalter (20) auf die Position CD/MP3.
2. Navigieren Sie mit Hilfe der Buttons (12) und (15) zu dem Titel, den Sie überspielen wollen.
Drücken Sie anschließend den Knopf (19)
3. Drücken Sie den Aufnahme-Knopf (22), um mit der Aufnahme zu beginnen.
4. Bestätigen Sie durch nochmaliges Drücken des Aufnahme-Knopfes (22).
5. Nochmaliges Drücken des Aufnahme-Knopfes (22) stoppt den Aufnahmevorgang.
6. Anmerkung: Es können nur ganze Titel aufgezeichnet werden.
Achtung : Einige CDs können aufgrund von Kopierschutzmechanismen nicht kopiert werden.
Aufnahmefunktion von Plattenspieler auf USB / MP3-Digitalisierung
1. Setzen Sie den Funktionswahlschalter (20) auf die Positon “Phono”.
2. Wählen Sie den aufzunehmenden Song an.
3. Drücken Sie den Aufnahme-Knopf (22), um mit der Aufnahme zu beginnen. Der Aufnahmevorgang
wird durch Einblendung des Symbols „USB“ dokumentiert.
4. Zum Abbrechen der Aufnahme drücken Sie den Stop-Knopf (17).
MP3-Disc auf USB kopieren
1. Legen Sie eine CD und einen USB-Datenträger ein.
2. Wählen Sie den CD-Betriebsmodus mit Knopf (17) aus.
3. Navigieren Sie mit Hilfe der Buttons (12) und (15) zu dem Titel, den Sie überspielen wollen.
Drücken Sie anschließend den Knopf (19)
4. Drücken Sie den Aufnahme-Knopf (22), um mit der Aufnahme zu beginnen. Der Aufnahmevorgang
wird durch Einblendung der Symbole „REC“ / „USB“ dokumentiert.
5. Zum Abbrechen der Aufnahme drücken Sie den Stop-Knopf (17).
Bassboost
Drüken Sie den Bassboost-Knopf (14), um die Bässe anzuheben.

7
Reparaturen
• Reparaturen am Gerät sollten nur von einer autorisierten Fachwerkstatt durchgeführt werden.
• Ein Umbauen oder Verändern des Produktes beeinträchtigt die Produktsicherheit. Achtung
Verletzungsgefahr!
• ÖnenSiedasProduktniemalseigenmächtigundführenSieReparaturennieselberaus!
• Falscher Zusammenbau führt möglicherweise zu Fehlfunktionen oder dem Totalausfall.
• ÖnenSieinkeinemFalldasGerät.
Achtung:
Es wird keine Haftung für Folgeschäden übernommen. Technische Änderungen und Irrtümer vorbe-
halten!
Beachten Sie:
DieGewährleistungverfälltbeiFremdeingrienindasGerät.
Technische Eigenschaften
Stromversorgung: 220-240V 50/60Hz 18W
Hinweise zur Entsorgung
BendetsichdielinkeAbbildung(durchgestricheneMülltonneaufRädern)aufdem
Produkt, gilt die Europäische Richtlinie 2012/19/EU. Diese Produkte dürfen nicht mit
dem normalen Hausmüll entsorgt werden. Informieren Sie sich über die örtlichen
Regelungen zur getrennten Sammlung elektrischer und elektronischer Gerätschaf-
ten. Richten Sie sich nach den örtlichen Regelungen und entsorgen Sie Altgeräte
nicht über den Hausmüll. Durch die regelkonforme Entsorgung der Altgeräte werden
Umwelt und die Gesundheit ihrer Mitmenschen vor möglichen negativen Konsequen-
zengeschützt.Materialrecyclinghilft,denVerbrauchvonRohstoenzuverringern.
Konformitätserklärung
Hersteller: Chal-Tec GmbH, Wallstraße 16, 10179 Berlin, Deutschland.
Dieses Produkt entspricht den folgenden Europäischen Richtlinien:
2014/30/EU (EMV)
2014/35/EU (LVD)
2011/65/EU (RoHS)

8
CAUTION
RISK OF ELECTRIC SHOCK
DO NOT OPEN
CAUTION:
TO REDUCE THE RISK OF ELECTRIC SHOCK, DO NOT REMOVE COVER (OR BACK).
NO USERSERVICEABLE PARTS INSIDE. REFER SERVICING TO QUALIFIED SERVICE PERSONNEL.
Thelightningashwitharrowheadsymbol,withinanequilateraltriangle,isintendedtoalert
the user to the presence of un-insulated “dangerous voltage “within the product’s enclosure
thatmaybeofsufficientmagnitudetoconstituteariskofelectricshocktopersons.
The exclamation point within an equilateral triangle is intended to alert the user to the pre-
sence of important operating and maintenance (servicing) instructions in the literature ac-
companying the appliance.
WARNING :
1. TO REDUCE THE RISK OF FIRE OR ELECTIC SHOCK, DO NOT EXPOSE THIS APPLIANCE TO
RAIN OR MOISTURE.
2. To avoid any damage, don‘t force the cover over its foreseen amplitude.
CAUTION!
Visible and invisible laser radiation when open and interlocks defeated. Avoid
exposure to beam.
REMARK:
Saving energy when the unit has no sound output on turntable player mode, CD mode or USB
about 60 minutes, It will be switched to stand-by automatically. It can be switched ON the
unit by switching the function selector again.

9
LOCATION OF CONTROLS
1. Turntable
2. 45 RPM Adaptor
3. Cue-lever (use this lever
to lift the tone arm. )
4. Tone Arm
5. Speed Selector
6. Tone arm Holder
7. Display
8. Speakers
9. Tuning Control
10. Open / Close Button
11. Mode Button (Program, Repeat 1,
Repeat Album, Repeat All, Random)
12. Skip + Button
13. Band Selector
14. Bass boost Button
15. Skip - Button
16. USB Port
17. Stop/ CD/USB Button
18. Headphone Jack
19. Play / Pause Button
20. Function Selector
21. CD Door
22. Record Button
23. Volume Control
24. IR Sensor
25. FM Antenna
26. Aux Line-Out output Socket
27. Auto Stop (ON/OFF) Selector
28. AC Power Cord

10
FM TUNER
Operation
1. Set the Function Selector (20) to the Radio position.
2. Select the desired frequency band with the Band Selector (13).
3. Tune to the desired radio station by turning the Tuning control (9).
4. Adjust the volume (23) control to desired level.
5.Toturnotheradio,settheFunctionSelector(20)tothePowerOFFposition.
Antenna
Move the antenna wire to a position so as to obtain the best reception.
You may have to move the unit to obtain the best reception.
FM Stereo and Mono Reception
When an FM signal is tuned in, setting the Band selector (13) to FM ST. position will enable the
broadcasting to be received in stereo sound. The FM Stereo indicator (7) will appear on LCD display.
TURNTABLE OPERATION
Preparation
Open the Record Player Cover.
Release the Tone arm Clamp, and remove the stylus protector.
Listening to Records
1. Set the Function Selector (20) to the PHONO position.
2. Place a record on the turntable, over the central spindle. Place the EP adapter over the central
spindle when playing 45RPM records.
3. Set the Speed Selector (5) to 33 or 45 or 78 rpm according to the record.
4. Release the tone arm clamp, and remove the protective cap from the stylus.
5. Lift the Tone arm with the Tone arm Lift Lever.
6. Move the tone arm to the beginning of the record, or to the start of a particular track.
7. Gently lower the tone arm onto the record with the Tone arm Lift lever to start playing.
8.When the record is nished thetone arm will automatically stop. Lift the tone armfromthe
record and return it to the rest.
9. To stop manually, lift the tone arm from the record and return it to the rest.
10. Auto Stop ON/OFF selector on turntable – Set the Function Selector (27) – Switch to ON for
turntable auto stop function
For EP 33 RPM – Switch to Auto stop “On” position - It enables the record auto stop when ending.
ForEP45or78RPM–SwitchtoAutostop“O”position,Itcanplaythewholesong.
Notes:
• Do not stop or turn the platter manually.
• Moving or jarring the turntable without securing the Tone arm clamp could result in damage to the
Tone arm.
• Replace the protective cap on the stylus when not in use.
Aux out Output
You can connect the unit to external speakers (4 OHM) by connecting the speaker output socket L, R
to your external speakers (Not included).
Note:
The sound from the original built-in speakers will still be heard even after connecting the external speakers
SOURCE SELECTING - STOP / CD / USB (17) button
Press this button continuously 3 seconds, It will be switched to CD, or USB mode

11
HEADPHONE USE
This unit will accept stereo headphones (not included) with a 3.5mm plug and an impedance
of 8 ohms or greater. The speakers are automatically disconnected when headphones are
connected to the HEADPHONE JACK
WARNING: USING A HEADPHONES
Please select the proper volume if you want to use headphones. In case of excessive volume
for the headphones, and a drumming in the ear happens, please decrease the volume or stop
usage.Youriskaneectontoyoureardrumandapartialortotaldeafness.Ifyourearshurt,
please contact a doctor.
COMPACT DISC/MP3 DISC OPERATION
LOADING AND UNLOADING COMPACT DISCS
Select CD/MP3 with the Function selector (20) on the unit to choose the CD/MP3 mode.
Open the disc compartment by pressing the CD Open Button (10).
When the disc compartment has opened, remove a disc from its case and place it carefully in the
compartment with the label side facing up. Locate smaller, discs, in the centre depression of the
compartment.
Close the disc compartment.
When the compartment is fully closed, the disc will start turning automatically. The total number of
tracks of the CD will appear on the LCD display.
LISTENING TO COMPACT DISC AND MP3 DISC (CD)
Select CD with the Function selector (20) on the unit to choose the CD mode.
A) In the CD mode
This unit can read CD, CD-R, CD-RW.
B ) In the MP3 mode
This unit can also read as below :
It can play back MP3 DISC.
Listening to CD
1. Select CD with the Function selector (20) on the unit to choose the CD mode.
2. Press the PLAY/PAUSE button on the unit once to start playing the CD from the
rsttrack,and“play”indicatorwillappearonthedisplay.
3. Press the PLAY /PAUSE button again to start playing the CD “pause” indicator will appear on the
display(thetracknumberwillbeashing).
4. To stop playback, press the “Stop/CD/USB” button.
TRACK SKIP
SelectingadierenttrackduringCDPlay
1. Press the SKIP / SEARCH (REW. or F.F.) button on the unit (12,15), the required track number
appears on the display.
2. Press the PLAY / PAUSE button on the unit. Starting again with the track that is currently selected.
SKIP/SEARCH MODE FOR MP3 DISC
1. Press FOLDER UP /DOWN by REMOTE (9,10), the Album no. will change.
2. Press SKIP +/SKIP - (REW. or F.F.) buttons (12,15 )the Track no. will change.
3. When the desired track has been selected, press the „PLAY“ button to start playback.
REPEAT PLAY IN CD
1. When playing the CD, if you desire to repeat the same track only, press the MODE (11) button
on the unit .
2. To repeat all disc, press the MODE twice and the „REP ALL“ display will light up.
3. To cancel repeat play, press the STOP button or press the MODE button repeatedly until the
repeat indicator disappears.
Note: If in „REPEAT ALL“ mode, the normal & program playing will also operate in this function.

12
RANDOM PLAY in CD
1. When playing the CD or MP3 disc,press the MODE button four times, the “RANDOM” indicator will
light up.
2. Press the SKIP +/- button , The tracks will be played randomly.
3. To cancel random play, press the STOP button twice time until the random indicator disappears.
PROGRAMMED DISC PLAY (CD)
Itisnotpossibletoenterprogramsduringdiscplay.PresstheStopbutton(15)rst,thenfollowthe
instructions below.
1. Press the PROGRAM button(MODE)Button(11) on the unit . The following information will be
displayed on the CD Display.
2. Press the Forward and Reverse Skip Track buttons (12,15) on the unit to select the track to be
stored in location i.e. track 03).
3.PressthePROGRAMbutton.Therstprogramselectionisnowstoredintheprogrammemory.
Listening to Programmed Tracks
PressthePlayPausebutton.Discplaywillstartatthebeginningoftherstprogrammedtrack.
To Clear The Program Memory If the disc is playing, press the Stop button to stop the disc.
SelectTunerorPowerotocleartheProgram.
USB OPERATION
1. Insert the memory USB to the slot.
2. Switch the CD/USB button on the unit,press button STOP/CD/USB,the unit will automatically
read the total folders and the number of the total tracks.
NOTE: onlyMP3leformatissupported.
*NotallbrandofUSBashdiscissupported.
PlayingThe Entire USB
1. InsertUSBmode,thesongwillbeonautoplay.Playbackstartswiththersttrack,thedisplay
shows the current track number.
2. Tointerruptplayback,pressPLAY/PAUSEbutton.Thetimeelapsedindicatorwillash.
3. To resume playback, press the PLAY/PAUSE again.
4. To stop playback, press the STOP button.
ENCODING AND STORING FROM A NORMAL CD
You can encode you favorite CD songs into MP3 format and store then into your memory device through
the USB port.
1. Set the Function Selector (20) on the unit to choose the CD mode
2. Press the SKIP +/- button (14,15) to select the track ,then press the PLAY/PAUSE button (19) to
be encoded.
3. PresstheRECORDbutton(22)tostartsyncencodingandthedisplaywillshow“USB”ash,
4. PresstheRECORDbuttontoconrm.
5. Press the Record button (22) or STOP/CD/USB button (17) to stop encoding.
6. Remarks:RecordingCDmustbesynchronizedandpresstheSTOP/CD/USBbuttontoconrm.
It must record the completed song until the end. In case of interrupting or stop record during the
middle of song playing, it cannot be recorded. Then, it should be recorded once again.
WARNING: Some CD’s cannot be recorded onto as they are protected against copy.
ENCODING AND STORING FROM PHONO.
You can encode you favorite EP/vinyl songs into MP3 format and store then into your memory device
through the USB port.
1. Set the Function Selector (20) on the PHONO position
2. Select the track no. to be encoded.
3.PresstheRecordbuttontostartsyncencodingandthedisplaywillshow“USB”ash.
4. Press the STOP/CD/USB button (17) to stop encoding

13
COPYING FROM MP3 DISC
Youcancopythelesfromonmp3discandstorethenintoyourmemorydevicethroughtheUSBport.
1. Insert the mp3 disc and press the function button to the CD .
2. Press the SKIP +/- button(12,15) to select the track ,then press the PLAY/PAUSE button (19) that
you want to copy.
3.Presstherecordingbuttontostartcopythelesandthedisplaywillshow“REC”“USB”ash.
4. Press the STOP/CD/USB button (17) to stop encoding.
BASS BOOST
Press the BBS button once (14 )to ON position to enjoy a more powerful Bass sound.
REMOTE CONTROL UNIT
PREPARATION BEFORE USE
1. Remove the battery cover from the back of the remote control unit.
2. Insert a CR2025 (3V) size battery (included). Insert the battery with the + and - terminals
matching the indication inside the battery compartment.
3. Replace the cover.
1. PLAY/PAUSE BUTTON
2. RECORD BUTTON
3. STOP/CD/USB (source selector)
BUTTON
4. SKIP- BUTTON
5. SKIP+ BUTTON
6. OPEN BUTTON
7. PROG BUTTON
8. MODE BUTTON (Repeat 1,
Repeat Album, Repeat All,
Random)
9. FOLDER UP
10. FOLDER DOWN
11. Remote Sensor
BATTERY REPLACEMENT
When the remote control operation becomes unstable or the distance from which remote control is
possible becomes shorter, replace the battery with new one.
USING THE REMOTE CONTROL UNIT
To use remote control unit, point it at the remote sensor (11) and press the button.
However, as the remote control range is weaker when unit is used at an angle, use directly in front
of the Remote sensor.
• Donotexposetheremotesensortostronglight(directsunlightorarticiallighting)andmakesure
that there are no obstacles between the remote sensor and the remote control unit.
Remarks:
Engergy saving when the unit has no sound output last around 60 minutes on turntable players, CD
mode, USB or SD mode. It will be switched to stand-by automatically. It can be switched ON the unit by
switching the Function selector again.
matching the indication inside the battery compartment.

14
SPECIFICATIONS
Power Supply: AC 230V ~ 50Hz
Power consumption: 18W
Radio Frequency Coverage: FM: 87.5 - 108 MHz
PROTECT YOUR HEARING
Listening advice to avoid hearing damage.
Listening via headphones, earbuds or headsets at a high volume may cause permanent
hearing loss to occur. The louder the volume, the less time is required before your hearing
couldbeaected.
Hints on Disposal
According to the European waste regulation 2012/19/EU this symbol on the product
or on its packaging indicates that this product may not be treated as household was-
te. Instead it should be taken to the appropriate collection point for the recycling of
electrical and electronic equipment. By ensuring this product is disposed of correct-
ly, you will help prevent potential negative consequences for the environment and
human health, which could otherwise be caused by inappropriate waste handling of
this product. For more detailled information about recycling of this product, please
contact your local council or your household waste disposial service.
Declaration of Conformity
Producer: Chal-Tec GmbH, Wallstraße 16, 10179 Berlin, Germany.
This product is conform to the following European Directives:
2014/30/EU (EMC)
2014/35/EU (LVD)
2011/65/EU (RoHS)
This manual suits for next models
2
Table of contents
Languages:
Other auna Turntable manuals

auna
auna NR-620 User manual

auna
auna Belle Epoque 1907 User manual

auna
auna Verticalo S User manual

auna
auna Belle Epoque 1908 User manual

auna
auna TT-10 BT User manual

auna
auna 10031933 User manual

auna
auna TT-Classic Light User manual

auna
auna Blackwood & Deerwood User manual

auna
auna TT-Classic Plus User manual

auna
auna Jerry Lee BT User manual

auna
auna Peggy Sue User manual

auna
auna Vinyl Clean User manual

auna
auna Pureness User manual

auna
auna Peggy Sue User manual

auna
auna TT-138 DAB User manual

auna
auna TT-Classic Plus User manual

auna
auna TT-18SB User manual

auna
auna Graceland TT User manual

auna
auna TT-Classic Light User manual

auna
auna Verticalo User manual