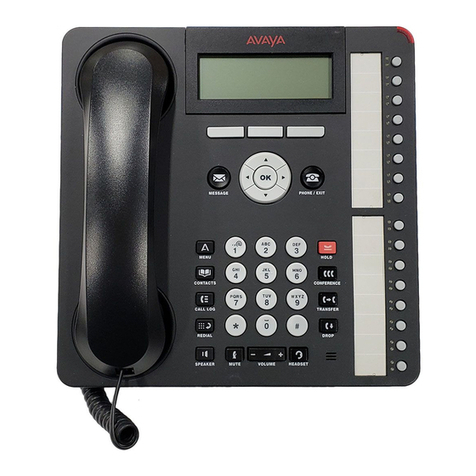
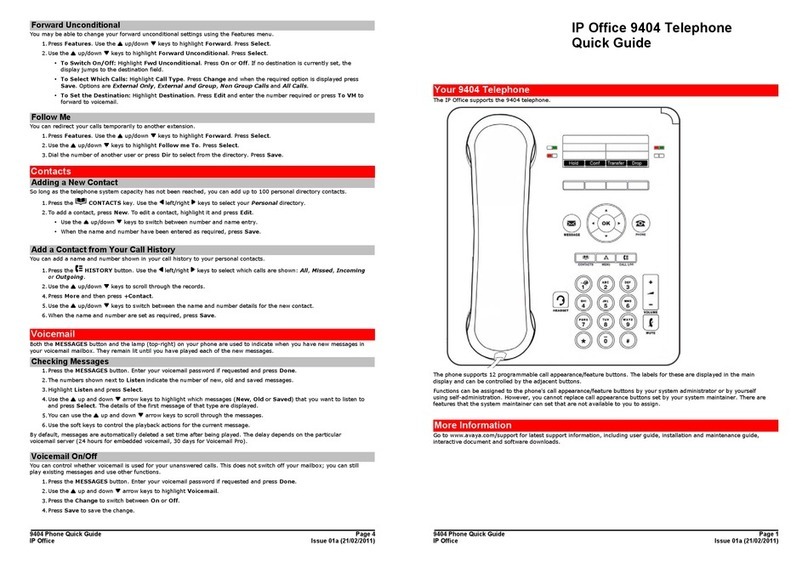
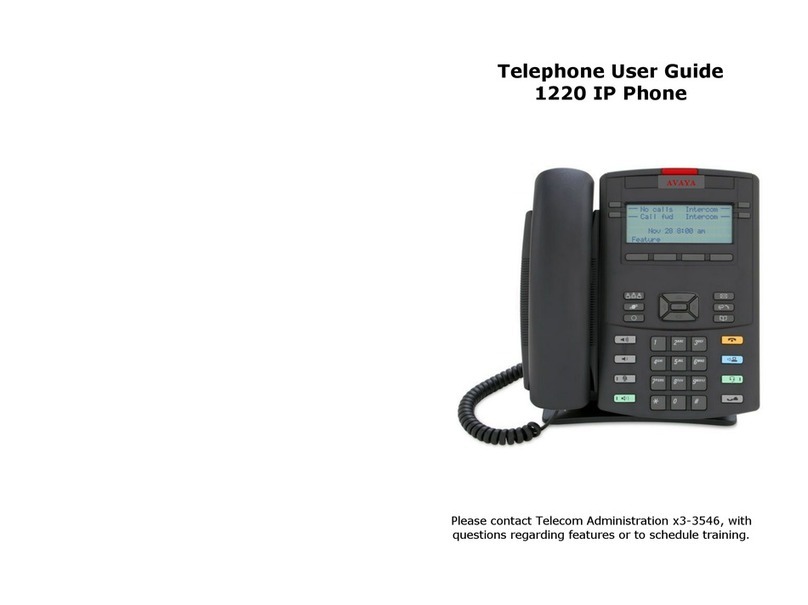
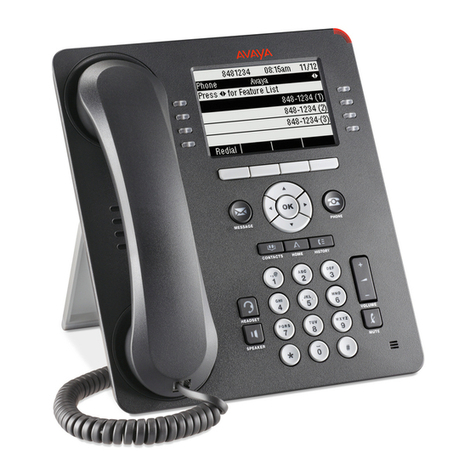
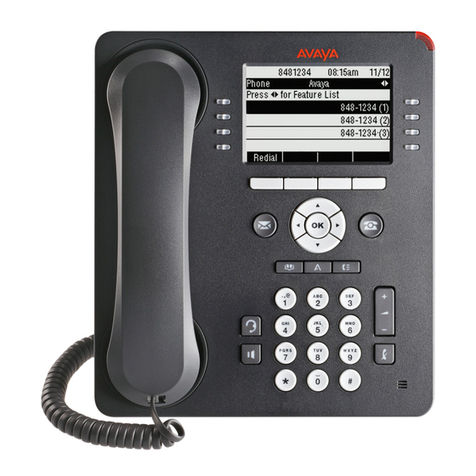
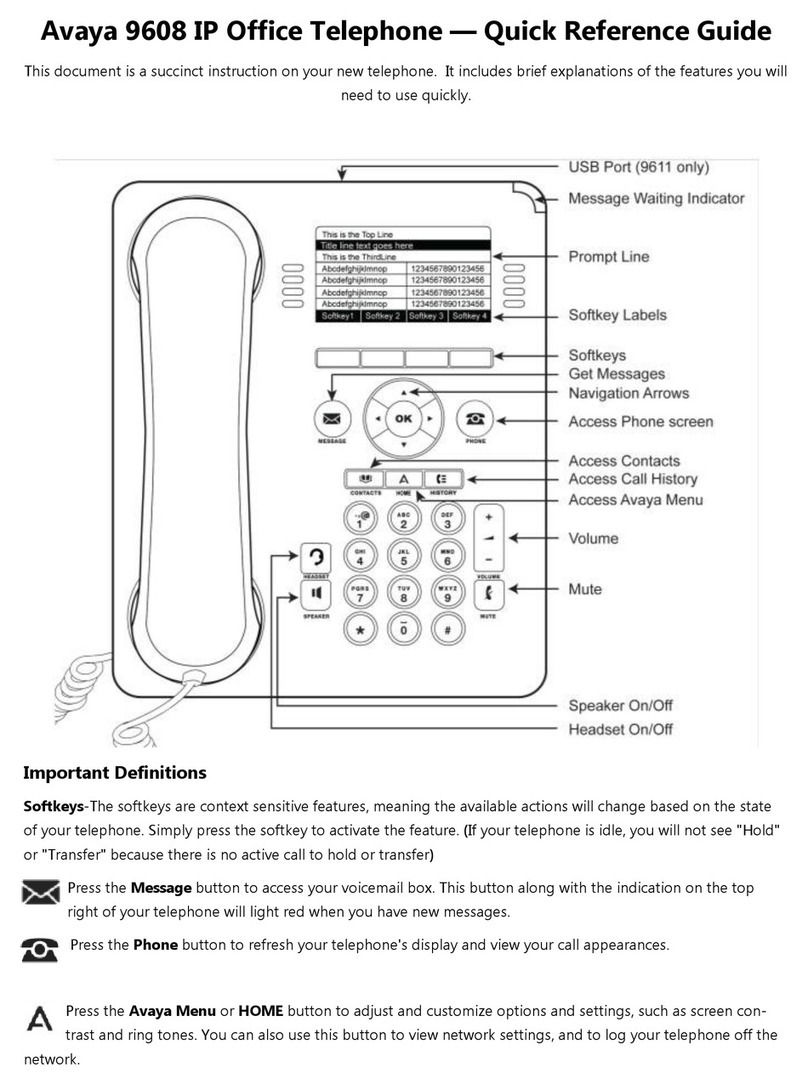
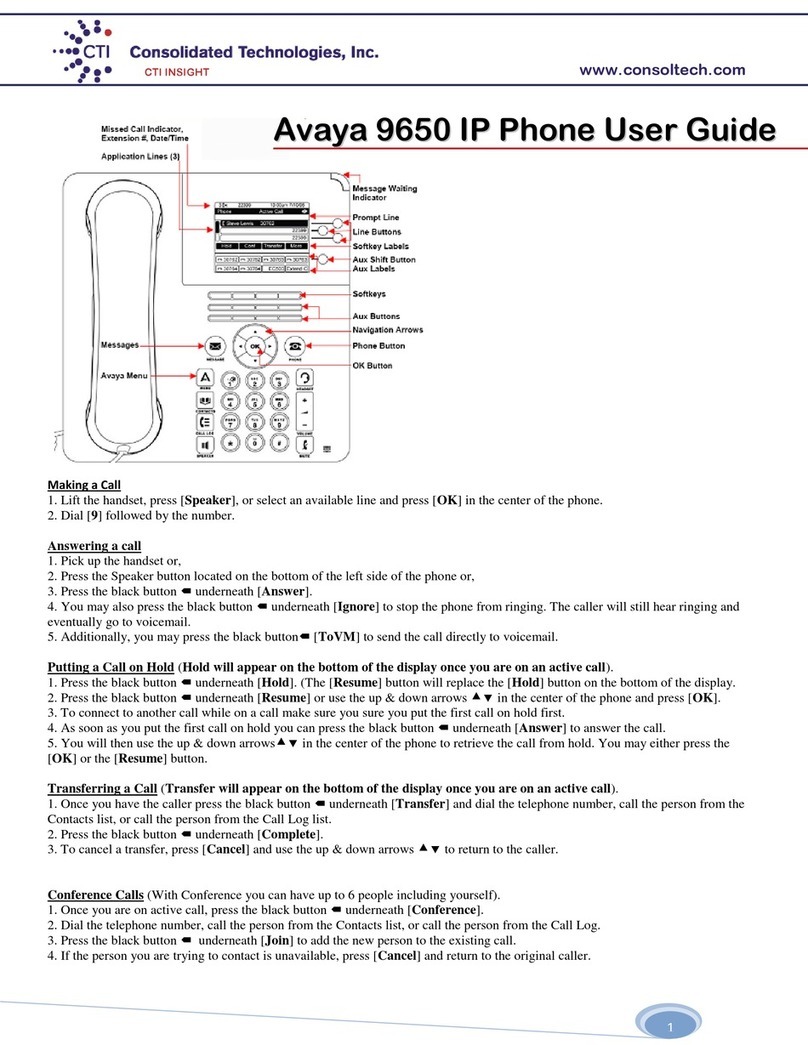
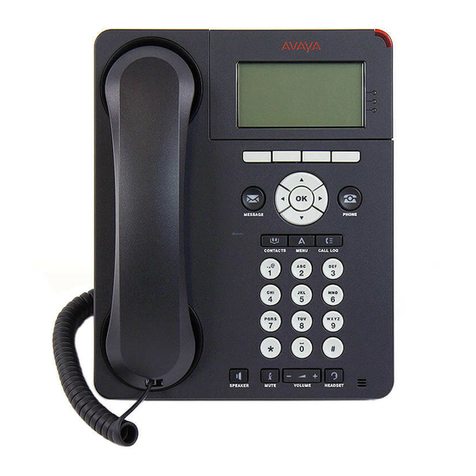
Avaya 9620 Deskphone Edition User manual

For bulk discounts, product demonstrations, free product
trials & world-wide Avaya orders, please contact:
Telefonix Voice & Data
UK (+44) 01252 333 888
http://www.telefonix.co.uk/

Avaya 9620 Manual
For the latest information about the Avaya 9620, please visit:
http://www.telefonix.co.uk/avaya-9620/
40DHB0002USEP - Issue 1 (4th November 2003)

The 4620 Telephone Page ii
4620 User’s Guide Page ii
IP Office 40DHB0002USEP - Issue 1 (4th November 2003)
The 4620 IP Telephone............ 4
Overview of the 4620...................................4
Call Appearance Keys..................................6
Call Handling............................ 7
Answer Incoming Calls.................................7
Make a Call..................................................7
Speakerphone..............................................7
Mute.............................................................8
Hold..............................................................8
Transfer........................................................9
Conference ..................................................9
4620 IP Telephone Options... 10
Telephone Options Overview.....................10
Application Option......................................11
Personalizing Redial....................................11
Phone Screen on Answer............................11
Phone Screen on Calling.............................11
Display Call Timers......................................11
Message Display Rate.................................12
Call Appearance Width................................12
Visual Alerting..............................................12
Call Log........................................................ 12
Personal Ringing Options ..........................13
Viewing the Status Screen.........................13
IP Address Settings.....................................13
Quality of Service (QoS) Information...........13
Phone Interface ...........................................13
Miscellaneous Information...........................14
Contrast Control.........................................14
Logging off the 4620 IP Phone...................14
Reinstating the Phone ................................. 15
Backup/Restore Options............................15
Feature Button Labeling.............................15
Display Language Selection.......................16
Speed Dials............................. 17
Overview of Speed Dials............................17
Using Speed Dials .....................................18
Accessing the Speed Dial
Directory/Dialing a Speed Dial.....................18
Adding a Speed Dial from the Call Log .......18
Editing a Speed Dial.................................... 18
Deleting a Speed Dial..................................18
Adding a New Speed Dial............................19
Using the Call Log ................. 20
Overview of the Call Log............................20
Using the Call Logs....................................21
To Access the Call Logs..............................21
To Delete All Entries from a Log..................21
To Exit the Call Logs....................................21
Using Individual Log Entries.......................22
To Display an Individual Log Entry..............22
To Delete an Individual Log Entry................22
To Turn a Log Entry into a Speed Dial.........22
Web Browsing.........................23
Overview of Web Browsing........................ 23
Accessing External WAP Websites........... 23
Web Navigation Controls........................... 24
Entering Data............................................. 25
Function Keys.........................26
Overview of Function Keys........................ 26
Functions................................................... 26
Absnt - Set Absent Text ...............................26
Acct - Account Code Entry...........................26
AD - Abbreviated Dial...................................26
Apear - Appearance.....................................26
AutCB - Automatic Callback.........................26
Cfrwd - Call Forwarding All ..........................27
CPark - Call Park..........................................27
CPkUp - Call Pickup.....................................27
CWOn - Call Waiting On ..............................27
ClrCW - Clear CW........................................27
Conf+ - Conference Add ..............................28
Drop - Drop...................................................28
DpkUp - Directed Call Pickup.......................28
DCW - Dial CW ............................................28
Dirct - Dial Direct..........................................28
DNDOn - Do Not Disturb On........................28
DNDX+ - Do Not Disturb Exception Add......29
DNDX- - Do Not Disturb Exception
Delete...........................................................29
Emrgy - Dial Emergency..............................29
FwdOf - Cancel All Forwarding....................29
FwNOn - Forward On No Answer On ..........29
FwBOn - Forward On Busy On....................29
FolTo - Follow Me To ...................................29
FwUOn - Forward Unconditional On............30
FwdNo - Forward Number............................30
FwdH+ - Forward Hunt Group Calls On.......30
GrpPg - Group Paging .................................30
HfAns - Internal Auto-Answer.......................30
HdSet - Headset Toggle...............................30
Here- - Follow Me Here Cancel....................30
Here+ - Follow Me Here...............................31
HGNS+ - Set Hunt Group Night Service......31
HGNS- - Clear Hunt Group Night Service....31
HGOS+ - Set Hunt Group Out of Service ....31
HGOS- - Clear Hunt Group Out of
Service .........................................................31
HGEna - Hunt Group Enable .......................31
HGDis - Hunt Group Disable........................31
HoldCW - Hold Call Waiting.........................32
IAuto - Automatic Intercom...........................32
IDial - Dial Intercom......................................32
Intru - Call Intrude.........................................32
Login - Extn Login ........................................32
Logof - Extn Logout......................................32
Music - Hold Music.......................................32
NATim - Set No Answer Time......................33
Park - Call Park to Other Extension.............33
Contents
The 4620 Telephone Page iii
4620 User’s Guide Page iii
IP Office 40DHB0002USEP - Issue 1 (4th November 2003)
PickA - Call Pickup Any...............................33
PickG - Call Pickup Group...........................33
PickM - Call Pickup Members......................33
Queue - Call Queue.....................................33
Recor - Call Record .....................................34
RngOf - Ringer Off.......................................34
Relay - Relay Pulse.....................................34
Rely+ - Relay On ......................................... 34
Rely- - Relay Off .......................................... 34
SAC - Send All Calls....................................34
Steal - Call Steal..........................................35
SusCW - Suspend CW................................35
TmDay - Time of Day...................................35
VMRB+ - Voicemail Ringback On................35
VMCol - Voicemail Collect...........................35
VMOn - Voicemail On..................................35
WUTim - Set Wrap Up Time........................35
Management and
Troubleshooting .................... 36
Overview....................................................36
Testing your phone ....................................36
Testing the Telephone's Lights and
Display.........................................................36
Troubleshooting Chart................................36
Resetting the IP Telephone........................40
Resetting Your Phone..................................40
Power Cycling Your Phone.......................... 41
Index........................................ 42

The 4620 Telephone Page 4
4620 User’s Guide Page 4
IP Office 40DHB0002USEP - Issue 1 (4th November 2003)
The 4620 IP Telephone
Overview of the 4620
This guide covers the use of the Avaya 4620 telephone on Avaya IP Office
telephone systems. The diagram below shows the face of the 4620
telephone and contains numbered “callouts”, which identify the phone’s
primary features and buttons. Each callout is described in detail in Table
1.1, which follows the diagram.
Figure 1-1: 4620 IP Telephone
Table 1-1: 4620 IP Telephone Button/Feature Descriptions
Callout
Number Button/Feature
Name Button/Feature Description
1 Message waiting
lamp Lit continuously when the user has
voicemail messages waiting. Can also
be set to flash when the phone is
ringing.
2 Display screen Information displayed varies according
to the application/function currently
active. When someone is calling in, the
name/phone number of that person
displays here.
3 Call
Appearance/Feature
buttons
Twelve Call Appearance/Feature
buttons provide both call appearance
(incoming and outgoing calls) and
application specific functionality.
4 Softkeys
Used to navigate to or initiate certain
features, such as Speed Dial or Call
Log, as well as control certain actions
within the features. These keys
correspond to the text prompts in the
display screen immediately above them.
5 Phone/Exit
Displays the phone application main
screen or, if applicable, exits the current
IP Office based feature, such as Speed
Dial or Call Log, and normalizes the
display.

The 4620 Telephone Page 5
4620 User’s Guide Page 5
IP Office 40DHB0002USEP - Issue 1 (4th November 2003)
6 Options
Displays the Options main screen, from
which display and application settings
can be updated.
7 Page Right/Left
Shifts from one page to another in the
same application, when the display
presents the paging indicator ( ).
These buttons have no effect when the
paging indicator is not displayed.
8 Speaker LED
Indicator Lights steadily when the Speakerphone
is active.
9 Speaker
Accesses the Speakerphone feature.
10 Headset LED
Indicator Lights steadily when the headset is
active.
11 Headset
With a headset connected, changes
audio control from the handset or
speaker to the headset.
12 Mute LED Indicator Lights steadily when the handset or
headset is muted.
13 Mute
Turns off the active Speakerphone,
handset, or headset microphone, to
prevent the other person from hearing
you.
14 Volume Control
Adjusts the handset, speaker, headset,
or ringer volume, depending on which
item is in use. As you increase or
decrease the volume, the top display
area provides either a speaker, headset,
handset, or ringer icon to indicate for
which item you are adjusting volume,
followed by a visual “volume meter”
showing the volume level. These
buttons
also control the volume of the key click
sounds made when you press fixed
buttons on the phone, such as the
dialpad or softkeys.
15 Headset Jack
Provides a port for connecting a
headset on the underside of the phone.
16 Hold
Red button used to place a call on hold.
17 Transfer
Transfers a call to another phone.
18 Conference
Sets up conference calls with more than
one other person.
19 Drop
Drops the current line on which the
Drop button is pressed.
20 Redial
Redials the last number dialed or
displays the last 6 numbers dialed from
the phone, depending on configuration
via the Options menu.
21 Numeric (Dialing)
Pad Standard 12 button pad for dialing
phone numbers.

The 4620 Telephone Page 6
4620 User’s Guide Page 6
IP Office 40DHB0002USEP - Issue 1 (4th November 2003)
Call Appearance Keys
The default first page of the main call screen contains three keys set as
‘call appearance’ keys. These keys show that the 4620 is a multi-line
phone and are indicated as a=, b= and c=.
Note: The number of call appearance keys can vary and the descriptive
text shown next to the key when idle can be changed. Call appearance
must be assigned sequentially starting with the first call appearance/feature
key.
The call appearance keys also indicate the status of calls as you are
toggling between calls. If you are set to receive call waiting indication, the
waiting call is shown against the next call appearance key. If you then
choose to pick up the waiting call, the status of the current call will change.
These are the call status symbols that can appear in the call appearance
key:
• Incoming Call:
A symbol next to a call appearance key indicates an incoming call.
The caller’s telephone number (if available) is also shown. Pressing
the adjacent key answers the call and puts any current call on hold.
• Connected:
A symbol next to a call appearance key indicates that it is the
currently connected call. The caller’s telephone number (if available) is
also shown. Pressing the adjacent key puts the call on hold.
• On Hold:
A symbol next to the call appearance key indicates a call on hold.
Pressing the adjacent key takes the call off hold and puts any other
current call on hold.

The 4620 Telephone Page 7
4620 User’s Guide Page 7
IP Office 40DHB0002USEP - Issue 1 (4th November 2003)
Call Handling
Answer Incoming Calls
When there is an incoming call, you will hear a ringing tone and a blinking
bell icon appears on the associated call appearance screen.
To answer an incoming call, do one of the following:
Answering the first incoming call
1. Pick up the handset or press the button to use the
speakerphone.
Answering waiting calls
If you have call waiting switched on, the waiting call is shown against the
next call appearance key and a tone is played to further indicate the
waiting call. If you choose to answer the waiting call, press the button
corresponding to waiting call and the current call will be placed on hold.
Make a Call There are several options for making a phone call, depending on what how
you want to use the phone.
Making a call using the handset
1. Pick up the handset.
2. Dial the phone number of the person you want to contact, including any
outside line digits and/or area codes.
Making a call using speakerphone
1. Press .
2. Dial the phone number of the person you want to contact, including any
outside line digits and/or area codes.
See “Speakerphone” for more information on using the speakerphone.
Making a call using speed dial
See “Using Speed Dials”.
Speakerphone The two-way built-in speakerphone allows you to make and answer calls
without lifting the handset. Keep in mind that two-way speakerphones may
not operate satisfactorily in every environment (such as in very noisy
locations).
Using the speakerphone with any feature
1. Press .
2. Make or answer the call, or access the selected feature.
3. Adjust the speakerphone volume if necessary.

The 4620 Telephone Page 8
4620 User’s Guide Page 8
IP Office 40DHB0002USEP - Issue 1 (4th November 2003)
• To change the volume, use the and buttons. The
display bar at the top of the display screen shows the volume level.
(There are eight volume levels.)
Changing from speakerphone to handset
1. Pick up the handset and continue talking.
Changing from handset to speakerphone
1. Press .
2. Hang up the handset.
Ending a speakerphone call
1. Press again.
Mute During an active call, the Mute feature prevents the party with whom you
are speaking from hearing you. This feature is most commonly used in
conjunction with the Speakerphone, but can be used to hold an off-line
conversation at any time during a call.
Preventing the other person on the line from hearing you
1. Press Mute.
• The other party cannot hear you. The indicator next to the Mute
button lights when Mute is active.
2. To reinstate two-way conversation, press Mute again.
Hold The Hold feature puts a call on hold until you retrieve it.
Placing a call on hold
Press the Hold.
• The line display area changes to white text with a dark gray
background,
and the Hold icon displays.
Retrieving the held call
Press the corresponding Line/Feature button on which the call is being
held, or press the Hold.
• The call is now active.

The 4620 Telephone Page 9
4620 User’s Guide Page 9
IP Office 40DHB0002USEP - Issue 1 (4th November 2003)
Transfer The Transfer feature lets you transfer a call from your telephone to another
extension or outside number.
Transferring a call to another telephone
1. With the call active (or with only one held call and no active calls),
press the Transfer.
• The call is placed on hold; the Hold icon displays and you hear a
dial tone while the next available line activates.
2. Dial the number to which you want to transfer the call.
3. If you do not want to announce the call, press the Transfer
again and proceed to Step 6. If you wish to wait for an answer and
announce the call, go to Step 4.
• The call is sent to the extension or number you dialed. A two-
second display message indicates the transfer is complete.
4. Remain on the line and announce the call; if the line is busy or if no one
answers, return to the held call by pressing the Call
Appearance/Feature button on which it is being held.
5. Press Transfer again.
• The call is sent to the extension or number you dialed. A two-
second display message indicates the transfer is complete.
6. Hang up your handset.
Conference The number of conferences available is dependent on the IP Office unit set
up on your system.
Adding another party to a call
1. Dial the first party, then press Conference.
• The line display area changes to white text with a dark gray
background. The current call is placed on hold, the Soft Hold
icon displays and you hear a dial tone.
2. Dial the number of the next party and wait for an answer.
3. Press Conference again to add the new party to the call.
4. Repeat Steps 1- 3 for each party you want to conference in to the call.
Adding a held call to the current call
1. Press Conference.
• The icon on the current line changes to the Soft Hold icon.
2. Press the Call Appearance/Feature button corresponding to the
held call.
3. Press the Conference button again.
• All parties are now connected.
Dropping yourself from the conference
Press the Drop button.
• Disconnects the line on which the drop button is pressed.

The 4620 Telephone Page 10
4620 User’s Guide Page 10
IP Office 40DHB0002USEP - Issue 1 (4th November 2003)
4620 IP Telephone Options
Telephone Options Overview
The (Option) button will allow viewing and configuring of certain
phone settings. These options are different from the function keys that
require configuration by the system administrator.
The phone settings available include:
• Displaying the Phone screen upon answering a call
• Personalizing the ringing pattern
• Determining how you want the Redial feature to work (redial the last
number called or select from a list of the last six calls)
• Displaying the Call Timer
• Changing the rate at which messages display
• Changing the display area’s contrast
• Logging off
• Backing up and restoring Speed Dial button data, feature button
labels, and options settings
• Selecting a different language for the 4620 user interface
• Changing the width of displayed call appearances
• Allowing the Voice message light to flash when the telephone rings
• Disabling and re-enabling the Call Log
This chapter also covers how to verify the status of certain phone/server
interactions. This information can be useful in troubleshooting problems or
when discussing phone operation with your System Administrator.

The 4620 Telephone Page 11
4620 User’s Guide Page 11
IP Office 40DHB0002USEP - Issue 1 (4th November 2003)
Application Option
Personalizing Redial
Redial can be configured to dial the last number dialed or list the last
six numbers dialed for you to choose from. The default is the last number
dialed.
To change Redial:
1. Select the corresponding Call Appearance/Feature button. It will
toggle between Last Number and Last 6 Numbers.
2. Select Save.
Phone Screen on Answer
This action controls the phone screen display when the phone is answered.
When the Phone Screen on Answer? option is set to Yes, the phone
screen appears in the display area when you answer a call, regardless of
the screen you were working with at that time. You will lose any unsaved
work in progress on that screen (for example, labeling a Speed Dial button),
except for the Web Access application (which “remembers” the current web
screen).
When the Phone Screen on Answer? option is set to No (the default
setting), answering an incoming call has no impact on the application
screen displayed, although the top display line will provide an appropriate
message.
To change Phone Screen on Answer:
1. Select the corresponding Call Appearance/Feature button. It will
toggle between Yes and No.
2. Select Save. (To restore the previous setting without changing
it, press Cancel.)
After saving or canceling, the first Options Main screen displays.
Phone Screen on Calling
This action is not supported with the 4620 IP Telephone on Avaya IP Office
System.
Display Call Timers
This action controls whether the duration of the current call is displayed or
not. If set to Yes, the duration of the current call is displayed on the call
appearance key. If set to No, the call duration will not be displayed.
To change the Display Call Timers status:
1. Select the corresponding Call Appearance/Feature button. It will
toggle between Yes and No.
2. Select Save. (To restore the previous setting without changing
it, press Cancel.)
After saving or canceling, the first Options Main screen displays.

The 4620 Telephone Page 12
4620 User’s Guide Page 12
IP Office 40DHB0002USEP - Issue 1 (4th November 2003)
Message Display Rate
When the IP Office sends messages to your phone that are longer than the
display area, the first part of the message is presented for a specific time
interval. The second part of the message is then displayed for a specific
time interval. The Message Display Rate can be either Fast (display
interval is 2 seconds) or Slow - default (display interval is 3 seconds).
To change Message Display Rate:
1. Select the corresponding Call Appearance/Feature button. This will
toggle between Fast and Slow.
2. Select Save. (To restore the previous setting without changing
it, press Cancel.)
Upon saving, the first Options Main screen displays.
Call Appearance Width
When the Call Appearance Width is set to Full (the default), each line on
which a call appears extends the full width of the display, and
accommodates messages in the call appearance display area. When this
option is set to Half, the call appearance area is limited to half of the
display area and call-related messages appear on the top display line.
To change Call Appearance width:
1. Select the corresponding Call Appearance/Feature button. This will
toggle between Full and Half.
2. Select Save. (To restore the previous setting without changing
it, press Cancel.)
Upon saving or canceling, the first Options Main screen displays.
Visual Alerting
When this option is set to No (the default), ringing is the only notification of
an incoming call. When set to Yes, your phone rings and your voice
message indicator light flashes to alert you to an incoming call.
To change Visual Alerting:
1. Press the corresponding Call Appearance/Feature button. To
toggle between No and Yes options.
2. Select Save.(To restore the previous setting without changing
it, press Cancel.)
Upon saving or canceling, the first Options Main screen displays.
Call Log
The 4620 IP Telephone’s Call Log is a standard application that saves
incoming and outgoing call log information in one of three logs:
• Incoming Answered calls
• Incoming Unanswered calls
• Outgoing calls
Having the Call Log Enabled (active) is the default, but this feature can be
Disabled, to stop call logging and delete any calls currently logged.
To enable/disable Call Log:
1. Select the corresponding Call Appearance/Feature button. This will
toggle between Enabled and Disabled.
2. Select Save.(To restore the previous setting without
changing it, press the Cancel.)
Upon saving or canceling, the first Options Main screen displays.

The 4620 Telephone Page 13
4620 User’s Guide Page 13
IP Office 40DHB0002USEP - Issue 1 (4th November 2003)
Personal Ringing Options
The 4620 IP Telephone has eight ringing pattern options. You can hear the
patterns and select the preferred one by using the Personal Ringing
option. Select this option from the Options Main screen, accessed by
pressing the phone’s Option button.
To hear a ring pattern and change the Personal Ringing options:
1. Select the corresponding Call Appearance/Feature button to the left
or right of any numbered pattern. The Current Pattern number
changes to the selected pattern, which rings once as a sample.
2. Repeat Step 1 until the preferred pattern appears as the Current
Pattern.
3. Save the setting by pressing the Save.
Upon saving or canceling, the first Options Main screen displays.
NOTE: Going off-hook, receiving a call, or losing power during ring pattern
selection interrupts the process, and you must start over from Step 1.
Viewing the Status Screen
Views of telephone and system information are available from this screen.
A user normally does not need to view this information, however your
System Administrator may ask you to report certain values from any of the
status screens in the event of problems.
The status screen data can be viewed, but cannot be changed.
1. Select View IP Settings from the Options Main screen (accessed
by pressing the phone’s Option button).
2. To select any option on this screen, press the corresponding Call
Appearance/Feature button. (When a screen has more than one
page, the Paging Indicator displays to allow scrolling from one page
to another using the Page Right/Left Indicator buttons as
applicable.)
3. To return to the first Options Main screen from any status screen,
press Return.
Each option is described in the sub-sections that follow.
IP Address Settings
IP (Internet Protocol) address information identifies certain components and
connections. IP Address information includes the location (address) of your
phone on the IP Office unit, the location and port (connection) of the IP
Office itself, the call routing and mask addresses, and the identification of
the File Server with which your telephone interacts. Although technical in
nature, having this information available and knowing how to get to it can
assist your System Administrator in tracking questions about or problems
with phone functions or connections.
Quality of Service (QoS) Information
QoS refers to a number of mechanisms used to improve audio quality over
the network.
Phone Interface
Your phone interfaces with several system hardware devices and software.
This screen provides information about three of the main interfaces.

The 4620 Telephone Page 14
4620 User’s Guide Page 14
IP Office 40DHB0002USEP - Issue 1 (4th November 2003)
Miscellaneous Information
The miscellaneous status screens provide additional information about your
telephone and its connections.
Contrast Control
On first-time startup, the 4620 IP Telephone’s display area contrast is set to
a mid-level. Should you need to adjust it to better suit your work
environment and lighting, 15 contrast levels are available.
NOTE: You may not be able to distinguish between all 15 contrast level
settings. Some of the upper and/or some of the lower contrast level settings
may appear identical to adjacent settings. This is normal.
To adjust the contrast level:
1. Select the Contrast Control option from the Options Main screen
(accessed by pressing the phone’s Option button).
2. To adjust the contrast, press corresponding to the Right
Arrow/Left Arrow until you reach the desired contrast level. (
symbols provide visual confirmation of the current level.)
3. Save the contrast level you set by pressing the Save, or, to
restore the previous setting without changing the contrast, press
the Cancel.
The first Options Main screen displays after saving or canceling.
Logging off the 4620 IP Phone
Log your telephone off to prevent unauthorized use during an absence, or
for privacy purposes. The Logoff function is accessed by selecting the
Options button.
CAUTION: Logging off deletes all Call Log entries and returns any options
you may have changed to their default values.
To log your phone off:
1. Select the Call Appearance/Feature button corresponding to the
Log Off option.
2. To proceed with the log off, select the Call Appearance/Feature
button corresponding to Yes. To return to the Options Main screen
without logging off, select the Call Appearance/Feature
corresponding to No.
Selecting Yes un-registers your phone from the IP Office, deletes all
Call Log entries and returns any options you may have configured to their
default values.
Selecting No displays the first Options Main screen; your phone remains
logged on to the network and your Call Log and options values remain
unchanged.

The 4620 Telephone Page 15
4620 User’s Guide Page 15
IP Office 40DHB0002USEP - Issue 1 (4th November 2003)
Reinstating the Phone
When your phone is logged off, the top line displays “Extension=*.”
To reinstate your phone following a log off:
1. The telephone screen displays your extension number. Press the
Hash (#) key. If the screen does not display your extension
number, use the dialpad to enter the number, then press the Hash
(#) key.
2. The display prompts for entry of your password. Using the dialpad,
enter your PBX/switch Password then press the Hash(#) key. If a
password was set by the System Administrator, enter any number
and press Hash (#).
The phone is now ready for use.
Backup/Restore Options
The 4620 IP Telephone’s backup/restore options require set up and
configuration by the system administrator prior to use. These options are
displayed on the telephone screen via the Options button, but will only be
amendable if they have been configured by the system administrator.
The backup/restore options provide the ability to:
• Back up your options/preference settings and your Speed Dial
button labels, names, and numbers automatically whenever you
save a change to any one of those settings or buttons.
Automatic backup protects this data against system failure, by
allowing you to restore your backup file of active settings and
button labels.
• Restore options settings and Speed Dial button labels, names
and numbers following a phone failure or replacement.
• Establish or modify FTP (File Transfer Protocol) settings such as
the network server address, directory path for saving backed-up
data, and a User ID and Password for server access via your
phone.
• Verify whether an automatic backup has occurred.
Because each telephone system has unique characteristics and settings,
modifying the Backup/Restore options generally require the assistance of
the System Administrator. For example, it is unlikely that a 4620 IP
Telephone user would know the specific Server IP Address to enter when
setting up FTP parameters without consulting his or her System
Administrator.
Due to the technical nature of this feature, it is highly recommended that
you consult with the system administrator before making any configuration
changes.
Feature Button Labeling
This action is not supported with the 4620 IP Telephone on Avaya IP Office
System.

The 4620 Telephone Page 16
4620 User’s Guide Page 16
IP Office 40DHB0002USEP - Issue 1 (4th November 2003)
Display Language Selection
Non-English speaking users can change the user interface language
displayed on their 4620 IP Telephones. This language selection feature is
accessible via the Options button.
Language options are:
• English (the default display language)
• Français
• Italiano
• Japanese
• Español
• Deutsche
• Nederlands
• Português
To select a language:
1. Select Select display language on the second Options Main
screen. The Language Selection screen displays.
2. Select the corresponding to the language you want your
phone to display when in use.
• If the currently active language is selected, the second
Options Main screen re-displays and no action is taken.
• If any language other than the currently active language is
selected, the Language Confirmation screen displays
prompting “Are you sure?” in the currently active language
and in the new language you selected.
• The four at the bottom of the display are labeled
respectively, Yes and No in both the currently active
language and the selected new language.
3. Choose Yes or No in either language.
• Yes selection: The active language changes to the new
language you selected. The second Options Main screen re-
displays. All screens now display the new user interface
language.
• No selection: The language remains unchanged and the
language selection screen redisplays.
Repeat the procedure from Step 2 to select a different language, or select
Return to return to the second Options Main screen.

The 4620 Telephone Page 17
4620 User’s Guide Page 17
IP Office 40DHB0002USEP - Issue 1 (4th November 2003)
Speed Dials
Overview of Speed Dials
The 4620 can store up to 108 personal speed dials, accessed by selecting
SpDial on the display.
• The speed dials are sorted alphabetically.
• Pressing the or key adjacent to an name, dials the speed dial
number stored with that name.
• The symbol indicates that there are more pages. You can more
between pages using the Page Left and Page Right keys.
Pressing Add allows you to add a new speed dial. You can also press
Edit and an existing speed dial to edit its current settings.
• Note: Speed dials can be used for any numbers that can be manually
dialed from the extension. If for external calls, a dialing prefix is
required; that prefix must be part of the speed dial number.

The 4620 Telephone Page 18
4620 User’s Guide Page 18
IP Office 40DHB0002USEP - Issue 1 (4th November 2003)
Using Speed Dials
Accessing the Speed Dial Directory/Dialing a Speed Dial
Note: You can use the speed dial directory to make a call with the handset
on hook or off hook.
1. Press SpDial to display the speed dial directory.
• If SpDial is not shown, you may have to press Phone Exit to
exit the current screen function.
2. The symbol is shown if there is more than one page of speed dials.
You can more between pages using the Page Left and Page
Right keys.
3. When the speed dial required is shown on the screen, press the or
key adjacent to the speed dial name.
4. Continue as per a normal call.
Adding a Speed Dial from the Call Log
You can create a new speed dial from a call log entry. See "To Turn a Log
Entry into a Speed Dial". This process will start the normal speed entry
screen but pre-filled with the name and number from the call log entry.
Editing a Speed Dial
1. Access the speed dial directory ( SpDial) (see "Accessing the
Speed Dial Directory/Dialing a Speed Dial" on page 18).
2. Go to the page containing the speed dial to edit ( Page Left and
Page Right)
3. Press Edit.
4. Press the or key next to the speed dial to edit.
The editing process is similar to adding a new speed dial, see "Adding a
New Speed Dial “on page 19.
• When editing an existing speed dial, a Delete option is provided
to remove the speed dial from the speed dial directory. When
selected press Delete to confirm or Cancel to exit without
deleting.
Deleting a Speed Dial
1. Access the speed dial directory ( SpDial) (see "Accessing the
Speed Dial Directory/Dialing a Speed Dial" on page 18).
2. Go to the page containing the speed dial to edit ( Page Left and
Page Right).
3. Press Delete.
4. Press the or key next to the speed dial to delete.
5. Press Delete to confirm the deletion. Press Cancel to exit
without deleting.

The 4620 Telephone Page 19
4620 User’s Guide Page 19
IP Office 40DHB0002USEP - Issue 1 (4th November 2003)
Adding a New Speed Dial
1. Access the speed dial directory (see "Accessing the Speed Dial
Directory/Dialing a Speed Dial" on page 18).
2. Press Add.
3. The cursor, a symbol, in initially in the empty name field. You can
move between Name and Number entry by pressing the adjacent
key.
4. Begin entering text using the telephone keypad. Each key is marked
with the letters it provides. You may have to press the key more than
once depending on the character you require.
• For example, the 2key is also marked as A, Band C. To enter a C
press the key until a C is displayed.
• If the next character you want to enter is on the same key, press
and then enter the next character.
5. As you enter characters you can use a number of other controls. Note:
The controls on this screen are context sensitive, ie. they only appear
when applicable. For example Save only appears when a name and
number have been entered.
• Save - Save the speed dial changes.
• - Moves the cursor left one character.
• - Moves the cursor right one character.
• Cancel - Return back to the speed dial directory without
making any changes.
• Clear - Delete the whole name or number entry.
• Case - Change the case of the current character between upper
and lower case.
• Backspace - Delete the character before the cursor.
• Apostrophe - Insert an apostrophe (') symbol.
• Comma - Insert a comma (,) symbol.
• Space - Insert a space.
Other manuals for 9620 Deskphone Edition
13
Table of contents
Other Avaya IP Phone manuals

Avaya
Avaya J189 SIP User manual

Avaya
Avaya one-X 9650 User manual

Avaya
Avaya J139 User manual

Avaya
Avaya one-X 9600 Series Product manual

Avaya
Avaya 1140E Safety guide

Avaya
Avaya T3 Comfort User manual

Avaya
Avaya i20 Datasheet

Avaya
Avaya J169 User manual

Avaya
Avaya 9640G User manual

Avaya
Avaya T3 Classic User manual

Avaya
Avaya one-X 9600 Series User manual

Avaya
Avaya E169 User manual

Avaya
Avaya DEFINITY 4606 User manual

Avaya
Avaya one-X H.323 Product manual

Avaya
Avaya 9640 Series User manual

Avaya
Avaya 9650 Deskphone Edition User manual

Avaya
Avaya B189 Datasheet

Avaya
Avaya E129 User manual

Avaya
Avaya 1600 Series User manual

Avaya
Avaya IP Office 1400 Series User manual