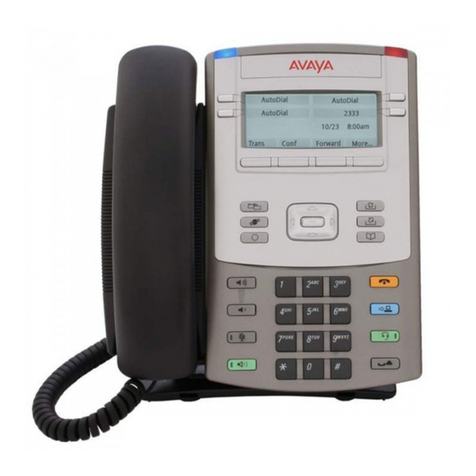
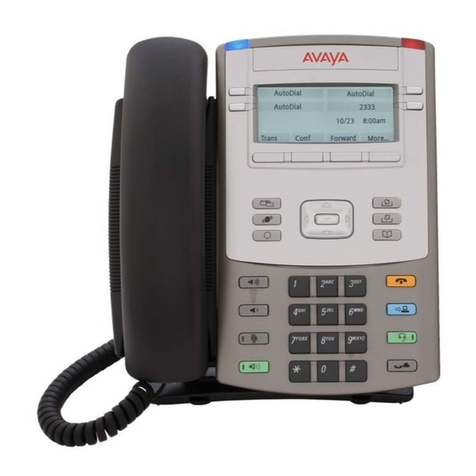
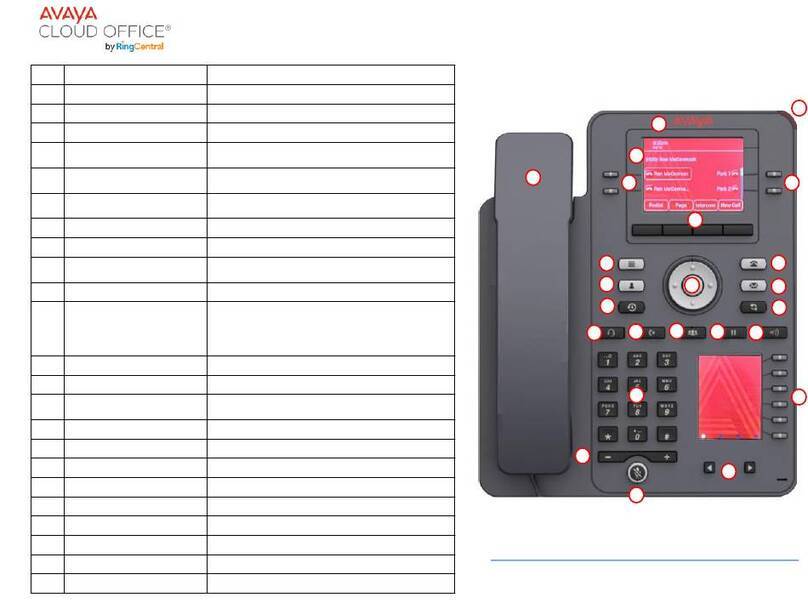
Avaya INDeX 20CC turret User manual


Page 2 - Contents
INDeX 20CC User's Guide 38DHB0002UKCM - Issue 2 January 2000
Contents
Introduction........................................................................................................3
20CC Turret Features.......................................................................................4
ACD Working.....................................................................................................6
Answering Calls.................................................................................................8
Actions During a Call.......................................................................................10
Making Calls....................................................................................................12
Speed Dials, PIN & Account Codes................................................................15
Busy or Unanswered.......................................................................................17
Transfer, Park & Hold Calls.............................................................................19
Diverting Calls.................................................................................................21
DSS Keys........................................................................................................23
Manager-Secretary Working...........................................................................25
Manager-Secretary Setup...............................................................................27
Ringer Controls...............................................................................................29
Other Features................................................................................................31
Turret Settings.................................................................................................33
Voice Manager................................................................................................35
Good Phone Usage.........................................................................................37
Glossary..........................................................................................................38
Index................................................................................................................39

Introduction – Page 3
38DHB0002UKCM - Issue 2 January 2000 INDeX 20CC User's Guide
Introduction
Using This Guide This guide is for INDeX 20CC Turrets used on the INDeX telephone system
operating under Software Release level 9.0.
To check the Software Release level of your system, press ANSWER
RELEASE and then PROGRAM. The phone displays the Software Release
level. Cancel the display by pressing ANSWER RELEASE again.
What Features Can I Use?
This guide covers all the features supported by the INDeX 20CC Turret.
However, your phone may not be enabled to use all of the features available.
If you are unsure which features you can use, contact your System Manager.
–Network Features:
Your phone system may be part of a network linking several sites. Where
possible, it treats network calls as internal calls and offers the same
features. However, this depends on the type of network link and type of
system at the other end of the link. Some links may be to non-INDeX
telephone systems.
Further Help
"Why don't you do something
to help me?"
Stan Laurel 1947.
In all instances, first seek help from your System Manager. They will seek
further assistance from your system's Maintainer if necessary.
System Manager:
on Extension: ..........................................
This guide is also available in several computer formats (e.g. Windows Help,
Adobe Acrobat). Contact your System Manager to obtain copies or download
them from our internet site(http://www.sdxplc.com).

Page 4 - 20CC Turret Features
INDeX 20CC User's Guide 38DHB0002UKCM - Issue 2 January 2000
20CC Turret Features
Introduction to 20CC Turrets
"When at last this little
instrument appeared,
consisting, as it does,
of parts everyone of which is
familiar to us, and capable
of being put together by an
amateur, the disappointment
arising from its humble
appearance was only
partially relieved on finding
that it was really able to talk."
James Clerk Maxwell,
"The Telephone" 1878.
The diagram shows the main features of an INDeX 20CC turret.
Display
Keys
Lamp
DSS
Keys
Dialling Keys
Speaker
(underneath)
BLF Lamps
H
eadset Connection
(
underneath)
Display
The turret display changes during use to show options and information
available. A -symbol next to a display indicates an option you can use by
pressing that key.
Desk Brackets
Clip-on plastic 'shoes' are available for you to raise the viewing angle of your
turret. Only one pair of brackets ('shoes') are required per turret. To change
the viewing angle, simply click-on a pair of 'shoes' over the top two legs of the
turret.
Using the SCROLL Key
Sometimes there are more options available than the turret can display. When
this happens, a -symbol appears next to the SCROLL key. Press SCROLL
to display the other options.
The turret display changes during calls and according to your own
customisation. Thus this guide cannot always detail when you would have to
press the SCROLL key to access a function.

20CC Turret Features – Page 5
38DHB0002UKCM - Issue 2 January 2000 INDeX 20CC User's Guide
Headset Connection & Use
MP
A
Bo
x
Barrier
Box
Headset
Turret
The INDeX 20CC turrets are designed for headset use. Pressing ANSWER
RELEASE has the same effect as lifting or replacing the handset on a normal
phone.
If headsets are connected via a MultiPurose Amplifier (MPA) box, the barrier
box (supplied with the turret) must be used. The barrier box then connects to
the socket marked H/SET under the turret. Use of the barrier box protects the
turret from high static environments.
Tones & Ringing The turret uses various tones and rings to indicate events. A sample of these
appears below. You can alter the ringer volume, sound, switch it on/off, etc
(see page 29).
Incoming Calls:
– Repeated Single Ring: Internal call.
– Repeated Double Ring: External call.
– Repeated Triple Ring: System or personal alarm.
– Single Tone: Page call (see page 8).
During Calls:
–Repeated Double Pip: Camp on set (see page 18).
–Repeated Single Pip: Another extension is about to intrude or has
intruded on your call.
Making Calls:
–Dial Tone: Dial number.
–Broken Dial Tone: Forwarding calls (see page 32).
–Repeated Tone: Busy number
(see page 17).
–Repeated Triple Tone: Diverting to external number.
–Continuous Tone: Number on no calls or unobtainable.
The Turret Lamp The turret uses its lamp (above the VIEW key) to show calls and messages.
– Fast Flashing Lamp: Call Waiting (see page 10).
– Lamp On: Message (see page 8).
– Repeating Double: Flash: External call.
– Repeating Single: Flash: Internal call.

Page 6 - ACD Working
INDeX 20CC User's Guide 38DHB0002UKCM - Issue 2 January 2000
ACD Working
Overview of ACD Typically agents on a phone system are grouped together, eg. Sales group,
technical support group. ACD (Automatic Call Distribution) routes calls on the
sales number to any free agent in the sales group.
As an ACD agent you have a log on number. Once logged on you can receive
call from your group. If your system supports Roaming Agents, you can log
on at any ACD turret, otherwise you must log on at a particular turret (check
with your Supervisor).
Incoming
Calls
Telephone
System ACD Group
Logged Off Logged On Busy Wrap Up Logged On Busy N/A
Supervisor
Supervisor PC
The ACD records information about calls and agents. It display this on
Supervisor PC's, wallboards and reports.
Starting Work - Logging On
When logging –on, you may be asked to enter your turret's passcode
(see page 33).
1. Press LOG ON/OFF.
2. Enter your agent number. If you make a mistake, press CANCEL and
re-enter your agent number.
3. Press DONE.
4. If okay, a -symbol appears above LOG ON/OFF.
5. If already logged-on, the turret displays the extension where your log on
number is in use.
6. If not recognised, the turret displays NOT AGENT, either enter your
number again or press DONE.
Finishing Work - Logging Off
Logging off stops you receiving ACD calls.
To log off:
1. Press LOG ON/OFF.

ACD Working – Page 7
38DHB0002UKCM - Issue 2 January 2000 INDeX 20CC User's Guide
Stopping Work Temporarily - Busy
You can stop receiving ACD calls without logging off.
–Busy Wrap Up: Use this when at your desk but doing other work. You
can still see your own status time plusview details of waiting ACD calls
(see page 7). Note that the system may automatically cancel busy wrap-
up after a short time.
–Busy Not Available: Use this when away from your desk (for breaks,
lunch, etc. The turret displays the time.
To temporarily stop receiving ACD group calls:
1. Press either WRAP-UP (at the desk but doing other work) or BUSY N/A
(away from the desk).
2. The -symbol above the appropriate key flashes.
To return to receiving ACD calls again:
1. Press the key below the flashing -symbol.
Sending Supervisor Messages
You can use the ACD MSG key to send a message to your supervisor. The
message appears on their PC's screen. The messages available to each turret
can be altered by the system maintainer.
To send a message:
1. Press ACD MSG.
2. Select the message required and press the display key next to it (use the
SCROLL key to see all the messages available). Otherwise press
DONE.
Viewing Waiting Calls
A fast flashing lamp indicates a call(s) waiting. Your turret can displaydetails
of the waiting calls.
To view call waiting information:
1. When the turret lamp is flashing, press VIEW to cycle through the
different options.
–CALLS WAITING: Displays the number of calls waiting.
–WAITING TIME: Displays the longest waiting call time.
–CALL WAITING FROM: Displays the line on which the longest waiting
call arrived (or extension if internal).
–TIME: Returns to normal call display.

Page 8 - Answering Calls
INDeX 20CC User's Guide 38DHB0002UKCM - Issue 2 January 2000
Answering Calls
Answering Normal Calls
When calls arrive, the display shows information about the call before you
answer. It gives a repeated double flash for external calls or a repeated single
flash for internal calls. The ringer, if on, also shows the call type by a repeated
single or double ring (see page 29).
To answer the call:
1. Press ANSWER RELEASE.
Answering a Page Call
When someone pages your turret (see page 13)or a group to which it belongs
(your turret does not have to be in group), the system connects the page after
giving a tone. You can hear the page but they cannot hear you. The display
shows PAGING and the pager's number. If you answer a page it turns into a
normal call. Note that this feature can be switched off for the whole system.
To answer a page:
1. Press ANSWER/RELEASE.
Answering a Message
"Phone call from God…
if it had been collect,
it would have been daring."
Robin Williams
(Dead Poets Society).
Other extensions can leave their number on your turret (see page 18). Your
turret can store several messages. It shows CALL FOR MESSAGE, the
caller's number and the lamp comes on. The exceptions are:
– If your own number appears, this indicates an alarm (see page 8).
– If "Message From Voice Mail" appears, this indicates voice mail
(see page 35).
To answer or cancel a message:
1. To view any other message, press NEXT (if shown).
2. To call the extension, press CALL.
3. To clear the message, press CANCEL.
4. At the last message, press AGAIN to repeat the list.
Alarms - Triple Ring, Music or Announcements
You can set an alarm to ring your turret (see page 31). The System Manager
can also set system alarms to call a group to which you belong. In both cases
the alarm can consist of ringing, music or a recording plus a displayed
message.
To answer an alarm:
1. Press CANCEL or ANSWER RELEASE.

Answering Calls – Page 9
38DHB0002UKCM - Issue 2 January 2000 INDeX 20CC User's Guide
Automatic External Call Connection
Free Flow - Alias:
- Force feed. The System Manager can set a turret to free flow mode. In this mode, the
system connects external calls automatically after giving a single tone (but not
transferred external calls). After ending a call, the system waits 3 seconds
before connecting the next call.
Answering a Callback
You can arrange a callback from a busy or ringing extension (see page 17).
When the callback takes place, your turret displays the call details and
"CALLING" above CALLBACK. If you do not answer, the callback cancels
after a short time (see page 30).
To answer/cancel a call back:
1. To continue the callback, press ANSWER RELEASE.
2. To cancel the callback, press CALLBACK.
Answering Other Extensions - Call Pickup
Pickup - Alias:
- Call pickup.
- Take.
You can pickup an external call to any other extension regardless of whether
or not the other extension is in your group. In addition, your turret can store a
pickup group number (see below). This allows you to pick up calls ringing any
turret in that group. The PICKUP option only appears when a turret in your
pickup group is ringing.
To show and pick up ringing turrets:
1. When you hear another extension ringing either:
- Dial their number and press PICKUP or, if you are in ringing group,
- Press PICKUP to show the longest ringing call.
2. Press the -symbol (if shown) opposite the name to switch between
details of who is calling and being called.
3. To display other ringing turrets, press NEXT (if shown).
4. To pick up the displayed call, press ANSWER RELEASE.
5. To cancel the pick-up display, press CANCEL.
6. To repeat the list press AGAIN.
To set the turret's pickup group:
1. Press PROGRAM and then SCROLL. Press PICKUP.
2. Enter the turret's passcode (see page 33).
3. The display shows the current pickup group (if set).
4. Press CANCEL and enter a new pickup group number.
5. Press PROGRAM to finish.
Page 10 - Actions During a Call
INDeX 20CC User's Guide 38DHB0002UKCM - Issue 2 January 2000
Actions During a Call
Answering a Call Waiting
A fast flashing lamp means someone has 'camped on' to your turret (see
page 18). Press the -symbol (if shown) opposite the name to switch
between details of the waiting and current call.
To answer a call waiting:
1. Park (press PARK) or end your current call.
2. The waiting call rings your turret.
Muting Calls
Mute - Alias:
- Microphone on/off. You can stop the caller from hearing you if necessary.
To switch mute on/off:
1. Press MUTE. The -symbol disappears when muted.
Changing the Call Volume
"Can you hear me mother" Sandy
Powell 1975. You can change the caller volume during a call.
To change the call volume:
1. During the call, press VOLUME (To change the volume without making
a call, just pressANSWER RELEASE first).
2. A slider appears. Adjusts this using the -keys on its left (softer) and right
(louder).
3. When finished, press DONE.
Adding Voluntary Account Codes
Voluntary Account - Alias:
- Call account allocation. You can enter an account code during any external call. If the system records
the call on its call log, it includes the account code. The system checks the
code against its stored codes. Ask your System Manager for a list of valid
codes.
To enter a voluntary account code:
1. During the call, press ACCOUNT.
2. Enter an account code. If you make a mistake, press DELETE to delete
the last digit entered.
3. When you have entered the full code, press DONE.
4. If the system does not recognise the code, the turret displays REENTER
ACCOUNT. Repeat the steps above.

Actions During a Call – Page 11
38DHB0002UKCM - Issue 2 January 2000 INDeX 20CC User's Guide
Answering an Alert
Alert - Alias:
- Polite intrusion. If ON HOLD appears during a call, an extension with your number set as a
Soft DSS key has sent you an alert (see page 26). Press the -symbol (if
shown) opposite the name to switch between details of the current and
waiting alert call.
To switch between calls:
1. Press HOLD. Use the held call features (see page 19).
Single Pips - Intrusion
Single pips during a call indicate that another phone is about to intrude on
your call. Once they intrude the system gives regular reminder pips.
Please Finish Call Message
Clearcheck - Alias:
- Polite shutdown. The system supports Clearcheck. "PLEASE FINISH CALL" appears when
maintenance is about to start on a part of the system your turret is using. The
message "THIS TERMINAL IS OFFLINE" appears when maintenance is in
progress.
Create a Conference Call
"No grand idea was ever born in
conference, but a lot of foolish
ideas have died there"
F.Scott Fitzgerald.
External Lines:
If your exchange uses digital
lines, you can conference
several of these with internal
calls. However, if your
exchange uses any other
types of line, you can only
include one of those in a
conference. Check with your
System Manager.
During a call, you can add callers to create a conference (of up to 64 calls).
To start a conference or add to a conference:
1. Press HOLD to hold your current call (or conference).
2. Call the new person that you want in the conference.
3. If answered, ask if they wish to join a conference; if "yes" press
CONFER, if "no" pressHOLD.
4. If unanswered, press HOLD to retrieve to the original call.
To exit the conference:
1. Press ANSWER RELEASE. If only two callers remain, it becomes a
normal call.
To park all the conference parties:
1. Press PARK (see page 20).
To split a 3-way conference:
1. Press SPLIT to hold one caller and connect the other.
2. To switch between calls, press HOLD.

Page 12 - Making Calls
INDeX 20CC User's Guide 38DHB0002UKCM - Issue 2 January 2000
Making Calls
Notes on Making Calls
When making calls, the display shows details about call progress, time, etc. It
also shows messages if you cannot make the call. To simplify dialling, the
system also stores speed dials for use by all extensions (see page 15). You
can also store your own frequently used numbers as speed dials.
–Call Barring:
The system can bar you from dialling particular numbers or types of
number (eg. national, international). Typically call barring increases when
a turret goes into night service (when it displays a symbol).
Call barring can also change according to time, date and day of the week.
As the call barring settings vary for each site, this guide cannot fully detail
their effect.
Making External Calls
"E.T. phone home"
Steven Spielberg.
Redial - Alias:
- Last number redial
– Saved number redial.
The system may apply call barring to some or all external numbers. You can
also lock your turret (see page 32)or bar it by wrong passcode entry (see
page 33).
To dial an external call:
1. Dial 9to get an external line. Your System Manager will inform you if you
need to dial a different number.
– If "ENTER ACCOUNT" appears, see page 16.
– If "ENTER PIN" appears, see page 16.
2. Dial the external telephone number.
To redial the last external number used:
1. Press REDIAL to repeat the last external number used (including speed
dials).
Automatic Calls - Hotline Operation
Hotline operation allows a turret to automatically dial a number when left off-
hook for a set period. Your System Manager or maintainer controls this
feature.

Making Calls – Page 13
38DHB0002UKCM - Issue 2 January 2000 INDeX 20CC User's Guide
Making Internal Calls
"My sole inspiration is a
telephone call from a director"
Cole Porter
During the call, the display shows the call progress. You can also make calls
using the INDeX feature (see page 13) or DSS keys (see page 23 & page
25).
To dial an internal call:
1. Dial the extension number. A triple-tone means that extension is diverting
calls to an external number.
2. If unanswered, your turret provides options to wait or notify the extension
(see page 17).
– If your turret displays a RINGER option, then the called extension is
set to automatically connect internal calls. Press RINGER to send a
reminder ring if no one has answered the call.
Making a Page Call
Page - Alias:
- Broadcast
- Zone paging.
You can page any INDeX phone. They will hear the call without doing
anything; you cannot hear them. If wanted, they can turn the page into a
normal call (see page 8). If the turret paged is diverting calls, the page also
diverts (except group pages).
To page an extension or group:
1. Press PAGE. Your turret displays PAGING.
2. Dial the extension or group or press a DSS key (see page 23).
3. If busy or unavailable, the display shows options to wait or leave a
message (see page 17).
4. Speak and then press ANSWER RELEASE.

Page 14 - Making Calls
INDeX 20CC User's Guide 38DHB0002UKCM - Issue 2 January 2000
Making Calls from the INDeX Directory
"Hello, Neil and Buzz. I'm
talking to you by telephone
from the Oval Room at the
White House, and this certainly
has to be the most historic
telephone call ever made."
Richard Nixon.
Using the INDeX Directory, your phone can display a selected entry from an
index of either extensions or speed dial names plus their numbers. There are
two methods of selecting entries of names and numbers from the INDeX
Directory:
By Alpha Group
By Dial by Name
In addition, the INDeX Directory entries can be sorted either by 1st name or by
last name. The particular method used and 1st or last name search is selected
by your System Manager. Consult your System Manager for which method is
available to you and if the sorting is by 1st or last name.
To make a call using an Alpha Group search of the INDeX Directory:
1. Press INDeX for an internal call or SPEED DIAL and then INDeX for
an external number.
2. Press the key matching the 1st letter of the name you want.
For example, to display the LAlpha Group, press the JKL key 3 times.
The INDeX System displays the 1st name beginning with Lfrom it's
Directory entries.
1. To move through the names beginning with L, press the -keys
on the right and left of the current name.
2. To skip forward 10 names, press SKIP.
3. To select another letter, press a letter key.
3. To dial the name/number shown, press CALL, otherwise to exit the
INDeX Directory, press ANSWER RELEASE.
To make a call using Dial by Name search of the INDeX Directory:
1. Press INDeX for an internal call or SPEED DIAL and then INDeX for
an external number.
2. Press the key matching the 1st letter of the Name you want.
For example, to find the name SMITH press the PRS key.
3. The INDeX System begins searching it's Directory on the first press and
will display the 1st name/number immediately, in this example a name
beginning with P. You can either:
1. Continue dialling the letters of the name, e.g. MNO, then GHI, etc.
until the required name (SMITH) is displayed OR.
2. Press CYCLE to move onto the next alpha group of the PRS key,
e.g. a name beginning with R. To move through the names
beginning with R, press the -keys on the right and left of the
current name.
3. To select the next letter of the alpha group of the PRS key, press
CYCLE again.
4. If NO MATCH is displayed, press PREVIOUS to go back one step
or press ANSWER RELEASE to cancel
4. To dial the name/number shown, press CALL, otherwise to exit the
INDeX Directory, press ANSWER RELEASE

Speed Dials, PIN & Account Codes – Page 15
38DHB0002UKCM - Issue 2 January 2000 INDeX 20CC User's Guide
Speed Dials, PIN & Account Codes
Using Speed Dials
Speed Dials – Alias:
- Abbreviated dialling The system can store external numbers as speed dials.
–System speed dials: Ask your System Manager for a list (note that call
barring may still apply).
–Personal speed dials: You can store up to 10 speed dials for your own
use (see below).
To use a speed dial:
1. Press SPEED DIAL.
2. To select a system speed dial by name, press INDeX (see "Making
Calls from the INDeX Directory" on page 14).
3. To select a system speed dial by number, press SYSTEM and dial the
store number (100 to 899 and 9000 to 9999).
4. For a personal speed dial, press OWN and dial the personal speed dial
number (0 to 9) or press the matching DSS key (the DSS keys match
personal speed dials 1 to 8 (1 at the top)).
– If "ENTER ACCOUNT" appears, see page 16.
– If "ENTER PIN" appears, see page 16.
5. Continue as for a normal external call (see page 12).
Storing Personal Speed Dials
To store a personal speed dial:
1. Press PROGRAM and then SPEED DIAL.
2. Enter the turret's passcode (see page 33).
3. The display shows 0-9 OR DSS KEY. Press the number (0to 9) or DSS
key under which you want to store the speed dial.
4. The display shows the current stored number (if set). Press DELETE
and dial the number.
– If external, prefix 9 to the number, thisis the normal number to seize
an external line. Your System Manager will inform you if you have to
add a different prefix before external numbers
5. When finished, press DONE.
6. Select another store or press PROGRAM to finish.

Page 16 - Speed Dials, PIN & Account Codes
INDeX 20CC User's Guide 38DHB0002UKCM - Issue 2 January 2000
If ENTER ACCOUNT Appears
If ENTER ACCOUNT appears when making an external call, you must enter
an account code to continue. The system checks this against its list of codes
before allowing the call.S (To enter an account code at any time during a call
see page 10).
To enter a forced account code:
1. Dial the account code. If you make a mistake, press DELETE to delete
the last digit entered.
2. When you have entered the full code, press DONE.
3. If the system does not recognise the code it displays REENTER
ACCOUNT. Repeat the entry or end the call.
4. If the code is recognised your call can continue.
If ENTER PIN Appears
If ENTER PIN appears when making an external call, you must enter a PIN
code to continue. When you use a PIN code, its turret and call barring settings
override those of the turret from which you dial. The system checks the code
against its list of codes before allowing the call.
To enter a forced PIN code:
1. Dial your PIN code. If you make a mistake, press DELETE to delete the
last digit entered.
2. When you have entered your PIN code, press DONE.
3. If the system does not recognise the code it gives a constant tone. End
your call attempt.
4. If the code is recognised your call can continue.
Roaming PIN's
Roaming PIN's – Alias:
- Mobile access. When you use a PIN code, its settings override those of the turret from which
you dial. Note however that the system automatically prefixes digits to force
the call externally.
To use a roaming PIN:
1. Press #and enter your PIN code. If you make a mistake, press DELETE
to delete the last digit entered.
2. When you have entered your PIN code, press DONE.
3. If the system does not recognise the code, your turret gives a constant
tone. End your call attempt.
4. If the code is recognised your call can continue.

Busy or Unanswered – Page 17
38DHB0002UKCM - Issue 2 January 2000 INDeX 20CC User's Guide
Busy or Unanswered
Options If Busy or Unanswered
Your turret provides several methods for contacting an extension that is busy,
not answering calls or set to no calls. These options work for normal, page
and diverted calls.
–Leave a Message: Lights the lamp of the extension called. It also stores
your number as a message to reply. If your system has an integrated
Voice Manager attached, you can record a voice message instead(see
page 36).
–Callback: Rings your turret when the extension called becomes free or is
next used.
–Camp On: Flashes the extension's lamp to warn that you are waiting. It
also stops other calls interrupting you.
–Intrude: Forces the other extension's call into a conference with you (not
available to all turrets).
–Monitor: Allows you to hear the other call without interrupting it (not
available to all turrets).
Arrange a Callback
Callback - Alias:
- Ringback.
- Call back when free.
- Call back when next used.
If the extension you call is busy or just rings, you can set a callback. When
that extension becomes free or is next used, your turret rings. If you answer,
the other extension rings. After setting a callback you can make other calls, it
will not take place while you are busy. You can only arrange one callback at
any time.
The Ringer Timeout sets how long a callback rings your extension before it
cancels (see page 30). The system also cancels any callbacks that have not
taken place after a set period (normally 2 hours).
To arrange a Callback:
1. Press CALLBACK (the option does not appear if you already have a
callback set).
2. The system ends the call.
3. Your turret shows CALLBACK.
To clear the Call Back:
1. Press CALLBACK again

Page 18 - Busy or Unanswered
INDeX 20CC User's Guide 38DHB0002UKCM - Issue 2 January 2000
Leave a Message You can leave your extension number as a message for someone to call you
(see page 8). If their extension has a message lamp, it lights. If your call is
diverted, the message goes to the extension you first called.
To leave a message:
1. Press MESSAGE. Your call ends unless the extension called has
already reached its limit of stored messages.
Camp On and Wait
Camp On - Alias:
Wait on busy. If the extension you call is busy, you can 'camp on' and wait. This flashes the
lamp on the busy extension. Also, if the busy extension has a suitable
display, it sees your name, number andCALL WAITING. While camped on
you cannot make or receive other calls. Your turret gives regular pips to
remind you of the camp on.
To Camp On to a busy extension:
1. Press CAMP ON.
2. To end the camp on,press ANSWER RELEASE.
Intrude
Intrude - Alias:
- Executive intrusion.
- Busy override.
- Forced intrusion.
If your turret can intrude, an INTRUDE option appears when calling a busy
extension. Your System Manager controls which extensions can intrude and
be intruded on.
To intrude on a call:
1. Press INTRUDE.
2. There is a short delay during which you and the other parties hear several
short pips.
3. After the intrusion, the system gives regular pips.
Monitoring a Call Silent monitoring allows you to listen to another call without being heard.
There are restriction on who can use this function (contact your System
Maintainer).
If your turret can use silent monitoring, a LISTEN option appears when
calling a busy extension. While monitoring, ACD turrets with Supervisor status
also have a REVIEW option. Pressing this connects them with the monitored
extension once the monitored call ends.
Note: While monitoring, ACD turrets with Supervisor status also have an
INTRUDE option. Pressing this connects them with the monitored
extensions forming a conference call.

Transfer, Park & Hold Calls – Page 19
38DHB0002UKCM - Issue 2 January 2000 INDeX 20CC User's Guide
Transfer, Park & Hold Calls
Transferring Calls
Ringing Transfer - Alias:
- Ring inward transfer. You can transfer a call to an extension that is ringing or giving busy tone. If
the call waits unanswered for too long, it may recall to your extension.
To transfer a call using hold:
1. Press HOLD to hold your current call.
2. Dial the extension to which you want to transfer the call.
–Announced transfer: Wait for the call to be answered. If okay to
transfer, press ANSWER RELEASE. If unanswered or not okay to
transfer, press HOLD to retrieve the call.
–Unannounced transfer: Press ANSWER RELEASE immediately
(even if you hear ringing or busy tone).
To transfer a call using dial ahead:
1. Dial the number of the other extension.
2. If the display shows FREE, press ANSWER RELEASE to transfer
(otherwise press CANCEL).
To transfer an external call using park:
1. Press PARK to park the current call. Note the line number of the call
and give this to the person whom you want to unpark the call (eg. by
calling or paging them).
Holding Calls
Hold - Alias:
- Exclusive hold.
- Call hold.
Switch calls – Alias:
- Toggle calls.
- Brokers call.
Only the extension that holds a call can retrieve it unless they transfer the
call. When you hold a call, your turret displays its details on the right side of
the display and the caller hears music (if installed). You can only hold one
call.
To hold a call:
1. Press HOLD (Pressing ANSWER RELEASE now parks the call, see
page 20).
2. Retrieve the call by pressing HOLD again or make another call (enquiry
call) and then:
3. Press the -symbol (if shown) opposite the name to switch the display
between the current and the held call details.
– To switch between calls, press HOLD.
– To conference, press CONFER (see page 11)
– To transfer the held call, press ANSWER RELEASE.

Page 20 - Transfer, Park & Hold Calls
INDeX 20CC User's Guide 38DHB0002UKCM - Issue 2 January 2000
Parking Calls
Park - Alias:
- Common hold. You can retrieve parked calls at any other extension on the system. Your
turret displayscalls you parked by a flashing
-symbol next to the line number. You can park several calls at the same
time. Calls parked and not retrieved, may recall your turret after a short time.
To park an external call:
1. During the call, press PARK.
To unpark calls parked at your extension:
1. Press the display key next to the flashing -symbol.
To unpark a call at another extension:
1. Dial the parked call's line number (external calls only).
Dialling Ahead
Announced – Alias:
- Screened transfer.
Unannounced – Alias:
- Unscreened transfer.
Whilst on an incoming call you can display the status of another extension (or
group) without interrupting your call.
To dial ahead during a call:
1. Dial the number that you want to check.
2. The extension's status appears on the right-hand display; FREE, BUSY or
NU (Number Unobtainable).
3. Dial another number or press CANCEL.
If the extension displayed is free:
1. For an unannounced transfer, press ANSWER RELEASE.
2. To make an enquiry, press HOLD. This holds your current caller and rings
the dial ahead extension.
3. If unanswered, press HOLD to retrieve your first call.
4. If answered, either press ANSWER RELEASE to transfer your call or
HOLD again to switch between calls.
You can set your turret to always automatically hold your current call and ring
the dial ahead number if it is free (rather than display FREE).
To select show free or ring if free:
1. Press PROGRAM and then SCROLL. Press CALLFREE.
2. Enter the turret's passcode (see page 33).
3. To change the current setting, press CHANGE.
4. Press PROGRAM to finish.

Other manuals for INDeX 20CC turret
2
Table of contents
Other Avaya IP Phone manuals

Avaya
Avaya IP Office 9620 User manual

Avaya
Avaya 1403 User manual

Avaya
Avaya E169 User manual

Avaya
Avaya IP Office 2402 User manual

Avaya
Avaya i20 Datasheet

Avaya
Avaya T3 Comfort User manual

Avaya
Avaya J129 Installation and operating instructions

Avaya
Avaya 1616 User manual

Avaya
Avaya 9408 User manual

Avaya
Avaya 4625SW User manual

Avaya
Avaya 1140E User manual

Avaya
Avaya 9620 Deskphone Edition User manual

Avaya
Avaya 4630 User manual

Avaya
Avaya 4610 User manual

Avaya
Avaya IP OFFICE 2410 User manual

Avaya
Avaya E169 User manual

Avaya
Avaya IP Office 5402 User manual

Avaya
Avaya J100 Series Instruction Manual

Avaya
Avaya 1692 User manual

Avaya
Avaya Norstar Mode M7100 User manual