Avaya one-X 9608 User manual

Avaya One-X 9608 IP Telephone – Quick Reference Guide
This document is the basic instructions on your new telephone. It includes brief explanations of the features you will
need to use quickly. Please reference the Avaya formal documents for more detailed instruction.
Important Definitions
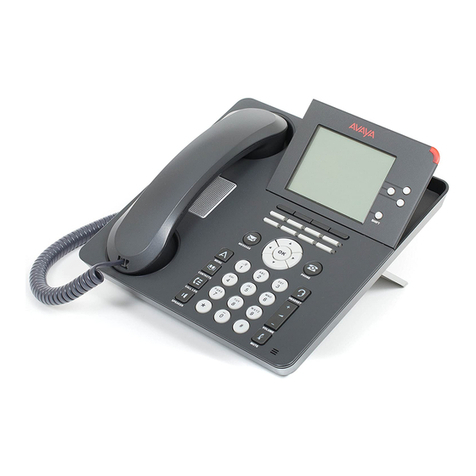
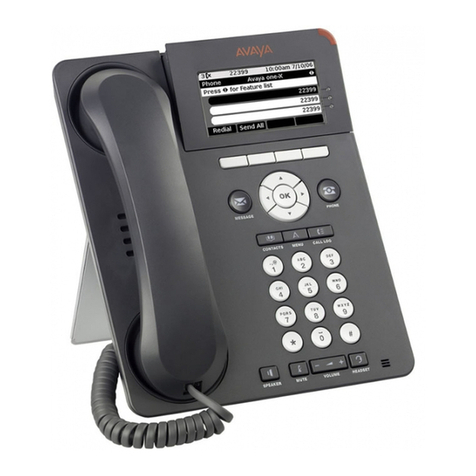
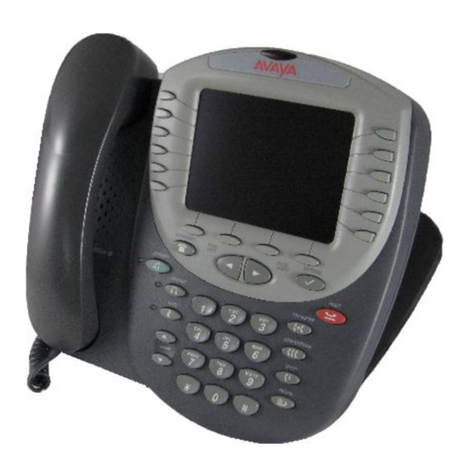
Softkeys & Softkey Labels – Softkeys are the white, rectangular buttons directly below the display screen that you use to
perform actions – the action corresponds to the softkey label in the display. NOTE – The softkey labels are context sensitive, meaning
the available actions will change based on the state of your telephone. (If your telephone is idle, you won’t see “Hold” or “Transfer”
because there is no active call to hold or transfer)
Navigation Arrows and OK button – located under the Softkey buttons, these keys enable you to scroll through line
appearances or menu options on your telephone. You can then use the
OK
button to select a line or feature. NOTE - a highlighted
line or feature is white writing on a black background.
Phone screen vs. Features menu
There are two main screens for your telephone’s display: the Phone screen, which shows your line appearances and your Features
menu, which can show additional appearances and features if programmed by your administrator. Use your Navigation Arrows left or
right to toggle between the two screens. You can then scroll up and down within the Features menu to view and activate available
features.
Press the Phone button to bring your telephone’s display to the screen with your phone lines and options for placing and
receiving phone calls.
Press the Message button to access your voicemail. This button along with the indication on the top right of your telephone
will light red when you have new messages. (VM Access: Internal 5101, and external 609-343-5101. Default password: 2580)

Avaya 9608 QRG ~ Quality Training Services, LLC. Page 2
Login to an unregistered or vacant telephone. . .
(From an unregistered telephone’s login screen, enter your 4digit extension, followed by
Enter
(Enter the security code “23456” followed by
Enter.
Login to a telephone registered to another extension. . .
(Note the telephone number you are overtaking (especially for a common area telephone)
(Press the Home button
(Scroll to and select
Log Out
. Confirm.
(Follow the Login instructions above to register your 4 digit extension to this telephone.
If you would like to change the security code (default 23456), follow the following procedure:
(Lift the receiver, and dial the feature code 147, you will hear dial tone.
(Dial your 4 digit extension, followed by #
(Dial the current security code (default 23456), followed by #
(Enter your new 5 digit security code, followed by #
(Repeat the new 5 digit security code, followed by #. You will hear a confirmation tone.
*Example: Your extension is 4321. Your new security code is 98765: You would dial:
147, 4321#, 23456#, 98765#, 98765#
Call Appearance buttons, also referred to as “Line” buttons show your extension, and can be used to get dial tone or answer a call.
A station has multiple appearances of the same extension but the last appearance is typically reserved as an outgoing only line.
Dialing
(Internal extension, dial the 4 digit digit extension number.
(For an external call, dial 9, followed by the entire telephone number.
(On Hook Dialing allows you to dial without lifting the handset or pressing the speaker button.
(Press the
Drop
softkey in the event of a misdial when transferring or conferencing, you will return to dial tone, input the correct
number.
Dialing 911 for an Emergency
(Dial “911” to reach your local Emergency Services. Stay on the line and report the issue and location.
(The system will immediately activate a “Crisis Alert” button on appropriate Security and/or Administrative telephones at your
location, including the telephone that dialed “911” so that they are informed and can direct Emergency Services as needed. (Users
with the “Crisis Alert” buttons will need to note the display information, and press the key twice to acknowledge and dismiss the
ringing / alert)
Answering a ringing call. . .
(Lift the receiver.
(Or, press the Speaker button.
(Or, press the Line button corresponding to the call
(Or, press the Answer softkey corresponding with the display feature.
(Or scroll to the ringing line appearance, and select OK
While your telephone is ringing, you can also press the
Ignore
softkey, to shut off your ringer for the individual call or the
To Vmail
softkey to interrupt the call and send it directly to your voicemail box.
Answering a second call. . .
(Press the
AnsHold
softkey, to place the first call on hold while answering the second in one step.
(Or, press the
AnsDrop
softkey, to disconnect the first call and answer the second in one step.
(You can also press the
To Vmail
softkey to interrupt the second call and send it directly to your voicemail.
(A bridged line provides an appearance of another user’s extension. Press the ringing line button to answer, OR you may
automatically be connected when answering,
if so programmed
.
(Bridged Lines, select the call that you want to answer, press the
Answer
softkey the ringing line will be selected
automatically if there are no other active calls. (Bridged lines typically belong to someone else but bridging allows you to
see if that line is in use and answer calls on that line).
Initiate a call. . .
(Lift the receiver, begin dialing
(Or, begin dialing to automatically access speaker function
(Or, press the
Redial
softkey to access the last number redial feature
Put a call on Hold. . .
(While on an active call, press the
Hold
softkey.
(Make sure the desired line is highlighted, then press the
Resume
softkey to get back to caller
(Or, press the Line button next to the held call
Avaya 9608 QRG ~ Quality Training Services, LLC. Page 3
Transfer a call. . .
(While on an active call, press the
Transfer
softkey.
(Dial the destination number you are transferring to.
(Press the
Complete
softkey (stay on the line to announce or press
Complete
immediately for a blind transfer)
If the destination is not available or you need to try another extension
(While the destination line is highlighted, press the
Drop
softkey
(Dial an alternate destination, or Press the original call Line button, or highlight the line appearance and press the
Resume
softkey.
(Or, press the
Cancel
softkey to stop the transfer process and return to the original caller
Transfer a call to AAM (Voicemail)
(While on an active call, press the
Transfer
softkey.
(Enter 5101or press the Messages button.
(When the system answers, press star (*). Enter the recipient’s mailbox number.
*If you are transferring from a telephone that does not have a mailbox, you will not need to press * before entering the recipient’s
mailbox number.
(To complete the transfer, press the
Complete
softkey.
Conference up to six parties. . .
(While on an active call, press the
Conf
softkey.
(Dial the next telephone extension
You can also use your
Contacts
or
History
feature to make the call
(After called party answers, press the
Join
softkey.
(Press the
Add
softkey and repeat process for additional conference parties
(Conference Display allows you to view the participants, press Conf Display and scroll through.
Add a person on hold to a Conference Call. . .
(Press
Conf
softkey, or
Add
softkey if you are already in a conference.
(Scroll to and select to resume the held call that you want to add to the conference.
(Press
Join
softkey to add the person to the conference call.
Send All Calls . . .
This button directs all your calls to your voicemail immediately. Diverted calls will still register in your Missed Calls list.
(From the Phone screen, select the
Send All
softkey to turn on.
(Press the
Send All
softkey again to turn off.
Directory / Next / Make Call. . .
These features work together to help you find an extension number of another co-worker and call them.
1. Scroll to Features using the right or left navigation keys
2. Scroll to and select
Directory
using the navigation keys.
3. Using the touchtone keypad, spell out the last name of the person you wish to find. This is not like text messaging – press
the corresponding number once only for each letter you want to spell. Example, press the 2 button once to select B and then
go to the next letter of the name.
4. Continue to spell the entry by completing the spelling of the last name. Use the 1 key to indicate that you wish to spell the
first name. Use the * (star) key to indicate an apostrophe or hyphen.
5. For multiple entries of the same name, use
Next
to scroll through the matches.
6. Scroll to and select
Make Call
to dial the number, or press the Phone button to exit.
Voice Activated Directory. . .
Dial 5199, and follow the prompts to speak the recipient’s full name.
The auto attendant will transfer you to that extension.
Recording a conversation “on the fly” – for emergency / malicious call use ONLY
(This feature will record a threat, malicious call, and save the recording to the user’s mailbox for further review.
When the initiator presses the audix-rec button, the LED for the audix-rec button flashes. After a few seconds, the telephone
displays of all internal users on the call change to Conference. The number of parties on the call increases by one. The LED on
the telephone of the initiator stays on, and no longer flashes. This light indicates that Communication Manager Messaging is
ready to record (optional) Communication Manager Messaging starts to record the conversation. The system plays the ready
indication tone to indicate that recording is started. Only the initiator hears any Communication Manager Messaging
announcements.
(To stop the recording at any time, the initiator can press the audix-rec button again.
The LED on the telephone of the initiator goes out. The number of parties on the call decreases by one. The call remains
active. The initiator can press the audix-rec button to start and stop recording the same conversation any number of times.
Each time creates a separate recorded message.

Avaya 9608 QRG ~ Quality Training Services, LLC. Page 4
If the initiator hangs up while Communication Manager Messaging is recording the conversation, the recording ends.
If the call is originally a two-party call and the other party hangs up, the recording ends. If the call is originally a multiple-
party conference call and someone other than the initiator hangs up, the recording continues.
When the recording ends, the system saves the recorded conversation in the voice mailbox of the initiator as a new voice mail
message.
Press the Home or Menu button to adjust and customize options and settings, such as screen contrast and ring tones. You
can also use this button to access additional Web-based applications if programmed by your administrator, to view network settings,
and to log out.
The Avaya Home menu has several choices to enable you to customize your phone. Some main options are:
•Options & Settings
•Browser (if enabled)
•Network Information (requires administrative password to modify)
•Log Out (logs telephone out of the network, cannot receive incoming calls until “Login” completed)
The Options & Settings Menu includes choices which enable you to change your call settings, personalize button labels, adjust
brightness and contrast, select your ringing patterns, etc. The Options & Settings menu choices are:
•Call Settings
•Application Settings
•Screen & Sound Options
•Advanced Options
Changing useful Call Settings. . .
1. Press the Home or Menu button
2. Select
Options and Settings
3. Select
Call Settings
4. Scroll to and select the desired option:
(Redial: Toggle between “One Number” and “List”
(Visual Alerting (voicemail light in upper right corner will flash to indicate incoming call): Toggle On/Off
(Pair Contacts to Calls (Name field in your saved Contacts will pair with incoming caller id): Toggle On/Off
5. Select
Save
softkey when complete.
To Re-label Buttons, such as bridged appearances. . .
1. Press the Avaya Home or Menu button.
2. Select
Options and Settings
.
3. Select
Application Settings
.
4. Select
Personalize Labels.
5. Scroll to and select the feature or appearance you would like to re-label using the navigation keys.
6. Type in the new label and press the
Save
soft-key.
Changing useful Screen and Sound Options. . .
1. Press the Home or Menu button
2. Select
Options and Settings
3. Scroll to and select
Screen & Sound Options
.
4. Scroll to and select the desired option:
(Brightness or Contrast: Use right/left arrows to adjust
(Personalized Ringing
(14 different ring patterns available):
Use the arrows to sample available ring
tones. Press “
Rich
”or “
Classic
”to toggle between ring types.
(Button Clicks: Use
Change
softkey or OK to toggle between On/Off
(Phone Screen Width: Use
Change
softkey or OK to toggle the screen width from Full (each call appearance or feature
occupies the entire width of a line) to Half (each call appearance or feature occupies half the width of a line, effectively
splitting the screen in half)
5. Press
Save
softkey when complete
Press the Contacts button to view up to 250 Contacts, with up to three telephone number entries each.
View Contacts Details. . .
1. Press the Contacts button to display the Contacts screen.
2. Scroll to the contact you want to view.
3. Press the
Details
softkey. If not visible, press the
More
softkey.

Avaya 9608 QRG ~ Quality Training Services, LLC. Page 5
Adding a New Contact. . .
1. Press the Contacts button
2. Press the
New
softkey, If
New
is not visible, press the
More
softkey.
3. Enter the name using the dialpad (like text messaging)
•If you need to remove a letter, use the left and right arrows to place your cursor after the character you want to
delete and press
Bksp.
•Press the softkeys below
More àAbc
to change between upper and lower case letters or to enter numbers, or
press
ABC
repeatedly to cycle through the options (
Abc/123/abc/ABC
) until the type you want to use is displayed.
•Press the softkeys below
More àSymbols
to enter characters that are not on your dialpad. Select the symbol you
want to use and press
Insert
.
•Press
Clear
to delete all text and start over.
4. Use the Navigation Arrows to scroll to the next field, or press the adjacent Line button to select the next field.
5. Enter the telephone number (
remember to include the 9 if entering an external number).
6. Scroll to the next field, and select the type of number entered (general, work, mobile, home) by arrowing right or
left. The icon will change accordingly.
7. If you have another number for this contact, follow steps 5 and 6 above.
8. Press the
Save
softkey.
Editing a Contact. . .
1. Press the Contacts button
2. Scroll to the contact entry you wish to edit.
3. Press the softkeys below
More àEdit
.
4. Choose the field you want to edit.
5. Use the dialpad and softkeys to make changes to the contact information.
6. Press the
Save
softkey.
Deleting a Contact. . .
1. Press the Contacts button.
2. Scroll to the contact entry you wish to delete.
3. Press the softkeys below
More àDelete
.
4. Press the softkey below
Delete
again to confirm.
Press the History button to view your received, missed, and outgoing calls. The telephone will store 100 log entries shared
between the three categories.
Viewing the History. . .
1. Press the History button.
2. Scroll to the right or left to view separate lists of your missed, answered, outgoing or all calls.
•
NOTE: You can scroll quickly to the top of the list by pressing
History
again.
Calling an entry in your History. . .
1. Press the History button.
2. Scroll to and select the number you want to call, or press the
Call
softkey.
Viewing History Details. . .
3. Press the History button.
4. Scroll to the number you want to view.
5. Press the
Details
softkey. If
Details
is not an option, press the
More
softkey.
6. Press the
Back
softkey to return to the list view.
Adding an Entry from the History to your Contacts List. . .
1. Press the History button.
2. Scroll to the entry you want to add to your Contacts list.
3. Press the
+Contact
softkey. If this is not on your display, press the
More
softkey.
4. Edit name and telephone number, if necessary. (Follow editing instruction in the “Contacts” section)
5. Press
Save
.
Removing an Entry from the History. . .
1. From the History screen, scroll to the entry you wish to delete.
2. Press the
More
softkey, if necessary.
3. Press the
Delete
softkey
4. Press the
Delete
softkey again to confirm,
or
press the
Cancel
softkey if you wish to retain the entry.

Avaya 9608 QRG ~ Quality Training Services, LLC. Page 6
Clearing all Entries from the History. . .
1. From the History screen, scroll right or left to select the list you want to delete. (All Calls, Outgoing Calls, etc.)
2. Press the
More
softkey, if necessary.
3. Press the
Clear All
softkey to delete all of the entries in the list you are viewing.
4. Press the
Clear All
softkey again to confirm.
Notes: -
_________________________________________________________________________________________
_________________________________________________________________________________________
_________________________________________________________________________________________
_________________________________________________________________________________________
_________________________________________________________________________________________
_________________________________________________________________________________________
_________________________________________________________________________________________
_________________________________________________________________________________________
_________________________________________________________________________________________
_________________________________________________________________________________________
_________________________________________________________________________________________
_________________________________________________________________________________________
Other manuals for one-X 9608
2
Table of contents
Other Avaya IP Phone manuals

Avaya
Avaya IP Office 9508 User manual

Avaya
Avaya 1230 User manual

Avaya
Avaya 9650 Deskphone Edition User manual

Avaya
Avaya 4600 Series User manual

Avaya
Avaya 9504 User manual

Avaya
Avaya 9610 User manual

Avaya
Avaya E129 Assembly Instructions

Avaya
Avaya 5601 User manual

Avaya
Avaya one-X 9611G User manual

Avaya
Avaya 4620 User manual

Avaya
Avaya 1120E User manual

Avaya
Avaya 4612 User manual

Avaya
Avaya IP OFFICE 2420 User manual

Avaya
Avaya B189 Installation and operating instructions

Avaya
Avaya 2033 User manual

Avaya
Avaya J139 User manual

Avaya
Avaya 4630 User manual

Avaya
Avaya J179 Instruction manual

Avaya
Avaya IP Office 9608 User manual

Avaya
Avaya one-X 9600 Series Installation guide