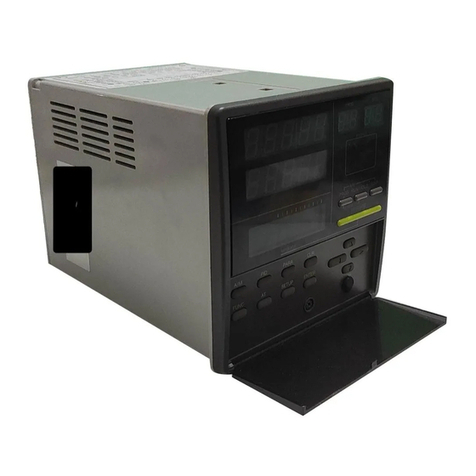
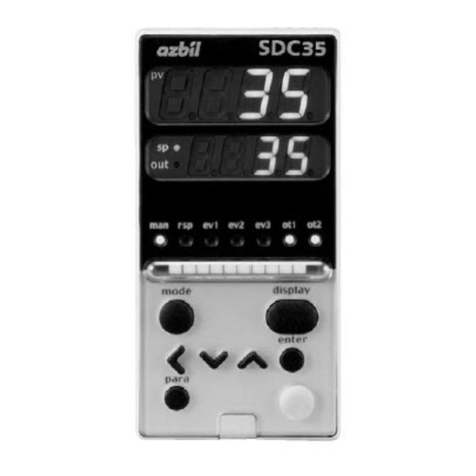
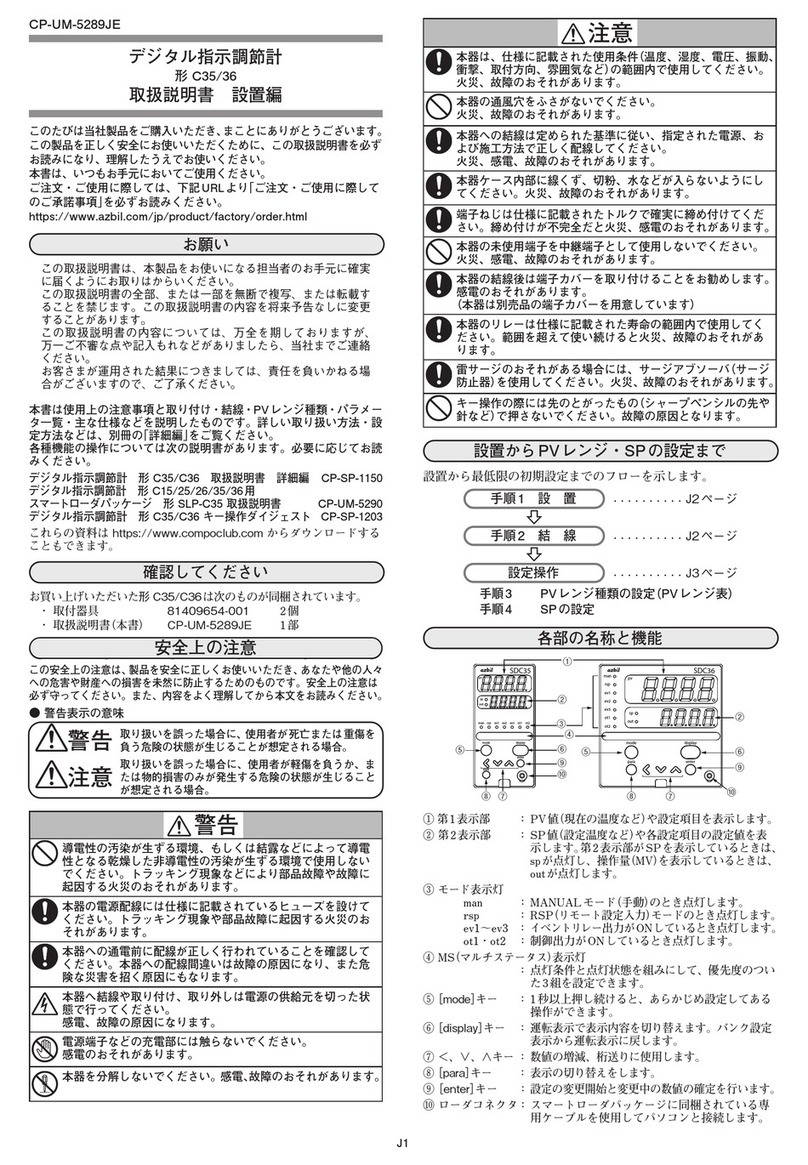
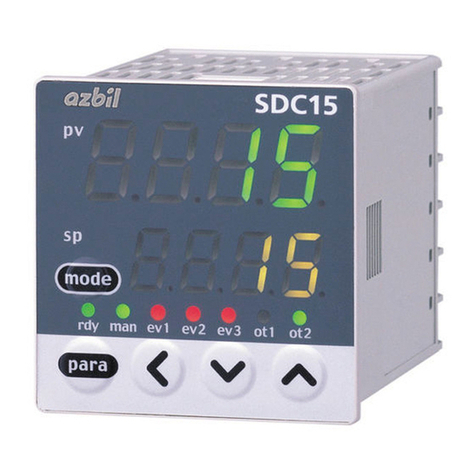
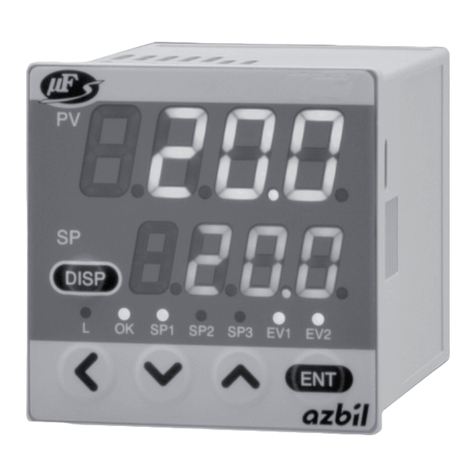
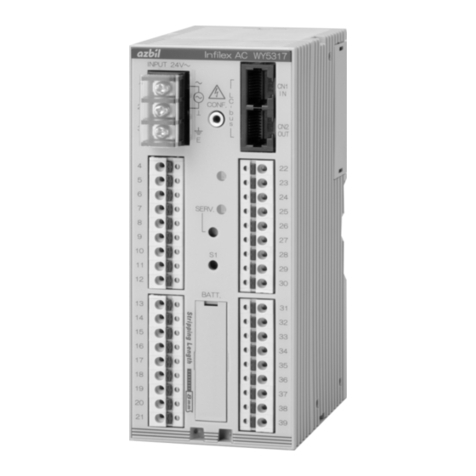
Azbil SDC45 User manual

Thank you for purchasing an Azbil
Corporation product.
This manual contains information
for ensuring the correct use of this
product. It also provides necessary
information for installation, main-
tenance, and troubleshooting.
This manual should be read by
those who design and maintain
equipment that uses this product.
Be sure to keep this manual nearby
for handy reference.
SDC45/46
Digital Indicating Controller
User's Manual
for
Displays and Settings
No. CP-SP-1265E

NOTICE
Be sure that the user receives this manual before the product is used.
Copying or duplicating this user’s manual in part or in whole is forbidden.
The information and specifications in this manual are subject to change
without notice.
Considerable effort has been made to ensure that this manual is free from
inaccuracies and omissions. If you should find an error or omission, please
contact the azbil Group.
In no event is Azbil Corporation liable to anyone for any indirect, special or
consequential damages as a result of using this product.
Please read“Terms and Conditions”from the following URL
before ordering and use.
https://www.azbil.com/products/factory/order.html
© 2007–2018 Azbil Corporation. All Rights Reserved.

i
The Role of This Manual
A total of 5 different manuals are available for the SDC45/46. Read them as necessary for your
specific requirements. If a manual you require is not available, contact the azbil Group or its
dealer.
SDC45/46 Digital Indicating Controller User’s Manual for Displays
and Settings Manual No. CP-SP-1265E
This manual.
The manual is a reference document necessary to set or change data.
The manual lists up the displays, setup items, setting ranges, and initial
values.
SDC45/46 Digital Indicating Controller Installation
Instructions
Manual No. CP-UM-5445E
This manual is supplied with the SDC45/46. Personnel in charge
of design and/or manufacture of a system using the SDC45/46
must thoroughly read this manual. This manual describes the
safety precautions, installation, wiring, primary specifications,
and transitions of key operations and displays. For further infor-
mation about operation, refer to another manual, Installation
and Configuration.
SDC45/46 Digital Indicating Controller User’s Manual for
Installation and Configuration
Manual No. CP-SP-1218E
Personnel in charge of design, manufacture, operation, and/or
maintenance of a system using SDC45/46 must thoroughly read
this manual. This manual also describes the installation, wiring,
connections for communication, all functions and settings of
the SDC45/46, operating procedures, troubleshooting, and de-
tailed specifications.

ii
SDC45V/46V Digital Indicating Controller User’s Manual for
Computational Functions
Manual No. CP-SP-1275E
It describes the computation functions of the SDC45V/46V.
Please read it together with the Installation and Configuration
manual (CP-SP-1218E) and the Displays and Settings manual
(CP-SP-1265E).
SLP-C45 Smart Loader Package for SDC45/46 Digital
Indicating Controller
Manual No. CP-UM-5458E
This manual is supplied with the SLP-C45 Smart Loader Package.
The manual describes the software used to make various set-
tings for SDC45/46 using a personal computer. Personnel in
charge of design or setting of a system using SDC45/46 must
thoroughly read this manual. The manual describes installation
of the software into a personal computer, operation of the per-
sonal computer, various functions, and setup procedures.

iii
Contents
The Role of This Manual
Chapter 1. PRELIMINARIES 1-1
Names and function of parts 1-1
Method of key operations 1-2
Chapter 2. PARA BANK SETTINGS 2-1
Mode bank (MODE)2-1
Loop 1 PID bank (L1.PI D)2-1
Loop 2 PID bank (L2.PI D)2-4
SP configuration bank (Spcnf)2-7
Event configuration bank (evcnf)2-8
Control bank (ctrl)2-11
MV bank (Mv)2-13
Setup bank (Setup)2-14
Priority bank (priOr)2-15
PV bank (pv)2-16
Output bank (OUt)2-18
Position proportional bank (PP)2-20
CT input bank (CT)2-20
AC input bank (ac)2-20
Linearization table bank (tbl)2-21
Internal contact input bank (ic)2-26
Digital output bank (dO)2-28
Logical operation bank (bf)2-29
User-defined bank (udb)2-32
Temperature and pressure compensation bank (PV.CMP)2-32
Input computation bank (IN.FNC)2-33
Output computation bank (OT.FNC)2-35
Display/key bank (hMi)2-37
Operation display switching order bank (dtUrn)2-39
User-defined operation display creation bank (UdESI) 2-40
RS-485 communication bank (rS485)2-41
Lock bank (lOcK)2-41
Monitor bank (MOni)2-42
Instrument information bank (Id)2-46

iv
Chapter 3. SP/EV BANK SETTINGS 3-1
SP group selection bank (SPNO)3-1
Loop 1 multi-SP bank (L1.LSP)3-1
Loop 2 multi-SP bank (L2.LSP)3-2
Loop 1 recipe bank (L1.rec)3-3
Loop 2 recipe bank (L2.rec)3-11
RSP bank (RSP)3-19
Event setup bank (EV)3-19
Chapter 4. STANDARD BIT CODES AND STANDARD NUMERICAL CODES 4-1
Standard bit codes 4-1
Standard numerical codes 4-3

1-1
Chapter 1.
PRELIMINARIES
Names and function of parts
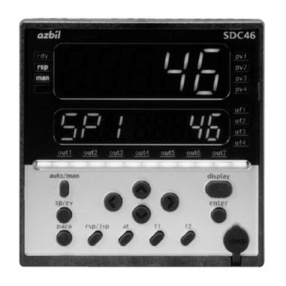
Front panel of SDC45 Front panel of SDC46
(15)(16)
(3)
(1)
(5) (5)
(3)
(1)
(9)
(8)
(9)
(10)
(12)
(10)
(12)
(15)(16) (14) (14) (8)
(13)
(11)
(17)
(13)
(11)
(17)
(2)
(4)
(7)
(5)
(6)
(4)
(5)
(6)
(7)
(2)
Description
(1) Upper display: Displays PV (present temperature etc.) or setup
items.
(2) Lower display: Displays SP (set temperature, etc.) and other
parameters.
(3) Auxiliary display: Displays user-defined operation display No. and
group No., loop No., and channel No. of items
available for setup.
*: The series of connections from PV input to PID operation
through to control output is generically called a loop.
(4) Multi-status indicator:
Indicates MV or DI/DO status.
(5) Mode indicators:
rdy: Lights up in READY mode.
rsp: Lights up in RSP (remote setting input) mode.
man: Lights up in MANUAL mode.
out1-7: Light up when the output is ON (SDC45: out1-5).
Always lit when the output is current or continu-
ous voltage.
(6) User function indicators:
uf1-4: Light under user-assigned conditions (SDC45: uf1,
uf2).
(7) Loop number indicators:
pv1, pv2: Light up to indicate which loop has the displayed
PV value.
(8) [], [ ],[<], [>] keys:
Used to increment/decrement numeric values and
shift between digits or settable items.
(9) [auto/man] key: Used to change AUTO/MANUAL mode.
(10) [sp/ev] key: Used to set the SP/EV bank.
(11) [display] key: Used to change the display contents in the opera-
tion display mode.
(12) [para] key: Used to set the PARA bank.
(13) [enter] key: Used in initiating setup and to confirm changed
values.
(14) [f1], [f2] key: Used for user-assigned functions. (SDC46 only).
(15) [at] key: Used to execute/cancel auto-tuning, or for user-
assigned functions.
(16) [rsp/lsp] key: Used to change between remote and local set
point, or for user-assigned functions.
(17) Loader jack: Jack for connection of PC loader cable (with cap).

1-2
Chapter 1. PRELIMINARIES
Method of key operations
Key operations when setting PARA bank
(1) Press the [display] key to return to the operation display.
(2) To select a bank, keep the [para] key pressed for 2 s.
(3) To display a bank to be set, press the [para] key, []key, or [ ] key.
(4) When a desired bank is displayed, press the [enter] key.
(5) To display an item to be set, press the [para] key, []key, [ ] key,
[<] key, or [>] key.
(6) When a desired item is displayed, press the [enter] key.
(7) Change the set value with the []key, [ ] key, [<] key, or [>] key.
(8) To set the set value you have changed, press the [enter] key.
(9) To set other items in the same bank, repeat the operation from
step (5).
To set desired set data in other bank, continue the operation
from step (2).
(10) To exit the setting, press the [display] key.
Key operations when setting SP/EV bank
(1) Press the [display] key to return to the operation display.
(2) To select a bank, keep the [sp/ev] key pressed for 2 s.
(3) To display a bank to be set, press the [sp/ev] key, []key, or [ ]
key.
(4) When a desired bank is displayed, press the [enter] key.
(5) To display an item to be set, press the [sp/ev] key, []key, [ ] key,
[<] key, or [>] key.
(6) When a desired item is displayed, press the [enter] key.
(7) Change the set value with the []key, [ ] key, [<] key, or [>] key.
(8) To set the set value you have changed, press the [enter] key.
(9) To set other items in the same bank, repeat the operation from
step (5).
To set desired set data in other bank, continue the operation
from step (2).
(10) To exit the setting, press the [display] key.

2-1
Chapter 2.
PARA BANK SETTINGS
Mode bank (MODE)
Display
Loop number
(auxiliary display)
Item Settings and descriptions Initial
value
User
setting
Remarks
r---r L. 1. RUN/READY rUn : RUN mode
rdy : READY mode
RUN
A---M L. 1. AUTO/MANUAL AutO : AUTO mode
Man : MANUAL mode
AUTO
At L. 1. Auto tuning (AT) stop/start At.Of: AT stop
At.On: AT start
AT.OF
L---r L. 1. LSP/RSP lSp : LSP mode
rSp : RSP mode
LSP
Cb L. 1. Backup/Through output lMv : Backup mode (local MV)
rMv :
Through output mode (remote MV)
LMV
r---r L.2. RUN/READY rUn : RUN mode
rdy : READY mode
RUN
A---M L.2. AUTO/MANUAL AutO : AUTO mode
Man : MANUAL mode
AUTO
At L.2. Auto tuning (AT) stop/start At.Of: AT stop
At.On: AT start
AT.OF
L---r L.2. LSP/RSP lSp : LSP mode
rSp : RSP mode
LSP
Cb L.2. (Reserved for future use) - Setting is disabled.
Loop 1 PID bank (L1.PI D)
Display
Loop number
(auxiliary display)
Item PID
value
Settings and descriptions Initial
value
User
setting
Remarks
p-0 1L. 1. Proportional band 1 0.1 to 3200.0 % 5.0
i-0 1L. 1. Integral time 1 0 to 32000 s, 0.0 to 3200.0 s or 0.00 to
320.00 s (no integral control action
when set at 0, 0.0 or 0.00.)
120 The decimal point position is
determined by the decimal
point positions for the integral
time and derivative time.
d-0 1L. 1. Derivative time 1 0 to 32000 s, 0.0 to 3200.0 s or 0.00 to
320.00 s (no derivative control action
when set at 0, 0.0 or 0.00.)
30
OL-0 1L. 1. Output low limit 1 -10.0 to +110.0 % 0.0
Oh-0 1L. 1. Output high limit 1 100.0
re-0 1L. 1. Manual reset 1 50.0
p-0 1c L. 1.
Proportional band for cool side
1 0.1 to 3200.0 % 5.0
i-0 1c L. 1.
Integral time for cool side
1 0 to 32000 s, 0.0 to 3200.0 s or 0.00 to
320.00 s (no integral control action
when set at 0, 0.0 or 0.00.)
120 The decimal point position is
determined by the decimal
point positions for the integral
time and derivative time.
d-0 1C L. 1.
Derivative time for cool side
1 0 to 32000 s, 0.0 to 3200.0 s or 0.00 to
320.00 s (no derivative control action
when set at 0, 0.0 or 0.00.)
30
OL.0 1C L. 1.
Output low limit for cool side
1 -10.0 to +110.0 % 0.0
OH.0 1C L. 1.
Output high limit for cool side
1 100.0
P-02 L. 1. Proportional band 2 Same as PID1 5.0 Same as PID1
i-02 L. 1. Integral time 2 120
d-02 L. 1. Derivative time 2 30
OL-02 L. 1. Output low limit 2 0.0
OH-02 L. 1. Output high limit 2 100.0
rE-02 L. 1. Manual reset 2 50.0
P-02C L. 1.
Proportional band for cool side
2 5.0
i-02C L. 1.
Integral time for cool side
2 120
d-02C L. 1.
Derivative time for cool side
2 30
OL.02C L. 1.
Output low limit for cool side
2 0.0
OH.02C L. 1.
Output high limit for cool side
2 100.0
P-03 L. 1. Proportional band 3 Same as PID1 5.0 Same as PID1
i-03 L. 1. Integral time 3 120
d-03 L. 1. Derivative time 3 30
OL-03 L. 1. Output low limit 3 0.0
OH-03 L. 1. Output high limit 3 100.0
rE-03 L. 1. Manual reset 3 50.0
P-03C L. 1.
Proportional band for cool side
3 5.0
i-03C L. 1.
Integral time for cool side
3 120
d-03C L. 1.
Derivative time for cool side
3 30
OL.03C L. 1.
Output low limit for cool side
3 0.0
OH.03C L. 1.
Output high limit for cool side
3 100.0
2-2
Chapter 2. PARA BANK SETTINGS
Display
Loop number
(auxiliary display)
Item PID
value
Settings and descriptions Initial
value
User
setting
Remarks
P-04 L. 1. Proportional band 4 Same as PID1 5.0 Same as PID1
I-04 L. 1. Integral time 4 120
d-04 L. 1. Derivative time 4 30
OL-04 L. 1. Output low limit 4 0.0
OH-04 L. 1. Output high limit 4 100.0
rE-04 L. 1. Manual reset 4 50.0
P-04C L. 1.
Proportional band for cool side
4 5.0
I-04C L. 1.
Integral time for cool side
4 120
d-04C L. 1.
Derivative time for cool side
4 30
OL.04C L. 1.
Output low limit for cool side
4 0.0
OH.04C L. 1.
Output high limit for cool side
4 100.0
P-05 L. 1. Proportional band 5 Same as PID1 5.0 Same as PID1
I-05 L. 1. Integral time 5 120
d-05 L. 1. Derivative time 5 30
OL-05 L. 1. Output low limit 5 0.0
OH-05 L. 1. Output high limit 5 100.0
rE-05 L. 1. Manual reset 5 50.0
P-05C L. 1.
Proportional band for cool side
5 5.0
I-05C L. 1.
Integral time for cool side
5 120
d-05C L. 1.
Derivative time for cool side
5 30
OL.05C L. 1.
Output low limit for cool side
5 0.0
OH.05C L. 1.
Output high limit for cool side
5 100.0
P-06 L. 1. Proportional band 6 Same as PID1 5.0 Same as PID1
I-06 L. 1. Integral time 6 120
d-06 L. 1. Derivative time 6 30
OL-06 L. 1. Output low limit 6 0.0
OH-06 L. 1. Output high limit 6 100.0
rE-06 L. 1. Manual reset 6 50.0
P-06C L. 1.
Proportional band for cool side
6 5.0
I-06C L. 1.
Integral time for cool side
6 120
d-06C L. 1.
Derivative time for cool side
6 30
OL.06C L. 1.
Output low limit for cool side
6 0.0
OH.06C L. 1.
Output high limit for cool side
6 100.0
P-07 L. 1. Proportional band 7 Same as PID1 5.0 Same as PID1
I-07 L. 1. Integral time 7 120
d-07 L. 1. Derivative time 7 30
OL-07 L. 1. Output low limit 7 0.0
OH-07 L. 1. Output high limit 7 100.0
rE-07 L. 1. Manual reset 7 50.0
P-07C L. 1.
Proportional band for cool side
7 5.0
I-07C L. 1.
Integral time for cool side
7 120
d-07C L. 1.
Derivative time for cool side
7 30
OL.07C L. 1.
Output low limit for cool side
7 0.0
OH.07C L. 1.
Output high limit for cool side
7 100.0
P-08 L. 1. Proportional band 8 Same as PID1 5.0 Same as PID1
I-08 L. 1. Integral time 8 120
d-08 L. 1. Derivative time 8 30
OL-08 L. 1. Output low limit 8 0.0
OH-08 L. 1. Output high limit 8 100.0
rE-08 L. 1. Manual reset 8 50.0
P-08C L. 1.
Proportional band for cool side
8 5.0
I-08C L. 1.
Integral time for cool side
8 120
d-08C L. 1.
Derivative time for cool side
8 30
OL.08C L. 1.
Output low limit for cool side
8 0.0
OH.08C L. 1.
Output high limit for cool side
8 100.0
P-09 L. 1. Proportional band 9 Same as PID1 5.0 Same as PID1
I-09 L. 1. Integral time 9 120
d-09 L. 1. Derivative time 9 30
OL-09 L. 1. Output low limit 9 0.0
OH-09 L. 1. Output high limit 9 100.0
rE-09 L. 1. Manual reset 9 50.0
P-09C L. 1.
Proportional band for cool side
9 5.0
I-09C L. 1.
Integral time for cool side
9 120
d-09C L. 1.
Derivative time for cool side
9 30
OL.09C L. 1.
Output low limit for cool side
9 0.0
OH.09C L. 1.
Output high limit for cool side
9 100.0

2-3
Chapter 2. PARA BANK SETTINGS
Display
Loop number
(auxiliary display)
Item PID
value
Settings and descriptions Initial
value
User
setting
Remarks
P- 10 L. 1. Proportional band 10 Same as PID1 5.0 Same as PID1
I-10 L. 1. Integral time 10 120
d- 10 L. 1. Derivative time 10 30
OL- 10 L. 1. Output low limit 10 0.0
OH- 10 L. 1. Output high limit 10 100.0
rE- 10 L. 1. Manual reset 10 50.0
P- 10C L. 1.
Proportional band for cool side
10 5.0
I-10C L. 1.
Integral time for cool side
10 120
d- 10C L. 1.
Derivative time for cool side
10 30
OL. 10C L. 1.
Output low limit for cool side
10 0.0
OH. 10C L. 1.
Output high limit for cool side
10 100.0
P- 11L. 1. Proportional band 11 Same as PID1 5.0 Same as PID1
I-11L. 1. Integral time 11 120
d- 11L. 1. Derivative time 11 30
OL- 11L. 1. Output low limit 11 0.0
OH- 11L. 1. Output high limit 11 100.0
rE- 11L. 1. Manual reset 11 50.0
P- 11C L. 1.
Proportional band for cool side
11 5.0
I-11C L. 1.
Integral time for cool side
11 120
d- 11C L. 1.
Derivative time for cool side
11 30
OL. 11C L. 1.
Output low limit for cool side
11 0.0
OH. 11C L. 1.
Output high limit for cool side
11 100.0
P- 12 L. 1. Proportional band 12 Same as PID1 5.0 Same as PID1
I-12 L. 1. Integral time 12 120
d- 12 L. 1. Derivative time 12 30
OL- 12 L. 1. Output low limit 12 0.0
OH- 12 L. 1. Output high limit 12 100.0
rE- 12 L. 1. Manual reset 12 50.0
P- 12C L. 1.
Proportional band for cool side
12 5.0
I-12C L. 1.
Integral time for cool side
12 120
d- 12C L. 1.
Derivative time for cool side
12 30
OL. 12C L. 1.
Output low limit for cool side
12 0.0
OH. 12C L. 1.
Output high limit for cool side
12 100.0
P- 13 L. 1. Proportional band 13 Same as PID1 5.0 Same as PID1
I-13 L. 1. Integral time 13 120
d- 13 L. 1. Derivative time 13 30
OL- 13 L. 1. Output low limit 13 0.0
OH- 13 L. 1. Output high limit 13 100.0
rE- 13 L. 1. Manual reset 13 50.0
P- 13C L. 1.
Proportional band for cool side
13 5.0
I-13C L. 1.
Integral time for cool side
13 120
d- 13C L. 1.
Derivative time for cool side
13 30
OL. 13C L. 1.
Output low limit for cool side
13 0.0
OH. 13C L. 1.
Output high limit for cool side
13 100.0
P- 14 L. 1. Proportional band 14 Same as PID1 5.0 Same as PID1
I-14 L. 1. Integral time 14 120
d- 14 L. 1. Derivative time 14 30
OL- 14 L. 1. Output low limit 14 0.0
OH- 14 L. 1. Output high limit 14 100.0
rE- 14 L. 1. Manual reset 14 50.0
P- 14C L. 1.
Proportional band for cool side
14 5.0
I-14C L. 1.
Integral time for cool side
14 120
d- 14C L. 1.
Derivative time for cool side
14 30
OL. 14C L. 1.
Output low limit for cool side
14 0.0
OH. 14C L. 1.
Output high limit for cool side
14 100.0
P- 15 L. 1. Proportional band 15 Same as PID1 5.0 Same as PID1
I-15 L. 1. Integral time 15 120
d- 15 L. 1. Derivative time 15 30
OL- 15 L. 1. Output low limit 15 0.0
OH- 15 L. 1. Output high limit 15 100.0
rE- 15 L. 1. Manual reset 15 50.0
P- 15C L. 1.
Proportional band for cool side
15 5.0
I-15C L. 1.
Integral time for cool side
15 120
d- 15C L. 1.
Derivative time for cool side
15 30
OL. 15C L. 1.
Output low limit for cool side
15 0.0
OH. 15C L. 1.
Output high limit for cool side
15 100.0

2-4
Chapter 2. PARA BANK SETTINGS
Display
Loop number
(auxiliary display)
Item PID
value
Settings and descriptions Initial
value
User
setting
Remarks
P- 16 L. 1. Proportional band 16 Same as PID1 5.0 Same as PID1
I-16 L. 1. Integral time 16 120
d- 16 L. 1. Derivative time 16 30
OL- 16 L. 1. Output low limit 16 0.0
OH- 16 L. 1. Output high limit 16 100.0
rE- 16 L. 1. Manual reset 16 50.0
P- 16C L. 1.
Proportional band for cool side
16 5.0
I-16C L. 1.
Integral time for cool side
16 120
d- 16C L. 1.
Derivative time for cool side
16 30
OL. 16C L. 1.
Output low limit for cool side
16 0.0
OH. 16C L. 1.
Output high limit for cool side
16 100.0
Loop 2 PID bank (L2.PI D)
Display
Loop number
(auxiliary display)
Item PID
value
Settings and descriptions Initial
value
User
setting
Remarks
p-0 1L.2. Proportional band 1 0.1 to 3200.0 % 5.0
I-0 1L.2. Integral time 1 0 to 32000 s, 0.0 to 3200.0 s or 0.00 to
320.00 s (no integral control action
when set at 0, 0.0 or 0.00.)
120 The decimal point position is
determined by the decimal
point positions for the integral
time and derivative time.
d-0 1L.2. Derivative time 1 0 to 32000 s, 0.0 to 3200.0 s or 0.00 to
320.00 s (no derivative control action
when set at 0, 0.0 or 0.00.)
30
OL-0 1L.2. Output low limit 1 -10.0 to +110.0 % 0.0
Oh-0 1L.2. Output high limit 1 100.0
re-0 1L.2. Manual reset 1 50.0
p-0 1c L.2.
Proportional band for cool side
1 0.1 to 3200.0 % 5.0
i-0 1c L.2. Integral time for cool
side
1 0 to 32000 s, 0.0 to 3200.0 s or 0.00 to
320.00 s (no integral control action
when set at 0, 0.0 or 0.00.)
120 The decimal point position is
determined by the decimal
point positions for the integral
time and derivative time.
d-0 1C L.2. Derivative time for
cool side
1 0 to 32000 s, 0.0 to 3200.0 s or 0.00 to
320.00 s (no derivative control action
when set at 0, 0.0 or 0.00.)
30
OL.0 1C L.2.
Output low limit for cool side
1 -10.0 to +110.0 % 0.0
OH.0 1C L.2.
Output high limit for cool side
1 100.0
P-02 L.2. Proportional band 2 Same as PID1 5.0 Same as PID1
I-02 L.2. Integral time 2 120
d-02 L.2. Derivative time 2 30
OL-02 L.2. Output low limit 2 0.0
OH-02 L.2. Output high limit 2 100.0
rE-02 L.2. Manual reset 2 50.0
P-02C L.2.
Proportional band for cool side
2 5.0
I-02C L.2.
Integral time for cool side
2 120
d-02C L.2.
Derivative time for cool side
2 30
OL.02C L.2.
Output low limit for cool side
2 0.0
OH.02C L.2.
Output high limit for cool side
2 100.0
P-03 L.2. Proportional band 3 Same as PID1 5.0 Same as PID1
I-03 L.2. Integral time 3 120
d-03 L.2. Derivative time 3 30
OL-03 L.2. Output low limit 3 0.0
OH-03 L.2. Output high limit 3 100.0
rE-03 L.2. Manual reset 3 50.0
P-03C L.2.
Proportional band for cool side
3 5.0
I-03C L.2.
Integral time for cool side
3 120
d-03C L.2.
Derivative time for cool side
3 30
OL.03C L.2.
Output low limit for cool side
3 0.0
OH.03C L.2.
Output high limit for cool side
3 100.0
P-04 L.2. Proportional band 4 Same as PID1 5.0 Same as PID1
I-04 L.2. Integral time 4 120
d-04 L.2. Derivative time 4 30
OL-04 L.2. Output low limit 4 0.0
OH-04 L.2. Output high limit 4 100.0
rE-04 L.2. Manual reset 4 50.0
P-04C L.2.
Proportional band for cool side
4 5.0
I-04C L.2.
Integral time for cool side
4 120
d-04C L.2.
Derivative time for cool side
4 30
OL.04C L.2.
Output low limit for cool side
4 0.0
OH.04C L.2.
Output high limit for cool side
4 100.0

2-5
Chapter 2. PARA BANK SETTINGS
Display
Loop number
(auxiliary display)
Item PID
value
Settings and descriptions Initial
value
User
setting
Remarks
P-05 L.2. Proportional band 5 Same as PID1 5.0 Same as PID1
I-05 L.2. Integral time 5 120
d-05 L.2. Derivative time 5 30
OL-05 L.2. Output low limit 5 0.0
OH-05 L.2. Output high limit 5 100.0
rE-05 L.2. Manual reset 5 50.0
P-05C L.2.
Proportional band for cool side
5 5.0
I-05C L.2.
Integral time for cool side
5 120
d-05C L.2.
Derivative time for cool side
5 30
OL.05C L.2.
Output low limit for cool side
5 0.0
OH.05C L.2.
Output high limit for cool side
5 100.0
P-06 L.2. Proportional band 6 Same as PID1 5.0 Same as PID1
I-06 L.2. Integral time 6 120
d-06 L.2. Derivative time 6 30
OL-06 L.2. Output low limit 6 0.0
OH-06 L.2. Output high limit 6 100.0
rE-06 L.2. Manual reset 6 50.0
P-06C L.2.
Proportional band for cool side
6 5.0
I-06C L.2.
Integral time for cool side
6 120
d-06C L.2.
Derivative time for cool side
6 30
OL.06C L.2.
Output low limit for cool side
6 0.0
OH.06C L.2.
Output high limit for cool side
6 100.0
P-07 L.2. Proportional band 7 Same as PID1 5.0 Same as PID1
I-07 L.2. Integral time 7 120
d-07 L.2. Derivative time 7 30
OL-07 L.2. Output low limit 7 0.0
OH-07 L.2. Output high limit 7 100.0
rE-07 L.2. Manual reset 7 50.0
P-07C L.2.
Proportional band for cool side
7 5.0
I-07C L.2.
Integral time for cool side
7 120
d-07C L.2.
Derivative time for cool side
7 30
OL.07C L.2.
Output low limit for cool side
7 0.0
OH.07C L.2.
Output high limit for cool side
7 100.0
P-08 L.2. Proportional band 8 Same as PID1 5.0 Same as PID1
I-08 L.2. Integral time 8 120
d-08 L.2. Derivative time 8 30
OL-08 L.2. Output low limit 8 0.0
OH-08 L.2. Output high limit 8 100.0
rE-08 L.2. Manual reset 8 50.0
P-08C L.2.
Proportional band for cool side
8 5.0
I-08C L.2.
Integral time for cool side
8 120
d-08C L.2.
Derivative time for cool side
8 30
OL.08C L.2.
Output low limit for cool side
8 0.0
OH.08C L.2.
Output high limit for cool side
8 100.0
P-09 L.2. Proportional band 9 Same as PID1 5.0 Same as PID1
I-09 L.2. Integral time 9 120
d-09 L.2. Derivative time 9 30
OL-09 L.2. Output low limit 9 0.0
OH-09 L.2. Output high limit 9 100.0
rE-09 L.2. Manual reset 9 50.0
P-09C L.2.
Proportional band for cool side
9 5.0
I-09C L.2.
Integral time for cool side
9 120
d-09C L.2.
Derivative time for cool side
9 30
OL.09C L.2.
Output low limit for cool side
9 0.0
OH.09C L.2.
Output high limit for cool side
9 100.0
P- 10 L.2. Proportional band 10 Same as PID1 5.0 Same as PID1
I-10 L.2. Integral time 10 120
d- 10 L.2. Derivative time 10 30
OL- 10 L.2. Output low limit 10 0.0
OH- 10 L.2. Output high limit 10 100.0
rE- 10 L.2. Manual reset 10 50.0
P- 10C L.2.
Proportional band for cool side
10 5.0
I-10C L.2.
Integral time for cool side
10 120
d- 10C L.2.
Derivative time for cool side
10 30
OL. 10C L.2.
Output low limit for cool side
10 0.0
OH. 10C L.2.
Output high limit for cool side
10 100.0

2-6
Chapter 2. PARA BANK SETTINGS
Display
Loop number
(auxiliary display)
Item PID
value
Settings and descriptions Initial
value
User
setting
Remarks
P- 11L.2. Proportional band 11 Same as PID1 5.0 Same as PID1
I-11L.2. Integral time 11 120
d- 11L.2. Derivative time 11 30
OL- 11L.2. Output low limit 11 0.0
OH- 11L.2. Output high limit 11 100.0
rE- 11L.2. Manual reset 11 50.0
P- 11C L.2.
Proportional band for cool side
11 5.0
I-11C L.2.
Integral time for cool side
11 120
d- 11C L.2.
Derivative time for cool side
11 30
OL. 11C L.2.
Output low limit for cool side
11 0.0
OH. 11C L.2.
Output high limit for cool side
11 100.0
P- 12 L.2. Proportional band 12 Same as PID1 5.0 Same as PID1
I-12 L.2. Integral time 12 120
d- 12 L.2. Derivative time 12 30
OL- 12 L.2. Output low limit 12 0.0
OH- 12 L.2. Output high limit 12 100.0
rE- 12 L.2. Manual reset 12 50.0
P- 12C L.2.
Proportional band for cool side
12 5.0
I-12C L.2.
Integral time for cool side
12 120
d- 12C L.2.
Derivative time for cool side
12 30
OL. 12C L.2.
Output low limit for cool side
12 0.0
OH. 12C L.2.
Output high limit for cool side
12 100.0
P- 13 L.2. Proportional band 13 Same as PID1 5.0 Same as PID1
I-13 L.2. Integral time 13 120
d- 13 L.2. Derivative time 13 30
OL- 13 L.2. Output low limit 13 0.0
OH- 13 L.2. Output high limit 13 100.0
rE- 13 L.2. Manual reset 13 50.0
P- 13C L.2.
Proportional band for cool side
13 5.0
I-13C L.2.
Integral time for cool side
13 120
d- 13C L.2.
Derivative time for cool side
13 30
OL. 13C L.2.
Output low limit for cool side
13 0.0
OH. 13C L.2.
Output high limit for cool side
13 100.0
P- 14 L.2. Proportional band 14 Same as PID1 5.0 Same as PID1
I-14 L.2. Integral time 14 120
d- 14 L.2. Derivative time 14 30
OL- 14 L.2. Output low limit 14 0.0
OH- 14 L.2. Output high limit 14 100.0
rE- 14 L.2. Manual reset 14 50.0
P- 14C L.2.
Proportional band for cool side
14 5.0
I-14C L.2.
Integral time for cool side
14 120
d- 14C L.2.
Derivative time for cool side
14 30
OL. 14C L.2.
Output low limit for cool side
14 0.0
OH. 14C L.2.
Output high limit for cool side
14 100.0
P- 15 L.2. Proportional band 15 Same as PID1 5.0 Same as PID1
I-15 L.2. Integral time 15 120
d- 15 L.2. Derivative time 15 30
OL- 15 L.2. Output low limit 15 0.0
OH- 15 L.2. Output high limit 15 100.0
rE- 15 L.2. Manual reset 15 50.0
P- 15C L.2.
Proportional band for cool side
15 5.0
I-15C L.2.
Integral time for cool side
15 120
d- 15C L.2.
Derivative time for cool side
15 30
OL. 15C L.2.
Output low limit for cool side
15 0.0
OH. 15C L.2.
Output high limit for cool side
15 100.0
P- 16 L.2. Proportional band 16 Same as PID1 5.0 Same as PID1
I-16 L.2. Integral time 16 120
d- 16 L.2. Derivative time 16 30
OL- 16 L.2. Output low limit 16 0.0
OH- 16 L.2. Output high limit 16 100.0
rE- 16 L.2. Manual reset 16 50.0
P- 16C L.2.
Proportional band for cool side
16 5.0
I-16C L.2.
Integral time for cool side
16 120
d- 16C L.2.
Derivative time for cool side
16 30
OL. 16C L.2.
Output low limit for cool side
16 0.0
OH. 16C L.2.
Output high limit for cool side
16 100.0

2-7
Chapter 2. PARA BANK SETTINGS
SP configuration bank (Spcnf)
Display
Loop number
(auxiliary display)
Item Settings and descriptions Initial
value
User
setting
Remarks
LMT.0 1L. 1. SP low limit -19999 to +32000 U
-1999.9
The decimal point position is
determined by the decimal point
positions for the loop PV/SP.
LMT.02 L. 1. SP high limit 3200.0
CSP.0 1L. 1. SP ramp unit 0: No decimal point/s
1: No decimal point/min
2: No decimal point/h 3: 0.1/s 4: 0.1/min
5: 0.1/h 6: 0.01/s 7: 0.01/min 8: 0.01/h
9: 0.001/s 10: 0.001/min 11: 0.001/h
0
CSP.02 L. 1. SP ramp-up for LSP 0 U (no ramp) 1 to 32000 U 0 The decimal point position is de-
termined by the SP ramp unit.
CSP.03 L. 1. SP ramp-down for LSP 0
CSP.04 L. 1. RSP tracking 0: No tracking 1: Tracking 0
CSP.05 L. 1. SP ramp-up for RSP 0 U (no ramp) 1 to 32000 U 0 The decimal point position is de-
termined by the SP ramp unit.
CSP.06 L. 1. SP ramp-down for RSP 0
CSP.07 L. 1. LSP bias -19999 to +32000U 0 The decimal point position is
determined by the decimal point
positions for the loop PV/SP.
CSP.08 L. 1. RSP bias 0
CSP.09 L. 1. PV start for LSP 0: PV start enabled
1: PV start disabled
0
CSP. 10 L. 1. PV start for RSP 0
CSP. 11L. 1. Digital RSP selection 0: Disabled
1: Enabled
0 SDC45A/46A/45R/46R
0: When disabled, the PV input
is used as the RSP.
SDC45V/46V
0: When disabled, the RSP
assignment is used as the RSP.
CSP. 12 L. 1. Digital RSP SP low limit to SP high limit 0 The decimal point position is
determined by the decimal point
positions for the loop PV/SP.
rrA.0 1L. 1. RSP ratio 1 0.001 to 32.000 1.000
rrA.02 L. 1. RSP ratio 2
rrA.03 L. 1. RSP ratio 3
rrA.04 L. 1. RSP ratio 4
rrA.05 L. 1. RSP ratio 5
rrA.06 L. 1. RSP ratio 6
rrA.07 L. 1. RSP ratio 7
rrA.08 L. 1. RSP ratio 8
LMT.0 1L.2. SP low limit -19999 to +32000 U
-1999.9
The decimal point position is
determined by the decimal point
positions for the loop PV/SP.
LMT.02 L.2. SP high limit 3200.0
CSP.0 1L.2. SP ramp unit 0: No decimal point/s
1: No decimal point/min
2: No decimal point/h 3: 0.1/s 4: 0.1/min
5: 0.1/h 6: 0.01/s 7: 0.01/min 8: 0.01/h
9: 0.001/s 10: 0.001/min 11: 0.001/h
0
CSP.02 L.2. SP ramp-up for LSP 0 U (no ramp) 1 to 32000 U 0 The decimal point position is de-
termined by the SP ramp unit.
CSP.03 L.2. SP ramp-down for LSP 0
CSP.04 L.2. RSP tracking 0: No tracking 1: Tracking 0
CSP.05 L.2. SP ramp-up for RSP 0 U (no ramp) 1 to 32000 U 0 The decimal point position is de-
termined by the SP ramp unit.
CSP.06 L.2. SP ramp-down for RSP 0
CSP.07 L.2. LSP bias -19999 to +32000U 0 The decimal point position is
determined by the decimal point
positions for the loop PV/SP.
CSP.08 L.2. RSP bias 0
CSP.09 L.2. PV start for LSP 0: PV start enabled
1: PV start disabled
0
CSP. 10 L.2. PV start for RSP 0
CSP. 11L.2. Digital RSP selection 0: Disabled
1: Enabled
0 SDC45A/46A/45R/46R
0: When disabled, the PV input
is used as the RSP.
SDC45V/46V
0: When disabled, the RSP
assignment is used as the RSP.
CSP.12 L.2. Digital RSP SP low limit to SP high limit 0 The decimal point position is
determined by the decimal point
positions for the loop PV/SP.
rrA.0 1L.2. RSP ratio 1 0.001 to 32.000 1.000
rrA.02 L.2. RSP ratio 2
rrA.03 L.2. RSP ratio 3
rrA.04 L.2. RSP ratio 4
rrA.05 L.2. RSP ratio 5
rrA.06 L.2. RSP ratio 6
rrA.07 L.2. RSP ratio 7
rrA.08 L.2. RSP ratio 8

2-8
Chapter 2. PARA BANK SETTINGS
Event configuration bank (evcnf)
Display
Event number
(auxiliary display)
Item Settings and descriptions Initial
value
User
setting
Remarks
EP-0 1 0 1. Operation type
0: No event 1: PV high limit 2: PV low limit
3: PV high/low limit 4: Deviation high limit
5: Deviation low limit 6: Deviation high/low limit
7:
Deviation high limit (final SP reference)
8: Deviation low limit (final SP reference)
9:
Deviation high/low limit (final SP reference)
10: SP high limit 11:SP low limit
12: SP high/low limit 13: MV high limit
14: MV low limit 15: MV high/low limit
16: MFB high/low limit 17 to 25: Undefined
26: Standard numerical bit high limit
27: Standard numerical bit low limit
28: Standard numerical bit high/low limit
29 to 60: Undefined 61: Alarm (status)
62: READY (status) 63: MANUAL(status)
64: RSP (status) 65: AT start (status)
66: During SP ramp (status)
67: Control direct action (status)
68: Through output (status)
69: Undefined 70: Timer (status)
0 Setting range is 0 to 255.
Refer to Event operation
types, polarity, hysteresis, main
settings and sub settings in
the installation and configura-
tion manual (Document No.
CP-SP-1218E).
EP-02 0 1. Loop/channel definition 1: Loop 1 2: Loop 2 1 Setting range is 0 to 99.
EP-03 0 1. Direct/reverse 0: Direct 1: Reverse 0
EP-04 0 1. Standby 0: None 1: Standby
2: Standby + Standby at SP change
0
EP-05 0 1. EVENT state at READY 0: Continued 1: Forced OFF 0
EP-06 0 1. Decimal point position 0: No decimal point
1: 1 digit after decimal point
2: 2 digits after decimal point
3: 3 digits after decimal point
4: 4 digits after decimal point
0
EP-07 0 1. Hysteresis 0 to 32000U 5 The decimal point position is
determined by the decimal point
position for event configuration.
EP-08 0 1. ON delay 0.0 to 3200.0s 0.0
EP-09 0 1. OFF delay 0.0
EP-0 102. Operation type Same as event 1 0 Same as event 1
EP-02 02. Loop/channel definition 1
EP-03 02. Direct/reverse 0
EP-04 02. Standby 0
EP-05 02. EVENT state at READY 0
EP-06 02. Decimal point position 0
EP-07 02. Hysteresis 5
EP-08 02. ON delay 0.0
EP-09 02. OFF delay 0.0
EP-0 103. Operation type Same as event 1 0 Same as event 1
EP-02 03. Loop/channel definition 1
EP-03 03. Direct/reverse 0
EP-04 03. Standby 0
EP-05 03. EVENT state at READY 0
EP-06 03. Decimal point position 0
EP-07 03. Hysteresis 5
EP-08 03. ON delay 0.0
EP-09 03. OFF delay 0.0
EP-0 104. Operation type Same as event 1 0 Same as event 1
EP-02 04. Loop/channel definition 1
EP-03 04. Direct/reverse 0
EP-04 04. Standby 0
EP-05 04. EVENT state at READY 0
EP-06 04. Decimal point position 0
EP-07 04. Hysteresis 5
EP-08 04. ON delay 0.0
EP-09 04. OFF delay 0.0

2-9
Chapter 2. PARA BANK SETTINGS
Display
Event number
(auxiliary display)
Item Settings and descriptions Initial
value
User
setting
Remarks
EP-0 105. Operation type Same as event 1 0 Same as event 1
EP-02 05. Loop/channel definition 1
EP-03 05. Direct/reverse 0
EP-04 05. Standby 0
EP-05 05. EVENT state at READY 0
EP-06 05. Decimal point position 0
EP-07 05. Hysteresis 5
EP-08 05. ON delay 0.0
EP-09 05. OFF delay 0.0
EP-0 106. Operation type Same as event 1 0 Same as event 1
EP-02 06. Loop/channel definition 1
EP-03 06. Direct/reverse 0
EP-04 06. Standby 0
EP-05 06. EVENT state at READY 0
EP-06 06. Decimal point position 0
EP-07 06. Hysteresis 5
EP-08 06. ON delay 0.0
EP-09 06. OFF delay 0.0
EP-0 107. Operation type Same as event 1 0 Same as event 1
EP-02 07. Loop/channel definition 1
EP-03 07. Direct/reverse 0
EP-04 07. Standby 0
EP-05 07. EVENT state at READY 0
EP-06 07. Decimal point position 0
EP-07 07. Hysteresis 5
EP-08 07. ON delay 0.0
EP-09 07. OFF delay 0.0
EP-0 108. Operation type Same as event 1 0 Same as event 1
EP-02 08. Loop/channel definition 1
EP-03 08. Direct/reverse 0
EP-04 08. Standby 0
EP-05 08. EVENT state at READY 0
EP-06 08. Decimal point position 0
EP-07 08. Hysteresis 5
EP-08 08. ON delay 0.0
EP-09 08. OFF delay 0.0
EP-01 09. Operation type Same as event 1 0 Same as event 1
EP-02 09. Loop/channel definition 1
EP-03 09. Direct/reverse 0
EP-04 09. Standby 0
EP-05 09. EVENT state at READY 0
EP-06 09. Decimal point position 0
EP-07 09. Hysteresis 5
EP-08 09. ON delay 0.0
EP-09 09. OFF delay 0.0
EP-0 110. Operation type Same as event 1 0 Same as event 1
EP-02 10. Loop/channel definition 1
EP-03 10. Direct/reverse 0
EP-04 10. Standby 0
EP-05 10. EVENT state at READY 0
EP-06 10. Decimal point position 0
EP-07 10. Hysteresis 5
EP-08 10. ON delay 0.0
EP-09 10. OFF delay 0.0
EP-0 1 1 1. Operation type Same as event 1 0 Same as event 1
EP-02 1 1. Loop/channel definition 1
EP-03 1 1. Direct/reverse 0
EP-04 1 1. Standby 0
EP-05 1 1. EVENT state at READY 0
EP-06 1 1. Decimal point position 0
EP-07 1 1. Hysteresis 5
EP-08 1 1. ON delay 0.0
EP-09 1 1. OFF delay 0.0

2-10
Chapter 2. PARA BANK SETTINGS
Display
Event number
(auxiliary display)
Item Settings and descriptions Initial
value
User
setting
Remarks
EP-0 112. Operation type Same as event 1 0 Same as event 1
EP-02 12. Loop/channel definition 1
EP-03 12. Direct/reverse 0
EP-04 12. Standby 0
EP-05 12. EVENT state at READY 0
EP-06 12. Decimal point position 0
EP-07 12. Hysteresis 5
EP-08 12. ON delay 0.0
EP-09 12. OFF delay 0.0
EP-0 113. Operation type Same as event 1 0 Same as event 1
EP-02 13. Loop/channel definition 1
EP-03 13. Direct/reverse 0
EP-04 13. Standby 0
EP-05 13. EVENT state at READY 0
EP-06 13. Decimal point position 0
EP-07 13. Hysteresis 5
EP-08 13. ON delay 0.0
EP-09 13. OFF delay 0.0
EP-0 114. Operation type Same as event 1 0 Same as event 1
EP-02 14. Loop/channel definition 1
EP-03 14. Direct/reverse 0
EP-04 14. Standby 0
EP-05 14. EVENT state at READY 0
EP-06 14. Decimal point position 0
EP-07 14. Hysteresis 5
EP-08 14. ON delay 0.0
EP-09 14. OFF delay 0.0
EP-0 115. Operation type Same as event 1 0 Same as event 1
EP-02 15. Loop/channel definition 1
EP-03 15. Direct/reverse 0
EP-04 15. Standby 0
EP-05 15. EVENT state at READY 0
EP-06 15. Decimal point position 0
EP-07 15. Hysteresis 5
EP-08 15. ON delay 0.0
EP-09 15. OFF delay 0.0
EP-0 116. Operation type Same as event 1 0 Same as event 1
EP-02 16. Loop/channel definition 1
EP-03 16. Direct/reverse 0
EP-04 16. Standby 0
EP-05 16. EVENT state at READY 0
EP-06 16. Decimal point position 0
EP-07 16. Hysteresis 5
EP-08 16. ON delay 0.0
EP-09 16. OFF delay 0.0

2-11
Chapter 2. PARA BANK SETTINGS
Control bank (ctrl)
Display
Loop number
(auxiliary display)
Item Settings and descriptions Initial
value
User
setting
Remarks
INP.0 1 L. 1. PV assignment 0: NOP 1: PV1 (input channel)
2: PV2/21 (input channel)
3: PV22 (input channel)
4: Results of input computation
5: Flowrate (corrected for temperature
and pressure)
Others
1Setting range is 0 to 3071.
For more details on the 2048 to
3071 range, see the Standard
numerical codes (P.4-3).
Cannot be set on the SDC45A/
46A/45R/46R.
INP.02 L. 1. RSP assignment 0
INP.03 L. 1. RMV assignment 0
Cnt.0 1 L. 1. Loop PV/SP decimal point
position
0: No decimal point
1: 1 digit after decimal point
2: 2 digits after decimal point
3: 3 digits after decimal point
4: 4 digits after decimal point
1
Cnt.03 L. 1. Control action 0: Reverse (heat) 1: Direct (cool)
2: Heat/cool
0
Cnt.04 L. 1. Control algorithm 0: PID-A (deviation derivative) 1: Ra-PID
2: PID-B (PV derivative)
0
Cnt.05 L. 1. Control range low limit -19999 to +32000 U 0The decimal point position is
determined by the decimal point
positions for the loop PV/SP.
Cnt.06 L. 1. Control range high limit 1000
Cnt.07 L. 1. AT type 0: Normal (regular control characteristics)
1: Immediate response (control charac-
teristics for fast response to external
disturbance)
2: Stable (control characteristics that mini-
mize up/down PV fluctuation)
0
Cnt.08 L. 1. Heat/cool control dead zone -100.0 to +100.0 % 0.0
Cnt.09 L. 1. Initial output of PID control -10.0 to +110.0 % 0.0
Cnt. 10 L. 1. Abnormal PV definition 0: If a PV alarm (AL01 to AL06) occurs
1: If a PV1 alarm (AL01 or AL02) occurs
2: If a PV2/21 alarm (AL03 or AL04) occurs
3: If a PV22 alarm (AL05 or AL06) occurs
0Cannot be set on the SDC45A/
46A/45R/46R.
Etd.0 1 L. 1. PID control initialization 0: Auto 1: Not initialized
2: Initialized (if SP value different from the
current value is input)
0
Etd.02 L. 1. Integral time/derivative time
decimal point position
0: No decimal point
1: 1 digit after decimal point
2: 2 digits after decimal point
0Affected by the decimal point
positions for integral time and
derivative time.
Etd.03 L. 1. Output after AUTO • MANUAL
change
0: Bumpless transfer
1: Preset
0
Etd.04 L. 1. Preset MANUAL value -10.0 to +110.0 % 0.0 When the power is turned ON, if
the operation mode is MANUAL,
the MV is preset MANUAL value.
Etd.05 L. 1. MV increase change limit 0.00: No limit
0.01 to 320.00 %/s
0.00
Etd.06 L. 1. MV decrease change limit 0.00
Etd.07 L. 1. Heat/cool selection 0: Normal 1: Energy saving 0
Etd.08 L. 1. MV low limit at AT -10.0 to +110.0 % 0.0
Etd.09 L. 1. MV high limit at AT 100.0
Etd. 12 L. 1. Zone operation 0: Changed by SP value
1: Changed by PV value
0When zone PID is used, set the
PID group selection priority to
"Zone PID function".
Etd. 13 L. 1. Zone 1 -19999 to +32000 U 3200.0 The decimal point position is
determined by the decimal point
positions for the loop PV/SP.
Etd. 14 L. 1. Zone 2
Etd. 15 L. 1. Zone 3
Etd. 16 L. 1. Zone 4
Etd. 17 L. 1. Zone 5
Etd. 18 L. 1. Zone 6
Etd. 19 L. 1. Zone 7
Etd.20 L. 1. Zone hysteresis 0 to 32000 U 5.0
INP.0 1 L.2. PV assignment 0: NOP 1: PV1 (input channel)
2: PV2/21 (input channel)
3: PV22 (input channel)
4: Results of input computation
5: Flowrate (corrected for temperature
and pressure)
Others
1Setting range is 0 to 3071.
For more details on the 2048 to
3071 range, see the Standard
numerical codes (P.4-3).
Cannot be set on the SDC45A/
46A/45R/46R.
INP.02 L.2. RSP assignment 0
INP.03 L.2. RMV assignment 0
Cnt.0 1 L.2. Loop PV/SP decimal point
position
0: No decimal point
1: 1 digit after decimal point
2: 2 digits after decimal point
3: 3 digits after decimal point
4: 4 digits after decimal point
1

2-12
Chapter 2. PARA BANK SETTINGS
Display
Loop number
(auxiliary display)
Item Settings and descriptions Initial
value
User
setting
Remarks
Cnt.03 L.2. Control action 0: Reverse (heat) 1: Direct (cool)
2: Heat/cool
0
Cnt.04 L.2. Control algorithm 0: PID-A (deviation derivative) 1: Ra-PID
2: PID-B (PV derivative)
0
Cnt.05 L.2. Control range low limit -19999 to +32000 U 0The decimal point position is
determined by the decimal point
positions for the loop PV/SV.
Cnt.06 L.2. Control range high limit 1000
Cnt.07 L.2. AT type 0: Normal (regular control characteristics)
1: Immediate response (control charac-
teristics for fast response to external
disturbance)
2: Stable (control characteristics that mini-
mize up/down PV fluctuation)
0
Cnt.08 L.2. Heat/cool control dead zone -100.0 to +100.0 % 0.0
Cnt.09 L.2. Initial output of PID control -10.0 to +110.0 % 0.0
Cnt. 10 L.2. Abnormal PV definition 0: If a PV alarm (AL01 to AL06) occurs
1: If a PV1 alarm (AL01 or AL02) occurs
2: If a PV2/21 alarm (AL03 or AL04) occurs
3: If a PV22 alarm (AL05 or AL06) occurs
0Cannot be set on the SDC45A/
46A/45R/46R.
Etd.0 1 L.2. PID control initialization 0: Auto 1: Not initialized
2: Initialized (if SP value different from the
current value is input)
0
Etd.02 L.2. Integration time/derivative
time decimal point position
0: No decimal point
1: 1 digit after decimal point
2: 2 digits after decimal point
0Affected by the decimal point
positions for integral time and
derivative time.
Etd.03 L.2. Output after AUTO • MANUAL
change
0: Bumpless transfer 1: Preset 0
Etd.04 L.2. Preset MANUAL value -10.0 to +110.0 % 0.0 When the power is turned ON, if
the operation mode is MANUAL,
the MV is the preset MANUAL
value.
Etd.05 L.2. MV increase change limit 0.00: No limit
0.01 to 320.00 %/s
0.00
Etd.06 L.2. MV decrease change limit 0.00
Etd.07 L.2. Heat/cool selection 0: Normal 1: Energy saving 0
Etd.08 L.2. MV low limit at AT -10.0 to +110.0 % 0.0
Etd.09 L.2. MV high limit at AT 100.0
Etd. 12 L.2. Zone operation 0: Changed by SP value
1: Changed by PV value
0When zone PID is used, set the
PID group selection priority to
"Zone PID function".
Etd. 13 L.2. Zone 1 -19999 to +32000 U 3200.0 The decimal position is deter-
mined by the decimal point
positions for the loop PV/SP.
Etd. 14 L.2. Zone 2
Etd. 15 L.2. Zone 3
Etd. 16 L.2. Zone 4
Etd. 17 L.2. Zone 5
Etd. 18 L.2. Zone 6
Etd. 19 L.2. Zone 7
Etd.20 L.2. Zone hysteresis 0 to 32000 U 5.0
This manual suits for next models
1
Table of contents
Other Azbil Controllers manuals

Azbil
Azbil Infilex WY5317C User manual

Azbil
Azbil Infilex FC User manual

Azbil
Azbil C36 User manual

Azbil
Azbil RA1B User manual

Azbil
Azbil C35 User manual

Azbil
Azbil Azbil MIZCON Plus User manual

Azbil
Azbil AUR890 Series User manual

Azbil
Azbil Micro Flow MQV9020 User manual

Azbil
Azbil C15 User manual

Azbil
Azbil AB-7352-U User manual

Azbil
Azbil C15M User manual

Azbil
Azbil AUR890 Series User manual

Azbil
Azbil KFDB User manual

Azbil
Azbil BC-R35 Series User manual

Azbil
Azbil KZ03 Series User manual

Azbil
Azbil BH-101G0W0000 User manual

Azbil
Azbil SDC26 Instruction Manual

Azbil
Azbil SLPC1F User manual

Azbil
Azbil FRS100 User manual

Azbil
Azbil Infilex VC User manual