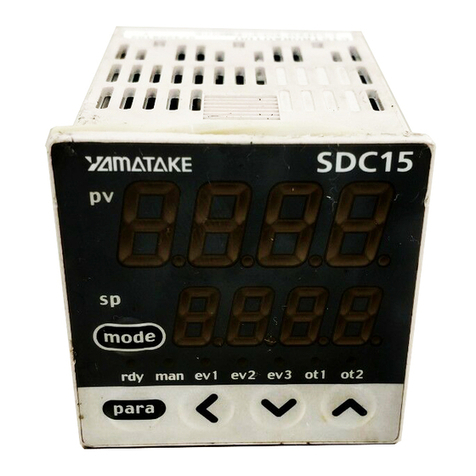
Azbil C15M User manual

Thank you for purchasing the C15M.
Before operating this product described in this User's Manual,
please take note of the following points regarding safety.
Be sure to keep this manual nearby for handy reference.
Please read the "Terms and Conditions" from the following URL
before ordering or use:
http://www.azbil.com/products/bi/order.html
This manual explains handling precautions, mounting, wiring procedures,
PV range types, parameter list and main specifications only.
Check the following items when removing the C15MT from its package:
Name Part No. Q'ty Remarks
Mounting Bracket 81409651-001 1
Gasket 81409657-001 1
User's Manual CP-UM-5410EC 1 This Manual
■Location
Install the controller in the following locations:
· Common mode voltages for I/O excluding the power supply and relay
contact output: The voltage to ground is 30Vr.m.s max., 42.4V peak
max., and 60Vdc max.
· Not high or low temperature / humidity.
· Free from silicone gas and other corrosive gases such as sulfide gas.
· Less dust or soot.
· Appropriately processed locations to prevent direct sunlight, wind or rain.
· Less mechanical vibration and shock.
· Not close to the high voltage line, welding machine or electrical noise
generating source.
· The minimum 15 meters away from the high voltage ignition device for a
boiler.
· Less effect by the magnetic.
· No flammable liquid or gas.
· Indoors.
■Mounting Procedure
· The mounting must be horizontal within 10 degrees tilted in back side
lowering or within 10 degrees tilted in back side rising.
· In the case of panel mount type (C15MT), the mounting panel should be
used with a thickness of less than 9 mm of firm board.
■External Dimensions
●C15MT (Panel Mount Type)
(unit: mm)
Handling Precautions
•To fasten this controller onto the panel, tighten a mounting
bracket screws, and turn one more half turn when there is no
play between the bracket and panel. Excessively tightening
the screws may deform the controller case.
●Panel Cutout Dimensions
Stand-alone mounting Gang-mounting
Handling Precautions
•When three or more units are gang-mounted horizontally, the
maximum allowable ambient temperature is 40°C.
•If dustproof or waterproof protection is required, mount the device
using the stand-alone mounting method. If gang-mounted,
dustproof and waterproof protection may not be maintained.
•Provide a space of at least 50mm or more above and below
the controller.
Be sure to provide a switch within operator reach for shutting OFF the main
power supply to the controller in the main supply wiring.
Also, in case of AC power supply models, the main supply wiring also requires
a time-lagged type (T) fuse (rated current: 0.2A, rated voltage: 250 V).
(IEC127)
The following table shows the meaning of the symbols in the terminal wiring
label on the controller side:
Handling Precautions
•Before wiring the C15M, verify the controller's model No. and
terminal Nos. written on the label on the side of the body.
Inspect all wiring once wiring work for the C15M has been
completed.
•Provide a distance of at least 50cm between I/O lead wires or
communications lead wires and power lead wires of 100V min.
Also, do not pass these lead wires through the same piping or
wiring duct.
•Be careful not to allow any crimp terminals lugs to touch
adjacent terminals.
•To connect 2 (max.) crimp terminals to the same
terminal screw, bend the crimp terminals
beforehand.
•Connect wires to terminals 1 - 6 and 13 - 18 from the left
(when viewing the terminal block).
•Use crimp terminals compatible with M3
terminal screws, as shown in the diagram.
A: 5.8mm max. B: 5.5 to 7.6mm
•When the power to this controller is turned off, the current
input circuit is cut off. If you connect two or more current-input
type controllers in series, change the current input to voltage
input by connecting a resistor (No. 81401325, sold separately).
•Prepare a heater current conductor to send a heater current
through the current transformer.
Do not use a heater current that exceeds the specified
permissible current as this may damage the controller.
•The controller requires about 6 seconds to start up once the
power is turned ON. The controller can be used once it has
started up. However, it is recommended to allow a warm-up
time of at least 30 minutes to attain the specified accuracy.
•The current transformer input cannot be used for phase
control.
•There is no isolation provided between control output 1 and
control output 2. Install an isolator as required.
•Do not connect a terminating resistor to either end of the RS-
485 communications line.
Doing so may interfere with communication.
•Make sure that devices and equipment connected to this
device have reinforced insulation suitable for the maximum
operating voltage of this device's power supply and
input/output ports.
●Connection of C15MT
●I/O isolation
Items surrounded by solid lines are insulated from other signals.
Availability of input or output is based on a model number.
E1
CP-UM-5410EC (Not for use in Japan)
C15M
Single Loop Controller
User's Manual
"Installation"
Use the C15M within the operating ranges recommended in the
specifications (temperature, humidity, voltage, vibration, shock,
mounting direction, atmosphere, etc.).
Failure to do so might cause fire or faulty operation.
Do not block ventilation holes.
Doing so might cause fire or faulty operation.
Wire the C15M properly according to predetermined standards.
Also wire the C15M using specified power leads according to
recognized installation methods.
Failure to do so might cause electric shock, fire or faulty operation.
Do not allow lead clippings, chips or water to enter the controller case.
Doing so might cause fire or faulty operation.
Firmly tighten the terminal screws at the torque listed in the
specifications. Insufficient tightening of terminal screws might
cause electric shock or fire.
Do not use unused terminals on the C15M as relay terminals.
Doing so might cause electric shock, fire or faulty operation.
We recommend attaching the terminal cover (sold separately)
after wiring the C15M.
Failure to do so might cause electric shock, fire or faulty operation.
Use the relays within the recommended service life.
Continuous use might cause fire or faulty operation.
If there is a risk of a power surge caused by lightning, use a surge
absorber (surge protector) to prevent fire or device failure.
Do not operate the keys with a propelling pencil or sharp-tipped
object. Doing so might cause faulty operation.
CAUTION
59
602
44.8
48
48
rdy man ev1 ev2 ev3 ot1 ot2
para
mode
SDC15
pv
sp
Mounting bracket
(Accessory) M3
Terminal screw
0
+0.5
45
50 min.
0
+0.5
45
30 min.
0
+0.5
(48xN -3)
0
+0.5
45
(N: number of mounted units)
1
2
3
1
2
1
2
3
4
5
6
13
14
15
16
17
18
7
8
9
10
11
12
4
5
6
4
5
6
7
8
9
10
+
–
+
–
11
12
1
2
3
C
B
A
Control outputs
Event outputs
Power supply
Relay
Voltage pulse
PV inputs
Thermo-
couple
RTD
Relay
AC power supply
100 to 240Vac
16
17
18
16
17
18
DA
DB
SG
1
2
DI/COM
Digital
inputs
RS-485
Communication
13
14
15
CT1
CT2
Current transformer inputs
1
2
+
–
Current
WARNING
Warnings are indicated when mishandling
this product might result in death or serious
injury to the user.
CAUTION Cautions are indicated when mishandling
this product might result in minor injury to
the user, or only physical damage to this
product.
Power supply
PV input
Current Transformer input 1
Current Transformer input 2
Loader communication
Digital input 1
Digital input 2
RS-485 Communication
Internal
Circuit
Control output 1
Control output 2
Event output 1
Event output 2
Event output 3
Mounting
Wiring
SAFETY PRECAUTIONS
(unit: mm)
Symbols Meaning
AC power supply
Caution, fear of electric shock
Caution
Be sure that the user receives this manual before the product is
used.
Copying or duplicating this user’s manual in part or in whole is
forbidden. The information and specifications in this manual are
subject to change without notice.
Considerable effort has been made to ensure that this manual is
free from inaccuracies and omissions. If you should find an error
or omission, please contact Azbil Corporation.
In no event is Azbil Corporation liable to anyone for any indirect,
special or consequential damages as a result of using this prod-
uct.
2006-2015 Azbil Corporation All Rights Reserved.
NOTICE
Note that incorrect wiring of the C15M can damage the C15M and
lead to other hazards. Check that the C15M has been correctly
wired before turning the power ON.
Before wiring, or removing/mounting the C15M, be sure to turn
the power OFF. Failure to do so might cause electric shock.
Do not touch electrically charged parts such as the power
terminals. Doing so might cause electric shock.
Do not disassemble the C15M.
Doing so might cause electric shock or faulty operation.
WARNING
A
B
Unpacking
E1

Thank you for purchasing the C15M.
Before operating this product described in this User's Manual,
please take note of the following points regarding safety.
Be sure to keep this manual nearby for handy reference.
Please read the "Terms and Conditions" from the following URL
before ordering or use:
http://www.azbil.com/products/bi/order.html
This manual explains handling precautions, mounting, wiring procedures,
PV range types, parameter list and main specifications only.
Check the following items when removing the C15MT from its package:
Name Part No. Q'ty Remarks
Mounting Bracket 81409651-001 1
Gasket 81409657-001 1
User's Manual CP-UM-5410EC 1 This Manual
■Location
Install the controller in the following locations:
· Common mode voltages for I/O excluding the power supply and relay
contact output: The voltage to ground is 30Vr.m.s max., 42.4V peak
max., and 60Vdc max.
· Not high or low temperature / humidity.
· Free from silicone gas and other corrosive gases such as sulfide gas.
· Less dust or soot.
· Appropriately processed locations to prevent direct sunlight, wind or rain.
· Less mechanical vibration and shock.
· Not close to the high voltage line, welding machine or electrical noise
generating source.
· The minimum 15 meters away from the high voltage ignition device for a
boiler.
· Less effect by the magnetic.
· No flammable liquid or gas.
· Indoors.
■Mounting Procedure
· The mounting must be horizontal within 10 degrees tilted in back side
lowering or within 10 degrees tilted in back side rising.
· In the case of panel mount type (C15MT), the mounting panel should be
used with a thickness of less than 9 mm of firm board.
■External Dimensions
●C15MT (Panel Mount Type)
(unit: mm)
Handling Precautions
•To fasten this controller onto the panel, tighten a mounting
bracket screws, and turn one more half turn when there is no
play between the bracket and panel. Excessively tightening
the screws may deform the controller case.
●Panel Cutout Dimensions
Stand-alone mounting Gang-mounting
Handling Precautions
•When three or more units are gang-mounted horizontally, the
maximum allowable ambient temperature is 40°C.
•If dustproof or waterproof protection is required, mount the device
using the stand-alone mounting method. If gang-mounted,
dustproof and waterproof protection may not be maintained.
•Provide a space of at least 50mm or more above and below
the controller.
Be sure to provide a switch within operator reach for shutting OFF the main
power supply to the controller in the main supply wiring.
Also, in case of AC power supply models, the main supply wiring also requires
a time-lagged type (T) fuse (rated current: 0.2A, rated voltage: 250 V).
(IEC127)
The following table shows the meaning of the symbols in the terminal wiring
label on the controller side:
Handling Precautions
•Before wiring the C15M, verify the controller's model No. and
terminal Nos. written on the label on the side of the body.
Inspect all wiring once wiring work for the C15M has been
completed.
•Provide a distance of at least 50cm between I/O lead wires or
communications lead wires and power lead wires of 100V min.
Also, do not pass these lead wires through the same piping or
wiring duct.
•Be careful not to allow any crimp terminals lugs to touch
adjacent terminals.
•To connect 2 (max.) crimp terminals to the same
terminal screw, bend the crimp terminals
beforehand.
•Connect wires to terminals 1 - 6 and 13 - 18 from the left
(when viewing the terminal block).
•Use crimp terminals compatible with M3
terminal screws, as shown in the diagram.
A: 5.8mm max. B: 5.5 to 7.6mm
•When the power to this controller is turned off, the current
input circuit is cut off. If you connect two or more current-input
type controllers in series, change the current input to voltage
input by connecting a resistor (No. 81401325, sold separately).
•Prepare a heater current conductor to send a heater current
through the current transformer.
Do not use a heater current that exceeds the specified
permissible current as this may damage the controller.
•The controller requires about 6 seconds to start up once the
power is turned ON. The controller can be used once it has
started up. However, it is recommended to allow a warm-up
time of at least 30 minutes to attain the specified accuracy.
•The current transformer input cannot be used for phase
control.
•There is no isolation provided between control output 1 and
control output 2. Install an isolator as required.
•Do not connect a terminating resistor to either end of the RS-
485 communications line.
Doing so may interfere with communication.
•Make sure that devices and equipment connected to this
device have reinforced insulation suitable for the maximum
operating voltage of this device's power supply and
input/output ports.
●Connection of C15MT
●I/O isolation
Items surrounded by solid lines are insulated from other signals.
Availability of input or output is based on a model number.
E1
CP-UM-5410EC (Not for use in Japan)
C15M
Single Loop Controller
User's Manual
"Installation"
Use the C15M within the operating ranges recommended in the
specifications (temperature, humidity, voltage, vibration, shock,
mounting direction, atmosphere, etc.).
Failure to do so might cause fire or faulty operation.
Do not block ventilation holes.
Doing so might cause fire or faulty operation.
Wire the C15M properly according to predetermined standards.
Also wire the C15M using specified power leads according to
recognized installation methods.
Failure to do so might cause electric shock, fire or faulty operation.
Do not allow lead clippings, chips or water to enter the controller case.
Doing so might cause fire or faulty operation.
Firmly tighten the terminal screws at the torque listed in the
specifications. Insufficient tightening of terminal screws might
cause electric shock or fire.
Do not use unused terminals on the C15M as relay terminals.
Doing so might cause electric shock, fire or faulty operation.
We recommend attaching the terminal cover (sold separately)
after wiring the C15M.
Failure to do so might cause electric shock, fire or faulty operation.
Use the relays within the recommended service life.
Continuous use might cause fire or faulty operation.
If there is a risk of a power surge caused by lightning, use a surge
absorber (surge protector) to prevent fire or device failure.
Do not operate the keys with a propelling pencil or sharp-tipped
object. Doing so might cause faulty operation.
CAUTION
59
602
44.8
48
48
rdy man ev1 ev2 ev3 ot1 ot2
para
mode
SDC15
pv
sp
Mounting bracket
(Accessory) M3
Terminal screw
0
+0.5
45
50 min.
0
+0.5
45
30 min.
0
+0.5
(48xN -3)
0
+0.5
45
(N: number of mounted units)
1
2
3
1
2
1
2
3
4
5
6
13
14
15
16
17
18
7
8
9
10
11
12
4
5
6
4
5
6
7
8
9
10
+
–
+
–
11
12
1
2
3
C
B
A
Control outputs
Event outputs
Power supply
Relay
Voltage pulse
PV inputs
Thermo-
couple
RTD
Relay
AC power supply
100 to 240Vac
16
17
18
16
17
18
DA
DB
SG
1
2
DI/COM
Digital
inputs
RS-485
Communication
13
14
15
CT1
CT2
Current transformer inputs
1
2
+
–
Current
WARNING
Warnings are indicated when mishandling
this product might result in death or serious
injury to the user.
CAUTION Cautions are indicated when mishandling
this product might result in minor injury to
the user, or only physical damage to this
product.
Power supply
PV input
Current Transformer input 1
Current Transformer input 2
Loader communication
Digital input 1
Digital input 2
RS-485 Communication
Internal
Circuit
Control output 1
Control output 2
Event output 1
Event output 2
Event output 3
Mounting
Wiring
SAFETY PRECAUTIONS
(unit: mm)
Symbols Meaning
AC power supply
Caution, fear of electric shock
Caution
Be sure that the user receives this manual before the product is
used.
Copying or duplicating this user’s manual in part or in whole is
forbidden. The information and specifications in this manual are
subject to change without notice.
Considerable effort has been made to ensure that this manual is
free from inaccuracies and omissions. If you should find an error
or omission, please contact Azbil Corporation.
In no event is Azbil Corporation liable to anyone for any indirect,
special or consequential damages as a result of using this prod-
uct.
2006-2015 Azbil Corporation All Rights Reserved.
NOTICE
Note that incorrect wiring of the C15M can damage the C15M and
lead to other hazards. Check that the C15M has been correctly
wired before turning the power ON.
Before wiring, or removing/mounting the C15M, be sure to turn
the power OFF. Failure to do so might cause electric shock.
Do not touch electrically charged parts such as the power
terminals. Doing so might cause electric shock.
Do not disassemble the C15M.
Doing so might cause electric shock or faulty operation.
WARNING
A
B
Unpacking
E2

E2
(1) Upper display: Displays PV values (current temperature, etc.)
or setup items.
(2) Lower display: Displays SP values (set temperature, etc.) and
other values of setup items.
(3) Mode indicator rdy: Lights when READY (control stop)
man: Lights when MANUAL (manual mode)
ev1 to ev3: Lights when event relays are ON.
ot1 to ot2: Lights when the control output is ON.
(4) Mode key: The operation which was set beforehand can
be done by pressing the key for 1s or more.
Factory setting is RUN / READY selection.
(5) Para key: Switches the display.
(6) <, , keys: Used for incrementing numeric values and
performing arithmetic shift operations.
(7) Loader connector: Connects to a personal computer with the
special cable provided in the smart loader
package.
The following shows the flow of the key operation. Various displays and
settings can be called up to the console:
●PV Input range setup
In the setup setting display mode [C01], press the [<] •[ ] •[ ] key
to set the lower display to select a desired PV range type.
>> When no keys are pressed for 2 sec. or longer, the flashing of the
numeric value is stopped to set the currently displayed value.
●SP setup
While the PV/SP is displayed in the operation display mode, press the
[<] •[ ] •[]key to change the SP in the lower display.
>> When no keys are pressed for 2 sec. or longer, the flashing of the
numeric value is stopped to set the currently displayed value.
SP can be set in the parameter setting display mode.
Handling Precautions
· The accuracy of the B thermocouple is ±5%FS for a range of
260°C or less, and ±1%FS for 260 to 800°C.
· The accuracy of the PLII thermocouple(CO1 No.19) in the
range of 0 to 32˚F does not meet the indication accuracy
specified in the Specifications.
· For ranges with a decimal point, tenths are displayed on the
line underneath point.
· Make sure to set the correct number in setup display C01,
according to the type and range of the sensor used. If the
setting is wrong, problems such as large temperature errors in
the output may occur.
Cleaning: When wiping out the C15M, use the soft and dried cloth.
Parts replacement: Do not replace the parts.
Fuse replacement: When replacing the fuse for the power supply wires, make
sure that the replacement fuse complies with all applicable
safety standards.
Standard IEC127, Cutoff Speed Delayed operation type (T),
Rated Voltage 250V, Rated Current 0.2A
●PV input
Thermocouple: K,J,E,T,R,S,B,N (JIS C1602-1995)
PL II (Engelhard Industries Data (ITS90))
WRe5-26 (ASTM E988-96(Reapproved 2002))
DIN U,DIN L (DIN 43710-1985)
Resistance temperature detector (RTD):
Pt100 (JIS C1604-1997)
JPt100 (JIS C1604-1989)
DC voltage: 0 to 1V, 1 to 5V, 0 to 5V, 0 to 10V
DC current: 0 to 20mA, 4 to 20mA
Sampling cycle: 500ms
Accuracy : ±0.5%FS±1digit,
±1%FS±1digit for a negative area of the
thermocouple (at ambient temperature 23±3°C)
Allowable input: • -0.5 V to +12 V (thermocouple, RTD, DC,
voltage)
• 30 mA max or 4 V max (DC current)
More than the allowable input voltage or
current may damage this device.
●Digital input
Input type : Dry contact or open collector
Allowable ON contact resistance
:Max.250Ω
Allowable OFF contact resistance
: Min.100kΩ
Allowable ON voltage : Max.1.0V
Terminal current (ON ) : Approx.7.5mA in case of short circuit
Approx.5.0mA in case of contact resistance
250Ω
Minimum hold time : 1s or more
●Current transformer input
Number of input points: 2 points
Input object: Current transformer with 100 to 4,000 turns
(availability is by 100-turn units)
Optional unit Model No.: QN206A
(800 turns, hole diameter: 5.8 mm)
Optional unit Model No.: QN212A
(800 turns, hole diameter: 12mm)
Current measurement
lower limit: 0.4Aac (800 turns, 1 time)
Formula; Number of turns ÷ (2000 x number
of power wire loops)
Current measurement
upper limit: 50.0Aac (800 turns, 1 time)
Formula; Number of turns ÷ (16 x number of
power wire loops)
Allowable measured current: 70.0Aac (800 turns, 1 time)
Formula; Number of turns ÷ (16 x number of
power wire loops) x 1.4
Display range lower limit: 0.0Aac
Display range upper limit: 70.0Aac (800 turns, 1 time)
Formula; Number of turns ÷ (16 x number of
power wire loops) x 1.4
Display accuracy: ±5%FS
Display resolution: 0.1Aac
●Control output
•Relay output
Contact rating : NO side 250Vac/30Vdc, 3A (resistive load)
NC side 250Vac/30Vdc, 1A (resistive load)
Life : NO side Min. 50,000 operations
NC side Min. 100,000 operations
Min. switching specifications : 5V, 100mA
Min. ON time / OFF time : 250ms
•Voltage pulse output (for SSR drive)
Open circuit voltage : 19Vdc±15%
Internal resistance : 82Ω±0.5%
Allowable current : Max. 24mAdc (a higher current might cause
output circuit failure)
Min. OFF time / ON time : 1ms (Time proportional cycle time < 10s)
250ms (Time proportional cycle time ≥10s)
•Current output
Output type : 0 to 20mAdc or 4 to 20mAdc current output
Allowable load resistance : Max.600Ω
Output accuracy : ±0.5%FS (at ambient temperature 23±3°C)
±1%FS at 0 to 1mA
●Event relay outputs (ev1 to 3)
Contact rating : 250Vac/30Vdc 2A (resistive load)
Life : Min. 100,000 operations
Min. switching specification : 5V, 10mA (Reference value)
●RS-485 communication
Transmission line : 3-wire system
Transmission speed : 4800, 9600, 19200, 38400bps
Communication protocol : CPL and MODBUS conforming
Terminating resistor : Do not connect a terminating resistor.
●Environmental condition
•Operating conditions
Ambient temperature : 0 to 50°C (Gang-mounting: 0 to 40°C)
Ambient humidity : 10 to 90%RH (Without condensation)
Power supply voltage : AC Model
85 to 264Vac, 50/60Hz±2Hz
(Rated power voltage 100 to 240Vac 50/60Hz)
•Transport conditions
Ambient temperature : –20 to +70°C
Ambient humidity : 10 to 95%RH (Without condensation)
●Other specifications
Degrees of protection : Case front side IP66 /NEMA 4 equivalent
(Only for stand-alone mounting on a panel
when an attached gasket is used. )
Power consumption : AC Model
Max. 12VA (100Vac:8VA, 264Vac:12VA)
(6VA for 100Vac and 9VA for 264Vac to
our company SDC10 equivalent function)
Non-detected power failure time
:Max. 20ms (AC model)
Altitude : Max. 2000m
Mass : Approx.150g (with mounting bracket) at
panel mount type
Terminal screw tightening torque
: 0.4 to 0.6N·m
Applicable standards : EN61010-1,
EN61326-1 (For use in industrial locations)
During EMC testing, the reading or output
may fluctuate by ±10 % FS.
Over-voltage category : Category II (IEC60364-4-443, IEC60664-1)
Allowable pollution degree : Pollution degree 2
Recommended cables: For thermocouples:
Connect thermocouple wires to the
terminals directly. When a thermocouple is
connected to terminal block, or wiring
distance is long, connect the wire via a
shielded compensating lead wire.
For input/output other than thermocouples:
Use a JCS 4364 instrument cable or
equivalent. If electromagnetic induction
noise is comparatively low, a shielded
multiconductor microphone cord (MVVS)
may be used.
<
<
<
<
<
<
C01 No.
Sensor type
Range[°C] Range[°F]
1K-200 to +1200 -300 to +2200
2K0 to 1200 0 to 2200
3K0.0 to 800.0 0 to 1500
4K0.0 to 600.0 0 to 1100
5K0.0 to 400.0 0 to 700
6K
-200.0 to +400.0
-300 to +700
9J0.0 to 800.0 0 to 1500
10 J 0.0 to 600.0 0 to 1100
11 J
-200.0 to +400.0
-300 to +700
13 E 0.0 to 600.0 0 to 1100
14 T
-200.0 to +400.0
-300 to +700
15 R 0 to 1600 0 to 3000
16 S 0 to 1600 0 to 3000
17 B 0 to 1800 0 to 3300
18 N 0 to 1300 0 to 2300
19 PLII 0 to 1300 0 to 2300
20 WRe5-26 0 to 1400 0 to 2400
21 WRe5-26 0 to 2300 0 to 4200
24 DIN U
-200.0 to +400.0
-300 to +700
25 DIN L
-100.0 to +800.0
-150 to +1500
C01 No.
Sensor type
Range[°C] Range[°F]
41 Pt100 -200 to +500 -300 to +900
42 JPt100 -200 to +500 -300 to +900
43 Pt100 -200 to +200 -300 to +400
44 JPt100 -200 to +200 -300 to +400
45 Pt100 -100 to +300 -150 to +500
46 JPt100 -100 to +300 -150 to +500
51 Pt100 -50.0 to +200.0 -50 to +400
52 JPt100 -50.0 to +200.0 -50 to +400
53 Pt100 -50.0 to +100.0 -50 to +200
54 JPt100 -50.0 to +100.0 -50 to +200
63 Pt100 0.0 to 200.0 0 to 400
64 JPt100 0.0 to 200.0 0 to 400
67 Pt100 0 to 500 0 to 900
68 JPt100 0 to 500 0 to 900
rdy man ev1 ev2 ev3 ot1 ot2
para
mode
pv
sp
(2)
(3)
(6)(5)
(1)
(4)
SDC15
Name Model No.
Mounting bracket (for C15MT) 81409651-001 (Accessory)
Gasket (for C15MT) 81409657-001 (Accessory)
Current transformer QN206A (5.8mm hole dia.)
QN212A (12mm hole dia.)
Hard cover 81446442-001
Soft cover 81446443-001
Terminal cover 81446898-001
(7)
SDC15
Alarm code Error Cause Countermeasure
AL01 PV input error Sensor line break, incorrect Checking wiring or
(over range) wiring, incorrect range code reset range code.
setting
AL02 PV input error Sensor line break, incorrect
(under range) wiring, incorrect range code
setting
AL03 CJ failure Terminal temperature
Checking the allowable
compensation unit failure ambient temperature.
(thermocouple)
PV input error Sensor line break, incorrect Checking wiring.
wiring (RTD)
AL11 CT input failure A current exceeding the upper • Use a CT with the
(over-range) limit of the display range was correct number of
(CT input 1 or 2,or both) measured. The number of CT turns for the
turns or the number of CT power display range.
wire loops is incorrectly set, or • Reset the number of
wiring is incorrect. CT
turns.
•
Reset the number of
CT
power wire loops.
• Check the wiring.
AL70 A/D conversion error Defective A/D converter Replace unit.
AL95 Parameter error •Power turned OFF during fixing Reset data or replace
of data unit.
•Data corrupted due to noise, etc.
AL96 Adjustment data error •Power turned OFF during fixing
of data
•Data corrupted due to noise, etc.
AL97 Parameter error Data corrupted due to noise, etc.
(RAM area)
AL98 Adjustment data error Data corrupted due to noise, etc.
(RAM area)
AL99 ROM error Data corrupted due to noise, etc. Replace unit.
PV range table
Part names and functions
Key Operation and Setting
Alarm code table
Maintenance
Specifications
Accessories and optional parts
Model selection table
Display when the power
is turned ON.
Keep the [para]
key pressed for
2 sec. or longer.
PV/SP display
Press the [para] key.
MV display
Other display and setup
(Operate the [para] key
repeatedly.)
Press the [para] key.
AUTO/MANUAL
selection
Press the [para] key.
RUN/READY
selection
Other setup
(Operate the [para] key
repeatedly.)
Press the [para] key.
Operation display
Press the [mode]
key.
Keep the [para]
key pressed for
2 sec. or longer.
Off.
The mode indicator
is lit sequentially
from the left.
Off.
No key operation for
3 minutes or more.
No key operation for
3 minutes or more.
Keep the [para] key pressed
for 2 sec. or longer.
Press the [mode] key.
mode
pv
sp
mode
pv
sp
mode
pv
sp
mode
pv
sp
mode
pv
sp
mode
pv
sp
rdy man ev1 ev2 ev3 ot1 ot2
para
mode
pv
sp
The mode indicators are lit
sequentially from the left during a
period of 6 sec. after the power has
been turned ON while both the upper
display and lower display are off.
When all mode indicators have been
lit, the display is changed to the
operation display.
Parameter setup
display
PV range type
setup
Press the [para] key.
Temperature unit
setup
Other setup
(Operate the [para] key
repeatedly.)
Press the [para] key.
Setup setting display
The display and setup status shown above are examples for
explanation. Therefore, some displays or settings are not
shown actually according to the model and/or setup contents.
C01 No.
Input type
Range
84 0 to 1V
86 1 to 5V
87 0 to 5V
88 0 to 10V
89 0 to 20mA
90 4 to 20mA
The scaling and
decimal point position
can be changed
variably in a range of
–1999 to +9999
Basic Mounting Control PV Power Optional Additional
Specifications
model No. output input supply functions
processing
C15M
T Panel mount type
Control output 1 Control output 2
R0 Relay output (NO) Relay output (NC)
V0
Voltage pulse output
None
(for SSR drive)
C0 Current output None
T Thermocouple input
(K, J, E, T, R, S, B, N, PLII, WRe5-26,
DINU, DINL)
R RTD input (Pt100/JPt 100)
L DC voltage /DC current input (0 to 1Vdc,
1 to 5Vdc, 0 to 5Vdc, 0 to 10Vdc, 0 to
20mAdc, 4 to 20mAdc)
A AC Model (100 to 240Vac)
01 Event relay output: 3 points
02 Event relay output: 3 points
Current transformer input: 2 points
Digital input: 2 points
03 Event relay output: 3 points
Current transformer input: 2 points
RS-485 communication
00 Chinese (Simplified)
01 Chinese (Traditional)
E3E2

E2
(1) Upper display: Displays PV values (current temperature, etc.)
or setup items.
(2) Lower display: Displays SP values (set temperature, etc.) and
other values of setup items.
(3) Mode indicator rdy: Lights when READY (control stop)
man: Lights when MANUAL (manual mode)
ev1 to ev3: Lights when event relays are ON.
ot1 to ot2: Lights when the control output is ON.
(4) Mode key: The operation which was set beforehand can
be done by pressing the key for 1s or more.
Factory setting is RUN / READY selection.
(5) Para key: Switches the display.
(6) <, , keys: Used for incrementing numeric values and
performing arithmetic shift operations.
(7) Loader connector: Connects to a personal computer with the
special cable provided in the smart loader
package.
The following shows the flow of the key operation. Various displays and
settings can be called up to the console:
●PV Input range setup
In the setup setting display mode [C01], press the [<] •[ ] •[ ] key
to set the lower display to select a desired PV range type.
>> When no keys are pressed for 2 sec. or longer, the flashing of the
numeric value is stopped to set the currently displayed value.
●SP setup
While the PV/SP is displayed in the operation display mode, press the
[<] •[ ] •[]key to change the SP in the lower display.
>> When no keys are pressed for 2 sec. or longer, the flashing of the
numeric value is stopped to set the currently displayed value.
SP can be set in the parameter setting display mode.
Handling Precautions
· The accuracy of the B thermocouple is ±5%FS for a range of
260°C or less, and ±1%FS for 260 to 800°C.
· The accuracy of the PLII thermocouple(CO1 No.19) in the
range of 0 to 32˚F does not meet the indication accuracy
specified in the Specifications.
· For ranges with a decimal point, tenths are displayed on the
line underneath point.
· Make sure to set the correct number in setup display C01,
according to the type and range of the sensor used. If the
setting is wrong, problems such as large temperature errors in
the output may occur.
Cleaning: When wiping out the C15M, use the soft and dried cloth.
Parts replacement: Do not replace the parts.
Fuse replacement: When replacing the fuse for the power supply wires, make
sure that the replacement fuse complies with all applicable
safety standards.
Standard IEC127, Cutoff Speed Delayed operation type (T),
Rated Voltage 250V, Rated Current 0.2A
●PV input
Thermocouple: K,J,E,T,R,S,B,N (JIS C1602-1995)
PL II (Engelhard Industries Data (ITS90))
WRe5-26 (ASTM E988-96(Reapproved 2002))
DIN U,DIN L (DIN 43710-1985)
Resistance temperature detector (RTD):
Pt100 (JIS C1604-1997)
JPt100 (JIS C1604-1989)
DC voltage: 0 to 1V, 1 to 5V, 0 to 5V, 0 to 10V
DC current: 0 to 20mA, 4 to 20mA
Sampling cycle: 500ms
Accuracy : ±0.5%FS±1digit,
±1%FS±1digit for a negative area of the
thermocouple (at ambient temperature 23±3°C)
Allowable input: • -0.5 V to +12 V (thermocouple, RTD, DC,
voltage)
• 30 mA max or 4 V max (DC current)
More than the allowable input voltage or
current may damage this device.
●Digital input
Input type : Dry contact or open collector
Allowable ON contact resistance
:Max.250Ω
Allowable OFF contact resistance
: Min.100kΩ
Allowable ON voltage : Max.1.0V
Terminal current (ON ) : Approx.7.5mA in case of short circuit
Approx.5.0mA in case of contact resistance
250Ω
Minimum hold time : 1s or more
●Current transformer input
Number of input points: 2 points
Input object: Current transformer with 100 to 4,000 turns
(availability is by 100-turn units)
Optional unit Model No.: QN206A
(800 turns, hole diameter: 5.8 mm)
Optional unit Model No.: QN212A
(800 turns, hole diameter: 12mm)
Current measurement
lower limit: 0.4Aac (800 turns, 1 time)
Formula; Number of turns ÷ (2000 x number
of power wire loops)
Current measurement
upper limit: 50.0Aac (800 turns, 1 time)
Formula; Number of turns ÷ (16 x number of
power wire loops)
Allowable measured current: 70.0Aac (800 turns, 1 time)
Formula; Number of turns ÷ (16 x number of
power wire loops) x 1.4
Display range lower limit: 0.0Aac
Display range upper limit: 70.0Aac (800 turns, 1 time)
Formula; Number of turns ÷ (16 x number of
power wire loops) x 1.4
Display accuracy: ±5%FS
Display resolution: 0.1Aac
●Control output
•Relay output
Contact rating : NO side 250Vac/30Vdc, 3A (resistive load)
NC side 250Vac/30Vdc, 1A (resistive load)
Life : NO side Min. 50,000 operations
NC side Min. 100,000 operations
Min. switching specifications : 5V, 100mA
Min. ON time / OFF time : 250ms
•Voltage pulse output (for SSR drive)
Open circuit voltage : 19Vdc±15%
Internal resistance : 82Ω±0.5%
Allowable current : Max. 24mAdc (a higher current might cause
output circuit failure)
Min. OFF time / ON time : 1ms (Time proportional cycle time < 10s)
250ms (Time proportional cycle time ≥10s)
•Current output
Output type : 0 to 20mAdc or 4 to 20mAdc current output
Allowable load resistance : Max.600Ω
Output accuracy : ±0.5%FS (at ambient temperature 23±3°C)
±1%FS at 0 to 1mA
●Event relay outputs (ev1 to 3)
Contact rating : 250Vac/30Vdc 2A (resistive load)
Life : Min. 100,000 operations
Min. switching specification : 5V, 10mA (Reference value)
●RS-485 communication
Transmission line : 3-wire system
Transmission speed : 4800, 9600, 19200, 38400bps
Communication protocol : CPL and MODBUS conforming
Terminating resistor : Do not connect a terminating resistor.
●Environmental condition
•Operating conditions
Ambient temperature : 0 to 50°C (Gang-mounting: 0 to 40°C)
Ambient humidity : 10 to 90%RH (Without condensation)
Power supply voltage : AC Model
85 to 264Vac, 50/60Hz±2Hz
(Rated power voltage 100 to 240Vac 50/60Hz)
•Transport conditions
Ambient temperature : –20 to +70°C
Ambient humidity : 10 to 95%RH (Without condensation)
●Other specifications
Degrees of protection : Case front side IP66 /NEMA 4 equivalent
(Only for stand-alone mounting on a panel
when an attached gasket is used. )
Power consumption : AC Model
Max. 12VA (100Vac:8VA, 264Vac:12VA)
(6VA for 100Vac and 9VA for 264Vac to
our company SDC10 equivalent function)
Non-detected power failure time
:Max. 20ms (AC model)
Altitude : Max. 2000m
Mass : Approx.150g (with mounting bracket) at
panel mount type
Terminal screw tightening torque
: 0.4 to 0.6N·m
Applicable standards : EN61010-1,
EN61326-1 (For use in industrial locations)
During EMC testing, the reading or output
may fluctuate by ±10 % FS.
Over-voltage category : Category II (IEC60364-4-443, IEC60664-1)
Allowable pollution degree : Pollution degree 2
Recommended cables: For thermocouples:
Connect thermocouple wires to the
terminals directly. When a thermocouple is
connected to terminal block, or wiring
distance is long, connect the wire via a
shielded compensating lead wire.
For input/output other than thermocouples:
Use a JCS 4364 instrument cable or
equivalent. If electromagnetic induction
noise is comparatively low, a shielded
multiconductor microphone cord (MVVS)
may be used.
<
<
<
<
<
<
C01 No.
Sensor type
Range[°C] Range[°F]
1K-200 to +1200 -300 to +2200
2K0 to 1200 0 to 2200
3K0.0 to 800v 0 to 1500
4K0.0 to 600.0 0 to 1100
5K0.0 to 400.0 0 to 700
6K
-200.0 to +400.0
-300 to +700
9J0.0 to 800.0 0 to 1500
10 J 0.0 to 600.0 0 to 1100
11 J
-200.0 to +400.0
-300 to +700
13 E 0.0 to 600.0 0 to 1100
14 T
-200.0 to +400.0
-300 to +700
15 R 0 to 1600 0 to 3000
16 S 0 to 1600 0 to 3000
17 B 0 to 1800 0 to 3300
18 N 0 to 1300 0 to 2300
19 PLII 0 to 1300 0 to 2300
20 WRe5-26 0 to 1400 0 to 2400
21 WRe5-26 0 to 2300 0 to 4200
24 DIN U
-200.0 to +400.0
-300 to +700
25 DIN L
-100.0 to +800.0
-150 to +1500
C01 No.
Sensor type
Range[°C] Range[°F]
41 Pt100 -200 to +500 -300 to +900
42 JPt100 -200 to +500 -300 to +900
43 Pt100 -200 to +200 -300 to +400
44 JPt100 -200 to +200 -300 to +400
45 Pt100 -100 to +300 -150 to +500
46 JPt100 -100 to +300 -150 to +500
51 Pt100 -50.0 to +200.0 -50 to +400
52 JPt100 -50.0 to +200.0 -50 to +400
53 Pt100 -50.0 to +100.0 -50 to +200
54 JPt100 -50.0 to +100.0 -50 to +200
63 Pt100 0.0 to 200.0 0 to 400
64 JPt100 0.0 to 200.0 0 to 400
67 Pt100 0 to 500 0 to 900
68 JPt100 0 to 500 0 to 900
rdy man ev1 ev2 ev3 ot1 ot2
para
mode
pv
sp
(2)
(3)
(6)(5)
(1)
(4)
SDC15
Name Model No.
Mounting bracket (for C15MT) 81409651-001 (Accessory)
Gasket (for C15MT) 81409657-001 (Accessory)
Current transformer QN206A (5.8mm hole dia.)
QN212A (12mm hole dia.)
Hard cover 81446442-001
Soft cover 81446443-001
Terminal cover 81446898-001
(7)
SDC15
Alarm code Error Cause Countermeasure
AL01 PV input error Sensor line break, incorrect Checking wiring or
(over range) wiring, incorrect range code reset range code.
setting
AL02 PV input error Sensor line break, incorrect
(under range) wiring, incorrect range code
setting
AL03 CJ failure Terminal temperature
Checking the allowable
compensation unit failure ambient temperature.
(thermocouple)
PV input error Sensor line break, incorrect Checking wiring.
wiring (RTD)
AL11 CT input failure A current exceeding the upper • Use a CT with the
(over-range) limit of the display range was correct number of
(CT input 1 or 2,or both) measured. The number of CT turns for the
turns or the number of CT power display range.
wire loops is incorrectly set, or • Reset the number of
wiring is incorrect. CT
turns.
•
Reset the number of
CT
power wire loops.
• Check the wiring.
AL70 A/D conversion error Defective A/D converter Replace unit.
AL95 Parameter error •Power turned OFF during fixing Reset data or replace
of data unit.
•Data corrupted due to noise, etc.
AL96 Adjustment data error •Power turned OFF during fixing
of data
•Data corrupted due to noise, etc.
AL97 Parameter error Data corrupted due to noise, etc.
(RAM area)
AL98 Adjustment data error Data corrupted due to noise, etc.
(RAM area)
AL99 ROM error Data corrupted due to noise, etc. Replace unit.
PV range table
Part names and functions
Key Operation and Setting
Alarm code table
Maintenance
Specifications
Accessories and optional parts
Model selection table
Display when the power
is turned ON.
Keep the [para]
key pressed for
2 sec. or longer.
PV/SP display
Press the [para] key.
MV display
Other display and setup
(Operate the [para] key
repeatedly.)
Press the [para] key.
AUTO/MANUAL
selection
Press the [para] key.
RUN/READY
selection
Other setup
(Operate the [para] key
repeatedly.)
Press the [para] key.
Operation display
Press the [mode]
key.
Keep the [para]
key pressed for
2 sec. or longer.
Off.
The mode indicator
is lit sequentially
from the left.
Off.
No key operation for
3 minutes or more.
No key operation for
3 minutes or more.
Keep the [para] key pressed
for 2 sec. or longer.
Press the [mode] key.
mode
pv
sp
mode
pv
sp
mode
pv
sp
mode
pv
sp
mode
pv
sp
mode
pv
sp
rdy man ev1 ev2 ev3 ot1 ot2
para
mode
pv
sp
The mode indicators are lit
sequentially from the left during a
period of 6 sec. after the power has
been turned ON while both the upper
display and lower display are off.
When all mode indicators have been
lit, the display is changed to the
operation display.
Parameter setup
display
PV range type
setup
Press the [para] key.
Temperature unit
setup
Other setup
(Operate the [para] key
repeatedly.)
Press the [para] key.
Setup setting display
The display and setup status shown above are examples for
explanation. Therefore, some displays or settings are not
shown actually according to the model and/or setup contents.
C01 No.
Input type
Range
84 0 to 1V
86 1 to 5V
87 0 to 5V
88 0 to 10V
89 0 to 20mA
90 4 to 20mA
The scaling and
decimal point position
can be changed
variably in a range of
–1999 to +9999
Basic Mounting Control PV Power Optional Additional
Specifications
model No. output input supply functions
processing
C15M
T Panel mount type
Control output 1 Control output 2
R0 Relay output (NO) Relay output (NC)
V0
Voltage pulse output
None
(for SSR drive)
C0 Current output None
T Thermocouple input
(K, J, E, T, R, S, B, N, PLII, WRe5-26,
DINU, DINL)
R RTD input (Pt100/JPt 100)
L DC voltage /DC current input (0 to 1Vdc,
1 to 5Vdc, 0 to 5Vdc, 0 to 10Vdc, 0 to
20mAdc, 4 to 20mAdc)
A AC Model (100 to 240Vac)
01 Event relay output: 3 points
02 Event relay output: 3 points
Current transformer input: 2 points
Digital input: 2 points
03 Event relay output: 3 points
Current transformer input: 2 points
RS-485 communication
00 Chinese (Simplified)
01 Chinese (Traditional)
E4

Display Item Contents Initial User
value level
C 64
CPL/MODBUS 0: CPL 0 0
1: MODBUS ASCII format
2: MODBUS RTU format
C 65
Station address 0 to 127 0 0
Communication is disabled when "0" is set.
C 66
Transmission 0: 4800bps 2 0
speed 1: 9600bps
2: 19200bps
3: 38400bps
C 67
Data format (data 0: 7bits 1 0
length) 1: 8bits
C 68
Data format 0: Even parity 0 0
(parity) 1: Odd parity
2: No parity
C 69
Data format (stop 0: 1bit 0 0
bits) 1: 2bits
C 70
Communication 1 to 250ms 3 2
minimum response
time
C71
Key operation 0: Standard type 0 2
mode/type 1: Special type
C 72
MODE key 0: Invalid 1 0
function 1: AUTO/MANUAL selection
2: RUN/READY selection
3: AT Stop/Start
4: LSP group selection
5: Release of all DO latches
6: Invalid
7: Communication DI1 selection
8: Invalid
C 73
MODE display Whether the mode bank setup display is enabled or 255 1
setup disabled is determined by the sum of the following
weighting:
Bit 0: AUTO/MANUAL display
0: Disabled, +1: Enabled
Bit 1: RUN/READY display
0: Disabled, +2: Enabled
Bit 3: AT stop/start display
0: Disabled, +8: Enabled
Bit 4: DO latch release
0: Disabled, +16: Enabled
Bit 5: Communication DI1 ON/OFF display
0: Disabled, +32: Enabled
Other invalid setup: 0, +4, +64, +128
C 74
PV/SP value Whether the basic display is enabled or disabled is 15 1
display setup determined by the sum of the following weighting:
Bit 0: PV display
0: Disabled, +1: Enabled
Bit 1: SP display
0: Disabled, +2: Enabled
Bit 2: LSP group No. display
0: Disabled, +4: Enabled
Other invalid setup: 0, +8
C 75
MV display setup Whether the basic display is enabled or disabled is 15 1
determined by the sum of the following weighting:
Bit 0: MV display
0: Disabled, +1: Enabled
Bit 1: Heat MV/cool MV display
0: Disabled, +2: Enabled
Bit 3: AT progress display
0: Disabled, +8: Enabled
Other invalid setup: 0, +4
C 76
Event setting value 0: In the operation display mode, the internal event 0 1
display setup setting value is not displayed.
1: In the operation display mode, the internal event 1
setting value is displayed.
2: In the operation display mode, the internal event 1
to 2 setting value is displayed.
3: In the operation display mode, the internal event 1
to 3 setting value is displayed.
C 77
Event remaining 0: In the operation display mode, the ON/OFF delay 0 1
time display setup remaining time of the internal event is not
displayed.
1: In the operation display mode, the ON/OFF delay
remaining time of the internal event 1 is displayed.
2: In the operation display mode, the ON/OFF delay
remaining time of the internal event 1 to 2 is
displayed.
3: In the operation display mode, the ON/OFF delay
remaining time of the internal event 1 to 3 is
displayed.
C 78
CT input current 0: In the operation display mode, the CT current 0 1
value display value is not displayed.
setup 1: In the operation display mode, the CT1 current
value is displayed.
2: In the operation display mode, the CT1 to 2
current value is displayed.
C 79
User level 0: Basic configuration 0 0
1: Standard configuration
2: High function configuration
C 80
LED monitor 0: Disabled 0 2
1: Flashing at RS-485 communication signal
transmission
2: Flashing at RS-485 communication signal
receiving
3: OR (logical sum) of all DI status
4: Flashing at READY
C 90 Number of CT1 0: 800 turns 8 2
turns 1 to 40: CT turns divided by 100.
C91 Number of CT1 0: 1 time 1 2
power wire loops 1 to 6: Number of times
C 92 Number of CT2 0: 800 turns 8 2
turns 1 to 40: CT turns divided by 100.
C 93 Number of CT2 0: 1 time 1 2
power wire loops 1 to 6: Number of times
Display Item Contents Initial User
value level
C01
PV input range Thermocouple (T):
1 to 6, 9 to 11, 13 to 21, 24, 25
10
type RTD (R):
41 to 46, 51 to 54, 63, 64, 67, 68 41
DC current/voltage (L):
84, 86 to 90 88
C 02
Temperature unit 0: Centigrade (°C) 0 0
1: Fahrenheit (°F)
C 03
Cold junction 0: Cold junction compensation is performed. (Internal) 0 2
compensation 1: Cold junction compensation is not performed.
(T/C) (External)
C 04
Decimal point 0: No decimal point 0 0
position 1: One digit below decimal point
2: Two digits below decimal point
3: Three digits below decimal point
(Select ‘0’ or ‘1’ for the RTD range with decimal
point)
C 05
PV range low limit When the PV input range type is thermocouple (T) or - 0
RTD (R), the setting is disabled although range low
limit is displayed.
–1999 to +9999U when the PV input range type is DC 0
voltage/current (L).
C 06
PV range high When the PV input range type is thermocouple (T) or - 0
RTD(R), the setting is disabled although range high
limit is displayed.
–1999 to +9999U when the PV input range type is DC 1000
voltage/current (L).
C 07
SP low limit PV input range low limit to PV input range high limit 0 1
C 08
SP high limit 1000 1
C 09
Squarer root 0.0 to 100.0% 0.0 2
extraction dropout (0.0: No square root extraction)
C 14
Control action 0: Heat control (reverse action)) 0 0
(direct/reverse) 1: Cool control (direct action)
C 15
Selection of MV 0: Control operation is continued. 0 2
at PV alarm 1: MV at PV alarm occurrence is outputted.
occurrence
C 16
MV at PV alarm –10.0 to +110.0% 0.0 2
occurrence
C 17
MV at READY (at –10.0 to +110.0% 0.0 1
heat-side for
heat/cool control)
C 18
MV at READY (at –10.0 to +110.0% 0.0 1
cool-side)
C 19
Operation at 0: Bump-less 0 1
MANUAL change 1: Preset
C 20
Preset MANUAL –10.0 to +110.0% 0.0 or 1
value (Used even at MANUAL mode when power is ON.) 50.0
C21
PID operation 0: Automatic 0 2
initialization 1: Not initialized
function selection 2: Initialized (when SP value different from current
value is inputted.)
C 22
PID operation –10.0 to +110.0% 0.0 or 2
initial MV 50.0
C 26
Heat/cool control 0: Disabled. 0 0
1: Enabled.
C 27
Heal/cool selection 0: Normal 0 1
1: Energy saving
C 28
Dead zone –100.0 to +100.0% 0.0 0
C 29
Heal/cool control –10.0 to +110.0% 50.0 2
selection point
C 30
LSP setting 1 to 4 1 0
system
C 32
SP ramp unit 0: 0.1U/s 1 2
1: 0.1U/min
2: 0.1U/h
C 36
CT1 operation 0: Heater burnout detection 0 0
type 1: Current value measurement
C 37
CT1 output 0: Control output 1 0 0
1: Control output 2
2: Event output 1
3: Event output 2
4: Event output 3
C 38
CT1 measurement 30 to 300ms 30 0
wait time
C 39
CT2 operation type Same as CT1. 0 0
C 40
CT2 output 0 0
C41
CT2 measurement 30 0
wait time
C 42
Control output 1 1: 4 to 2mA 1 0
range 2: 0 to 20mA
C 43
Control output 1 0: MV 0 0
type 1: Heat MV
2: Cool MV
3: PV
4: PV before ratio bias filter
5: SP
6: Deviation (PV-SP)
7: CT1 current value
8: CT2 current value
9: Invalid
10: SP+MV
11: PV+MV
C 44
Control output 1 –1999 to +9999 0.0 0
scaling low limit (The decimal point position and unit may vary
C 45
Control output 1 depending on the control output 1 type.) 100.0 0
scaling high limit
C 46 Control output 1 0 to 9999 200 0
MV scaling The decimal point position and unit are same as
for PV.
C 47
Control output 2 Same as control output 1. 1 0
range
C 48
Control output 2 3 0
type
C 49
Control output 2 –1999 to +9999 0 0
scaling low limit (The decimal point position and unit may vary
C 50
Control output 2 depending on the control output 2 type.) 1000 0
scaling high limit
C51 Control output 2 0 to 9999 200 0
MV scaling The decimal point position and unit are same as
for PV.
E3
Display Item Contents Initial User
value level
A--M
AUTO/MANUAL AUTO : AUTO mode AUTO 0
mode selection MAN : MANUAL mode
r--r
RUN/READY RUN : RUN mode RUN 0
mode selection RDY : READY mode
At
AT Stop/Start At. OF : AT Stop AT Stop 0
selection At. ON : AT Start
do Lt
Release all DO Lt. ON : Latch continue Latch 0
latches Lt. OF : Latch release continue
C. dI 1
Communication dI. OF : OFF OFF 0
DI 1 dI. On : ON
[List of Parameter Setting Displays]
■Mode bank
Bank selection: MOdE
Display Item Contents Initial User
value level
At
.
ty
AT type 0: Normal (Standard control characteristics) 1 0
1: Immediate response (Control
characteristics immediately responding
to the external disturbance.)
2: Stable (Control characteristics with less
up/down function of PV)
JF
.
bd
Just-FiTTER setting band 0.00 to 10.00 0.30 2
SP
.
LG
SP lag constant 0.0 to 999.9 0.0 2
At-P
Proportional band tuning 0.00 to 99.99 1.00 2
factor at AT
At-I
Integration time tuning factor 0.00 to 99.99 1.00 2
at AT
At-d
Derivative time tuning factor 0.00 to 99.99 1.00 2
at AT
Ctr
.
A
Control algorithm 0: PID (conventional PID) 0 1
1: Ra-PID (high performance type)
JF
.
Ov
Just-FiTTER overshoot 0 to 100 0 1
suppression factor
St.SA ST step execution resolution
0.00 to 99.99 % 10.00 2
width
St.Sb ST step settling bound
0.00 to 10.00 % 0.50 2
St.Hb ST hunting settling bound
0.00 to 10.00 % 1.00 2
St.ud ST step ramp change
0: ST is executed when the PV ramp up or 0 1
down.
1: ST is executed only when the PV ramp
up.
Display Item Contents Initial User
value level
CtrL Control method 0: ON/OFF control 0 or 1 0
1: PID fixed
2: ST (Self turning)
At. OL MV low limit at AT –10.0 to +110.0% 0.0 0
At. OH MV high limit at AT –10.0 to +110.0% 100.0 0
dIFF ON/OFF control differential 0 to 9999U 5 0
OFFS ON/OFF control operating –1999 to 9999U 0 2
point differential
FL PV filter 0.0 to 120.0s 0.0 0
rA PV ratio 0.001 to 9.999 1.000 1
bI PV bias –1999 to +9999U 0 0
CyU Time proportional cycle unit 1 0: 1s unit 0 2
1: 0.5s fixed (Cycle time is disabled.)
2: 0.2s fixed (Cycle time is disabled.)
3: 0.1s fixed (Cycle time is disabled.)
Cy Time proportional cycle1 5 to 120s (The output includes the relay 10 or 2 0
output.)
1 to 120s (The output does not include the
relay output.)
CyU2 Time proportional cycle unit 2 0: 1s unit 0 2
1: 0.5s fixed (Cycle time is disabled.)
2: 0.2s fixed (Cycle time is disabled.)
3: 0.1s fixed (Cycle time is disabled.)
Cy2 Time proportional cycle 2 5 to 120s (The output includes the relay 10 or 2 0
output.)
1 to 120s (The output does not include the
relay output.)
tP. ty Time proportional operation 0: Controllability aiming type 0 or 1 2
type 1: Actuator life aiming type
(Only one ON/OFF operation within time
proportional cycle time)
SPU SP ramp-up 0.0 to 999.9U (0.0: No ramp) 0.0 2
SPd SP ramp-down 0.0 2
Display Item Contents Initial User
value level
SP- 1
to SP of LSP1 group to SP low limit (C07) to SP high limit (C08) 0 0
SP-4
LSP4 group
Display Item Contents Initial User
value level
Upper display: PV SP (Target value) SP low limit (C07) to SP high limit (C08) 0 0
Lower display: SP
LSP 1 LSP No. (1st digit: 1 to LSP system group (C30 Max. 4) 1 0
Lower display: Value at the
LSP right end digit)
Out
MV (Manipulated –10.0 to +110.0% - 0
Variable) Setting is disabled in AUTO mode.
(Numeric value does not flash.)
Setting is enabled in MANUAL mode.
(Numeric value flashes.)
HEAt Heat MV Setting is disabled - 0
(Manipulated –10.0 to +110.0%
Variable)
COOL Cool MV - 0
(Manipulated
Variable)
Upper display: PV AT progress Setting is disabled. - 0
At 1 (display display (1st digit Except for 0: During execution of AT
example) = Numeric value (Value is decreased.)
at right end digit) 0: Completion of AT
Ct 1 CT (Current Setting is disabled. - 0
transformer)
current value 1
Ct2 CT (Current Setting is disabled. - 0
transformer)
current value 2
E1 Internal event 1 Setting range is different depending on the internal 0 0
main setting event operation type.
E 1. Sb Internal event 1 –1999 to +9999U: Except below. 0 0
sub-setting 0 to 9999U: When the setting value is an absolute value.
–199.9 to +999.9%: For MV.
t 1. -- Timer remaining Setting is disabled. - 0
time 1 Upper display: The distinction by ON delay or OFF
delay is displayed at the side location of [t1.].
Lower display: Displayed by the unit (either one of
0.1s, s, or min) based on the internal event 1 delay
time unit (E1. the 3rd digit of C3).
E2 Internal event 2 Setting range is different depending on the internal 0 0
main setting event operation type.
E2. Sb Internal event 2 –1999 to +9999U: Except below. 0 0
sub-setting 0 to 9999U: When the setting value is an absolute
value.
–199.9 to +999.9%: For MV.
t2. -- Timer remaining Setting is disabled. - 0
time 2 Upper display: The distinction by ON delay or OFF
delay is displayed at the side location of [t2.].
Lower display: Displayed by the unit (either one of
0.1s, s, or min) based on the internal event 2 delay
time unit (E2. the 3rd digit of C3).
E3 Internal event 3 Setting range is different depending on the internal 0 0
main setting event operation type.
E3. Sb Internal event 3 –1999 to +9999U: Except below. 0 0
sub-setting 0 to 9999U: When the setting value is an absolute value.
–199.9 to +999.9%: For MV.
t3. -- Timer remaining Setting is disabled. - 0
time 3 Upper display: The distinction by ON delay or OFF
delay is displayed at the side location of [t3.].
Lower display: Displayed by the unit (either one of
0.1s, s, or min) based on the internal event 3 delay
time unit(E3. the 3rd digit of C3).
Display Item Contents Initial User
value level
P- 1
Proportional band 0.1 to 999.9% 5.0 0
I- 1
Integration time 0 to 9999s 120 0
(0: No integral control action)
d- 1
Derivative time 0 to 9999s 30 0
(0: No derivative control action)
rE- 1
Manual reset –10.0 to +110.0% 50.0 0
OL- 1
MV low limit –10.0 to +110.0% 0.0 1
OH- 1
MV high limit –10.0 to +110.0% 100.0 1
P-1C
Cool-side 0.1 to 999.9% 5.0 0
proportional band
I-1C
Cool-side 0 to 9999s 120 0
integration time (0: No integral control action)
d-1C
Cool-side 0 to 9999s 30 0
derivative time (0: No derivative control action)
OL
.
1C
Cool-side MV low –10.0 to +110.0% 0.0 1
limit
OH
.
1C
Cool-side MV high –10.0 to +110.0% 100.0 1
limit
C15M List of Parameters
[List of Operation Displays]
■Operation Displays
■SP bank
Bank selection: SP
User level details 0: Display in basic / standard / high function,
1: Display in standard / high function,
2: Display in high function.
Initial value may vary depending on model No.
■Event bank
Bank selection: Ev
■PID bank
Bank selection: PId
■Parameter bank
Bank selection: PArA
■Extension tuning bank
Bank selection: Et
[List of Setup Setting Displays]
■Setup bank
Bank selection: StUP
CP-UM-5410EC
(continued on back page)
Display Item Contents Initial User
value level
E1 to E5 Internal event 1 to –1999 to +9999 0 0
5, main setting The decimal point position varies by meeting the
E1
.
Sb
to Internal event 1 to internal event operation type. 0 0
E5
.
Sb
5, sub-setting 0 to 9999 for some operation type.
E1
.
Hy
to Internal event 1 to 0 to 9999 5 0
E5
.
Hy
5, hysteresis The decimal point position varies by meeting the
internal event operation type.
E1
.
On
to Internal event 1 to 0.0 to 999.9 0 2
E5
.
On
5, ON delay (For the delay time unit 0.1s)
E1
.
OF
to Internal event 1 to 0 to 9999 0 2
E5
.
OF
5, OFF delay (Except for the delay time unit 0.1s)
E5E4
Display Item Contents Initial User
value level
C 64
CPL/MODBUS 0: CPL 0 0
1: MODBUS ASCII format
2: MODBUS RTU format
C 65
Station address 0 to 127 0 0
Communication is disabled when "0" is set.
C 66
Transmission 0: 4800bps 2 0
speed 1: 9600bps
2: 19200bps
3: 38400bps
C 67
Data format (data 0: 7bits 1 0
length) 1: 8bits
C 68
Data format 0: Even parity 0 0
(parity) 1: Odd parity
2: No parity
C 69
Data format (stop 0: 1bit 0 0
bits) 1: 2bits
C 70
Communication 1 to 250ms 3 2
minimum response
time
C71
Key operation 0: Standard type 0 2
mode/type 1: Special type
C 72
MODE key 0: Invalid 1 0
function 1: AUTO/MANUAL selection
2: RUN/READY selection
3: AT Stop/Start
4: LSP group selection
5: Release of all DO latches
6: Invalid
7: Communication DI1 selection
8: Invalid
C 73
MODE display Whether the mode bank setup display is enabled or 255 1
setup disabled is determined by the sum of the following
weighting:
Bit 0: AUTO/MANUAL display
0: Disabled, +1: Enabled
Bit 1: RUN/READY display
0: Disabled, +2: Enabled
Bit 3: AT stop/start display
0: Disabled, +8: Enabled
Bit 4: DO latch release
0: Disabled, +16: Enabled
Bit 5: Communication DI1 ON/OFF display
0: Disabled, +32: Enabled
Other invalid setup: 0, +4, +64, +128
C 74
PV/SP value Whether the basic display is enabled or disabled is 15 1
display setup determined by the sum of the following weighting:
Bit 0: PV display
0: Disabled, +1: Enabled
Bit 1: SP display
0: Disabled, +2: Enabled
Bit 2: LSP group No. display
0: Disabled, +4: Enabled
Other invalid setup: 0, +8
C 75
MV display setup Whether the basic display is enabled or disabled is 15 1
determined by the sum of the following weighting:
Bit 0: MV display
0: Disabled, +1: Enabled
Bit 1: Heat MV/cool MV display
0: Disabled, +2: Enabled
Bit 3: AT progress display
0: Disabled, +8: Enabled
Other invalid setup: 0, +4
C 76
Event setting value 0: In the operation display mode, the internal event 0 1
display setup setting value is not displayed.
1: In the operation display mode, the internal event 1
setting value is displayed.
2: In the operation display mode, the internal event 1
to 2 setting value is displayed.
3: In the operation display mode, the internal event 1
to 3 setting value is displayed.
C 77
Event remaining 0: In the operation display mode, the ON/OFF delay 0 1
time display setup remaining time of the internal event is not
displayed.
1: In the operation display mode, the ON/OFF delay
remaining time of the internal event 1 is displayed.
2: In the operation display mode, the ON/OFF delay
remaining time of the internal event 1 to 2 is
displayed.
3: In the operation display mode, the ON/OFF delay
remaining time of the internal event 1 to 3 is
displayed.
C 78
CT input current 0: In the operation display mode, the CT current 0 1
value display value is not displayed.
setup 1: In the operation display mode, the CT1 current
value is displayed.
2: In the operation display mode, the CT1 to 2
current value is displayed.
C 79
User level 0: Basic configuration 0 0
1: Standard configuration
2: High function configuration
C 80
LED monitor 0: Disabled 0 2
1: Flashing at RS-485 communication signal
transmission
2: Flashing at RS-485 communication signal
receiving
3: OR (logical sum) of all DI status
4: Flashing at READY
C 90 Number of CT1 0: 800 turns 8 2
turns 1 to 40: CT turns divided by 100.
C91 Number of CT1 0: 1 time 1 2
power wire loops 1 to 6: Number of times
C 92 Number of CT2 0: 800 turns 8 2
turns 1 to 40: CT turns divided by 100.
C 93 Number of CT2 0: 1 time 1 2
power wire loops 1 to 6: Number of times
Display Item Contents Initial User
value level
C01
PV input range Thermocouple (T):
1 to 6, 9 to 11, 13 to 21, 24, 25
10
type RTD (R):
41 to 46, 51 to 54, 63, 64, 67, 68 41
DC current/voltage (L):
84, 86 to 90 88
C 02
Temperature unit 0: Centigrade (°C) 0 0
1: Fahrenheit (°F)
C 03
Cold junction 0: Cold junction compensation is performed. (Internal) 0 2
compensation 1: Cold junction compensation is not performed.
(T/C) (External)
C 04
Decimal point 0: No decimal point 0 0
position 1: One digit below decimal point
2: Two digits below decimal point
3: Three digits below decimal point
(Select ‘0’ or ‘1’ for the RTD range with decimal
point)
C 05
PV range low limit When the PV input range type is thermocouple (T) or - 0
RTD (R), the setting is disabled although range low
limit is displayed.
–1999 to +9999U when the PV input range type is DC 0
voltage/current (L).
C 06
PV range high When the PV input range type is thermocouple (T) or - 0
RTD(R), the setting is disabled although range high
limit is displayed.
–1999 to +9999U when the PV input range type is DC 1000
voltage/current (L).
C 07
SP low limit PV input range low limit to PV input range high limit 0 1
C 08
SP high limit 1000 1
C 09
Squarer root 0.0 to 100.0% 0.0 2
extraction dropout (0.0: No square root extraction)
C 14
Control action 0: Heat control (reverse action)) 0 0
(direct/reverse) 1: Cool control (direct action)
C 15
Selection of MV 0: Control operation is continued. 0 2
at PV alarm 1: MV at PV alarm occurrence is outputted.
occurrence
C 16
MV at PV alarm –10.0 to +110.0% 0.0 2
occurrence
C 17
MV at READY (at –10.0 to +110.0% 0.0 1
heat-side for
heat/cool control)
C 18
MV at READY (at –10.0 to +110.0% 0.0 1
cool-side)
C 19
Operation at 0: Bump-less 0 1
MANUAL change 1: Preset
C 20
Preset MANUAL –10.0 to +110.0% 0.0 or 1
value (Used even at MANUAL mode when power is ON.) 50.0
C21
PID operation 0: Automatic 0 2
initialization 1: Not initialized
function selection 2: Initialized (when SP value different from current
value is inputted.)
C 22
PID operation –10.0 to +110.0% 0.0 or 2
initial MV 50.0
C 26
Heat/cool control 0: Disabled. 0 0
1: Enabled.
C 27
Heal/cool selection 0: Normal 0 1
1: Energy saving
C 28
Dead zone –100.0 to +100.0% 0.0 0
C 29
Heal/cool control –10.0 to +110.0% 50.0 2
selection point
C 30
LSP setting 1 to 4 1 0
system
C 32
SP ramp unit 0: 0.1U/s 1 2
1: 0.1U/min
2: 0.1U/h
C 36
CT1 operation 0: Heater burnout detection 0 0
type 1: Current value measurement
C 37
CT1 output 0: Control output 1 0 0
1: Control output 2
2: Event output 1
3: Event output 2
4: Event output 3
C 38
CT1 measurement 30 to 300ms 30 0
wait time
C 39
CT2 operation type Same as CT1. 0 0
C 40
CT2 output 0 0
C41
CT2 measurement 30 0
wait time
C 42
Control output 1 1: 4 to 2mA 1 0
range 2: 0 to 20mA
C 43
Control output 1 0: MV 0 0
type 1: Heat MV
2: Cool MV
3: PV
4: PV before ratio bias filter
5: SP
6: Deviation (PV-SP)
7: CT1 current value
8: CT2 current value
9: Invalid
10: SP+MV
11: PV+MV
C 44
Control output 1 –1999 to +9999 0.0 0
scaling low limit (The decimal point position and unit may vary
C 45
Control output 1 depending on the control output 1 type.) 100.0 0
scaling high limit
C 46 Control output 1 0 to 9999 200 0
MV scaling The decimal point position and unit are same as
for PV.
C 47
Control output 2 Same as control output 1. 1 0
range
C 48
Control output 2 3 0
type
C 49
Control output 2 –1999 to +9999 0 0
scaling low limit (The decimal point position and unit may vary
C 50
Control output 2 depending on the control output 2 type.) 1000 0
scaling high limit
C51 Control output 2 0 to 9999 200 0
MV scaling The decimal point position and unit are same as
for PV.
E3
Display Item Contents Initial User
value level
A--M
AUTO/MANUAL AUTO : AUTO mode AUTO 0
mode selection MAN : MANUAL mode
r--r
RUN/READY RUN : RUN mode RUN 0
mode selection RDY : READY mode
At
AT Stop/Start At. OF : AT Stop AT Stop 0
selection At. ON : AT Start
do Lt
Release all DO Lt. ON : Latch continue Latch 0
latches Lt. OF : Latch release continue
C. dI 1
Communication dI. OF : OFF OFF 0
DI 1 dI. On : ON
[List of Parameter Setting Displays]
■Mode bank
Bank selection: MOdE
Display Item Contents Initial User
value level
At
.
ty
AT type 0: Normal (Standard control characteristics) 1 0
1: Immediate response (Control
characteristics immediately responding
to the external disturbance.)
2: Stable (Control characteristics with less
up/down function of PV)
JF
.
bd
Just-FiTTER setting band 0.00 to 10.00 0.30 2
SP
.
LG
SP lag constant 0.0 to 999.9 0.0 2
At-P
Proportional band tuning 0.00 to 99.99 1.00 2
factor at AT
At-I
Integration time tuning factor 0.00 to 99.99 1.00 2
at AT
At-d
Derivative time tuning factor 0.00 to 99.99 1.00 2
at AT
Ctr
.
A
Control algorithm 0: PID (conventional PID) 0 1
1: Ra-PID (high performance type)
JF
.
Ov
Just-FiTTER overshoot 0 to 100 0 1
suppression factor
St.SA ST step execution resolution
0.00 to 99.99 % 10.00 2
width
St.Sb ST step settling bound
0.00 to 10.00 % 0.50 2
St.Hb ST hunting settling bound
0.00 to 10.00 % 1.00 2
St.ud ST step ramp change
0: ST is executed when the PV ramp up or 0 1
down.
1: ST is executed only when the PV ramp
up.
Display Item Contents Initial User
value level
CtrL Control method 0: ON/OFF control 0 or 1 0
1: PID fixed
2: ST (Self turning)
At. OL MV low limit at AT –10.0 to +110.0% 0.0 0
At. OH MV high limit at AT –10.0 to +110.0% 100.0 0
dIFF ON/OFF control differential 0 to 9999U 5 0
OFFS ON/OFF control operating –1999 to 9999U 0 2
point differential
FL PV filter 0.0 to 120.0s 0.0 0
rA PV ratio 0.001 to 9.999 1.000 1
bI PV bias –1999 to +9999U 0 0
CyU Time proportional cycle unit 1 0: 1s unit 0 2
1: 0.5s fixed (Cycle time is disabled.)
2: 0.2s fixed (Cycle time is disabled.)
3: 0.1s fixed (Cycle time is disabled.)
Cy Time proportional cycle1 5 to 120s (The output includes the relay 10 or 2 0
output.)
1 to 120s (The output does not include the
relay output.)
CyU2 Time proportional cycle unit 2 0: 1s unit 0 2
1: 0.5s fixed (Cycle time is disabled.)
2: 0.2s fixed (Cycle time is disabled.)
3: 0.1s fixed (Cycle time is disabled.)
Cy2 Time proportional cycle 2 5 to 120s (The output includes the relay 10 or 2 0
output.)
1 to 120s (The output does not include the
relay output.)
tP. ty Time proportional operation 0: Controllability aiming type 0 or 1 2
type 1: Actuator life aiming type
(Only one ON/OFF operation within time
proportional cycle time)
SPU SP ramp-up 0.0 to 999.9U (0.0: No ramp) 0.0 2
SPd SP ramp-down 0.0 2
Display Item Contents Initial User
value level
SP- 1
to SP of LSP1 group to SP low limit (C07) to SP high limit (C08) 0 0
SP-4
LSP4 group
Display Item Contents Initial User
value level
Upper display: PV SP (Target value) SP low limit (C07) to SP high limit (C08) 0 0
Lower display: SP
LSP 1 LSP No. (1st digit: 1 to LSP system group (C30 Max. 4) 1 0
Lower display: Value at the
LSP right end digit)
Out
MV (Manipulated –10.0 to +110.0% - 0
Variable) Setting is disabled in AUTO mode.
(Numeric value does not flash.)
Setting is enabled in MANUAL mode.
(Numeric value flashes.)
HEAt Heat MV Setting is disabled - 0
(Manipulated –10.0 to +110.0%
Variable)
COOL Cool MV - 0
(Manipulated
Variable)
Upper display: PV AT progress Setting is disabled. - 0
At 1 (display display (1st digit Except for 0: During execution of AT
example) = Numeric value (Value is decreased.)
at right end digit) 0: Completion of AT
Ct 1 CT (Current Setting is disabled. - 0
transformer)
current value 1
Ct2 CT (Current Setting is disabled. - 0
transformer)
current value 2
E1 Internal event 1 Setting range is different depending on the internal 0 0
main setting event operation type.
E 1. Sb Internal event 1 –1999 to +9999U: Except below. 0 0
sub-setting 0 to 9999U: When the setting value is an absolute value.
–199.9 to +999.9%: For MV.
t 1. -- Timer remaining Setting is disabled. - 0
time 1 Upper display: The distinction by ON delay or OFF
delay is displayed at the side location of [t1.].
Lower display: Displayed by the unit (either one of
0.1s, s, or min) based on the internal event 1 delay
time unit (E1. the 3rd digit of C3).
E2 Internal event 2 Setting range is different depending on the internal 0 0
main setting event operation type.
E2. Sb Internal event 2 –1999 to +9999U: Except below. 0 0
sub-setting 0 to 9999U: When the setting value is an absolute
value.
–199.9 to +999.9%: For MV.
t2. -- Timer remaining Setting is disabled. - 0
time 2 Upper display: The distinction by ON delay or OFF
delay is displayed at the side location of [t2.].
Lower display: Displayed by the unit (either one of
0.1s, s, or min) based on the internal event 2 delay
time unit (E2. the 3rd digit of C3).
E3 Internal event 3 Setting range is different depending on the internal 0 0
main setting event operation type.
E3. Sb Internal event 3 –1999 to +9999U: Except below. 0 0
sub-setting 0 to 9999U: When the setting value is an absolute value.
–199.9 to +999.9%: For MV.
t3. -- Timer remaining Setting is disabled. - 0
time 3 Upper display: The distinction by ON delay or OFF
delay is displayed at the side location of [t3.].
Lower display: Displayed by the unit (either one of
0.1s, s, or min) based on the internal event 3 delay
time unit(E3. the 3rd digit of C3).
Display Item Contents Initial User
value level
P- 1
Proportional band 0.1 to 999.9% 5.0 0
I- 1
Integration time 0 to 9999s 120 0
(0: No integral control action)
d- 1
Derivative time 0 to 9999s 30 0
(0: No derivative control action)
rE- 1
Manual reset –10.0 to +110.0% 50.0 0
OL- 1
MV low limit –10.0 to +110.0% 0.0 1
OH- 1
MV high limit –10.0 to +110.0% 100.0 1
P-1C
Cool-side 0.1 to 999.9% 5.0 0
proportional band
I-1C
Cool-side 0 to 9999s 120 0
integration time (0: No integral control action)
d-1C
Cool-side 0 to 9999s 30 0
derivative time (0: No derivative control action)
OL
.
1C
Cool-side MV low –10.0 to +110.0% 0.0 1
limit
OH
.
1C
Cool-side MV high –10.0 to +110.0% 100.0 1
limit
C15M List of Parameters
[List of Operation Displays]
■Operation Displays
■SP bank
Bank selection: SP
User level details 0: Display in basic / standard / high function,
1: Display in standard / high function,
2: Display in high function.
Initial value may vary depending on model No.
■Event bank
Bank selection: Ev
■PID bank
Bank selection: PId
■Parameter bank
Bank selection: PArA
■Extension tuning bank
Bank selection: Et
[List of Setup Setting Displays]
■Setup bank
Bank selection: StUP
CP-UM-5410EC
(continued on back page)
Display Item Contents Initial User
value level
E1 to E5 Internal event 1 to –1999 to +9999 0 0
5, main setting The decimal point position varies by meeting the
E1
.
Sb
to Internal event 1 to internal event operation type. 0 0
E5
.
Sb
5, sub-setting 0 to 9999 for some operation type.
E1
.
Hy
to Internal event 1 to 0 to 9999 5 0
E5
.
Hy
5, hysteresis The decimal point position varies by meeting the
internal event operation type.
E1
.
On
to Internal event 1 to 0.0 to 999.9 0 2
E5
.
On
5, ON delay (For the delay time unit 0.1s)
E1
.
OF
to Internal event 1 to 0 to 9999 0 2
E5
.
OF
5, OFF delay (Except for the delay time unit 0.1s)
E6

Display Item Contents Initial User
value level
UF- 1
User function - - - - 1
definition 1
UF-2
User function - - - - 1
definition 2
UF-3
User function - - - - 1
definition 3
UF-4
User function - - - - 1
definition 4
UF-5
User function - - - - 1
definition 5
UF-6
User function - - - - 1
definition 6
UF-7
User function - - - - 1
definition 7
UF-8
User function - - - - 1
definition 8
E4
Display Item Contents Initial User
value level
Ot 1
.
1
to Control output 0: Input of default 0 2
Ot2
.
1
1 to 2, event output 1: MV1 (ON/OFF control output, time proportional
Ev 1
.
1
to 1 to 3 operation output,heat-side proportional output of heat/cool
Ev3
.
1
type control)
2: MV2 (cool-side proportional output of heat/cool
control)
3: Function 1 ((A and B) or (C and D))
4: Function 2 ((A or B) and (C or D))
5: Function 3 (A or B or C or D)
6: Function 4 (A and B and C and D)
Ot 1
.
2
to Control output 0: Normally open (OFF, 0) 14 to 15 2
Ot2
.
2
1 to 2, event output 1: Normally close (ON, 1) or
Ev 1
.
2
to 1 to 3 output 2: Internal event 1 2 to 4
Ev3
.
2
assignment A 3: Internal event 2
4: Internal event 3
5: Internal event 4
6: Internal event 5
7 to 13: Undefined
14: MV1
Ot 1
.
3
to Control output 15: MV2 0 2
Ot2
.
3
1 to 2, event output 16 to 17: Undefined
Ev 1
.
3
to 1 to 3 output 18: DI1
Ev3
.
3
assignment B 19: DI2
20 to 25: Undefined
26: Internal contact 1
27: Internal contact 2
28: Internal contact 3
29 to 33: Undefined
Ot 1
.
4
to Control output 34: Communication DI1 0 2
Ot2
.
4
1 to 2, event output 35: Communication DI2
Ev 1
.
4
to 1 to 3 output 36: Communication DI3
Ev3
.
4
assignment C 37: Communication DI4
38: MANUAL mode
39: READY mode
40: Invalid
41: During AT execution
42: During SP ramp
Ot 1
.
5
to Control output 43: Undefined 0 2
Ot2
.
5
1 to 2 event output 44: Alarm is enabled.
Ev 1
.
5
to 1 to 3 output 45: PV alarm is enabled.
Ev3
.
5
assignment D 46: Undefined
47: mode key function selection status
48: Event output 1 status
49: Control output 1 status
Display Item Contents Initial User
value level
dI 1
.
3
to Internal contact 0: Normally open (OFF, 0) 2 to 4 2
dI3
.
3
1 to 3 1: Normally close (ON, 1)
Input assignment A 2: DI1
3: DI2
4 to 9: Undefined
10: Internal event 1
11: Internal event 2
dI 1
.
4
to Internal contact 12: Internal event 3 0 2
dI3
.
4
1 to 3 13: Internal event 4
Input assignment B 14: Internal event 5
15 to 17: Undefined
18: Communication DI1
19: Communication DI2
20: Communication DI3
dI 1
.
5
to Internal contact 21: Communication DI4 0 2
dI3
.
5
1 to 3 22: MANUAL mode
Input assignment C 23: READY mode
24: Undefined
25: During AT execution
26: During SP ramp
27: Undefined
dI 1
.
6
to Internal contact 28: Alarm is enabled. 0 2
dI3
.
6
1 to 3 29: PV alarm is enabled.
Input assignment D 30: Undefined
31: Mode key function selection status
32: Event output 1 status
33: Control output 1 status
dI 1
.
7
to Internal contact Digits are called as 1st digit, 2nd digit, 3rd digit and 0000 2
dI3
.
7
1 to 3 4th digit from the right end digit.
Polarity A to D
1st digit: Polarity A 0: Direct 0
(Polarity of input 1: Reverse
assignment A)
2nd digit: Polarity B 0
(Polarity of input
assignment B)
3rd digit: Polarity C 0
(Polarity of input
assignment C)
4th digit: Polarity D 0
(Polarity of input
assignment D)
dI 1
.
8
to Internal contact 0: Direct 0 2
dI3
.
8
1 to 3 Polarity 1: Reverse
dI 1
.
9
to Internal contact 0: Every internal event 0 2
dI3
.
9
1 to 3 1 to 5: Internal event numbers
Internal event
No.assignment
Display Item Contents Initial User
value level
Ot 1
.
6
to Control output 1 to Digits are called as 1st digit, 2nd digit, 3rd digit and 0000 2
Ot2
.
6
2, event output 1 to 4th digit from the right end digit.
Ev 1
.
6
to 2 Polarity A to D
Ev3
.
6
1st digit: Polarity A 0: Direct 0
2nd digit: Polarity B 1: Reverse 0
3rd digit: Polarity C 0
4th digit: Polarity D 0
Ot 1
.
7
to Control output 1 0: Direct 0 2
Ot2
.
7
to 2, event output 1: Reverse
Ev 1
.
7
to 1 to 3
Ev3
.
7
Polarity
Ot 1
.
8
to Control output 1 0: Disabled 0 2
Ot2
.
8
to 2, event output 1: Enabled (Latch at ON)
Ev 1
.
8
to 1 to 3 2: Enabled (Latch at OFF, except at the time of
Ev3
.
8
Latch initialization after power ON)
Display Item Contents Initial User
value level
Id0 1
ROM ID 0: fixed - 2
Id02
ROM version 1 XX. XX (2 digits after decimal point) - 2
Id03
ROM version 2 XX. XX (2 digits after decimal point) - 2
Id04
SLP support - 2
Information
Id05
EST support - 2
version
Id06
Manufacturing Year - 2000 - 2
date code (year) Ex.: “3” means the year 2003.
Id07
Manufacturing Month + Day 100 - 2
date code (month, Ex.: “12.01” means the 1st day of December
day)
Id08
Serial No. - 2
Display Item Contents Initial User
value level
dI 1
.
1
to Internal contact 1 0: No function 0 0
dI3
.
1
to 3 1: LSP group selection (0/+1)
Operation type 2: LSP group selection (0/+2)
3: LSP group selection (0/+4)
4: Invalid
5: Invalid
6: Invalid
7: RUN/READY selection
8: AUTO/MANUAL selection
9: Invalid
10: AT Stop/Start
11: ST Disabled/Enabled
12: Control action direct/reverse selection (As per
setting/opposite operation of setting)
13: SP ramp Enabled/Disabled
14: PV hold (No-hold/Hold)
15: PV maximum value hold (No-hold/Hold)
16: PV minimum value hold (No-hold/Hold)
17: Timer Stop/Start
18: Release of all DO latches (Continue/Release)
19: Invalid
20: Invalid
dI 1
.
2
to Internal contact 1 0: Disabled. (Input of default) 0 2
dI3
.
2
to 3 1: Function 1 ((A and B) or (C and D))
Input bit operation 2: Function 2 ((A or B) and (C or D))
3: Function 3 (A or B or C or D)
4: Function 4 (A and B and C and D)
■Event assignment bank
Bank selection: EvCF
■DI assignment bank
Bank selection: dI
■Lock bank
Bank selection: LOC
■Instrument information bank
Bank selection: Id
Display Item Contents Initial User
value level
LOC
Key lock 0: All settings are enabled. 0 0
1: Mode, event, operation display, SP, UF, lock,
manual MV, and mode key can be set.
2: Operation display, SP, UF, lock, manual MV, and
mode key can be set.
3: UF, lock, manual MV, and mode key can be set.
C
.
LOC
Communication 0: RS-485 communication read/write is enabled. 0 2
lock 1: RS-485 communication read/write is disabled.
L
.
LOC
Loader lock 0: Loader communication read/write is enabled. 0 2
1: Loader communication read/write is disabled.
PASS
Password display 0 to 15 0 0
5: Password 1A to 2B display
PS 1A
Password 1A 0000 to FFFF (hexadecimal value) 0000 0
PS2A
Password 2A 0000 to FFFF (hexadecimal value) 0000 0
PS 1b
Password 1B 0000 to FFFF (hexadecimal value) 0000 0
PS2b
Password 2B 0000 to FFFF (hexadecimal value) 0000 0
■DO assignment bank
Bank selection: dO
■User function bank
Bank selection: UF
Display Item Contents Initial User
value level
E1
.
C1
to Operation type of 0: No event 0 0
E5
.
C1
internal event 1 to 1: PV high limit
5 configuration 1 2: PV low limit
3: PV high/low limit
4: Deviation high limit
5: Deviation low limit
6: Deviation high/low limit
7: Deviation high limit (Final SP reference)
8: Deviation low limit (Final SP reference)
9: Deviation high/low limit (Final SP reference)
10: SP high limit
11: SP low limit
12: SP high/low limit
13: MV high limit
14: MV low limit
15: MV high/low limit
16: CT1 heater burnout/over-current
17: CT1 heater short-circuit
18: CT2 heater burnout/over-current
19: CT2 heater short-circuit
20: Loop diagnosis 1
21: Loop diagnosis 2
22: Loop diagnosis 3
23: Alarm (status)
24: READY (status)
25: MANUAL (status)
26: Invalid
27: During AT execution (status)
28: During SP ramp (status)
29: Control direct action (status)
30: ST execution (status)
31: Invalid
32: Timer (status)
E1
.
C2
to Internal event 1 to Digits are called as 1st digit, 2nd digit, 3rd digit and 0000 0
E5
.
C2
5 Configuration 2 4th digit from the right end digit.
1st digit: 0: Direct 0
Direct/Reverse 1: Reverse
2nd digit: Stand-by 0: None 0
1: Standby
2: Standby + Standby at SP change
3rd digit: EVENT 0: Continue 0
state at READY 1: Forced OFF
4th digit: Undefined 0 0
E1
.
C3
to Internal event 1 to Digits are called as 1st digit, 2nd digit, 3rd digit and 0000 2
E5
.
C3
5 Configuration 3 4th digit from the right end digit.
1st digit: Alarm OR 0: No event 0
1: Alarm direct + OR operation
2: Alarm direct + AND operation
3: Alarm reverse + OR operation
4: Alarm reverse + AND operation
2nd digit: Special 0: As normal execution 0
OFF 1: Event OFF at the event setting value (main)=0
3rd digit: Delay 0: 0.1s 0
time unit 1: 1s
2: 1min
4th digit: 0 0
Undefined
This is the display in upper display. The setup
exception is as follows:
----
: Yet to be registered.
P--
: Proportional band of the PID group in use
I--
: Integration time of the PID group in use
d--
: Derivative time of the PID group in use
rE--
: Manual reset of the PID group in use
OL--
: MV low limit of the PID group in use
OH--
: MV high limit of the PID group in use
P--C
: Cool-side proportional band of the PID
group in use
I--C
: Cool-side integration time of the PID group
in use
d--C
: Cool-side derivative time of the PID group
in use
Ol.-C
: Cool-side MV low limit of the PID group in
use
Oh.-C
: Cool-side of MV high limit of the PID group
in use
1st edition: Mar. 2006
13th edition: Mar. 2015 (F)
E7E6

Display Item Contents Initial User
value level
UF- 1
User function - - - - 1
definition 1
UF-2
User function - - - - 1
definition 2
UF-3
User function - - - - 1
definition 3
UF-4
User function - - - - 1
definition 4
UF-5
User function - - - - 1
definition 5
UF-6
User function - - - - 1
definition 6
UF-7
User function - - - - 1
definition 7
UF-8
User function - - - - 1
definition 8
E4
Display Item Contents Initial User
value level
Ot 1
.
1
to Control output 0: Input of default 0 2
Ot2
.
1
1 to 2, event output 1: MV1 (ON/OFF control output, time proportional
Ev 1
.
1
to 1 to 3 operation output,heat-side proportional output of heat/cool
Ev3
.
1
type control)
2: MV2 (cool-side proportional output of heat/cool
control)
3: Function 1 ((A and B) or (C and D))
4: Function 2 ((A or B) and (C or D))
5: Function 3 (A or B or C or D)
6: Function 4 (A and B and C and D)
Ot 1
.
2
to Control output 0: Normally open (OFF, 0) 14 to 15 2
Ot2
.
2
1 to 2, event output 1: Normally close (ON, 1) or
Ev 1
.
2
to 1 to 3 output 2: Internal event 1 2 to 4
Ev3
.
2
assignment A 3: Internal event 2
4: Internal event 3
5: Internal event 4
6: Internal event 5
7 to 13: Undefined
14: MV1
Ot 1
.
3
to Control output 15: MV2 0 2
Ot2
.
3
1 to 2, event output 16 to 17: Undefined
Ev 1
.
3
to 1 to 3 output 18: DI1
Ev3
.
3
assignment B 19: DI2
20 to 25: Undefined
26: Internal contact 1
27: Internal contact 2
28: Internal contact 3
29 to 33: Undefined
Ot 1
.
4
to Control output 34: Communication DI1 0 2
Ot2
.
4
1 to 2, event output 35: Communication DI2
Ev 1
.
4
to 1 to 3 output 36: Communication DI3
Ev3
.
4
assignment C 37: Communication DI4
38: MANUAL mode
39: READY mode
40: Invalid
41: During AT execution
42: During SP ramp
Ot 1
.
5
to Control output 43: Undefined 0 2
Ot2
.
5
1 to 2 event output 44: Alarm is enabled.
Ev 1
.
5
to 1 to 3 output 45: PV alarm is enabled.
Ev3
.
5
assignment D 46: Undefined
47: mode key function selection status
48: Event output 1 status
49: Control output 1 status
Display Item Contents Initial User
value level
dI 1
.
3
to Internal contact 0: Normally open (OFF, 0) 2 to 4 2
dI3
.
3
1 to 3 1: Normally close (ON, 1)
Input assignment A 2: DI1
3: DI2
4 to 9: Undefined
10: Internal event 1
11: Internal event 2
dI 1
.
4
to Internal contact 12: Internal event 3 0 2
dI3
.
4
1 to 3 13: Internal event 4
Input assignment B 14: Internal event 5
15 to 17: Undefined
18: Communication DI1
19: Communication DI2
20: Communication DI3
dI 1
.
5
to Internal contact 21: Communication DI4 0 2
dI3
.
5
1 to 3 22: MANUAL mode
Input assignment C 23: READY mode
24: Undefined
25: During AT execution
26: During SP ramp
27: Undefined
dI 1
.
6
to Internal contact 28: Alarm is enabled. 0 2
dI3
.
6
1 to 3 29: PV alarm is enabled.
Input assignment D 30: Undefined
31: Mode key function selection status
32: Event output 1 status
33: Control output 1 status
dI 1
.
7
to Internal contact Digits are called as 1st digit, 2nd digit, 3rd digit and 0000 2
dI3
.
7
1 to 3 4th digit from the right end digit.
Polarity A to D
1st digit: Polarity A 0: Direct 0
(Polarity of input 1: Reverse
assignment A)
2nd digit: Polarity B 0
(Polarity of input
assignment B)
3rd digit: Polarity C 0
(Polarity of input
assignment C)
4th digit: Polarity D 0
(Polarity of input
assignment D)
dI 1
.
8
to Internal contact 0: Direct 0 2
dI3
.
8
1 to 3 Polarity 1: Reverse
dI 1
.
9
to Internal contact 0: Every internal event 0 2
dI3
.
9
1 to 3 1 to 5: Internal event numbers
Internal event
No.assignment
Display Item Contents Initial User
value level
Ot 1
.
6
to Control output 1 to Digits are called as 1st digit, 2nd digit, 3rd digit and 0000 2
Ot2
.
6
2, event output 1 to 4th digit from the right end digit.
Ev 1
.
6
to 2 Polarity A to D
Ev3
.
6
1st digit: Polarity A 0: Direct 0
2nd digit: Polarity B 1: Reverse 0
3rd digit: Polarity C 0
4th digit: Polarity D 0
Ot 1
.
7
to Control output 1 0: Direct 0 2
Ot2
.
7
to 2, event output 1: Reverse
Ev 1
.
7
to 1 to 3
Ev3
.
7
Polarity
Ot 1
.
8
to Control output 1 0: Disabled 0 2
Ot2
.
8
to 2, event output 1: Enabled (Latch at ON)
Ev 1
.
8
to 1 to 3 2: Enabled (Latch at OFF, except at the time of
Ev3
.
8
Latch initialization after power ON)
Display Item Contents Initial User
value level
Id0 1
ROM ID 0: fixed - 2
Id02
ROM version 1 XX. XX (2 digits after decimal point) - 2
Id03
ROM version 2 XX. XX (2 digits after decimal point) - 2
Id04
SLP support - 2
Information
Id05
EST support - 2
version
Id06
Manufacturing Year - 2000 - 2
date code (year) Ex.: “3” means the year 2003.
Id07
Manufacturing Month + Day 100 - 2
date code (month, Ex.: “12.01” means the 1st day of December
day)
Id08
Serial No. - 2
Display Item Contents Initial User
value level
dI 1
.
1
to Internal contact 1 0: No function 0 0
dI3
.
1
to 3 1: LSP group selection (0/+1)
Operation type 2: LSP group selection (0/+2)
3: LSP group selection (0/+4)
4: Invalid
5: Invalid
6: Invalid
7: RUN/READY selection
8: AUTO/MANUAL selection
9: Invalid
10: AT Stop/Start
11: ST Disabled/Enabled
12: Control action direct/reverse selection (As per
setting/opposite operation of setting)
13: SP ramp Enabled/Disabled
14: PV hold (No-hold/Hold)
15: PV maximum value hold (No-hold/Hold)
16: PV minimum value hold (No-hold/Hold)
17: Timer Stop/Start
18: Release of all DO latches (Continue/Release)
19: Invalid
20: Invalid
dI 1
.
2
to Internal contact 1 0: Disabled. (Input of default) 0 2
dI3
.
2
to 3 1: Function 1 ((A and B) or (C and D))
Input bit operation 2: Function 2 ((A or B) and (C or D))
3: Function 3 (A or B or C or D)
4: Function 4 (A and B and C and D)
■Event assignment bank
Bank selection: EvCF
■DI assignment bank
Bank selection: dI
■Lock bank
Bank selection: LOC
■Instrument information bank
Bank selection: Id
Display Item Contents Initial User
value level
LOC
Key lock 0: All settings are enabled. 0 0
1: Mode, event, operation display, SP, UF, lock,
manual MV, and mode key can be set.
2: Operation display, SP, UF, lock, manual MV, and
mode key can be set.
3: UF, lock, manual MV, and mode key can be set.
C
.
LOC
Communication 0: RS-485 communication read/write is enabled. 0 2
lock 1: RS-485 communication read/write is disabled.
L
.
LOC
Loader lock 0: Loader communication read/write is enabled. 0 2
1: Loader communication read/write is disabled.
PASS
Password display 0 to 15 0 0
5: Password 1A to 2B display
PS 1A
Password 1A 0000 to FFFF (hexadecimal value) 0000 0
PS2A
Password 2A 0000 to FFFF (hexadecimal value) 0000 0
PS 1b
Password 1B 0000 to FFFF (hexadecimal value) 0000 0
PS2b
Password 2B 0000 to FFFF (hexadecimal value) 0000 0
■DO assignment bank
Bank selection: dO
■User function bank
Bank selection: UF
Display Item Contents Initial User
value level
E1
.
C1
to Operation type of 0: No event 0 0
E5
.
C1
internal event 1 to 1: PV high limit
5 configuration 1 2: PV low limit
3: PV high/low limit
4: Deviation high limit
5: Deviation low limit
6: Deviation high/low limit
7: Deviation high limit (Final SP reference)
8: Deviation low limit (Final SP reference)
9: Deviation high/low limit (Final SP reference)
10: SP high limit
11: SP low limit
12: SP high/low limit
13: MV high limit
14: MV low limit
15: MV high/low limit
16: CT1 heater burnout/over-current
17: CT1 heater short-circuit
18: CT2 heater burnout/over-current
19: CT2 heater short-circuit
20: Loop diagnosis 1
21: Loop diagnosis 2
22: Loop diagnosis 3
23: Alarm (status)
24: READY (status)
25: MANUAL (status)
26: Invalid
27: During AT execution (status)
28: During SP ramp (status)
29: Control direct action (status)
30: ST execution (status)
31: Invalid
32: Timer (status)
E1
.
C2
to Internal event 1 to Digits are called as 1st digit, 2nd digit, 3rd digit and 0000 0
E5
.
C2
5 Configuration 2 4th digit from the right end digit.
1st digit: 0: Direct 0
Direct/Reverse 1: Reverse
2nd digit: Stand-by 0: None 0
1: Standby
2: Standby + Standby at SP change
3rd digit: EVENT 0: Continue 0
state at READY 1: Forced OFF
4th digit: Undefined 0 0
E1
.
C3
to Internal event 1 to Digits are called as 1st digit, 2nd digit, 3rd digit and 0000 2
E5
.
C3
5 Configuration 3 4th digit from the right end digit.
1st digit: Alarm OR 0: No event 0
1: Alarm direct + OR operation
2: Alarm direct + AND operation
3: Alarm reverse + OR operation
4: Alarm reverse + AND operation
2nd digit: Special 0: As normal execution 0
OFF 1: Event OFF at the event setting value (main)=0
3rd digit: Delay 0: 0.1s 0
time unit 1: 1s
2: 1min
4th digit: 0 0
Undefined
This is the display in upper display. The setup
exception is as follows:
----
: Yet to be registered.
P--
: Proportional band of the PID group in use
I--
: Integration time of the PID group in use
d--
: Derivative time of the PID group in use
rE--
: Manual reset of the PID group in use
OL--
: MV low limit of the PID group in use
OH--
: MV high limit of the PID group in use
P--C
: Cool-side proportional band of the PID
group in use
I--C
: Cool-side integration time of the PID group
in use
d--C
: Cool-side derivative time of the PID group
in use
Ol.-C
: Cool-side MV low limit of the PID group in
use
Oh.-C
: Cool-side of MV high limit of the PID group
in use
1st edition: Mar. 2006
13th edition: Mar. 2015 (F)
E8

C1
CP-UM-5410EC (不适用于日本)
数字显示调节器
C15M
使用说明书 设置篇
感谢您购买阿自倍尔株式会社产品。
为了正确、安全的使用本产品,请务必阅读本使用说明书,在阅读、理解
本书的基础上进行使用。
在订购及使用产品之际,请务必登入以下网站,浏览“产品订购注意事项”。
http://www.azbil.com/cn/products/order.html
中英文版的内容如有差异,以英文版为准。
要求
请确保把本使用说明书送到本产品使用者手中。
禁止擅自复印和转载全部或部分本使用说明书的内容。
今后内容变更时恕不事先通知。
本使用说明书的内容经过仔细审查校对,万一有错误和遗漏,请向本公司
提出。
对客户应用结果,本公司有不能承担责任的场合,敬请谅解。
©2006-2015 Azbil Corporation All Rights Reserved.
本书对使用上的注意事项和安装、接线、PV量程种类、参数一览、主要规
格等进行说明。
请确认
您购买的C15MT含有以下物品
安装件 81409651-001 1 个
密封垫 81409657-001 1 个
使用说明书(本书) CP-UM-5410EC 1 本
安全注意事项
警告 错误使用时,可能会造成使用者死亡或负重伤的危
险状态。
注意 错误使用时,可能会发生使用者负轻伤或造成物品
损坏的危险状态。
警告
本机的接线错误会造成故障或产生危险灾害。
本机在通电前,请务必确认接线是否正确。
本机的接线或安装、拆卸时,请务必在切断电源的情况下进行。
请勿触摸电源端子等受电体。
否则可能会触电。
请勿分解本机。
否则可能会触电及产生故障。
注意
请在规格规定的使用条件(温度、湿度、电压、振动、冲击、安装
方向、环境等)范围内使用本机。
否则可能会引起火灾、产生故障。
请勿遮盖本机的通风口。
否则可能会引起火灾或产生故障。
请按照规定的基准、指定的电源及施工方法进行正确配线。
否则可能会引起火灾、触电、故障。
避免线头、切削粉、水等进入本机内部。
否则可能发生火灾、故障。
请按照端子螺丝规格中记载的扭矩切实拧紧螺丝。
如果紧固不充分,可能会触电、引起火灾。
请勿把本机未使用端子作为中继端子使用。
否则可能会触电、发生火灾、产生故障。
本机接线后建议盖上端子盖。
否则可能会触电。(本机的端子盖是另售品)
请按规格中记载的寿命范围内使用本机的继电器。
过度使用后可能引起火灾、产生故障。
有雷浪涌的场合,请使用本公司生产的浪涌吸收器。
否则可能会引起火灾、产生故障。
请勿用头部尖锐的物品(铅笔尖或针等)操作键。
否则会产生故障。
设置
■安装场所
请把本机设置在如下场所。
•除供给电源及继电器接点输出外,输入输出模件的共模电压:
对大地间的电压为30Vr.m.s.以下,峰值42.4以下,DC60V以下。
•无高温﹑低温﹑高湿度﹑低湿度的场所。
•无硫化气等腐蚀性气体及硅气体的场所。
•粉尘﹑油烟较少的场所。
•无直射阳光及风雨不能直接触及的场所。
•机械振动﹑冲击少的场所。
•远离高压线﹑焊接机附近及电气干扰发生源附近的场所。
•远离如锅炉等有高压点火装置 15m 以上的场所。
•受电磁干扰少的场所
•无可燃性液体或蒸汽的场所
•室内
■安装方法
•安装角度从水平位置向后仰10度以内﹑向前倾10度以内。
•仪表盘安装型(C15MT)的场合,请使用板厚在9mm以下的钢板。
■外型尺寸
●C15MT(盘安装型)
(单位:mm)
使用上的注意事项
拧紧附属的安装件螺丝,直到安装件不再活动后再拧1圈螺丝,固
定在仪表盘上。
请勿将螺丝拧得过紧,否则会使机箱变形。
● 盘开孔图
单台安装 密集安装
(单位:mm)
使用上的注意事项
•3台以上横向密集安装的场合,环境温度不要超过40℃。
•需要防水、防尘的场合,请单台安装。 已经密集安装的场合,不
能保证防水、防尘性能。
•上下方向保持50mm以上的间隔。
接线
进行仪表电源配线时,请将本产品的主电源切断开关设置在操作员手能触
及的范围内。
另外,进行AC电源型的仪表电源配线时,请配上滞后型(T)额定电流0.2A、
额定电压250V的保险丝。(IEC127)
仪表侧面的端子配列标号的含义如下表所示。
记号 内 容
~ 交流
注意、触电的危险
注意
使用上的注意事项
•请在确认贴在本机侧面的仪表型号与端子编号后进行接线。
接线完毕后,请务必确认接线无误。
•输入输出信号线远离动力线或电源线50cm以上,而且不能在同
一配线管或线槽内。
•请注意压接端子等不能与相邻的端子接触。
•1个端子螺丝连接多个压接端子的场合,请事先把压
接端子弯曲处理并连接不超过2个压接端子。
•1~6, 13~18号端子的配线请从端子台侧看的左方向进行配线。
•端子连接时请使用适合M3螺丝的下述尺寸的端子。
A : 5.8mm
以下
B : 5.5
~
7.6mm
(参考)推荐压接端子:日本压接端子制造(株)
V1.25-MS3
A
B
•仪表电源为OFF时,电流输入回路被断开。当计装设计需数台仪表
的电流输入串联时,请配上另售的电阻(81401325),取其电压作为
电压量程使用。
•请把流过加热电流的导线贯通在电流互感器中。同时,请勿在超
过规格中规定的容许电流的情况下使用。否则会损坏本机。
•本机在电源投入后进入稳定状态前,最长6s内不动作。其后进入
运行状态,但为了保证规定的精度,请预热30分钟以上。
•电流互感器输入不能用于位相控制。
•控制输出1与控制输出2之间未隔离。请根据需要进行隔离。
•RS-485的通信路的两端上请勿连接终端电阻。否则不能通讯。
•与本机连接的机器或装置,需采取与本机的电源、输入输出部的
最高使用电压适合的强化绝缘措施后,才能使用。
●C15MT的接线
● 输入输出间隔离
实线围住部分与其它信号隔离。
有无输入输出根据型号决定。
59
602
44.8
48
48
rdy man ev1 ev2 ev3 ot1 ot2
para
mode
pv
sp
安装件(附属品) M3
端子螺丝
SDC15
0
+0.5
45
50 以上
0
+0.5
45
30 以上.
0
+0.5
(48xN -3)
0
+0.5
45
(N为安装台数)
1
2
3
1
2
1
2
3
4
5
6
13
14
15
16
17
18
7
8
9
10
11
12
4
5
6
4
5
6
7
8
9
10
+
–
+
–
11
12
1
2
3
C
B
A
控制输出
事件输出
电源
继电器
电压脉冲
PV输入
热电偶
热电阻
继电器
AC电源
100~240Vac
16
17
18
16
17
18
DA
DB
SG
1
2
DI/通讯
数字输入
RS-485
通讯
13
14
15
CT1
CT2
CT输入
1
2
+
–
电流
电流
电压
mA
V
4
5
6
+
-
+
电源
内部回路
控制输出1
控制输出2
PV输入
CT输入1
CT输入2
编程器通讯
事件输出1(注)
事件输出2(注)
事件输出3
数字输入1
数字输入2
RS-485通讯
C1

C1
CP-UM-5410EC (不适用于日本)
数字显示调节器
C15M
使用说明书 设置篇
感谢您购买阿自倍尔株式会社产品。
为了正确、安全的使用本产品,请务必阅读本使用说明书,在阅读、理解
本书的基础上进行使用。
在订购及使用产品之际,请务必登入以下网站,浏览“产品订购注意事项”。
http://www.azbil.com/cn/products/order.html
中英文版的内容如有差异,以英文版为准。
要求
请确保把本使用说明书送到本产品使用者手中。
禁止擅自复印和转载全部或部分本使用说明书的内容。
今后内容变更时恕不事先通知。
本使用说明书的内容经过仔细审查校对,万一有错误和遗漏,请向本公司
提出。
对客户应用结果,本公司有不能承担责任的场合,敬请谅解。
©2006-2015 Azbil Corporation All Rights Reserved.
本书对使用上的注意事项和安装、接线、PV量程种类、参数一览、主要规
格等进行说明。
请确认
您购买的C15MT含有以下物品
安装件 81409651-001 1 个
密封垫 81409657-001 1 个
使用说明书(本书) CP-UM-5410EC 1 本
安全注意事项
警告 错误使用时,可能会造成使用者死亡或负重伤的危
险状态。
注意 错误使用时,可能会发生使用者负轻伤或造成物品
损坏的危险状态。
警告
本机的接线错误会造成故障或产生危险灾害。
本机在通电前,请务必确认接线是否正确。
本机的接线或安装、拆卸时,请务必在切断电源的情况下进行。
请勿触摸电源端子等受电体。
否则可能会触电。
请勿分解本机。
否则可能会触电及产生故障。
注意
请在规格规定的使用条件(温度、湿度、电压、振动、冲击、安装
方向、环境等)范围内使用本机。
否则可能会引起火灾、产生故障。
请勿遮盖本机的通风口。
否则可能会引起火灾或产生故障。
请按照规定的基准、指定的电源及施工方法进行正确配线。
否则可能会引起火灾、触电、故障。
避免线头、切削粉、水等进入本机内部。
否则可能发生火灾、故障。
请按照端子螺丝规格中记载的扭矩切实拧紧螺丝。
如果紧固不充分,可能会触电、引起火灾。
请勿把本机未使用端子作为中继端子使用。
否则可能会触电、发生火灾、产生故障。
本机接线后建议盖上端子盖。
否则可能会触电。(本机的端子盖是另售品)
请按规格中记载的寿命范围内使用本机的继电器。
过度使用后可能引起火灾、产生故障。
有雷浪涌的场合,请使用本公司生产的浪涌吸收器。
否则可能会引起火灾、产生故障。
请勿用头部尖锐的物品(铅笔尖或针等)操作键。
否则会产生故障。
设置
■安装场所
请把本机设置在如下场所。
•除供给电源及继电器接点输出外,输入输出模件的共模电压:
对大地间的电压为30Vr.m.s.以下,峰值42.4以下,DC60V以下。
•无高温﹑低温﹑高湿度﹑低湿度的场所。
•无硫化气等腐蚀性气体及硅气体的场所。
•粉尘﹑油烟较少的场所。
•无直射阳光及风雨不能直接触及的场所。
•机械振动﹑冲击少的场所。
•远离高压线﹑焊接机附近及电气干扰发生源附近的场所。
•远离如锅炉等有高压点火装置 15m 以上的场所。
•受电磁干扰少的场所
•无可燃性液体或蒸汽的场所
•室内
■安装方法
•安装角度从水平位置向后仰10度以内﹑向前倾10度以内。
•仪表盘安装型(C15MT)的场合,请使用板厚在9mm以下的钢板。
■外型尺寸
●C15MT(盘安装型)
(单位:mm)
使用上的注意事项
拧紧附属的安装件螺丝,直到安装件不再活动后再拧1圈螺丝,固
定在仪表盘上。
请勿将螺丝拧得过紧,否则会使机箱变形。
● 盘开孔图
单台安装 密集安装
(单位:mm)
使用上的注意事项
•3台以上横向密集安装的场合,环境温度不要超过40℃。
•需要防水、防尘的场合,请单台安装。 已经密集安装的场合,不
能保证防水、防尘性能。
•上下方向保持50mm以上的间隔。
接线
进行仪表电源配线时,请将本产品的主电源切断开关设置在操作员手能触
及的范围内。
另外,进行AC电源型的仪表电源配线时,请配上滞后型(T)额定电流0.2A、
额定电压250V的保险丝。(IEC127)
仪表侧面的端子配列标号的含义如下表所示。
记号 内 容
~ 交流
注意、触电的危险
注意
使用上的注意事项
•请在确认贴在本机侧面的仪表型号与端子编号后进行接线。
接线完毕后,请务必确认接线无误。
•输入输出信号线远离动力线或电源线50cm以上,而且不能在同
一配线管或线槽内。
•请注意压接端子等不能与相邻的端子接触。
•1个端子螺丝连接多个压接端子的场合,请事先把压
接端子弯曲处理并连接不超过2个压接端子。
•1~6, 13~18号端子的配线请从端子台侧看的左方向进行配线。
•端子连接时请使用适合M3螺丝的下述尺寸的端子。
A : 5.8mm
以下
B : 5.5
~
7.6mm
(参考)推荐压接端子:日本压接端子制造(株)
V1.25-MS3
A
B
•仪表电源为OFF时,电流输入回路被断开。当计装设计需数台仪表
的电流输入串联时,请配上另售的电阻(81401325),取其电压作为
电压量程使用。
•请把流过加热电流的导线贯通在电流互感器中。同时,请勿在超
过规格中规定的容许电流的情况下使用。否则会损坏本机。
•本机在电源投入后进入稳定状态前,最长6s内不动作。其后进入
运行状态,但为了保证规定的精度,请预热30分钟以上。
•电流互感器输入不能用于位相控制。
•控制输出1与控制输出2之间未隔离。请根据需要进行隔离。
•RS-485的通信路的两端上请勿连接终端电阻。否则不能通讯。
•与本机连接的机器或装置,需采取与本机的电源、输入输出部的
最高使用电压适合的强化绝缘措施后,才能使用。
●C15MT的接线
● 输入输出间隔离
实线围住部分与其它信号隔离。
有无输入输出根据型号决定。
59
60
2
44.8
48
48
rdy man ev1 ev2 ev3 ot1 ot2
para
mode
pv
sp
安装件(附属品) M3
端子螺丝
SDC15
0
+0.5
45
50 以上
0
+0.5
45
30 以上.
0
+0.5
(48xN -3)
0
+0.5
45
(N为安装台数)
1
2
3
1
2
1
2
3
4
5
6
13
14
15
16
17
18
7
8
9
10
11
12
4
5
6
4
5
6
7
8
9
10
+
–
+
–
11
12
1
2
3
C
B
A
控制输出
事件输出
电源
继电器
电压脉冲
PV输入
热电偶
热电阻
继电器
AC电源
100~240Vac
16
17
18
16
17
18
DA
DB
SG
1
2
DI/通讯
数字输入
RS-485
通讯
13
14
15
CT1
CT2
CT输入
1
2
+
–
电流
电流
电压
mA
V
4
5
6
+
-
+
电源
内部回路
控制输出1
控制输出2
PV输入
CT输入1
CT输入2
编程器通讯
事件输出1(注)
事件输出2(注)
事件输出3
数字输入1
数字输入2
RS-485通讯
C2

C2
各部件的名称和功能
①第1显示部: 显示PV值(现在的温度等)或设定项目。
②第2显示部: 显示SP值(设定温度值等)或各设定项目的设定
值。
③模式显示灯 rdy:READY模式(控制停止)时灯亮
man:MANUAL模式(手动)时灯亮
ev1~ev3:事件继电器输出ON时灯亮
ot1~ot2:控制输出为ON时灯亮
④[mode]键: 连续按键1s以上时可进行预先设定的操作。
出厂时设定为RUN/READY切换。
⑤[para]键: 显示切换。
⑥<、∨、∧键: 数值增减、位变更时使用。
⑦编程器插口: 使用智能编程器软件包同包装的专用电缆与计
算机连接。
键操作和设定
下图表示键操作的流程。各种显示或设定可以从面板上调出。
●PV输入量程的设定
设定显示「C01」下按[<]、[∨] 、[∧]键,在第2显示部上设定希望
的PV量程种类。
不需按键,只要经过2s以上时,闪烁将停止,PV量程种类的设定完
成。
●SP的设定
运行显示的PV/SP显示中按[<]、[∨]、[∧]键, 变更第2显示部的
SP。
不需按键,只要经过2s以上时,数值闪烁将停止,确定设定值。
SP在参数设定显示下也可以设定。
PV量程表
使用上的注意事项
•B型热电偶的精度为260℃以下±5%FS、260~800℃±1%FS。
•在0~32℉的量程范围内,PL II热电偶(C01 No.19)的指示精度不
能满足本规格书的规定。
•带小数点显示的量程,显示小数点以下1位。
•根据使用传感器的类型与量程,设定设置数据C01的编号。请用
设置数据C01设定正确的传感器的类型及量程的编号,否则会引
起大的温度误差而导致异常输出。
报警代码一览表
维护
清扫 : 清除仪表污物时,请使用柔软的干布擦拭。
部件更换 : 请勿更换部件。
保险丝更换 : 在更换AC电源型的电源保险丝时,务必使用指定规格的产
品。
规格IEC127、切断速度 滞后型(T)、额定电压250V、额定电
流0.2A。
型号构成表
规格
●PV输入
热电偶 : K、J、E、T、R、S、B、N(JIS C 1602-1995)
PL II(Engelhard Industries資料(ITS90))
WRe5-26(ASTM E988-96(Reapproved 2002))
DIN U、DIN L(DIN 43710-1985)
热电阻 : Pt100(JIS C 1604-1997)
JPt100(JIS C 1604-1989)
直流电压 : 0~1V、1~5V、0~5V、0~10V
直流电流 : 0~20mA、4~20mA
采样周期 : 500ms
显示精度 : ±0.5%FS±1digit
热电偶的负区域是±1%FS±1digit
(环境温度23±3℃)
容许输入 : -0.5V~+12V(热电偶、热电阻、直流电压)
30mA以下或4V以下(直流电流)
如果输入容许输入值以上的电压或电流,有可
能损坏仪表
● 数字输入
输入形式 : 无电压接点或开路集电极
容许ON接点电阻 : 250Ω以下
容许OFF接点电阻 : 100kΩ以上
容许ON残留电压 : 1.0V以下
ON时端子电流 : 约7.5mA (短路时) 约5.0mA (接点电阻250Ω时)
最小保持时间 : 1s以上
● 电流互感器输入
点数 : 2点
输入对象 : 电流互感器巻数100~4000匝(按100匝单位对应)
另售品型号: QN206A(800匝、孔径5.8mm)
另售品型号: QN212A(800匝、孔径12mm)
测量电流下限 : 0.4Aac(800匝,在电力线貫通次数为1时)
计算式: 匝数÷(2000×电力线貫通次数)
测量电流上限 : 50.0Aac(800匝、在电力线貫通次数为1时)
计算式: 匝数÷(16×电力线貫通次数)
容许测量电流 : 70.0Aac以下(800匝、在电力线貫通次数为1时)
计算式: 匝数÷(16×电力线貫通次数)×1.4
显示范围下限 : 0.0Aac
显示范围上限 : 70.0Aac(800匝、在电力线貫通次数为1时)
计算式: 匝数÷(16×电力线貫通次数)×1.4
显示精度 : ±5%FS
显示分辨率 : 0.1Aac
● 控制输出
•继电器输出
接点额定值 : 控制输出 NO侧250Vac/30Vdc、
3A(电阻负荷)
控制输出 NC侧250Vac/30Vdc、
1A(电阻负荷)
寿命 : NO侧5万次以上、NC侧10万次以上
最小开闭规格 : 5V、100mA
最小开时间/闭时间 : 250ms
•电压脉冲输出 (SSR驱动用)
开路时电压 : 19Vdc±15%
内部电阻 : 82Ω±0.5%
容许电流 : 24mAdc 以下(输出超过该值时,有可能损坏输
出回路。)
最小OFF时间/ON时间
: 时间比例周期小于10s时1ms
: 时间比例周期大于10s时250ms
•电流输出
输出形式 : 0~20mAdc或4~20mA电流输出
容许负载电阻 : 600Ω以下
输出精度 : ±0.5%FS (环境温度23±3℃时)
但0~1mA时为±1%FS
● 事件继电器输出 (ev1~3)
接点额定值 : 250Vac /30Vdc 2A (电阻负载)
寿命 : 10万次 以上
最小开闭规格 : 5V、10mA(参考值)
●RS-485通讯
传送路 : 3线式
传送速度 : 4800、9600、19200、38400bps
通讯协议 : 基于CPL、MODBUS标准
终端电阻 : 禁止连接
● 环境条件
•动作条件
环境温度 : 0~50℃(密集安装的場合为0~40℃)
环境湿度 : 10~90%RH (无结露)
电源电压 : AC电源型85~264Vac、50/60Hz±2Hz
(额定值:100~240Vac 50/60Hz)
•运输条件
环境温度 : -20~+70℃
环境湿度 : 10~95%RH (无结露)
● 其他规格
保护等級 : 机器面板IP66/NEMA 4基准
(使用付属的垫片时,仅限于盘单个安装)
消耗功率 : AC电源型
12VA 以下(100Vac时8VA、264Vac时12VA)
(与本公司SDC10相当功能的场合,100Vac时
6VA、264Vac时9VA)
断电停歇时间 : AC电源型 20ms以下
高度: 2000m 以下
质量: 盘安装型 约150g(含专用安装件)
端子螺丝拧紧扭矩 : 0.4~0.6N·m
适合规格 : EN61010-1、
EN61326-1(For use in industrial locations)
在EMC试验中,有产生相当于±10%FS的指
示值或输出值变动的情况。
过电压类别 : Category II (IEC60364-4-443、IEC60664-1)
容许汚染度 : Pollution degree2
使用电缆 : 热电偶输入
请直接把热电偶引线连接到端子上。
配线距离长的场合或热电偶是端子连接的场
合,请用补偿导线延长后与端子连接。
其它的输入输出
请使用与JCS-4364弱电仪表用电缆相当的产
品。电磁干扰比较小的场合,可使用带屏蔽
的多芯微音器电缆(MVVS)。
附属品选项部件一览表
名称型号
安装件 (C15MT用) 81409651-001 (附属品)
密封垫 (C15MT用) 81409657-001 (附属品)
电流互感器 QN206A (孔径5.8mm)
QN212A (孔径12mm)
硬盖 81446442-001
软盖 81446443-001
端子盖 81446898-001
rdy man ev1 ev2 ev3 ot1 ot2
para
mode
pv
sp
②
③
⑥⑤
①
④
SDC15
⑦
SDC15
电源投入后 6s 内,第 1显示部、第 2显示部保持灯灭状态,
模式显示灯从左依次灯亮。如果所有的灯亮,则切换到运行
显示。
灯灭
灯灭
模式显示灯从左依
次灯亮
3min以上不进行键操作
3min以上不进行键操作
按mode
键
AUTO/MANUAL切换 PV 量程种类设定
PV/SP 显示
按para
键
MV显示
定设位单度温
RUN/READY切换
此图中描写的显示或设定状态是说明用的例子。
实际中根据型号或设定内容,显示或设定可能不显示。
其它设定
(重复para键操作)
其它设定
(重复para键操作)
其它显示、设定
(重复 para 键操作)
pv
sp
mode
pv
sp
mode
pv
sp
mode
pv
sp
mode
pv
sp
mode
pv
sp
mode
设置数据设定显示参数设定显示运行显示
pv
sp
mode
para
电源投入时显示
rdy man ev1 ev2 ev3 ot1 ot2
按para 键
2s以上
按para 键
2s以上
按mode
键
按para 键2s以上
按para
键按para
键
按para
键按para
键按para
键
按para
键按para
键按para
键
C01 编号 传感器类型 量程
41 Pt100 -200~+500℃
42 JPt100 -200~+500℃
43 Pt100 -200~+200℃
44 JPt100 -200~+200℃
45 Pt100 -100~+300℃
46 JPt100 -100~+300℃
51 Pt100 -50.0~+200.0℃
52 JPt100 -50.0~+200.0℃
53 Pt100 -50.0~+100.0℃
54 JPt100 -50.0~+100.0℃
63 Pt100 0.0~200.0℃
64 JPt100 0.0~200.0℃
67 Pt100 0~500℃
68 JPt100 0~500℃
C01编号 输入类型 量程
84 0~1V -1999~+9999的量
程范围,小数点位置
可变
86 1~5V
87 0~5V
88 0~10V
89 0~20mA
90 4~20mA
C01编号 传感器类型 量程
1K-200~+1200℃
2K 0~1200℃
3K 0.0~800.0℃
4K0.0~600.0℃
5K0.0~400.0℃
6K-200.0~+400.0℃
9J 0.0~800.0℃
10 J 0.0~600.0℃
11 J -200.0~+400.0℃
13 E 0.0~600.0℃
14 T -200.0~+400.0℃
15 R 0~1600℃
16 S 0~1600℃
17 B 0~1800℃
18 N 0~1300℃
19 PL II 0~1300℃
20 WRe5-26 0~1400℃
21 WRe5-26 0~2300℃
24 DIN U -200.0~+400.0℃
25 DIN L -100.0~+800.0℃
报警代码 异常名称 原 因处理
AL01
PV输入异常
(超量程)
传感器断线、误配线
PV量程种类误设定
确认配线
再次设定PV量程种类
AL02
PV输入异常
(欠量程)
传感器断线、误配线 PV量程种
类误设定
AL03
CJ异常 端子温度补偿部故障
(热电偶)
确认环境温度
PV输入异常 传感器断线、误配线
(热电阻)
确认配线
AL11
CT输入异常 (超量程)
(CT输入1/2的单方、
或两方)
超过显示范围上限的电流测量、
CT匝数误设定、CT电力线貫通
次数的误设定
误配线
使用匝数与显示范围符合的
CT、匝数的再设定、CT电
力线貫通次数的再设定、配
线的确认
AL70
A/D转换异常 A/D转换部故障 更换本体
AL95
参数异常 数据确定中断电
因干扰等数据被破坏
再次投入电源
再次设定数据
(AL95/97为设定数据,
AL96/98为调整数据)
更换本体
AL96
调整数据异常 数据确定中断电
因干扰等数据被破坏
AL97
参数异常
(RAM区域)
因干扰等数据被破坏
AL98
调整数据异常
(RAM区域)
因干扰等数据被破坏
AL99
ROM异常 ROM(内存) 故障 再次投入电源
更换本体
基本型号 安 装 控制输出 PV输入 电 源选项语言规格
C15M
T盘安装型
控制输出1(ot1) 控制输出2(ot2)
R0 继电器输出(NO) 继电器输出(NC)
V0 电压脉冲输出
(SSR驱动用)
无
C0 电流输出 无
T热电偶输入
(K, J, E, T, R, S, B, N, PLII, WRe5-
26, DINU, DINL)
R热电阻输入 (Pt100/JPt 100)
L直流电压/电流输入
(0~1Vdc, 1~5Vdc, 0~5Vdc,
0~10Vdc, 0~20mAdc, 4~20mAdc
A AC电源 (100 ~240Vac)
01 事件输出3点
02 事件继电器输出3点
电流互感器输入2点
数字输入2点
03 事件继电器输出3点
电流互感器输入2点
RS-485通讯
00 中文(简体字)
01 中文(繁体字)
C3C2

C2
各部件的名称和功能
①第1显示部: 显示PV值(现在的温度等)或设定项目。
②第2显示部: 显示SP值(设定温度值等)或各设定项目的设定
值。
③模式显示灯 rdy:READY模式(控制停止)时灯亮
man:MANUAL模式(手动)时灯亮
ev1~ev3:事件继电器输出ON时灯亮
ot1~ot2:控制输出为ON时灯亮
④[mode]键: 连续按键1s以上时可进行预先设定的操作。
出厂时设定为RUN/READY切换。
⑤[para]键: 显示切换。
⑥<、∨、∧键: 数值增减、位变更时使用。
⑦编程器插口: 使用智能编程器软件包同包装的专用电缆与计
算机连接。
键操作和设定
下图表示键操作的流程。各种显示或设定可以从面板上调出。
●PV输入量程的设定
设定显示「C01」下按[<]、[∨] 、[∧]键,在第2显示部上设定希望
的PV量程种类。
不需按键,只要经过2s以上时,闪烁将停止,PV量程种类的设定完
成。
●SP的设定
运行显示的PV/SP显示中按[<]、[∨]、[∧]键, 变更第2显示部的
SP。
不需按键,只要经过2s以上时,数值闪烁将停止,确定设定值。
SP在参数设定显示下也可以设定。
PV量程表
使用上的注意事项
•B型热电偶的精度为260℃以下±5%FS、260~800℃±1%FS。
•在0~32℉的量程范围内,PL II热电偶(C01 No.19)的指示精度不
能满足本规格书的规定。
•带小数点显示的量程,显示小数点以下1位。
•根据使用传感器的类型与量程,设定设置数据C01的编号。请用
设置数据C01设定正确的传感器的类型及量程的编号,否则会引
起大的温度误差而导致异常输出。
报警代码一览表
维护
清扫 : 清除仪表污物时,请使用柔软的干布擦拭。
部件更换 : 请勿更换部件。
保险丝更换 : 在更换AC电源型的电源保险丝时,务必使用指定规格的产
品。
规格IEC127、切断速度 滞后型(T)、额定电压250V、额定电
流0.2A。
型号构成表
规格
●PV输入
热电偶 : K、J、E、T、R、S、B、N(JIS C 1602-1995)
PL II(Engelhard Industries資料(ITS90))
WRe5-26(ASTM E988-96(Reapproved 2002))
DIN U、DIN L(DIN 43710-1985)
热电阻 : Pt100(JIS C 1604-1997)
JPt100(JIS C 1604-1989)
直流电压 : 0~1V、1~5V、0~5V、0~10V
直流电流 : 0~20mA、4~20mA
采样周期 : 500ms
显示精度 : ±0.5%FS±1digit
热电偶的负区域是±1%FS±1digit
(环境温度23±3℃)
容许输入 : -0.5V~+12V(热电偶、热电阻、直流电压)
30mA以下或4V以下(直流电流)
如果输入容许输入值以上的电压或电流,有可
能损坏仪表
● 数字输入
输入形式 : 无电压接点或开路集电极
容许ON接点电阻 : 250Ω以下
容许OFF接点电阻 : 100kΩ以上
容许ON残留电压 : 1.0V以下
ON时端子电流 : 约7.5mA (短路时) 约5.0mA (接点电阻250Ω时)
最小保持时间 : 1s以上
● 电流互感器输入
点数 : 2点
输入对象 : 电流互感器巻数100~4000匝(按100匝单位对应)
另售品型号: QN206A(800匝、孔径5.8mm)
另售品型号: QN212A(800匝、孔径12mm)
测量电流下限 : 0.4Aac(800匝,在电力线貫通次数为1时)
计算式: 匝数÷(2000×电力线貫通次数)
测量电流上限 : 50.0Aac(800匝、在电力线貫通次数为1时)
计算式: 匝数÷(16×电力线貫通次数)
容许测量电流 : 70.0Aac以下(800匝、在电力线貫通次数为1时)
计算式: 匝数÷(16×电力线貫通次数)×1.4
显示范围下限 : 0.0Aac
显示范围上限 : 70.0Aac(800匝、在电力线貫通次数为1时)
计算式: 匝数÷(16×电力线貫通次数)×1.4
显示精度 : ±5%FS
显示分辨率 : 0.1Aac
● 控制输出
•继电器输出
接点额定值 : 控制输出 NO侧250Vac/30Vdc、
3A(电阻负荷)
控制输出 NC侧250Vac/30Vdc、
1A(电阻负荷)
寿命 : NO侧5万次以上、NC侧10万次以上
最小开闭规格 : 5V、100mA
最小开时间/闭时间 : 250ms
•电压脉冲输出 (SSR驱动用)
开路时电压 : 19Vdc±15%
内部电阻 : 82Ω±0.5%
容许电流 : 24mAdc 以下(输出超过该值时,有可能损坏输
出回路。)
最小OFF时间/ON时间
: 时间比例周期小于10s时1ms
: 时间比例周期大于10s时250ms
•电流输出
输出形式 : 0~20mAdc或4~20mA电流输出
容许负载电阻 : 600Ω以下
输出精度 : ±0.5%FS (环境温度23±3℃时)
但0~1mA时为±1%FS
● 事件继电器输出 (ev1~3)
接点额定值 : 250Vac /30Vdc 2A (电阻负载)
寿命 : 10万次 以上
最小开闭规格 : 5V、10mA(参考值)
●RS-485通讯
传送路 : 3线式
传送速度 : 4800、9600、19200、38400bps
通讯协议 : 基于CPL、MODBUS标准
终端电阻 : 禁止连接
● 环境条件
•动作条件
环境温度 : 0~50℃(密集安装的場合为0~40℃)
环境湿度 : 10~90%RH (无结露)
电源电压 : AC电源型85~264Vac、50/60Hz±2Hz
(额定值:100~240Vac 50/60Hz)
•运输条件
环境温度 : -20~+70℃
环境湿度 : 10~95%RH (无结露)
● 其他规格
保护等級 : 机器面板IP66/NEMA 4基准
(使用付属的垫片时,仅限于盘单个安装)
消耗功率 : AC电源型
12VA 以下(100Vac时8VA、264Vac时12VA)
(与本公司SDC10相当功能的场合,100Vac时
6VA、264Vac时9VA)
断电停歇时间 : AC电源型 20ms以下
高度: 2000m 以下
质量: 盘安装型 约150g(含专用安装件)
端子螺丝拧紧扭矩 : 0.4~0.6N·m
适合规格 : EN61010-1、
EN61326-1(For use in industrial locations)
在EMC试验中,有产生相当于±10%FS的指
示值或输出值变动的情况。
过电压类别 : Category II (IEC60364-4-443、IEC60664-1)
容许汚染度 : Pollution degree2
使用电缆 : 热电偶输入
请直接把热电偶引线连接到端子上。
配线距离长的场合或热电偶是端子连接的场
合,请用补偿导线延长后与端子连接。
其它的输入输出
请使用与JCS-4364弱电仪表用电缆相当的产
品。电磁干扰比较小的场合,可使用带屏蔽
的多芯微音器电缆(MVVS)。
附属品选项部件一览表
名称型号
安装件 (C15MT用) 81409651-001 (附属品)
密封垫 (C15MT用) 81409657-001 (附属品)
电流互感器 QN206A (孔径5.8mm)
QN212A (孔径12mm)
硬盖 81446442-001
软盖 81446443-001
端子盖 81446898-001
rdy man ev1 ev2 ev3 ot1 ot2
para
mode
pv
sp
②
③
⑥⑤
①
④
SDC15
⑦
SDC15
电源投入后 6s 内,第 1显示部、第 2显示部保持灯灭状态,
模式显示灯从左依次灯亮。如果所有的灯亮,则切换到运行
显示。
灯灭
灯灭
模式显示灯从左依
次灯亮
3min以上不进行键操作
3min以上不进行键操作
按mode
键
AUTO/MANUAL切换 PV 量程种类设定
PV/SP 显示
按para
键
MV显示
定设位单度温
RUN/READY切换
此图中描写的显示或设定状态是说明用的例子。
实际中根据型号或设定内容,显示或设定可能不显示。
其它设定
(重复para键操作)
其它设定
(重复para键操作)
其它显示、设定
(重复 para 键操作)
pv
sp
mode
pv
sp
mode
pv
sp
mode
pv
sp
mode
pv
sp
mode
pv
sp
mode
设置数据设定显示参数设定显示运行显示
pv
sp
mode
para
电源投入时显示
rdy man ev1 ev2 ev3 ot1 ot2
按para 键
2s以上
按para 键
2s以上
按mode
键
按para 键2s以上
按para
键
按para
键
按para
键按para
键
按para
键
按para
键按para
键
按para
键
C01 编号 传感器类型 量程
41 Pt100 -200~+500℃
42 JPt100 -200~+500℃
43 Pt100 -200~+200℃
44 JPt100 -200~+200℃
45 Pt100 -100~+300℃
46 JPt100 -100~+300℃
51 Pt100 -50.0~+200.0℃
52 JPt100 -50.0~+200.0℃
53 Pt100 -50.0~+100.0℃
54 JPt100 -50.0~+100.0℃
63 Pt100 0.0~200.0℃
64 JPt100 0.0~200.0℃
67 Pt100 0~500℃
68 JPt100 0~500℃
C01编号 输入类型 量程
84 0~1V -1999~+9999的量
程范围,小数点位置
可变
86 1~5V
87 0~5V
88 0~10V
89 0~20mA
90 4~20mA
C01编号 传感器类型 量程
1K-200~+1200℃
2K 0~1200℃
3K 0.0~800.0℃
4K0.0~600.0℃
5K0.0~400.0℃
6K-200.0~+400.0℃
9J 0.0~800.0℃
10 J 0.0~600.0℃
11 J -200.0~+400.0℃
13 E 0.0~600.0℃
14 T -200.0~+400.0℃
15 R 0~1600℃
16 S 0~1600℃
17 B 0~1800℃
18 N 0~1300℃
19 PL II 0~1300℃
20 WRe5-26 0~1400℃
21 WRe5-26 0~2300℃
24 DIN U -200.0~+400.0℃
25 DIN L -100.0~+800.0℃
报警代码 异常名称 原 因处理
AL01
PV输入异常
(超量程)
传感器断线、误配线
PV量程种类误设定
确认配线
再次设定PV量程种类
AL02
PV输入异常
(欠量程)
传感器断线、误配线 PV量程种
类误设定
AL03
CJ异常 端子温度补偿部故障
(热电偶)
确认环境温度
PV输入异常 传感器断线、误配线
(热电阻)
确认配线
AL11
CT输入异常 (超量程)
(CT输入1/2的单方、
或两方)
超过显示范围上限的电流测量、
CT匝数误设定、CT电力线貫通
次数的误设定
误配线
使用匝数与显示范围符合的
CT、匝数的再设定、CT电
力线貫通次数的再设定、配
线的确认
AL70
A/D转换异常 A/D转换部故障 更换本体
AL95
参数异常 数据确定中断电
因干扰等数据被破坏
再次投入电源
再次设定数据
(AL95/97为设定数据,
AL96/98为调整数据)
更换本体
AL96
调整数据异常 数据确定中断电
因干扰等数据被破坏
AL97
参数异常
(RAM区域)
因干扰等数据被破坏
AL98
调整数据异常
(RAM区域)
因干扰等数据被破坏
AL99
ROM异常 ROM(内存) 故障 再次投入电源
更换本体
基本型号 安 装 控制输出 PV输入 电 源选项语言规格
C15M
T盘安装型
控制输出1(ot1) 控制输出2(ot2)
R0 继电器输出(NO) 继电器输出(NC)
V0 电压脉冲输出
(SSR驱动用)
无
C0 电流输出 无
T热电偶输入
(K, J, E, T, R, S, B, N, PLII, WRe5-
26, DINU, DINL)
R热电阻输入 (Pt100/JPt 100)
L直流电压/电流输入
(0~1Vdc, 1~5Vdc, 0~5Vdc,
0~10Vdc, 0~20mAdc, 4~20mAdc
A AC电源 (100 ~240Vac)
01 事件输出3点
02 事件继电器输出3点
电流互感器输入2点
数字输入2点
03 事件继电器输出3点
电流互感器输入2点
RS-485通讯
00 中文(简体字)
01 中文(繁体字)
C4

C3
C15M参数一览表
[运行显示一览表 ]
■运行显示
显示项目 内 容 初始值 显示
级别
第1显示:PV
第2显示:SP
SP (目标值) SP限幅下限(C07)~
SP限幅上限 (C08)
0 0
LSP1
第2显示:LSP
LSP组编号
(第1位=最右位的数值)
1~LSP使用组数(C30、最大4) 1 0
out MV(操作量)-10.0~+110.0%
AUTO模式下设定不可
(无数值闪烁)
MANUAL模式下设定可能
(数值闪烁)
-0
HEAt 加热MV(操作量)设定不可
-10.0~+110.0%
-0
CooL 冷却MV(操作量)-0
第1显示:PV
At1 (显示例)
AT进程
(第1位=最右位的数值)
设定不可
1~:AT启动中(值减小)
-0
Ct1 CT(电流互感器)输入1
电流值
设定不可 - 0
Ct2 CT(电流互感器)输入2
电流值
设定不可 - 0
E1 内部事件1主设定 根据内部事件动作种类,可设定的范
围不同
-1999~+9999U:下述以外的场合
0~9999U:设定值是绝对值的场合
-199.9~+999.9%:MV的场合
0 0
E1.Sb
内部事件1副设定 0 0
t1
定时器剩余时间1设定不可
第1显示:「t1.」的旁边显示ON延迟、
OFF延迟的区别
第2显示:内部事件1延迟时间
按照单位(E1.C3的第3位)的单位
(0.1s、s、min中的一个)显示
-0
E2 内部事件2主设定 根据内部事件动作种类,可设定的范
围不同
-1999~+9999U:下述以外的场合
0~9999U:设定是绝对值的场合
-199.9~+999.9%:MV的场合
0 0
E2.Sb
内部事件2副设定 0 0
t2
定时器剩余时间2设定不可
第1显示:「t2.」的旁边显示ON延迟、
OFF延迟的区别
第2显示:内部事件1延迟时间
按照单位(E2.C3的第3位)的单位
(0.1s、s、min中的一个)显示
-0
E3 内部事件3主设定 根据内部事件动作种类,可设定的范
围不同
-1999~+9999U:下述以外的场合
0~9999U:设定是绝对值的场合
-199.9~+999.9%:MV的场合
0 0
E3.Sb
内部事件3副设定 0 0
t3
定时器剩余时间3设定不可
第1显示:「t3.」的旁边显示ON延迟、
OFF延迟的区别
第2显示:内部事件1延迟时间
按照单位(E3.C3的第3位)的单位
(0.1s、s、min中的一个)显示
-0
[参数设定显示一览表 ]
■模式库
库选择 : MODE
显示 项 目 内 容 初始值 显示 级
别
A--M AUTO/MANUAL模式
切换
AUTo:AUTO(自动)模式
n-an :MANUAL(手动)模式
AUTO 0
r--r RUN/READY模式切换 RUN :RUN模式
RDY :READY模式
RUN 0
At AT停止/启动切换 At.oF:AT停止
At.oN:AT启动
AT停止 0
do.Lt 全DO锁定解除 Lt.oN:锁定继续
Lt.oF:锁定解除
锁定
继续
0
C.dI1 通讯DI1 dI.oF:OFF
dI.on:ON
OFF 0
■SP 库
库选择:SP
显示 项 目 内 容 初始值 显示
级别
SP-1 ~
SP-4
LSP1~4组的SP SP限幅下限 (C07) ~
SP限幅上限 (C08)
0 0
■事件库
库选择 : EU
显示 项 目 内 容 初始值 显示
级别
E1 ~E5 内部事件1~5主设定 -1999~+9999
小数点位置根据内部事件动作种类变
化一部分的动作种类为0~9999
0 0
E1.Sb ~
E5.Sb
内部事件1~5副设定 0 0
E1.H ~
E5.Hy
内部事件1~5回差 0~9999
小数点位置根据内部事件动作种类变化
5 0
E1.on ~
E5.on
内部事件1~5 ON延迟 0.0~999.9
(延迟时间单位0.1s的场合)
0~9999
(延迟时间单位0.1s以外的场合)
0 2
E1.oF ~
E5.oF
内部事件1~5 OFF延迟 0 2
显示级别的含义 0:简单、标准、多功能显示,
1:标准、多功能显示
2:多功能显示
初始值有根据型号变化的情况。
■PID 库
库选择 : PID
显示 项 目 内 容 初始值 显示
级别
P-1 比例带 0.1~999.9%5.0 0
I-1 積分时间 0~9999s
(0时无积分动作)
120 0
d-1 微分时间 0~9999s
(0时无微分动作)
30 0
rE-1 手动复位 -10.0~+110.0%50.0 0
oL-1 操作量下限 -10.0~+110.0%0.0 1
oH-1 操作量上限 -10.0~+110.0%100.0 1
P-1C 冷却侧比例帯 0.1~999.9%5.0 0
I-1C 冷却侧积分时间 0~9999s
(0时无积分动作)
120 0
d-1C 冷却侧微分时间 0~9999s
(0时无微分动作)
30 0
oL.1C 冷却侧操作量下限 -10.0~+110.0%0.0 1
oH.1C 冷却侧操作量上限 -10.0~+110.0%100.0 1
■参数库
库选择 : PARA
显示 项 目 内 容 初始值 显示
级别
CtrL
控制方式 0:ON/OFF控制
1:PID固定
2:ST(自适应)
0、
或1
0
At.oL AT时操作量下限 -10.0~+110.0%0.0 0
At.oH AT时操作量上限 -10.0~+110.0%100.0 0
dIFF ON/OFF控制差动 0~9999U 5 0
oFFS ON/OFF控制动作点偏移量 -1999~+9999U 0 2
FL PV滤波 0.0~120.0s 0.0 0
rA PV比率 0.001~9.999 1.000 1
bI PV偏置 -1999~+9999U 0 0
CyU
时间比例单位1 0:1s单位
1:0.5s固定 (周期设定不可)
2:0.2s固定 (周期设定不可)
3:0.1s固定 (周期设定不可)
0 2
Cy 时间比例周期1 5~120s (输出中包含继电器输出的
场合)
1~120s (输出中不包含继电器输出
的场合)
10、
或2
0
CyU2
时间比例单位2 0:1s单位
1:0.5s固定 (周期设定不可)
2:0.2s固定 (周期设定不可)
3:0.1s固定 (周期设定不可)
0 2
Cy2 时间比例周期2 5~120s (输出中包含继电器输出的
场合)
1~120s (输出中不包含继电器输出
的场合)
10、
或2
0
tP.ty 时间比例动作种类 0:控制性重视型
1:操作端寿命重视型 (时间比例周
期内 仅1回ON/OFF动作)
0、
或1
2
SPU SP斜坡上升斜率 0.0~999.9U (0.0U时无斜率) 0.0 2
SPd SP斜坡下降斜率 0.0 2
■扩展调整库
库选择 : ET
显示 项 目 内 容 初始值 显示 级
别
At.ty
AT种类 0:通常 (标准的控制特性)
1:立即响应 (对干扰迅速反应的控制
特性)
2:稳定 (PV上下波动少的控制特性)
1 0
JF.bd JF整定幅 0.00~10.00 0.30 2
SP.LG SP抑制时常数 0.0~999.9 0.0 2
At-P AT时比例带调整系数 0.00~99.99 1.00 2
At-I AT时积分时间调整系数 0.00~99.99 1.00 2
At-d AT时微分时间调整系数 0.00~99.99 1.00 2
Ctr.A 控制运算 0:PID (传统型PID)
1:Ra-PID (高性能型PID)
0 1
JF.ov JF超调抑制系数 0~100 0 1
St.SA ST阶跃执行判定幅 0.00~99.99 10.00 2
St.Sb ST阶跃整定幅 0.00~10.00 0.50 2
St.Hb ST振荡整定幅 0.00~10.00 1.00 2
St.ud ST阶跃升降切换 0:PV上升/下降时均执行ST
1:仅PV上升时执行ST
0 1
[运行显示一览表 ]
■设置库
库选择 : STUP
显示 项 目 内 容 初始值 显示
级别
C01
PV量程种类 热电偶(T)的场合:
1~6、9~11、13~21、24、25
1 0
热电阻(R)的场合:
41~46、51~54、63、64、67、68
41
直流电压/直流电流(L)的场合:
84、86~90
88
C02 温度单位 0:摄氏 (℃)
1:华氏 (℉)
0 0
C03 冷端补偿 0:进行冷端补偿 (内部)
1:不进行冷端补偿 (外部)
0 2
C04
小数点位置 0:无小数点
1:小数点以下1位
2:小数点以下2位
3:小数点以下3位
(热电阻带小数点量程的场合0~1)
0 0
C05
PV量程下限 PV输入型号为热电偶(T)、热电阻(R)的
场合,显示量程的下限,但设定不可
-0
PV输入型号为直流电压/直流电流(L)
的场合,-1999~+9999U
0
C06
PV量程上限 PV输入型号为热电偶(T)、热电阻(R)的
场合,显示量程的上限,但设定不可
-0
PV输入型号为直流电压/直流电流(L)
的场合,-1999~+9999U
1000
C07 SP限幅下限 PV量程下限~PV量程上限 - 1
C08 SP限幅上限 - 1
C09 开方运算小数舍去 0.0~100.0%
(0.0时无开方运算)
0.0 2
C14 控制动作(正逆) 0:加热控制 (逆动作)
1:冷却控制 (正动作)
0 0
C15 PV异常时操作量选择 0:继续控制运算
1:PV异常时输出操作量
0 2
C16 PV异常时操作量 -10.0~+110.0%0.0 2
C17 READY时操作量(加热冷
却控制的场合为加热侧)
-10.0~+110.0%0.0 1
C18 READY时操作量(冷却
侧)
-10.0~+110.0%0.0 1
C19 MANUAL变更时动作 0:无扰
1:预置
0 1
C20 预置MANUAL值 -10.0~+110.0%
(电源ON时、处于MANUAL模式时也
使用)
0.0或
50.0
1
C21 PID运算初始化功能选择 0:自动
1:不初始化
2:初始化
(输入和现在值不同的SP值时)
0 2
C22 PID运算初始操作量 -10.0~+110.0%0.0或
50.0
2
C26 加热冷却控制选择 0:不使用
1:使用
0 0
C27 加热冷却切换 0:通常
1:节能
0 1
C28 加热冷却控制不感带 -100.0~+100.0%0.0 0
C29 加热冷却控制切换点 -10.0~+110.0%50.0 2
C30 LSP使用组数 1~4 1 0
C32 SP斜坡单位 0:0.1U/s
1:0.1U/min
2:0.1U/h
1 2
C36 CT1动作 0:加热器断线检测
1:电流值测定
0 0
C37 CT1监视输出 0:控制输出1
1:控制输出2
2:事件输出1
3:事件输出 2
4:事件输出3
0 0
C38 CT1测定等待时间 30~300ms 30 0
C39 CT2动作 和CT1相同 0 0
C40 CT2监视输出 0 0
C41 CT2测定等待时间 30 0
C42 控制输出1量程 1:4~20mA
2:0~20mA
1 0
C43
控制输出1种类 0:MV
1:加热MV (加热冷却控制用)
2:冷却MV (加热冷却控制用)
3:PV
4:比率、偏置、滤波前PV
5:SP
6:偏差(PV-SP)
7:CT1电流值
8:CT2电流值
9:MFB (C15M时无效)
10:SP+MV
11:PV+MV
0 0
C44 控制输出1量程下限 -1999~+9999(小数点位置根据控
制输出1的种类变化)
0.0 0
C45 控制输出1量程上限 100.0 0
C46 控制输出1
MV量程幅
0~9999
小数点位置及单位与PV相同
200 0
C47 控制输出2量程 与控制输出1相同 13 0
C48 控制输出2量程种类 0
C49 控制输出2量程下限 -1999~+9999(小数点位置根据控
制输出2的种类变化)
0 0
C50 控制输出2量程上限 1000 00
C51 控制输出2
MV量程幅
0~9999
小数点位置及单位与PV相同
200 0
CP-UM-5410EC
显示 项 目 内 容 初始值 显示
级别
C64
通讯种类 0:CPL
1:MODBUSASCII形式
2:MODBUSRTU形式
0 0
C65 机器地址 0~127
(0时不通讯)
0 0
C66
传送速度 0:4800bps
1:9600bps
2:19200bps
3:38400bps
2 0
C67 数据形式(数据长) 0:7位
1:8位
1 0
C68
数据形式(校验) 0:偶数校验
1:奇数校验
2:无校验
0 0
C69 数据形式(停止位) 0:1位
1:2位
0 0
C70 通讯最小应答时间 1~250ms 3 2
C71 键操作种类 0:标准型
1:特殊型
0 2
C72
Mode键功能 0:无效
1:AUTO/MANUAL切换
2:RUN/READY切换
3:AT停止/启动
4:LSP组切换
5:全DO锁定解除
6:无效
7:通讯DI1切换
8:无效
1 0
C73
模式显示设定 模式组的设定显示有无,由下列的加
权的和决定
位0:AUTO/MANUAL显示
无:0、有:+1
位1:RUN/READY显示
无:0、有:+2
位3:AT停止/启动显示
无:0、有:+8
位4:DO锁定解除显示
无:0、有:+16
位5:通讯DI1 ON/OFF显示
无:0、有:+32
其他无效的设定 0、+4、+64、+128
255 1
C74
PV/SP值显示设定 基本显示的显示有无,由下列的加权
的和决定
位0:PV显示
无:0、有:+1
位1:SP显示
无:0、有:+2
位2:LSP组编号显示
无:0、有:+4
其他无效的设定 0、+8
15 1
C75
操作量显示设定 基本显示的显示有无,由下列的加权
的和决定
位0:MV显示
无:0、有:+1
位1:加热MV/冷却MV显示
无:0、有:+2
位3:AT进程显示
无:0、有:+8
其他无效的设定 0、+4
15 1
C76
事件设定值显示设定 0:运行显示时不显示内部事件设定
值
1:运行显示时显示内部事件1设定
值
2:运行显示时显示内部事件1~2设
定值
3:运行显示时显示内部事件1~3设
定值
0 1
C77
事件剩余时间显示设定 0:运行显示时不显示内部事件的
ON/OFF 延迟剩余时间
1:运行显示时显示内部事件1的ON/
OFF延迟剩余时间
2:运行显示时显示内部事件1~2的
ON/OFF延迟剩余时间
3:运行显 示时显示内部事1~3
0 1
C78
CT输入电流值显示设定 0:运行显示时不显示CT的电流值
1:运行显示时显示CT1电流值
2:运行显示时显示CT1~2电流值
0 1
C79
显示级别 0:简单设定
1:标准设定
2:多功能设定
0 0
C80
LED监视 0:不使用
1:RS-485通讯发送时闪烁
2:RS-485通讯接收时闪烁
3:全DI状态的OR(逻辑和)
4:READY时闪烁
0 2
C90 CT1匝数 0: 800匝
1~40:CT的匝数除以100后的值
8 2
C91 CT1电力线貫通回数 0: 1回
1~6: 回数
1 2
C92 CT2匝数 0: 800匝
1~40:CT的匝数除以100后的值
8 2
C93 CT2电力线貫通回数 0: 1回
1~6:回数
1 2
(下页续)
C5C4

C3
C15M参数一览表
[运行显示一览表 ]
■运行显示
显示项目 内 容 初始值 显示
级别
第1显示:PV
第2显示:SP
SP (目标值) SP限幅下限(C07)~
SP限幅上限 (C08)
0 0
LSP1
第2显示:LSP
LSP组编号
(第1位=最右位的数值)
1~LSP使用组数(C30、最大4) 1 0
out MV(操作量)-10.0~+110.0%
AUTO模式下设定不可
(无数值闪烁)
MANUAL模式下设定可能
(数值闪烁)
-0
HEAt 加热MV(操作量)设定不可
-10.0~+110.0%
-0
CooL 冷却MV(操作量)-0
第1显示:PV
At1 (显示例)
AT进程
(第1位=最右位的数值)
设定不可
1~:AT启动中(值减小)
-0
Ct1 CT(电流互感器)输入1
电流值
设定不可 - 0
Ct2 CT(电流互感器)输入2
电流值
设定不可 - 0
E1 内部事件1主设定 根据内部事件动作种类,可设定的范
围不同
-1999~+9999U:下述以外的场合
0~9999U:设定值是绝对值的场合
-199.9~+999.9%:MV的场合
0 0
E1.Sb
内部事件1副设定 0 0
t1
定时器剩余时间1设定不可
第1显示:「t1.」的旁边显示ON延迟、
OFF延迟的区别
第2显示:内部事件1延迟时间
按照单位(E1.C3的第3位)的单位
(0.1s、s、min中的一个)显示
-0
E2 内部事件2主设定 根据内部事件动作种类,可设定的范
围不同
-1999~+9999U:下述以外的场合
0~9999U:设定是绝对值的场合
-199.9~+999.9%:MV的场合
0 0
E2.Sb
内部事件2副设定 0 0
t2
定时器剩余时间2设定不可
第1显示:「t2.」的旁边显示ON延迟、
OFF延迟的区别
第2显示:内部事件1延迟时间
按照单位(E2.C3的第3位)的单位
(0.1s、s、min中的一个)显示
-0
E3 内部事件3主设定 根据内部事件动作种类,可设定的范
围不同
-1999~+9999U:下述以外的场合
0~9999U:设定是绝对值的场合
-199.9~+999.9%:MV的场合
0 0
E3.Sb
内部事件3副设定 0 0
t3
定时器剩余时间3设定不可
第1显示:「t3.」的旁边显示ON延迟、
OFF延迟的区别
第2显示:内部事件1延迟时间
按照单位(E3.C3的第3位)的单位
(0.1s、s、min中的一个)显示
-0
[参数设定显示一览表 ]
■模式库
库选择 : MODE
显示 项 目 内 容 初始值 显示 级
别
A--M AUTO/MANUAL模式
切换
AUTo:AUTO(自动)模式
n-an :MANUAL(手动)模式
AUTO 0
r--r RUN/READY模式切换 RUN :RUN模式
RDY :READY模式
RUN 0
At AT停止/启动切换 At.oF:AT停止
At.oN:AT启动
AT停止 0
do.Lt 全DO锁定解除 Lt.oN:锁定继续
Lt.oF:锁定解除
锁定
继续
0
C.dI1 通讯DI1 dI.oF:OFF
dI.on:ON
OFF 0
■SP 库
库选择:SP
显示 项 目 内 容 初始值 显示
级别
SP-1 ~
SP-4
LSP1~4组的SP SP限幅下限 (C07) ~
SP限幅上限 (C08)
0 0
■事件库
库选择 : EU
显示 项 目 内 容 初始值 显示
级别
E1 ~E5 内部事件1~5主设定 -1999~+9999
小数点位置根据内部事件动作种类变
化一部分的动作种类为0~9999
0 0
E1.Sb ~
E5.Sb
内部事件1~5副设定 0 0
E1.H ~
E5.Hy
内部事件1~5回差 0~9999
小数点位置根据内部事件动作种类变化
5 0
E1.on ~
E5.on
内部事件1~5 ON延迟 0.0~999.9
(延迟时间单位0.1s的场合)
0~9999
(延迟时间单位0.1s以外的场合)
0 2
E1.oF ~
E5.oF
内部事件1~5 OFF延迟 0 2
显示级别的含义 0:简单、标准、多功能显示,
1:标准、多功能显示
2:多功能显示
初始值有根据型号变化的情况。
■PID 库
库选择 : PID
显示 项 目 内 容 初始值 显示
级别
P-1 比例带 0.1~999.9%5.0 0
I-1 積分时间 0~9999s
(0时无积分动作)
120 0
d-1 微分时间 0~9999s
(0时无微分动作)
30 0
rE-1 手动复位 -10.0~+110.0%50.0 0
oL-1 操作量下限 -10.0~+110.0%0.0 1
oH-1 操作量上限 -10.0~+110.0%100.0 1
P-1C 冷却侧比例帯 0.1~999.9%5.0 0
I-1C 冷却侧积分时间 0~9999s
(0时无积分动作)
120 0
d-1C 冷却侧微分时间 0~9999s
(0时无微分动作)
30 0
oL.1C 冷却侧操作量下限 -10.0~+110.0%0.0 1
oH.1C 冷却侧操作量上限 -10.0~+110.0%100.0 1
■参数库
库选择 : PARA
显示 项 目 内 容 初始值 显示
级别
CtrL
控制方式 0:ON/OFF控制
1:PID固定
2:ST(自适应)
0、
或1
0
At.oL AT时操作量下限 -10.0~+110.0%0.0 0
At.oH AT时操作量上限 -10.0~+110.0%100.0 0
dIFF ON/OFF控制差动 0~9999U 5 0
oFFS ON/OFF控制动作点偏移量 -1999~+9999U 0 2
FL PV滤波 0.0~120.0s 0.0 0
rA PV比率 0.001~9.999 1.000 1
bI PV偏置 -1999~+9999U 0 0
CyU
时间比例单位1 0:1s单位
1:0.5s固定 (周期设定不可)
2:0.2s固定 (周期设定不可)
3:0.1s固定 (周期设定不可)
0 2
Cy 时间比例周期1 5~120s (输出中包含继电器输出的
场合)
1~120s (输出中不包含继电器输出
的场合)
10、
或2
0
CyU2
时间比例单位2 0:1s单位
1:0.5s固定 (周期设定不可)
2:0.2s固定 (周期设定不可)
3:0.1s固定 (周期设定不可)
0 2
Cy2 时间比例周期2 5~120s (输出中包含继电器输出的
场合)
1~120s (输出中不包含继电器输出
的场合)
10、
或2
0
tP.ty 时间比例动作种类 0:控制性重视型
1:操作端寿命重视型 (时间比例周
期内 仅1回ON/OFF动作)
0、
或1
2
SPU SP斜坡上升斜率 0.0~999.9U (0.0U时无斜率) 0.0 2
SPd SP斜坡下降斜率 0.0 2
■扩展调整库
库选择 : ET
显示 项 目 内 容 初始值 显示 级
别
At.ty
AT种类 0:通常 (标准的控制特性)
1:立即响应 (对干扰迅速反应的控制
特性)
2:稳定 (PV上下波动少的控制特性)
1 0
JF.bd JF整定幅 0.00~10.00 0.30 2
SP.LG SP抑制时常数 0.0~999.9 0.0 2
At-P AT时比例带调整系数 0.00~99.99 1.00 2
At-I AT时积分时间调整系数 0.00~99.99 1.00 2
At-d AT时微分时间调整系数 0.00~99.99 1.00 2
Ctr.A 控制运算 0:PID (传统型PID)
1:Ra-PID (高性能型PID)
0 1
JF.ov JF超调抑制系数 0~100 0 1
St.SA ST阶跃执行判定幅 0.00~99.99 10.00 2
St.Sb ST阶跃整定幅 0.00~10.00 0.50 2
St.Hb ST振荡整定幅 0.00~10.00 1.00 2
St.ud ST阶跃升降切换 0:PV上升/下降时均执行ST
1:仅PV上升时执行ST
0 1
[运行显示一览表 ]
■设置库
库选择 : STUP
显示 项 目 内 容 初始值 显示
级别
C01
PV量程种类 热电偶(T)的场合:
1~6、9~11、13~21、24、25
1 0
热电阻(R)的场合:
41~46、51~54、63、64、67、68
41
直流电压/直流电流(L)的场合:
84、86~90
88
C02 温度单位 0:摄氏 (℃)
1:华氏 (℉)
0 0
C03 冷端补偿 0:进行冷端补偿 (内部)
1:不进行冷端补偿 (外部)
0 2
C04
小数点位置 0:无小数点
1:小数点以下1位
2:小数点以下2位
3:小数点以下3位
(热电阻带小数点量程的场合0~1)
0 0
C05
PV量程下限 PV输入型号为热电偶(T)、热电阻(R)的
场合,显示量程的下限,但设定不可
-0
PV输入型号为直流电压/直流电流(L)
的场合,-1999~+9999U
0
C06
PV量程上限 PV输入型号为热电偶(T)、热电阻(R)的
场合,显示量程的上限,但设定不可
-0
PV输入型号为直流电压/直流电流(L)
的场合,-1999~+9999U
1000
C07 SP限幅下限 PV量程下限~PV量程上限 - 1
C08 SP限幅上限 - 1
C09 开方运算小数舍去 0.0~100.0%
(0.0时无开方运算)
0.0 2
C14 控制动作(正逆) 0:加热控制 (逆动作)
1:冷却控制 (正动作)
0 0
C15 PV异常时操作量选择 0:继续控制运算
1:PV异常时输出操作量
0 2
C16 PV异常时操作量 -10.0~+110.0%0.0 2
C17 READY时操作量(加热冷
却控制的场合为加热侧)
-10.0~+110.0%0.0 1
C18 READY时操作量(冷却
侧)
-10.0~+110.0%0.0 1
C19 MANUAL变更时动作 0:无扰
1:预置
0 1
C20 预置MANUAL值 -10.0~+110.0%
(电源ON时、处于MANUAL模式时也
使用)
0.0或
50.0
1
C21 PID运算初始化功能选择 0:自动
1:不初始化
2:初始化
(输入和现在值不同的SP值时)
0 2
C22 PID运算初始操作量 -10.0~+110.0%0.0或
50.0
2
C26 加热冷却控制选择 0:不使用
1:使用
0 0
C27 加热冷却切换 0:通常
1:节能
0 1
C28 加热冷却控制不感带 -100.0~+100.0%0.0 0
C29 加热冷却控制切换点 -10.0~+110.0%50.0 2
C30 LSP使用组数 1~4 1 0
C32 SP斜坡单位 0:0.1U/s
1:0.1U/min
2:0.1U/h
1 2
C36 CT1动作 0:加热器断线检测
1:电流值测定
0 0
C37 CT1监视输出 0:控制输出1
1:控制输出2
2:事件输出1
3:事件输出 2
4:事件输出3
0 0
C38 CT1测定等待时间 30~300ms 30 0
C39 CT2动作 和CT1相同 0 0
C40 CT2监视输出 0 0
C41 CT2测定等待时间 30 0
C42 控制输出1量程 1:4~20mA
2:0~20mA
1 0
C43
控制输出1种类 0:MV
1:加热MV (加热冷却控制用)
2:冷却MV (加热冷却控制用)
3:PV
4:比率、偏置、滤波前PV
5:SP
6:偏差(PV-SP)
7:CT1电流值
8:CT2电流值
9:MFB (C15M时无效)
10:SP+MV
11:PV+MV
0 0
C44 控制输出1量程下限 -1999~+9999(小数点位置根据控
制输出1的种类变化)
0.0 0
C45 控制输出1量程上限 100.0 0
C46 控制输出1
MV量程幅
0~9999
小数点位置及单位与PV相同
200 0
C47 控制输出2量程 与控制输出1相同 13 0
C48 控制输出2量程种类 0
C49 控制输出2量程下限 -1999~+9999(小数点位置根据控
制输出2的种类变化)
0 0
C50 控制输出2量程上限 1000 00
C51 控制输出2
MV量程幅
0~9999
小数点位置及单位与PV相同
200 0
CP-UM-5410EC
显示 项 目 内 容 初始值 显示
级别
C64
通讯种类 0:CPL
1:MODBUSASCII形式
2:MODBUSRTU形式
0 0
C65 机器地址 0~127
(0时不通讯)
0 0
C66
传送速度 0:4800bps
1:9600bps
2:19200bps
3:38400bps
2 0
C67 数据形式(数据长) 0:7位
1:8位
1 0
C68
数据形式(校验) 0:偶数校验
1:奇数校验
2:无校验
0 0
C69 数据形式(停止位) 0:1位
1:2位
0 0
C70 通讯最小应答时间 1~250ms 3 2
C71 键操作种类 0:标准型
1:特殊型
0 2
C72
Mode键功能 0:无效
1:AUTO/MANUAL切换
2:RUN/READY切换
3:AT停止/启动
4:LSP组切换
5:全DO锁定解除
6:无效
7:通讯DI1切换
8:无效
1 0
C73
模式显示设定 模式组的设定显示有无,由下列的加
权的和决定
位0:AUTO/MANUAL显示
无:0、有:+1
位1:RUN/READY显示
无:0、有:+2
位3:AT停止/启动显示
无:0、有:+8
位4:DO锁定解除显示
无:0、有:+16
位5:通讯DI1 ON/OFF显示
无:0、有:+32
其他无效的设定 0、+4、+64、+128
255 1
C74
PV/SP值显示设定 基本显示的显示有无,由下列的加权
的和决定
位0:PV显示
无:0、有:+1
位1:SP显示
无:0、有:+2
位2:LSP组编号显示
无:0、有:+4
其他无效的设定 0、+8
15 1
C75
操作量显示设定 基本显示的显示有无,由下列的加权
的和决定
位0:MV显示
无:0、有:+1
位1:加热MV/冷却MV显示
无:0、有:+2
位3:AT进程显示
无:0、有:+8
其他无效的设定 0、+4
15 1
C76
事件设定值显示设定 0:运行显示时不显示内部事件设定
值
1:运行显示时显示内部事件1设定
值
2:运行显示时显示内部事件1~2设
定值
3:运行显示时显示内部事件1~3设
定值
0 1
C77
事件剩余时间显示设定 0:运行显示时不显示内部事件的
ON/OFF 延迟剩余时间
1:运行显示时显示内部事件1的ON/
OFF延迟剩余时间
2:运行显示时显示内部事件1~2的
ON/OFF延迟剩余时间
3:运行显 示时显示内部事1~3
01
C78
CT输入电流值显示设定 0:运行显示时不显示CT的电流值
1:运行显示时显示CT1电流值
2:运行显示时显示CT1~2电流值
0 1
C79
显示级别 0:简单设定
1:标准设定
2:多功能设定
0 0
C80
LED监视 0:不使用
1:RS-485通讯发送时闪烁
2:RS-485通讯接收时闪烁
3:全DI状态的OR(逻辑和)
4:READY时闪烁
0 2
C90 CT1匝数 0: 800匝
1~40:CT的匝数除以100后的值
8 2
C91 CT1电力线貫通回数 0: 1回
1~6: 回数
1 2
C92 CT2匝数 0: 800匝
1~40:CT的匝数除以100后的值
8 2
C93 CT2电力线貫通回数 0: 1回
1~6:回数
1 2
(下页续)
C6

C4
■事件组态库
库选择 : EVCF
显示 项 目 内 容 初始值 显示
级别
E1.C1 ~
E5.C1
内部事件1~5 组态1
动作种类
0:无事件
1:PV上限
2:PV下限
3:PV上下限
4:偏差上限
5:偏差下限
6:偏差上下限
7:偏差上限 (最终SP基准)
8:偏差下限 (最终SP基准)
9:偏差上下限 (最终SP基准)
10:SP上限
11:SP下限
12:SP上下限
13:MV上限
14:MV下限
15:MV上下限
16:CT1加热器断线/过电流
17:CT1加热器短路
18:CT2加热器断线/过电流
19:CT2加热器短路
20:回路诊断1
21:回路诊断2
22:回路诊断3
23:报警 (状态)
24:READY (状态)
25:MANUAL (状态)
26:无效
27:AT启动中 (状态)
28:SP斜坡中 (状态)
29:控制正动作 (状态)
30:ST起动中 (状态)
31:无效
32:定时器 (状态)
33:MFB(马达反馈)值上下限(本机
无效)
0 0
E1.C2 ~
E5.C2
内部事件1~5 组态2从右侧开始1、2、3、4位0000 0
第1位:正逆 0:正
1:逆
0
第2位:待机 0:无
1:待机
2:待机+SP变更时待机
0
第3位:READY时动作 0:继续
1:强制OFF
0
第4位:未定义 0 0
E1.C3 ~
E5.C3
内部事件1~5 组态3从右侧开始1、2、3、4位0000 2
第1位:报警OR 0:无
1:报警正+OR动作
2:报警正+AND动作
3:报警逆+OR动作
4:报警逆+AND动作
0
第2位:特殊OFF 0:通常
1:事件设定值 (主)=0的场合、 事
件OFF
0
第3位:延时时间单位 0:0.1s
1:1s
2:1min
0
第4位:未定义 0 0
■DI 分配库
库选择 : DI
显示 项 目 内 容 初始值 显示
级别
dI1.1 ~
dI3.1
内部接点1~3
动作种类
0:无功能
1:LSP组选择 (0/+1)
2:LSP组选择 (0/+2)
3:LSP组选择 (0/+4)
4:无效
5:无效
6:无效
7:RUN/READY切换
8:AUTO/MANUAL切换
9:无效
10:AT停止/启动
11:ST禁止/启动
12:控制动作正逆切换(与设定一致/
与设定相反)
13:SP斜坡许可/禁止
14:PV值保持(不保持/保持)
15:PV最大值保持(不保持/保持)
16:PV最小值保持(不保持/保持)
17:定时器停止/启动
18:全DO锁定解除除(继续/解除)
19:无效
20:无效
0 0
dI1.2 ~
dI3.2
内部接点1~3
输入位运算
0:不使用(默认输入)
1:运算1((A and B) or (C and D))
2:运算2((A or B) and (C or D))
3:运算3( A or B or C or D )
4:运算4( A and B and C and D )
0 2
显示 项 目 内 容 初始值 显示
级别
dI1.3 ~
dI3.3
内部接点1~3
输入分配A
0:常开 (OFF、0)
1:常闭 (ON、1)
2:DI1
3:DI2
4~9:未定义
10:内部事件1
11:内部事件2
12:内部事件3
13:内部事件4
14:内部事件5
15~17:未定义
18:通讯DI1
19:通讯DI2
20:通讯DI3
21:通讯DI4
22:MANUAL模式
23:READY模式
24:未定义
25:AT启动中
26:SP斜坡中
27:未定义
28:有报警
29:有PV报警
30:未定义
31:mode键按键状态
32:事件输出1端子状态
33:控制输出1端子状态
2~4 2
dI1.4 ~
dI3.4
内部接点1~3 输入分配B 0 2
dI1.5 ~
dI3.5
内部接点1~3 输入分配C 0 2
dI1.6 ~
dI3.6
内部接点1~3 输入分配D 0 2
dI1.7 ~
dI3.7
内部接点1~3 反转A~D从右侧开始1、2、3、4位0000 2
第1位:反转A
(输入分配A反转)
0:不反转
1:反转
0
第2位:反转B (输入分配
B反转)
0
第3位:反转C
(输入分配C反转)
0
第4位:反转D (输入分配
D反转)
0
dI1.8 ~
dI3.8
内部接点1~3 反转 0:不反转
1:反转
0 2
dI1.9 ~
dI3.9
内部接点1~3 内部事件
编号指定
0:所有的内部事件
1~5:内部事件编号
0 2
■DO 分配库
库选择 : DO
显示 项 目 内 容 初始值 显示
级别
ot1.1 ~
ot2.1
Ev1.1 ~
Ev3.1
控制输出1~2、
事件输出1~3 动作种类
0:默认输出
1:MV1(ON/OFF控制输出、时间比
例输出、加热冷却控制的加热侧
时间比例输出)
2:MV2(加热冷却控制的冷却侧时间
比例输出)
3:运算1 ((A and B) or (C and D))
4:运算2 ((A or B) and (C or D))
5:运算3 (A or B or C or D)
6:运算3 (A and B and C and D)
0 2
ot1.2 ~
ot2.2
Ev1.2 ~
Ev3.2
控制输出1~2、
事件输出1~3
输出分配A
0:常开 (OFF、0)
1:常闭 (ON、1)
2:内部事件1
3:内部事件2
4:内部事件3
5:内部事件4
6:内部事件5
7~13:未定义
14:MV1
15:MV2
16~17:未定义
18:DI1
19:DI2
20~25:未定义
26:内部接点1
27:内部接点2
28:内部接点3
29~33:未定义
34:通讯DI1
35:通讯DI2
36:通讯DI3
37:通讯DI4
38:MANUAL模式
39:READY模式
40:未定义
41:AT启动中
42:SP斜坡中
43:未定义
44:有报警
45:有PV报警
46:未定义
47:mode键按键状态
48:事件输出1端子状态
49:控制输出1端子状态
14~15
或
2~4
2
ot1.3 ~
ot2.3
Ev1.3 ~
Ev3.3
控制输出1~2、
事件输出1~3
输出分配B
0 2
ot1.4 ~
ot2.4
Ev1.4 ~
Ev3.4
控制输出1~2、
事件输出1~3
输出分配C
0 2
ot1.5 ~
ot2.5
Ev1.5 ~
Ev3.5
控制输出1~2、
事件输出1~3
输出分配D
0 2
显示 项 目 内 容 初始值 显示
级别
ot1.6 ~
ot2.6
Ev1.6 ~
Ev3.6
控制输出1~2、事件 输
出1~3 反转A~D
从右侧开始1、2、3、4位0000 2
第1位:反转A 0:不反转
1:反转
0
第2位:反转B 0
第3位:反转C 0
第4位:反转D 0
ot1.7 ~
ot2.7
Ev1.7 ~
Ev3.7
控制输出1~2、事件
输出1~3 反转
0:不反转
1:反转
0 2
ot1.8 ~
ot2.8
Ev1.8 ~
Ev3.8
控制输出1~2、事件 输
出1~3 锁定
0:无
1:有(ON时锁定)
2:有(OFF时锁定、电源投入初始化
时除外)
0 2
■用户功能库
库选择 : UF
显示 项 目 内 容 初始值 显示
级别
UF-1 用户功能定义1各设定的第1显示部的显示,设定例
外的内容如下
---- :未登録
P-- :使用中PID组的比例带
I-- :使用中PID组的积分时间
d-- :使用中PID组的微分时间
rE-- :使用中PID组的手动复位
oL-- :使用中PID组的操作量下限
oH--
:使用中PID组的操作量上限
P--C
:使用中PID组的冷却侧比例
带
I--C
:使用中PID组的冷却侧积分
时间
d--C
:使用中PID组的冷却侧微分
时间
oL.-C
:使用中PID组的冷却侧操作
量下限
oh.-C
:使用中PID组的冷却侧操作
量上限
- - - - 1
UF-2 用户功能定义2 - - - - 1
UF-3 用户功能定义3 - - - - 1
UF-4 用户功能定义4 - - - - 1
UF-5 用户功能定义5 - - - - 1
UF-6 用户功能定义6 - - - - 1
UF-7 用户功能定义7 - - - - 1
UF-8 用户功能定义8 - - - - 1
■锁定库
库选择 : loc
显示 项 目 内 容 初始值 显示
级别
LoC
键锁定 0 :所有设定可能
1 :模式、事件、运行显示、SP、
UF、锁定、手动MV、mode键
的设定可能
2 :运行显示、SP、UF、锁定、手
动MV、mode键的设定可能
3 :UF、锁定、手动MV、mode键
的设定可能
0 0
C.LoC 通讯锁定 0:RS-485通讯read/write可能
1:RS-485通讯read/write不可
0 2
L.LoC 设定器锁定 0:设定器通讯read/write可能
1:设定器通讯read/write不可
0 2
PASS 口令显示 0~15
5:口令1A~2B显示
0 0
PS1A 口令1A 0000~FFFF (16进制数) 0000 0
PS2A 口令2A 0000~FFFF (16进制数) 0000 0
PS1b 口令1B 0000~FFFF (16进制数) 0000 0
PS2b 口令2B 0000~FFFF (16进制数) 0000 0
■仪表信息库
库选择 : ID
显示 项 目 内 容 初始值 显示
级别
Id01 ROMID 0固定 - 2
Id02 ROM版本1 XX.XX (小数点以下2位)-2
Id03 ROM版本2 XX.XX (小数点以下2位)-2
Id04 SLP对应版本 - 2
Id05 EST对应版本 - 2
Id06 日期代码 年 公历-2000
例:2003年为「3」
-2
Id07 日期代码 月日 月+(日÷100)
例:12月1日为「12.01」
-2
Id08 制造编号 - 2本资料所记内容如有变更恕不另行通知
阿自倍尔自控工程 (上海 )有限公司
总 部 上海市徐汇区柳州路 928 号百丽国际广场 12F
邮编 : 200235
电话 : 021-50905580 传真 : 021-50909625
2015 年2月中文第 13 版
阿自倍尔株式会社
Advanced Automation Company
有毒害物质或元素
铅
(Pb)
汞
(Hg)
镉
(Cd)
六价铬
(Cr6+)
多溴联苯
(PBB)
多溴二苯醚
(PBDE)
电路板组件*1
此标志表示电子信息产品的环保使用期限,适用于在中国销售的
产品,其依据是2006年2月28日公布的“电子信息产品污染控制管
理办法”与SJ/T11364-2006“电子信息产品污染控制标识要求”。只
要遵守此产品相关的安全及使用注意事项,在从生产日期开始的
标识年限内,便不会因产品中的有害物质发生泄漏或突然异变而
对环境、人体或财产造成重大影响。正当使用产品后实施废弃处
理时,请遵从电子信息产品的相关回收再利用法律法规。
有毒害物质含有表示
○ : 表示该部件的所有均质材料中,该有毒害物质含量均低于
SJ/T11363-2006标准所规定的限量要求。
× : 表示至少在该部件的一种以上的匀质材料中
,
该有毒害物质含量超过
SJ/T11363-2006标准所规定的限量要求。
*1 : 电路板组件包括印刷电路板及其构成的零部件,如电阻、电容、集成
电路、连接器等。
注意 : 没有记载于零部件名称的部件的均质材料中,该有毒害物质含量
均低于SJ/T11363-2006标准所规定的限量要求。
基于SJ/T11364-2006「电子信息产品污染控制标识要求」
的表示式样
零部件名称
×○○○○○
C7C6

C4
■事件组态库
库选择 : EVCF
显示 项 目 内 容 初始值 显示
级别
E1.C1 ~
E5.C1
内部事件1~5 组态1
动作种类
0:无事件
1:PV上限
2:PV下限
3:PV上下限
4:偏差上限
5:偏差下限
6:偏差上下限
7:偏差上限 (最终SP基准)
8:偏差下限 (最终SP基准)
9:偏差上下限 (最终SP基准)
10:SP上限
11:SP下限
12:SP上下限
13:MV上限
14:MV下限
15:MV上下限
16:CT1加热器断线/过电流
17:CT1加热器短路
18:CT2加热器断线/过电流
19:CT2加热器短路
20:回路诊断1
21:回路诊断2
22:回路诊断3
23:报警 (状态)
24:READY (状态)
25:MANUAL (状态)
26:无效
27:AT启动中 (状态)
28:SP斜坡中 (状态)
29:控制正动作 (状态)
30:ST起动中 (状态)
31:无效
32:定时器 (状态)
33:MFB(马达反馈)值上下限(本机
无效)
0 0
E1.C2 ~
E5.C2
内部事件1~5 组态2从右侧开始1、2、3、4位0000 0
第1位:正逆 0:正
1:逆
0
第2位:待机 0:无
1:待机
2:待机+SP变更时待机
0
第3位:READY时动作 0:继续
1:强制OFF
0
第4位:未定义 0 0
E1.C3 ~
E5.C3
内部事件1~5 组态3从右侧开始1、2、3、4位0000 2
第1位:报警OR 0:无
1:报警正+OR动作
2:报警正+AND动作
3:报警逆+OR动作
4:报警逆+AND动作
0
第2位:特殊OFF 0:通常
1:事件设定值 (主)=0的场合、 事
件OFF
0
第3位:延时时间单位 0:0.1s
1:1s
2:1min
0
第4位:未定义 0 0
■DI 分配库
库选择 : DI
显示 项 目 内 容 初始值 显示
级别
dI1.1 ~
dI3.1
内部接点1~3
动作种类
0:无功能
1:LSP组选择 (0/+1)
2:LSP组选择 (0/+2)
3:LSP组选择 (0/+4)
4:无效
5:无效
6:无效
7:RUN/READY切换
8:AUTO/MANUAL切换
9:无效
10:AT停止/启动
11:ST禁止/启动
12:控制动作正逆切换(与设定一致/
与设定相反)
13:SP斜坡许可/禁止
14:PV值保持(不保持/保持)
15:PV最大值保持(不保持/保持)
16:PV最小值保持(不保持/保持)
17:定时器停止/启动
18:全DO锁定解除除(继续/解除)
19:无效
20:无效
0 0
dI1.2 ~
dI3.2
内部接点1~3
输入位运算
0:不使用(默认输入)
1:运算1((A and B) or (C and D))
2:运算2((A or B) and (C or D))
3:运算3( A or B or C or D )
4:运算4( A and B and C and D )
0 2
显示 项 目 内 容 初始值 显示
级别
dI1.3 ~
dI3.3
内部接点1~3
输入分配A
0:常开 (OFF、0)
1:常闭 (ON、1)
2:DI1
3:DI2
4~9:未定义
10:内部事件1
11:内部事件2
12:内部事件3
13:内部事件4
14:内部事件5
15~17:未定义
18:通讯DI1
19:通讯DI2
20:通讯DI3
21:通讯DI4
22:MANUAL模式
23:READY模式
24:未定义
25:AT启动中
26:SP斜坡中
27:未定义
28:有报警
29:有PV报警
30:未定义
31:mode键按键状态
32:事件输出1端子状态
33:控制输出1端子状态
2~4 2
dI1.4 ~
dI3.4
内部接点1~3 输入分配B 0 2
dI1.5 ~
dI3.5
内部接点1~3 输入分配C 0 2
dI1.6 ~
dI3.6
内部接点1~3 输入分配D 0 2
dI1.7 ~
dI3.7
内部接点1~3 反转A~D从右侧开始1、2、3、4位0000 2
第1位:反转A
(输入分配A反转)
0:不反转
1:反转
0
第2位:反转B (输入分配
B反转)
0
第3位:反转C
(输入分配C反转)
0
第4位:反转D (输入分配
D反转)
0
dI1.8 ~
dI3.8
内部接点1~3 反转 0:不反转
1:反转
0 2
dI1.9 ~
dI3.9
内部接点1~3 内部事件
编号指定
0:所有的内部事件
1~5:内部事件编号
0 2
■DO 分配库
库选择 : DO
显示 项 目 内 容 初始值 显示
级别
ot1.1 ~
ot2.1
Ev1.1 ~
Ev3.1
控制输出1~2、
事件输出1~3 动作种类
0:默认输出
1:MV1(ON/OFF控制输出、时间比
例输出、加热冷却控制的加热侧
时间比例输出)
2:MV2(加热冷却控制的冷却侧时间
比例输出)
3:运算1 ((A and B) or (C and D))
4:运算2 ((A or B) and (C or D))
5:运算3 (A or B or C or D)
6:运算3 (A and B and C and D)
0 2
ot1.2 ~
ot2.2
Ev1.2 ~
Ev3.2
控制输出1~2、
事件输出1~3
输出分配A
0:常开 (OFF、0)
1:常闭 (ON、1)
2:内部事件1
3:内部事件2
4:内部事件3
5:内部事件4
6:内部事件5
7~13:未定义
14:MV1
15:MV2
16~17:未定义
18:DI1
19:DI2
20~25:未定义
26:内部接点1
27:内部接点2
28:内部接点3
29~33:未定义
34:通讯DI1
35:通讯DI2
36:通讯DI3
37:通讯DI4
38:MANUAL模式
39:READY模式
40:未定义
41:AT启动中
42:SP斜坡中
43:未定义
44:有报警
45:有PV报警
46:未定义
47:mode键按键状态
48:事件输出1端子状态
49:控制输出1端子状态
14~15
或
2~4
2
ot1.3 ~
ot2.3
Ev1.3 ~
Ev3.3
控制输出1~2、
事件输出1~3
输出分配B
0 2
ot1.4 ~
ot2.4
Ev1.4 ~
Ev3.4
控制输出1~2、
事件输出1~3
输出分配C
0 2
ot1.5 ~
ot2.5
Ev1.5 ~
Ev3.5
控制输出1~2、
事件输出1~3
输出分配D
0 2
显示 项 目 内 容 初始值 显示
级别
ot1.6 ~
ot2.6
Ev1.6 ~
Ev3.6
控制输出1~2、事件 输
出1~3 反转A~D
从右侧开始1、2、3、4位0000 2
第1位:反转A 0:不反转
1:反转
0
第2位:反转B 0
第3位:反转C 0
第4位:反转D 0
ot1.7 ~
ot2.7
Ev1.7 ~
Ev3.7
控制输出1~2、事件
输出1~3 反转
0:不反转
1:反转
0 2
ot1.8 ~
ot2.8
Ev1.8 ~
Ev3.8
控制输出1~2、事件 输
出1~3 锁定
0:无
1:有(ON时锁定)
2:有(OFF时锁定、电源投入初始化
时除外)
0 2
■用户功能库
库选择 : UF
显示 项 目 内 容 初始值 显示
级别
UF-1 用户功能定义1各设定的第1显示部的显示,设定例
外的内容如下
---- :未登録
P-- :使用中PID组的比例带
I-- :使用中PID组的积分时间
d-- :使用中PID组的微分时间
rE-- :使用中PID组的手动复位
oL-- :使用中PID组的操作量下限
oH--
:使用中PID组的操作量上限
P--C
:使用中PID组的冷却侧比例
带
I--C
:使用中PID组的冷却侧积分
时间
d--C
:使用中PID组的冷却侧微分
时间
oL.-C
:使用中PID组的冷却侧操作
量下限
oh.-C
:使用中PID组的冷却侧操作
量上限
- - - - 1
UF-2 用户功能定义2 - - - - 1
UF-3 用户功能定义3 - - - - 1
UF-4 用户功能定义4 - - - - 1
UF-5 用户功能定义5 - - - - 1
UF-6 用户功能定义6 - - - - 1
UF-7 用户功能定义7 - - - - 1
UF-8 用户功能定义8 - - - - 1
■锁定库
库选择 : loc
显示 项 目 内 容 初始值 显示
级别
LoC
键锁定 0 :所有设定可能
1 :模式、事件、运行显示、SP、
UF、锁定、手动MV、mode键
的设定可能
2 :运行显示、SP、UF、锁定、手
动MV、mode键的设定可能
3 :UF、锁定、手动MV、mode键
的设定可能
0 0
C.LoC 通讯锁定 0:RS-485通讯read/write可能
1:RS-485通讯read/write不可
0 2
L.LoC 设定器锁定 0:设定器通讯read/write可能
1:设定器通讯read/write不可
0 2
PASS 口令显示 0~15
5:口令1A~2B显示
0 0
PS1A 口令1A 0000~FFFF (16进制数) 0000 0
PS2A 口令2A 0000~FFFF (16进制数) 0000 0
PS1b 口令1B 0000~FFFF (16进制数) 0000 0
PS2b 口令2B 0000~FFFF (16进制数) 0000 0
■仪表信息库
库选择 : ID
显示 项 目 内 容 初始值 显示
级别
Id01 ROMID 0固定 - 2
Id02 ROM版本1 XX.XX (小数点以下2位)-2
Id03 ROM版本2 XX.XX (小数点以下2位)-2
Id04 SLP对应版本 - 2
Id05 EST对应版本 - 2
Id06 日期代码 年 公历-2000
例:2003年为「3」
-2
Id07 日期代码 月日 月+(日÷100)
例:12月1日为「12.01」
-2
Id08 制造编号 - 2本资料所记内容如有变更恕不另行通知
阿自倍尔自控工程 (上海 )有限公司
总 部 上海市徐汇区柳州路 928 号百丽国际广场 12F
邮编 : 200235
电话 : 021-50905580 传真 : 021-50909625
2015 年2月中文第 13 版
阿自倍尔株式会社
Advanced Automation Company
有毒害物质或元素
铅
(Pb)
汞
(Hg)
镉
(Cd)
六价铬
(Cr6+)
多溴联苯
(PBB)
多溴二苯醚
(PBDE)
电路板组件*1
此标志表示电子信息产品的环保使用期限,适用于在中国销售的
产品,其依据是2006年2月28日公布的“电子信息产品污染控制管
理办法”与SJ/T11364-2006“电子信息产品污染控制标识要求”。只
要遵守此产品相关的安全及使用注意事项,在从生产日期开始的
标识年限内,便不会因产品中的有害物质发生泄漏或突然异变而
对环境、人体或财产造成重大影响。正当使用产品后实施废弃处
理时,请遵从电子信息产品的相关回收再利用法律法规。
有毒害物质含有表示
○ : 表示该部件的所有均质材料中,该有毒害物质含量均低于
SJ/T11363-2006标准所规定的限量要求。
× : 表示至少在该部件的一种以上的匀质材料中
,
该有毒害物质含量超过
SJ/T11363-2006标准所规定的限量要求。
*1 : 电路板组件包括印刷电路板及其构成的零部件,如电阻、电容、集成
电路、连接器等。
注意 : 没有记载于零部件名称的部件的均质材料中,该有毒害物质含量
均低于SJ/T11363-2006标准所规定的限量要求。
基于SJ/T11364-2006「电子信息产品污染控制标识要求」
的表示式样
零部件名称
×○○○○○
C8
This manual suits for next models
1
Table of contents
Other Azbil Controllers manuals

Azbil
Azbil RA1B User manual

Azbil
Azbil MPC0002 User manual

Azbil
Azbil DMC10E User manual

Azbil
Azbil AB-7352-U User manual

Azbil
Azbil F4Q User manual

Azbil
Azbil SDC26 Instruction Manual

Azbil
Azbil C36 User manual

Azbil
Azbil DCP31 User manual

Azbil
Azbil KFDB User manual

Azbil
Azbil Infilex ZM WY5122 User manual

Azbil
Azbil BC-R25 Series User manual

Azbil
Azbil dcp551 mark II User manual

Azbil
Azbil C26 User manual

Azbil
Azbil SDC46 User manual

Azbil
Azbil AUR890 Series User manual

Azbil
Azbil Infilex GC WY5111 User manual

Azbil
Azbil Micro Flow MQV9020 User manual

Azbil
Azbil AUR450C User manual

Azbil
Azbil C45 User manual

Azbil
Azbil INFILEX GC WY5311 User manual