manuals.online logo
Brands
  1. Home
  2. •
  3. Brands
  4. •
  5. B.E.G.
  6. •
  7. Security Sensor
  8. •
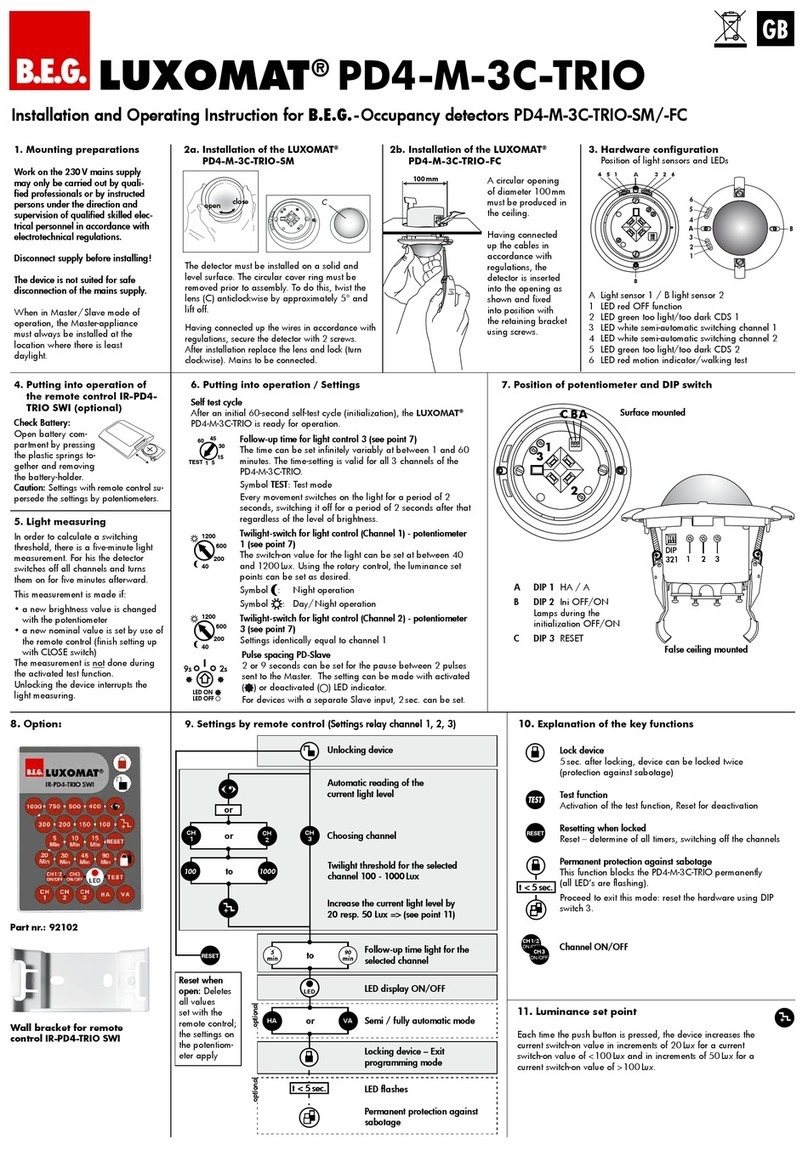
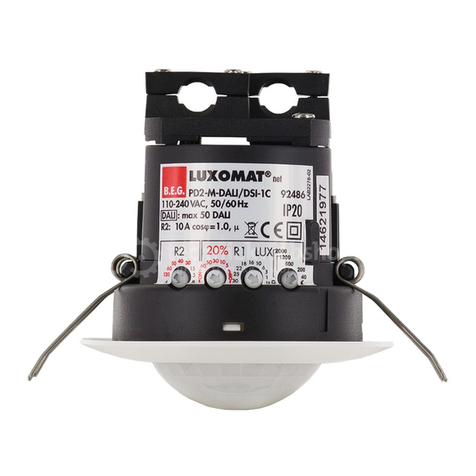
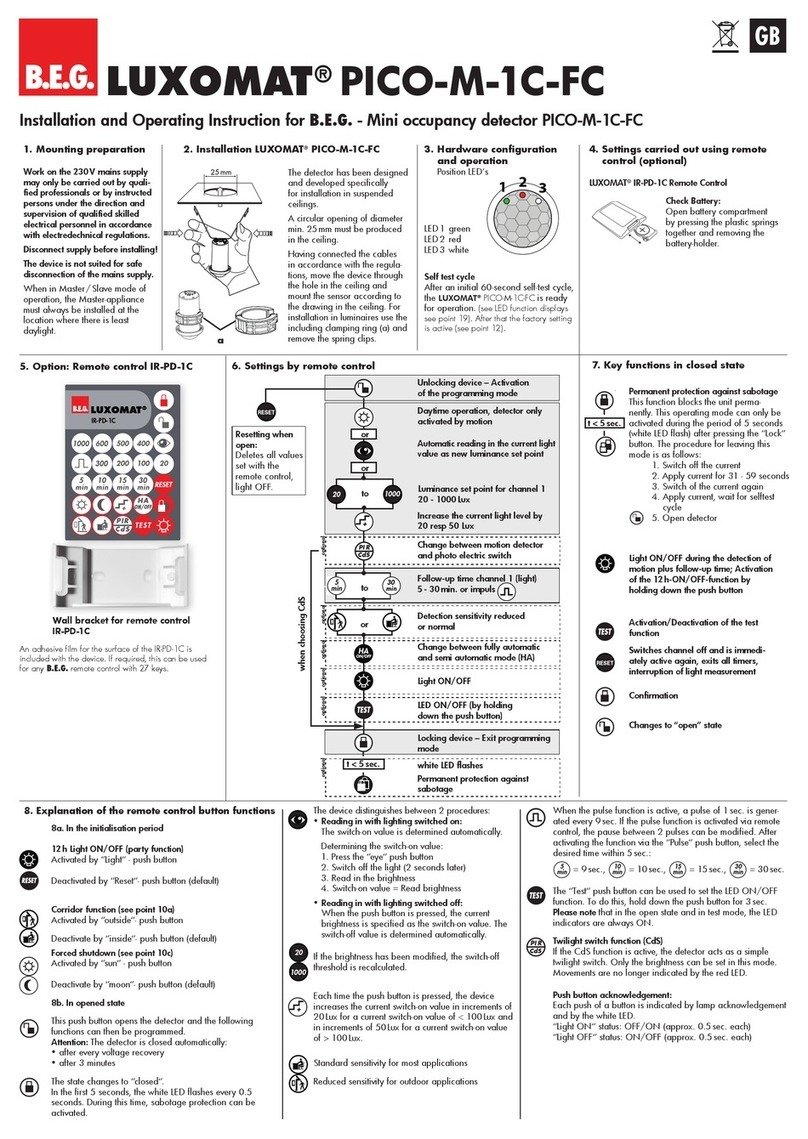
  9. B.E.G. WAVE-PIR-120-DR-(O/V) User manual

B.E.G. WAVE-PIR-120-DR-(O/V) User manual

Control Panel Cover
LED Indicator
OCCD OCCS VACD
TIME
TEST
520
Min Min
RANGE
Mounting Yoke
Fresnel Lens
23
4
1
OCCD OCCS VACD
-03-
-02-
DESCRI P T I O N
WAVE-PIR-120/277-DR-(O/V)
OCCUPANCY / VACANCY (2-IN-1)
Voltage .................................................................… 120/277VAC, 60Hz
Incandescent ........................................................................… 800W
Motor ...................................................................................…… 1/4Hp
Time Delay..........................................................…… 15Sec to 30Mins
SPECIFIC A TIO N S
SENSOR SWITCH
INSTALLATI O N
Turn off the circuit breaker before installation;
WARNING:
Do not exceed electrical ratings.
Black lead to Line 1 (Hot), Blue lead to Line 2 (Hot), Red lead to Primary
2. Gently position wires in wall box, attach sensor switch to the box.
3. Mount device “TOP” up.
4. Restore power at circuit breaker or fuse, wait
6. Locate the adjustment knobs on the control panel to perform test
ADJUSTMENT
INSTALLATION INSTRUCTIONS
Light Level..................................................................... 30 Lux-Daylight
In door use only;
Figure 2
1. Connect lead wires as shown in WIRING DIAGRAM (see Figure 2):
The passive infrared sensors work by detecting the difference between
heat emitted from the human body in motion and the background space.
Band switch prescription.
The sensor switch can turn a load on and hold it as long as the sensor
detects occupancy. After no motion is detected for the set time delay, the
load turns off automatically. WAVE-PIR-120/277-DR-(O/V) has two relays
5. Remove the small cover plate (illustrated as Figure 3).
7. Replace the small cover plate after testing and adjustment.
8. Attach the wallplate.
Figure 3
and adjustment (illustrated as Figure 3). Default position: 15 Seconds (Test mode)
Adjustable: from 15 Seconds to 30 Minutes (clockwise)
Default position: Center at 65%
Adjustable: 30% (Position 1) to 100% (Position 4)
Note: Turn toward right for greater room space.
Turn toward left to avoid false alert in smaller room and near
the door way or heat source.
Time Delay Knob
Sensor Sensitivity Range Knob
three minutes.
Fluorescent/Ballast.................... 800VA@120VAC /1600VA@277VAC
Ground wire is required;
Neutral
Load
RedRed
Ground Green
Primary
Load
Brown
Secondary
Neutral
Line 1 Black
Line 2 Blue
Neutral
Load
RedRed
Ground Green
Primary
Load
Brown
Secondary
Line Black
Blue
Best:320 sq.ft.
The coverage range of the sensor switch is specified and illustrated
the light to turn off even though someone is still in the detection area.
in Figure 1. Large objects and some transparent barriers like glass
windows will obstruct the sensor's view and prevent detection, causing
Coverage Area
Figure 1
Regular: 800 sq.ft.
Maximum: 1200 sq.ft.
40'
Top View
20'
10'
20'
10'
20'
5'
4'
OCCS
Mode
OCCD
VACD
Description
Position
Left
Center
Right
Vacancy Mode: Manual On only,
Automatic Off after set time delay.
React to the push-button
Manually toggles
Manually toggles
On / Off the loads
On / Off the loads.
Operation Temperature.................................................. 32°F -- 131°F
DUAL LOAD
(equal to
Dual Load Switch), and also includes Ambient Light Level Sensor.
Load wire, Brown lead to Secondary Load, Green lead to Ground.
(Push Button)
Primary Load
Secondary Load
Occupancy Mode: Dual Load
Automatically On, Automatically Off
after set time delay both Loads together.
Manually toggles
On / Off the loads
Primary Load
Occupancy Mode: Automatic On,
Automatic Off after set time delay.
Secondary Load
VAC Mode: Secondary Load Manual On,
Automaic Off after set time delay
Ambient Light Level
hold the primary Manual ON/OFF Button for 6 seconds until the Load
turns on, release the primary button within the next 4 seconds, the Load
will turn off and stay off for a maximum 10 seconds. The Load will
turn on again (2 seconds) and then off. It confirms that the present light
-01-
After Initial Run (3 minutes), set the Band Switch to VACD, press and
30
Min
10Min
Controls
B.E.G.
Part Number: 97346
Set the Band Switch to VACD, press and hold the primary Manual
1. Switch from OCCD to VACD mode.
-06-
-05-
-04-
WARRANTY INFORMATION

INSTALLATION INSTRUCTIONS
(Test Mode), make sure there is no motion (no LED flashing); the
TROUBLESHOOTING`
The Time Delay knob is default set on 15 seconds, do not adjust it until
By Pushing the Control Panel Cover, the Load(s) can be turned On/Off
detected. To verify proper operation, turn the Time Delay Knob to 15s

The Sensor Switch is programmed independently for either Occupancy
Manual On/Off Button
Turning On the Load under Occupancy Mode
Load automatically turns On when occupancy is detected.
Turning On the Load under Vacancy Mode
Manual On/Off Button has to be pushed to turn On the Load.
Automatically Turning Off the Load
Under all modes, the Sensor keeps the Load(s) On until no motion is
Manually Turning Off the Load
By pushing Manual On/Off Button, the Load(s) can be turned Off under
any mode.
Mode or Vacancy Mode depending on the Band Switch position under
the control panel cover. Some might call the Vacancy mode as “Manual
under any (OCCD, OCCS, VACD) mode.
detected for the set time delay, then turns Off automatically.
OPERATION

For proper operation, the Sensor Switch has to consume power from
Therefore, a
Initial run
The Sensor Switch needs
During the
initial run, the load might be turned On and Off several times.
initial run is finished and proper operation function confirmed.
The Load is out of control (frequently flashing)
1. It can take up to three minutes for initial run.
2. Check the wiring connections, especially the
The Load does not turn On without LED flashing or LED flashing
1. Push Manual On/Off Button, if the load turns On; verify that Sensitive
Range is on high. If the Load does not turn On, go to Step 2.
2. Check the wiring connections, especially Hot line and Ground wiring.
The Load does not turn On while LED flashing with motion detected
1. Check to see if Ambient Light Level is enabled by covering the lens
2. Push Manual On/Off Button, if the load turns On; verify that Sensitivity
Range is on high. If the Load does not turn On, go to Step 3.
3. Check the wiring connections, especially Hot Line and Ground wiring.
The Load does not turn Off
1. There can be up to a 30-minute time delay after the last motion
initial run for three minutes.
regardless of motion
2. Check if there is any significant heat source mounted within six feet (two
meters) that may cause false detection such as high wattage light bulb,
portable heater, and HVAC device.
3. Check the wiring connections, especially the Neutral wiring to the
The Load turns On when not desired
2. Mask the Sensor Switch’s lens to eliminate unwanted coverage area.
3. Turn the Sensitivity Level knob toward left to avoid false alert in
smaller room and near the door way.
Ground. Secured Ground Wiring is required.
Ground Wiring.
On Occupancy Mode”.
Hot and
by hand.
Load should turn Off in 15 seconds.
sensor switch.
TROUBLESHOOTING
There is a 5-second re-trigger delay between On and Off.
Under OCCD, OCCS mode,the Load(s) cannot automatically turn on
5 minutes after the last motion detected.
Manually Turn Off One Load
Another Load stays On until no motion detected plus the set time delay.
The manual turned Off Load stays Off all the about time.
level becomes the set Ambient Light Level. Set the Band Switch to
OCCD or OCCS mode. The Load will turn on only if motion is detected
and the Ambient Light Level also is below the set light level.
Back to factory default (daylight)
ON/OFF Button for 6 seconds until the Load turns on, continue holding
the primary button for another 5 seconds until the Load turns off, then
release the primary button and set the Band Switch to OCCD or OCCS
Mode, it confirms that the sensor switch goes back to factory default.
For technical support please call (770)
349- 6341 and press "2" at the prompt, or
email [email protected]. Technical
support is available Monday through Friday,
8:00 AM to 5:00 PM Eastern time.
B.E.G. Controls warranties its products to be free of defects in materials
and
workmanship for a period of five (5) years. There are no
obligations or
liabilities on the part of our company for consequential
damages arising
out of or in connection with the use or performance
of this product or
other indirect damages with respect to loss of property,
revenue, or profit,
or cost of removal, installation or reinstallation.
Feb, 2017
This manual suits for next models

2

Other B.E.G. Security Sensor manuals

B.E.G. 93385 User manual

B.E.G.

B.E.G. 93385 User manual

B.E.G. LUXOMAT PD4-S-GH Firmware update

B.E.G.

B.E.G. LUXOMAT PD4-S-GH Firmware update

B.E.G. LUXOMAT PD4-S Series User guide

B.E.G.

B.E.G. LUXOMAT PD4-S Series User guide

B.E.G. LUXOMAT BL2 User manual

B.E.G.

B.E.G. LUXOMAT BL2 User manual

B.E.G. LUXOMAT PD9-M-DALI/DSI-FC User guide

B.E.G.

B.E.G. LUXOMAT PD9-M-DALI/DSI-FC User guide

B.E.G. LUXOMAT PD4-M-TRIO-2DALI DSI-1C Wiring diagram

B.E.G.

B.E.G. LUXOMAT PD4-M-TRIO-2DALI DSI-1C Wiring diagram

B.E.G. LUXOMAT 180-SC Service manual

B.E.G.

B.E.G. LUXOMAT 180-SC Service manual

B.E.G. MINI-S-PP-FC User guide

B.E.G.

B.E.G. MINI-S-PP-FC User guide

B.E.G. LUXOMAT PD9-M-1C+HVAC User guide

B.E.G.

B.E.G. LUXOMAT PD9-M-1C+HVAC User guide

B.E.G. LUXOMAT PD5-M-1C-Clip User guide

B.E.G.

B.E.G. LUXOMAT PD5-M-1C-Clip User guide

B.E.G. LUXOMAT Indoor 180/R-2W UK Service manual

B.E.G.

B.E.G. LUXOMAT Indoor 180/R-2W UK Service manual

B.E.G. LUXOMAT PD4-M-GH-SM User guide

B.E.G.

B.E.G. LUXOMAT PD4-M-GH-SM User guide

B.E.G. LUXOMAT PD4-M-1C-C-SM User guide

B.E.G.

B.E.G. LUXOMAT PD4-M-1C-C-SM User guide

B.E.G. RC-plus next 130 Service manual

B.E.G.

B.E.G. RC-plus next 130 Service manual

B.E.G. Luxomat PICO-M-1C-FC User guide

B.E.G.

B.E.G. Luxomat PICO-M-1C-FC User guide

B.E.G. Luxomat PD2-S User manual

B.E.G.

B.E.G. Luxomat PD2-S User manual

B.E.G. LUXOMAT PD2-M-2C-24V User guide

B.E.G.

B.E.G. LUXOMAT PD2-M-2C-24V User guide

B.E.G. LUXOMAT PD2-M-DALI/DSI-SM/FC User guide

B.E.G.

B.E.G. LUXOMAT PD2-M-DALI/DSI-SM/FC User guide

B.E.G. LUXOMAT PD2-M-1C User guide

B.E.G.

B.E.G. LUXOMAT PD2-M-1C User guide

B.E.G. LUXOMAT PD4-S-GH User guide

B.E.G.

B.E.G. LUXOMAT PD4-S-GH User guide

B.E.G. LUXOMAT PD4N-KNX-K-DX How to use

B.E.G.

B.E.G. LUXOMAT PD4N-KNX-K-DX How to use

B.E.G. LUXOMAT PD4-M-1C-SM User guide

B.E.G.

B.E.G. LUXOMAT PD4-M-1C-SM User guide

B.E.G. LUXOMAT PD9-M-2C User guide

B.E.G.

B.E.G. LUXOMAT PD9-M-2C User guide

B.E.G. LUXOMAT PD4-M-DAA4G User guide

B.E.G.

B.E.G. LUXOMAT PD4-M-DAA4G User guide

Popular Security Sensor manuals by other brands

Contrinex SAFETINEX instruction manual

Contrinex

Contrinex SAFETINEX instruction manual

netvox R718WA user manual

netvox

netvox R718WA user manual

Inficon Ecotec E3000 Technical handbook

Inficon

Inficon Ecotec E3000 Technical handbook

Hudora 83161 INSTRUCTIONS ON ASSEMBLY AND USE

Hudora

Hudora 83161 INSTRUCTIONS ON ASSEMBLY AND USE

INSTEON 2852-222 quick start guide

INSTEON

INSTEON 2852-222 quick start guide

Macurco CD-6 User instruction

Macurco

Macurco CD-6 User instruction

Mitsubishi Electric MP-EG-TS-V2 Technical manual

Mitsubishi Electric

Mitsubishi Electric MP-EG-TS-V2 Technical manual

BEA CRYSTAL user guide

BEA

BEA CRYSTAL user guide

Niko 350-41601 Technical manual

Niko

Niko 350-41601 Technical manual

Vivax Metrotech VM-550 user guide

Vivax Metrotech

Vivax Metrotech VM-550 user guide

Risco WatchIN 325DT installation instructions

Risco

Risco WatchIN 325DT installation instructions

Agilent Technologies 6820 GC installation guide

Agilent Technologies

Agilent Technologies 6820 GC installation guide

System Sensor RTS151KEYA installation instructions

System Sensor

System Sensor RTS151KEYA installation instructions

HORN LH-913C installation instructions

HORN

HORN LH-913C installation instructions

Videofied OMV601MB quick start guide

Videofied

Videofied OMV601MB quick start guide

SECO-LARM SLI Enforcer SS-040Q manual

SECO-LARM

SECO-LARM SLI Enforcer SS-040Q manual

Triplett ET350 Assembly instructions

Triplett

Triplett ET350 Assembly instructions

Aritech ATS1190 manual

Aritech

Aritech ATS1190 manual

manuals.online logo
manuals.online logoBrands
  • About & Mission
  • Contact us
  • Privacy Policy
  • Terms and Conditions

Copyright 2025 Manuals.Online. All Rights Reserved.