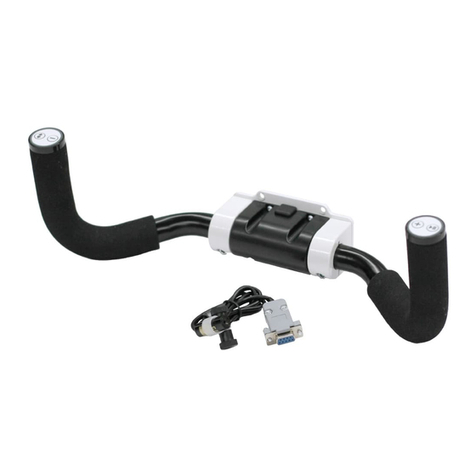
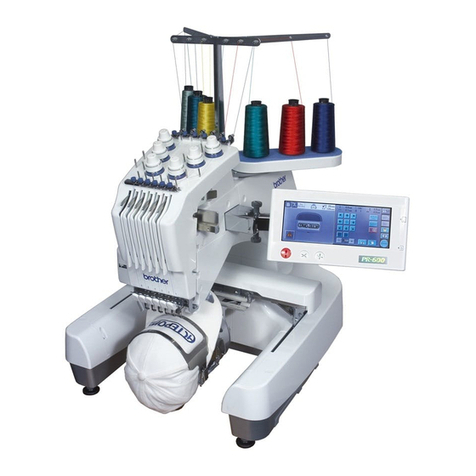
Baby Lock Pro-Stitcher Premium BLPS6 User manual


www.babylock.com BLPS6 - CJ Installaon Guide | 1.2
Table of Contents
1. Table of Contents ....................................................................................................1.1
2. Important Safety Instructions ................................................................................2.1
3. Installation................................................................................................................3.1
Congratulations on your Pro-Stitcher®Purchase ......................................................3.1
Grounding..................................................................................................................3.2
Pro-Stitcher Parts List for Baby Lock Crown Jewel...............................................3.2
Installation .................................................................................................................3.5
Installation of the X-Rack and Y-Rack .......................................................................3.5
To install the X-Rack..............................................................................................3.5
To install the Y-Rack ..............................................................................................3.7
Y-encoder circuit board replacement.........................................................................3.8
To replace the Y-encoder.......................................................................................3.8
To set up the Pro-Stitcher carriage..........................................................................3.10
To attach the tablet computer ..............................................................................3.13
4. To Turn on and shut down Pro-Stitcher ................................................................4.1
To turn on Pro-Stitcher ..........................................................................................4.1
To shut down Pro-Stitcher .....................................................................................4.1
5. Getting Started Pro-Stitcher...................................................................................5.1
To move the quilting machine after the software has been loaded .......................5.1
If you have a Pro-Stitcher carriage without levers.................................................5.1
To use the USB ash drive ....................................................................................5.2
6. Troubleshooting ......................................................................................................6.1


www.babylock.com Safety | 2.1
Save these instructions
This machine is intended for household use.
Disclaimer
Baby Lock and its Representatives are in no way legally responsible or liable for damage to the
Pro-Stitcher when used improperly or not in accordance with the guidelines stated in this guide or
when used on machine quilting frames not recommended by Baby Lock.
Read all instructions before using
When using any machine, basic safety precautions should always be taken, including the
following: Read all instructions before using.
WARNING - To reduce the risk of burns, re, electric shock, or injury to
persons:
The Pro-Stitcher installed on your quilting machine should never be left unattended when plugged
in. Always unplug the machine from the electric outlet immediately after using and before
cleaning.
• Do not allow to be used as a toy. Close attention is necessary when this quilting machine is used by
or near children.
• Use this quilting machine only for its intended use as described in this manual. Use only
attachments recommended by the manufacturer as contained in this manual.
• Never operate this quilting machine if it has a damaged cord or plug, if it is not working properly, if
it has been dropped or damaged, or dropped into water. Return the quilting machine to the nearest
authorized dealer or service center for examination, repair, electrical or mechanical adjustment.
• Never operate the machine with any air openings blocked. Keep ventilation openings of the
machine free from the accumulation of lint, dust, and loose cloth.
• Never drop or insert any object into any opening.
• Do not use outdoors.
• Do not operate where aerosol (spray) products are being used or where oxygen is being
administered.
• To disconnect, shut down the computer, then disconnect all cables.
• Do not unplug by pulling on cord. To unplug, grasp the plug, not the cord.
• Keep ngers away from all moving parts.
• Always unplug the machine from the electrical outlet when removing covers, lubricating, or when
making any other user servicing adjustments mentioned in the instruction manual.
• This appliance is not intended for use by persons (including children) with reduced physical,
sensory, or mental capabilities, or lack of experience or knowledge, unless they have been given
supervision or instruction concerning use of the appliance by a person responsible for their safety.
• Use only the power cord set provided by the manufacturer or a certied replacement set from the
manufacturer.
2. Important Safety Instructions

www.babylock.com
2.2 | Safety
Read these instructions before using the machine
To use the machine safely
1. Keep hands and loose clothing away from wheels, gears or other moving parts.
2. Turn the machine off and unplug the cord in the following cases:
• when you have stopped using the machine
• when you replace or remove the quilting machine needle or any other part
• in case of failure when you use the machine
• when you check or clean the machine
• when you leave the machine unattended
3. Connect the machine directly to the wall outlet. Do not use extension cords.
To increase the life of your machine
1. Do not store this machine in areas exposed to direct sunlight or high humidity. Never use or
store the machine near a heater, an iron, a halogen lamp or other hot things.
2. Clean the computer monitor with a soft, lint-free rag. If necessary, dampen the rag with a small
amount of isopropyl alcohol. Do not use any other cleaners on the computer monitor.
3. Use only neutral soaps or detergents to clean the carriage. Benzene, solvents and scouring
powders can damage the machine and therefore should never be used.
4. Do not drop or bump the machine.
5. Always consult the manual to replace or x any other part of the machine.
To repair or adjust the machine
If the machine breaks down or needs adjustment, rst check the troubleshooting chart in the
appendix to inspect and adjust the machine yourself.
How to use this manual
Notes, important notes, and cautions
NOTE: A NOTE indicates important information that helps you make better use of Pro-
Stitcher.
ÂIMPORTANT: An IMPORTANT note provides information that is essential to properly using
your Pro-Stitcher.
UCAUTION: A CAUTION indicates a potential for causing harm to your quilting machine, the
quilt, or to yourself.

www.babylock.com Safety | 2.3
Conservez ces consignes
Cette machine est destinée à un usage domestique.
Avertissement
Baby Lock et ses représentants ne sont en aucun cas juridiquement responsables des dommages
causés à Pro-Stitcher lorsque cellle-ci est utilisée de manière inadéquate ou non conforme aux
consignes énoncées dans ce manuel ou lorsqu'elle est utilisée sur des cadres de machine à
quilter non recommandés par Baby Lock.
Lisez toutes les consignes avant d'utiliser le produit
Lorsque vous utilisez une machine, vous devez toujours prendre des précautions de sécurité de
base, notamment ce qui suit : lisez toutes les consignes avant d'utiliser le produit.
AVERTISSEMENT : pour réduire le risque de brûlures, d'incendie, de
choc électrique ou de blessures :
Ne jamais laisser la machine à quilter Pro-Stitcher sans surveillance lorsqu'elle est branchée.
Débranchez toujours la machine de la prise électrique immédiatement après usage et avant de la
nettoyer.
• Ne pas l'utiliser comme un jouet. Il est nécessaire de faire preuve de vigilance lorsque cette
machine à quilter est utilisée à côté ou à proximité d'enfants.
• Utilisez cette machine à quilter uniquement pour l'usage prévu décrit dans ce manuel. Utilisez
uniquement les accessoires recommandés par le fabricant décrits dans ce manuel.
• Ne jamais utiliser cette machine à quilter si le cordon ou la che est endommagé, si elle ne
fonctionne pas correctement, si on l'a fait tomber ou endommagé, ou si elle est tombée dans l'eau.
Renvoyez la machine à quilter au revendeur ou centre de service après-vente agréé le plus proche
pour examen, réparation, ou réglage électrique ou mécanique.
• Ne jamais utiliser la machine si des ouvertures d'air sont bloquées. Gardez les ouvertures de
ventilation de la machine libérées d'accumulation de peluches, poussières et morceaux de tissu.
• Ne jamais faire tomber ou insérer un objet dans une ouverture.
• Ne pas utiliser à l'extérieur.
• Ne pas utiliser là où des aérosols (vaporisateurs) sont utilisés ou de l'oxygène est administré.
• Pour déconnecter, arrêtez l'ordinateur, puis débranchez tous les câbles.
• Ne pas débrancher en tirant sur le cordon. Pour débrancher, saisir la che, non le cordon.
• N'approchez pas les doigts des parties mobiles.
• Débranchez toujours la machine de la prise électrique pour retirer des couvercles, lubrier, ou pour
tout autre réglage d'entretien de l'utilisateur mentionné dans le manuel d'instruction.
• Cet appareil n'est pas destiné intended à être utilisé par des personnes (y compris les enfants)
dotées de facultés physiques, sensorielles, ou mentales réduites, ou manquant d'expérience ou de
connaissances, sauf si elles ont été formées et encadrées sur l'utilisation de cet appareil par une
personne responsable de leur sécurité.
• Utilisez uniquement le cordon d'alimentation fourni par le fabricant ou une pièce de rechange
certiée par le fabricant.
Consignes de sécurité importantes
www.babylock.com
2.4 | Safety
Lisez ces consignes avant d'utiliser la machine.
Pour utiliser la machine en toute sécurité
1. N'approchez pas les mains et les vêtements amples des roues, des engrenages ou des autres
pièces mobiles.
2. Mettez la machine hors tension et débranchez le cordon dans les cas suivants :
• lorsque vous avez ni d'utiliser la machine
• lorsque vous remplacez ou retirez l'aiguille ou une autre pièce de la machine à quilter
• en cas de défaillance lorsque vous utilisez la machine
• lorsque vous inspectez ou nettoyez la machine
• lorsque vous laissez la machine sans surveillance
3. Connectez la machine directement à la prise murale. Ne pas utiliser de rallonges.
Pour augmenter la durée de vie de votre machine
1. Ne pas ranger cette machine dans des endroits exposés à la lumière directe du soleil ou à
une forte humidité. Ne jamais utiliser ni ranger la machine à proximité d'un radiateur, d'un fer à
repasser, d'une lampe halogène ou d'autres objets brûlants.
2. Nettoyez l'écran d'ordinateur avec un chiffon doux non pelucheux. Au besoin, humidiez le
chiffon avec une petite quantité d'alcool isopropylique. Ne pas utiliser d'autres produits de
nettoyage sur l'écran d'ordinateur.
3. Utilisez uniquement des savons ou détergents neutres pour nettoyer le chariot. Le benzène,
les solvants et les poudres à récurer peuvent endommager la machine et ne doivent donc
jamais être utilisés.
4. Ne pas faire tomber ou cogner la machine.
5. Consultez toujours le manuel pour remplacer ou réparer toute autre pièce de la machine.
Pour réparer ou régler la machine
• Si la machine tombe en panne ou doit être réglée, consultez d'abord les consignes de
dépannage gurant en annexe pour inspecter et régler vous-même la machine.

www.babylock.com BLPS6 - CJ Installaon Guide | 3.1
3. Installation
Congratulations on your Pro-Stitcher®Purchase
Baby Lock is proud to offer you user-friendly quilting machines and computer-guided machines
with the latest technology and the best value for your money. Because the world of computer-
guided quilting is constantly changing, we invite you to keep up with us by checking our website
frequently for news, software updates and tutorials.
Go to www.babylock.com for:
1. Updates to the Pro-Stitcher software (provided FREE as long as you own your machine)
2. A full-color version of this manual that can be downloaded and printed
3. Updates to this manual
4. Customer Support: www.babylock.com/support
Machine Packaging Information
Keep the carton and packing materials. You will need them in the event that you need to return the
machine to your Baby Lock retailer or send it for repair.
If you do not pack the machine properly or if you do not use the correct packaging materials, the
machine could be damaged. Baby Lock is not liable for damage that occurs during return shipping.

3.2 | BLPS6 - CJ Installaon Guide www.babylock.com
Optional U.S. Grounding
This product is for use on a nominal 120 V or nominal 220 V circuit, and has a grounding plug that
looks like the plug illustrated in sketch A above. A temporary adapter, which looks like the adapter
illustrated in sketches B and C, may be used to connect this plug to a 2-hole receptacle as shown
in sketch B if a properly grounded outlet is not available. The temporary adapter should be used
only until a properly grounded outlet can be installed by a qualied electrician. The green colored
rigid ear, lug, and the like, extending from the adapter, must be connected to a permanent ground
such as a properly grounded outlet box cover. Whenever the adapter is used, it must be held in
place by the metal screw.
ÂIMPORTANT: In Canada, the use of a temporary adapter is not permitted by the Canadian
Electric Code.
Pro-Stitcher Parts List for Baby Lock Crown Jewel
NOTE: The parts photographed in this manual may look different from the ones you
received.
A. Blue X-axis Flexirack (12 feet)
B. X-axis Flexirack clamps and screws
C. 3/32-inch drill bit
ITEM QUANTITY PHOTO
1
4
1
GROUNDED OUTLET BOXES
METAL
SCREW
TAB FOR
GROUNDING
SCREW

www.babylock.com BLPS6 - CJ Installaon Guide | 3.3
D. Emergency base-plate repair kit
E. Pro-Stitcher Carriage
NOTE: The Pro-Stitcher carriage
assembly may be different
from the one pictured.
F. Computer bracket
NOTE: The computer bracket
assembly may be different
from the one pictured.
ITEM QUANTITY PHOTO
1
1
1
G. Y-encoder circuit 1
H. Y-axis mounting bracket assembly 1
I. Power cord assembly, 12 foot with ferrite 1
J. Adhesive cable mounting clips 4
K. USB ash drive 1
L. Pro-Stitcher Designer Software
1
M. USB cable 1

3.4 | BLPS6 - CJ Installaon Guide www.babylock.com
N. Computer power cord
O. Manual engagement / disengagement tool
Q. Pro-Stitcher tablet computer
NOTE: The model of the Pro-Stitcher
tablet computer may be different
from the one pictured.
ITEM QUANTITY PHOTO
1
1
1
P. Harness cable
1
R. Pro-Stitcher Premium Quick
Reference Guide 1
Quick Reference Guide
THE PRO-STITCHER WORKSPACE
This guide will help you through the learning curve of the user interface, nding
commonly used features,and becoming familiar with new features you’ll love using.
Quick
Access
Toolbar:
Buttons shown
here arealways
visible.Youcan
add your favor-
ite commands
to this toolbar.
Workspace
Toolbar:
Buttons shown
here are
alwaysvisible .
Only one
button can be
selected at a
time.
PREMIUM
Tabs:Select any tab to display
its buttons and functions.
Ribbon: The buttons on the Ribbon
change according to which tab is selected.
SelectAll Select None
Multi Select
Zoom to
Design
Zoom to
Area
Actual
Size
Refresh
Zoom the
workspace:
Touchthe plus
(+) or minus (--)
buttons to zoom
in or out,
or use the slider
bar:slide right to
zoom in or left
to zoom out.
Help button: Select the Help tab for on-screen indexed
and hyperlinkedhelp content. Select the Help button and then
click a button or tab on the screenfor context-sensitive help.
Sidebar: The
sidebar includes
buttons for the
functions tied
to the various
Ribbon buttons.
The Sidebar Tabs
relateto other
aspects of the
workspace.
Open or
Hide Sidebar
Rulers Jump(purple dotted line) not stitched
Pan Scroll
Bars
Design Bounding Box
(blue)
Design End Point
(red)
Design Start Point
(green)
Design Rubber Band
(green)
Pro-Stitcher Premium Quick Reference Guidewww.ProStitcher.com 01/2020
S. Pro-Stitcher Installation Guide
(this guide) 1

www.babylock.com BLPS6 - CJ Installaon Guide | 3.5
Installation
NOTE: Baby Lock recommends installation by an authorized Pro-Stitcher retailer,
if available.
Tools required
• Power drill
• 4mm Allen wrench
• 5mm Allen wrench
• Slotted screwdriver (one large and one small)
• Phillips screwdriver (one large and one small)
• Manual engagement/disengagement tool (see Parts List, item O)
Installation of the X-Rack and Y-Rack
To install the X-Rack
1. Remove the blue Flexirack (see Parts List, item
A) and the Pro-Stitcher carriage (see Parts List,
item E) from the box.
2. Place the Pro-Stitcher carriage on the frame.
Starting at one end of the table, begin mounting
the blue Flexirack to the front of the table while
aligning it to the front white gear on the carriage.
Peel back a few inches of the pink protective
layer of the tape.

3.6 | BLPS6 - CJ Installaon Guide www.babylock.com
3. Use the carriage as a guide and align the blue
Flexirack with the white gear along the length
of the table (see arrow at right), removing the
pink protective layer and pressing downward on
the blue Flexirack while moving down the entire
length of the table.
4. Double check the alignment of the carriage white gear with the blue Flexirack by rolling the
carriage along the entire length of the table.
5. Trim the Flexirack to length using a knife or wire
cutters. The blue Flexirack does not need to
extend the full width of the table and can be a
couple of inches shorter on both ends.
6. At both ends of the blue Flexirack, use two of the
small metal clamps (see Parts List, item B) to
hold the ends rmly in place. The clamps have
a hole through the center and a lip on one end.
The lip should be on the side opposite the blue
Flexirack. Place the clamps where they will be
attached and drill pilot holes using the 3/32-inch
drill bit and then use a Phillips screwdriver to
fasten the clamps on both sides of the Flexirack
to the table.
Lip

www.babylock.com BLPS6 - CJ Installaon Guide | 3.7
UCAUTION: Do not use the larger drill bit included in the emergency repair kit, as this is
the wrong size for the Flexirack clamps.
NOTE: As an alternative, use one clamp at each end. Slide the lip of the clamp over the
last gear of the blue Flexirack, drill a pilot hole, and screw in place.
To install the Y-Rack
7. Carefully lay the quilting machine on its power
pod side (the left side, looking from the front).
UCAUTION: Pay close attention to the
Y-encoder mounted to the rear left wheel so
you do not damage the Y-encoder bracket.
Underneath the base plates, near the wheels
on the C-pod side of the machine (the side with
the thread tensioner and guides) there will
be either two screws or two holes. If the
screws are there, use a large at screwdriver
to remove the screws.
8. Attach the Y-Rack to the bottom of the front and
rear base plates. The blue Flexirack should be
toward the middle of the machine while the bolt
holes should be toward the outside. Use the
screws that were removed from the front and rear
base plates (or use the two smallest screws in
the Base Plate Repair Kit [see Parts List, item D]
if your machine had no screws here).
UCAUTION: Be careful not to over-tighten the screws as the base plate holes will strip
easily. In case of accidentally cross-threading or stripping one of the base plate holes, an
emergency repair kit (see Parts List, item D) has been provided.
9. If the screws in the base plates do not have slotted heads and a nut driver cannot be tted
over the screw head, use one of the provided slotted screws as a replacement (see Parts
List, item D) and use a slotted screwdriver to tighten the screws in place.

3.8 | BLPS6 - CJ Installaon Guide www.babylock.com
Y-encoder circuit board replacement
ÂIMPORTANT: This step is required only if the circuit board on the Y-encoder is blue. If the
Y-encoder has a black circuit board, skip ahead to the next step.
Replace the Y-encoder circuit board with the one in the package (see Parts List, item G) if the
circuit board is blue and does not have a 3-pin connector attached. It is held in place with one
screw and ve connecting pins.
To replace the Y-encoder
1. Unplug the stitch regulator cable from the Y-encoder.
2. Remove the screw that holds the circuit board in
place with a small Phillips screwdriver.
3. Gently pull the circuit board outward toward the front of the quilting machine (the same
direction the screw came out).
Replace this style
Y-encoder circuit board.
This styleY-encoder circuit board does
not need to be replaced.

www.babylock.com BLPS6 - CJ Installaon Guide | 3.9
4. Align the new Y-Encoder circuit board so the
ve pins on the encoder t into the ve-pin
connector on the circuit board and gently push
into position. The screw hole on the circuit board
should match up with the hole in the encoder
housing.
5. Replace the Phillips screw.
6. Plug the stitch regulator cable into the new Y-encoder circuit board.

3.10 | BLPS6 - CJ Installaon Guide www.babylock.com
To set up the Pro-Stitcher carriage
1. Place the Pro-Stitcher carriage on the frame system with the connectors toward the back
of the frame. Carefully lift the quilting machine and place it on the carriage so the wheels
engage the aluminum carriage tracks, making sure not to set the wheels on top of the stitch
regulator cable. This is easier to do with two people, one at each end of the quilting machine.
2. With one end of the stitch-regulator cable
plugged into the machine’s C-Pod (A, right) and
the middle connector plugged into the quilting
machine’s Y-encoder (B, below), plug the other
end of the cable into the carriage X-encoder (C,
lower right).
3. Attach one end of the harness cable (see Parts
List, item P) into the connector on the right side
of the power supply. Tighten the side screws. You
will plug the other ends to the bracket as part of
step 5 when you attach the tablet computer.
4. Two long power cords are utilized, one for the
quilting machine and another for the Pro-Stitcher
carriage.
5. Connect one end of the twelve-foot power cord (see Parts List, item I) to the carriage power
inlet and secure the power cord into the Pro-Stitcher carriage by pressing the wire cord
retainer onto the cord (D). The other end will be plugged into the power outlet later on,
after all connections have been made.
D
C
A
B

www.babylock.com BLPS6 - CJ Installaon Guide | 3.11
6. Plug one end of the machine’s power cord into
the quilting machine’s P-pod upper power outlet.
The other end of the machine power cord will
plug into the power outlet later on. Do not plug it
into the wall at this time; it will be plugged into the
power outlet later on after all connections have
been made.
7. The black cables attached to the Pro-Stitcher
carriage should be routed up between the rear
handles and the quilting machine, toward the
right-hand side of the machine (looking at the
machine from the back). Attach the cable clips
(see Parts List, item J) and route the cable
accordingly.
8. The small black cable with the black 3-connector
clip should be routed underneath the P-Pod and
snapped into the quilting machine’s Y-encoder.
The cables that run from the carriage up to the
Y-encoder should be clipped into the cable clip
under the rear handlebar to help prevent these
cables from getting caught on the edges of the
carriage.

3.12 | BLPS6 - CJ Installaon Guide www.babylock.com
9. Once again verify that the y-axis gear engages
the blue Flexirack for the y-axis.
• Do this by looking from the back of the
machine between the bottom of the quilt-
ing machine and the top of the carriage. If
necessary, use the manual engagement /
disengagement tool to move the gears so
they engage.
• If horizontal adjustment is needed to ensure
that at least half the white gear and blue Flex-
irack are interlocking, loosen the two screws
that mount the y-axis bracket to the base
plates and push the bracket in the direction
necessary while re-tightening the screws.
• Both screws can be adjusted with the quilting
machine on the carriage. Pull the machine to
the front to access the front screw and to the
rear to access the rear screw.
• Pull the quilting machine to the rear of the
carriage and ensure the rear of the Y-axis
bracket does not collide with the black plas-
tic track retainer on the rear of the carriage.
Adjust the Y-bracket if needed.
ÂIMPORTANT: If necessary, use the manual
engagement/disengagement tool to move
the gears so they engage. Insert the end of
the tool into the hole at the front of the Pro-
Stitcher Carriage.
10.With the power cable unplugged and the motors in the engaged position (use the manual
engagement/disengagement tool if necessary), ensure that as the quilting machine is moved
in both the X and the Y directions, the corresponding gears are rotating as well.

www.babylock.com BLPS6 - CJ Installaon Guide | 3.13
To attach the tablet computer
1. Disconnect the front handlebar cable from the side of the machine’s head. Then remove the
handlebars from the front of the quilting machine by removing the three hex-head bolts with a
5mm Allen wrench.
If you’re having difculty reaching the front handlebar cable, rst remove two of the hex-head
bolts and loosen the third bolt. Then, rotate the handlebar slightly to provide easier access to
the handlebar cable.
2. Make sure the three handlebar bolts are in the
front handlebar and protruding out the bottom of
the handlebar.
3. Position the handlebar over the computer bracket
such that the screws go through the three holes
in the bracket.
4. Secure the handlebar and bracket in place on the machine head using the three
handlebar bolts.
Table of contents
Other Baby Lock Sewing Machine Accessories manuals

Baby Lock
Baby Lock BLQ2-AGF User manual

Baby Lock
Baby Lock BLES8-CST User manual

Baby Lock
Baby Lock Solaris BLSAU User manual

Baby Lock
Baby Lock Momentum BLQM Quick setup guide

Baby Lock
Baby Lock BLQ2-OT User manual

Baby Lock
Baby Lock BLRG20ST Technical manual

Baby Lock
Baby Lock GALLANT BLGT15-RH User manual

Baby Lock
Baby Lock Pro-Stitcher Instruction Manual

Baby Lock
Baby Lock General Purpose Zig Zag Foot User manual

Baby Lock
Baby Lock BLQ2-QGF User manual