manuals.online logo
Brands
  1. Home
  2. •
  3. Brands
  4. •
  5. BaByliss
  6. •
  7. Hair Styler
  8. •
  9. BaByliss BELISS PO230E User manual

BaByliss BELISS PO230E User manual

MARQUE: BABYLISS
REFERENCE: PO230E BELISS
CODIC: 2791765
3
4
4
2
2
3
3
1
1
5
5
6
6
4
BCD
A
5
EFG
HI
6
FFrraannççaaiiss••EEnngglliisshh
1
1.
.T
Te
en
ns
si
io
oC
Co
on
nt
tr
ro
ol
lS
Sy
ys
st
te
em
m
4 règlages pour lisser les : 1. cheveux ondulés, 2. bouclés, 3. frisés, 4.
crépus
2
2.
.P
Pe
ei
ig
gn
ne
ed
dé
ém
mê
êl
la
an
nt
t,
,sépare légèrement les mèches de cheveux pour
mieux les préparer au lissage.
3
3.
.D
Do
ou
ub
bl
le
er
ra
an
ng
gé
ée
ed
de
ep
pe
ei
ig
gn
ne
es
sl
li
is
ss
sa
an
nt
ts
sm
mo
ob
bi
il
le
es
s(
(2
2x
x9
9d
de
en
nt
ts
sM
Me
et
ta
al
l-
-
C
Ce
er
ra
am
mi
ic
c)
).
.La double tête de lissage de votre nouveau BE Liss rend
son maniement encore plus aisé, le lissage peut se faire avec une
seule main! La double rangée de peignes permet deux lissages en un
seul passage pour plus d’efficacité et de rapidité.
Les peignes inclinés pénètrent les cheveux facilement et vont au plus
près de la racine.
4
4.
.G
Gr
ri
il
ll
le
eM
Me
et
ta
al
l-
-C
Ce
er
ra
am
mi
ic
c,
,apporte une brillance extrême aux cheveux
tout en les respectant.
5
5.
.D
Do
ou
ub
bl
le
ei
in
nt
te
er
rr
ru
up
pt
te
eu
ur
r.
.2 vitesses et 3 températures peuvent être
combinées pour s’adapter au mieux à chaque type de cheveux.
6
6.
.T
To
ou
uc
ch
he
e“
“a
ai
ir
rf
fr
ra
ai
is
s”
”.
.Le coup d'air frais en fin de lissage fixe la coiffure
pour un effet longue durée.
7
7.
.C
Co
on
nc
ce
en
nt
tr
ra
at
te
eu
ur
ru
ul
lt
tr
ra
a-
-f
fi
in
n(8mm seulement), qui vous garantit une
précision optimale dans la mise en forme de vos cheveux.
1
1.
.T
Te
en
ns
si
io
oC
Co
on
nt
tr
ro
ol
lS
Sy
ys
st
te
em
m
4 settings to straighten: 1. wavy hair, 2. curly hair, 3. very curly hair, 4. frizzy
hair
2
2.
.U
Un
nt
ta
an
ng
gl
li
in
ng
gc
co
om
mb
b.
.Slightly separates the hair locks in order to
prepare them better for straightening.
3
3.
.D
Do
ou
ub
bl
le
er
ro
ow
wo
of
fm
mo
ov
vi
in
ng
gs
st
tr
ra
ai
ig
gh
ht
te
en
ni
in
ng
gc
co
om
mb
bs
s(
(2
2x
x9
9M
Me
et
ta
al
l-
-C
Ce
er
ra
am
mi
ic
c
t
te
ee
et
th
h)
).
.The double straightening head of BE Liss eases its handling
even more, straightening can be achieved with a single hand! The
result of the straightening is 2x faster as only one passing through is
needed!
The sloped combs easily penetrate the hair and go as close to the roots
as possible.
4
4.
.M
Me
et
ta
al
l-
-C
Ce
er
ra
am
mi
ic
cg
gr
ri
id
d,
,gives an extreme shine to the hair while
respecting it.
5
5.
.D
Do
ou
ub
bl
le
es
sw
wi
it
tc
ch
h.
.2 speeds and 3 temperatures may be combined in
order to adapt perfectly to every hair type.
6
6.
.T
Th
he
e'
'c
co
oo
ol
la
ai
ir
r'
'b
bu
ut
tt
to
on
n. A shot of cool air at the end of straightening
sets the movement of the hair and gives it a 'long-lasting' effect.
7
7.
.U
Ul
lt
tr
ra
a-
-s
sl
li
im
mc
co
on
nc
ce
en
nt
tr
ra
at
to
or
rn
no
oz
zz
zl
le
e(only 8 mm), which guarantees
optimal precision in shaping your hair.
TTOOUUTTSSAAVVOOIIRRSSUURR
K
Kn
no
ow
we
ev
ve
er
ry
yt
th
hi
in
ng
ga
ab
bo
ou
ut
t
7
FFrraannççaaiiss••EEnngglliisshh
U
UN
NS
SE
EC
CH
HE
E-
-C
CH
HE
EV
VE
EU
UX
XU
UL
LT
TR
RA
AP
PU
UI
IS
SS
SA
AN
NT
T
•U
UN
NE
EP
PU
UI
IS
SS
SA
AN
NC
CE
EE
EX
XC
CE
EP
PT
TI
IO
ON
NN
NE
EL
LL
LE
E
Equipé d'une turbine professionnelle, ce sèche-cheveux ultra-
puissant (2000Watts) vous permet d’accélérer le pré-séchage et
d'obtenir un séchage très rapide.
• L
LA
AT
TE
EC
CH
HN
NO
OL
LO
OG
GI
IE
EI
IO
ON
NI
IC
C
Elle permet de maîtriser l'électricité statique et aussi de renforcer
l'efficacité de soins capillaires non rincés. Elle facilite votre
coiffage et optimise la brillance et la douceur de vos cheveux. Ils
seront plus faciles à coiffer et à mettre en forme.
U
UN
NO
OU
UT
TI
IL
LD
DE
EL
LI
IS
SS
SA
AG
GE
EE
EX
XC
CL
LU
US
SI
IF
F(
(A
A)
)
Un outil triple action breveté : Be Liss réunit 3 fonctions en 1
1) Un peigne démêlant prépare le cheveu au lissage.
2) Deux peignes lissants mobiles Metal-Ceramic, dont la structure
en métal leur confère un pouvoir chauffant élevé et durable.
Complété du revêtement Ceramic offrant un glissement parfait sur
le cheveu, BE Liss garantit un lissage efficace et rapide
(1700Watts), dans le respect total de la fibre capillaire.
3) L’action combinée de la grille et des dents Metal-Ceramic vous
garantit une brillance extrème!
A
AN
NU
UL
LT
TR
RA
A-
-P
PO
OW
WE
ER
RF
FU
UL
LH
HA
AI
IR
RD
DR
RY
YE
ER
R
•
•E
EX
XC
CE
EP
PT
TI
IO
ON
NA
AL
LP
PO
OW
WE
ER
R
Equipped with a professional turbine, this powerful (2000Watts)
hairdryer gives faster pre-drying and very quick drying.
•
•I
IO
ON
NI
IC
CT
TE
EC
CH
HN
NO
OL
LO
OG
GY
Y
Controls static electricity and also enhances the effectiveness of
leave-in hair care. It facilitates your styling and optimises your
hair's shine and softness. It will be easier to style and shape your
hair.
A
AN
NE
EX
XC
CL
LU
US
SI
IV
VE
ES
ST
TR
RA
AI
IG
GH
HT
TE
EN
NE
ER
RA
AT
TT
TA
AC
CH
HM
ME
EN
NT
T(
(A
A)
)
A patented triple-action attachment: Be Liss unites 3 functions in 1
1) An untangling comb prepares your hair for straightening.
2) Two moving Metal/Ceramic straightening combs. The metal
structure of the straightening combs gives them high and long-
lasting heat capacity. The Ceramic coating allows it to glide
perfectly through your hair, BE Liss guarantees quick and efficient
straightening (1700 Watts) while fully respecting the hair fibre.
3) The combined action of the Metal-Ceramic grid and teeth
provides you with an extreme shine!
• “
“T
TE
EN
NS
SI
IO
OC
CO
ON
NT
TR
RO
OL
LS
SY
YS
ST
TE
EM
M”
”
La Recherche BaByliss a déterminé par de nombreuses études à travers
le monde l'existence de 4 types fondamentaux de frisure :
Leur expertise permet aujourd'hui d'apporter à Be Liss une
performance inégalée grâce au Tensio Control System.
Cette technologie brevetée permet d'adapter à chacun des types de
cheveux la tension adéquate pour un lissage parfait : finis les
tiraillements et les cheveux arrachés lors de brushings trop
laborieux.
• “
“T
TE
EN
NS
SI
IO
OC
CO
ON
NT
TR
RO
OL
LS
SY
YS
ST
TE
EM
M”
”
BaByliss Research has discovered through several studies around
the world 4 fundamental kinds of curly hair:
Its expertise lets it give Be Liss unrivalled performance thanks to the
Tensio Control System.
This patented technology adjusts the slide tension to suit each hair
type for perfect straightening: say goodbye to tugging and tearing
hair during painstaking drying.
8
FFrraannççaaiiss••EEnngglliisshh
bouclés
curly hair
frisés
very curly hair
crépus
frizzy hair
Cheveux ondulés
wavy hair
9
FFrraannççaaiiss••EEnngglliisshh
•T
TÊ
ÊT
TE
ER
RO
OT
TA
AT
TI
IV
VE
EÀ
À3
36
60
0°
°
Exclusif, ce système vous apporte un confort d'utilisation
exceptionnel. Vous pouvez désormais travailler le coiffage du côté
droit ou du côté gauche de la chevelure sans fatigue. Lisser les
cheveux les plus longs, gonfler la frange, les racines ou rebiquer les
pointes, tout ceci devient un réel plaisir.
•3
36
60
0°
°
R
RO
OT
TA
AT
TI
IN
NG
GH
HE
EA
AD
D
Exclusive, this system makes the appliance exceptionally
comfortable to use. Now you can style both the right and left sides
of your head without tiring. Straightening very long hair, giving your
fringe and roots body or turning the ends up, all of this becomes a
real joy.
HORIZONTALE /
HORIZONTAL
OBLIQUE /
DIAGONAL
VERTICALE /
VERTICAL
Longueurs
Lenghts
Rebiquer pointes vers l’intérieur
Curling the ends up under
Contours visage
Contours of the face
Racines
Roots
Franges
Fringe
Rebiquer pointes vers l’extérieur
Curling the ends up over
10
FFrraannççaaiiss••EEnngglliisshh
LLIISSSSAAGGEEEETTAAPPEEPPAARREETTAAPPEE
SStteeppbbyysstteeppssttrraaiigghhtteenniinngg
I
IN
NS
ST
TA
AL
LL
LA
AT
TI
IO
ON
NE
ET
TR
RE
ET
TR
RA
AI
IT
TD
DE
ES
SO
OU
UT
TI
IL
LS
S
• Branchez Be Liss
• Fixez l'outil de lissage ou le concentrateur en emboîtant
l'accessoire sur l'appareil jusqu'au « clic ».
• Pour retirer l'accessoire
Pressez les 2 boutons latéraux en le détachant délicatement (
(B
B)
).
P
PR
RE
EP
PA
AR
RA
AT
TI
IO
ON
ND
DE
EV
VO
OS
SC
CH
HE
EV
VE
EU
UX
X
1. Lavez et démêlez soigneusement vos cheveux à l'aide d'un
peigne à grosses dents.
C
Co
on
ns
se
ei
il
ld
de
el
l’
’e
ex
xp
pe
er
rt
t
Commencez toujours le démêlage de vos cheveux mouillés par les
pointes, pour ensuite remonter progressivement. Le démêlage en
douceur empêche la formation de fourches.
2. Préséchez vos cheveux à l'aide de Be Liss, en vous aidant du
concentrateur si besoin.
P
PU
UT
TT
TI
IN
NG
GO
ON
NA
AN
ND
DT
TA
AK
KI
IN
NG
GO
OF
FF
FT
TH
HE
EA
AT
TT
TA
AC
CH
HM
ME
EN
NT
TS
S
•
•Plug in the Be Liss
•
•Place the straightener or concentrator attachment into
position on the appliance.
•
•To remove the attachment
Press the 2 buttons on either side of the appliance while
gently loosening the attachment (
(B
B)
).
P
PR
RE
EP
PA
AR
RI
IN
NG
GY
YO
OU
UR
RH
HA
AI
IR
R
1. Carefully wash and comb out your hair using a wide-tooth comb.
E
Ex
xp
pe
er
rt
t'
's
sa
ad
dv
vi
ic
ce
e
Always start combing wet hair at the ends then slowly work
your way up towards the roots. Gentle combing prevents split ends
from forming.
2. Pre dry your hair with Be Liss, using the concentrator if necessary.
11
FFrraannççaaiiss••EEnngglliisshh
C
Co
on
ns
se
ei
il
ld
de
el
l’
’e
ex
xp
pe
er
rt
t
-Quel que soit votre type de cheveux, commencez le préséchage en
basculant la tête vers l'avant pour mieux décoller les racines et
donner du volume à votre coiffure.
-Si par contre vous souhaitez moins de volume, gardez la tête droite
pour les présécher.
R
RÉ
ÉG
GL
LA
AG
GE
ED
DE
EL
L’
’A
AP
PP
PA
AR
RE
EI
IL
L
• Fixez l'outil de lissage comme expliqué précédemment.
• Pour un maximum d’efficacité, préférez la position III (vitesse/
température).
•Sélectionnez la tension adaptée à votre type de cheveux à l'aide du
Tensio Control System situé sur le côté de l'outil de lissage (
(C
C)
).
C
Co
on
ns
se
ei
il
ld
de
el
l’
’e
ex
xp
pe
er
rt
t
-Pour une première utilisation, choisissez la tension 1 (tension la plus
faible) afin de vous familiariser avec Be Liss.
-Augmentez ensuite graduellement la tension jusqu'à trouver celle
qui vous convient le mieux.
E
Ex
xp
pe
er
rt
t'
's
sa
ad
dv
vi
ic
ce
e
-Whatever type of hair you have, start the pre-drying by
bending at the waist, allowing your hair to fall forward to
better lift the roots and give your style volume.
-If, however, you prefer less volume, stand with your head
straight to pre-dry your hair.
A
AD
DJ
JU
US
ST
TI
IN
NG
GT
TH
HE
EA
AP
PP
PL
LI
IA
AN
NC
CE
E
•
•Attach the straightener attachment as described above.
• For best results, use the appliance set at position III
(Speed/temperature).
•
•Select the tension recommended for your hair type using the Tensio
Control System located on the side of the straightener attachment.
(
(C
C)
)
E
Ex
xp
pe
er
rt
t'
's
sa
ad
dv
vi
ic
ce
e
-The first time you use the attachment, set it at tension 1
(weakest tension) to familiarise yourself with the Be Liss.
-Gradually increase the tension until you find the best setting
for your hair.
12
FFrraannççaaiiss••EEnngglliisshh
P
PO
OS
SI
IT
TI
IO
ON
ND
DE
EL
LA
AT
TE
ET
TE
ER
RO
OT
TA
AT
TI
IV
VE
E
Pour que les 3 étapes ci-dessus puissent être efficacement
réalisées, quelle que soit la zone à lisser, l'outil de lissage est rotatif
(4 positions possibles).
• Pour changer sa position, pressez les 2 boutons latéraux (
(B
B)
), le
faire pivoter et relâcher les 2 boutons jusqu'à obtenir un « clic ».
C
Co
on
ns
se
ei
il
ld
de
el
l’
’e
ex
xp
pe
er
rt
t
Les dents de démêlage doivent idéalement être positionnées vers le
bas et agir en premier lieu, on démêle, et ensuite on lisse...
A
AV
VA
AN
NT
TD
DE
EC
CO
OM
MM
ME
EN
NC
CE
ER
R
T
Tr
ra
av
va
ai
il
ll
le
ez
zp
pa
ar
ré
ét
ta
ap
pe
es
s:
1. Relevez les cheveux du dessus avec une ou plusieurs
pinces pour commencer par les mèches de la nuque et
les mèches du bas.
2. Continuez avec les mèches de l'arrière de la tête et
ensuite les mèches des côtés.
3. Terminez par les mèches du dessus de la tête.
P
PO
OS
SI
IT
TI
IO
ON
NO
OF
FT
TH
HE
ER
RO
OT
TA
AT
TI
IN
NG
GH
HE
EA
AD
D
To carry out the above 3 steps effectively, regardless of the section
to straighten, the straightener attachment rotates (4 possible
positions).
• To change the position, press the 2 buttons on either side of the
appliance (
(B
B)
), turn the attachment, and then release the buttons
rotating the nozzle until it 'clicks' into place.
E
Ex
xp
pe
er
rt
t'
's
sa
ad
dv
vi
ic
ce
e
Ideally, the teeth of untangling comb should be positioned facing
down and used on the hair first: comb through and then straighten
the hair...
B
BE
EF
FO
OR
RE
EB
BE
EG
GI
IN
NN
NI
IN
NG
G
W
Wo
or
rk
ki
in
ns
st
ta
ag
ge
es
s:
1. Clip the upper layer of hair on top of your head to begin with the
hair underneath and at the nape of the neck.
2. Move on to the hair on the back of your head and then on the
sides.
3. Finish with the upper layers of hair.
13
FFrraannççaaiiss••EEnngglliisshh
C
Co
on
ns
se
ei
il
ld
de
el
l’
’e
ex
xp
pe
er
rt
t
Lissage plat ou lissage volume ?
- Pour réduire le volume des cheveux épais ou volumineux, placez
Be Liss au-dessus de la mèche de cheveux (
(F
F)
).
- Si vous avez des cheveux plutôt fins ou sans volume, placez Be
Liss en-dessous de la mèche de cheveux (
(E
E)
), il lissera tout en
décollant les racines et en donnant un effet volume.
L
LI
IS
SS
SE
ER
RL
LE
ES
SL
LO
ON
NG
GU
UE
EU
UR
RS
S
1.Sélectionnez la position horizontale pour l'outil de lissage.
2.Séparez une mèche de cheveux d'environ 5 cm de large.
Tenez Be Liss (peigne démêlant vers le bas) et placez-le à la racine
en veillant à ce que les dents du peigne démêlant
pénètrent bien dans les cheveux (
(D
D)
).
3.En effectuant un léger mouvement du poignet vers
l'intérieur, faites glisser l'appareil lentement sur toute la
longueur du cheveu : l'action des peignes lissants mobiles Metal-
Ceramic est alors à son maximum.(
(E
E)
)
4. Terminez par un coup d'air frais pour fixer la coiffure avec un effet
longue durée.
E
Ex
xp
pe
er
rt
t'
's
sa
ad
dv
vi
ic
ce
e
Smooth or volume straightening?
- To reduce the volume of thick or voluminous hair, place the Be Liss
on top of the section of hair (
(F
F)
).
- If your hair is quite fine or lifeless, place the Be Liss
underneath the section of hair (
(E
E)
), it will straighten while
lifting the roots giving the effect of volume.
S
ST
TR
RA
AI
IG
GH
HT
TE
EN
NI
IN
NG
GT
TH
HE
EL
LE
EN
NG
GT
TH
HS
S
1.Select the horizontal position for the straightener attachment.
2.Separate a section of hair about 5 cm wide. Place the Be Liss
(untangling comb facing down) at the roots ensuring that the teeth
of the untangling comb penetrate the hair fully (
(D
D)
).
3.With a slight twisting motion of the wrist, turn the appliance under
and slide it slowly down the length of your hair: the action of the
moving Metal/Ceramic straightening combs is thus maximised. (
(E
E)
)
4.Finish with a cool-air shot on the section of hair for perfect hold.
14
FFrraannççaaiiss••EEnngglliisshh
R
RE
EB
BI
IQ
QU
UE
ER
RL
LE
ES
SP
PO
OI
IN
NT
TE
ES
S
• V
VE
ER
RS
SL
L'
'I
IN
NT
TE
ER
RI
IE
EU
UR
R
1. Sélectionnez la position horizontale pour l'outil de lissage.
2. Séparez une mèche de cheveux d'environ 5 cm de large. Tenez
Be Liss (peigne démêlant vers le bas) sous la mèche sélectionnée (
(D
D)
).
3. En effectuant un léger mouvement du poignet vers
l'intérieur, faites glisser l'appareil lentement sur les
pointes, en vous aidant au besoin de votre main libre
pour accompagner l'arrondi de la mèche (
(E
E)
).
4. Maintenez la position pendant 5 à 10 secondes :
l'action des
peignes lissants mobiles Metal-Ceramic est alors à son
maximum.
5.
Terminez par un coup d'air frais pour fixer la coiffure avec un effet
longue durée.
• V
VE
ER
RS
SL
L'
'E
EX
XT
TE
ER
RI
IE
EU
UR
R
1. Sélectionnez la position verticale pour l'outil de lissage.
2. Séparez une mèche de cheveux d'environ 5 cm de large. Tenez
le Be Liss (peigne démêlant vers le bas) au dessus de la mèche
sélectionnée.
3. En effectuant un léger mouvement du poignet vers
l'extérieur, faites glisser l'appareil lentement sur les pointes, en
vous aidant au besoin de votre main libre pour accompagner
l'arrondi de la mèche (
(F
F)
). Procédez ensuite comme les étapes 4
et 5 précédentes.
C
CU
UR
RL
LI
IN
NG
GT
TH
HE
EE
EN
ND
DS
S
• U
UP
PU
UN
ND
DE
ER
R
1. Select the horizontal position for the straightener attachment.
2. Separate a section of hair about 5 cm wide. Place the Be Liss
(untangling teeth facing down) under the section of hair (
(D
D)
).
3. With a slight twisting motion of the wrist, turn the appliance
under and slide it slowly towards the ends, using your free hand if
necessary to turn the hair up (
(E
E)
).
4. Hold it for 5 to 10 seconds: the action of the moving
Metal/Ceramic straightening combs is thus maximised.
5. Finish with a cool-air shot on the section of hair for perfect hold.
• O
OU
UT
TW
WA
AR
RD
DS
S
1. Select the vertical position for the straightener attachment.
2. Separate a section of hair about 5 cm wide. Hold the Be Liss
(untangling comb facing down) over the section of hair.
3. With a slight twisting motion of the wrist, turn the appliance over
and slide it slowly towards the ends, using your free hand
if necessary to turn the hair up (
(F
F)
). Then follow instructions under
4 and 5 described above.
15
FFrraannççaaiiss••EEnngglliisshh
T
TR
RA
AV
VA
AI
IL
LL
LE
ER
RL
LA
AR
RA
AC
CI
IN
NE
E
1. Sélectionnez la position verticale pour l'outil de lissage.
2. Séparez une mèche de cheveux de 5 cm de large. Tenez
Be Liss (peigne démêlant vers le haut) sous la mèche
sélectionnée et placez-le à la racine en veillant à ce que les
dents du peigne démêlant pénètrent bien dans les cheveux.
3. Tirez doucement Be Liss jusqu'à 3 cm de la racine environ
et faites-le tourner vers l'intérieur : l'action des peignes lissants
mobiles Metal-Ceramic est alors à son maximum.
4. Maintenez Be Liss parallèle à votre cuir chevelu pendant
5 secondes.
5. Faites ensuite glisser l'appareil lentement jusqu'aux pointes.
6. Terminez par un coup d'air frais pour fixer la coiffure avec un
effet longue durée.
T
TR
RA
AV
VA
AI
IL
LL
LE
ER
RL
LE
ES
SC
CO
ON
NT
TO
OU
UR
RS
SD
DU
UV
VI
IS
SA
AG
GE
E
1. Sélectionnez la position oblique pour l'outil de lissage.
Procédez ensuite comme les étapes 2, 3, 4, 5 et 6 précédentes.
W
WO
OR
RK
KI
IN
NG
GT
TH
HE
ER
RO
OO
OT
TS
S
1. Select the vertical position for the straightener attachment.
2. Separate a section of hair about 5 cm wide. Hold the Be Liss
(untangling comb facing up) under the section of hair and
place it at the roots ensuring that the teeth penetrate the
hair fully.
3. Gently pull the Be Liss to about 3 cm from the roots and turn
under: the action of the moving Metal/Ceramic straightening
combs is thus maximised.
4. Hold the Be Liss parallel to your scalp for 5 seconds.
5. Then slide the appliance slowly towards the ends.
6. Finish with a cool-air shot on the section of hair for perfect hold.
W
WO
OR
RK
KI
IN
NG
GA
AR
RO
OU
UN
ND
DT
TH
HE
EC
CO
ON
NT
TO
OU
UR
RS
SO
OF
FT
TH
HE
EF
FA
AC
CE
E
1. Select the diagonal position for the straightener attachment.
Then follow instructions under 2, 3, 4, 5 and 6 described above.
16
FFrraannççaaiiss••EEnngglliisshh
T
TR
RA
AV
VA
AI
IL
LL
LE
ER
RL
LA
AF
FR
RA
AN
NG
GE
E
•F
FR
RA
AN
NG
GE
EA
AR
RR
RO
ON
ND
DI
IE
E
1. Sélectionnez la position verticale pour l'outil de lissage.
2. Séparez une mèche de cheveux d'environ 5 cm de large.
Tenez Be Liss (peigne démêlant vers le haut) sous la mèche
sélectionnée (
(H
H)
).
3. En effectuant un léger mouvement du poignet vers le haut
pour décoller la racine, faites glisser l'appareil lentement sur
les pointes.
4. Maintenez la position pendant 5 à 10 secondes : l'action des
peignes lissants mobiles Metal-Ceramic est alors à son
maximum.
5. Terminez par un coup d'air frais pour fixer la coiffure avec un effet
longue durée.
•F
FR
RA
AN
NG
GE
EL
LI
IS
SS
SE
E
1. Sélectionnez la position verticale pour l'outil de lissage.
2. Séparez une mèche de cheveux d'environ 5 cm de large.
Tenez Be Liss (peigne démêlant vers le bas) au-dessus de
la mèche sélectionnée.
3. En effectuant un léger mouvement du poignet vers le bas,
faites glisser l'appareil lentement sur les pointes.
4. Terminez par un coup d'air frais pour fixer la coiffure avec un effet
longue durée.
W
WO
OR
RK
KI
IN
NG
GT
TH
HE
EF
FR
RI
IN
NG
GE
E
•R
RO
OU
UN
ND
DE
ED
DF
FR
RI
IN
NG
GE
E
1. Select the vertical position for the straightener attachment.
2. Separate a section of hair about 5 cm wide. Place Be Liss
(untangling comb facing up) under the section of hair (
(H
H)
).
3. With a slight twisting motion of the wrist, turn the appliance upward
to lift the roots and slide it slowly over the ends.
4. Hold for 5 to 10 seconds: the action of the moving Metal/Ceramic
straightening combs is thus maximised.
5. Finish with a cool-air shot on the section of hair for perfect hold.
•S
ST
TR
RA
AI
IG
GH
HT
TE
EN
NE
ED
DF
FR
RI
IN
NG
GE
E
1. Select the vertical position for the straightener attachment.
2. Separate a section of hair about 5 cm wide. Place Be Liss
(untangling comb facing down) over the section of hair.
3. With a slight twisting motion of the wrist, turn the
appliance down and slowly slide it over the ends.
4. Finish with a cool-air shot on the section of hair for perfect hold.
17
FFrraannççaaiiss••EEnngglliisshh
F
FI
IN
NI
IT
TI
IO
ON
NA
AV
VE
EC
CL
LE
EC
CO
ON
NC
CE
EN
NT
TR
RA
AT
TE
EU
UR
R
Une fois le lissage terminé, fixez votre coiffure avec un coup d'air
frais ionique pour éliminer toute trace d'électricité statique.
1. Retirez l'accessoire de lissage en pressant les 2 boutons
latéraux et en le détachant délicatement (
(B
B)
).
2. Fixez le concentrateur en emboîtant l'accessoire sur
l'appareil jusqu'au « clic ».
3. Mettez en marche Be Liss, sur la position I ou II.
4. Actionnez la touche “air frais” et diriger le flux d'air du haut
de la tête vers le bas (
(I
I)
).
E
EN
NT
TR
RE
ET
TI
IE
EN
ND
DE
EL
L'
'A
AP
PP
PA
AR
RE
EI
IL
L
• Débrancher l'appareil et le laisser refroidir complètement avant de le nettoyer. Utiliser
un chiffon humide et un peu de détergent doux puis sécher soigneusement. S'assurer
que l'appareil est complètement sec avant de l'utiliser à nouveau.
Important ! Ne jamais plonger l'appareil dans l'eau ou tout autre liquide.
• Nous vous conseillons de nettoyer l'embout de lissage exclusif régulièrement pour
éviter l'accumulation de cheveux, de produits coiffants, etc. entre les patins lissants.
C
CO
ON
NS
SI
IG
GN
NE
ES
SD
DE
ES
SE
EC
CU
UR
RI
IT
TE
E
•Ne pas immerger dans l'eau ou tout autre liquide. Ne pas utiliser au-dessus ou à proximité
de lavabos ou autres récipients contenant de l'eau. La proximité de l'eau peut également
présenter un danger.
•Ranger l'appareil hors de portée des enfants.
•Débrancher l'appareil après utilisation et avant de le nettoyer.
F
FI
IN
NI
IS
SH
HI
IN
NG
GW
WI
IT
TH
HT
TH
HE
EC
CO
ON
NC
CE
EN
NT
TR
RA
AT
TO
OR
R
Once the straightening is finished, set your style with a shot of ionic
cool air to eliminate all traces of static electricity.
1. Detach the straightener attachment by pressing the 2 buttons on
either side of the appliance and gently remove it (
(B
B)
).
2. 'Click' the concentrator attachment into position on the
appliance.
3. Turn on the Be Liss, set in position I or II.
4. Press the cool-air button, aiming the airflow at the top of your head
first and working down the hair (
(I
I)
).
M
MA
AI
IN
NT
TE
EN
NA
AN
NC
CE
E
• Unplug the dryer and let cool completely before cleaning it. Use a damp cloth and a
little soft detergent then dry carefully. Make sure the appliance is completely dry before
using again.
Important! Never immerse the dryer in water or any other liquid.
• We recommend cleaning the exclusive straightener nozzle regularly to prevent build-up
of hair, styling products and so on between the straightener slides.
S
SA
AF
FE
ET
TY
YP
PR
RE
EC
CA
AU
UT
TI
IO
ON
NS
S
• Never immerse in water or any other liquid. Do not use above or near washbasins or any
other container with water. Using it near water can also be dangerous.
• Store the appliance out of reach of children.
• Unplug the appliance after use and before cleaning.
18
FFrraannççaaiiss••EEnngglliisshh
• Garder le cordon à l'écart des surfaces chaudes. Laisser refroidir l'appareil avant de le ranger.
• Eviter tout contact entre la surface chaude de l'appareil et le visage ou le cou.
• Toujours s'assurer que la tension d'utilisation correspond à celle indiquée sur l'appareil.
• Cesser immédiatement d'utiliser l'appareil si le cordon est endommagé. Le cordon doit être
remplacé par le fabricant, son service après-vente ou une personne de qualification similaire
afin d'éviter tout risque pour l'utilisateur.
• Retourner l'appareil au centre de réparation le plus proche pour inspection, réglages,
réparation électrique ou mécanique. Aucune réparation ne peut être effectuée par l'utilisateur.
• Cet appareil satisfait aux exigences des directives 89/336/C.E.E. (compatibilité
électromagnétique) et 73/23/C.E.E. (sécurité des appareils électrodomestiques), amendées
par la directive 93/68/C.E.E. (marquage CE).
• ATTENTION: les sacs en polyéthylène contenant le produit ou son emballage peuvent
être dangereux. Pour prévenir les risques de suffocation, conserver ces sacs hors de
portée des bébés et des enfants. Ce sac n'est pas un jouet.
• Lorsque l’appareil est utilisé dans une salle de bains, le débrancher après usage car
la proximité de l’eau peut présenter un danger même lorsque l’appareil est arrêté.
Pour assurer une protection supplémentaire à l’installation, l’équipement d’un circuit
électrique alimentant la salle de bains d’un dispositif à courant différentiel résiduel
(DDR) de courant différentiel de fonctionnement assigné n’excédant pas 30mA est
conseillé. Demandez conseil à votre installateur.
E
Eq
qu
ui
ip
pe
em
me
en
nt
ts
sé
él
le
ec
ct
tr
ri
iq
qu
ue
es
se
et
té
él
le
ec
ct
tr
ro
on
ni
iq
qu
ue
es
se
en
nf
fi
in
nd
de
ev
vi
ie
e
Dans l'intérêt de tous et pour participer activement à l'effort collectif de
protection de l'environnement :
• Ne jetez pas vos produits avec les déchets ménagers.
• Utilisez les systèmes de reprise et de collecte qui seraient mis à votre
disposition dans votre pays.
Certains matériaux pourront ainsi être recyclés ou valorisés.
• Keep the cord away from hot surfaces. Allow the hairdryer to cool before storing.
• Avoid contact between the hot surface of the dryer and your face or neck.
• Always ensure that the voltage of the power source used matches that indicated on the
hairdryer.
• Stop using the hairdryer immediately if the cord is damaged. The cord must be replaced by
the manufacturer, its after-sales service or a similarly qualified person to avoid harm to the user.
• Return the hairdryer to the repair centre nearest you for inspection, adjustments, or electrical
or mechanical repairs. The user must not make any repairs to the hairdryer.
•This appliance meets the requirements of Directives 89/336/EEC (electromagnetic
compatibility) and 73/23/EEC (safety of domestic electrical equipment), as amended by
Directive 93/68/EEC (CE marking).
•
WARNING:
:Polythene bags over the product or packaging may be dangerous. To
avoid danger of suffocation, keep away from babies and children. These bags are not
toys.
• If using the appliance in a bathroom, unplug after use as the proximity of water can
be dangerous even if the appliance is switched off. (UK only: this appliance must not
be used in the bathroom). For additional protection,the installation of a residual
current device (RCD) with a rated residual operating current not exceeding 30mA is
advisable in the electrical circuit supplying the bathroom. Ask your installer for advice.
D
Di
is
sc
ca
ar
rd
di
in
ng
ge
en
nd
d-
-o
of
f-
-l
li
if
fe
ee
el
le
ec
ct
tr
ri
ic
ca
al
la
an
nd
de
el
le
ec
ct
tr
ro
on
ni
ic
ce
eq
qu
ui
ip
pm
me
en
nt
t
In everybody's interest and to participate actively in protecting the environment:
• Do not discard these items with your household waste.
• Use return and collection systems available in your country.
Some materials can in this way be recycled or recovered.

This manual suits for next models

1

Other BaByliss Hair Styler manuals

BaByliss CURL SECRET 2 User manual

BaByliss

BaByliss CURL SECRET 2 User manual

BaByliss BIG HAIR PETITE User manual

BaByliss

BaByliss BIG HAIR PETITE User manual

BaByliss STEAM PURE User manual

BaByliss

BaByliss STEAM PURE User manual

BaByliss I PRO 230 STEAM (ST396E) User manual

BaByliss

BaByliss I PRO 230 STEAM (ST396E) User manual

BaByliss Digital Sensor Curl Secret User manual

BaByliss

BaByliss Digital Sensor Curl Secret User manual

BaByliss ST480E User manual

BaByliss

BaByliss ST480E User manual

BaByliss C1100E User manual

BaByliss

BaByliss C1100E User manual

BaByliss Smooth & Wave C2000E User manual

BaByliss

BaByliss Smooth & Wave C2000E User manual

BaByliss 2585U User manual

BaByliss

BaByliss 2585U User manual

BaByliss multistyle 1200 User manual

BaByliss

BaByliss multistyle 1200 User manual

BaByliss Curl Secret C1200E User manual

BaByliss

BaByliss Curl Secret C1200E User manual

BaByliss 2199U User manual

BaByliss

BaByliss 2199U User manual

BaByliss BIG HAIR CARE AIRSTYLER User manual

BaByliss

BaByliss BIG HAIR CARE AIRSTYLER User manual

BaByliss AS121E User manual

BaByliss

BaByliss AS121E User manual

BaByliss Beliss IoniCeramic Series User manual
BaByliss

BaByliss Beliss IoniCeramic Series User manual

BaByliss BE Liss brushing 1000 User manual

BaByliss

BaByliss BE Liss brushing 1000 User manual

BaByliss i curl ipro 230 User manual

BaByliss

BaByliss i curl ipro 230 User manual

BaByliss PRO BAB2469TTE User manual

BaByliss

BaByliss PRO BAB2469TTE User manual

BaByliss 667E User manual

BaByliss

BaByliss 667E User manual

BaByliss MT991E User manual

BaByliss

BaByliss MT991E User manual

BaByliss Sleek Control 235 User manual

BaByliss

BaByliss Sleek Control 235 User manual

BaByliss 2995U User manual

BaByliss

BaByliss 2995U User manual

BaByliss 2990U User manual

BaByliss

BaByliss 2990U User manual
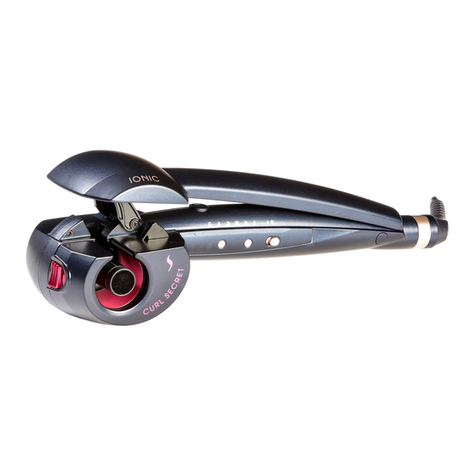
BaByliss 2440BDU User manual

BaByliss

BaByliss 2440BDU User manual

Popular Hair Styler manuals by other brands

Arzum Volume Pro AR 5063 instruction manual

Arzum

Arzum Volume Pro AR 5063 instruction manual

TONDEO Cerion Crimp Original instructions

TONDEO

TONDEO Cerion Crimp Original instructions

Bellezza BZHRCRLERXA user manual

Bellezza

Bellezza BZHRCRLERXA user manual

Remington AIR3D D7777XAU Use & care manual

Remington

Remington AIR3D D7777XAU Use & care manual

wad KARE user manual

wad

wad KARE user manual

Silvercrest SHGD 40 B1 operating instructions

Silvercrest

Silvercrest SHGD 40 B1 operating instructions

Silvercrest SLSD 34D A1 operating instructions

Silvercrest

Silvercrest SLSD 34D A1 operating instructions

Silvercrest SDRB 1000 C1 operating instructions

Silvercrest

Silvercrest SDRB 1000 C1 operating instructions

Silvercrest SRHG 15 A1 operating instructions

Silvercrest

Silvercrest SRHG 15 A1 operating instructions

GAMA CP3 User's guide and warranty

GAMA

GAMA CP3 User's guide and warranty

BaByliss PRO Titanium Expression WAVING WAND manual

BaByliss PRO

BaByliss PRO Titanium Expression WAVING WAND manual

GAMA INNOVA STEAM user manual

GAMA

GAMA INNOVA STEAM user manual

Silvercrest SWCD 1000 A1 operating instructions

Silvercrest

Silvercrest SWCD 1000 A1 operating instructions

Max Pro MOHI JL-1002 instruction manual

Max Pro

Max Pro MOHI JL-1002 instruction manual

Philips HP8660 user manual

Philips

Philips HP8660 user manual

Prestige Ionic Styler instruction manual

Prestige

Prestige Ionic Styler instruction manual

TEFAL Beauty ULTIMATE STYLER HS6020 instructions

TEFAL

TEFAL Beauty ULTIMATE STYLER HS6020 instructions

Argan Woman CURLY STRAIGHT user manual

Argan Woman

Argan Woman CURLY STRAIGHT user manual

manuals.online logo
manuals.online logoBrands
  • About & Mission
  • Contact us
  • Privacy Policy
  • Terms and Conditions

Copyright 2025 Manuals.Online. All Rights Reserved.