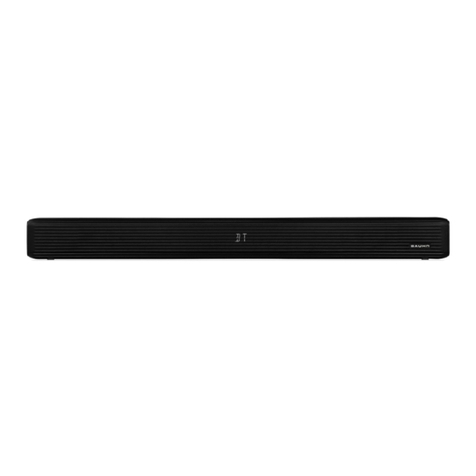
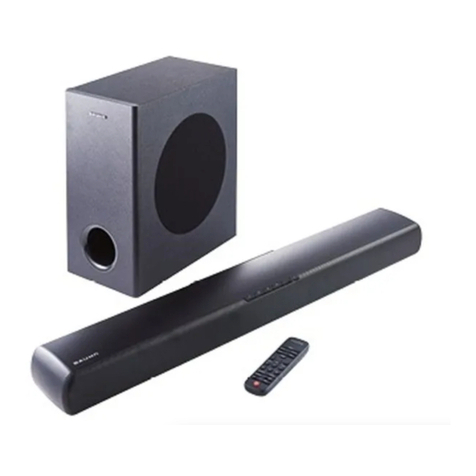
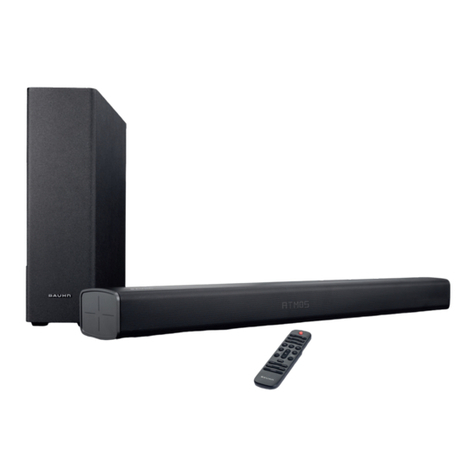
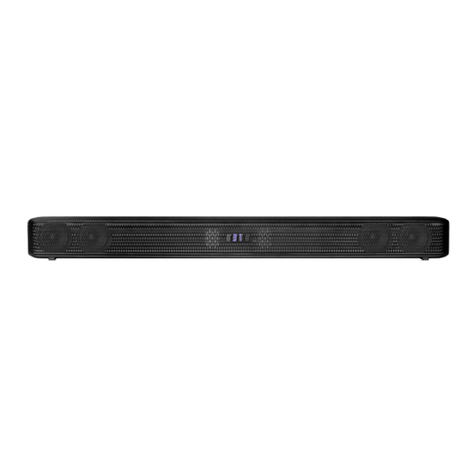
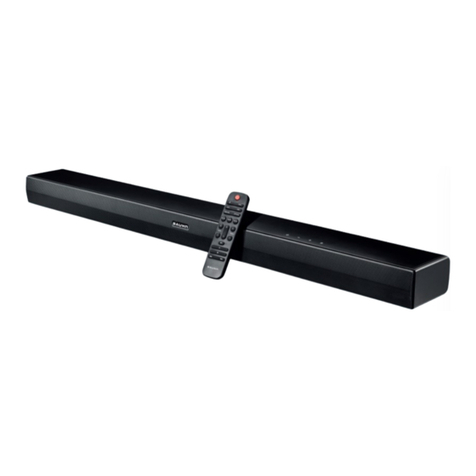
Bauhn P64172 User manual

2.1 DOLBY ATMOS SOUNDBAR
WITH WIRELESS SUBWOOFER
P64172
User Manual

Contents
3
Contents
About this user manual................................................................................... 5
Explanation of symbols ......................................................................................5
Proper use ....................................................................................................... 7
Safety information .......................................................................................... 8
Setting up the device safely ..............................................................................8
Power supply ..................................................................................................... 10
Handling batteries ............................................................................................ 10
Ambient temperature .......................................................................................12
Faults....................................................................................................................12
Package contents ...........................................................................................13
Device overview.............................................................................................14
Front view............................................................................................................14
Rear view.............................................................................................................15
Subwoofer (rear view)...................................................................................... 16
Remote control ...................................................................................................17
Preparation for use ........................................................................................18
Inserting batteries into the remote control................................................... 18
Setting up / mounting soundbar.................................................................... 19
Connecting external devices.......................................................................... 21
Connecting external device via AUX............................................................... 22
Connecting an external device via the optical connection......................... 22
Connecting an external device via the coaxial socket................................. 23
Important information about HDMI CEC/HDMI ARC/HDMI eARC.................. 23
Connecting television via HDMI ARC/HDMI eARC .......................................... 24
Connecting other external devices via HDMI 1 / HDMI 2............................... 24
Connecting USB storage devices.....................................................................25
Setting up the soundbar................................................................................25
Connecting the soundbar and subwoofer to mains power .......................25
Switching on the soundbar / switching to standby mode..........................26
Connecting soundbar to subwoofer ..............................................................26
Connecting an external device via Bluetooth®.............................................27
Operation....................................................................................................... 28
Selecting audio source .....................................................................................28

Contents
4
Setting the volume............................................................................................29
Muting the soundbar........................................................................................29
Selecting equaliser setting ..............................................................................29
Setting the treble and bass .............................................................................29
Setting Vertical Surround sound.....................................................................30
Playback control in USB/Bluetooth® mode...................................................30
Selecting folders for MP3 files..........................................................................30
Maintenance...................................................................................................31
Cleaning..........................................................................................................31
Storing the devices when not in use .............................................................32
Troubleshooting.............................................................................................32
Declaration of conformity ..............................................................................33
Trademark information .................................................................................... 33
Disposal ..........................................................................................................33
Technical data................................................................................................ 34
Privacy statement ......................................................................................... 35
Service information....................................................................................... 36
Legal Notice ....................................................................................................37
Warranty Details ............................................................................................ 38
Repair and Refurbished Goods or Parts Notice............................................ 39

About this user manual
5
About this user manual
Thank you for choosing our product. We hope you enjoy using it.
Read the safety instructions carefully before using the device for the first
time. Note the warnings on the device and in the user manual.
Always keep the user manual close to hand. If you sell the device or give
it away, please ensure that you also pass on this user manual. They are an essential
component of the product.
Explanation of symbols
If a block of text is marked with one of the warning symbols listed below, the hazard
described in that text must be avoided to prevent the potential consequences
described there from occurring.
DANGER!
This signal word indicates a hazard with a high level of risk which, if not avoided, will
result in death or serious injury.
WARNING!
This signal word indicates a hazard with a medium level of risk which, if not avoided,
could result in death or serious injury.
CAUTION!
This signal word indicates a hazard with a low level of risk which, if not avoided, could
result in minor or moderate injury.
NOTICE!
This signal word warns of possible damage to property.
Additional information on using the appliance!

About this user manual
6
Read the user manual and observe its instructions.
Protection class II
Electrical appliances in protection class II are electrical appliances that
permanently have double and/or reinforced insulation and do not
have any connection options for a protective earth. The housing of an
electrical appliance in protection class II that is enclosed in insulated
material can partially or fully act as the additional or reinforced
insulation.
Indoor use
Devices with this symbol are only suitable for use indoors.
Symbol for direct current
Symbol for alternating current
The Australian Regulatory Compliance Mark (RCM) is a single
compliance mark used by suppliers after establishing compliance
with all applicable regulations, including EMC, telecoms, radiocoms,
electromagnetic radiation (EMR) and electrical safety.
Manufactured under license from Dolby Laboratories. Dolby, Dolby
Vision,Dolby Atmos, Dolby Audio, and the double-D symbol are
trademarks of Dolby Laboratories.
The HDMI logo and High-Definition Multimedia Interface are registered
trademarks of HDMI Licensing LLC.
• Check list/Provides information concerning an event that may occur
during use
− Instructions to follow
− Safety instructions to follow

Proper use
7
Proper use
The device is used to play back audio signals. The soundbar is
designed for connecting to televisions. Other devices such as
portable CD or MP3 players, computers/notebooks, smartphones
and stereo systems can also be connected.
The device is only intended for private use and not for industrial/
commercial use.
Please note that no liability will be accepted if the device is used
for an improper purpose:
− Do not modify the device without our express agreement and
do not use any accessories that have not been supplied or
approved by us.
− Only use replacement parts and accessories supplied or
approved by us.
− Observe all the information in this user manual, especially the
safety information. Any other use is deemed improper and may
cause personal injury or damage to property.

Safety information
8
Safety information
WARNING!
Risk of injury due to improper handling.
− This device is not intended to be used by people (including
children) with reduced physical, sensory or mental capacity or
with a lack of experience and/or knowledge unless they use
the device under the supervision of a person responsible for
their safety or if they have been given instructions about how
to use the device safely.
− Do not allow children to play with electrical devices without
adult supervision. Children cannot always properly identify
possible hazards.
Setting up the device safely
WARNING!
Risk of injury due to electric shock!
There is a risk of electric shock due to live wires.
− Select a suitable location to set up the device and make
sure that you do not damage concealed electrical wires or
installation cables when drilling.
− Do not place any containers filled with liquid, such as vases, on
or near the device and power cord. The container may tip over
and the liquid may compromise electrical safety.
− Protect the device and all connected devices from moisture,
drips or splashes of water. Avoid dust, heat and direct sunlight
to prevent malfunctions.
− Do not place any sources of open flame, such as burning
candles, on or near the device.

Safety information
9
− Do not use the device in areas where there is a risk of explosion.
This includes e.g. fuel pumps, fuel storage areas or areas in
which corrosive agents are processed. This device should
also not be used in areas where the air is contaminated with
particles (e.g. flour or sawdust).
− Do not expose the device to extreme conditions; it is only
intended for use in indoor spaces.
Avoid:
• high humidity or wet conditions
• extremely high or low temperatures
• direct sunlight
• open flame
− To prevent overheating, do not cover the device with objects
(newspapers, blankets, etc.).
− Do not place any objects on the cords because this may
damage them.
− Place and operate all components on a stable, level and
vibration-free surface to prevent the device from falling over.
− All multimedia devices that are connected to the device must
meet the requirements of the EU Low Voltage Directive.

Safety information
10
Power supply
WARNING!
Risk of injury due to electric shock!
There is a risk of electric shock due to live wires.
− The power points must be located near the device and be
easily accessible. Lay the cord in such a way that no-one can
step on it or trip over it.
− To disconnect your device from the power supply, switch off the
power point and unplug the device. Always hold on to the plug
itself when unplugging the device. To prevent damage, never
pull on the cord itself.
− Only operate the device from an earthed power point with a
voltage of 100–240V ~ 50/60Hz. If you are not sure about the
electricity supply at the location where you are setting up the
device, check with your local electricity supply company.
− Do not use the plug of the device if the housing or the cord to
the device are damaged.
− Do not under any circumstances open the housing of the
device. Any contact with live parts or modifications to the
electrical and mechanical assembly are dangerous and may
lead to device malfunctions.
− Disconnect the device from the mains power if there is a storm
or if you do not want to use it for an extended period.
Handling batteries
The remote control is battery-operated. Please observe the
following advice concerning the batteries:
− Keep new and used batteries away from children.
− Do not swallow batteries; there is the risk of chemical burns.

Safety information
11
WARNING!
Risk of chemical burns!
The remote control contains two batteries. If these batteries are
swallowed, they can cause severe internal chemical burns within
2 hours that may lead to death.
− If you suspect that batteries may have been swallowed or
entered any part of the body, immediately seek medical
attention.
− Remove flat batteries from the device immediately. Clean the
contacts before inserting new batteries. Avoid contact with
skin, eyes and mucous membranes. Rinse areas affected
by battery acid immediately with plenty of clear water and
immediately seek medical advice. There is a risk of chemical
burns due to battery acid!
− Do not use the remote control if the battery compartment no
longer closes securely and keep it away from children.
WARNING!
Explosion hazard!
Not replacing the batteries properly can create the risk of
explosion.
− There is a risk of explosion if batteries are not changed properly.
Only insert new batteries of the same type. Never use old and
new batteries together.
− Never attempt to recharge the batteries. There is a risk of
explosion!
− Never expose the batteries to excessive heat (such as sunlight,
fire or similar).
− Store batteries in a cool and dry place. Extreme direct heat can
damage the batteries. Do not expose the device to extreme
sources of heat.

Safety information
12
− Do not short-circuit batteries.
− Do not throw batteries into a fire.
− Ensure the correct polarity (+/-) when inserting the batteries.
− Remove flat batteries from the device.
− If you are not going to use the device for an extended period,
remove the batteries.
Ambient temperature
− The device can be operated in an ambient temperature of
between +0°C and +40°C.
− When the device is switched off, it can be stored at
temperatures of between 0°C and +40°C.
− Only use the appliance in dry indoor spaces.
DANGER!
Risk of electric shock!
In the event of significant fluctuations in temperature or humidity,
condensation may cause moisture to build up within the device,
which can cause an electrical short circuit.
− After transporting the device, wait until it has reached the
ambient temperature before operating it.
Faults
− If the device or the power cord is damaged, turn off the power
point immediately and pull out the plug.
− Do not use the device or its accessories if they show signs
of damage or if you see smoke or hear abnormal noises
during operation. If this happens, switch off the power point
immediately and pull out the plug.
− Never try to open or repair the device yourself.
− If there are technical problems, please contact our Service
Centre.

Package contents
13
Package contents
DANGER!
Risk of choking and suffocation!
There is a risk of choking and suffocation through swallowing or
inhaling small parts or plastic wrap.
− Keep packaging away from children.
− Do not allow children to play with the packaging material.
− Packaging material is not a toy!
− Take the product out of the packaging and dispose of all the packaging material.
− Please check your purchase to ensure that all items are included. If anything is
missing, please contact our Service Centre within 14 days of purchase.
− The device must be checked for damage before each use.
− If damage is present, please contact our Service Centre.
The following items are supplied with your product:
• Soundbar
• Subwoofer
• 2 × power cords
• Remote control incl. 2 × AAA LR03 batteries
• Audio cable (3.5 mm jack)
• HDMI cable
• Wall brackets incl. fixings
• User manual and warranty documents

Device overview
14
Device overview
Front view
A
2
1
1Standby LED
2Display
Control buttons
B
3 4 5 6 7 8
3Switch on the soundbar / switch to standby mode
4Select audio source
5Quick press: Select Bluetooth audio source
Press and hold: Put soundbar in Bluetooth pairing mode, disconnect
active Bluetooth connection
6Mute / unmute soundbar
7Decrease volume
8Increase volume

Device overview
15
Rear view
C
9
9Attachment points for wall brackets
Connections
D
10 11 12 13 14 15 16 17
10 AC~ Connection socket for power cord (100–240V 50/60Hz)
11 COAXIAL Coaxial input socket for TV and other audio output devices
12 OPTICAL Optical input socket for TV and other audio output devices
13 USB USB port (5V 500mA) for playing MP3 files
14 AUX Socket for TV and other audio output devices (3.5mm jack)

Device overview
16
15 HDMI OUT
TV eARC/ARC
Output for ARC/eARC-compatible TV and other audio output
devices
16 HDMI 1 Input for DVD player and other audio output devices
17 HDMI 2 Input for DVD player and other audio output devices
Subwoofer (rear view)
E
18
19
20
18 AC~ Connection socket for power cord (100–240V 50/60Hz)
19 Pairing LED
20 PAIR Press and hold: Turn on pairing mode to connect the
subwoofer to the soundbar manually

Device overview
17
Remote control
F
22
23
24
25
26
30
21
28
2931
32
33
34
35
36
39
38
37
27
21 Switch on the
soundbar / switch to
standby mode
22 Select Bluetooth
audio source
23 OPT/COA Select Optical /
Coaxial audio input
24 HDMI eARC Select HDMI eARC
audio input
25 Mute / unmute
soundbar
26 TREBLE +/- Increase / decrease
treble
27 VERTICAL
SURROUND
Switch Vertical
Surround sound on
/ off
28 SPORT Set “Sport” equaliser
sound effect
29 MUSIC Set “Music” equaliser sound effect
30 DIMMER Set brightness level for display lighting
31 MOVIE Set “Movie” equaliser sound effect
32 VOICE Set “Voice” equaliser sound effect
33 +/- Increase / reduce volume

Preparation for use
18
34 BASS +/- Increase / decrease bass
35 / Play previous / next track, fast rewind / forward within a track
36
Start / pause playback
In Bluetooth pairing mode:
Restore Bluetooth connection to the last paired device
37 HDMI 1/2 Select HDMI 1 / HDMI 2 audio input
38 USB Select USB audio input
39 AUX Select AUX audio input
Preparation for use
Inserting batteries into the remote control
Before first use or if the device no longer responds to the remote control, or only
responds poorly, the batteries must be inserted or changed.
To do so, proceed as shown in Fig. 1 and as described below:
− Depress the latch of the battery
compartment lid slightly and then
push it downwards. Pull the battery
compartment lid upwards to
remove it.
− Remove old batteries if present and
dispose of them as required by law.
− Insert two new AAA LR03 batteries.
Pay attention to the correct polarity
when inserting the batteries.
1
− Replace the lid on the battery compartment with the latch pointing up and push
it upward until you hear the latch click into place.

Preparation for use
19
Setting up / mounting soundbar
You have the option of using the soundbar either on a horizontal surface (Fig. 2
Version A) or mounted on a wall using the supplied wall bracket (Fig. 2 version B).
2
AB
Version A – using soundbar on a horizontal surface
NOTICE!
Risk of damage!
There is a risk that the devices may be damaged if not set up
correctly.
− Place and operate all components on a stable, level and
vibration-free surface to prevent devices from falling.
− Some types of aggressive furniture varnish can attack the
rubber feet of devices. If necessary, place the device on an anti-
slip underlay.
− Position the soundbar and the subwoofer on a stable and level surface near
readily accessible power points.
− Set up the subwoofer close to the soundbar to ensure there is no interference
when the devices connect.

Preparation for use
20
Version B – fixing soundbar onto a wall
WARNING!
Risk of injury due to electric shock!
There is a risk of electric shock due to live wires.
− Select a suitable location to mount the device and make
sure that you do not damage concealed electrical wires or
installation cables when drilling.
NOTICE!
Risk of damage!
Risk of damage to devices or property due to improper mounting
of devices.
− Before mounting the soundbar on the wall, check if the wall
has the necessary load-bearing capacity. MEDION AG does not
assume any liability for damage that occurs due to incorrect or
improper mounting.
− Use only the supplied wall brackets for wall mounting.
Proceed as described below to mount the soundbar onto an internal wall:
− Hold the wall brackets at the
desired mounting position and
draw the 4 required drill holes in a
horizontal line (see Fig 3).
The distance between the two wall
brackets is 696mm.
− Drill the holes. For this purpose
use a drill bit appropriate to the
particular subsurface (Ø 5.5–6mm,
depending on the type of wall).
3
696 mm

Connecting external devices
21
− Insert a plug into each of the drill
holes and screw the wall brackets
into the wall as shown in Fig. 4.
Make sure that the slots for hanging
the soundbar are pointing up, as
shown opposite.
4
− Undo the existing screws on
the back of the soundbar at the
attachment points for the wall
brackets 9.
Screw both the supplied wall
mounting screws into the attachment
points on the soundbar.
Leave the screws projecting a little so
that you can then hang the soundbar
on the wall brackets.
5
Position the soundbar with the
projecting screws onto the slots on
the wall brackets, and then push the
soundbar down carefully, until the
screws engage in the wall brackets.
6
Connecting external devices
You can connect a range of different audio output devices to the soundbar, such as a
television, an MP3 or CD player, a receiver, a computer, a USB stick, etc.
− Switch all devices off before connecting them to one another.
Also refer to the user manual for the device you want to connect to the
soundbar.
Other manuals for P64172
1
Table of contents
Other Bauhn Speakers System manuals

Bauhn
Bauhn ASB-0120 User manual

Bauhn
Bauhn AFSB-0320-B User manual

Bauhn
Bauhn ASBBS-0421-B User manual

Bauhn
Bauhn MD 44055 User manual

Bauhn
Bauhn ASBEB-0121 User manual

Bauhn
Bauhn ACSB-1022-B User manual

Bauhn
Bauhn ASB-0417 Guide

Bauhn
Bauhn P64172 User manual

Bauhn
Bauhn ASBW-0718 User manual

Bauhn
Bauhn ASBBS-1020 User manual

Bauhn
Bauhn ASBEB-0919 User manual

Bauhn
Bauhn ASB-0319 User manual

Bauhn
Bauhn ACSB-0122 User manual

Bauhn
Bauhn ACSB-0422-B User manual

Bauhn
Bauhn ASBBS-0322-B User manual

Bauhn
Bauhn SoundMax User manual

Bauhn
Bauhn AFSB-0320-B User manual

Bauhn
Bauhn ASB-0418 User manual

Bauhn
Bauhn P61330 User manual

Bauhn
Bauhn AFSB-0920-B User manual