10 / EN Cooker Hood / User Manual
3 Using the appliance
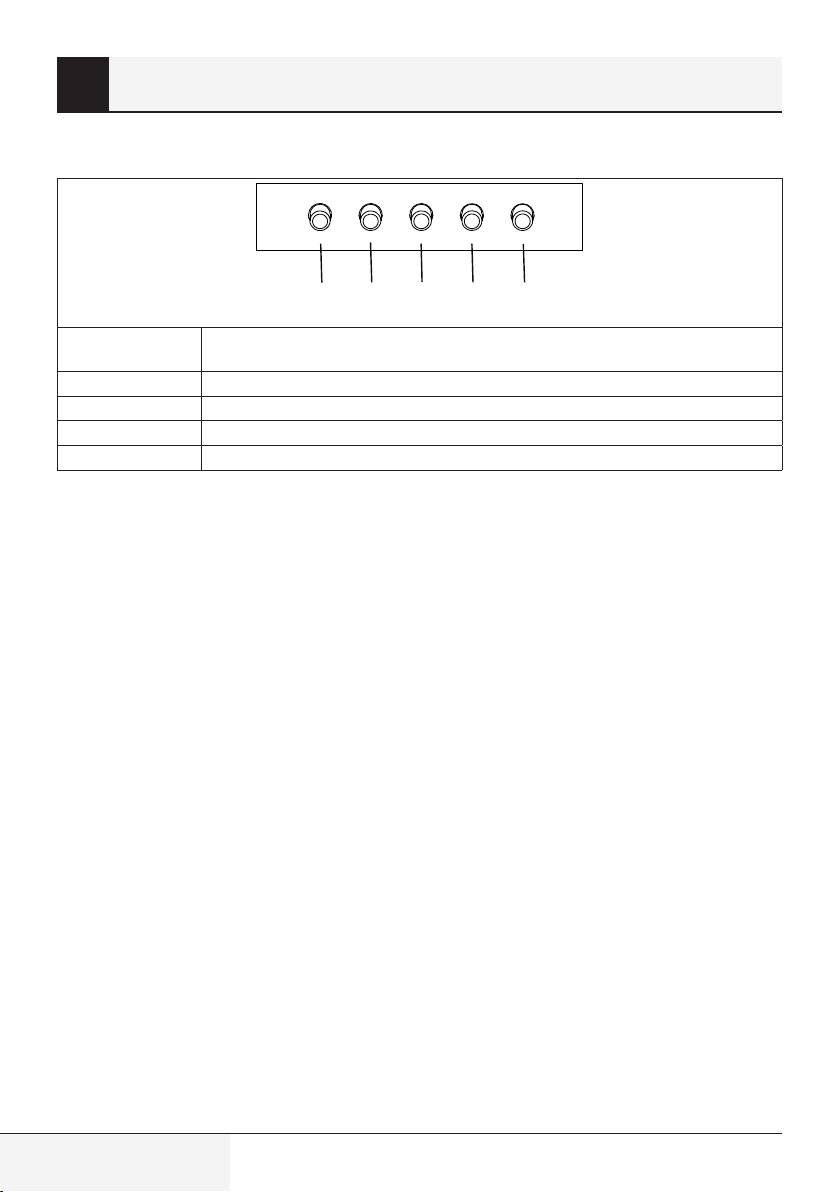
3.1 Controls panel
A : Light on/off Pressing the “a “ button turns on the light. Pressing the button again
switches off the lighting.
B : 1. Speed button Pressing the “1” button activates the hood turbine at minimum speed
C : 2. Speed button Pressing the “2” button activates the hood turbine at medium speed
D : 3. Speed button Pressing the “3” button activates the hood turbine at maximum speed
E : 0. Hood shut off Pressing the “0” button deactivates the hood turbine
•The extractor hood has been designed exclusively for domestic use to eliminate
kitchen smells.
•Never use the hood for purposes other than for which it has been designed.
•Never leave high naked flames under the hood when it is in operation.
•Adjust the flame intensity to direct it onto the bottom of the pan only, making sure
that it does not engulf the sides.
•Deep fat fryers must be continuously monitored during use: overheated can burst
into flames.
3.2 Efficient use in terms of energy saving
•When using your appliance, adjust the speed settings according to vapour and odour
intensity, in order to save energy.
•Use low speeds (1-2) under normal conditions, and high speed (3) and boost mode
for intense odour and vapour.
•The hood is equipped with lamps in order to illuminate the cooking area.
•Using them for environmental lighting shall cause unnecessary energy expenditure
and insufficient lighting.
•For your device to consume less energy, run it at a low speed level.
•Your device will reduce energy consumption as it will run more efficiently when you
provide sufficient air intake to it.
•Set your device to the intense suction power level before the formation of steam, in
cases where you know that the dense steam will occur. So, you reduce energy con-
sumption by using your device for a shorter time as it will have a sufficient air intake.
•Keep the lids of the cookware closed to reduce the steam evolving.