manuals.online logo
Brands
  1. Home
  2. •
  3. Brands
  4. •
  5. Beninca
  6. •
  7. Gate Opener
  8. •
  9. Beninca DU.35L2FC Installer manual

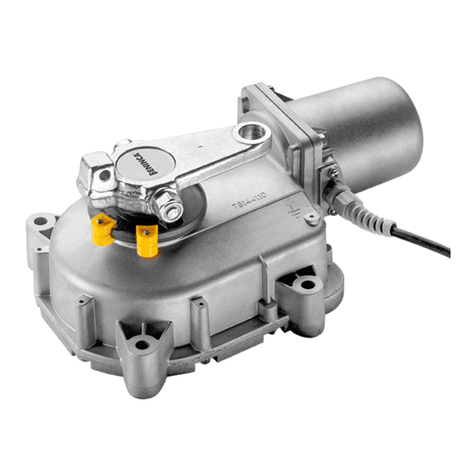
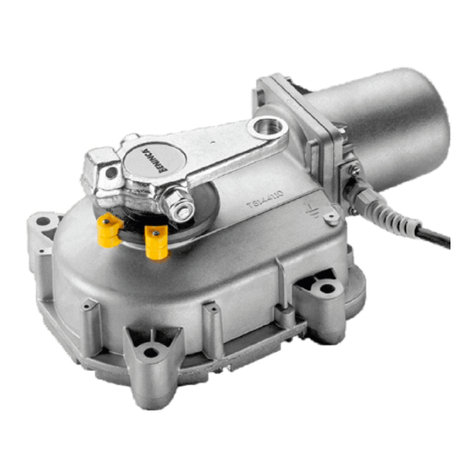
Beninca DU.35L2FC Installer manual

DU.35L2FC
L8542848
Rev. 10/07/03
UNIONE NAZIONALE COSTRUTTORI
AUTOMATISMI PER CANCELLI, PORTE,
SERRANDE ED AFFINI
APRICANCELLO ELETTROMECCANICO
ELECTROMECHANICAL GATE OPENER
ELEKTROMECHANISCHE AUTOMATION FÜR SCHIEBEGITTER
AUTOMATISATION ÉLECTROMÉCANIQUE POUR GRILLES
ABRECANCELA ELECTROMECANICO
ELEKTROMECHANICZNY OTWIERACZ BRAM
Manual istruzioni e catalogo ricambi
Operating instructions and spare parts catalogue
Betriebsanleitung und Ersatzteilliste
Livret d’instructions et catalogue des pieces de rechange
Manual de instrucciones y catálogo de recambios
Książeczka z instrukcjami i katalog części wymiennych
4
5
420*
970
92
136
354
* Corsa.
Stroke.
Hub.
Course.
Carrera.
Posuw.
Fig.1
Arresto in apertura (necessario se non si usa il F. C.).
Stop when opening (necessary if not using the
limit stop).
Endanschlag zur Öffnung (nötig, wenn kein Endschalter
benutzt wird).
Arrêt en ouverture (arrêt en ouverture nécessaire
si on n’utilise pas le F.C.).
Tope en apertura (necesario si no se usa el F.C.).
Zatrzymanie przy otwieraniu (konieczne, jeżeli nie
używa się wyłącznika krańcowego)
Arresto in chiusura - indispensabile.
Stop when closing - essential.
Endanschlag zur Schließung - unerläßlich.
Arrêt en fermeture - indispensable.
Tope de cierre indispensable.
Zatrzymanie przy zamykaniu;
obowiązkowo.
Dimensioni d’ingombro
Overall dimensions
Abmessungen
Dimensions d’encombrement
Dimensiones exteriores
Wymiary gabarytowe
Dati tecnici Technical data
Technische Daten Donnees technique
Datos técnicos
Dane techniczne
DU.35L2FC
Alimentazione
Potenza assorbita
Corrente assorbita
Spinta
Classe isolamento
Temper. funzionamento
Rumorosità
Condensatore
Lubricazione
Corsa standard
Peso
Power supply
Absorbed rating
Absorbed current
Thrust
Insulation class
Operating temperature
Noise level
Capacitor
Lubrication
Standard stroke
Weight
Speisung
Leistung
Strom-Verbrauch
Druck
Isolierklasse
Laufzeit
Geräuschentwicklung
Kondensator
Schmierung
Standardhub
Gewicht
Alimentation
Puissance absorbée
Courant absorbé
Poussée
Classe d'isolement
Température de fonct.
Bruit
Condensateur
Lubrication
Course standard
Poids
Alimentación
Potencia absorbida
Corriente absorbida
Par
Clase de aislamiento
Temperatura funcionam.
Ruido
Condensador
Lubricación
Carrera estancar
Peso
Zasilanie
Natężemie
Pobór mocy
Skok
Klasa izolacji
Temperatura przy pracy
Max. halas
Kondensator
Smarowanie
Posuw standard
Ciężar
230 Vac
310 W
1,4 A
2000 N
F
-20°C / +70°C
<70 dB
9 µF
Molykote
Longterm 2 plus
420 mm
11 kg
6
7
K
P
X
M
V
Y
Z
X
Apertura max.
Max. opening
Max. Öffnung
Ouverture max.
Abiertura max.
Tempo apertura 90°
Opening time
Öffnungszeit
Temps d’ouverture
Tiempo de abiertura
Dimensioni max. anta
Max. wing dimensions
Max Flügelmasse
Dimens. max. de la porte
Dimens. max. de la hoja
L (m) P (kg)
2 600
2,530"906759015015090° 500
3 400
4
40"15560016020020090°
300
5 200
2
30"9067590145145130°
400
2,5 350
3 300
4 200
YZ
min.
KM *
max
Fig.2
* N.B.: La quota M max. è riferita ad una quota V= 50 mm
* N.B.: The dimension M max. refers to a dimension V= 50 mm
* N.B.: Das Maß M max. bezieht sich auf ein Maß V= 50 mm
* N.B.: La cote M max. est référée à une cote V= 50 mm
* N.B.: La cota M máx. hace referencia a la cota V= 50 mm
* N.B.: Wymiar M max odnosi się do parametru V = 50 mm
Mettere a livello.
Level.
Nivellieren.
Mettre de niveau.
Nivelar.
Uliniować
T
S
Otwarcie
maks.
Czas otwierania
Maks. wymiary skrzydła
6
7
Fig.3
R
M
V
P
U
D
Vite Ø3.9 UNI 6955.
Screw Ø3.9 UNI 6955.
Schraube Ø3.9 UNI 6955.
Vis Ø3.9 UNI 6955.
Tornillo Ø3.9 UNI 6955
Sruba Ø3.9 UNI 6955.
Collegamenti - Connections - Kabelanschlüsse
Connexions - Conexiones - Połączenia






 


 
     




 
  

 
 









 
  
 
 
 

Fig.A - Cablaggio standard - i necorsa di apertura/chiusura (FCO/FCC)
interrompono le rispettive fasi del motore.
Pic.A - Default wiring - Opening and closing limit switches are connected
in series with the motor’s phases.
Abb. A - Standardverkabelung - die Endschalter für Öffnen/Schließen (FCO/
FCC) unterbrechen die jeweiligen Motorphasen.
Fig.A – Câblage standard - les ns de course d’ouverture et de fermeture
(FCO/FCC) interrompent les phases respectives du moteur.
Fig.A – Cableo estándar – los nes de carrera de apertura/cierre (FCO/FCC)
interrumpen las respectivas fases del motor.
Rys. A – Trasy kablowe standard - krańcówki otwierania/zamykania
(FCO/FCC) przerywają odnośne fazy silnika.
Fig.B - Per collegare i necorsa di apertura/chiusura (FCO/FCC) alla centrale modicare i col-
legamenti come indicato. E' necessario aggiungere il morsetto evidenziato per il collegamento
del comune necorsa (+V).
Pic.B - To connect the opening and closing limit switches (FCO/FCC) to the main control
board is necessary to perform the changes showed in this picture. One more terminal
(+V) must be added in order to connect the limit switches common.
Abb. B – Um die Endschalter für Öffnen/Schließen (FCO/FCC) an die Zentrale anzuschließen,
die Verbindungen wie angegeben verändern. Für den Anschluss des gemeinsamen Leiters des
Endschalters (+V) muss die markierte Klemme hinzugefügt werden.
Fig.B – Pour connecter les ns de course d’ouverture et de fermeture (FCO/FCC) à la
logique de commande, modier les connexions suivant les indications. il faut ajouter la
borne mise en évidence pour la connexion du conducteur commun n de course (+V).
Fig.B – Para conectar los nes de carrera de apertura/cierre (FCO/FCC) a la centralita,
modicar las conexiones como se indica. Es necesario incorporar el borne indicado
para conectar el conductor común de n de carrera (+V).
Rys. B – By podłączyć krańcówki otwierania/zamykania (FCO/FCC) do centralki należy
zmienić podłączenia według podanych wskazówek. Konieczny jest dodatkowy, oznac-
zony na rysunku, zacisk do połączenia ze wspólną krańcówką (+V).
8
9
Fig.4
T
D
F.C. chiusura
Closing limit stop
Endschalter in ”zu”
Fin de course de fermeture
F.C. de cierre
Wył. krańc. zamykania
F
marrone: F.C. chiude
brown: limit stop closes
brauner Draht: Endschalter richtung ”Tor-zu”
marron: le n de course referme
marron: F.C. cerrar
Brązowy:Wył. krańc. zamykania
F
N.B.: Utilizzare solamente questo foro della piastra.
N.B.: Only use this plate hole.
Anmerkung: Nur diese Öffnung der Platte verwenden.
N.B.: Utiliser seulement ce trou de la plaque.
NOTA: Utilizar solamente este agujero de la pletina de anclaje.
N.B.: Należy używać wyłącznie tego otworu płyty.
Attenzione: se l’automatismo non viene fermato in tempo,
la piastra può tranciare il cavo.
Warning: if the automatism does not stop in time, the
plate may cut the cable.
Achtung: Wenn der Antrieb nicht rechtzeitig angehalten
wird, kann die Platte das Kabel durchschneiden.
Attention: si l’automatisme n’est pas arrêté à temps,
la plaque peut couper le câble.
Atencion! Si el automatismo no se para a tiempo, la pletina
de anclaje puede cortar la manguera.
Uwaga: jeżeli urządzenie automatyzacji nie zosta-
nie odpowiednio wcześnie zatrzymane, płyta może
przeciąć przewód.
Posticipa.
Postpone.
Anziehen.
Diffère.
Atrasa.
Opóźnienie
Anticipa.
Advance.
Verlangsamt.
Anticipe.
Adelanta.
Wyprzedzenie
Anticipa.
Advance.
Verlangsamt.
Anticipe.
Adelanta.
Wyprzedzenie
Posticipa.
Postpone.
Anziehen.
Diffère.
Atrasa.
Opóźnienie
F.C. apertura
Opening limit stop
Öffnungsendschalter
Fin de course d’ouverture
F.C. apertura
Wył. krańc. otwierania
marrone: F.C. apre
brown: limit stop opens
brauner Draht: Endschalter richtung ”Tor-auf”
marron: le n de course ouvre
marron: F.C. abrir
Brązowy: Wył- krańc. otwierania
bleu: comune F.C.
blue: limit stop common
blauer Draht: gemeinsamer Erdung
bleu: n de course commun
azul: comun F.C.
Granatowy: Wspólny wył. krańc.
bleu: comune F.C.
blue: limit stop common
blauer Draht: gemeinsamer Erdung
bleu: n de course commun
azul: comun F.C.
Granatowy: Wspólny wył. krańc.
8
9
Fig.5
C
Spostare nel senso della freccia.
Move arrowise.
In Pfeilrichtung schieben.
Déplacer dans le sens de la èche.
Desplazar en el sentido de la echa.
Przesunąć w kierunku strzałki
Premere.
Press.
Drücken.
Pousser.
Presionar.
Wcisnąć
Inserire e ruotare di 90°.
Insert and rotate by 90°.
Einstecken und um 90° drehen.
Insérer et tourner de 90°.
Insertar y girar 90°.
Wprowadzić i obrócić o 90°.
Farla ruotare no sentire lo scatto.
Rotate till the click.
Drehen, bis man es schnappen hört.
La faire tourner jusqu’à obtention du déclic.
Hacerla girar hasta sentir el golpecillo de desbloqueo.
Obracać aż do usłyszenia dźwięku wskazującego
zadziałanie urządzenia.
Tirare.
Pull.
Ziehen.
Tirer.
Tirar.
Ciągnąć
10
11
34
2
5
Legenda:
1 Motoriduttore DU.35L2FC
2 Fotocellule SC.P50 (da incasso), SC.P50E (da esterno)
3 Selettore a chiave ID.SC o ID.SCE (da esterno) o tastiera digitale ID.PTD
4 Lampeggiante ID.LUX
5 Antenna LO.E1N (superreattiva) o LO.E1LUX (quarzata)
6 Centrale elettronica DA.93A
Legenda:
1 Motoreducer DU.35L2FC
2 Photo-electric cells SC.P50 (built in), SC.P50E (external)
3 Key selector ID.SC or ID.SCE (external) or digital keyboard ID.PTD
4 Flash-light ID.LUX
5 Antenna LO.E1N (superreactive) or LO.E1LUX (quartz)
6 Electronic gearcase DA.93A
Zeichenerklärung:
1 Getriebemotor DU.35L2FC
2 Fotozelle SC.P50 (eingelegt), SC.P50E (außenliegend)
3 Schlüssel-Selektor ID.SC oder ID.SCE (außenliegend) oder Digital-Tastatur ID.PTD
4 Blinker ID.LUX
5 Antennne LO.E1N (Superreaktiv) oder LO.E1LUX (Quartz)
6 Elektroschrank DA.93A
1
6
3x1,5 min
230Vac
2
1
2x1,5
2x0,35
2x0,35
2x1
4x1,5
4x1,5
2x1
4x0,35
RG 58
Légende:
1 Moteur-réducteur DU.35L2FC
2 Photocellule SC.P50 (noyée) - SC.P50E (d’extérieur)
3 Selecteur à clé ID.SC ou ID.SCE (d’extérieur) ou clavier digital ID.PTD
4 Clignotant ID.LUX
5 Antenne LO.E1N (super-active) ou LO.E1LUX (au quartz)
6 Centrale électronique DA.93A
Leyenda:
1 Motorreductor DU.35L2FC.
2 Fotocélulas SC.P50 (de empotrar), SC.P50E (de supercie).
3 Selectores a llave ID.SC o ID.SCE (de supercie).
4 Relampagueador ID.LUX.
5 Antena LO.E1N (superreactiva) o LO.E1LUX (cuarzada).
6 Central electrónica DA.93A.
Legenda:
1 Siłownik DU.35L2FC
2 Fotokomórki SC.P50 (wbudowane), SC.P50E (zewnętrzne)
3 Wyłącznik kluczowy ID.SC lub ID.SCE (zewnętrzny) lub elektroniczna
tablica przyciskowa ID.PTD
4 Lampa migocąca ID.LUX
5 Antena LO.E1N (superczuła) lub LO.E1LUX (kwarcowa )
6 Centralka elektroniczna DA.93A
N.B.: Tenere separati i cavi di potenza da quelli ausiliari.
N.B.: The power cables must be kept separated from the auxiliary cables.
Wichtig: Leistungskabel von Hilfskabeln getrennt halten.
N.B.: Séparer les câbles de puissance des câbles auxiliaires.
N.B.: Tener separados los cables de potencia de los auxiliares.
Uwaga: należy trzymać w oddali przewody zasilania od przewodów pomocniczych.
16
17
DU.35L2FC
Libro istruzioni per l’utilizzatore - User’s handbook
Handbuch für den Verbraucher - Manuel d’instructions pour l’utilisateur
Manual de instrucciones para el usuario - Książeczka z instrukcjami dla użytkownika
Fig.A
Fig.B
Fig.C
C
Spostare nel senso della freccia.
Move arrowise.
In Pfeilrichtung schieben.
Déplacer dans le sens de la èche.
Desplazar en el sentido de la echa.
Przesunąć w kierunku strzałki
Premere.
Press.
Drücken.
Pousser.
Presionar.
Wcisnąć
Inserire e ruotare di 90°.
Insert and rotate by 90°.
Einstecken und um 90° drehen.
Insérer et tourner de 90°.
Insertar y girar 90°.
Wprowadzić i obrócić o 90°.
Farla ruotare no sentire lo scatto.
Rotate till the click.
Drehen, bis man es schnappen hört.
La faire tourner jusqu’à obtention du déclic.
Hacerla girar hasta sentir el golpecillo de desbloqueo.
Obracać aż do usłyszenia dźwięku wskazującego
zadziałanie urządzenia.
Tirare.
Pull.
Ziehen.
Tirer.
Tirar.
Ciągnąć

Other Beninca Gate Opener manuals

Beninca BULL 17 OMI User manual

Beninca

Beninca BULL 17 OMI User manual

Beninca RI.6SF Installer manual

Beninca

Beninca RI.6SF Installer manual

Beninca BULL 20T Installer manual

Beninca

Beninca BULL 20T Installer manual

Beninca BOB21M User manual

Beninca

Beninca BOB21M User manual

Beninca BOB2124 E User manual

Beninca

Beninca BOB2124 E User manual

Beninca AU.MS25 User manual

Beninca

Beninca AU.MS25 User manual

Beninca BOB5024 User manual

Beninca

Beninca BOB5024 User manual

Beninca BOB24 Instruction Manual

Beninca

Beninca BOB24 Instruction Manual

Beninca DU.IT14N Installer manual

Beninca

Beninca DU.IT14N Installer manual

Beninca BULL 1524 User manual

Beninca

Beninca BULL 1524 User manual

Beninca CP.PONY User manual

Beninca

Beninca CP.PONY User manual

Beninca MS424 Installer manual

Beninca

Beninca MS424 Installer manual

Beninca BULL 10M User manual

Beninca

Beninca BULL 10M User manual

Beninca THINKY User manual

Beninca

Beninca THINKY User manual

Beninca BOB Installer manual

Beninca

Beninca BOB Installer manual

Beninca BOB User manual

Beninca

Beninca BOB User manual

Beninca RI.6E Installer manual

Beninca

Beninca RI.6E Installer manual

Beninca MS424 Installer manual

Beninca

Beninca MS424 Installer manual

Beninca DU.45E24 Installer manual

Beninca

Beninca DU.45E24 Installer manual

Beninca RI.10K Installer manual

Beninca

Beninca RI.10K Installer manual

Beninca DU.50 Instruction Manual

Beninca

Beninca DU.50 Instruction Manual

Beninca BULL 20T Installer manual

Beninca

Beninca BULL 20T Installer manual

Beninca MB24V Installer manual

Beninca

Beninca MB24V Installer manual

Beninca RI.5K Installer manual

Beninca

Beninca RI.5K Installer manual

Popular Gate Opener manuals by other brands

BFT E5 BT A18 Installation and user manual

BFT

BFT E5 BT A18 Installation and user manual

Chamberlain LiftMaster Professional HS670 owner's manual

Chamberlain

Chamberlain LiftMaster Professional HS670 owner's manual

Aleko FG300NOR user manual

Aleko

Aleko FG300NOR user manual

FAAC XFS manual

FAAC

FAAC XFS manual

GFA 10002374 10010 installation instructions

GFA

GFA 10002374 10010 installation instructions

OSCO SWR installation guide

OSCO

OSCO SWR installation guide

Genius FALCON 14 MC Instructions for use

Genius

Genius FALCON 14 MC Instructions for use

Centurion D10 installation manual

Centurion

Centurion D10 installation manual

Chamberlain MEGA ARM / MEGA ARM TOWER Installation and service manual

Chamberlain

Chamberlain MEGA ARM / MEGA ARM TOWER Installation and service manual

Forematic PICO PK-550 manual

Forematic

Forematic PICO PK-550 manual

CAME FERNI 1024 KIT installation manual

CAME

CAME FERNI 1024 KIT installation manual

GTO SW-4000XL installation manual

GTO

GTO SW-4000XL installation manual

CAME BXV600GS Quick setup guide

CAME

CAME BXV600GS Quick setup guide

SOMFY IXENGO S installation manual

SOMFY

SOMFY IXENGO S installation manual

fadini Jubi 433 manual

fadini

fadini Jubi 433 manual

Novoferm Thermo S600 user manual

Novoferm

Novoferm Thermo S600 user manual

Linear SWR installation guide

Linear

Linear SWR installation guide

Entrya ENIRO30/1 Guide for installation and connections

Entrya

Entrya ENIRO30/1 Guide for installation and connections

manuals.online logo
manuals.online logoBrands
  • About & Mission
  • Contact us
  • Privacy Policy
  • Terms and Conditions

Copyright 2025 Manuals.Online. All Rights Reserved.