Bertin Technologies Coriolis m User manual

Coriolis µ
WWW.BERTINTECHNOLOGIES.COM
USER MANUAL
New generation AIR SAMPLER
Quick & reliable air control

Page 3
CORIOLIS µ
Page 2
USER MANUAL
User manual Coriolis®µ
Manual Code : 05027-006-DU002-G ENG
Revised : DECEMBER 2015 – English
Designed by :
BERTIN TECHNOLOGIES
Parc d’activités du Pas du Lac
10 bis, avenue Ampère
78180 Montigny le Bretonneux
France
Tél : + 33 (0)1 39 30 61 60
Coriolis® est une marque déposée de Bertin Technologies.
©2023 Bertin Technologies Tous droits réservés
Coriolis®µ : 05027.030.RD003
INDEX
1. INTRODUCTION
1.1. Safety information
1.2. Warranty
1.3. Manufacturer information
1.4. Technical support
2. DESCRIPTION OF CORIOLIS®µAIR SAMPLER
2.1. Product overview
2.2. Presentation of the Keypad
2.3. Setting
2.4. Technical features
2.5. Operating principle
2.6. Normative requirements
3. TRANSPORT / STORAGE
3.1. Transport
3.2. Storage
4. INSTALLATION
4.1. Unpacking
4.2. Assembling
4.3. Recommendations
5. INSTRUCTIONS FOR USE
5.1. Turning on the equipement
5.2. Auto-tests
5.3. Using parameters for“stand alone” mode
5.4. Using parameters for“long time monitoring”mode
5.5. Run failure
5.6. Battery supply
5.7. Administrator Menu
6. FLOW CONTROL OPTION
6.1. Flow Control Option overview
6.2. Using the ow control option
6.3. Maintenance of the ow control option
7. CLEANING & DECONTAMINATION
7.1. Routine decontamination / sterilisation
7.2. H2O2 : vapour peroxide hydrogen decontamination
7.3. Maintenance
8. REFERENCES LIST
Annexe 1 : Example of a ow control report

Page 5Page 4
USER MANUAL
CORIOLIS µ
1.1.3 Biological risks
To prevent any risk of contamination, wear gloves when handling samples
and follow strictly the safety instructions related to biohazardous agents.
The waste produced by the normal operation of the instrument must
be scraped of in biological waste containers and handled by specialised
companies.
1.1.4 Noise level
The maximum noise level of the equipment is 70 dB in operating mode, at
a ow rate of 300 l/min.
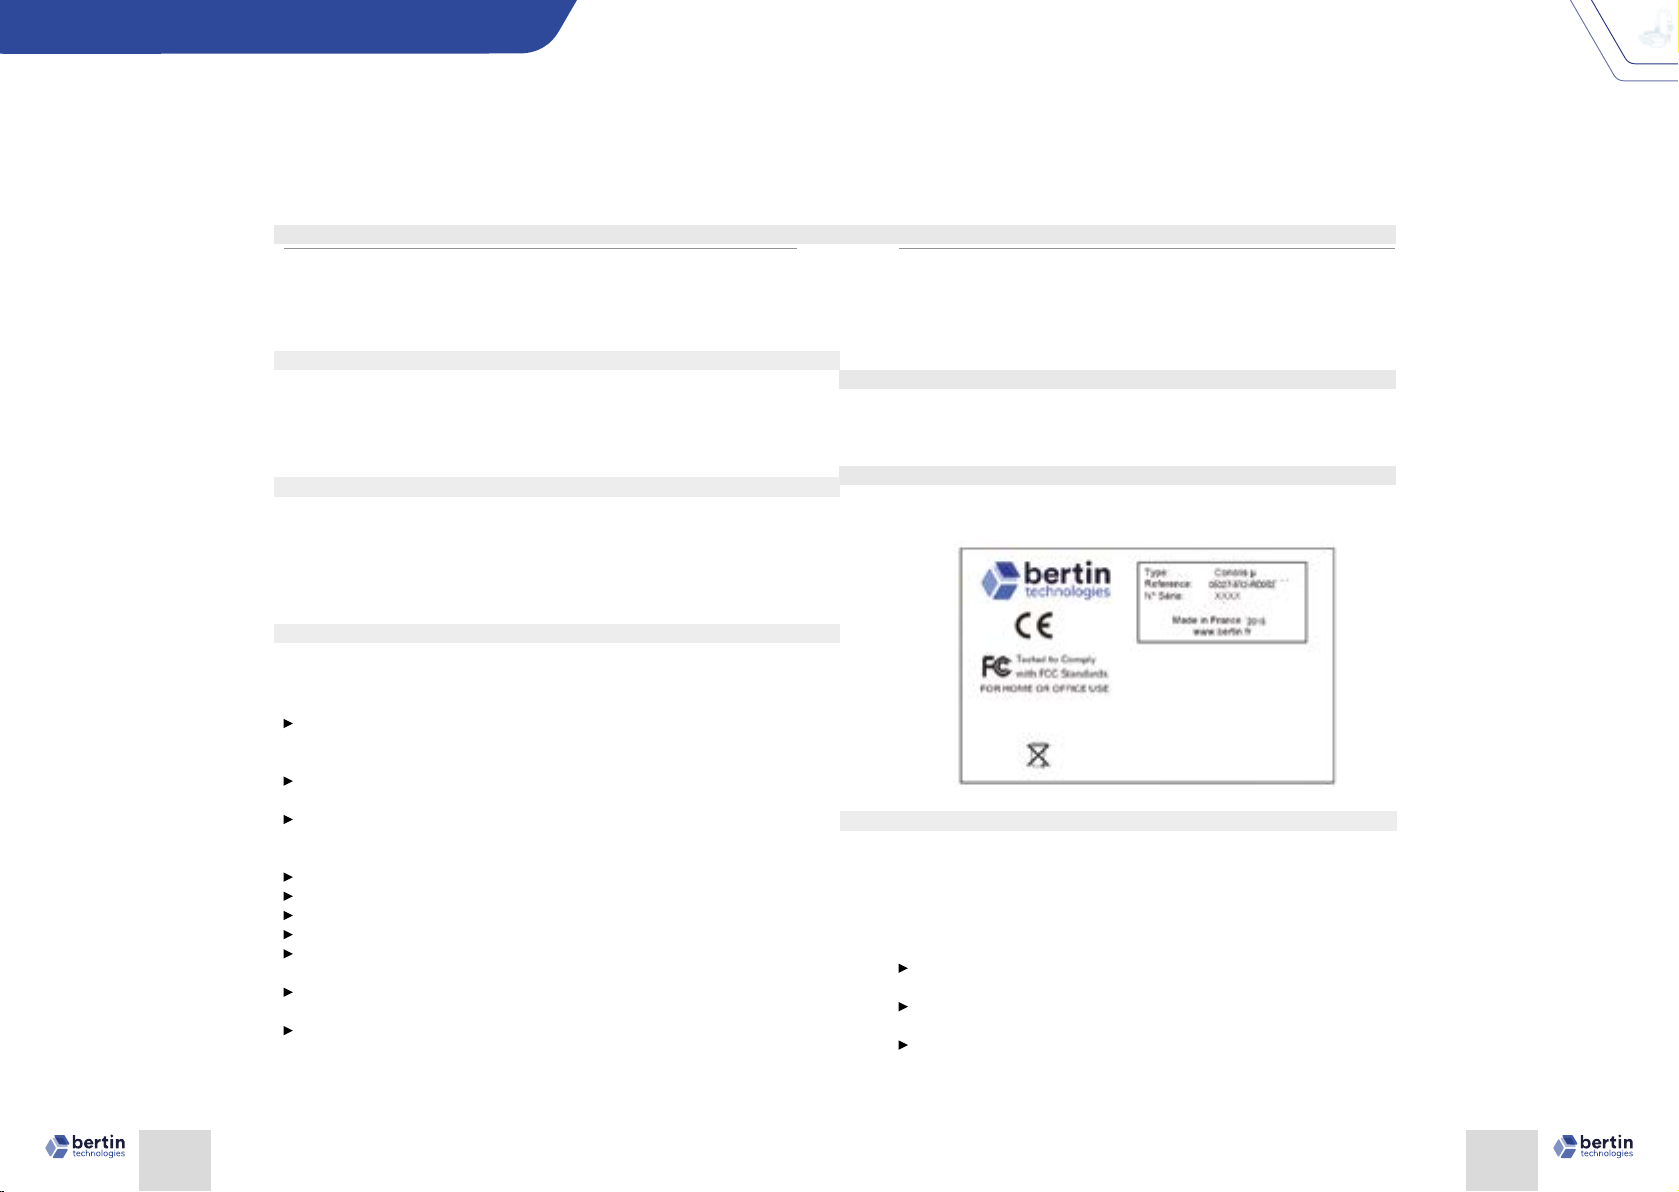
1.1.5 Conformity
This equipment conforms with CE, CEM and FCC norms:
1.2 Warranty
BERTIN TECHNOLOGIES certies that this product is free of defects at the
time of shipment.
This warranty is limited to a period of one (1) year and does not cover the
cane, the air intake and the battery.
This warranty does not cover the following circumstances:
The equipment has not been installed, operated or maintained
according to the instructions described in this user manual.
The equipment has been repaired or modied by unauthorised
personnel.
The equipment serial number has been damaged or removed.
1. INTRODUCTION
This user manual includes the required information regarding installation,
operation and maintenance of the Coriolis®µ Air Sampler.
The product’s technical specications and the following information may
change without prior notice.
1.1. Safety information
This user manual must be read carefully before operating the Coriolis®µ
Air Sampler.
If there is any doubt or concern about the safety of the equipment, please
contact the manufacturer.
1.1.1 Risk of electric shock
It is important for all users to be aware of the potential hazard of using
liquids close to a power supply. If any liquids are spilled, immediately
disconnect the instrument from the main power supply (even if it is
running), dry and clean the equipment and the surrounding area.
DO NOT reconnect the equipment until it has been fully inspected.
1.1.2 Incorrect operation / using precautions
Operating the equipment in other ways than those detailed in this user
manual may damage the protection of the unit.
DO NOT operate the unit when the casing is removed; the ca-
sing protects users from potentially lethal voltage that may
occur within the instrument.
DO NOT operate the unit when the safety ground is
disconnected.
DO NOT install unauthorised cards, spare parts or accessories
as this may damage the safety of the unit. The warranty will be
cancelled.
DO NOT hold the equipment by the cane but use the handle.
DO NOT obstruct the air output.
DO NOT ll in the cone with more than 15 ml of liquid.
CHECK that the power cord is properly plugged in.
REMOVE THE CANE and screw the xation when moving the
equipment.
Processing, PUT the equipment on an horizontal surface and
clear the space around the air ouput.
PUT the air intake at the strict opposite of the air output to
avoid disturbance of the aspiration.
BERTIN TECHNOLOGIES is not responsible for any damage or injury that
may occur as a result of operating the instrument in a dierent way as
described in this document.

Page 7Page 6
USER MANUAL
CORIOLIS µ
Low Part Upper Part
An engine to aspirate
A power interface board
A MMI board An autoclavable air intake
A handle A cone with a screw cap
MINI Board
Handle
Power
interface Board
Connection
to long time
monitoring
plateform
Air owing
cane
Air intake
Cone
2. DESCRIPTION OF CORIOLIS®Μ AIR SAMPLER
2.1 Product overview
Coriolis®µ is a cyclonic system air sampler used to collect biological airborne
particles for air monitoring.
Coriolis®µ Air Sampler has been designed to capture particles size from 0,5
to 20 µm and concentrates them in a liquid sample.
The main components of the Coriolis®µ Air Sampler are:
1.3 Manufacturer information
1.4 Technical support
If any problem occurs, please contact the manufacturer or your distributor.
BERTIN TECHNOLOGIES
Parc d’activités du Pas du Lac
10 bis, avenue Ampère
78180 Montigny le Bretonneux
FRANCE
Tel: +33 (0)1 39 30 60 70
Fax: +33 (0)1 39 30 61 85
E-mail: [email protected]
An autoclavable air owing cane

Page 9Page 8
USER MANUAL
CORIOLIS µ
Up button
Down button
Red light Green light
Cancel
button
2.2 Presentation of the Keypad
The LCD screen lights up when the unit is switched on.
The keypad allows the user to set and start runs.
The keypad consists in a 4-line-LCD screen, 4 buttons and 2 LEDs (see
below):
The user can adjust dierent settings with this interface.
Up and Down are used to navigate through the menu and adjust
parameters.
When used for navigation, the Up and Down buttons can be used to
move the selection cursor.
2.3 Setting
The Coriolis®µ has been designed to work at a maximum air ow rate of
300 l/min during 10 minutes maximum in“stand alone” mode. The length
of sampling can be extended to 360 minutes if the Coriolis µ is linked to
long time monitoring option, equipped with a pump for collection liquid
reinjection (“Long time monitoring” mode).
Some parameters can be adjusted, according to the link mode of the
equipment:
Valid
button
Screen/Display
Parameters
Mode Stand alone Long time monitoring
Air Flow Rate 100 to 300 l/min by 50 l/min 100 to 300 l/min by 50 l/min
Volume of air Up to 3 m3Up to 108 m3
Time 1 to 10 min by 1 min
1 to 60 min by 1 minute
Then up to 120 min by 10 min
Then up to 360min by 30 min
Delay
Collection liquid injection -------- From 0 to 4ml/min by 0.1 ml/min
Technical characteristics
Power requirements 100 - 240 V, 2A, 50 - 60 Hz
Power consumption 140 W
Size / weight (Air sampler alone)
Width 220 mm
Length 300 mm
Height 180 mm
Setting Range
0 to 100 min by :
- 1 min to 10 min
- 10 min to 100 min
2.4 Technical features

Page 11Page 10
USER MANUAL
CORIOLIS µ
Size / weight (Air sampler alone)
Height with the cane 355 mm
Weight ~ 2 kg
Weight with battery ~ 2,8 kg
Operating conditions
Temperature 5-40°C
Humidity 15-60 %
Setting range
Maximal Flow rate 300 l/min
Maximal Volume of air collected 3 m3 or 108 m3
Maximal Collection time 10 min
Delay 0 – 100 min
User interface
Keypad 4 buttons: Up / Down / Valid / Cancel
Display
4-line-LCD screen,
16 characters per line backlight,
2 lights (1 green, 1 red)
2.5 Operating principle
Coriolis® patented technology is highly innovative: based on a cyclone type
operation, it concentrates airborne biological particles into a liquid sample.
Air is rst aspirated into the cone (pre-lled with collection liquid) in a
whirling motion to form a vortex.
Particles are pulled against the wall due to centrifugal force and separated
from air to be concentrated in the liquid.
2.6 Normative requirements
BERTIN TECHNOLOGIES is certied ISO 9001:2000 (BVQI) and
certied Qualifas (notation A)
Coriolis®µ is in compliance with CE requirements (cf. Conformity
declaration delivered with the equipment)
Biological and physical eciency of Coriolis® technology are
validated by an independent testing agency HPA (Health
Protection Agency, Porton Down, UK), according to the ISO
14698-1 standard requirements (“Cleanrooms and associated
controlled environments - Biocontamination control”).
According to ISO14698-1 standard:
The impaction device should have an impact speed on the collection medium:
(speed of entry in the liquid cyclone for Coriolis®)
1. high enough to allow the capture of viable particles down to
approximately 1 μm, and
2. low enough not to damage fragile viable particles
The device should have a sucient ow rate to collect 1 m3 in a reasonable
time, without signicant drying of the sampling medium;
Air
Collection Liquid
Particles

Page 13Page 12
USER MANUAL
CORIOLIS µ
Coriolis® technology respects the requirements concerning impact speed
of micro-organisms, as far as it allows an ecient recovery of viable
particles.
Coriolis®µ allows to collect the required 1 m3 in less than 4 minutes,
and its liquid sample avoids any problem of medium drying. Thereby it
enables more sampling in less time, with possible dierent and faster
analysis. Coriolis®µ allows a better and easier contamination monitoring.
3. TRANSPORT / STORAGE
3.1 Transport
Avoid violent shocks that may damage the equipment.
To transport the equipment, use the appropriate case: delivery box or
optional transport box.
3.2 Storage
The unit must be stored in a dry area at a temperature from +0°C to +50°C.
4. INSTALLATION
4.1 Unpacking
1. Remove the equipment from the case and place it on a clean,
horizontal and stable surface.
2. Unpack the instrument and inspect it carefully. Report any
damage to the carrier immediately.
3. Check the content of the case with the checking list delivered
with the equipment.
If one ofthe items is missing,pleasecontact immediately themanufacturer.
Insert the air owing cane in the fan’s hole and screw it
delicately until it blocks.
On the other extremity, x the air intake by pushing and
screwing delicately with the xation part.
Screw the cone (pre-lled with liquid) on the lower part of the
air intake.
Place the air intake on the strictly opposite direction of the air
output to avoid any disturbance of the aspiration.
1
2
3
4
4.2 Assembling
Before running, the air owing cane and the air intake must be assembled
following the instructions below:
4.3 Recommendations
DO NOT connect the unit to the mains supply before
the installation is over.
123 4
DO NOT ll in the cone with more than 15 ml of
collection liquid.
The optimal air ow rate is 300 l/min.
DO NOT USE NON RECOMMENDED COLLECTION
LIQUID. (Bertin recommends to use Coriolis µ only with
Bertin collection liquid :
Collection liquid sterile doses (15 ml) : 05237-1-202
Collection liquid un bottle (200ml) : 05237-1-203
The use of non-recommended collection liquid can
damage the Coriolis µ (Corrosion, salt deposit…).
Contact us before your sampling in order to check the
compatibility of your Collection Liquid.

Page 15Page 14
USER MANUAL
CORIOLIS µ
5.2 Auto-tests
The equipment automatically achieves auto-tests before being available for
the user:
Clock
Memory card
Supply mode detection (battery/mains supply)
Pump detection (long time monitoring mode)
When all auto-tests are done and ok, the screen displays:
If errors occur during these auto-tests, the following messages are displayed
and the red led light on.
5.2.1 Clock
The equipment can be used but it is not possible to set the collection time.
Be aware that you will have to check the time yourself during collection.
Turn o the equipment by pressing the “Valid” button and re-start the
equipment. If the error still occurs, please contact the manufacturer.
Plug the Coriolis®µ Air Sampler into the mains supply using a compatible
power cord.
Check power requirements before plugging.
Processing, PUT the equipment on an horizontal surface and clear the
space around the air output.
PUT the air intake at the strict opposite of the air output to avoid
disturbance of the aspiration.
5. INSTRUCTIONS FOR USE
5.1 Turning on the equipement
Turn the unit ON by pressing the“Valid” button (around 3 seconds),
until the home screen is displayed:
CORIOLIS Name of the equipment
02.-- Software version
The screen has a back light energy economy which switches o after 10
seconds: at any time, you can switch the back light on by pressing“Up”or
“Down” button.
This equipment must be powered from a mains supply
with a protective ground terminal and protected with
a dierential circuit breaker of 30 mA.
An earth-leak circuit breaker must be used on the main
line.
CORIOLIS
02.12
10 : 15 10/01/07
ERROR CLOCK
AUTOTESTS OK
AUTOTESTS KO
SHUTDOWN?

Page 17Page 16
USER MANUAL
CORIOLIS µ
5.3 Using parameters for“stand alone” mode
5.3.1 Accessing to the set up menu
After the autotests, the set up menu is automatically displayed with the
menu screen:
To display the set up menu press the “Down” button on the main menu to
place the selection cursor on the line “SET UP” and press the “Valid” button.
5.3.2 Adjusting parameters
Once the set up menu is displayed, the rst parameter value ashes: the
“FLOW”value, which corresponds to the air ow rate of aspiration.
To adjust parameters, change the value by short pressing (by 1 increment) or
long pressing (for faster scrolling) “Up” and/or “Down” buttons.
5.2.2 Memory
The equipment can not be used as far as the data can not be saved and
the number of runs can not be incremented (data necessary for the
maintenance of the equipment).
Turn o the equipment by pressing the “Valid” button and re-start the
equipment. If the error still occurs, please contact the manufacturer.
5.2.3 Supply mode
If battery supply is detected during auto-test and a problem occurs, the
following message will be displayed:
The equipment can be used but only on mains supply.
Turn o the equipment by pressing the “Valid” button and re-start the
equipment. If the error still occurs, please plug the equipment on the
mains supply or charge the battery and try again. If the error still occurs,
please contact the manufacturer.
10 : 15 10/01/07
ERROR MEMORY
COLLECT
ERROR BATTERY
>> SETUP <<
AUTOTESTS KO
SHUTDOWN?
SHUTDOWN?
10 : 15
10 : 15
FLOW :
TIME :
DELAY :
10/01/07
10/01/07
300 l/min
005 min
000 min

Page 19Page 18
USER MANUAL
CORIOLIS µ
The user can change the FLOW value from 100 to 300 l/min by increments
of 50 l/min.
Press the “Valid” button to save the adjusted value and get to
the next parameter setting:
The “TIME” value ashes: it represents the run duration and
ranges from 1 to 10 minutes by increments of 1 minute.
Press the “Cancel” button if you want to go back on the
previous parameter.
Press the “Valid” button to save the “TIME” value and go to the
next parameter setting.
The“DELAY”value ashes: it is the waiting time set before starting the run.
It ranges from 0 to 100 min by increments of 1min (up to 10min), then 10
min (up to 100min).
Press the“Valid” button to store new parameters.
Then you go back to the menu screen with COLLECT and SET UP lines and
you can start the collection by pushing valid when the cursor points on the
COLLECT line.
5.3.3 Sampling
5.3.3.1 Prepare a sampling run
To start a run, place the selection cursor on the line “COLLECT” on the main
menu display.
Then, the following screen is displayed:
Press“Valid” to start the run.
Press“Cancel”to go back on the main menu.
10 : 15
10 : 15
10/01/07
10/01/07
COLLECT
>>> START <<<
>> SETUP <<
FLOW :
TIME :
DELAY :
300 l/min
005 min
000 min
FLOW :
TIME :
DELAY :
300 l/min
005 min
000 min
DO NOT start a run without the air owing cane, the
air intake and the cone.
ALWAYS place these parts on the equipment before
collection.

Page 21Page 20
USER MANUAL
CORIOLIS µ
Press the“Valid” button to display the data of the run:
Unscrew the cone and recover your sample; the liquid contains the
concentrated airborne particles.
5.3.3.4 Stop a sampling run
The operator can stop the run by pressing the “Cancel” button at any time
during the run.
The red led lights on and the screen displays:
Press the “Valid” button to display the data of the run; the time value
displayed here represents the duration of the run before the stop:
5.3.3.2 Start a sampling run
The run starts:
If a delay is set, the delay time is displayed: an elapsed time
counter (in minutes and seconds) counts down the delay.
If not, the collection time is displayed: an elapsed time counter
(in minutes and seconds) counts down the time remaining
before the end of the run.
The green led ashes during processing.
5.3.3.3 End a sampling run
At the end of the set time, the run stops and the following screen is
displayed:
10 : 15
10 : 15
10/01/07
10/01/07
DELAY: 004min59s
>>> PROCESSING <<<
>>> PROCESSING <<<
REMAIN: 004min59s
and / or
10 : 15
10 : 15
10 : 15
10/01/07
10/01/07
10/01/07
>> VALID
>> VALID
END PROCESS
STOD PROCESS
FLOW :
TIME :
FLOW :
TIME :
300 l/min
005 min 00s
300 l/min
003 min 47s
10 : 15 10/01/07
Wait for the complete stop of the unit before taking
o the cone from the air intake and recovering the
liquid sample.

Page 23Page 22
USER MANUAL
CORIOLIS µ
5.4 Using parameters for“long time monitoring”mode
5.4.1 Connection of the air sampler to the platform
The sampler is placed as shown hereunder
Place the sampler on the platform and connect the pump wire
Put in place the consumables
Place the bottle lled with collection liquid
Place the cone previously lled with 15ml of collection liquid.
Connect the hoses to the pump and to the air intake with
injection pipe
Connect the external power supply
Screw the tripod under the platform, if necessary.
5.4.2 Estimate the quantity of collection liquid before collecting
In order to determine the quantity of collection liquid to inject every
minute, one method consists to make a collection in “stand alone” mode
with the appropriate ow rate during ten minutes with 15 ml of collection
liquid. Then measure the real evaporation during this period (preferably
by weighting) and divide the evaporated volume by ten to determine the
value by minute. After 30 mn of sampling, check the volume of collection
liquid in the cone. The collection liquid should not exceed 15 ml.
5.4.3 Priming of the hoses
When the main menu is displayed, press the “Up” button, the following
screen is displayed:
To start the pump, press the“Valid”button until the collection liquid reaches
the injection pipe of the air intake.
To return to the set up menu, press on “Down” button.
5.4.4 Accessing to the set up menu
After the autotests, the set up menu is automatically displayed with the
menu screen:
IIMPORTANT NOTA : Before starting the setting of the parameters, it is
necessary to prime the hoses before starting the rst collection for that
follows the instructions of the next paragraph.
To display the set up menu press the “Down” button on the main menu to
place the selection cursor on the line “SET UP” and press the “Valid” button.
10 : 15
10 : 15
10/01/07
>>> PRIMING <<<
COLLECT
1310/01/07

Page 25Page 24
USER MANUAL
CORIOLIS µ
5.4.5 Adjusting parameters
Once the set up menu is displayed, the rst parameter value ashes: the
“FLOW”value, which corresponds to the air ow rate of aspiration.
To adjust parameters, change the value by short pressing (by 1 increment)
or long pressing (for faster scrolling) “Up” and/or “Down” buttons.
The user can change the FLOW value from 100 to 300 l/min by increments
of 50 l/min.
Press the “Valid” button to save the adjusted value and get to
the next parameter setting :
The “TIME” value ashes: it represents the run duration and ranges from
1 to 10 minutes by increments of 1 minute, then from 10 minutes to 120
minutes by increments of 10 minutes, then from 120 minutes to 360
minutes by increments of 30 minutes
Press the “Cancel” button if you want to go back on the
previous parameter.
Press the “Valid” button to save the “TIME” value and go to the
next parameter setting.
The “DELAY” value ashes: it is the waiting time set before starting the run.
It ranges from 0 to 100 min by increments of 1min (up to 10min), then 10
min (up to 100min).
Press the“Valid” button to store new parameters.
Then you go back to the menu screen with COLLECT and SET UP lines and
you can start the collection by pushing valid when the cursor points on the
COLLECT line.
Press the “Valid” button in order to adjust the injection volume to inject
each minute (previously estimated. see § 5.4.2).
To adjust the value, use the “Up” or “Down”button
Press on“Valid” button when adjusted.
FLOW :
TIME :
DELAY :
FLOW :
TIME :
DELAY :
FLOW :
TIME :
DELAY :
300 l/min
360 min
000 min
300 l/min
360 min
000 min
300 l/min
360 min
000 min
10 : 15 10/01/07
COLLECT
LIQUID : 0.7ml/mn
>> SETUP <<

Page 27Page 26
USER MANUAL
CORIOLIS µ
5.4.6 Sampling
5.4.6.1 Prepare a sampling run
To start a run, place the selection cursor on the line “COLLECT” on the
main menu display.
Then, the following screen is displayed :
Press“Valid” to start the run.
Press“Cancel”to go back on the main menu.
5.4.6.2 Start a sampling run
If a delay is set, the delay time is displayed: an elapsed time
counter (in minutes and seconds) counts down the delay.
If not, the collection time is displayed: an elapsed time counter
(in minutes and seconds) counts down the time remaining
before the end of the run.
The green led ashes during processing.
5.4.6.3 Pause during a sampling run
Pressing on the “Valid” button during the run allows suspending momentarily
the collection (without modifying the eective time of collection) and to
readjust if necessary the injection parameter. The following screen is displayed :
To modify this parameter, use the “Up” and “Down”buttons. To start the collection
again, press on the“Valid”button.
NOTA: During collection, it is necessary to verify periodically if it remains suciently
of collection liquid to nish the collection cycle. If necessary rell the bottle.
10 : 15 10/01/07
>>> START <<<
DO NOT start a run without the air owing cane, the air
intake and the cone.
ALWAYS place these parts on the equipment before
collection.
10 : 15
10 : 15
10 : 15
10/01/07
10/01/07
10/01/07
DELAY: 004min59s
>>> PROCESSING <<<
PAUSE
>>> PROCESSING <<<
REMAIN: 004min59s
LIQUID : 0.7ml/mn
and / or

Page 29Page 28
USER MANUAL
CORIOLIS µ
5.4.6.4 End a sampling run
At the end of the set time, the run stops and the following screen is
displayed:
Press the“Valid” button to display the data of the run:
Unscrew the cone and recover your sample; the liquid contains the
concentrated airborne particles.
5.4.6.5 Stop a sampling run
The operator can stop the run by pressing the “Cancel” button at any time
during the run.
The red led lights on and the screen displays :
10 : 15
10 : 15
10/01/07
10/01/07
>> VALID
>> VALID
END PROCESS
STOP PROCESS
10 : 15 10/01/07
FLOW :
TIME :
300 l/min
055 min 00s
Wait for the complete stop of the unit before taking o
the cone from the air intake and recovering the liquid
sample.
Press the “Valid” button to display the data of the run; the time value
displayed here represents the duration of the run before the stop :
5.5 Run failure
Potential cause Solution
Empty battery Change battery or plug the
equipment on mains supply
Technical problem
(engine, electronics, abnormal noise…)
Check if the air intake and the
exhaust are not obstructed
Start a new run
If the problem still occurs, please
contact the manufacturer
If a run failure occurs, the collection stops, the red led lights on and the
screen displays:
This error message is saved in memory.
Press the “Valid” button to display the data of the run (these data are
saved in the memory and can be transferred to a computer with the data
management option):
10 : 15 10/01/07
FLOW :
TIME :
300 l/min
040 min 47s
10 : 15 10/01/07
>> VALID
ERROR PROCESS
10 : 15 10/01/07
TIME ERROR: 10:13
REMAIN: 003min47s

Page 31Page 30
USER MANUAL
CORIOLIS µ
Start a new run or unscrew the cone to recover your sample.
5.6 Run failure
The equipment can be either used on mains supply or on battery. Even if
you do not use the battery, be sure to maintain it charged in order to keep its
autonomy capacity.
If the equipment is not on mains supply and the battery is well placed, the
equipment detects the battery during autotests and displays:
Then all screens will show the charging level of the battery on the last line:
10 % of charge level
Wait for the complete stop of the unit before taking o
the cone from the air intake and recovering the liquid
sample.
Always put the battery charged before turning on the
equipment or re-start the equipment to detect the
“battery” supply mode.
10 : 15 10/01/07
BATTERY OK
BAT:/ /
As soon as the battery level reaches 10 minutes of autonomy left, the red
led lights on and the message “LOW BATTERY” is displayed and ashes:
Plug the equipment on mains supply to avoid any process failure
Charge or change the battery
If power is not supplied during a low battery run, the process will fail and
the screen will display :
If the equipment is not running, please plug the charger on the battery: the
colour of the light gives the level of charge:
Yellow: no battery / charge initialisation
Orange: fast charge
Green /Yellow ashing : end of charge (an empty battery requires
about 2 hours charging)
Green : charged
Orange / Green ashing : error
5.7 Administrator Menu
The administrator menu allows to set up time and date, and to access to the
decontamination menu of the equipment.
To access this menu press the “Cancel” button for 3 seconds on the main
menu “COLLECT / SET UP”. This screen is displayed:
V02.-- represents the soft version;
CPT 00004 is the number of runs performed by the equipment
since its installation.
10 : 15 10/01/07
>> VALID
ERROR PROCESS
V2.01 CPT 00004
>>LOW BATTERY
SHUTDOWN?

Page 33Page 32
USER MANUAL
CORIOLIS µ
Flow control option specications:
6.2 Using the ow control option
Be sure that the reector is well placed on the rotor of the motor in the
sampler.
The motor of the sampler has to be stopped, then put the equipment on the
input as shown on the picture below.
NOTE: The screen of the tachymeter has to be placed facing the screen of
the Coriolis®µ
Start the Coriolis®µ at 300l/min and wait until the speed becomes stabilized
(10 to 15 seconds).
Press and hold the button ON/OFF on the tachymeter: the speed will be
displayed. Read and note the value on the report (in rot/min).
NOTE: The screen only lights during the measure
Press the “Up” button: you access to the “DECONTAMINATION” menu to
launch a vapour H2O2 decontamination cycle and make the vapours
circulate into the equipment.
Press again the “Up” button and enter the admin code to access the
administrator menu:
The default admin code of this equipment is 0204.
If the administrator code is incorrect, the screen displays back on
“SHUTDOWN ?”.
Use the “Up” button to navigate through the administrator menu and
“Valid” to select the right task:
SET TIME (to set time and date)
RESET GAUGE (for the battery)
SHUTDOWN?
DECONTAMINATION
Press“Cancel”to go back to the main menu “COLLECT / SET UP”.
6 FLOW CONTROL OPTION
6.1 Flow Control Option overview
The Coriolis® ow control accessory is an optical tachymeter designed to
measure the rotation speed of the motor of the Coriolis®µ. An interface
part has been designed to place the accessory at a correct distance and
angle from the input blade of the motor.
The option is presented as followed:
an optical tachymeter
an interface part
a user manual
a certicate of calibration
V2.01 CPT 00004
ADMIN CODE >>xxxx
Source Measure range Precision
Visible Minilamp 60 – 19999 rot/min 0.01% + ou – 1 digit
Reector
Button On / O

Page 35Page 34
USER MANUAL
CORIOLIS µ
7.2 HO: vapour peroxide hydrogen decontamination
Coriolis®µ resists to vapour peroxide hydrogen decontamination.
Use the“DECONTAMINATION”mode in the Administrator menu to make the
vapours circulate into the equipment.
7.3 Maintenance
Except decontamination, spare parts do not require any specic
maintenance.
BERTIN TECHNOLOGIES recommended to achieve a ow rate control of the
equipment at least once a year: it can be performed with the ow control
option provided by Bertin Technologies or directly by Bertin Technologies.
Please contact the manufacturer.
8 REFERENCES LIST
The value in rot/min should be in accordance with the following table:
As you stop pressing the button, the screen of the tachymeter turns o.
An example of ow control report is appended to this manual.
6.3 Maintenance of the ow control option
The Coriolis® ow control accessory should be veried periodically. This
period can be modulated in function of the use.
The recommended verication period is 1 year.
The Coriolis® ow control accessory does not need any special
maintenance; it is recommended to change the battery once a year.
7 CLEANING & DECONTAMINATION
7.1 Routine decontamination / sterilisation
The housing of the unit and the platform can be cleaned up with a wet
sponge or a rag, either with water, alcohol or aqueous solutions of sodium
hypochlorite at 1,8° Cl.
Between each sample, change the cone.
Each day or between each controlled room, clean the following parts by
autoclave (at 121°C maximum for 15 min): Air owing cane - Air intake.
Flow
rate l/min 100 150 200 250 300
Speed
rot/min
4415
-
4880
6675
-
7378
8996
-
9943
11325
-
12517
12909
-
14268
If the values found for every ow rate are not in
accordance with the values of the table, the sampler
should be sent to our service department for
calibration.
For safety reasons and to prevent any damage of
the unit, the recommendations listed below should
be strictly followed:
DO NOT spray liquids directly on the air opening of
the fan;
Disconnect the power cord before cleaning;
DO NOT use any type of scrapers;
DO NOT use caustic soda or acetone
Description References
Cane S001081-CORM0-A.0
Air intake S001085-CORM0-A.0
Air intake for long time monitoring S001203-CORM0-A.0
Li-Ion Battery S001093-CORM0-A.0
Li-Ion Battery charger C29200000019A.0
Flow control Option S001118-CORM0-A.0
Cones and caps S001107-CORM0-A.0
Sterile cones and caps S001109-CORM0-A.0
Collection liquid sterile doses (by 50) S001113-CORM0-A.0
Collection liquid in bottle (250 ml) S001114-CORM0-A.0
Tubing kit S001115-CORM0-A.0

Page 37Page 36
USER MANUAL
CORIOLIS µ
ANNEXE 1 : EXAMPLE OF A FLOW CONTROL REPORT
Rapport de vérication d’un biocollecteur CORIOLIS®µ
Verication report of a CORIOLIS®µ Air Sampler
Documents de référence : Manuel utilisateur du banc référencé
05027-006-DU001-A
Referencedocument:usermanualofthebenchreferenced05027-006-DU001-A
Moyens de vérication : Banc de vérication - référence :
N° série :
Verication equipment : Verication bench - reference
Serial number :
Résultats :
Results:
Débit en l/min
Flow in l/min 300
Vitesse attendue en tour/min
Expected speed in rot /min
Comprise entre 12909 et 14268
between 12909 et 14268
Vitesse mesurée en tour/min
Measured speed in rot /min
Conforme
Conform
Non-conforme
Non conform
Observations
Remarks
Opérateur
Operator
Non-conforme
Non conform
Nom
Name
Date et Visa
Date and Visa

Page 39Page 38
USER MANUAL
CORIOLIS µ
NOTESNOTES
Other manuals for Coriolis m
1
Table of contents
Other Bertin Technologies Laboratory Equipment manuals

Bertin Technologies
Bertin Technologies PRECELLYS 24 User manual

Bertin Technologies
Bertin Technologies Coriolis m User manual

Bertin Technologies
Bertin Technologies PRECELLYS 24 Touch User manual

Bertin Technologies
Bertin Technologies PRECELLYS Evolution Touch User manual

Bertin Technologies
Bertin Technologies CORIOLIS Compact User manual

Bertin Technologies
Bertin Technologies PRECELLYS 24 User manual

Bertin Technologies
Bertin Technologies CORIOLIS COMPACT User manual

Bertin Technologies
Bertin Technologies Cryolys Evolution User manual

Bertin Technologies
Bertin Technologies Cryolys Evolution User manual