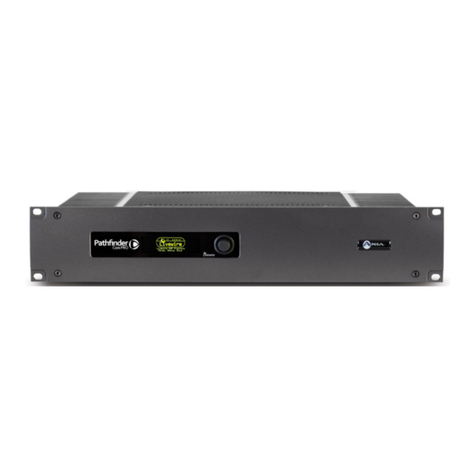
bonitron M3575R User manual

Model M3575R
Resistive Braking Load Module
Customer Reference Manual

Bonitron, Inc.
2
Bonitron, Inc.
Nashville, TN
An industry leader in providing solutions for AC drives.
ABOUT BONITRON
Bonitron designs and manufactures quality industrial electronics that improve the reliability of
processes and variable frequency drives worldwide. With products in numerous industries, and
an educated and experienced team of engineers, Bonitron has seen thousands of products
engineered since 1962 and welcomes custom applications.
With engineering, production, and testing all in the same facility, Bonitron is able to ensure its
products are of the utmost quality and ready to be applied to your application.
The Bonitron engineering team has the background and expertise necessary to design, develop,
and manufacture the quality industrial electronic systems demanded in today’s market. A strong
academic background supported by continuing education is complemented by many years of
hands-on field experience. A clear advantage Bonitron has over many competitors is combined
on-site engineering labs and manufacturing facilities, which allows the engineering team to have
immediate access to testing and manufacturing. This not only saves time during prototype
development, but also is essential to providing only the highest quality products.
The sales and marketing teams work closely with engineering to provide up-to-date information
and provide remarkable customer support to make sure you receive the best solution for your
application. Thanks to this combination of quality products and superior customer support,
Bonitron has products installed in critical applications worldwide.

Bonitron, Inc.
3
AC DRIVE OPTIONS
In 1975, Bonitron began working with AC inverter drive specialists at synthetic fiber plants to
develop speed control systems that could be interfaced with their plant process computers. Ever
since, Bonitron has developed AC drive options that solve application issues associated with
modern AC variable frequency drives and aid in reducing drive faults. Below is a sampling of
Bonitron’s current product offering.
WORLD CLASS PRODUCTS
Undervoltage Solutions
Overvoltage Solutions
Uninterruptible Power for Drives
(DC Bus Ride-Thru)
Voltage Regulators
Chargers and Dischargers
Energy Storage
Braking Transistors
Braking Resistors
Transistor/Resistor Combo
Line Regeneration
Dynamic Braking for Servo Drives
Common Bus Solutions
Portable Maintenance Solutions
Single Phase Power Supplies
3-Phase Power Supplies
Common Bus Diodes
Capacitor Formers
Capacitor Testers
Power Quality Solutions
Green Solutions
12 and 18 Pulse Kits
Line Regeneration

M3575R
4
1. INTRODUCTION..........................................................................................................................7
1.1. Who should use ............................................................................................................................ 7
1.2. Purpose and Scope........................................................................................................................7
1.3. Manual version and change record...............................................................................................7
Figure 1-1: Typical M3575R-B10 Unit....................................................................................................7
1.4. Symbol Conventions Used in this Manual and on Equipment.....................................................8
2. PRODUCT DESCRIPTION.............................................................................................................9
2.1. Related Docs.................................................................................................................................9
2.2. Part Number Breakdown ..............................................................................................................9
Figure 2-1: Example of Part Number Breakdown....................................................................................9
Table 2-1: AC Voltage Rating ...............................................................................................................10
Table 2-2: Example of Horsepower Rating............................................................................................10
Table 2-3: Chassis Styles .......................................................................................................................10
Table 2-4: Cooling Options....................................................................................................................11
2.3. General Specifications Chart......................................................................................................11
Table 2-5: General Specifications..........................................................................................................11
2.4. General Precautions and Safety Warnings .................................................................................12
3. INSTALLATION INSTRUCTIONS................................................................................................13
3.1. Environment ...............................................................................................................................13
3.2. Unpacking................................................................................................................................... 13
Figure 3-1: M3575R Mounting Orientation...........................................................................................13
3.3. Mounting ....................................................................................................................................13
3.4. Wiring and Customer Connections.............................................................................................14
3.4.1. Power Wiring..................................................................................................................14
Table 3-1: Power Wiring Chart..............................................................................................................14
3.4.2. I/O Wiring.......................................................................................................................15
Table 3-2: Terminal Block Specifications..............................................................................................15
Figure 3-2: Typical Braking Resistor Field Connections.......................................................................16
3.5. Typical Configurations...............................................................................................................17
Figure 3-3: Typical Braking Interconnection Diagram ..........................................................................17
Figure 3-4: Typical Braking Interconnection Diagram With Parallel Load Modules............................17
4. OPERATION..............................................................................................................................19
4.1. Functional Description ...............................................................................................................19
4.2. Features....................................................................................................................................... 19
4.2.1. Terminal Strip I/O...........................................................................................................19
4.3. Startup......................................................................................................................................... 19
4.3.1. Pre-power Checks ...........................................................................................................19
4.3.2. Startup Procedure and Checks......................................................................................... 19
4.4. Operational Adjustments............................................................................................................19
5. MAINTENANCE AND TROUBLESHOOTING...............................................................................21
5.1. Periodic Testing..........................................................................................................................21
5.2. Maintenance Items......................................................................................................................21
5.3. Troubleshooting..........................................................................................................................21
5.3.1. Drive trips on over-voltage or self-limits its decel rate...................................................21
5.3.2. The cooling fan doesn't turn on.......................................................................................21
5.3.3. Over-Temp Contact is open ............................................................................................ 22
5.3.4. Over-Temp Contact does not open on Over-Temp condition.........................................22
5.4. Technical Help –Before you call...............................................................................................22

Table of Contents
5
6. ENGINEERING DATA................................................................................................................23
6.1. Ratings........................................................................................................................................23
Table 6-1: Module Ratings –230VAC (320VDC Bus) at 6% Duty1.....................................................23
Table 6-2: Module Ratings –230VAC (320VDC Bus) at 20% Duty1...................................................23
Table 6-3: Module Ratings –460VAC (640VDC Bus) at 6% Duty1.....................................................24
Table 6-4: Module Ratings –460VAC (640VDC Bus) at 20% Duty1...................................................24
6.2. Watt Loss....................................................................................................................................25
6.3. Certifications ..............................................................................................................................25
Table 6-5: Certifications.........................................................................................................................25
6.4. Fuse/Circuit Breaker Sizing and Ratings....................................................................................25
6.5. Dimensions and Mechanical Drawings......................................................................................26
Figure 6-1: Bookshelf and Mini Chassis Dimensional Outline Drawing..............................................26
Table 6-6: Bookshelf and Mini Chassis Dimensions .............................................................................26
7. APPENDICES..........................................................................ERROR!BOOKMARK NOT DEFINED.
7.1. Application Notes.......................................................................................................................27
7.1.1. Wattage ...........................................................................................................................27
7.1.2. Ohmic value ....................................................................................................................27
7.1.3. Duty Cycle ......................................................................................................................27
7.1.4. Continuous rating............................................................................................................28
7.2. Competitive cross reference .......................................................................................................28
Table 7-1: AB-To-Bonitron Shunt Cross-Reference..............................................................................28

M3575R
6
This page intentionally left blank

User’s Manual
7
1. INTRODUCTION
1.1. WHO SHOULD USE
This manual is intendedfor use by anyone who is responsible for integrating, installing,
maintaining, troubleshooting, or using this equipment with any Motion Control System.
Please keep this manual for future reference.
1.2. PURPOSE AND SCOPE
This manual is a user’s guide for the Model M3575R Resistive Braking Load Modules.
It will provide the user with the necessary information to successfully install, integrate,
and use the M3575R modules in any Motion Control System.
In the event of any conflict between this document and any publication and/or
documentation related to the Motion Control System, the latter shall have precedence.
1.3. MANUAL VERSION AND CHANGE RECORD
The Over-temp spec is updated in Rev 11b
Chassis styles and dimensions are updated in Rev 11c.
Field Connection Drawings are updated in Rev 11d.
Formatting was updated in Rev 11e.
The manual template was updated in Rev 11f.
Tables 6-1, 6-2, 6-3, 6-4 were updated in Rev 11g.
Figure 1-1: Typical M3575R-B10 Unit

M3575R
8
1.4. SYMBOL CONVENTIONS USED IN THIS MANUAL AND ON
EQUIPMENT
Earth Ground or Protective Earth
AC Voltage
DC Voltage
DANGER!
DANGER: Electrical hazard - Identifies a statement that indicates
a shock or electrocution hazard that must be avoided.
DANGER!
DANGER: Identifies information about practices or circumstances
that can lead to personal injury or death, property damage, or
economic loss.
WARNING!
WARNING: Identifies information about actions or circumstances
that will probably lead to property damage, personal injury or
economic loss.
CAUTION!
CAUTION: Identifies information about practices or
circumstances that can lead to property damage, or economic
loss.
CAUTION!
CAUTION: Heat or burn hazard - Identifies a statement regarding
heat production or a burn hazard that should be avoided.
ATTENTION!
ATTENTION: Helps you identify a potential hazard, avoid a
hazard, and recognize the consequences.

User’s Manual
9
2. PRODUCT DESCRIPTION
The need for resistive braking control occurs in applications where the frequency of an AC
motor at times exceeds that of the variable frequency drive controlling it. When this
happens, the motor acts as a generator. The energy produced in these circumstances
may cause the drive to trip on an over-voltage condition or cause the motor to build up
heat. This regenerated energy must either be dissipated or returned to the power line.
For applications where this condition occurs infrequently, dissipating the energy as heat
through resistive braking control can be the most cost-effective solution.
The Model M3575R series of braking products is designed to provide resistive loads for
braking control in applications utilizing a standard AC drive with a fixed DC bus. These
modules have been designed for use as remotely mounted resistive loads for voltage
controlled chopper modules such asthe ModelM3575T Seriesof Braking Control Modules
or other existing resistive braking circuitry.
2.1. RELATED DOCS
The Model M3575T series of Resistive Braking Control modules is available in a
variety of ratings and configurations for use as voltage controlled chopper modules
with the M3575R Resistive Load modules or other resistive loads.
Contact the AC drive distributor for more information.
2.2. PART NUMBER BREAKDOWN
Figure 2-1: Example of Part Number Breakdown
BASE MODEL NUMBER
The Base Model Number of this unit (M3575R) indicates that the unit
incorporates the resistive load only. An external resistive braking transistor
module and its associated control circuitry are required for proper braking
function.
M3575R
L
16
B
F
COOLING OPTION
CHASSIS STYLE
HORSEPOWER RATING
AC VOLTAGE RATING
BASE MODEL NUMBER

M3575R
10
AC VOLTAGE RATING
The AC Voltage Rating of the braking load module should match the AC line
input voltage to the AC Drive being used. This rating is represented by an
alpha code.
Table 2-1: AC Voltage Rating
RATING
CODE
AC VOLTAGE
NOMINAL AC LINE
L
230VAC Line
H
460VAC Line
HORSEPOWER RATING
The Horsepower (hp) Rating indicates the maximum horsepower level safely
handled by the braking resistor module. Please see the Module Ratings
Tables in Section 6.1 for the M3575R modules currently available. The
Horsepower Rating is indicated by a numeric code.
Table 2-2: Example of Horsepower Rating
RATING CODE
HORSEPOWER
1
1hp
24
24hp
CHASSIS STYLE
The Chassis Style position indicates the unit enclosure. Please see the
Module Ratings in Section 6.1 to determine a unit’s chassis style.
Table 2-3: Chassis Styles
CHASSIS
STYLE
CHASSIS
CODE
DESCRIPTION
DIMENSIONS
H”X W”X D”
B
B4
Type-1 Bookshelf
17.75 x 4 x 9.50
B
B7
Type-1 Bookshelf
17.75 x 7 x 9.50
B
B10
Type-1 Bookshelf
17.75 x 10 x 9.50
B
B10D
Type-1 Bookshelf
17.75 x 10 x 11.50
M
M4
Mini
12.75 x 4 x 9.50
M
M7
Mini
12.75 x 7 x 9.50
M
M10
Mini
12.75 x 10 x 9.50
COOLING OPTION
The Cooling Option position indicates whether or not the unit has an internal
cooling fan which is thermostatically controlled to activate if the units internal
temperatureexceeds 110F. The Cooling FanOption isindicated by an alpha
or numeric code.

User’s Manual
11
Table 2-4: Cooling Options
COOLING OPTION CODE
DESCRIPTION
0
No internal cooling fan
F
115VAC internal cooling fan
FL
230VAC internal cooling fan
FD
24VDC internal cooling fan
2.3. GENERAL SPECIFICATIONS CHART
Table 2-5: General Specifications
PARAMETER
SPECIFICATION
Nominal Drive Voltage
Available for use with: 230VAC (320VDC Bus) or
460VAC (640VDC Bus) drive systems.
Braking Current
Units available for 1-47* amps DC
* Loads can be combined for greater capacity.
Maximum On-Time
60 seconds for units rated for 33hp or less
Duty Cycle
20% Maximum with cooling fan option
6% Maximum without cooling fan option
Fan Voltage
230VAC, 115VAC, 24VDC
Connections
Chopper module or braking kit (from drive or add-on braking kit)
Output
Over-Temp - 125VAC, 15A resistive
Enclosure
Enclosed
Operating Temp
0C - 40C
Storage Temp
-20C to +65C

M3575R
12
2.4. GENERAL PRECAUTIONS AND SAFETY WARNINGS
DANGER!
HIGH VOLTAGES MAY BE PRESENT!
NEVER ATTEMPT TO OPERATE THIS PRODUCT WITH THE
ENCLOSURE COVER REMOVED!
FAILURE TO HEED THESE WARNINGS MAY
RESULT IN SERIOUS BODILY INJURY OR DEATH!
CAUTION!
THIS PRODUCT WILL GENERATE HIGH TEMPERATURES
DURING OPERATION.
THIS PRODUCT SHOULD B E INSTALLED ACCORDIN GLY ON
NON-FLAMMABLE SURFACES WITH CLEARANCES OF AT
LEAST TWO INCHES IN ALL DIRECTIONS.
ALWAYS ALLOW AMPLE TIME FOR THE UNIT TO COOL
BEFORE ATTEMPTING SERVICE ON THIS PRODUCT.
NO USER-SERVICEABLE PARTS ARE CONTAINED WITHIN
THIS PRODUCT .INOPERABLE UNITS SHOULD BE
REPLACED OR RETURNED FOR EVALUATION AND/OR
REPAIR BY QUALIFIED TECHNICIANS.
BEFORE ATTEMPTING INSTALLATION OR REMOVAL OF
THIS PRODUCT,BE SURE TO REVIEW ALL DRIVE AND/OR
RESISTIVE LOAD DOCUMENTATION FOR PERTINENT
SAFETY PRECAUTIONS.
ANY QUESTIONS REGARDING APPLICATION, INSTALLATION OR
SERVICE SAFETY SHOULD BE DIRECTED TO THE EQUIPMENT SUPPLIER.

User’s Manual
13
3. INSTALLATION INSTRUCTIONS
WARNING!
Installation and/or removal of this product should only be performed by a
qualified electrician in accordance with National Electrical Code or local
codes and regulations.
Proper installation of the Model M3575R Resistive Braking Load Module should be
accomplished following the steps outlined below. Be sure to refer to the AC Drive and/or
Braking Kit instruction manual as these steps are performed. Please direct all installation
inquiries that may arise during the installation and startup of this braking product to the
equipment supplier or system integrator.
3.1. ENVIRONMENT
The module should be installed in an area protected from moisture and falling debris.
Buildup of dust or dirt on the resistor can be a fire hazard. Operating in a wet
environment can pose a shock hazard.
See Table 2-5 for the recommended temperature range for operating or storing this
module.
3.2. UNPACKING
Upon receipt of this product, please verify that the product received matches the
product that was ordered and that there is no obvious physical damage to the unit. If
the wrong product was received or the product is damaged in any way, please contact
the supplier from which the product was purchased.
Figure 3-1: M3575R Mounting Orientation
C
B
A
VERTICAL SURFACE HORIZONTAL TO FLOOR
UP
UP
HANGING UNDERSIDE
UP
HORIZONTAL SURFACE
3.3. MOUNTING
The installation site for the module should be chosen with several considerations in
mind:
The mounting surface must be non-flammable, as the unit will generate high
surface temperatures during typical operation.
The unit requires a minimum clearance of two (2) inches in all directions around it
when mounted near a non-heat source. When mounting near a second M3575R
or other heat source, a minimum of six (6) inches of clearance MUST be allowed
between the two.
Once the installation site has been selected as outlined above, the unit should be
mounted in place. The M3575R must be properly oriented for proper air flow through
Dwg: 070131 Rev: 20070524

M3575R
14
the units. The M3575R must ALWAYS be mounted with the rear surface of the unit
to the mounting surface. Refer to Figure 3-1A for acceptable mounting orientation.
NEVER mount a unit in a horizontal position with its side parallel to the mounting
surface or floor as shown in Figure 3-1C. Do not mount the unit in an upside-down
position or on the underside of a mounting surface as shown in Figure 3-1B.
Mounting dimensions and provisions vary by unit chassis size and style. Refer to
Tables 6-1 thru 6-4 in Section 6.1 of this manual to determine the chassis size and
style for the unit. Then refer to Section 6.5 of this manual to determine the correct
mounting dimensions and provisions for the unit.
3.4. WIRING AND CUSTOMER CONNECTIONS
Connection points and terminal numbers of the AC Drive and/or Braking Kit will be
found in the documentation provided with those units.
Be sure to review all pertinent AC Drive, Braking Kit and System documentation as
well as the Field Connection Notes listed below before proceeding.
3.4.1. POWER WIRING
WARNING!
Only qualifiedelectricians shouldperform and maintain the interconnection
wiring of this product. All wiring should be done in accordance with
National Electrical Code or equivalent regulations.
WARNING!
Never connect the Resistive Braking Load Module directly across the DC
bus! This would exceed the maximum duty cycle rating of the load. The
extreme overheating generated by the load resistors under this condition
could present a fire hazard in and around the Resistive Load Module.
Table 3-1: Power Wiring Chart
CHASSIS
TERM.
CONNECTION
TORQUE
B,M
(Fig 3-3)
Res1
Res2
18 - 12 AWG
3.5 –5.3 lb-in
7
ground
Please note that although the connection diagrams shown in Figures 3-3
and 3-4 depict a typical interconnection of the M3575R Resistor Module
with the M3575T Braking Transistor Module, the M3575R can be used
with any properly sized braking transistor module. Refer to the installation
manual for the transistor module used to determine proper connection
details.
Be sure that the Resistive Load being connected meets the minimum load
resistance requirements listed in the Braking Kit and/or AC Drive
documentation.
Field connection terminals used on the Bookshelf (B*) and Mini (M*)
chassis units are depicted in Figure 3-3.
Wire types and sizes should be chosen in accordance with national and/or
local electrical codes as well as module termination limitations outlined in
Table 3-1 to meet the voltage and RMS current ratings of the M3575R
module as listed Section 6.1 of this manual.
Figure 3-4 shows typical connections for a single M3575R module.

User’s Manual
15
Figure 3-5 shows parallel interconnection of two M3575R modules.
3.4.1.1. SOURCE CONSIDERATIONS
Please refer to your local codes and requirements for inline fusing
between the resistor and drive. Special considerations may apply, as a
blown fuse in the DC will remove the braking load, and may lead to loss
of braking torque. Review the safety standards required for your
application.
3.4.1.2. GROUNDING REQUIREMENTS
Using the ground lug provided, ground the chassis in accordance with
local codes. Typically the wire gauge will be the same as is used to
ground the attached drive.
3.4.2. I/O WIRING
The M3575R Resistive Load is equipped with an Over-Temp contact for use
with existing drive or system interlock circuitry. Please refer to the system
documentation for field control interlock connection details. When installing
M3575R modules in parallel, it is recommended that the over-temperature
contacts of these units be connected in series as shown in Figure 3-5.
Actual connection points and terminal numbers for the AC Drive module
should be found in the documentation provided with the drive. Be sure to
review all pertinent drive and system documentation before proceeding.
Table 3-2: Terminal Block Specifications
CHASSIS
TERM.
FUNCTION
DESCRIPTION
LOCATION
ELECTRICAL RATINGS
(RESISTIVE)
CONN.
TORQUE
B,M
(Fig 3-3)
3,4
Over-
Temp
4.2.1.1
125VAC, 15A
250VAC, 10A
100,000 Cycles
18 - 12
AWG
3.5 –5.3
lb-in
5,6
Fan
Power
4.2.1.2
Type FL -230VAC 0.25A
Type F –115VAC 0.5A
Type FD –24VDC 1A
14 –12
AWG
3.5 –5.3
lb-in

M3575R
16
Figure 3-2: Typical Braking Resistor Field Connections
Dwg: 070076 Rev: 20070418

User’s Manual
17
3.5. TYPICAL CONFIGURATIONS
Figure 3-3: Typical Braking Interconnection Diagram
Dwg: 070105 Rev: 20101025

M3575R
18
Figure 3-4: Typical Braking Interconnection Diagram With Parallel Load Modules
Dwg: 070106 Rev: 20070419

User’s Manual
19
4. OPERATION
The operation of the M3575R Resistive Load Module is passive in that there are no
parameters or adjustments that can be made before or during operation. Please refer to
the ratings charts in Tables 6-1 thru 6-4 in Section 6 and selection criteria for proper sizing
considerations.
4.1. FUNCTIONAL DESCRIPTION
Braking resistors absorb energy from drives during braking by converting excess
power into heat. In order to control the drive’s bus voltage level, a braking transistor
must be used. This transistor may be integral to the drive, or may be connected
externally. Refer to your drive manual for information on integrating the M3575R
Resistive Load Module with your drive.
4.2. FEATURES
4.2.1. TERMINAL STRIP I/O
4.2.1.1. OVER-TEMP
The Over-Temp Switch is a normally closed thermostat that opens when
the case temperature exceeds 71ºC. This contact can be used to indicate
that the braking resistor is overheating due to excessive duty cycle.
4.2.1.2. FAN POWER
Fan power is provided for cooling when the resistor is in operation. Refer
to the chart for the power requirements for your unit. Note that the fan
will not run continuously. When the fan thermostat is ON, the fan will run
until the thermostat cools down.
4.3. STARTUP
4.3.1. PRE-POWER CHECKS
Ensure that all connections are tight and that all wiring is of the proper size
for operation. Check for exposed conductors that may lead to inadvertent
contact.
4.3.2. STARTUP PROCEDURE AND CHECKS
Apply power to your drive. Ensure that the resistive load has no current
flowing to it when the drive is in the idle state. If there is significant current
flowing to the resistor during the idle state, this can indicate that the resistor
is not properly attached to the drive. The resistor must be used with a
properly sized braking transistor. Once the resistor connection is verified, run
the drive through a normal acceleration and deceleration cycle. During the
deceleration cycle, current may be observed through the resistive load. Refer
to Section 5.3 Troubleshooting if the drive does not operate properly.
4.4. OPERATIONAL ADJUSTMENTS
No adjustments are necessary for this module.

M3575R
20
This page intentionally left blank
Table of contents
Other bonitron Control Unit manuals

bonitron
bonitron M3460RD User manual

bonitron
bonitron M3452 User manual

bonitron
bonitron M3528M4 User manual

bonitron
bonitron M3628PUD User manual
bonitron
bonitron M3460D User manual
bonitron
bonitron M3452 EIP User manual

bonitron
bonitron M3452 User manual
bonitron
bonitron M3528M2 User manual
bonitron
bonitron M3345D User manual

bonitron
bonitron M3699 User manual
