7
en
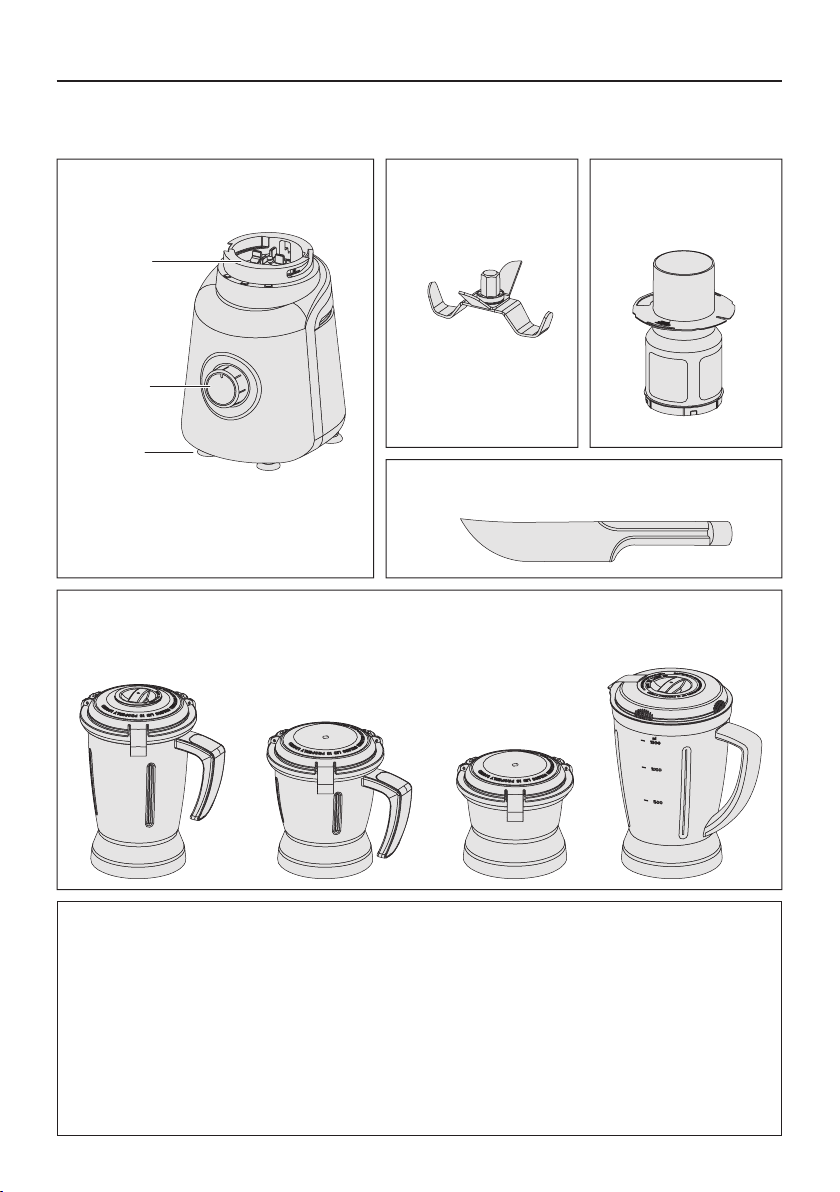
Operating your mixer grinder
Operating your mixer
grinder
Before using for the first time /
using after a long time
Before using the mixer grinder for the
first time or using it after a long time,
thoroughly clean all the parts that come
into contact with food ingredients.
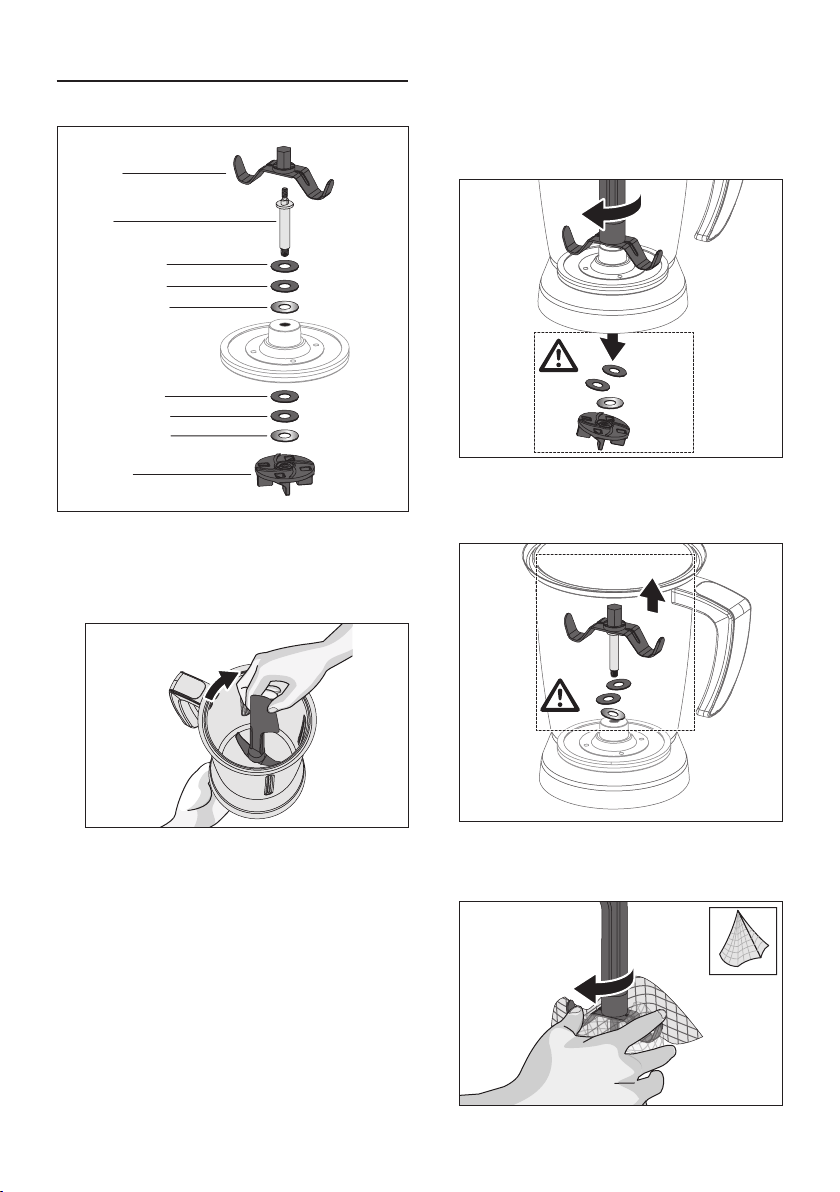
Rotate the motor shaft by hand via the
motor coupler, on top of the main unit.
The motor shaft should rotate freely.
Check that the speed selector is in the
OFF position.
Place the main unit on a smooth, stable
and clean surface.
W Caution!
Never place plastic, paper or cloth under
the mixer grinder as it may block the
ventilation holes.
Connect the main plug to the wall
socket. Switch on the main supply
and turn the speed selector knob to
the required position and speed. After
operation, turn the speed selector knob
to the OFF position and check. Repeat
until the desired results are obtained.
You may observe some minor oil
spillage in the Jars and Jar sockets
during first two to three operations. This
is normal. Thoroughly clean the minor
oil spillages with water and wipe dry with
soft cloth.
Preparation of ingredients
Important!
Cool down any hot ingredients before
putting in the jar.
Cut large ingredients into small pieces
approx. 2 cm in size before mixing/
grinding.
Regular use and operation
For blending/liquidising/puréeing use
‘Pulse’ on the speed selector knob. This
will activate Pulse until you release the
button. Use position 1-3 for continuous
operation.
1 = Lowest operating speed
3 = Highest operating speed
Hold down the jar lid gently while your
mixer grinder is in operation.
After switching off the mixer grinder, wait
until the blade stops rotating completely
and only then remove the lid or insert
the spatula.
Before removing the jar from the main
unit, ensure that the power supply is
disconnected.
Avoid using your hand to fill or clean
jars. It is safer and more hygienic to use
the spatula.
Avoid storing food in the jar.
Cleaning
W Risk of electric shock!
Never immerse the main unit in water or
any other liquid or pour any liquid over it.
Never hold under running water and do not
clean in the dishwasher.
To keep your Bosch mixer grinder sparkling
clean, just follow these steps.
1. First remove the mains plug from the
electrical socket.
2. Clean the main unit using a damp/wet
cloth. Do not use abrasive cleaning
agents.