manuals.online logo
Brands
  1. Home
  2. •
  3. Brands
  4. •
  5. Bosch
  6. •
  7. Security Sensor
  8. •
  9. Bosch DS9360 TriTech User manual

Bosch DS9360 TriTech User manual

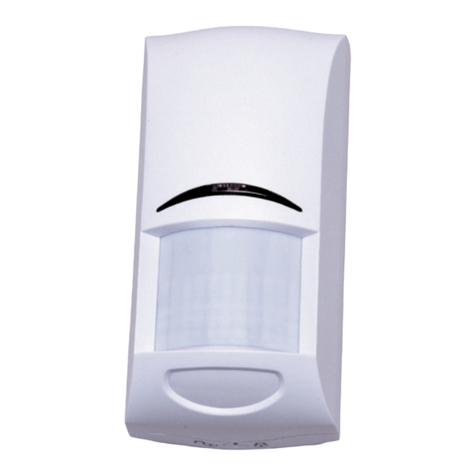
DS9360 TriTech Ceiling Mount
PIR/ Microwave Intrusion Detector
1.0 Specifications
• Dimensions (HxDia): 3.5 in. x 5.25 in. (8.9 cm x 13.3 cm)
•Coverage: 360° by 60 ft. (18.3 m) diameter
coverage when mounted on 8 to 18 ft.
(2.4 to 5.5 m) high ceilings. Pattern
consists of 64 zones grouped into 16
barriers, with one additional zone
looking straight down from the unit
(sabotage). Each barrier is 30 ft. (9.2 m)
long and 4.4 ft. (1.3 m) wide at 30 ft.
(9.2 m). Choice of two optical modules
depending on ceiling height.
•Input Power: 6.0 to 15.0 VDC; 18 mA standby, 75 mA
in alarm with LEDs enabled. Use only
an Approved Limited Power Source.
•Standby Power: There is no internal standby battery.
Standby power must be provided by an
Approved Limited Power Source.
Eighteen mAh required for each hour of
standby time needed. For UL Listed
Requirements, 72 mAh standby current
is required.
• Sensitivity: Field selectable for Intermediate and
High.
•Alarm Relay: Silent-operating Form “C” relay. Contacts
rated 125 mA, 28 VDC maximum for DC
resistive loads. To be connected to a
SELV (Safety Extra-Low Voltage) circuit
only. Do not use with capacitive or
inductive loads.
•Tamper: Normally Closed (with cover in place)
tamper switch. Contacts rated at
28 VDC, 125 mA maximum. To be
connected to a SELV (Safety Extra-Low
Voltage) circuit only. Connect tamper
circuit to a 24-hour protection circuit.
•Temperature Range: The storage and operating range is
-40°F to +120°F (-40°C to +49°C). For UL Listed
Requirements, the range is +32°F to
+120°F (0°C to +49°C).
•Compliance: This device complies with Part 15 of the FCC
Rules and with RSS-210 of Industry and Science Canada.
Operation is subject to the following two conditions:
(1) this device may not cause harmful interference, and
(2) this device must accept any interference received,
including interference that may cause undesirable
operation.
Changes or modifications not expressly approved by Bosch
Security Systems can void the user’s authority to operate the
equipment.
2.0 Installation Considerations
•Never install the detector in an environment that causes an
alarm condition in one technology. Good installations start with
the LED OFF when there is no target motion. It should never be
left to operate with the tri-color LED in a constant or intermittent
green, yellow, or red condition.
• Point the unit away from outside traffic (roads/alleys).
NOTE: Microwave energy will pass through glass and most
common non-metallic construction walls.
• Avoid installations where rotating machines (e.g. ceiling fans)
are normally in operation within the coverage pattern. Point the
unit away from glass exposed to the outdoors and objects that
may change temperature rapidly.
NOTE: The PIR detector will react to objects rapidly changing
temperature within its field-of-view.
• Eliminate interference from nearby outside sources.
3.0 Mounting
• Select a location likely to intercept an intruder moving beneath
and across the coverage pattern. Recommended mounting
height range is 8 to 18 feet (2.4 to 5.5 m).
• The surface should be solid and vibration-free. (i.e. Drop tiles
should be secured if the area above the tiles is used as an air
return for HVAC systems).
• Open the cover by turning counterclockwise. One side of the
cover will remain attached to the base of the detector. Do not
attempt to entirely remove the cover.
Enclosure Release Tabs
Base
Enclosure
Cover
The Cover remains
attached to the
Enclosure
• Remove the base from the enclosure by pressing the two
enclosure release tabs inward while lifting the enclosure away
from the base.
Hint: Slightly rock the enclosure side-to-side during removal to
overcome the friction caused by the base-to-enclosure
terminal pins.
• Route wiring as necessary to the rear of the base and through
the center hole.
Note: Be sure all wiring is de-energized before routing.
• Firmly mount the base. Depending on local regulations, the
base may be directly surface mounted using anchors, mollies,
or wing-nuts, or may be mounted to standard 4-inch octagonal
or square electrical boxes.
EN50131-2-4 Grade 2 Environmental Class II
Page 2 © 2011 Bosch Security Systems, Inc. DS9360 Installation Guide
Note: The DS9360 base will not completely cover a 4-inch
square box. Where aesthetics are important, a 4-inch
octagonal box is recommended.
Hint: Mounting to removable ceiling tiles is not recommended
unless a sandwich is made of the base, ceiling tile, and a
back plate behind the tile. Covers used for 4-inch
octagonal and square boxes make a suitable back plate
(when used with bolts and wing nuts, as an example).
4.0 Selecting the Optical Module
• Replace the enclosure onto the base.
• For ceilings between 8 and 13 ft. (2.4 and 4.0 m) from the floor,
use the optical module marked AR8-13. This marking can be
found next to the two optical module tabs.
For ceilings between 13 and 18 ft. (4.0 and 5.5 m) high, use
the optical module marked AR13-18.
• To replace an optical module, push the optical module tabs
towards the center until the module snaps free of the circuit
board. Holding the new module by the tabs, snap the new
module into place.
NOTE: Avoid fingerprints on the mirrored surfaces. Should the
mirrored surfaces become soiled or otherwise marked,
they can be cleaned using a soft, clean cloth and any
commonly available, mild window cleaner.
5.0 Wiring
CAUTION
Only apply power after all connections have been
made and inspected. Do not coil excess wiring
inside detector.
NOTE: Input power must use only an Approved Limited Power
Source. Alarm and Tamper Contacts to be connected to a
SELV (Safety Extra-Low Voltage) circuit only.
-+NO CNC TT
ALARM TAMPER
POWER
+
-
TR
•Terminals 1 (-) & 2 (+): Power limits are 6 to 15 VDC. Use no
smaller than #22 AWG (0.8 mm) wire pair between the unit and
the power source.
•Terminals 3 (NO), 4 (C), & 5 (NC): Alarm relay contacts rated
125 mA, 28 VDC maximum for DC resistive loads. Use
terminals 4 & 5 for Normally Closed circuits. Do not use with
capacitive or inductive loads.
•Terminals 6 (T) & 7 (T): Normally Closed tamper contacts
rated at 28 VDC, 125 mA.
•Terminal 8 (TR): Solid state Trouble output. Shorts to ground
(-) when the detector is in a Trouble condition.
6.0 LED Operation
The detector uses a tri-color LED to indicate the various alarm and
supervision trouble conditions that may exist. See chart below.
LED CAUSE
Steady red Unit alarm
Steady green + yellow + red Microwave activation (walk test)
Steady green PIR activation (walk test)
Flashing red Warm-up period after power-up
Flashing red (4 pulse sequence) Replace Unit
If the detector experiences a Microwave or PIR self-test failure, it is
in need of replacement.
NOTE: During walk testing, the LED will light for the first
technology (microwave or PIR) and then light red to
indicate a detector alarm. The LED will not indicate
activation of the second technology by lighting its color.
7.0 Feature Selection
LED
OFF ON
I H
Sensitivity
Jumper
IH
OFF ON
LED
Jumper
7.1 LEDOn/OffPins
The ON position allows operation of the tri-color LED. If LED
indication is not desired after setup and walk tests are completed,
place in the OFF position. The OFF position does not prevent the
LED from indicating supervision trouble conditions.
Mounting Base
REAR WIRE
ENTRANCE
WIRE
TIE-DOWNS (2)
TERMINAL
STRIP
INTERFACE
PINS
MOUNTING
SLOTS (4)
18
LED
OFF ON
I H
LED and
LED J mper
Sensitivity
J mper
Microwave
Adj stment
LED
Wires
To
Cover
Top View of Enclosure
MIN
Anti-vandal Screw Hole
Req ired for
EN50131
Installations
Anti-vandal Screw Hole
Req ired for
EN50131
Installations
DS9360 Installation Guide © 2011 Bosch Security Systems, Inc. Page 3
7.2 PIR Sensitivity Selection Pins
For selection, place the plug across the pins marked I for
Intermediate mode or H for High mode.
•Intermediate Sensitivity (I): Tolerates environment extremes
on this setting, but requires the largest amount of intruder
motion to achieve an alarm.
•High Sensitivity (H): The recommended setting for most
installations. Use in locations where an intruder is expected to
cover only a small portion of the protected area. Tolerates
normal environments on this setting. The detector is shipped
inHighSensitivitymode.
7.3 Microwave Adjustment
Note: It is important to wait 1 minute after removing/replacing the
cover so the microwave portion of the detector can settle,
and to wait at least 5 seconds between the following walk
testing procedures.
• The tri-color LED should be OFF before walk
testing.
• Walk test across the pattern at the intended
coverage’s farthest end. Start walking from
outside the intended protection area and
observe the tri-color LED. The edge of the
microwave pattern is determined by the first 3 color, microwave
activation of the LED (or the first red activation if the green PIR
LED activates first).
• If adequate range can not be reached, increase the Microwave
Range Adjust slightly. Continue walk testing (waiting 1 minute
after removing/replacing the cover) and adjusting the range
until the farthest edge of desired coverage has been accurately
placed.
Do not adjust the microwave range higher than required.
Doing so will enable the detector to catch movement outside
of the intended coverage pattern.
• Walk test the unit from all directions to determine all the
detection pattern boundaries.
8.0 Supervision Features
The supervision features function as follows:
•PIR/Microwave: The complete circuit operation of these
subsystems is checked approximately every 6 hours. If the PIR
or microwave subsystem fails, the red LED will flash 4 times
per cycle and the unit should be replaced.
•Default: The detector will default to PIR technology protection if
the microwave subsystem fails.
9.0 Other Information
9.1 Anti-Vandal Screws for EN50131 Applications
• After the cover has been installed and twisted into place, the
entire assembly can be secured together using the supplied
anti-vandal screws. The anit-vandal screws are required for
EN50131 applications. Refer to the Top View of Enclosure
figure on page 2 for the location of the screw holes.
9.2 Maintenance
At least once a year, the range and coverage should be verified. To
ensure continual daily operation, the end user should be instructed
to walk through the far end of the coverage pattern. This ensures an
alarm output prior to arming the system.
9.3 Reading Bosch Security Systems, Inc. Product Date
Codes
For Product Date Code information, refer to the Bosch Security
Systems, Inc. Web site at:
http://www.boschsecurity.com/datecodes/.
MIN MAX
Microwave
Adjustment
10.0 Optical Module Masking
• Peel-off masks are provided with the unit for each segment of
the optical module to allow for customized coverage, or to
block out areas of objects that may cause thermal
disturbances. The mask is self-adhesive and pre-cut in the
shape of the optical module.
• The location of the zone to be masked depends on the
position of the detector. Therefore, determine the mirror
surface to be masked before removing the mirror from the
detector.
• To block out a particular zone or group of zones, peel off a
section of the mask that corresponds to the appropriate zone,
and stick it on the mirror segment. Before attempting any
masking, be sure the chosen mirror surface is the correct one.
NOTE: When attempting to remove any masking, many
adhesives will either destroy the mirror surface or leave
enough residue behind to reduce coverage performance.
AR8-13
D
432143125
ABP C
E
F
G
H
I
J
N
O
K
L
M
AB
C
D
E
F
G
H
I
J
K
L
M
N
O
P
TOP VIEW
M-4 M-3 M-2 M-1 E-1 E-2 E-3
E-4
5
SIDE VIEW
• When replacing the mirror, make sure it is facing the same
direction as before it was removed.
NOTE: Avoid soiling or leaving fingerprints on the mirror surfaces.
Should they become soiled or otherwise marked, they can
be cleaned using a soft, clean cloth and any commonly
available mild window cleaner.
© 2011 Bosch Security Systems, Inc.
130 Perinton Parkway, Fairport, New York 14450
www.boschsecurity.com
3/11
DS9360 Installation Guide
P/N: F01U069640-05 Page 4

Other Bosch Security Sensor manuals

Bosch CRS-WM-TA869 User manual

Bosch

Bosch CRS-WM-TA869 User manual

Bosch ISW-ZPR1-WP13 User manual

Bosch

Bosch ISW-ZPR1-WP13 User manual

Bosch DS936 User manual

Bosch

Bosch DS936 User manual

Bosch ISC-CDL1-W15G User manual

Bosch

Bosch ISC-CDL1-W15G User manual

Bosch ISC-PDL1-W18G User manual

Bosch

Bosch ISC-PDL1-W18G User manual

Bosch SF8172 User manual

Bosch

Bosch SF8172 User manual

Bosch RADION contact SM User manual

Bosch

Bosch RADION contact SM User manual

Bosch DS9360 User manual

Bosch

Bosch DS9360 User manual

Bosch DS432i-CHI User manual

Bosch

Bosch DS432i-CHI User manual

Bosch Professional Series User manual

Bosch

Bosch Professional Series User manual

Bosch FCP-500 User manual

Bosch

Bosch FCP-500 User manual

Bosch Blue Line D1-P User manual

Bosch

Bosch Blue Line D1-P User manual

Bosch Blue Line D1-P User manual

Bosch

Bosch Blue Line D1-P User manual

Bosch PAVIRO Series User manual

Bosch

Bosch PAVIRO Series User manual

Bosch RF835E User manual

Bosch

Bosch RF835E User manual

Bosch MS-LZS User manual

Bosch

Bosch MS-LZS User manual

Bosch RF940U User manual

Bosch

Bosch RF940U User manual

Bosch ISC-PPR1-WA16G User manual

Bosch

Bosch ISC-PPR1-WA16G User manual

Bosch ISA-WM-869 User manual

Bosch

Bosch ISA-WM-869 User manual

Bosch PMD 7 User manual

Bosch

Bosch PMD 7 User manual

Bosch DS935LSN User manual

Bosch

Bosch DS935LSN User manual

Bosch BMA400 Instruction Manual

Bosch

Bosch BMA400 Instruction Manual

Bosch AP1-P User manual

Bosch

Bosch AP1-P User manual

Bosch WEU PDO Multi User manual

Bosch

Bosch WEU PDO Multi User manual

Popular Security Sensor manuals by other brands

NAPCO C 100 SAFARI datasheet

NAPCO

NAPCO C 100 SAFARI datasheet

Sensor Partners 3H-IR14C user manual

Sensor Partners

Sensor Partners 3H-IR14C user manual

Greystone Energy Systems WD-100 Series installation instructions

Greystone Energy Systems

Greystone Energy Systems WD-100 Series installation instructions

PCB Piezotronics 1203-14A Installation and operating manual

PCB Piezotronics

PCB Piezotronics 1203-14A Installation and operating manual

Atwood 36719 User manual and installation instructiions

Atwood

Atwood 36719 User manual and installation instructiions

Hytronik HMW39/RF quick start guide

Hytronik

Hytronik HMW39/RF quick start guide

Zircon LEAK ALERT X quick start guide

Zircon

Zircon LEAK ALERT X quick start guide

Lince Bobby Universale Technical manual

Lince

Lince Bobby Universale Technical manual

Airthings Wave operating manual

Airthings

Airthings Wave operating manual

ektor EV-MERCURY-III-40M installation instructions

ektor

ektor EV-MERCURY-III-40M installation instructions

Inficon XL3000flexRC Translation of the original operating instructions

Inficon

Inficon XL3000flexRC Translation of the original operating instructions

Fenwal F1H-RYW1 Operation & instruction manual

Fenwal

Fenwal F1H-RYW1 Operation & instruction manual

CPAT FLEX DRV3 user manual

CPAT

CPAT FLEX DRV3 user manual

Aura Light Kvill CE installation manual

Aura Light

Aura Light Kvill CE installation manual

exemys ID Series user manual

exemys

exemys ID Series user manual

SmartSun Y SOL user manual

SmartSun

SmartSun Y SOL user manual

INIM Electronics OTT100H Installation and programming manual

INIM Electronics

INIM Electronics OTT100H Installation and programming manual

NDT Systems Curlin-Air user guide

NDT Systems

NDT Systems Curlin-Air user guide

manuals.online logo
manuals.online logoBrands
  • About & Mission
  • Contact us
  • Privacy Policy
  • Terms and Conditions

Copyright 2025 Manuals.Online. All Rights Reserved.