Breezy UniX2 Manual

DIRECTIONS FOR USE
GEBRAUCHSANWEISUNG
MANUALE D’USO
GEBRUIKERSHANDLEIDING
NOTICE D'UTILISATION
UniX
WHEELCHAIR
ROLLSTUHL
CARROZZINA MANUALE
ROLSTOEL
FAUTEUIL ROULANT
2
000690915

2
UniX2
Wheelchair Components
We at SUNRISE MEDICAL have been awarded the ISO-9001certificate, which affirms the quality of our products at every stage, from R & D
to production. This products meet the requirements in accordance with EC guidelines. Options or accessories shown are available at extra
cost.
EN
Componenti della carrozzina
Sunrise Medical ha ottenuto la certificazione ISO-9001, che ribadisce la qualità dei suoi prodotti in ogni fase, dalla ricerca e sviluppo fino alla
produzione.
Questo prodotto è conforme ai requisiti previsti dalle linee guida CE. Sono disponibili ulteriori opzioni ed accessori ad un costo aggiuntivo.
IT
Rolstoelonderdelen
SUNRISE MEDICAL heeft het ISO 9001 certificaat toegekend gekregen, een bewijs van de kwaliteit van onze processen in elk stadium,
vanaf het onderzoek en de ontwikkeling tot de productie.
Deze producten voldoen aan de vereisten in overeenstemming met Europese richtlijnen. Getoonde opties en accessoires zijn tegen betaling
verkrijgbaar.
NL
Rollstuhlkomponenten
SUNRISE MEDICAL ist nach ISO 9001zertifiziert und garantiert damit die Qualität unserer Produkte bei allen Entwicklungs- und
Produktionsstufen dieses Rollstuhls. Dieses Produkt erfüllt die Anforderungen gemäß der EU-Richtlinien. Hier abgebildete Optionen oder
Zubehörteile sind gegen Aufpreis erhältlich.
DE
Description du fauteuil
SUNRISE MEDICAL est certifié ISO -9001, une norme qui garantit la qualité des produits à toutes les étapes, de la conception à la
production, en passant par la recherche et le développement. Ce produit est conforme aux directives de la Communauté européenne.
Les options ou accessoires illustrés sont disponibles moyennant un coût supplémentaire.
FR

3
UniX2
7
10
9
11
2
1
3
4
5
6
8
12
Wheelchairs:
1. Push handles
2. Backrest upholstery
3. Sideguard
4. Seat sling
5. Footrest
6. Castors
7. Footboard
8. Fork
9. Quick-release axle
10. Wheel locks
11. Handrim
12. Rear wheel
5
Rollstühle:
1. Schiebegriffe
2. Rückenpolster
3. sideguard
4. Sitzgurt
5. Fußstütze
6. Rollen
7. Trittbrett
8. Gabel
9. Steckachse
10. Felgenschlösser
11. Greifreifen
12. Hinterrad
16
FAUTEUIL ROULANT:
POIGNÉES DE POUSSÉE
TOILE DE DOSSIER
PROTÈGE-VÊTEMENT
TOILE DU SIÈGE
REPOSE-PIEDS
ROUES AVANT
PALETTE
FOURCHE
CHÂSSIS PLIANT
FREINS
ROUE ARRIÈRE
MANCHETTE
49
Rolstoelonderdelen:
1. Duwhandvatten
2. Spanbanden rug
3. Zijbescherming
4. Zittingbespanning
5. Voetsteun
6. Voorwielen
7. Voetplaten
8. Vork
9. Quick release assen
10. Wielvergrendelingen
11. Hoepel
12. Achterwiel
38
Carrozzina:
1. Manopole di spinta
2. Rivestimento schienale
3. Spondina
4. Telo seduta
5. Pedana
6. Ruote anteriori
7. Appoggiapiedi
8. Forcella
9. Asse ad estrazione rapida
10. Freni
11. Corrimano
12. Ruota posteriore
27

4
UniX2
1090
975
700
580
1090
975
970
920
MAX
mm
MIN
mm
520
470
420
420
220
220
535
530
10°
10°
10°
10°
3°
3°
80°
79°
115°
115°
520
360
425
410
500
380
13.4
12.2
MAX
kg
MIN
kg
125
---
19.4
18.0
310
300
10°
10°
850
810
<
MAX
<
MIN
<
MAX
<
MIN
313
183
+20
0

5
UniX2
Table of contentsForeword
Dear Customer,
We are very happy that you have decided in favour of a high-quality
SUNRISE MEDICAL product.
This user’s manual will provide numerous tips and ideas so that
your new wheelchair can become a trustworthy and reliable partner
in your life.
We want you to be satisfied with our products and service. Sunrise
Medical has been consistently working at continuously developing
its products, for this reason, changes can occur in our palette of
products with regard to form, technology and equipment.
Consequently, no claims can be construed from the data or pictures
contained in this user’s manual.
The management system of SUNRISE MEDICAL is certified to
ISO 9001, ISO 13485 and ISO 14001.
As the manufacturer, SUNRISE MEDICAL, declares
that the wheelchairs conform to the 93/42/EEC,
amended by 2007/47/EC guideline.
Please contact your local, authorised SUNRISE MEDICAL dealer if
you have any questions regarding the use, maintenance or safety
of your wheelchair.
In case there is no authorised dealer in your area or you have any
questions, contact Sunrise Medical either in writing or by telephone
(contact addresses can be found on the back page).
Sunrise Medical
Thorns Road
Brierley Hill
West Midlands
DY5 2LD
England
Phone: 0845 605 66 88
Fax: 0845 605 66 89
www.SunriseMedical.com
Please keep a note of your local service agent’s address and
telephone number in the space below.
In the event of a breakdown, contact them and try to give all
relevant details so they can help you quickly.
IMPORTANT:
DO NOT USE YOUR WHEELCHAIR UNTIL THIS
MANUAL HAS BEEN READ AND UNDERSTOOD.
DANGER!
Warning messages regarding possible risks of serious
accident or death.
WARNING!
Warning messages regarding possible risks of injury.
CAUTION!
Warning messages regarding possible technical damage.
NOTE:
Information for operating the product.
Use
Steel wheelchairs are exclusively for a user who is unable to walk,
has limited limited mobility, for their own personal use in- and
outdoor on dry, firm and level surface terrains (self propelling or
attendant push).
The maximum weight limit (includes both the user and any weight of
accessories fitted to the wheelchair) is marked on the serial number
label, which is affixed to the crossbar or stabiliser bar below the
seat.
Warranty can only be taken on if the product is used under the
specified conditions and for the intended purposes.
The intended lifetime of the wheelchair is 5 years. DO NOT use or fit
any 3rd party components to the wheelchair unless they are officially
approved by Sunrise Medical.
Symbol legend
Area of application
The variety of fitting variants as well as the modular design mean
that it can be used by those who cannot walk or have limited mobility
because of:
• Paralysis
• Loss of extremity (leg amputation)
• Extremity defect deformity
• Joint contractures/joint injuries
• Illnesses such as heart and circulation deficiencies, disturbance of
equilibrium or cachexia as well as for elderly people who still have
strength in the upper body.
When considering provision, please also note the body size, weight,
physical and psychological constitution, the age of the person, living
conditions and environment.
ENGLISH
Wheelchair Components 2
Foreword 5
Symbol legend 5
Table of contents 5
Use 5
Area of application 5
General safety notes and driving restrictions 6
Warranty 7
Transportability 8
Handling 10
Options - Step Tubes 10
Options - Brakes 10
Options - Crutch Holder 10
Options - Footplates 11
Options - Castors 11
Options - Side Guard 12
Options - Back Rest 12
Options - Therapy Table 12
Options - Anti Tip Tubes 12
Options - Lap Belt 12
Name Plate 13
Tyres and Mounting 14
Daily Checks 14
Trouble Shooting 14
Maintenance and Care 14
Disposal / Recycling of Materials 14
Technical Data 15
Seat Height Adjustment 15
Torque 15

6
UniX2
General safety notes and driving restrictions
The engineering and construction of this wheelchair has been
designed to provide maximum safety. International safety standards
currently in force have either been fulfilled or exceeded in parts.
Nevertheless, users may put themselves at risk by improperly using
their wheelchairs. For your own safety, the following rules must be
strictly observed.
Unprofessional or erroneous changes or adjustments increase the
risk of accident. As a wheelchair user, you are also part of the daily
traffic on streets and pavements, just like anyone else. We would
like to remind you that you are therefore also subject to any and all
traffic laws.
Be careful during your first ride in this wheelchair. Get to know your
wheelchair.
Before each use, the following should be checked:
• Fixed axles or Quick-release axles on the rear wheels.
• Velcro on seats and backrests
• Tyres, tyre pressure and wheel locks.
Before changing any of the adjustments of this wheelchair, it is
important to read the corresponding section of the user’s manual.
It is possible that potholes or uneven ground could cause this
wheelchair to tip over, especially when riding uphill or downhill.
When riding forwards over a step or up an incline, the body should
be leaning forward.
DANGER!
• NEVER exceed the maximum load of 125 kg for user plus any
items carried on the wheelchair. If you exceed the maximum
load, this can lead to damage to the chair, or you may fall or tip
over, lose control and may lead to serious injury of the user and
other people.
• When it is dark, please wear light clothing or clothing with
reflectors, so that you can be seen more easily. Make sure that
the reflectors on the side and back of the wheelchair are clearly
visible.
• We would also recommend that you fit an active light.
DANGER!
• To avoid falls and dangerous situations, you should first
practice using your new wheelchair on level ground with good
visibility.
• When getting on or off the wheelchair, do not use the
footboards.
• These should be flipped up beforehand and swung to the
outside as far as possible. Always position yourself as close as
possible to the place where you wish to transfer to.
• Only use your wheelchair with care. For example, avoid
travelling against an obstacle without braking (step, kerb edge)
or dropping down gaps.
• The wheel locks are not intended to stop your wheelchair in
motion. They are only there to ensure that your wheelchair
does not begin rolling unintentionally. When you stop on
uneven ground, you should always use the wheel locks to
prevent unintended movement. Always apply both wheel locks;
otherwise, your wheelchair could tip over.
• Explore the effects of changing the centre of gravity on the
behaviour of the wheelchair in use, for example on inclines,
slopes, all gradients or when overcoming obstacles. Do this
with the secure aid of a helper.
• With extreme settings (e.g. rear wheels in the most forward
position) and less than perfect posture, the wheelchair may tip
over even on a level surface.
• Lean your upper body further forward when going up slopes
and steps.
• Lean your upper body further back when going down slopes
and steps. Never try to climb and descend a slope diagonally.
• Avoid using an escalator which may lead to serious injury in the
event of a fall.
• Do not use the wheelchair on slopes more than 10°. The
Dynamic safe slope is dependant on the chair configuration,
the users abilities and the style of riding. As the users abilities
and style of riding cannot be predetermined then the max safe
slope cannot be determined. Therefore this must be determined
by the user with the assistance of an attendant to prevent
tipping. It is strongly recommended that inexperienced users
have Anti-tips fitted.
• It is possible that potholes or uneven ground could cause this
wheelchair to tip over, especially when riding uphill or downhill.
• Do not use your wheelchair on muddy or icy ground.
• Do not use your wheelchair where pedestrians are not allowed.
• To avoid hand injuries do not grab in between the spokes or
between the rear wheel and wheel lock when driving the
wheelchair.
• In particular when using lightweight metal handrims, fingers will
easily become hot when braking from a high speed or on long
inclines.
• Only attempt stairs with the help of an attendant. There is
equipment available to help you, e.g. climbing ramps or lifts,
please use them. If there is no such equipment available, then
the wheelchair must be tipped and pushed, never carried, over
the steps (2 helpers). We recommend that users over 100 kg in
weight are not transferred in this way. In general, any anti-tip
tubes fitted must be set beforehand, so that they cannot touch
the steps, as otherwise this could lead to a serious tumble.
Afterwards the anti-tip tubes must be set back to their correct
position.
• Make sure that the attendant only holds the wheelchair using
securely mounted parts. Do not use removable parts (e.g. not
on the footrests or the side guards).
• When using the lifting ramp make sure that the anti-tip tubes
fitted are positioned outside the danger area.
• Secure your wheelchair on uneven ground or when
transferring, e.g. into a car, by using the brakes.
• If and whenever possible, during a journey in a specially fitted
vehicle for disabled people, vehicle occupants should use the
seats in the vehicle and the appropriate restraint system. This
is the only way to ensure that occupants will have the
maximum protection if there is an accident.
10°
10°
ENGLISH

7
UniX2
DANGER!
• Depending on the diameter and setting of the castors, as well
as the centre of gravity setting of the wheelchair, the castors
may begin to wobble at high speeds. This can lead to castor
seizure and the wheelchair may tip over. Therefore, please
make sure that the castors are adjusted correctly (see the
Chapter "Castors").
• In particular, do not travel on an incline without brakes, travel at
a reduced speed. We recommend that novice users use anti-tip
tubes.
• Anti-tip tubes should prevent the chair tipping over backwards
unintentionally. Under no circumstances should they take the
place of transit wheels, and be used to transport a person in a
wheelchair with the rear wheels removed.
• When reaching for objects (which are in front of, to the side or
behind the wheelchair) make sure that you do not lean too far
out of the wheelchair, as if you change the centre of gravity
there is a risk of tipping or rolling over. The hanging of
additional load (back pack or similar items) onto your chair
back posts can affect the rearward stability of your chair,
especially when used in combination with recliner backrests.
This can cause the chair to tip backwards causing injury.
• For thigh amputees you must use anti-tip tubes.
• Before setting off, check that your tyre pressure is correct. For
rear wheels it should be at least 3.5 bar ( 350 kPa). The max.
pressure is indicated on the tyre.The knee-lever brakes will
only work if there is sufficient tyre pressure and if the correct
setting has been made (see the Chapter on "Brakes").
• If the seat and back sling are damaged, you must replace them
immediately.
• Be careful with fire, in particular with burning cigarettes. Seat
and back slings can be set alight.
• If the wheelchair is subject to direct sunlight / cold temperature
for a long period of time, then parts of the wheelchair (e.g.
frame, legrests, brakes and side guard) may become hot
(>41°C) / very cold (<0°).
• Always make sure that, if fitted, the quick-release axles on the
rear wheels are set properly and lock in (locking ball bearings
are showing completely through the axle sleeve). If the button
on the quick-release axle is not pressed in, the rear wheel
cannot be removed.
CAUTION !
• The effect of the knee-lever brake as well as the general driving
characteristics are dependant on tyre pressure. The wheelchair
is significantly lighter and easier to manoeuvre when the rear
wheels are pumped up correctly and both wheels have the
same pressure.
• Make sure that your tyres have sufficient tread!
• Please note that you are subject to any and all traffic laws
when driving in public traffic.
• Always be careful when handling or adjusting the wheelchair!
• Adjustments which require tools should always be done by
authorized dealers.
• Clean the wheelchair regularly to avoid rust and salt corrosion.
• Check the rivets, nuts and bolts to make sure they are tight and
that no wheelchair parts will come loose.
• With all moving parts there is a natural risk of finger traps.
Please handle with care.
• The products shown and described in this manual may not be
exactly the same in every detail as your own model. However,
all instructions are still entirely relevant, irrespective of detai
differences.
• The manufacturer reserves the right to alter without notice any
weights, measurements or other technical data shown in this
manual. All figures, measurements and capacities shown in this
manual are approximate and do not constitute specifications.
DANGER!
CHOKING HAZARD – This mobility aid uses small parts which
under certain circumstances may present a choking hazard to
young children.
LIFETIME
The expected lifetime of this product is 5 years provided that:
it is used in strict accordance with the intended use
all service and maintenance requirements are met.
Warranty
GUARANTEE
THIS GUARANTEE DOES NOT AFFECT YOUR
LEGAL RIGHTS IN ANY WAY.
Sunrise Medical* provides a guarantee, as set out in the
warranty conditions, for wheelchairs to its customers covering
the following
Warranty conditions
1. Should a part or parts of the wheelchair require repair
or replacement as a result of a manufacturing and/or
material fault within 24 months or for frame and cross-
braces within 5 years after delivery to the customer, then
the affected part or parts will be repaired or replaced
free of charge. (Batteries are guaranteed for a period of
12 months subject to the correct battery care plan being
followed)
2. To enforce the warranty, please contact Sunrise Medical
Customer Service with the exact details of the nature of
the difficulty. Should you be using the wheelchair outside
the area covered by the Sunrise Medical customer
service agent, repairs or replacement will be carried out
by another agency as designated by the manufacturer
The wheelchair must be repaired by a Sunrise Medical
designated Customer Service agent, (dealer).
3. For parts, which have been repaired or exchanged
within the scope of this warranty, we provide a warranty
in accordance with these warranty conditions for
the remaining warranty period for the wheelchair in
accordance with point 1).
4. For original spare parts which have been fitted at
the customer’s expense, these will have a 12 months
guarantee, (following the fitting), in accordance with these
warranty conditions.
5. Consumable parts such as pads, tyres, inner tubes and
similar parts are excluded from the warranty, except in the
case that premature wear of the part is the direct result of
a manufacturing fault.
6. Claims from this warranty shall not arise, if a repair or
replacement of a wheelchair or a part is required for the
following reasons:
a) The product or part has not been maintained or serviced
in accordance with the manufacturer’s recommendations
as shown in the User Instructions and/or the Service
Instructions.
b) Accessories have been used which are not specified as
original accessories.
c) The wheelchair or part having been damaged by neglect,
accident or improper use.
d) Changes/modifications have been made to the
wheelchair or parts, which deviate from the
manufacturer’s specifications.
e) Repairs have been carried out, before our Customer
Service has been informed of the circumstances.
7. This guarantee is subject to the law of the country in
which the product was purchased from Sunrise Medical“
* Means the Sunrise Medical facility from which the product was
purchased.
ENGLISH

8
UniX2
Transportability
DANGER!
There is a risk of serious injury or death if this if this advice is
ignored!
TRANSPORTATION OF YOUR WHEELCHAIR WITHIN A
VEHICLE:
A wheelchair secured in a vehicle will not provide the equivalent
level of safety and security as a vehicle seating system. It is always
recommended that the user transfers to the vehicle seating. It is
recognised that this is not always practical for the user to be
transferred and in these circumstances, where the user must be
transported whilst in the wheelchair, the following advice must be
followed:
1. Confirm that the vehicle is suitably equipped to transport a
passenger in a wheelchair, and ensure the method of access/
egress is suitable for your wheelchair type. The vehicle should have
the floor strength to take the combined weight of the user, the wheel
chair and accessories.
2. Sufficient space should be available around the wheelchair to
enable clear access to attach, tighten and release the wheelchair
and occupant tie down restraints and safety belts.
3.The occupied wheelchair must be located in a forward facing
position and secured by the wheelchair tie down and occupant
restraint straps (WTORS tie downs meeting the requirements of
ISO 10542 or SAE J2249) in accordance with the WTORS
manufacturer’s instructions.
4. The wheelchair’s use in other positions within a vehicle has not
been tested e.g. transportation in a side facing position must not be
carried out under any circumstances (Fig. A).
5. The wheelchair should be secured by a Tie Down Restraint
system, conforming to ISO 10542 or SAE J2249 with non-
adjustable front straps and adjustable rear straps, which typically
use Karabiner clips/S hooks and tongue and buckle fittings. These
restraints generally comprise of 4 individual straps that are attached
to each corner of the wheelchair.
6. The tie-down restraints should be fitted to the main frame of the
wheelchair as indicated in the diagram on the following page, and
not to any attachments or accessories, e.g. not around the spokes
of wheels, brakes or footrests.
Fig.A
7. The tie–down restraints should be attached as close as possible
at an angle of 45 degrees and tightened securely in accordance
with the manufacturer’s instructions.
8.Alterations or substitutions must not be made to the wheelchair
securement points or to structural and frame or components
without consulting the manufacturer. Failure to do so will invalidate
the ability of a Sunrise Medical wheelchair to be transported within
a vehicle.
9. Both pelvic and upper torso restraint belts must be used to
restrain the occupant to reduce the possibility of head and chest
impacts with the vehicle components and serious risk of injury to
the user and other vehicle occupants. (Fig B) The upper torso
restraint belt should be mounted to the vehicle “B” pillar - failure to
do so will increase the risk of serious abdominal injuries to the user.
10. A head restraint suitable for transportation (see label on
headrest) must be fitted and suitably positioned at all times during
transportation.
11. Postural supports (lap straps, lap belts) should not be used or
relied on for occupant restraint in a moving vehicle unless they are
labelled as meeting the requirements specified in ISO 7176-
19:2001 or SAE J2249.
12. The safety of the user during transportation depends upon the
diligence of the person securing the tie-down restraints and they
should have received appropriate instructions and/or training in
their use.
13. Wherever possible remove and stow safely away from the
wheelchair all auxiliary equipment, for example:
Crutches, Loose cushions and Tray Tables.
14. Articulating/elevating leg rest should not be used in the elevated
position when the wheelchair and user are being transported and
the wheelchair is restrained using Wheelchair Transport and
Occupant Restraints.
15. Reclining backrests should be returned to an upright position.
16. The manual brakes must be firmly applied.
17. Restraints should be mounted to the vehicle “B” pillar and
should not be held away from the body by wheelchair components
such as armrest or wheels.
Fig.B
ENGLISH

9
UniX2
ENGLISH
OCCUPANT RESTRAINTS INSTRUCTION:
1. The pelvic restraint belt must be worn low across the front of the
pelvis so that the angle of the pelvic belt is within the preferred zone
of 30 to 75 degrees to the horizontal.
A steeper (greater) angle within the preferred zone is desirable i.e.
closer to, but never exceeding 75degrees. (Fig C)
2. The upper torso restraint belt must fit over the shoulder and
across the chest as illustrated Fig d and e
Restraint belts must be adjusted as tightly as possible consistent
with user comfort.
Restraint belt webbing must not be twisted when in use.
The upper torso restraint belt must fit over the shoulder and across
the shoulder as illustrated in Fig D and E.
3. The attachment points to the chair are the inner front side frame
just above the castor, and the rear side frame. The straps are fitted
around the side frames at the intersection of the horizontal and
vertical frame tubes. (See Figs G - K)
4. The tie down symbol (Fig F) on the wheelchair frame indicates
the position of the wheelchair restraint straps. The straps are then
tensioned after the front straps have been fitted to secure the
wheelchair.
USER WEIGHT LESS THAN 22 kg
When the user being transported is a child, less than 22Kg mass and
the vehicle involved has less than eight (8) seated passengers it is
recommended that they be transferred to an UNCE Regulation 44
compliant child restraint system (CRS).
This type of restraint system provides a more effective occupant
restraint system than the conventional 3 point occupant restraint
system and some CRS systems also include additional postural
supports to assist in maintaining the position of the child when seated.
Parents or care providers may consider the option, in some
circumstances, for their child is to remain in their wheelchair whilst in
transport due to the level of posture control and comfort provided by
the set up in the wheelchair.
We would recommend in such circumstances that a risk assessment
be carried out by your healthcare professional and relevant
competent persons.
Positioning of wheelchair tie down restraints on wheelchair:
1. Location of the front and rear tie down labels (Fig.G - H).
2. Position of the front, (Fig.I) and rear, (Fig.J), wheelchair tie down
restraint and the tie down label.
3. Side view of tie down straps, (Fig.K).
Fig.D
Fig.E
Fig.C
PREFERED
ZONE
Fig.F
Transportability >>>
Fig.H
Fig.I
Fig.G Fig.K
Fig.J

10
UniX2
Handling
FOLDING UP
First remove the seat cushion from
the wheelchair and flip up the
(platform) footplate or the individual
footrests. Take hold of the sling or
the seat tubes in the middle, from the
back and pull upwards. The
wheelchair will then fold up. To fold
your wheelchair so that it is as small
as possible, e.g., to put into a car,
you can remove the footrests
(depending on the model). For this
purpose, open the latch from the
outside and swing the footrest to the
side. Then the footrest only has to be
drawn out of the receiver tube (Fig.
1).
UNFOLDING
Press down on the seat tube (see
figure). Your wheelchair is then
unfolded. Now snap the seat tubing
into position in the seat saddle. This
can be facilitated by slightly tipping
your wheelchair, as this means that
the weight is taken off one of the rear wheels. Be careful not to get
your fingers caught in the cross-tube assembly. Refit the seat
cushionl (Fig. 2).
Fig. 1
Fig. 2
GETTING INTO YOUR WHEELCHAIR
INDEPENDENTLY (FIG. 3)
• The wheelchair should be pushed up against
a wall or solid piece of furniture;
• The brakes should be on;
• The footplates should be hinged up;
• The user can then lower himself into the chair;
• The footplates should then be pushed down
and the feet rested on them in front of the heel
loops.
GETTING OUT OF YOUR WHEELCHAIR
INDEPENDENTLY (FIG. 4)
• The brakes should be on;
• The hinged footplates should be hinged up;
• With one hand on each armrest, the person
should bend slightly forward to bring the body
weight to the front of the seat, and with both
feet firmly on the ground, one foot well back,
push up into the upright position.
WARNING!
When standing, do not stand on the footplates or the wheelchair will
tip up. It is easier and safer to get into your wheel chair if you turn
the footplates up and out of the way or take them off the wheelchair.
Fig. 3
Fig. 4
Options - Brakes
CAUTION!
Mounting the wheel lock too close towards the wheel will
result in a higher effort to operate. This might cause the brake
lever to break!
CAUTION!
Leaning onto the brake lever while transferring will cause the
lever to break! Splashing water from tyres might cause the
wheel lock to malfunction..
DRUM BRAKES
Drum brakes permit safe and
convenient braking for an attendant.
They can also be set with the aid of
a locking lever (1) to prevent rolling.
The lever must snap audibly into
place. Drum brakes are not
influenced by air pressure inside the
tyres, (Fig.8.0).
WARNING!
• Drum brakes must only be adjusted by authorised dealers.
• Always operate the two brakes simultaneously to guarantee the
control of the driving direction!
• Drum brakes can only be used as a dynamic brake to stop the
wheelchair while driving.
• Always engage the wheel locks to secure the wheelchair during a
short or long stop, or for transfer.
WHEEL LOCKS
Your wheelchair is equipped with two
wheel locks. They are applied
directly against the tyres. To engage,
press both brake levers forward
against the stops. To release the
locks, pull the levers back to their
original positions.
Braking power will decrease with:
• Worn tyre tread
• Tyre pressure that is too low
• Wet tyres
• Improperly adjusted wheel locks
The wheel locks have not been
designed to be used as brakes for a
moving wheelchair. The wheel locks
should therefore never be used to
brake a moving wheelchair. Always
use the hand-rims for braking. Make
sure that the gap between the tyres
and wheel locks complies with given
specifications. To readjust, loosen
the screw and set the appropriate
gap. Then re-tighten the screw (Fig.
6 + 7).
CAUTION!
After each adjustment of the rear wheels, check the wheel lock gap
and re-adjust if necessary.
Fig. 6
Options - Step Tubes
STEP TUBES (FIG.5)
Step tubes are used by attendants to
tip a wheelchair over an obstacle.
Simply step on the tube to push a
wheelchair, for example, over a kerb
or step.
NOTE: Sunrise Medical strongly
reccommends the use of a step tube
on any model where attendant use is
the predominant intended use.
Damage to the backposts may occur
if you constantly use the backpost without a step tube, as a lever to
pull back on to tip the wheelchair, in order to overcome obstacles.
Fig.5
ENGLISH
Options - Crutch Holder
Fig. 9 Fig. 10
Fig. 7
18mm
Fig. 8
1

11
UniX2
ENGLISH
Options - Footplates
FOOTPLATES:
The footplates can be flipped up to make
it easier to transfer to/from the chair.
Each assembly weighs 1.0kg
LOWER LEG LENGTH:
For users with longer legs, the leg
support can be lowered to the
appropriate level by using the screws (1).
Loosen the screws, push the tubes to the
desired position and then re-tighten the
screws (see section on torque). There
must always be a minimum gap of 2.5
cm between the footplates and the
ground, (Fig.11).
FOOTRESTS AND LATCH
The legrests can be swung inwards
under the seat sling or outwards. When
fitting the legrests, the footrests must be
pointing inwards or outwards. Then
rotate the legrest inwards, until it locks
into place. To remove, pull the lever (1),
swing the footplate inwards or outwards
and then lift the legrest out. Make sure
that the legrest is locked into place
correctly, (Fig.12).
CAUTION!
• The legrests must not be used to lift or to carry the wheelchair.
• When getting on or off the wheelchair, do not use the footboards.
These should be flipped up beforehand or the footrest should be
swung to the outside as far as possible.
OPTION ELEVATING LEGREST
(Fig 13-15)
To remove, pull the lever (1), swing the
footplate outwards and then lift the
legrest out.
HEIGHT ADJUSTMENT:
The lower leg length can be adjusted
infinitely by releasing the screw (2).
Adjust the suitable height and tighten the
screw again.
CAUTION!
The distance between the footplate
and the ground must be at least 40
mm.
ANGLE ADJUSTMENT:
Press the lever (3) downward with one
hand while supporting the legrest with
the other hand to take the load off. When
a suitable angle is achieved, let go of the
lever and the legrest will lock into one of
the preset positions.
FIG. 12 1
FIG. 13
1
FIG. 11
1
ADJUSTING THE CALF PAD
(Fig 16).
The calf pad can be adjusted as
follows:
Height: Open bolt (4) and move the
clamping piece to the desired
position. By rotating the clamping
piece also the angle can be
adjusted.
Depth: Open bolt (5) and move the
calf pad into the desired position.
Width: Open bolt (5) and position the
spacers (6) behind the pad, to get
the desired position.
WARNING!
• Keep hands clear of the adjustable mechanism between the
frame and the movable parts of the foot rest, while elevating or
lowering the footrest.
• Always make sure that the fasteners are secure.
• The foot rests must not be used to lift or to carry the
wheelchair.
• Risk of trapping fingers! When moving the foot rest up or
down, do not put your fingers in the adjusting mechanism
between the moving parts of the foot rest.
AMPUTEE SUPPORT
(Fig.17).
The Amputee Support can be
adjusted in every direction as
required.
CASTORS, CASTOR PLATES, FORKS
The wheelchair may veer slightly to the right or left, or the castors
may wobble. This may be caused by the following:
• Forward and/or reverse wheel motion has not been set properly.
• The castor angle has not been set correctly.
• Castor and/or rear wheel air pressure is incorrect; the wheels do
not turn smoothly.
The wheelchair will not move in a straight line if the castors have
not been properly adjusted. Castors should always be adjusted by
an authorised dealer. The wheel locks must be checked every time
the rear wheel position has been altered.
The seat height is determined by the castor and rear wheel
position. The seat height can be adjusted by altering the position of
the rear wheels and the castors
CAUTION!
After adjusting the seat height, all screws must be re-tightened and
the wheel lock must be readjusted.
The castors must be set at 90°
2
FIG. 14
3FIG. 15
FIG. 16
4
5
6
FIG. 17
Options - Castors

12
UniX2
STANDARD SIDE GUARDS, FLIP-UP, WITH SHORT OR
LONG ARMRESTS
The side guard with rounded off front edges will allow you to get up
close to a table.
To flip the armrest up, push the lever (1), so that the side guard is
released (Fig. 18).
The length of the armrest can be adjusted by releasing the screws
(2), then move the armrest to the desired position and re-tighten the
screws (Fig. 19).
WARNING!
Neither the side guards nor the armrests are to be used for lifting or
carrying the wheelchair.
SIDEGUARD, FLIP-UP, REMOVABLE WITH SHORT OR
LONG ARMRESTS, HEIGHT-ADJUSTABLE
The armrest can be height-adjusted as follows.
Push the lever downwards and move the armrest to the desired
height (3).
Release the lever and press the
armrest downwards until you hear it
click into place. Always check that
the sideguards are correctly in
place.
To flip the armrest up, push the lever
(1) so that the sideguard is released.
You can adjust the length of the
armrest by releasing the screws (2)
push the armrest to the desired
position and then re-tighten the
screws (Fig. 20).
WARNING!
Neither the sideguards nor the armrests are to be used for lifting or
carrying the wheelchair.
HEIGHT-ADJUSTABLE
BACKREST
The height of the backrest can be
set to 2 different positions (41 cm
and 42.5 cm). Release and remove
the bolts (1), and push the backrest
sling to the desired position. Tighten
up the bolts again (Fig. 21).
THERAPY TABLE
The tray provides a flat surface for
most activities. Before using a tray, it
first has to be adjusted to the width of
the seat by an authorised dealer. The
user must be sitting in the wheelchair
during this adjustment (Fig. 22).
Options - Side Guard
FIG. 18
1
FIG. 19
2
FIG.20
1
2
3
Options - Back Rest
FIG.21
1
Options - Anti Tip Tubes
ANTI-TIP TUBES
Anti-tip tubes provide additional
safety for inexperienced users when
they are still learning how to operate
their wheelchair. They prevent a
wheelchair from tipping over
backwards.
By pushing on the release button (1),
the safety wheels can be set
upwards or removed. There must
always be a gap of between 3 cm
and 5 cm between the tube and the
ground.
You must swing the safety wheels upwards when going up and
down large obstacles (such as a kerb) to prevent them from
touching the ground. Then rotate the safety wheels back down to
the normal position (Fig. 23).
WARNING!
Incorrect setup of the anti-tips will increase the risk of a rearwards
tip.
WARNING!
Before using your wheelchair ensure
the seat belt is worn and correctly
adjusted before use.
The lap belt is fitted to the wheelchair
as shown in the illustrations. The
seat belt comprises 2 halves. They
are fitted using the existing arm rest
fixing bolt fitted through the eyelet on
the belt.
The belt is routed under the rear of
the side panel.
Adjust the belt position so buckles
are in the centre of the seat.
(Fig.24-25)
Adjust lap belt to suit the user’s needs as follows:
To increase the belt
length
To reduce the belt
length
Feed free belt
through slide adjust-
ers and male buckle
to provide more belt
length.
Feed free belt back
through male buckle
and slide adjusters.
Ensure belt is not
looped at male
buckle.
FIG. 23
1
ENGLISH
Options - Lap Belt
FIG. 24
FIG. 25
Type A Type A
Type A
Type B Type B Type B
Fig. 22
Options - Therapy Table

13
UniX2
When fastened check space between the lap belt and user, when
correctly adjusted it should not be possible to insert more than the
flat of the hand between the lap belt and the user. (Fig. 26)
Generally the Lap Belt should be fixed so that the straps sit at an
angle of approximately 45°, and when correctly adjusted should not
allow user to slip down in the seat.
(Fig. 27)
ENGLISH
Fig. 26 Fig. 27
To fasten buckle:
Firmly push male buckle into
female buckle.
To release belt:
Press exposed sides of male
buckle and push towards
centre / push the press button
of the female buckle whilst
gently pulling apart.
ADVICE TO CLIENT
DANGER!
• Do not rely on the lap belt only when the wheelchair and
occupant are transported in a vehicle, use the separate
occupant lap and diagonal restraints provided in the vehicle.
• Before use we recommend that the lap belt be checked to
ensure that it is adjusted correctly, free from any obstruction or
adverse wear and that the buckle engages securely.
• Failure to make sure that the lap belt is secure and adjusted
prior to use could cause serious injury to the user. e.g. too
loose a strap may allow the user to slip down in the chair and
risk suffocation.
MAINTENANCE:
Check lap belt and securing components at regular intervals for
any sign of fraying or damage. Replace if necessary. Clean the lap
belt with warm soapy water and allow it to dry.
DANGER!
The lap belt should be adjusted to suit the end user as detailed
above Sunrise Medical also recommend that the length and fit of
the belt is checked on a regular basis to reduce the risk of the end
user inadvertently re-adjusting the belt to an excessive length.
If in doubt about the use and operation of the seat belt then ask
your health care professional, wheelchair dealer, carer or attendant
for assistance.
Options - Lap Belt>>> Name Plate
NAMEPLATES
The nameplate is located on either the cross-tube assembly or the
transverse frame tube, as well as on a label in the owner’s manual.
The nameplate indicates the exact model designation and other
technical specifications. Please provide the following pieces of
information whenever you have to order replacement parts or to file
a claim:
Due to our policy of continuous improvement in the design of our
wheelchairs, product specifications may vary slightly from the
examples illustrated. All weight/dimensions and performance data
are approximate and provided solely for guidance.
Sunrise Medical complies with the EU Medical Devices Directive
93/42/EEC
All wheelchairs must be used in accordance with the
manufacturer’s guidelines.
Sunrise Medical GmbH & Co. KG
Kahlbachring 2-4
69254 Malsch/Heidelberg
Deutschland
Tel.: +49 (0) 7253/980-0
Fax: +49 (0) 7253/980-222
www.SunriseMedical.de
Product Name/SKU Number.
Maximum safe slope with anti-tips fitted,
Depends on wheelchair setting, posture and
physical capabilities of the user.
Seat width.
Depth (maximum).
Load Maximum.
CE Mark
User's Guide.
Crash Tested
Date of manufacture.
Serial number.
SAMPLE
UniX2

14
UniX2
ENGLISH
Tyres and Mounting
TYRES AND MOUNTING
Solid tyres are fitted as standard from the factory.
If pneumatic tyres are used, make sure that you maintain the
correct tyre pressure, as this can have an effect on wheelchair
performance. If the tyre pressure is too low, rolling resistance will
increase, requiring more effort to move the chair forward. Low tyre
pressure also has a negative impact on manoeuvrability. If the tyre
pressure is too high, the tyre could burst. The correct pressure for a
given tyre is printed on the surface of the tyre itself.
Tyres can be mounted the same way as an ordinary bicycle tyre.
Before installing a new inner tube, you should always make sure
that the base of the rim and the interior of the tyre are free of
foreign objects. Check the pressure after mounting or repairing a
tyre. It is critical to your safety and to the wheelchair’s performance
that regulation air pressure be maintained and that tyres be in good
condition.
CAUTION!
As the user, you are the first person to notice any possible
defects. We therefore recommend that before each use,
you check the items in the following list:
• Check for correct tyre pressures
• Check that the brakes work correctly
• Check that all removable parts are secure, e.g.
armrest, footrest, quick-release axle etc.
• Check for visible damage e.g. on the frame, backrest,
seat sling and back sling, wheels, footplate etc
If there is any damage or malfunction, please contact your
authorised dealer.
Wheelchair pulls to one side
• Check tyre pressure (pneumatic tyres only).
• Check to make sure wheel turns easily (bearings, axle).
• Check the castors are set consistently and make proper contact
with the ground.
• Ensure castor fork bearings rotate freely.
Castors begin to wobble
• Check to make sure all bolts are secure; tighten if necessary (see
the section on torque).
• Check to make sure both castors are making proper contact with
the ground.
Wheelchair squeaks and rattles
• Check to make sure all bolts are secure; tighten if necessary (see
the section on torque).
• Apply small amount of lubrication to spots where movable parts
come in contact with one another.
Wheelchair begins to wobble
• Check angle at which castors are set.
• Check all tyres for damage or wear.
• Check to see if rear wheels are adjusted or fixed unevenly.
MAINTENANCE
• Check the tyre pressure every 4 weeks. Check all tyres for wear
and damage.
• Check the brakes approximately every 4 weeks to make sure that
they are working properly
and are easy to use.
• Change tyres as you would an ordinary bicycle tyre.
• All of the joints that are critical to using your wheelchair safely are
self-locking nuts. Please
check every three months to make sure that all bolts are secure
(see the section on torque).
Safety nuts should only be used once and should be replaced
after use.
Daily Checks
• Please use only mild household cleansers when your wheelchair
is dirty. Use only soap and
water when cleaning the seat upholstery and lap belt.
• If your wheelchair should ever get wet, please dry it after use, to
avoid rust and salt corrosion.
• A small amount of sewing-machine oil should be applied to quick
release axles approximately every 8 weeks. Depending on the
frequency and type of use, we recommend taking your wheelchair
to your authorised dealer every 6 months to have it inspected by
trained personnel.
CAUTION!
Sand and sea water (or salt in the winter) can damage the bearings
of the front and rear wheels. Clean the wheelchair thoroughly after
exposure.
The following parts can be removed and sent to the manufacturer /
dealer for repair:
Rear wheels, Armrest, Hanger, Anti – tips. These components are
available as spares. More details can be found in the parts manual.
HYGIENE WHEN BEING REUSED:
When the chair is to be reused, it should be prepared carefully, and
wiped and treated with spray disinfectant on all surfaces which
could come into contact with the user.
In doing this, you must use a liquid for alcoholic quick disinfection
for medical products and medical inventory when you require a
quick effect. Please pay attention to the manufacturer’s instructions
of the disinfectant you are using.
In general, a safe disinfectant cannot be guaranteed on seams. We
therefore recommend, that you properly dispose of seat and back
slings in the case of micro bacterial contamination with active
agents according to § 6 infection protection law.
STORAGE
Please store/keep the wheelchair in a dry place.
NOTE: If the wheelchair has been supplied to you free of charge it
may not belong to you. If it is no longer required follow any
instructions given by the organisation issuing the wheelchair in
order that it may be returned to them.
The following information describes the materials used in the
wheelchair in relation to the disposal or re-cycling of the wheelchair
and its packaging. Specific waste disposal or recycling regulations
may be in force locally and these should be taken into consideration
when disposal arrangements are made. (This may include the
cleaning or decontamination of the wheelchair before disposal).
Steel: Fasteners, QR axle, side frames, armrests, frame, leg rests,
push handles.
Plastic: Handgrips, castor forks, tube plugs, castor wheels,
footplates, armpads and 12” wheel/tyre, wheels, side guards.
Packaging: Low density polythene bag, cardboard box.
Upholstery: Woven polyester with PVC coatings and expanded
combustion modified foam.
Disposal or recycling should be done through a licensed agent or
authorised place of disposal. Alternatively your wheelchair may be
returned to your dealer for disposal.
Trouble Shooting
Disposal / Recycling of Materials
Maintenance and Care

15
UniX2
ENGLISH
MAXIMUM LOAD: 125 KG
ALSO SEE PAGE 4
In Accordance with EN12183: 2009 all there listed parts (seat - back upholstery, arm pad, side panel...) are fire resistant as per EN1021-2 .
The Dynamic safe slope is dependant on the chair configuration, the users abilities and the style of riding. As the users abilities and style of
riding cannot be predetermined then the max safe slope cannot be determined. Therefore this must be determined by the user with the
assistance of an attendant to prevent tipping. It is strongly recommended that inexperienced users have Ant-tips fitted.
The wheelchair conforms to the following standards:
a) Requirements and test methods for static, impact and fatigue strengths (ISO 7176-8)
b) Requirements for resistance to ignition in accordance with ISO 7176-16 (EN 1021-1)
43.5
470 mm 8” 5 24” B
510 mm 8” 1 24” A
Technical Data
Torque
Seat Height Adjustment
20Nm
20Nm
B
A
5
4
3
2
1

16
UniX2
InhaltsverzeichnisVorwort
SEHR GEEHRTER KUNDE,
Wir freuen uns sehr, dass Sie ein Spitzenqualitätsprodukt von
SUNRISE MEDICAL gewählt haben.
Dieses Handbuch vermittelt Ihnen zahlreiche Tipps und Ideen,
damit Ihr neuer Rollstuhl ein vertrauter und zuverlässiger Partner im
Leben werden kann.
Wir möchten, dass Sie mit unseren Produkten und unserem
Service zufrieden sind. Sunrise Medical arbeitet daher ständig an
der Weiterentwicklung seiner Produkte. Aus diesem Grund können
in unserer Produktreihe Änderungen in der Form, Technologie und
Ausstattung vorkommen. Es können also aus den Angaben und
Abbildungen in diesem Handbuch keine Ansprüche abgeleitet
werden.
Das Managementsystem von SUNRISE MEDICAL ist zertifiziert
nach DIN ISO 9001, ISO 13485 und ISO 14001.
SUNRISE MEDICAL erklärt als Hersteller, dass die
Rollstühle mit den Anforderungen der Richtlinie
93/42/EWG, geändert durch 2007/47/EG,
übereinstimmen.
Fragen zum Gebrauch, zur Wartung und Sicherheit Ihres Rollstuhls
richten Sie bitte an den zuständigen, zugelassenen SUNRISE
MEDICAL Fachhändler.
Falls sich kein zuständiger Fachhändler in Ihrer Nähe befindet oder
falls Sie Fragen haben, können Sie Sunrise Medical auch schriftlich
oder telefonisch erreichen (Kontaktadressen auf der letzten Seite).
Sunrise Medical GmbH & Co. KG
Kahlbachring 2-4
69254 Malsch
Deutschland
Tel.: +49 (0) 7253 980 400
www.sunrisemedical.de
Bitte notieren Sie die Adresse und Telefonnummer Ihres
zuständigen Kundendiensts unten in dem dafür vorgesehenen Feld.
Benachrichtigen Sie ihn im Fall einer Panne, und versuchen Sie,
alle relevanten Einzelheiten anzugeben, damit Ihnen rasch
geholfen werden kann.
WICHTIG:
BENUTZEN SIE IHREN ROLLSTUHL ERST, WENN SIE
DIESES HANDBUCH VOLLSTÄNDIG GELESEN UND
VERSTANDEN HABEN.
GEFAHR!
Warnungen zu möglichen Gefahren von schweren Unfällen
oder Lebensgefahr.
WARNUNG!
Warnungen zu möglichen Verletzungsgefahren.
VORSICHT!
Warnungen zu möglichen technischen Schäden.
HINWEIS:
Informationen zur Bedienung des Produkts.
Verwendung
Stahlrollstühle sind ausschließlich für gehunfähige oder
gehbehinderte Menschen zum individuellen Gebrauch im Haus und
im Freien auf trockenem, festem und ebenem Untergrund bestimmt
(Selbstfahrer oder Schieben durch Begleitperson).
Das Höchstgewicht (das Körpergewicht des Benutzers und das
Gewicht des im Rollstuhl eingebauten Zubehörs) ist auf dem Etikett
mit der Seriennummer angegeben, das an der Querstange oder an
der Stabilisierungsstange unter dem Sitz angebracht ist.
Eine Gewähr kann nur übernommen werden, wenn das Produkt
unter den vorgegebenen Bedingungen und zu den vorgesehenen
Zwecken eingesetzt wird.
Die vorgesehene Lebensdauer des Rollstuhls beträgt 5 Jahre.
KEINE Teile von anderen Herstellern verwenden, außer diese sind
von Sunrise Medical offiziell zugelassen.
Legende für die Symbole
Verwendungszweck
Die Vielfalt an Ausstattungsvarianten sowie die modulare Bauweise
erlauben einen Einsatz bei Gehunfähigkeit/Gehbehinderung durch:
• Lähmung
• Gliedmaßenverlust (Beinamputation)
• Gliedmaßendefekt/Deformation
• Gelenkkontrakturen/-schäden
• Erkrankungen wie Herz- und Kreislaufinsuffizienz,
Gleichgewichtsstörungen oder Kachexie sowie für Geriatriker mit
noch verwendbaren Restkräften der oberen Gliedmaßen.
Beachten Sie bei der Versorgung außerdem auf Körpergröße,
Gewicht, physische und psychische Verfassung, Alter des
Behinderten, Wohnverhältnisse und Umwelt.
DEUTSCH
Rollstuhlkomponenten 2
Vorwort 16
Legende für die Symbole 16
Inhaltsverzeichnis 16
Verwendung 16
Verwendungszweck 16
Allgemeine Sicherheitshinweise und
Fahrbeschränkungen 17
Garantie 18
Transport 19
Handhabung 21
Optionen - Ankippbügel 21
Optionen - Bremsen 21
Optionen - Stockhalter 21
Optionen - Fußplatten 22
Optionen - Lenkräder 22
Optionen - Seitenteil 23
Optionen - Rücken 23
Optionen - Therapietisch 23
Optionen - Sicherheitsräder 23
Optionen – Beckengurt 23
Typenschild 24
Reifen und Montage 25
Tägliche Überprüfungen 25
Fehlersuche 25
Wartung und Pflege 25
Entsorgung / Recycling von Materialien 25
Technische Daten 26
Sitzhöhenverstellung 26
Drehmoment 26

17
UniX2
Allgemeine Sicherheitshinweise und Fahrbeschränkungen
Technik und Bauweise dieses Rollstuhls sind für die maximale
Sicherheit entworfen. Die aktuell gültigen internationalen
Sicherheitsstandards wurden erfüllt oder teilweise übererfüllt.
Dennoch kann sich der Benutzer einem Risiko aussetzen, wenn er
den Rollstuhl nicht vorschriftsmäßig handhabt. Beachten Sie zu
Ihrer eigenen Sicherheit bitte unbedingt die nachstehenden Regeln.
Unfachmännische oder fehlerhafte Änderungen oder Einstellungen
erhöhen das Unfallrisiko. Als Rollstuhlfahrer sind Sie auch
Verkehrsteilnehmer und Passant auf Straßen und Gehwegen. Wir
möchten Sie daran erinnern, dass für Sie als Rollstuhlfahrer alle
Verkehrsregeln gelten.
Seien Sie auf Ihrer ersten Fahrt im Rollstuhl besonders vorsichtig.
Lernen Sie Ihren Stuhl kennen.
Überprüfen Sie Folgendes vor jedem Gebrauch:
• Starrachsen oder Steckachsen an den Hinterrädern.
• Klettverschluss am Sitz und an der Rückenlehne
• Reifen, Reifendruck und Feststellbremsen.
Sollten irgendwelche Veränderungen an den Einstellungen
vorgenommen werden, ist es wichtig, den entsprechenden Abschnitt
der Gebrauchsanweisung zu lesen.
Besonders beim Befahren von Steigungen oder Gefällen können
Schlaglöcher oder unebener Untergrund den Rollstuhl zum Kippen
bringen. Wird eine Stufe oder ein Anstieg vorwärts befahren, sollte
der Körper nach vorne geneigt sein.
GEFAHR!
• Überschreiten Sie NIEMALS die Höchstlast von 125 kg für den
Fahrer plus mitgeführte Gegenstände. Das Überschreiten der
Maximalen Zuladung kann zu Schäden am Stuhl, zu Fallen
oder Kippen aus dem Rollstuhl, Verlust der Kontrolle, oder zu
schweren Verletzungen des Fahrers und anderer Personen
führen.
• Tragen Sie im Dunklen möglichst helle Kleidung oder Kleidung
mit Reflektoren, um besser gesehen werden zu können. Achten
Sie darauf, dass die seitlich und rückwärtig am Rollstuhl
angebrachten Reflektoren gut sichtbar sind.
• Wir empfehlen Ihnen auch das Anbringen einer aktiven
Beleuchtung.
• Um Stürze und gefährliche Situationen zu vermeiden, sollten
Sie den Umgang mit Ihrem neuen Rollstuhl erst auf ebenem,
überschaubarem Gelände üben.
• Benutzen Sie zum Ein- oder Aussteigen aus dem Rollstuhl
nicht die Fußbretter.
• Diese sollten vorher hochgeklappt und möglichst nach außen
weggeschwenkt werden. Begeben Sie sich immer so nah wie
möglich an die Stelle, an der Sie umsteigen möchten.
10°
10°
• Lassen Sie bei der Benutzung des Rollstuhls immer Vorsicht
walten. Vermeiden Sie z.B. ein ungebremstes Fahren gegen
ein Hindernis (Stufen, Bordsteinkante) oder Herunterfahren von
Kanten.
• Die Feststellbremsen sind nicht dazu gedacht, Ihren Rollstuhl
während der Fahrt zu bremsen. Sie sichern den Rollstuhl
gegen das Wegrollen. Wenn Sie auf unebenem Untergrund
anhalten, ziehen Sie immer die Feststellbremse an, damit sich
der Rollstuhl nicht plötzlich bewegen kann. Ziehen Sie die
Bremsen auf beiden Seiten an, sonst könnte der Stuhl kippen.
• Erforschen Sie die Auswirkungen von
Schwerpunktverlagerungen auf das Verhalten des Rollstuhls,
zum Beispiel auf Gefällstrecken, Steigungen, sämtlichen
Neigungen oder beim Überwinden von Hindernissen nur mit
sicherer Unterstützung eines Helfers.
• Bei extremen Einstellungen (z.B. Antriebsräder in vorderster
Position) und ungünstiger Körperhaltung kann der Rollstuhl
bereits auf ebener Fläche kippen.
• Neigen Sie Ihren Oberkörper beim Befahren von Steigungen
und Stufen weit nach vorn.
• Lehnen Sie Ihren Oberkörper beim Befahren von Neigungen
und Stufen weiter nach hinten. Versuchen Sie keinesfalls,
Gefälle diagonal hinauf oder hinunter zu fahren.
• Vermeiden Sie Rolltreppen, da diese bei einem Sturz schwere
Verletzungen verursachen können.
• Den Rollstuhl nicht an Gefällen bzw. Steigungen von mehr als
10° verwenden. Die dynamische Stabilität an Gefällen hängt
von der Konfiguration des Rollstuhls, den Fertigkeiten und dem
Fahrstil des Benutzers ab. Da die Fertigkeiten des Benutzers
und der Fahrstil nicht vorherbestimmt werden können, kann der
Höchstwert für das sichere Gefälle nicht bestimmt werden.
Dieser muss vom Benutzer mit Hilfe einer Begleitperson
ermittelt werden, um das Umkippen zu verhindern. Für
unerfahrene Benutzer wird der Einbau von Sicherheitsrädern
dringend empfohlen.
• Besonders beim Befahren von Steigungen oder Gefällen
können Schlaglöcher oder unebener Untergrund den Rollstuhl
zum Kippen bringen.
• Den Rollstuhl nicht auf schlammigem oder vereistem Grund
verwenden.
• Den Rollstuhl nur dort verwenden, wo auch Fußgänger
zugelassen sind.
• Zur Vermeidung von Handverletzungen greifen Sie bei der
Fahrt mit dem Rollstuhl nicht zwischen die Speichen oder
zwischen das Antriebsrad und die Radbremse.
• Bei Verwendung von Leichtmetallgreifringen kann es beim
Abbremsen aus schneller Fahrt oder auf längeren
Gefällestrecken zum erhitzen der Greifringe kommen.
• Treppen dürfen nur mit Hilfe von Begleitpersonen überwunden
werden. Sind dafür Einrichtungen wie z.B. Auffahrrampen oder
Aufzüge vorhanden, so sind diese zu benutzen. Fehlen solche
Einrichtungen, ist der Rollstuhl anzukippen und über die Stufen
zu führen (2 Helfer). Wir empfehlen, Benutzer mit einem
Körpergewicht über 100 kg nicht auf diese Weise zu
transportieren. Generell müssen montierte Sicherheitsräder
zuvor so eingestellt werden, dass sie beim Transport nicht auf
die Stufen aufsetzen können, da es sonst zu schweren Stürzen
kommen kann. Anschließend müssen die Sicherheitsräder
wider korrekt eingestellt werden.
• Achten Sie darauf, dass die Begleitpersonen den Rollstuhl nur
an fest montierten Bauteilen anfassen. Keine abnehmbaren
Teile (z.B. die Fußrasten oder Seitenteile) dafür verwenden.
• Achten Sie beim Benutzen von Hebebühnen darauf, dass sich
montierte Sicherheitsräder außerhalb des Gefahrenbereichs
befinden.
• Sichern Sie Ihren Rollstuhl auf unebenem Gelände oder beim
Umsteigen (z. B. ins Auto) durch Betätigen der Bremse.
• Achten Sie beim Benutzen von Hebebühnen darauf, dass sich
montierte Sicherheitsräder außerhalb des Gefahrenbereichs
befinden.
• Sichern Sie Ihren Rollstuhl auf unebenem Gelände oder beim
Umsteigen (z. B. ins Auto) durch Betätigen der Bremse.
• Wenn und wann immer möglich, sollten Fahrzeuginsassen
während der Fahrt in einem Behindertentransportkraftwagen
(BTW) die im Fahrzeug installierten Sitze und die
dazugehörigen Rückhaltesysteme nutzen. Nur so sind Insassen
bei einem Unfall optimal geschützt.
• Abhängig von Durchmesser und Einstellung der Lenkräder
sowie der Schwerpunkteinstellung des Rollstuhls kann bei
höheren Geschwindigkeiten ein Flattern der Lenkräder
auftreten. Dies kann zu einem Blockieren der Lenkräder und
zum Kippen des Rollstuhls führen. Achten Sie daher auf eine
korrekte Einstellung der Lenkräder (siehe Kapitel «Lenkräder»).
• Befahren Sie insbesondere Gefällstrecken nicht ungebremst,
sondern mit reduzierter Geschwindigkeit. Die Verwendung von
Sicherheitsrädern ist bei ungeübten Nutzern unbedingt
empfehlenswert.
DEUTSCH

18
UniX2
GEFAHR!
• Die Sicherheitsräder sollen ein unbeabsichtigtes Kippen nach hinten
verhindern. Keinesfalls sollen sie die Funktion von Transitrollen
übernehmen, etwa um eine Person bei abgenommenen
Antriebsrädern im Rollstuhl zu transportieren.
• Achten Sie beim Ergreifen von Gegenständen (die vor, seitlich oder
hinter dem Rollstuhl liegen) darauf, dass Sie sich nicht zu weit aus
dem Rollstuhl lehnen, da durch Schwerpunktverlagerung eine Kipp-
bzw. Überschlaggefahr besteht. Das Aufhängen von zusätzlichen
Lasten (Rucksack oder ähnliche Gegenstände) an die Rückenpfosten
Ihres Rollstuhls kann die Stabilität Ihres Rollstuhls nach hinten
beeinträchtigen, vor allem, wenn der Rückenwinkel nach hinten
verstellt wurde. Der Rollstuhl kann dadurch nach hinten kippen und
Verletzungen verursachen.
• Bei Oberschenkelamputation müssen die Sicherheitsräder verwendet
werden.
• Achten Sie vor Fahrtantritt auf den korrekten Luftdruck der von Ihnen
verwendeten Bereifung. Bei den Antriebsrädern muss er mindestens
3,5 bar (350 kPa) betragen. Der max. Luftdruck ist am Reifen
angegeben. Die Kniehebelbremsen sind nur bei ausreichendem
Luftdruck und korrekter Einstellung wirksam (siehe Kapitel "Bremse").
• Sollte die Sitz- und Rückenbespannung beschädigt sein, tauschen
Sie diese bitte umgehend aus.
• Vorsicht beim Umgang mit Feuer, insbesondere brennenden
Zigaretten. Sitz- und Rückenbespannung könnten sich entzünden.
• Wenn der Rollstuhl längere Zeit direkter Sonneneinstrahlung /
niedrigen Temperaturen ausgesetzt war, können Teile des Rollstuhls
(z.B. Rahmen, Fußrasten, Bremsen und Seitenteile) sehr heiß
(>41°C) bzw. sehr kalt (<0°) werden.
• Achten Sie immer darauf, dass die Steckachsen an den Hinterrädern
(falls eingebaut) richtig eingestellt sind und ganz einrasten
(Kugellager sind ganz durch die Achsaufnahme sichtbar). Bei nicht
gedrücktem Knopf der Steckachse darf sich das Antriebsrad nicht
entfernen lassen.
VORSICHT!
• Sowohl die Wirkung der Kniehebelbremse als auch das allgemeine
Fahrverhalten sind vom Luftdruck abhängig. Mit korrekt
aufgepumpten Antriebsrädern und gleichem Luftdruck auf beiden
Rädern lässt sich Ihr Rollstuhl wesentlich leichter und besser
manövrieren.
• Achten Sie auf eine ausreichende Profiltiefe Ihrer Bereifung!
• Beachten Sie bitte, dass Sie bei Fahrten im öffentlichen
Straßenverkehr der Straßenverkehrsordnung unterliegen.
• Lassen Sie bei der Handhabung und beim Einstellen des Rollstuhls
immer Vorsicht walten!
• Anpassungen, für die Werkzeug benötigt wird, sollten nur von
autorisierten Fachhändlern vorgenommen werden.
• Reinigen Sie den Rollstuhl regelmäßig, um Rostbildung und
Korrosion durch Salz zu vermeiden.
• Überprüfen Sie die Nieten, Muttern und Schrauben, um
sicherzustellen, dass sie fest sitzen und sich keine Rollstuhlteile
lösen.
• Bei allen beweglichen Teilen besteht immer die Gefahr, dass die
Finger eingeklemmt werden können. Bitte immer vorsichtig
handhaben.
• Die Rollstühle, die in diesem Handbuch abgebildet und beschrieben
sind, entsprechen möglicherweise nicht in allen Einzelheiten genau
Ihrem eigenen Modell. Dennoch sind alle Anweisungen trotz
möglicher Detailunterschiede völlig relevant.
• Der Hersteller behält sich das Recht vor, Gewichte, Abmessungen
oder andere in diesem Handbuch aufgeführte technische Daten ohne
vorherige Benachrichtigung zu ändern. Alle in diesem Handbuch
aufgeführten Zahlenangaben, Abmessungen und Kapazitäten sind
ungefähr und stellen keine präzisen technischen Daten dar.
GEFAHR!
ERSTICKUNGSGEFAHR – Diese Mobilitätshilfe enthält Kleinteile, die
unter Umständen eine Erstickungsgefahr für kleine Kinder darstellen
können.
LEBENSDAUER
Die erwartete Lebensdauer des Rollstuhls beträgt 5 Jahre, vorausgesetzt:
Die bestimmungsgemäße Verwendung wird genau beachtet
Alle Anforderungen in Bezug auf Service und Wartung werden erfüllt.
Garantie
DIESE GARANTIE BESCHRÄNKT IHRE
GESETZLICHEN RECHTE IN KEINER WEISE.
Sunrise Medical* gewährt ihren Kunden weltweit auf ihre
Rollstühle eine Garantie zu den folgenden
Garantiebedingungen
1. Sollte ein Teil oder sollten Teile des Rollstuhls als Folge
eines Herstellungs- und/oder Materialfehlers innerhalb von
24 Monaten bzw. bei Rahmen- und Kreuzstreben innerhalb
von 5 Jahren nach der Auslieferung an den Käufer eine
Reparatur oder einen Austausch benötigen, wird das
betroffene Teil bzw. werden die betroffenen Teile repariert
oder kostenlos ausgetauscht.
2. Zur Geltendmachung der Garantie benachrichtigen Sie
umgehend den Sunrise Medical Kundendienst mit genauen
Angaben zur Art der Schwierigkeiten. Sollten Sie den
Rollstuhl außerhalb des Zuständigkeitsbereichs des Sunrise
Medical Kundendienstes verwenden, werden Reparatur oder
Austausch von einem anderen vom Hersteller bezeichneten
Kundendienst ausgeführt. Der Rollstuhl muss von einem
zuständigen Sunrise Medical Kundendienst (Händler)
repariert werden.
3. Für Teile, die im Rahmen dieser Garantie repariert oder
ausgetauscht werden, gewähren wir eine Garantie nach
diesen Garantiebedingungen für die für den Rollstuhl
verbleibende Garantiedauer nach Ziffer 1).
4. Für Originalersatzteile, die auf Kosten des Käufers eingebaut
werden, gewähren wir 24 Monate Garantie ab dem Einbau
nach diesen Garantiebedingungen (für Batterien gilt davon
abweichend jedoch nur eine verringerte Garantiezeit von 12
Monaten).
5. Verschleißteile wie Polster, Reifen, Schläuche,
Bespannungen und ähnliche Teile sind von der
Garantie ausgeschlossen, es sei denn es liegt eine
vorzeitige Abnutzung des Teils vor, die direkt auf einen
Herstellungsfehler zurückzuführen ist.
6. Ansprüche aus dieser Garantie entfallen, wenn eine
Reparatur oder ein Ersatz des Rollstuhls oder eines Teiles
aus den folgenden Gründen erforderlich ist:
a) Das Produkt oder das Teil wurde nicht gemäß den in
der Betriebsanleitung und/oder dem Service-Handbuch
aufgeführten Empfehlungen des Herstellers gepflegt oder
gewartet.
b) Es wurde Zubehör verwendet, bei dem es sich nicht um
Originalzubehör handelte.
c) Der Rollstuhl oder ein Teil des Rollstuhls wurde durch
Nachlässigkeit, Unfall oder unsachgemäße Verwendung
beschädigt.
d) Es wurden Änderungen/Modifikationen am Rollstuhl
oder an Teilen vorgenommen, die von unseren
Herstellerspezifikationen abweichen.
e) Es wurden Reparaturen durchgeführt, bevor unser
Kundendienst über den jeweiligen Sachverhalt informiert
wurde.
7. Diese Garantie unterliegt dem Recht des Landes indem das
Produkt von Sunrise Medical gekauft worden ist.
* Bedeutet der Sunrise Medical Standort von dem das Produkt
gekauft wurde.
DEUTSCH

19
UniX2
Transport
GEFAHR!
Bei Nichtbeachtung dieser Ratschläge besteht die Gefahr von
schweren Körperverletzungen und sogar Lebensgefahr!
Transport Ihres Rollstuhls in einem Fahrzeug:
Ein in einem Fahrzeug gesicherter Rollstuhl bietet nicht die gleiche
Sicherheit wie das Sitzsystem eines Fahrzeugs. Wir empfehlen
immer, dass der Benutzer in das Sitzsystem des Fahrzeugs
umsteigt. Wir erkennen an, dass es in der Praxis nicht immer
möglich ist, dass der Benutzer umsteigt und in diesem Fall müssen
die folgenden Ratschläge beachtet werden, wenn der Benutzer im
Rollstuhl sitzend transportiert werden muss:
1. Überprüfen Sie, dass das Fahrzeug für den Transport eines
Insassen in einem Rollstuhl ausgestattet ist und über einen für
Ihren Rollstuhltyp geeigneten Zugang/Ausgang verfügt. Das
Fahrzeug muss über eine ausreichende Tragkraft für das
Gesamtgewicht, d.h., das Körpergewicht des Benutzers und das
Gewicht von Rollstuhl und Zubehör, verfügen.
2. Um den Rollstuhl herum sollte genügend Platz zur Verfügung
stehen, damit das Rückhaltesystem und die Sicherheitsgurte des
Rollstuhls und für den Benutzer angelegt, festgezogen und wieder
geöffnet werden können.
3. Wenn sich der Benutzer im Rollstuhl befindet, muss dieser
vorwärts gerichtet stehen und mit den Befestigungsgurten für den
Rollstuhl und den Sicherheitsgurten des Rollstuhls
(Befestigungsgurte gemäß WTORS müssen den Anforderungen
von ISO 10542 oder SAE J2249 entsprechen) gemäß der
Gebrauchsanweisung des Herstellers des Rückhaltesystems
(WTORS) befestigt werden.
4. Der Rollstuhl wurde für den Transport in einem Fahrzeug in einer
anderen Stellung nicht geprüft, so darf z.B. der Rollstuhl keinesfalls
seitlich gerichtet transportiert werden (Fig. A).
5. Der Rollstuhl muss mit einem Rückhaltesystem gemäß ISO
10542 oder SAE J2249 mit nicht verstellbaren Gurten vorne und
verstellbaren Gurten hinten gesichert werden, dabei handelt es sich
normalerweise um Karabinerhaken/S-förmige Haken sowie um
Steckverschlüsse. Die Rückhaltesysteme bestehen normalerweise
aus 4 Einzelgurten, die an den vier Ecken des Rollstuhls befestigt
werden.
6. Das Rückhaltesystem muss wie auf der nächsten Seite
abgebildet am Fahrgestell des Rollstuhls und nicht an Anbauten
oder Zubehör, z.B. nicht um die Speichen der Räder, die Bremse
oder Fußraste befestigt werden.
Fig. A
7. Das Rückhaltesystem muss so nah wie möglich mit einem
Winkel von 45 Grad angebracht und gemäß der
Bedienungsanleitung des Herstellers sicher befestigt werden.
8. Ohne Rücksprache mit dem Hersteller dürfen an den
Befestigungspunkten des Rollstuhls oder an Bauteilen des
Fahrgestells und des Rahmens keine Änderungen vorgenommen
bzw. diese nicht ausgewechselt werden. Bei Nichtbeachtung dieser
Vorgabe dürfen Sunrise Medical Rollstühle nicht in Fahrzeugen
transportiert werden.
9. Der Benutzer muss sowohl mit dem Beckengurt als auch mit
dem Schultergurt angeschnallt werden, um die Wahrscheinlichkeit
eines Aufpralls von Kopf und Brust auf die Bauteile des Fahrzeugs
und schwere Körperverletzungen beim Benutzer und anderen
Fahrzeuginsassen zu verringern. (Fig. B) Der Schultergurt muss
an der "B"-Säule des Fahrzeugs befestigt werden - bei
Nichtbeachtung erhöht sich die Gefahr von schweren
Bauchverletzungen für den Benutzer.
10. Eine für den Transport geeignete Kopfstütze (siehe Aufkleber
an der Kopfstütze) muss eingebaut und während des Transports
stets richtig angebracht sein.
11. Haltevorrichtungen (Beckenriemen, Beckengurte) dürfen bei
der Fahrt nur zur Sicherung des Rollstuhlbenutzers verwendet
werden, wenn auf dem Etikett angegeben ist, dass sie die
Anforderungen von ISO 7176-19:2001 oder SAE J2249 erfüllen.
12. Die Sicherheit des Benutzers während des Transports hängt
von der Sorgfalt ab, mit der das Rückhaltesystem befestigt wird,
die Person, von der die Befestigung ausgeführt wird, sollte in der
Bedienung des Systems unterwiesen bzw. geschult sein.
13. Soweit möglich sollten alle Hilfsmittel vom Rollstuhl
abgenommen und sicher verstaut werden wie etwa:
Krücken, lose Kissen und Therapietische.
14. Hochschwenkbare/höhenverstellbare Fußrasten dürfen nicht
hochgestellt sein, wenn der Benutzer im Rollstuhl sitzend
transportiert wird und der Rollstuhl mit einem Rückhaltesystem und
Sicherheitsgurt gesichert ist.
15. Verstellbare Rücken müssen in die aufrechte Position gebracht
werden.
16. Die manuelle Bremse muss fest angezogen werden.
17. Die Sicherheitsgurte müssen an der “B”-Säule des Fahrzeugs
angebracht werden und dürfen nicht durch Rollstuhlteile wie
Armlehnen oder Räder vom Körper ferngehalten werden.
Fig. B
DEUTSCH

20
UniX2
ANLEITUNG FÜR DAS ANSCHNALLEN DES
ROLLSTUHLBENUTZERS
1. Der Beckengurt muss unten an der Vorderseite des Beckens
getragen werden, so dass der Winkel des Beckengurts innerhalb des
bevorzugten Bereichs von 30 bis 75 Grad zur Horizontalen liegt.
Ein steilerer (größerer) Winkel innerhalb des bevorzugten Bereichs ist
wünschenswert, d.h., näher an 75°, aber keinesfalls darüber. (Fig. C)
2. Der Schultergurt muss wie in Fig. D und E gezeigt über die Schulter
und quer über die Brust passen.
Sicherheitsgurte müssen so fest wie möglich sitzen ohne den
Benutzerkomfort zu beeinträchtigen.
Sicherheitsgurte dürfen beim Gebrauch nicht verdreht sein.
Der Schultergurt muss wie in Fig. D und E gezeigt über die Schulter
und quer über die Schulter passen.
3. Die Befestigungspunkte am Rollstuhl befinden sich am vorderen
inneren Seitenteil des Fahrgestells direkt über dem Lenkrad und am
hinteren Seitenteil des Fahrgestells. Die Gurte werden um die
Seitenteile des Fahrgestells an der Stelle befestigt, an der das
waagrechte und das senkrechte Rohr aufeinandertreffen. (Siehe Fig.
G - K).
4. Die Position der Befestigungsgurte für den Rollstuhl ist mit dem
Symbol für den Befestigungspunkt (Fig. F) markiert. Wenn die
vorderen Gurte zur Befestigung des Rollstuhls angebracht sind,
werden die Gurte gestrafft.
KÖRPERGEWICHT DES BENUTZERS UNTER 22 kg (48 lb 8.0 oz)
Wenn ein Kind mit einem Körpergewicht von unter 22 kg befördert
wird und weniger als acht (8) Insassen im Fahrzeug sitzen, wird
empfohlen, ein Rückhaltesystem für Kinder (CRS) gemäß UNCE
Regulation 44 zu verwenden.
Diese Art von Rückhaltesystem bietet einen wirksameren Schutz als
der normale Dreipunkt-Sicherheitsgurt in Fahrzeugen und manche
Rückhaltesysteme für Kinder verfügen auch über zusätzliche
Haltevorrichtungen, die dazu beitragen, die Sitzhaltung des Kindes
aufrecht zu erhalten.
Eltern oder Therapeuten können unter bestimmten Umständen auch
erwägen, dass ihr Kind während der Fahrt im Rollstuhl sitzen bleibt,
da der Rollstuhl für eine bessere Haltungskontrolle sorgt und mehr
Komfort bietet.
In diesem Fall empfehlen wir, dass Ihr Gesundheitspfleger und
sachkundige Personen eine Risikoanalyse durchführen.
Lage der Befestigungspunkte für das Rückhaltesystem am Rollstuhl:
1. Lage der vorderen und hinteren Verankerungsaufkleber
(Fig. G - H).
2. Lage der vorderen (Fig. I) und hinteren (Fig. J) Aufkleber mit den
Befestigungspunkten für das Rückhaltesystem am Rollstuhl und
des Verankerungsaufklebers.
3. Seitenansicht der Befestigungsgurte (Fig. K).
Fig. C
BEVORZUGTER
BEREICH
Transport >>>
DEUTSCH
Fig.D
Fig.E
Fig.F
Fig.H
Fig.I
Fig.G Fig.K
Fig.J
Table of contents
Languages:
Other Breezy Wheelchair manuals

Breezy
Breezy BasiX Manual

Breezy
Breezy Nuage PLS User manual

Breezy
Breezy Elegance Manual

Breezy
Breezy Ibis PowerDrive User manual

Breezy
Breezy Breezy Premium User manual
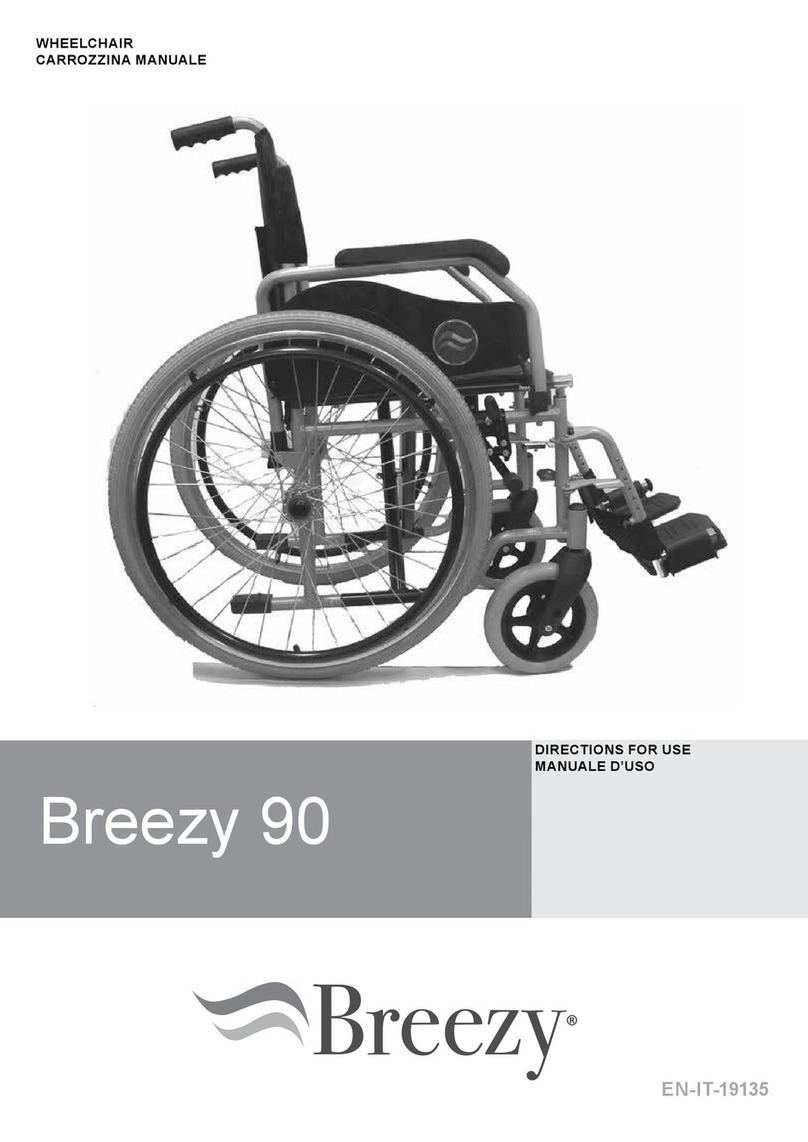
Breezy
Breezy Breezy 90 Manual

Breezy
Breezy Emineo User manual

Breezy
Breezy Breezy 90 Manual

Breezy
Breezy Ultra 4 Installation and operation manual

Breezy
Breezy UniX 2 Manual

