Breezy Nuage PLS User manual

USER MANUAL
GEBRUIKERSHANDLEIDING
NOTICE D’UTILISATION
Seating system
Zitsysteem
Système d’assise
Nuage PLS
9011307C
NUAGE PLS
NUAGE PLS ACTIVE
NUAGE PLS ACTIVE XS
FR
EN
NL

2 Nuage
English.............................................................3
Nederlands....................................................31
Français.........................................................59

3Nuage
© 2019 Sunrise Medical
All rights reserved.
The information provided herein may not be reproduced and/or published in any form, by print,
photoprint, microlm or any other means whatsoever (electronically or mechanically) without the prior
written authorization of Sunrise Medical.
The information provided is based on general data concerning the construction known at the time
of the publication of this manual. Sunrise Medical executes a policy of continuous improvement and
reserves the right to changes and modications.
The information provided is valid for the product in its standard version. Sunrise Medical can therefore
not be held liable for any damage resulting from specications of the product deviating from the
standard conguration. Illustrations contained in the manual may deviate from the conguration of your
product.
The information made available has been prepared with all possible diligence, but Sunrise Medical
cannot be held liable for any errors contained in the information or the consequences thereof.
Sunrise Medical accepts no liability for loss resulting from work executed by third parties.
Names, trade names, trademarks etc. used by Sunrise Medical may not, as per the legislation
concerning the protection of trade names, be considered as being available.
English

4 Table of contents Nuage
1 Introduction....................................................................................................................................6
1.1 This user manual 6
1.2 For further information 6
1.3 Symbols used in this manual 6
2 Safety ............................................................................................................................................7
2.1 Temperature 7
2.2 Moving parts 7
2.3 General safety guidelines and instructions 7
3 Product description........................................................................................................................8
3.1 Nuage PLS series 8
3.2 Positioning options and accessories 9
4 Use..............................................................................................................................................10
4.1 Getting into and out of the seat 10
4.2 Reducing the seating system in size for transportation 10
4.3 Use as a passenger seat in a vehicle 10
4.4 Adjusting the seating system 10
5 Settings (by a professional).........................................................................................................11
5.1 Webbing straps and contour cushion (II) 11
5.2 Seat and backrest shells (II) 12
5.3 Seat webbing (II) 12
5.4 Contour cushion (II) 12
5.5 Pelvic obliquity (II) 13
5.6 Leg length discrepancy (II) 14
5.7 Backrest webbing (II) 14
5.8 Dorsal obliquity (II) 14
5.9 Tensioning the cover 15
5.10 Cushion lling 15
5.11 Seat width (wheelchair specic) 16
5.12 Seat depth (wheelchair specic) 16
5.13 Backrest width 17
5.14 Backrest height (wheelchair specic) 17
5.15 Funnel shape backrest shells (wheelchair specic) 17
5.16 Angle backrest shells (wheelchair specic) 18
5.17 Backrest angle (wheelchair specic) 18
5.18 Webbing straps (I) 18
5.19 Seat and backrest shells (I) 19
5.20 Seat webbing (I) 19
5.21 Pelvic obliquity (I) 19
5.22 Leg length discrepancy (I) 20
5.23 Contour cushion (I) 20
5.24 Backrest webbing (I) 20
5.25 Dorsal obliquity (I) 21
Table of contents

Nuage Table of contents 5
6 Maintenance................................................................................................................................22
6.1 Cleaning the upholstery 22
6.2 Replacing the upholstery 22
7 Troubleshooting...........................................................................................................................23
8 Technical specications...............................................................................................................24
8.1 CE declaration and requirements 24
8.2 Technical information 24
9 Warranty......................................................................................................................................26
9.1 Denitions of terms 26
9.2 Warranty period table 27
10 Labelling......................................................................................................................................28
10.1 Markings on the seating system 28
11 Accessories.................................................................................................................................29

6 Introduction Nuage
1 Introduction
Congratulations on choosing a Nuage PLS
seating system for your tilt in space wheelchair.
All of our high-quality mobility products are
designed to enhance independence and make
your everyday life easier.
1.1 This user manual
This user manual will help you to use and
maintain your seating system safely This
user manual is a supplement to our general
wheelchair user manual.
Where necessary this user manual refers to
other manuals as shown below:
Wheelchair: Refers to the general
wheelchair user manual.
Read this user manual and the other user
manuals referred to carefully before using
the product. If one of the user manuals was
not included with your wheelchair, please
contact your dealer immediately.
In addition to this user manual, there is also a
service manual for qualied specialists.
If you are visually impaired, this
document can be viewed in PDF format at
www.SunriseMedical.eu or alternatively is
available on request in large text.
1.2 For further information
Please contact your local, authorised Sunrise
Medical dealer if you have any questions
regarding the use, maintenance or safety of
your wheelchair. In case there is no authorised
dealer in your area or you have any questions,
contact Sunrise Medical either in writing or by
telephone.
For information about product safety
notices and product recalls, go to
www.SunriseMedical.eu
1.3 Symbols used in this manual
Note!
Pointing out possible problems to the user.
Caution!
Advice for the user to prevent damage to the
product.
Warning!
Warnings for the user to prevent personal in
jury.
Not following these instructions may result
in physical injury, damage to the product or
damage to the environment!
Symbols in illustrations
Each illustration includes icons and numbering
to indicate what needs to be done and in which
order.
Loosen by one turn with torx
Tighten by one turn with torx
Step 1, 2 etc.
An arrow, as part of an illustration, indicates
that the component in question moves or needs
to be moved in the direction indicated.
12
,

Safety 7Nuage
2 Safety
Please note all safety instructions before
starting to use the seating system.
Warning!
Always follow the instructions given next to
the warning symbols! Not following these
instructions may result in physical injury,
damage to the seating system, to the
wheelchair or to the environment. Where
possible, the warnings have been placed in
the applicable paragraphs.
2.1 Temperature
If you do not use the seating system, ensure
that it is not exposed to direct sunlight for
lengthy periods of time. Certain parts of the
seating system, such as the seat, the back and
the armrests can become hot if they have been
exposed to full sunlight for too long. This may
cause burns or allergic reactions to the skin.
2.2 Moving parts
Warning!
A seating system and wheelchair have
moving and rotating parts. Be careful:
contact with moving parts may result in
serious physical injury or damage to the
seating system or wheelchair.
2.3 General safety guidelines and
instructions
Sunrise Medical accepts no liability whatsoever
for damage or injury caused by failure to
(strictly) adhere to the safety guidelines and
instructions or else due to carelessness
during the use, service and cleaning of the
seating system. Depending on the specic use
circumstances, additional safety instructions
may be required. Please contact your dealer
immediately if you observe a potential danger
during the use of the product.
Warning!
Only use the seating system as intended and
as prescribed in this manual. Do not adjust or
change the product if not promptly described.
Do not use parts or add-ons which are not
clearly marked as compatible with Nuage
seating systems.
To avoid accidents and other problems, it is
very important to pay attention to the safety
instructions as described in the user manual
of the manual wheelchair which the seating
system will be used with.
In case of possible technical malfunctioning,
please contact your dealer.

8 Product description Nuage
1
2
3
3 Product description
Nuage PLS series seating systems are
individually adjustable high comfort wheelchair
seating solutions for people with limited mobility,
trunk balance and postural control. The softly
padded seating system ‘embraces’ the body
contours for high comfort, stability, pain and
pressure relief.
The seating systems are compatible with most
common tilt in space wheelchair frames in
the market. Contact your dealer for detailed
information and installation.
Caution!
Please study this manual carefully before
using the seating system.
3.1 Nuage PLS series
The Nuage PLS series features:
Nuage PLS (gure 1)
A seating support for full body and leg support
of passive users: people with strongly reduced
trunk balance and a very limited ability for
active sitting.
Nuage PLS Active (gure 2)
A seating support for semi-passive users:
people with reduced rump balance and postural
stability. The seating system combines body
support and a stimulation of (postural) activity.
Nuage PLS Active XS (gure 3)
A seating support for semi-passive children or
small adults with reduced rump balance and
postural stability. The seating system combines
body support and a stimulation of (postural)
activity.
For all models a variant with integrated
abduction cushion is also available (gure 4).

Product description 9Nuage
1
2
3
4
3.2 Positioning options and
accessories
The seating systems offer a number of
adjustment options to optimize the positioning
and support for each individual user.
With the adjustable webbing straps, the seat
and backrest contours can be accurately tted
to the body contours of the user. The seating
systems also provide asymmetrical positioning
options, for example useful in case of pelvic
obliquity.
Optional accessories are available for a
comfortable support of head, arms and legs.
See chapter 11.
The seating system and wheelchair must be
adjusted by a qualied specialist. Incorrect
settings may have negative consequences for
seating posture.
10 Use Nuage
5
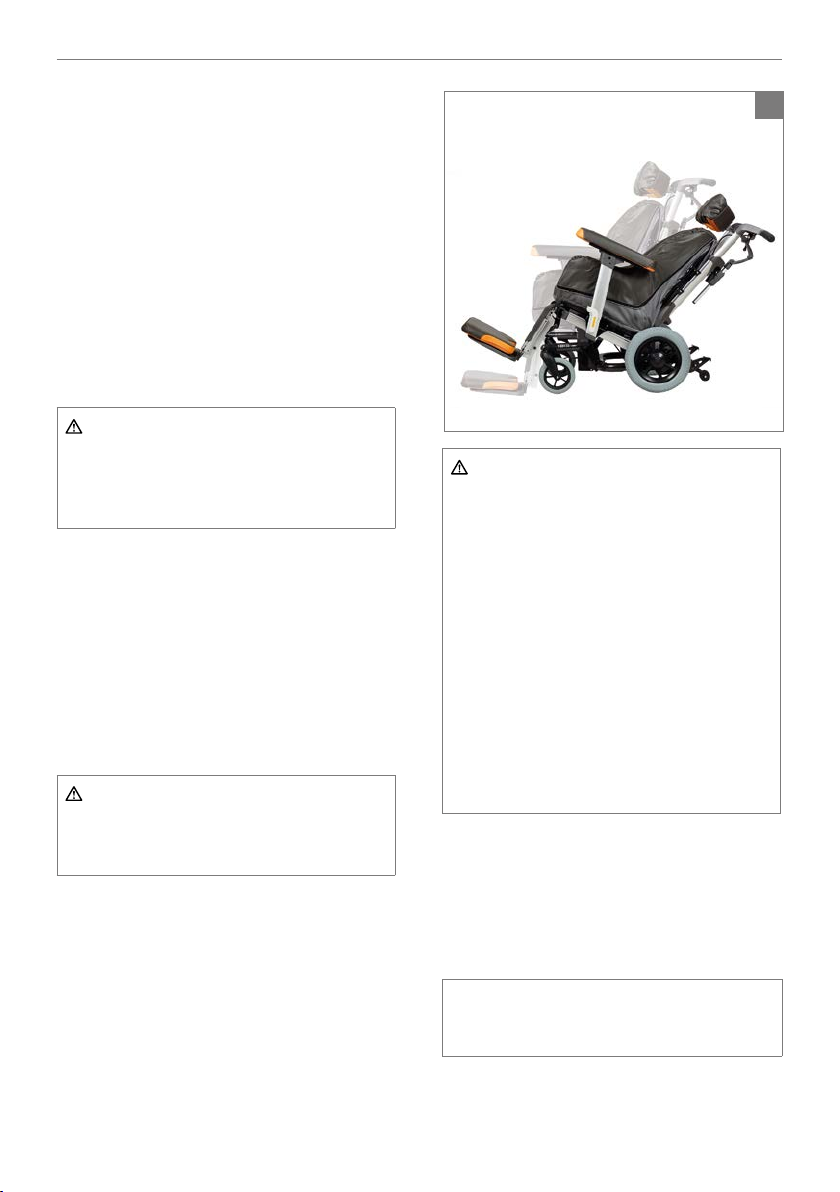
4 Use
Nuage PLS seating systems are intended
for use on tilt in space wheelchairs. The tilt
enables to easily change position. This reduces
prolonged pressure on body parts en is
therefore important for your health and comfort.
4.1 Getting into and out of the
seat
Make sure to engage the wheelchair brakes
before getting a person into or out of the seat.
Do not stand on the footplates.
Warning!
Putting your full weight on the footplates may
lead to wheelchair damage and to hazardous
situations, including the wheelchair tipping
up.
4.2 Reducing the seating system
in size for transportation
The way a seating system can be reduced in
size for transportation without a passenger
highly depends on the wheelchair frame it is
mounted on. Head rests, armrests and legrests
are usually easily removable ( Wheelchair).
Complete disassembly and reassembly is
reserved to professionals, contact your dealer.
Warning!
Store away detached components safely so
that they can not cause injury or damage, or
become damaged themselves.
4.3 Use as a passenger seat in a
vehicle
Before transporting people in a car or other
vehicle as a passenger in a wheelchair with a
Nuage PLS seating system, it is recommended
to check that compliance with all safety
regulations can be assured. Contact your
dealer for information and an assessment
of your specic situation. Professionals can
contact Sunrise Medical for all information on
ISO 7176-19 test results.
Warning!
Please check the proper instructions on
transportation ( Wheelchair)
A wheelchair is not primarly designed to
be used as seat in a motor vehicle during
transport. Transfer to a regular car seat if
possible.
Contact your dealer to check if your
wheelchair has been crash tested according
to ISO 7176-19 (2008) in combination with
your Nuage PLS seating system.
A seating system should be inspected by
a Sunrise Medical’s representative before
reuse after an involvement in any type of
vehicle collision.
4.4 Adjusting the seating system
The adjustment possibilities and the way of
adjusting dependend on the wheelchair frame
the seating system is mounted on.
Note!
See information about wheelchair specic
adjustment options ( Wheelchair)

Settings (by a professional) 11Nuage
6
7
8
A
BC
I
II
5 Settings (by a
professional)
Seating system adjustments may vary per
brand and model of the wheelchair frame. The
wheelchair specic adjustments are marked
with the addition ‘(wheelchair specic)’. In
these cases, the instructions and gures
refer to adjustments of a Nuage PLS on Ibis
wheelchairs with Sedeo Pro seating system.
Note!
When you do have another seating system
then Sedeo Pro check the manual
( Wheelchair) or contact your dealer
Under the cover (A) of a Nuage PLS seating
system you nd a seat and backrest with straps
providing multiple adjustment possibilities for
comfortable positioning.
There are two versions of the Nuage PLS
seating system with different webbing settings:
Nuage PLS I or the more recent version Nuage
PLS II. Settings as shown are for Nuage PLS II.
For settings specic to Nuage PLS I see at the
end of this chapter.
Note!
For all settings marked with (II) see Nuage
PLS I specic settings marked with (I) at the
end of this chapter.
5.1 Webbing straps and contour
cushion (II)
The backrest contour is formed with 7 webbing
straps (B).
The seat contour is formed with a contour
cushion (C) in the front and 4 webbing straps
(B) in the back. (C) is held in place with 3
additional webbing straps (B).
The webbing straps (B) have orange velcro
ends.

12 Settings (by a professional) Nuage
F1- F5
G
1
2
3
2
9
10
11
5.2 Seat and backrest shells (II)
The straps are looped through slotted holes in
adjustable plywood seat shells (D) and backrest
shells (E).
For adjustment purposes seat shell (D) offers 5
rows of slotted holes. Backrest shell (E) offers 3
rows of slotted holes.
Choose which set of holes is best used to
accomodate the user. The middle rows marked
in black suit the average user.
Warning!
Choose the slotted holes carefully to prevent
bottoming-out.
5.3 Seat webbing (II)
The webbing straps (B) enable to follow the
contours of the buttocks and provide support
where needed for an optimal seating position
and stability.
1. Identify the set of slotted holes best suited to
accomodate the user (positions F1 to F5).
2. On left and right seat shell (D) loop each
strap (B) through a slotted hole (F) or if
required over the edge (G).
3. Attach the velcro strap ends to the velcro
outer shell surface.
4. Put tension on the webbing straps by
stretching them to about 110% of their
length.
Warning!
Always check for bottoming-out. If needed
change strap position and/or strap tension.
5.4 Contour cushion (II)
The contour cushion (C) helps to create an
posterior well that offers postural stability and
prevents from sliding forward. Contour cushion
(C) consists of 2 side segments, 1 to 3 middle
segments and a velcro strap.
1. Determine the number of middle segments
to use:

Settings (by a professional) 13Nuage
F1- F5
G
1
2
3
2
9
10
11
B
C
I
B
5
I
5
6
6
1
2
G
B
F1- F5F1- F5
I
H
3
H
3
I
B
4
12
13
14
S M L
# Middle
segments
1 2 3
Seat width 30-40 cm 40-50 cm > 50 cm
2. Attach the velcro strap to the bottom side of
the cushion segments to hold them together.
3. Loop a webbing strap (B) through slotted
holes (H) and attach on the outside of the
seat shells with velcro.
4. Place the contour cushion on the seat, back
side of the cushion against (B).
5. Loop a webbing strap (B) over the top of the
cushion and through slotted holes (I). Attach
the strap on the outside of the seat shells
with velcro.
6. Place a webbing strap (B) against the front
of the contour cushion and attach directly on
the outside of the seat shells with velcro.
Caution!
Do not put much tension on the straps (B)
that hold the contour cushion in place.
5.5 Pelvic obliquity (II)
1. Create an asymmetrical support by choosing
different slottted holes (F1 to F5) left and
right.
2. Tension the webbing straps (B) in slotted
holes (F1 to F5) or if required over edge (G).

14 Settings (by a professional) Nuage
2
1
D1 D2
B
FC
3
G
J1- J3
G
J1- J3
B
15
16
17
5.6 Leg length discrepancy (II)
1. Move one of the seat shells (D1) forwards.
To do so, loosen the armrestholder and
webbing straps (B) , slide it in the rail towards
the front of the seat and fasten again.
2. On (D1) shift the position of the webbing
straps (B) one slot position to the back.
Tension the webbing straps (B) in slotted
holes (F1 to F5) or if required over edge (G).
3. Reposition (C) and the front webbings straps
(B).
Note!
Step 1 is not possible in combination with
seating systems other than Sedeo Pro /
Sedeo Original.
5.7 Backrest webbing (II)
The webbing straps (B) enable to follow the
contours of the back, create a lumbal support
and give further extra support where needed.
1. Identify the set of slotted holes best suited to
accomodate the user (positions J1 to J3).
2. On left and right backrest shell (E) loop
each strap (B) through a slotted hole (J) or if
required over the edge (G).
3. Attach the velcro strap ends to the velcro
outer shell surface.
4. Put tension on the webbing straps by
stretching them to about 110% of their
length.
Warning!
Always check for bottoming-out. If needed
change strap position and/or strap tension.
5.8 Dorsal obliquity (II)
1. Create an asymmetrical support by choosing
different slottted holes (J1 to J3) left and
right.
2. Tension the webbing straps (B) in slotted
holes (J1 to J3) or if required over edge (G).

Settings (by a professional) 15Nuage
3
S
A
R
4
2
P
O
15
24
Q
18
19
20
2
1
D1 D2
B
FC
3
G
J1- J3
G
J1- J3
B
15
16
17
5.9 Tensioning the cover
1. Free the cover back ap (O) by detaching
the velcro ends (P) at the bottom of the ap
from the velcro surfaces on the seat shells.
2. Untie the elastic rope (Q) in hem of the
cover.
3. Position the cover.
4. Tension the elastic rope (Q) and tie a knot.
5. Close the back ap (O) by attaching the
velcro ends (P) to the velcro surfaces on the
seat shells.
5.10 Cushion lling
1. Remove the cover (A).
2. Open the zipper (R).
3. Add or remove lling (S).
4. Close the zipper (R).
5. Place the cover (A).

16 Settings (by a professional) Nuage
X
Y
1
2
3
T
U
V
W
1
2
3
21
22
23
5.11 Seat width (wheelchair
specic)
The distance between the seat shells edges
(T) and the required seat width relate as
(T) = (U) + 12 cm.
Rough adjustment
When mounting the seat, choose the screw
hole pattern that ts the required seat width
range: 30 to 40 cm, 40 to 50 cm or over 50 cm.
Finetuning
Further adjustment of the seat width for a
specic user takes place during a tting
session.
1. Remove the straps on one side by detaching
the velcro ends from the velcro surfaces on
the seat shells.
2. Loosen (V) on both sides.
3. Move the armrest holder (W) inwards or
outwards on both sides.
4. Fasten (V) on both sides.
5. Tension the straps and attach the velcro
ends to the velcro surfaces of the seat
shells.
5.12 Seat depth (wheelchair
specic)
1. Loosen (X) on both sides.
2. Slide (Y) to the front or back to create the
required seat depth.
3. Fasten (X) on both sides.

Settings (by a professional) 17Nuage
2
4
B
3
3
A
3
2
4
A
B
33
2
4
B
33
C
24
25
26
27
28
29
X
Y
1
2
3
T
U
V
W
1
2
3
21
22
23
5.13 Backrest width
The seat width and backrest width are
separately adjustable, enabling to position
people with broad hips / small shoulders as well
as people with small hips / broad shoulders.
1. If required loosen the straps by detaching
the velcro ends on one end from the velcro
surfaces of the shells.
2. Loosen bolts (A) half a turn with a ring key
13.
3. Slide the backrest shells (B) outwards or
inwards.
4. Fasten bolts (A) again.
5. Tension the straps and attach velcro ends on
the velcro surfaces of the shells.
5.14 Backrest height (wheelchair
specic)
1. Detach the velcro ends of the cover from the
seat.
2. Loosen socket screws (C) .
3. Slide backrest shells (B) up or down.
4. Fasten socket screws (C).
5. Position the cover and fasten cover with the
velcro ends.
5.15 Funnel shape backrest shells
(wheelchair specic)
1. If required loosen straps (D).
2. Loosen bolts (C).
3. Slide the top of the backrest shells (B)
apart / closer to each other for more / less
shoulder room.
4. Fasten bolts (C).
5. Tension straps (D).
6. Position the cover, tie elastic rope and attach
the velcro ends to the seat.

18 Settings (by a professional) Nuage
E
2
1
3
5
4
B
D
1
F
G
30
31
BZ
32
5.16 Angle backrest shells
(wheelchair specic)
1. If required loosen straps (D) by detaching
the velcro ends on one end from the velcro
surfaces of the shells.
2. Loosen screws for shell angle adjustment
(E).
3. Turn backrest shellls (B) inwards or
outwards.
4. Fasten (E) again.
5. Tension straps (D).
5.17 Backrest angle (wheelchair
specic)
1. Turn (F) to adjust the inclination angle of the
backrest (G).
Note!
Alternatively, the wheelchair can be equipped
with an optional gas spring actuated angle
adjustment ( Wheelchair).
5.18 Webbing straps (I)
The seat contour is formed with 3 simple
webbing straps (B) and 4 adjustable webbing
straps (Z).
The backrest contour is formed with 1 webbing
strap (B) and 6 adjustable webbing straps (Z).
The webbing straps (B) have orange velcro
ends.
The adjustable webbing straps (Z) have sliding
buckles and double velcro ends (orange and
black).

Settings (by a professional) 19Nuage
I
H
F
G
1
2
F
G
H
E
D
33
34
35
E
2
1
3
5
4
B
D
1
F
G
30
31
BZ
32
5.19 Seat and backrest shells (I)
The straps are looped through slotted holes in
adjustable plywood seat shells (D) and backrest
shells (E).
Warning!
Tension the straps sufciently to prevent
bottoming-out.
5.20 Seat webbing (I)
The 4 webbing straps (B) in the front and the
4 adjustable straps (Z) in the back enable to
follow the contours of buttocks and upper legs
while in the mean time providing support where
needed for an optimal seating position and
stability.
2. Place the adjustable straps (Z) in slotted
holes (F), (G) and / or if required over the
edge (H).
3. Tension adjustable straps and fasten the
velcro ends.
4. Tension further with the sliding buckles.
5. Place the simple straps (B) in slotted hole
(I).
6. Tension to approx. 110% of the length and
fasten the velcro ends.
Warning!
Always check for bottoming-out. If needed
adjust the strap tension.
5.21 Pelvic obliquity (I)
1. Tension the adjustable straps in slotted
holes (F) and (G) or if required in slotted
hole (G) and over edge (H).
2. Use the sliding buckles and move the velcro
ends to create a different (asymmetrical)
support left and right.

20 Settings (by a professional) Nuage
C
B
2
I
B
4
I
3
2
G
I
1
K
M
L
N
L
M
N
XS
36
37
38
5.22 Leg length discrepancy (I)
1. Move one of the seat shells forwards. To do
so, loosen the armrestholder, slide it in the
rail towards the front of the seat and fasten
again.
2. Tension an adjustable strap from slotted
hole (G) to slotted hole (I). At (I) remove the
sliding buckle.
Note!
Step 1 is not possible in combination with
seating systems other than Sedeo Pro /
Sedeo Original.
5.23 Contour cushion (I)
Optionally the front straps can be replaced with
a contour cushion.
1. Remove the front webbing straps (B).
2. Put the cushion segments together attaching
with the velcro strap to the bottom side and
place the contour cushion (C) on the seat.
3. Loop webbing straps (B) over the top of the
cushion through slotted hole (I) and attach
on the outside of the seat shells with velcro.
4. Place a webbing strap (B) against the front
of the contour cushion and attach directly on
the outside of the seat shells with velcro.
Caution!
Do not put much tension on the straps (B)
that hold the contour cushion in place.
5.24 Backrest webbing (I)
The 6 adjustable straps (Z) and 1 simple
webbing strap (B) (Nuage PLS Active XS: ve
adjustable straps) enable to follow the contours
of the back, create a lumbal support and give
further extra support where needed.
1. Place a webbing strap (B) in the upper
slotted holes (K).
2. Tension strap and fasten the velcro ends.
3. Place adjustable webbing straps (Z) in
slotted holes (L), (M) and / or if required over
Other manuals for Nuage PLS
2
This manual suits for next models
2
Table of contents
Languages:
Other Breezy Wheelchair manuals


Breezy
Breezy BasiX2 Manual

Breezy
Breezy UniX Manual

Breezy
Breezy Emineo User manual

Breezy
Breezy BasiX Manual

Breezy
Breezy Exigo 30 User manual

Breezy
Breezy Cirrus G5 User manual

Breezy
Breezy PariX2 Manual

Breezy
Breezy Emineo User manual

Breezy
Breezy Ultra 4 Installation and operation manual

Breezy
Breezy Elegance Manual


Popular Wheelchair manuals by other brands


Invacare
Invacare TDX SP user manual

Permobil
Permobil Chairman Robo PG8 Service manual

Invacare
Invacare Wheelchair Pronto M61 Operating and maintenance manual

Medema
Medema MC concept 1103 user manual

Invacare
Invacare top end pro 2 all sport Assembly instructions

Meyra
Meyra Primus 2 3.310 active operating manual