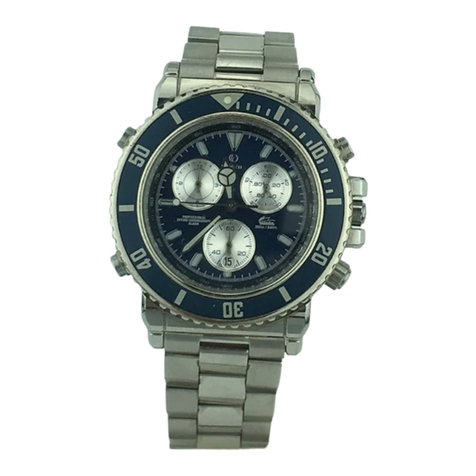
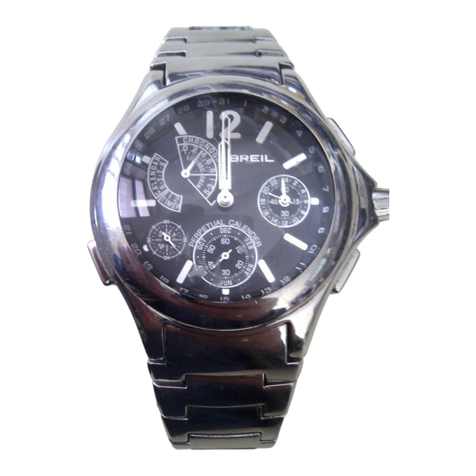
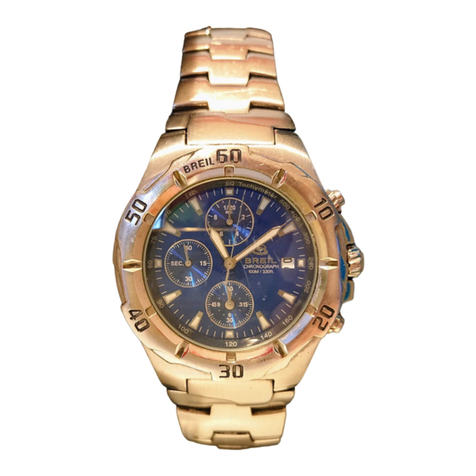
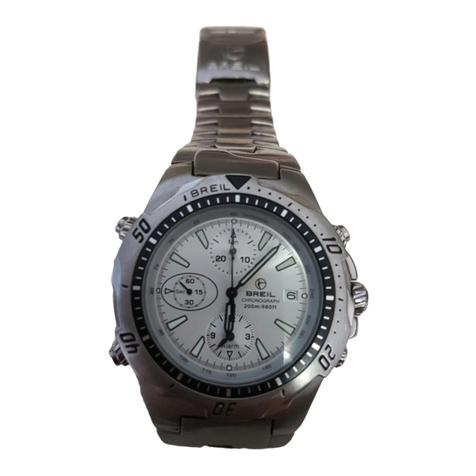
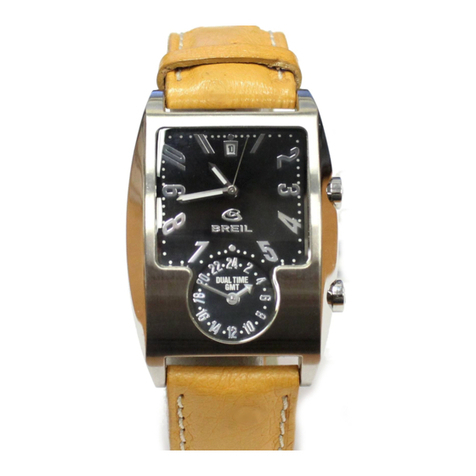
BREIL X.LARGE PRO User manual

BREIL-BREIL-BREIL-BREIL-BREIL-BREIL-BREIL-BREIL-BREIL-BREIL-BREIL-BREIL-BREIL-BREIL-BREIL-BREIL-BREIL-BREIL-BREIL-BREIL-BREIL-BREIL-BREIL-BREIL-BREIL-BREIL-BREIL-BREIL-BREIL-BREIL-BREIL-BREIL-BREIL-BREIL-BREIL-
Manuale di funzionamento
User’s manual
X.LARGE
PRO

MANUALE DI FUNZIONAMENTO 2
Grazie per aver acquistato l’orologio X.LARGE PRO. Si tratta di un
orologio realizzato con alti standard tecnici e di qualità, in grado di consentire
un uso prolungato e senza problemi del prodotto. L’orologio, da lei acquistato,
è corredato da un secondo cinturino che può essere montato al posto del
bracciale. Il CINTURINO NATO mantiene intatta l’essenza dell’orologio,
offrendo al contempo un look più sportivo.

MANUALE DI FUNZIONAMENTO 3
Le seguenti istruzioni di base sono fornite
in conformità ai requisiti di legge.
Per ulteriori informazioni e funzioni specifiche
dei movimenti di orologi è possibile visitare il sito web
www.breil.com
INFORMAZIONI
BINDA ITALIA srl produttore del modello di orologio da Lei acquistato,
è attivamente e globalmente impegnata in vari programmi di protezione dell’ambiente.
Nel caso in cui si presenti la necessità di disfarsi di un vecchio orologio, si prega di smaltirlo
in linea con le regolamentazioni previste da ciascuno dei paesi membri della UE,
effettuando una raccolta separata o riconsegnandolo al rivenditore
all’atto dell’acquisto di un nuovo orologio.
L’eventuale smaltimento dell’orologio con modalità non conformi,
oltre ad essere sanzionato, può cagionare danni all’ambiente.
Gli uffici di BINDA ITALIA srl e i nominativi elencati nel libretto istruzioni,
rimangono a disposizione per ulteriori informazioni in proposito.

MANUALE DI FUNZIONAMENTO 4
1 Estrarre completamente la corona (C) fino al secondo scatto;
2 Ruotare la corona per spostare le lancette delle ore (1) e dei minuti (2) sulla posizione
desiderata.
3 Riportare la corona in posizione normale.
Prima di regolare la data (7), assicurarsi di avere impostato l’ora.
1 Estrarre la corona (C) fino al primo scatto;
2 Girare la corona in senso orario per visualizzare la data desiderata;
3 Dopo aver predisposto la data, riportare la corona in posizione normale.
Nota: non impostare la data tra le 20:00 e le 04:00 poiché il cambio di data potrebbe non
avvenire correttamente. Se è necessario impostare il calendario durante questi periodi di
tempo, modificare prima l’orario in qualsiasi momento diverso da questi, impostare la data
desiderata e quindi reimpostare l’ora corretta.
Non ruotare le lancette in senso anti-orario in prossimità della mezzanotte per evitare il rischio
di danneggiare l’ingranaggio del datario.
IMPOSTAZIONE DELL’ORA
IMPOSTAZIONE DELLA DATA
COMPONENTI PRINCIPALI
1 Lancetta delle ore
2 Lancetta dei minuti
3 Piccola lancetta dei secondi
4 Lancetta delle 24 ore
5 Lancetta dei minuti del cronografo
6 Lancetta dei secondi del cronografo
7 Datario
C Corona
MOVIMENTO EPSON YM12
1 6
753
24
01 2

MANUALE DI FUNZIONAMENTO 5
Premere i pulsanti nel seguente ordine:
Avvio: Premere A
Arresto: Premere A
Riavvio: Premere A
Arresto: Premere A
Riazzeramento: Premere B
Lo start e stop del cronografo possono essere ripetuti più volte premendo il pulsante A.
Premere i pulsanti nel seguente ordine:
Avvio: Premere A
Arresto parziale: Premere B
Riavvio: Premere A
Arresto: Premere A
Riazzeramento: Premere B
Lo start e stop del tempo parziale possono essere ripetuti più volte premendo il pulsante B.
MISURAZIONE DEL TEMPO
MISURAZIONE DEL TEMPO ACCUMULATO
MISURAZIONE DEL TEMPO PARZIALE
CRONOGRAFO
Premere i pulsanti nel seguente ordine:
Avvio: Premere A
Arresto: Premere A
Riazzeramento: Premere B
Il cronografo può misurare fino a 60 minuti in frazioni di 1/5 di secondo. A partire dal 61
minuto il conteggio ricomincia da 0 o sino ad un massimo di 12 ripartenze.Quando la
misurazione raggiunge le 12 ore, il cronografo interrompe automaticamente il conteggio.

MANUALE DI FUNZIONAMENTO 6
AZZERAMENTO DEL CRONOGRAFO
SOSTITUZIONE DEL BRACCIALE
AZZERAMENTOAZZERAMENTO MISURAZIONE DEL TEMPO
1 Estrarre completamente la corona (C) fino al secondo scatto;
2 Premere il pulsante A per 2 secondi. La lancetta dei minuti del cronografo compie un
giro completo e può essere impostata sulla posizione corretta «0» premendo
ripetutamente il pulsante B;
3 Premere il pulsante A per 2 secondi. La lancetta dedel cronografo di 1/5 di secondo
compie un giro completo e può essere impostata sulla posizione corretta «0» premendo
ripetutamente il pulsante B;
4 Riportare la corona nella posizione normale.
Non è necessario impostare le lancette del cronografo dopo il cambio della batteria. Se la
posizione delle lancette del cronografo sono errate, seguendo la procedura seguente tutte le
lancette del cronografo saranno riportate alla posizione normale.
L’orologio è corredato da un bracciale e un secondo cinturino NATO che può essere montato
al posto del bracciale per un look più sportivo.
Per effettuare il cambio bracciale-cinturino si consiglia di rivolgersi a un negozio specializzato
o al proprio orologiaio di fiducia.

MANUALE DI FUNZIONAMENTO 7
RESISTENZA ALL’ACQUA
- La corona non deve essere mai estratta ed i pulsanti (A e B) premuti quando l’orologio è
bagnato o immerso in acqua.
- Gli orologi esposti all’acqua salata o ad abbondante sudore, devono essere risciacquati
con acqua dolce e quindi completamente asciugati.
- In nessun caso si deve indossare l’orologio durante l’esecuzione di tuffi in acqua.
- Non lasciare l’orologio sotto i raggi diretti del sole o in luoghi estremamente caldi
o estremamente freddi per un lungo periodo di tempo.
- Non sottoporre l’orologio a brusche variazioni di temperatura.
- Se l’orologio cade per terra o riceve colpi molto forti, può subire danni o guasti
al funzionamento.
- Strofinare con un panno soffice assorbente le parti sporche. Se l’orologio viene indossato
quando il retro della cassa e il cinturino sono sporchi, questi possono provocare un’irritazione
cutanea in quanto a contatto diretto con la pelle.
- Lavare il bracciale in metallo con uno spazzolino da denti bagnato con acqua tiepida
saponata.
- Lavare il cinturino in tessuto con acqua e sapone delicato. Non usare solventi.

MANUALE DI FUNZIONAMENTO 8
CONDIZIONI DI VALIDITÀ
DELLA GARANZIA
GARANZIA INTERNAZIONALE DI DUE ANNI
Il produttore garantisce gli Orologi BREIL all’acquirente originario per un periodo di due
(2) anni dalla data di acquisto e garantisce l’orologio acquistato per difetti di materiale e di
fabbricazione.
La garanzia non pregiudica i diritti spettanti all’acquirente in materia di garanzie legali in forza
della normativa vigente nel paese di acquisto.
Questa garanzia non comprende logorio o alterazioni della cassa, del cinturino e del
vetro, né danni dovuti all’acqua (se non contrassegnato «water resistant» sul fondo cassa
dell’orologio).
Questa garanzia non è valida se l’orologio risulta danneggiato a causa di incidenti,
negligenza, utilizzo non adeguato a causa di altri fattori non dovuti a difetti di materiale o di
fabbricazione.
Il rivenditore si assume la responsabilità di qualsiasi forma di garanzia offerta al consumatore.
Sono coperti da garanzia, per tutto il periodo della medesima, soltanto il movimento, le
lancette ed il quadrante dell’orologio.
Questi verranno riparati gratuitamente o l’orologio sarà sostituito (a discrezione esclusiva del
Centro Assistenza Autorizzato BREIL) se non ne sarà fatto uso improprio, e per comprovato
difetto di materiale o di costruzione.
In caso di sostituzione, BINDA ITALIA srl non garantisce che venga fornito un orologio del
medesimo modello. Se tale modello non sarà disponibile, sarà fornito un modello simile e
di valore equivalente. La garanzia sull’orologio fornito ha la durata di due anni dalla data di
consegna.
Le spese di spedizione per indirizzi internazionali, dovranno essere preventivate
separatamente.
RICHIESTA DI INTERVENTO
In caso di problemi con l’orologio, l’acquirente è pregato di inviare la copia originale completa
in ogni sua parte del certificato di garanzia, lo scontrino d’acquisto o un’ulteriore idonea
prova d’acquisto ed una descrizione del problema, al Centro di Assistenza Autorizzato BREIL
più vicino.
Per conoscere i Centri Assistenza Autorizzati BREIL nei diversi paesi, l’acquirente potrà
consultare il sito internet www.breil.com alla sezione «Centri Assistenza»,
o se presenti nel territorio italiano, contattare il numero verde 02 39 245 301.
Le spese di affrancatura, imballaggio ed assicurazione sono a carico dell’acquirente.
Consigliamo di assicurare il pacco in quanto la responsabilità di inviare l’Orologio al Centro di
Assistenza Autorizzato BREIL più vicino spetta all’acquirente. L’acquirente inoltre dovrà anche
assicurarsi che l’orologio sia adeguatamente protetto durante la spedizione. Si prega inoltre
di inviare l’orologio senza il relativo astuccio.
Per quanto riguarda gli interventi non coperti da garanzia relativi a pila, vetro, cassa o alla
sostituzione della corona del bracciale o del cinturino, i Centri di Assistenza Autorizzati BREIL
fattureranno all’acquirente la spesa per i servizi richiesti a seconda del tipo di orologio e
dell’intervento necessario.
L’importo da addebitare potrà subire variazioni. Per ricevere conferma dell’importo della
spesa prevista, l’acquirente può telefonare al Centro di Assistenza Autorizzato BREIL.

USER’S MANUAL 9
Thank you for purchasing the BREIL X.LARGE PRO watch. It is a
precision timepiece, manufactured to the highest quality and technical
standards, that allow a trouble-free use for years. The watch you have
purchased is sold with spare strap that can be used in place of the bracelet.
The NATO STRAP keeps the essence of the watch intact, while offering
a more sporty look.

USER’S MANUAL 10
The following basic instructions are provided
based on legal requirements.
For additional information and specific functions
of the watch movement please visit us at
www.breil.com
INFORMATION
BINDA ITALIA srl, who manufactured the watch that you have purchased, is actively and
globally engaged in various environmental protection programs.
If you need to get rid of an old watch, please dispose of it in accordance with the regulations
laid down by each of the member countries of the EU, through the differentiated waste
collection service or by giving it to your dealer when you purchase a new watch.
Illegal dumping of the watch may be punished with fines and may cause damage to the
environment. The offices of BINDA ITALIA srl and the persons whose names are listed in the
instructions booklet remain at your disposal for further enquiries.

USER’S MANUAL 11
1 Pull the crown (C) to its fully out position (2);
2 Turn the crown clockwise to move the hour (1) and minute (2) hands to the desired
positions;
3 Push the crown back to its normal position.
Before setting the date (7), make sure you have set the time.
1 Pull the crown (C) out to its first position;
2 Turn crown clockwise to view the desired date;
3 Push the crown back to its normal position.
Nota: do not set the date between 8:00 PM and 04:00 AM as the date change may not be
made correctly.
Do not rotate the hands-counter-clockwise when it’s midnight to avoid the risk of damaging
the date gear.
SETTING THE TIME
SETTING THE DATE
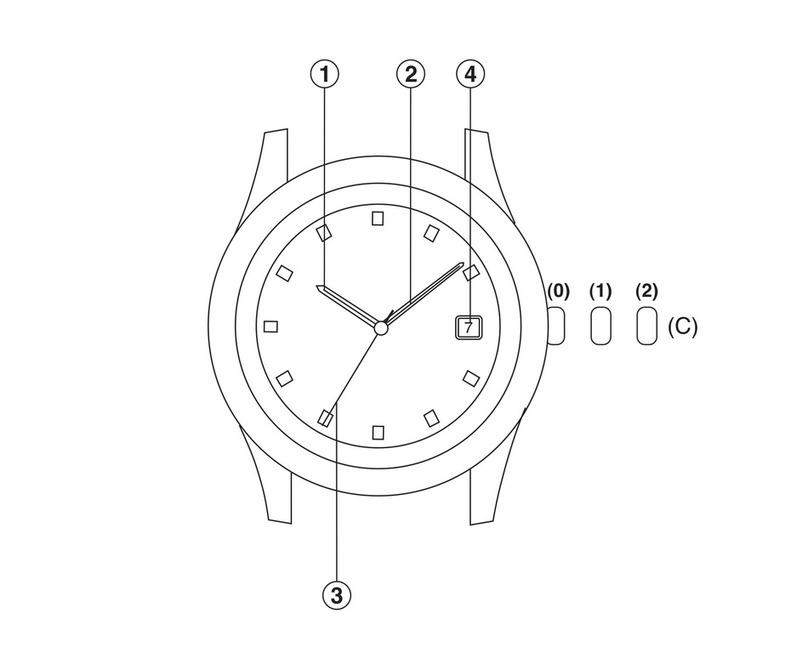
MAIN COMPONENTS
1 Hour hand
2 Minute hand
3 Small second hand
4 24 hour hand
5 Minute chronograph hand
6 Second chronograph hand
7 Calendar date
C Crown
MOVEMENT EPSON YM12
1 6
753
24
01 2

USER’S MANUAL 12
Press the button in the following order:
Start: Button A
Stop: Button A
Reboot: Button A
Stop: Button A
Reset: Button B
Restart and stop of the chronograph can be repeated as many time as necessary by
pressing button A.
Press the button in the following order:
Start: Button A
Split: Button B
Split release: Button B
Stop: Button A
Reset: Button B
Measurement and release of split time can be repeated by pressing button B.
TIME MEASUREMENT
MEASURING ACCUMULATED TIME
MEASURING SPLIT TIME
ChRONOGRAph
Press the button in the following order:
Start: Press A
Stop: Press A
Reset: Press B
The chronograph can measure up to 60 minutes in fractions of 1/5 of a second. Starting
from 61st minute, the cout restarts from «0» or up to a maximum of 12 restarts. When the
measurement reaches 12 hours, the chronograph automatically stops counting.

USER’S MANUAL 13
RESETTING THE CHRONOGRAPH
BRACELET REPLACEMENT
1 Pull the crown (C) out to the second click position;
2 Press the button A for two seconds. Minute chronograph hand turns a full round and can
now be set to correct «0» position by repeatedly pressing button B;
3 Press the button A for two seconds. 1/5 second chronograph hand turns a full round and
can now be set to correct «0» position by repeatedly pressing button B;
4 Push the crown back to the normal position.
It is not necessary to set the chronograph hands after the battery is changed. If the
chronograph hand positions are incorrect, following below procedure all the chronograph
hands will be reset to their normal position.
The watch is sold with a stainless steel bracelet and a second spare NATO strap, that can be
used in place of the bracelet for a more sporty look.
In order to change bracelet, contact a specialized shop or your trusted watchmaker.
RESETSTART TIME MEASUREMENT

USER’S MANUAL 14
WATER RESISTANCE
- The crown should never be pulled out and the pushbuttons A e B should never be pressed
when the watch is wet or underwater.
- If watches are exposed to salt water or abundant sweat, they should be rinsed with fresh
water and then completely dried.
- Keep the condition of the glass under control: if it has any cracks, however small, it should
be changed immediately.
- The watch should never be worn when you dive into water as the impact produces a
pressure that by far exceeds that to which the watch is resistant and is a shock that should
be avoided at all costs.
- Do not leave the watch in the sunshine or in extremely hot or cold places for prolonged
periods of time.
- This watch withstands the knocks and shocks that take place during normal daily use and
in sports in which there is no direct physical contact. If the watch is dropped on the ground or
is subjected to intense shocks, it may get damaged or malfunction. If the watch is worn with
its back or strap dirty, this could cause skin irritation through direct contact with the skin.
- Metal bracelet and strap: wash with water and mild soap. Do not use solvents.

USER’S MANUAL 15
GUARANTEE CONDITIONS
TWO-YEAR LIMITED INTERNATIONAL GUARANTEE
The manufacturers guarantee BREIL watches for their original purchaser for a period of two
(2) years starting from the purchase date and guarantees the watch against all material and
manufacturing defects. The guarantee does not affect the purchaser’s rights in terms of legal
guarantees ensured by the legislation in force in the country of purchase.
This guarantee does not cover wear and tear or damage to the casing, strap or glass, or
damage due to water (unless the bottom of the casing is marked «water resistant»).
This guarantee is not valid if the watch is damaged due to accidents, negligence, improper
use caused by other factors not attributable to material or manufacturing defects.
The dealer assumes all responsibilities for any form of guarantee he may offer the consumer.
For the entire period of validity, the guarantee only covers the movement, hands and dial of
the watch. These will be repaired free of charge or the watch will be replaced (at the exclusive
discretion of the BREIL Authorized Service Centre) providing that it has not been used
improperly and a material or manufacturing defect has been found.
In case of replacement, BINDA ITALIA srl does not guarantee that a watch of the same model
will be provided. If this model is not available, a similar model of an equivalent value will be
provided.
The guarantee of the watch lasts for two years, starting from the date of delivery.
Shipment expenses for overseas deliveries will be calculated separately.
SERVICE CALL
If a fault occurs, the purchaser must send the original copy of the guarantee certificate,
completely filled in, the receipt or other suitable proof of purchase and a description of
the fault to BREIL warehouse. If purchasers are based in Italy, they can call the free phone
number +39 02 39 245 301, otherwise write an email to the following adress:
Postage, packaging and insurance are to be paid for by the purchaser. We recommend the
package be insured in that the purchaser is responsible for the watch during transport to the
nearest BREIL Authorized Service Centre.
The purchaser must also make sure that the watch is adequately protected during transport.
Please send the watch without its box.
For repairs not covered by the guarantee on the battery, glass, casing or strap replacement,
the amount charged by the BREIL Authorized Service Centre to the purchaser for the
services requested will depend on the type of watch and repair work required.
This amount may therefore vary. For confirmation of the cost of repairs, the purchaser may
call the BREIL Authorized Service Centre.

MANUALE DI FUNZIONAMENTO 16
BREIL-BREIL-BREIL-BREIL-BREIL-BREIL-BREIL-BREIL-BREIL-BREIL-BREIL-BREIL-BREIL-BREIL-BREIL-BREIL-BREIL-BREIL-BREIL-BREIL-BREIL-BREIL-BREIL-BREIL-BREIL-BREIL-BREIL-BREIL-BREIL-BREIL-BREIL-BREIL-BREIL-BREIL-BREIL-
In ottemperanza al D.Lgs. 206 – 6/9/2005, tutti gli orologi
BREIL sono conformi alla norma Europea Reach 1907/2006
e sono realizzati in acciaio AISI 304, 316L e in materiali non
preziosi, salvo indicazioni specifiche.
In compliance with the Italian law
D.Lgs. 206 – 6/9/2005, all BREIL watches comply
with the European Reach 1907/2006
and are made of stainless steel AISI 304, 316L
and non-precious materials,
unless otherwise specified.
www.breil.com
Table of contents
Languages:
Other BREIL Watch manuals

BREIL
BREIL YM91 User manual

BREIL
BREIL AS10 User manual

BREIL
BREIL CHRONO YM92 User manual

BREIL
BREIL Chrono FS00 User manual

BREIL
BREIL CHRONO FS10 User manual

BREIL
BREIL 1L12 - DUAL TIME GMT User manual

BREIL
BREIL CHRONO OS10 User manual

BREIL
BREIL AW00 User manual

BREIL
BREIL CHRONO ALARM YM52 User manual

BREIL
BREIL ABARTH 595 SCORPIONEORO User manual

BREIL
BREIL OT10 User manual

BREIL
BREIL TRIBE User manual

BREIL
BREIL CHRONO FS20 User manual

BREIL
BREIL ABARTH 595 SCORPIONEORO User manual

BREIL
BREIL Time 1M52 User manual

BREIL
BREIL ABARTH 595 SCORPIONEORO User manual

BREIL
BREIL OS80 Manta User manual

BREIL
BREIL 6U50 User manual

BREIL
BREIL SUNON PE 902 User manual

BREIL
BREIL 3S10 User manual